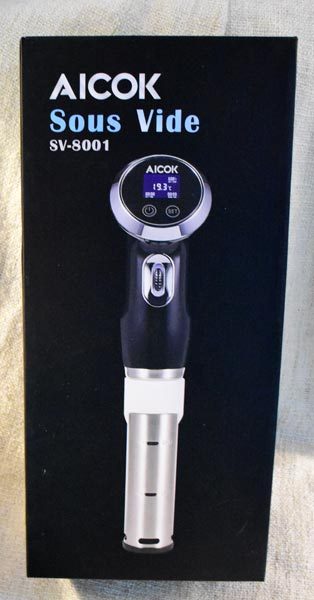
Aicok SV-8001 Sous Vide Cooker review

Living all my life in the southern United States, I grew up eating my mother’s fried chicken, which is so often considered a staple of southern cooking.  My mother’s chicken was great – juicy, tender, well-done, and tasty.  I didn’t quite inherit my mother’s skills, and I was never able to produce fried chicken as good as hers.  I often ended up burning the breading because I was worried the chicken would be undercooked.  I always felt that cooking the chicken first would result in a better frying result, but I wasn’t sure how to “pre-cook” it for best results.  Instead of finding some new-age type of cooking method, I found an old method that’s just what I needed.  Aicok offered The Gadgeteer the perfect tool for my dilemma – their Sous Vide Cooker.

What is it?

What is sous vide?  It sounds fancy and difficult.  In French, sous vide means “under vacuum”.  Sous vide cooking, at least in a home kitchen, doesn’t actually involve a vacuum.  It does require food to be in a sealed bag, which floats in a heated water bath.  The heated water cooks the food to a specified degree of doneness at a set temperature point.  Because the water is heated directly, it’s easier to reach and maintain a steady temperature than it is in an oven or on a cooktop, where the temperature can experience wide swings as it tries to heat the air in the oven or transfer heat inefficiently through a metal pot on the stovetop.

Hardware specs

  • Model Number: SV-8001
  • Material Type: Stainless steel and plastic
  • Color: Black and silver
  • Item Dimensions: 8.1″x 4.5″ x 17.6″
  • Item Weight: 3.3 pounds
  • Power Wattage (US): 1oooW

What’s in the box?

  • Sous vide cooker
  • Manual with some cooking instructions
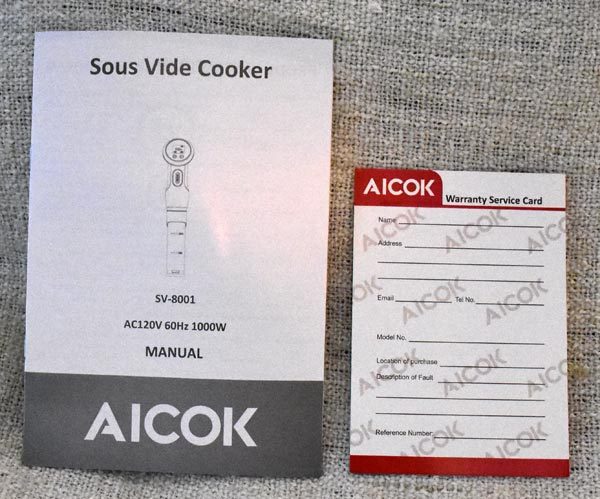
  • Warranty card

Design and features

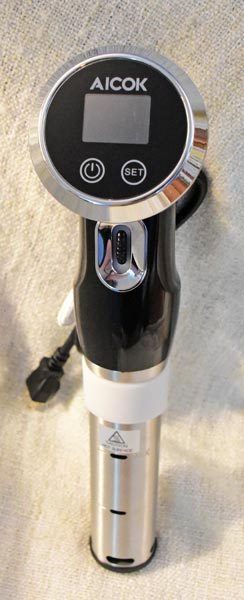
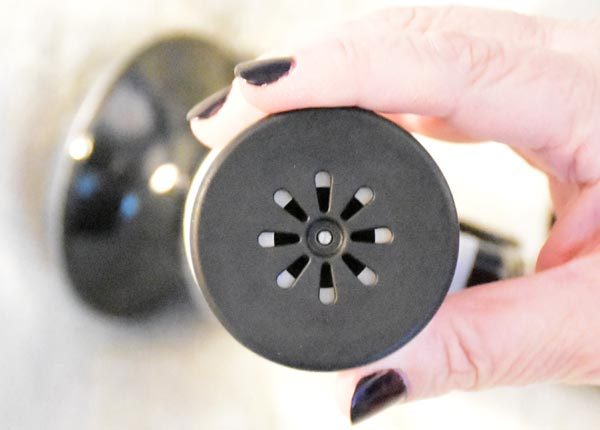
The cooker looks a bit like a short, stocky walking stick.  The metal post is submerged in the water bath, and the holes you see along the length, plus the holes in the bottom…

… allow the water to flow in for heating and then out to circulate through the bath.

The display has a touchscreen with a power button and a settings selection button.  The dial on the front under the display is used for adjusting temperatures, delay time, and cooking time.  The machine defaults to displaying temperature in Celsius, but you can switch it easily to Fahrenheit if desired.

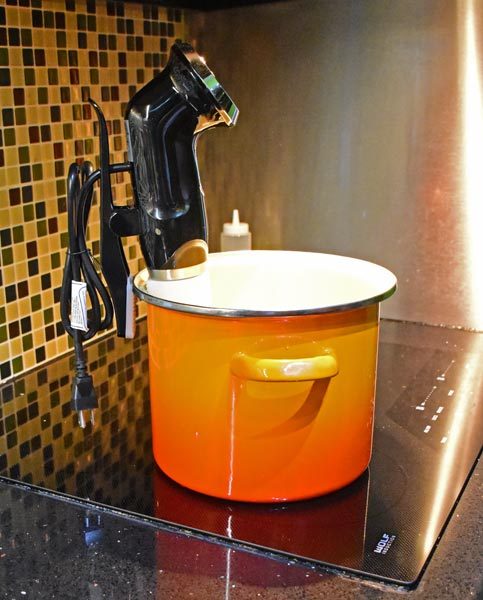
The back of the Aicok has a big clip to attach it to the side of the cooking vessel.  The clip is lined with silicone to prevent scratching your cookware.

Setup

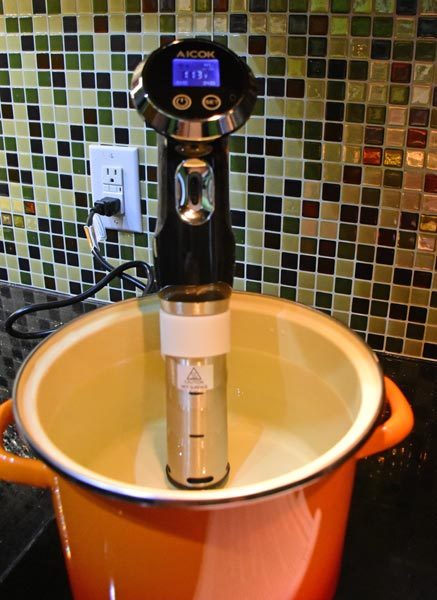
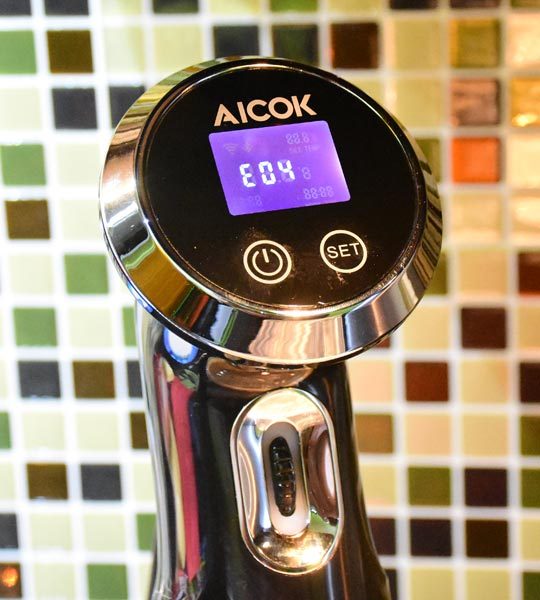
To cook, you’ll need a pot that’s 7.5″ or deeper and holds between 3 – 20 liters.  You can actually purchase special plastic pans designed for sous vide cooking, some with lids custom-designed to accommodate a particular brand of cooker.  I just used my Le Creuset stockpot.  I clipped the sous vide cooker to the side of the pot using the clip on the back of the Aicok, then I filled the pot with room temperature water, making sure I had it filled up to the max fill line.  (You’ll see an image below with an E04 error message I got before I made sure I had the right amount of  water in my pot.)

You can set the cooking temperature between 32°F and 203°F and the cooking time from 1 minute to 99 hours.  You use the delay-time function to hold the food and water bath at room temperature before the bath starts heating.  This delay allows you to have the food just finishing cooking when you get home.  I didn’t use this delay function.  I will be cooking meat almost exclusively with the Aicok, and I will not leave meat at room temperature very long before cooking it.

The point of sous vide cooking is to hold food at a perfect temperature for long enough to get it cooked thoroughly.  Different meats need to reach different temperatures and be held there for differing amounts of time to be cooked thoroughly.  The nice thing about sous vide is that your food will be held at that temperature until you are ready to use it, so there are no worries if it is held a few minutes or even an hour at that temperature.  The food won’t cook anymore with additional time.

You put the food in a closed plastic bag.  Even a standard zipper-type bag will work, though you could vacuum seal it if you have a vacuum food -saver machine.  You need the closed bag to hold in the food’s own juices to prevent it from drying out as it cooks, but you need to be sure the bag is securely closed so no water gets in from the bath.  Meat boiled in water is far different from meat cooked in its own juice.

I bought a sous vide cookbook for ideas for cooking various foods, but I really most want the cooker for chicken.  When it’s cooked too long with traditional methods, chicken can get dry and tough.  I want to use the sous vide to get the chicken thoroughly done, so all I need to do is just brown it or bread-and-fry.

You can marinate meat before cooking it, but you should place only the meat in the plastic bag.  Squeeze out all the air from the bag that you can, then zip it up.

I set the Aicok to cook the chicken at 144 degrees for four hours.  I checked the bath temperature periodically during the cooking time.  Unfortunately, I didn’t have anything that could monitor and record temperature continually, so I just checked it with a candy thermometer.  Every time I checked, it was within a degree of my set point.

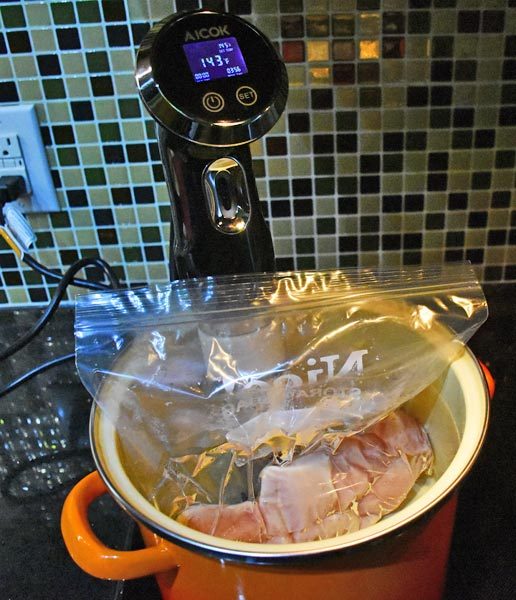
I chunked up whole, boneless chicken breasts (just over a pound in weight) before placing them in a gallon-sized zipper bag.  When the Aicok beeped to let me know it had reached temperature, I put the bag in the stockpot and left it.  I was a bit concerned that the meat didn’t submerge completely in the water bath.  In the above image, you’ll see the chicken has started to cook just a bit.  I left it alone for four hours, other than quickly checking the bath temperature periodically.  The Aicok beeped again to signal the end of the cooking time, then it turned itself off.

Performance

This is how the chicken looked after four hours in the sous vide bath.  The amber liquid cooked out of the chicken.  You can see the meat is very pale and a bit unappetizing in appearance, but I plan to fry it up before eating.

I took out a piece and cut it to check the degree of doneness.  The chicken was thoroughly cooked and very moist and tender.

I dredged the chicken in some flour and herbs and spices and fried it.  It took no time to fry – just long enough to brown the flour coating.  The fried chicken was still moist and tender and completely done inside, and it was beautifully browned outside.  It was perfect fried chicken!

My entire family agreed it was the best fried chicken we had made at home, and we all agreed we shouldn’t make anything with chicken without first pre-cooking it in the Aicok sous vide.  This moist chicken works equally well in a stir-fry, and it’s great quickly sautéed in a pan or quickly browned under the broiler.  I haven’t tried it with other meats yet, but pork chops will be my next venture.

I had originally thought that a sous vide cooker would be perfect for preparing steaks for grilling, but it won’t work for my family.  I thought I’d be able to put my steak in first to cook for a while, then put my daughter’s in for a while, then finally my husband’s for just a short while before throwing them on the grill.  That’s not how sous vide cooking works, though.  A rare steak would need one temperature, a medium rare another temperature, and a medium-medium well would need a third temperature.  Steaks aren’t meant to be for us, but it will make our other meals much easier and tastier.

What I like

The Aicok SV-8001 sous vide cooks meat perfectly while leaving it tender and juicy, so it’s ready for just a quick searing or quick breading and frying.

What needs to be improved

The Aicok SV-8001 sous vide cooker works great, I can’t think of anything I would change.  I do wish the manual had more guidance for cooking foods.  The online manual (the only type I ever use) doesn’t even have time/temp information for chicken.

Final thoughts

Sous vide cooking is a great, relatively hands-free method of pre-cooking meats (or vegetables) for use in recipes.  It takes a while to actually cook in the sous vide, but it really is set-it-and-forget-it cooking.  If you aren’t home to start the cooker a few hours before you’re ready to cook dinner, you can cook the food in the Aicok the night before while you’re reading or watching TV then throw it in the fridge until you’re ready to cook the next day.

Price: $79.88
Where to buy: Amazon.
Source: The sample of this product was provided by Aicok.

The post Aicok SV-8001 Sous Vide Cooker review appeared first on The Gadgeteer.

Filed in categories: Reviews

Tagged: ,

Aicok SV-8001 Sous Vide Cooker review originally appeared on The Gadgeteer on April 14, 2018 at 2:54 pm.

Note: If you are subscribed to this feed through FeedBurner, please switch to our native feed URL http://the-gadgeteer.com/feed/ in order to ensure continuous delivery.

Grace Digital Encore+ Wi-Fi speaker and internet radio review

Five years ago, I said this about the Grace Mondo portable internet radio, “After using the Grace Digital Mondo Wi-Fi Music Player and Internet Radio for a few months, I have come to one conclusion: Anyone looking for a portable radio today that does not choose an internet radio is wasting money.” That statement might sound a bit out of date in today’s age of smartphones connected to Bluetooth speakers. Even so, I can still see the appeal of a portable internet radio like the Mondo—notice I said portable. I’ve never been entirely convinced that a larger table-top internet radio is necessary. Grace Digital obviously disagrees and thinks tabletop radio is still relevant because they updated their Grace Encore stereo Wi-Fi speaker and internet radio with the new Encore+.

What is it?

Present day internet radios beg the question, “Why would anyone desire an internet radio, when their smartphone will do most everything the radio will do?” Hopefully, this review will answer that question.

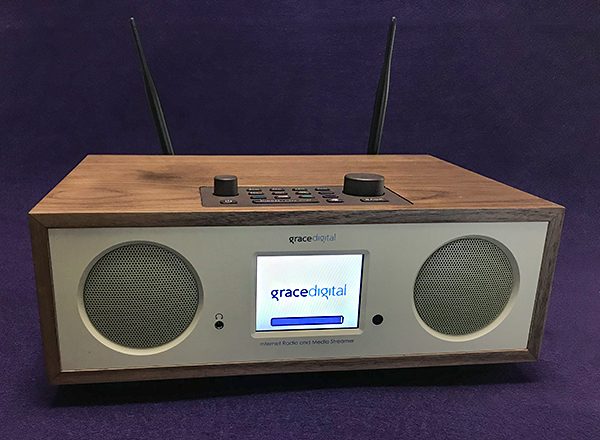
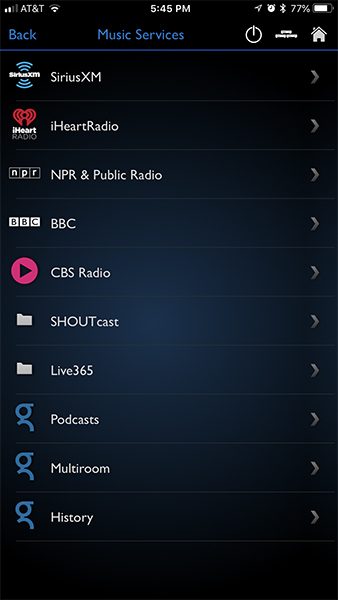
The Grace Encore+ stereo Wi-Fi speaker and internet radio is an updated version of their original Encore radio. The Encore+ now comes with built-in Chromecast and its many enabled apps. If you are a fan of internet radio sites, like (local and distant) AM/FM stations, I Heart Radio, BBC, NPR, Fox, CNN—just to name a few—you’ll love the Encore+. If you want multi-room audio—without paying for propriety systems like SONOS or HEOS—the Encore+ will do that too. Plus, it works with other Chromecast enabled speakers as well.  

The upgraded Encore+ also comes with Bluetooth which makes it much more useful than the previous Encore. This matters, because you now can have your cake and eat it too by switching between radio, Chromecast and even Apple Music (via Bluetooth). You really do get the best of all worlds. 

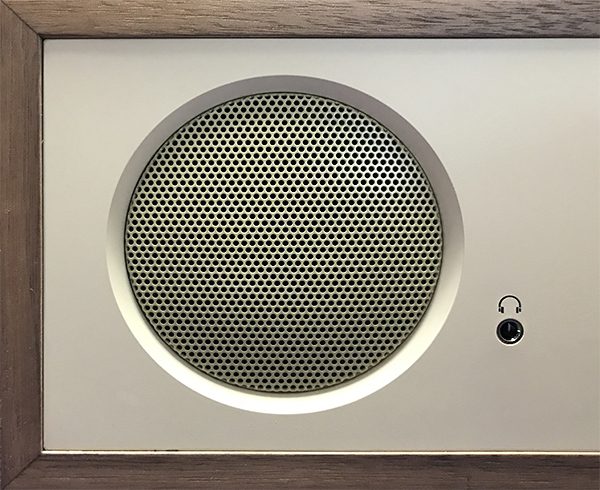
But it matters even more because the Encore+ doesn’t just sound like most other wireless radios. There’s some serious audio stuff going on here. There are two 3 in. front facing speakers with a down-firing subwoofer driven by a class D amp. This subwoofer gives the Encore+ a significant audio advantage over other table-top radios in its price range—along with all of its added internet benefits.

The front of the Encore+ has a large color screen that can display settings, media, cover art or other info whenever you want. There’s also a free smartphone app that is a breeze to use and practically a must-have. More on that later.

Specs

The specs of the Encore+ is overwhelming. Visit the Grace website for the full list. Here are some highlights:

Audio

  • Class D Digital 12watt amplifier
  • 2-3″ front facing speakers with a down-facingsubwooferr
  • 3.5mm Stereo headphone jack
  • L/R RCA outputs
  • RCA Aux in
  • USB port
  • Integrated dual band equalizer with 5 preset modes
  • Remote Control iOS and Android App
  • Built-in Chromecast audio software that integrates with Google home.

Clock & Alarm

  • 12 or 24 hour clock with date
  • 5 individual alarms
  • Sleep Timer
  • Smartphone Remote Control Apps
  • Control your radios via the front panel, included remote control, or from anywhere in your house via the Grace Control Apps loaded on your smartphone or tablet.

Size & Weight

  • Width: 13.5 in. Depth: 10.75 in. Height: 5.75 in.
  • Weight: 8.5 lbs

Networking

  • 802.11n wireless connectivity

Design and features

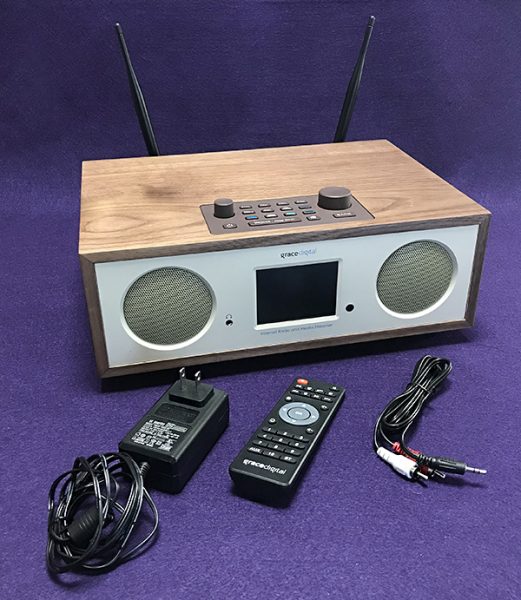
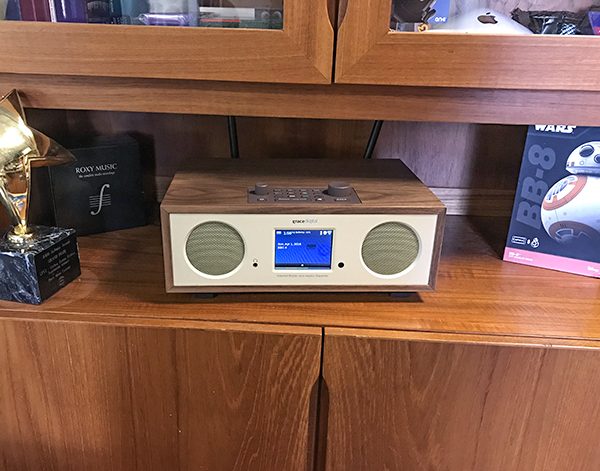
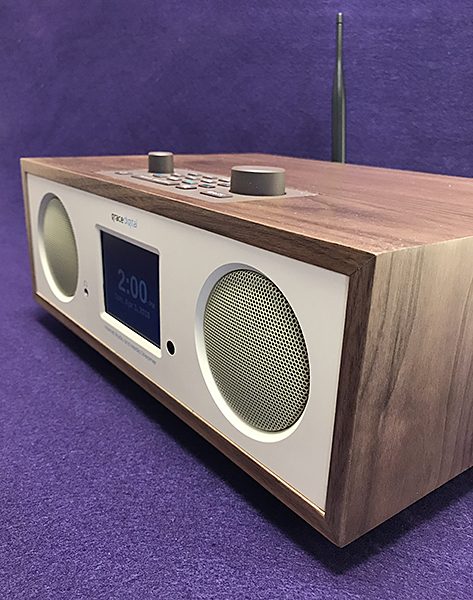
The Encore+ is a table-top radio, so even though it can be moved from room to room, it’s not portable. It needs to be plugged in at all times—there is no battery. The retro mid-century modern design comes in either all black or walnut wood and looks good with any decor. I  prefer the classic walnut finish to the more modern black. 

Included is a clock/radio function making the this a perfect nightstand companion—provided your nightstand has the available real estate to accommodate the wide and deep Encore+.

A 3.5 in. front color screen shows whatever function the Encore+ is performing, plus other information you may want to display. While the colors are bright enough, the screen is not angled upwards as on the Mondo radio making the screen more difficult to read without bending down to look straight at it. Even so, the screen can bes helpful to see info at a glance. There’s also a headphone port on the front.

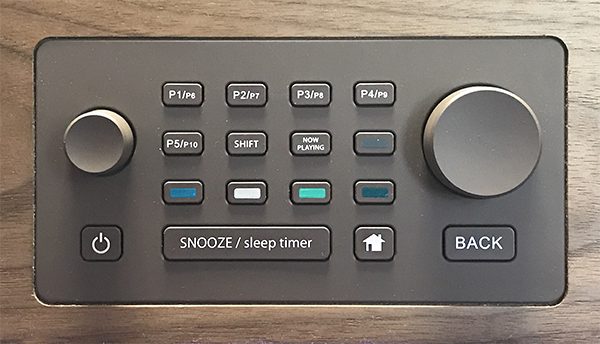
A top panel contains a volume knob, power button and a now playing button that displays artist info, cover art, etc. on the front screen. There’s also a tuning knob, a handy back button that takes you to the previous screen, home button and that ever popular clock-radio snooze button. 

Finally, there are five color coded buttons on the top panel that correspond to whatever function has the matching color seen on the screen. So what they do is dependent on what is visible on the screen. I found these buttons to be more trouble than they’re worth and now ignore them.

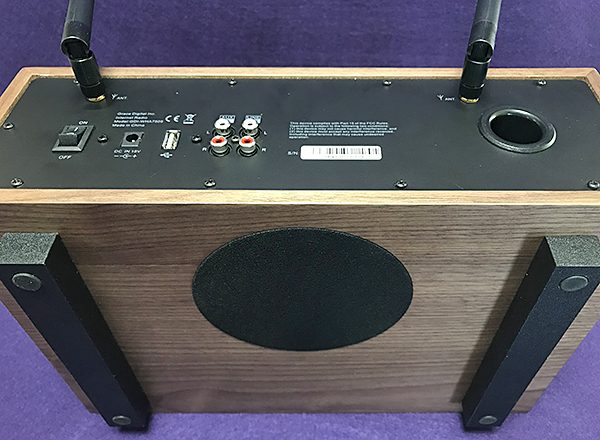
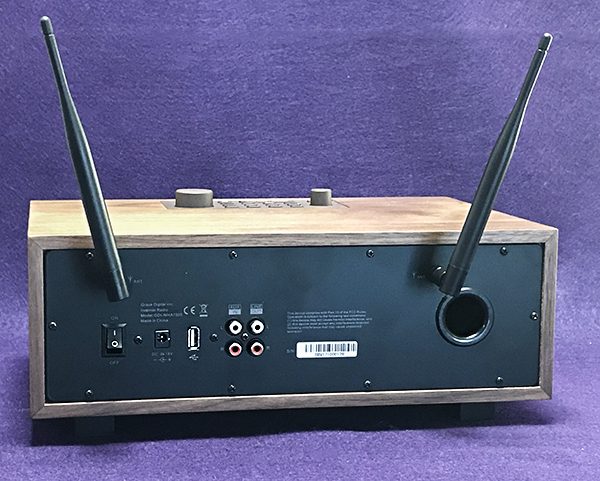
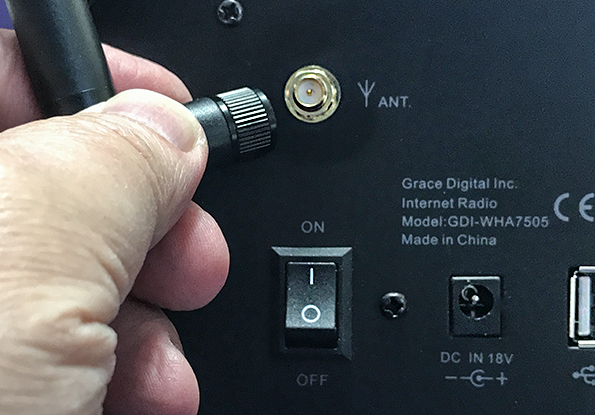
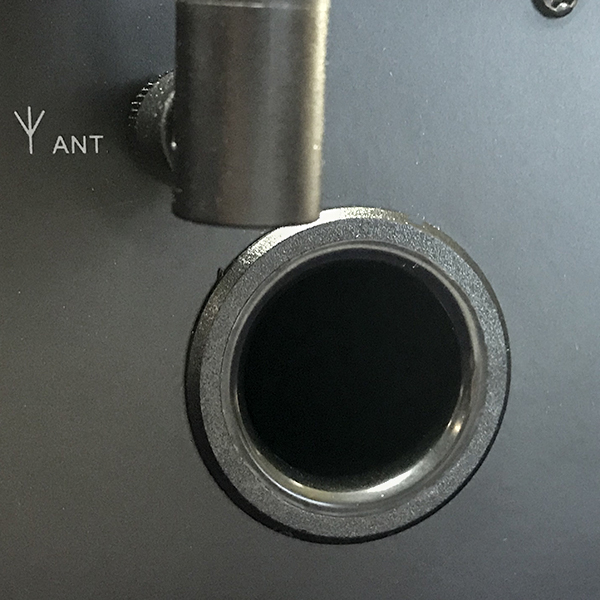
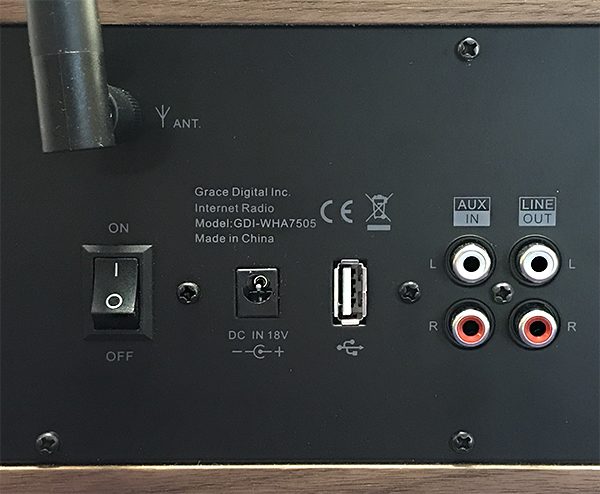
The back panel houses two antenna connectors giving the Encore+ a better than good range. There is a power switch, and AUX in ports along with a UB port for connecting hard drives or thumb drives and a bass port. Finally, there are RCA line out connections for connecting external speakers. 

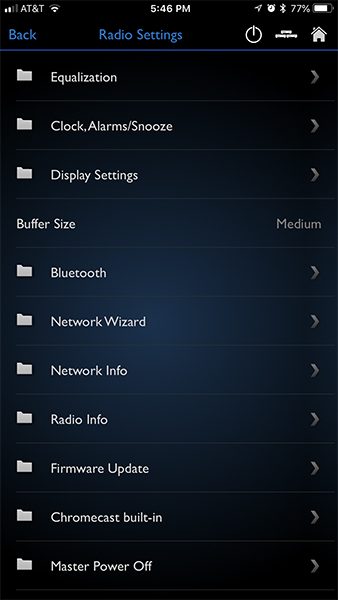
While it’s technically true that you don’t need Grace Digital’s GD Control app to run the Encore+, you want this smartphone app! Without it, navigating the screen with only the buttons on the unit or remote is a nightmare. The iOS/Android GD Control app lets you do anything the top panel will do, but with an added ease of use. Unfortunately, there is no equivalent Mac or PC app.

As with the recently reviewed Solis speakers, I still hold that Apple Music has an edge over Chromecast in ease of use and sound quality. Music just seems more alive through Apple music. Android users may get different results, but to this iOS user, Apple wins every time in audio quality compared to Chromecast. 

Seeing album cover art on the Encore’s front screen worked well with Chromecast, but not so well with Apple Music or when streaming my own music from my hard drive. That’s not a big deal for me because I seldom look at the Encore+ screen for that kind of info. However,  it’s nice to have info available should you want to see what’s playing. Cover art along with other information is also available when using the built-in SiriusXM app. I haven’t been able to figure out why cover art from Apple Music doesn’t carry over to the Encore+.

Note that you must have full SiriusXM capability to use it with the Encore+. My SiriusXM account only covers my car and nothing more, so I wasn’t able to use it with the Encore+.

Despite the usefulness of Bluetooth, Chromecast or even internet radio, the Encore+ really excels with its audio quality. The front facing speakers handle mids and high frequencies quite well with enough power and clarity to fill any large bedroom or kitchen. It’s that down-firing subwoofer that places the Encore+ on another level by playing low notes without distorting. Brian Eno’s “Written, Forgotten” is a song I’ve used before to test bass. There are notes in this song that are more felt than heard and the Encore+ lets you feel—as well as hear— those notes. 

DJ Hell’s remix of Bryan Ferry’s “U Can Dance” features a visceral kick that requires your body to want to move to the beat. Sure, the lower notes sound better on dedicated stereo speakers, but the Encore+ can more than hold its own (for a table-top speaker) without straining. 

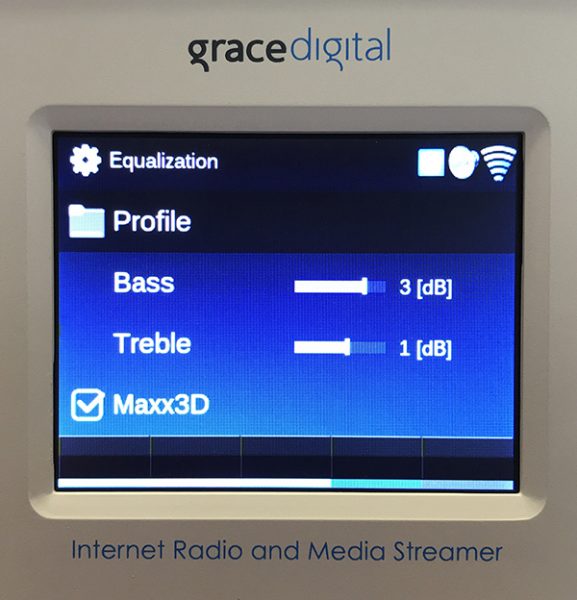
Note that the Encore+ has a built-in equalizer for fine-tuning music to your taste.

Even sports or talk radio sound good on the Encore+. Vocals are clear and easily understood without too much bass or too bright treble. Keep in mind that audio quality and clarity can be dependent on the source, especially when it comes to internet radio. Some stations may sound better than others.

In addition to Bluetooth, the Encore+ can play music from USB and AUX (RCA) inputs. You can even play music stored on a USB thumb drive—which sounds even better than wireless!

What I like

The Encore+ is a jack-of-all-trades kind of radio. It does so much that I’ve touched on only some of it. I recommend visiting the Grace Digital site and exploring everything it can do.

What needs to be improved

The built-in software has not improved much since the original Mondo radio. At least the free Grace GD Control app exists.

Final Thoughts

The Grace Digital Encore+ is a worthy radio that does a lot of what’s asked of it. I like to think of it as a great-sounding Bluetooth speaker that also happens to play many radio formats (including internet radio), is a clock/radio, works with Google Assistant, has a color screen and will even charge your smartphone! My only concern is that time and changing listening habits may eventually pass internet radios like the Encore+ by. I sincerely hope not.

Price: $249.99
Where to buy: Amazon
Source: The sample of this product was provided by Grace Digital.

The post Grace Digital Encore+ Wi-Fi speaker and internet radio review appeared first on The Gadgeteer.

Filed in categories: Reviews

Tagged: ,

Grace Digital Encore+ Wi-Fi speaker and internet radio review originally appeared on The Gadgeteer on April 14, 2018 at 10:00 am.

Note: If you are subscribed to this feed through FeedBurner, please switch to our native feed URL http://the-gadgeteer.com/feed/ in order to ensure continuous delivery.
Julie’s favorite gear, Cuchina Safe dish, Finn wallets, and more – Review updates

We have a few quick review updates for you today, including an update to my Julie’s favorite gear list. We like to regularly update our reviews days, weeks, months, and even decades later to let you know how a product stands up long after the initial review was posted. You’ll find the updates at the bottom of each linked page.

Ditch plastic wrap and use this glass spatter guard in your microwave by Julie Strietelmeier

Julie’s favorite gear

LG 21:9 UltraWide IPS LED monitor (29EA73) review by Julie Strietelmeier

WaterField Designs Finn Wallet review by Julie Strietelmeier

PITAKA Aramid Pixel 2 XL case review by Julie Strietelmeier

The post Julie’s favorite gear, Cuchina Safe dish, Finn wallets, and more – Review updates appeared first on The Gadgeteer.

Filed in categories: Reviews

Tagged:

Julie’s favorite gear, Cuchina Safe dish, Finn wallets, and more – Review updates originally appeared on The Gadgeteer on April 13, 2018 at 10:12 am.

Note: If you are subscribed to this feed through FeedBurner, please switch to our native feed URL http://the-gadgeteer.com/feed/ in order to ensure continuous delivery.
Comtrend PG-9172PoE/PG-9172PT Powerline Adapters with G.hn Technology review

What is it?

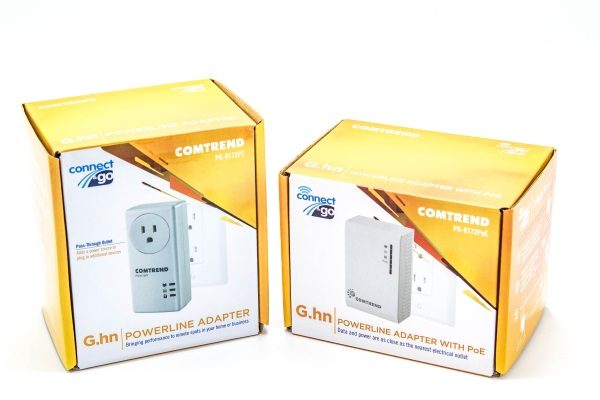
The Comtrend PG-9172PoE/PG-9172PT Powerline Adapters with G.hn technology provides network access in areas where it may be difficult to run network cables, to add data jacks, or access points. It utilizes existing electrical lines to extend the network, and it supports PoE- Power over Ethernet-enabled devices. It can also support devices that have their own power but need a network connection. Using the Comtrend also cuts installation costs and time, since the cable runs are not needed. Its G.hn technology manages any interference from the electrical wiring that can be caused by other appliances and equipment that are being used within the same or surrounding environment.

What’s in the box

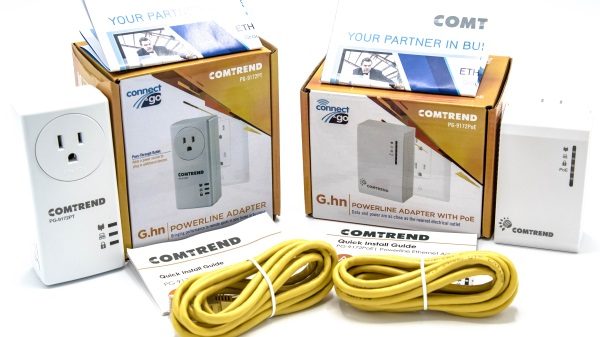
Each adapter is sold separately and comes with:
1 x PG-9172PT or 1 x PG-9172PoE
2 x CAT5e Network cables
2 x Instruction booklets

Design and features

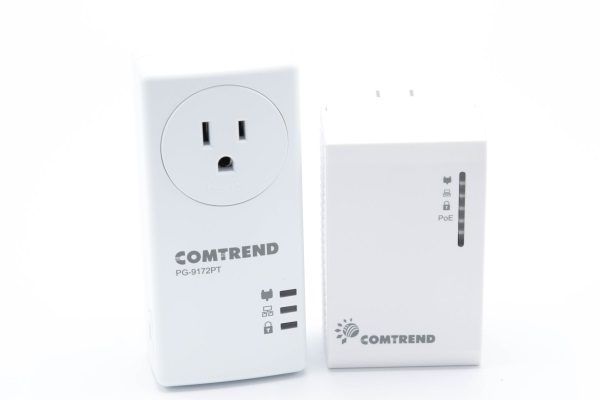
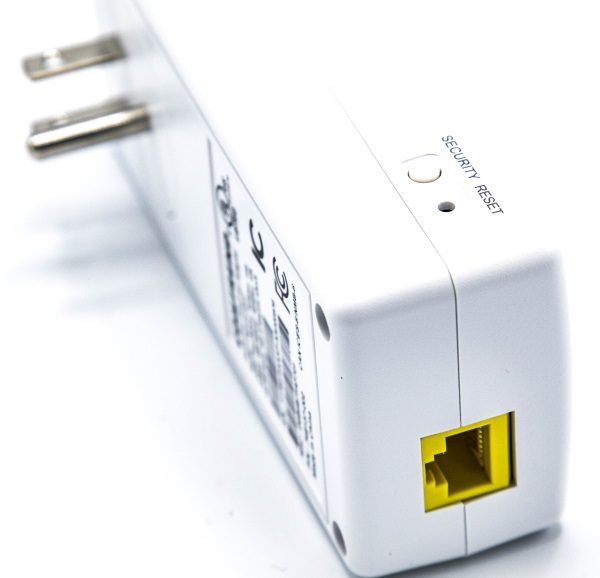
The Comtrend Powerline PG-9172PT module connects to your router or switch and it functions as the transmitter. Once you connect it with the included network cable to your router or switch and plug it into an electrical wall outlet, it powers up and immediately begins the process of connecting to your network. There are 3 LED indicators on the module for connection, network and security. It is recommended that the security option be used, and I installed and tested both secured and unsecured and both modes worked. There is also a pass thru electrical outlet on the module.


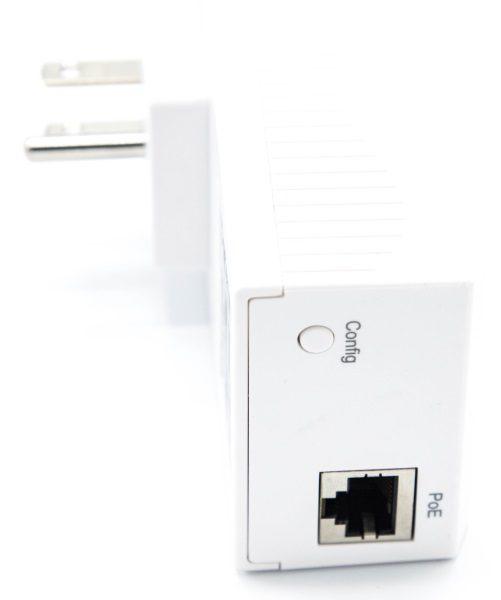
The second module the PG-9172PoE is the receiver module that you plug into the wall outlet in the room/area where you want to add the network connection. Depressing the “config” button for 3 to 5 seconds initiates the setup and connection to the transmitter.

On the first attempt, I plugged the receiver module into an extension cord despite the warning in the instructions not to do so. And just as should be expected, I had a bit of a difficult time getting the modules to connect. Once they did connect, I plugged in a Roku streaming box and it took some time for the Roku to recognize the network connection. The picture produced on the TV was just horrible reception. I then plugged the PG-9172PoE receiver module out of the extension cord and plugged it directly into the wall outlet. It immediately connected with the PG-9172PT transmitter, and the picture the Roku then produced was perfect. I also tried plugging in my Lorex PoE security camera, and that worked immediately as well.

For my last test, I was curious about the network speed at the receiver and how it compared to the WIFI signal in the house. My data plan is 20Mbps upstream and 300Mbps downstream. However, because of my location in relation to a core ISP site, I usually get even better numbers.
First, I connected my laptop wirelessly to my router and using the speedtest.net website, I ran a speed test. Here is the result:

Next, I disconnected the laptop from the wireless network and plugged in the network cable from the PG-9172PoE receiver and ran another speed test. Here is the result:

As you can see, the downstream speed of the modules is less than a quarter of the speed of the wireless connection, and slightly less than the upstream. However, both the upstream and downstream speeds were more than enough for any network, and any streaming of security cameras or media boxes.

What I like

I love the convenience of the Comtrend kit. The connection speed is more than enough for most uses, and the ability to add a network connection this easily to an area that would otherwise present much difficulty to do so, is just a great plus. No matter how many times I plugged out from the receiver and then plugged back in, the connection was always “up” and consistent. Both modules are lightweight and attractive enough that they blend right into any décor and as far as technology goes, in my opinion they are aesthetically attractive.

What can be improved

The only thing I would like to see improved is the ability for the Comtrend to provide even faster network downstream speeds, but this may differ by location and structural characteristics within the environment, and may not actually be a factor that needs improvement.

Final thoughts

I really like the Comtrend G.hn Powerline adapters and they have already become a permanent addition to my network. The stability of its network connection and the versatility that it adds to a network make it a winner all around. I can see myself buying at least another PG-9172PoE receiver module for an additional PoE camera that I want to add to my security network in another area of my house where adding network cabling is just a headache. Simply put, the Comtrend Kit just works.

Price: $49.99 for each module
Where to buy: Comtrend Powerline PG-9172PT on Amazon, Comtrend Powerline PG-9172PoE on Amazon
Source: The sample for this review was provided by Comtrend

The post Comtrend PG-9172PoE/PG-9172PT Powerline Adapters with G.hn Technology review appeared first on The Gadgeteer.

Filed in categories: Reviews

Tagged: ,

Comtrend PG-9172PoE/PG-9172PT Powerline Adapters with G.hn Technology review originally appeared on The Gadgeteer on April 13, 2018 at 9:00 am.

Note: If you are subscribed to this feed through FeedBurner, please switch to our native feed URL http://the-gadgeteer.com/feed/ in order to ensure continuous delivery.
Alto slim minimalist wallets review

What images come to mind when you think about minimalist wallets? Maybe a classic binder clip that holds a few credit cards and some cash? Or maybe a really thin traditional style wallet that is made of sail cloth? How about a handmade wood, carbon fiber, or aluminum wallet that can hold cash and cards while remaining sleek and stylish? That describes Alto Wallets. Let’s take a look.
What is it?

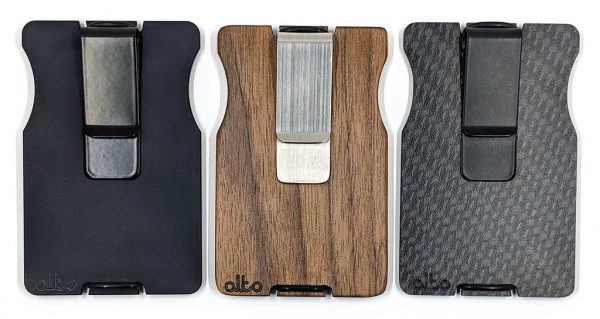
The Alto Wallet is a minimalist wallet that is available in three verisons: black aluminum, walnut or mahogany wood, or carbon fiber. The wallets are made by hand by the Alto brothers from Canada.

Design and features

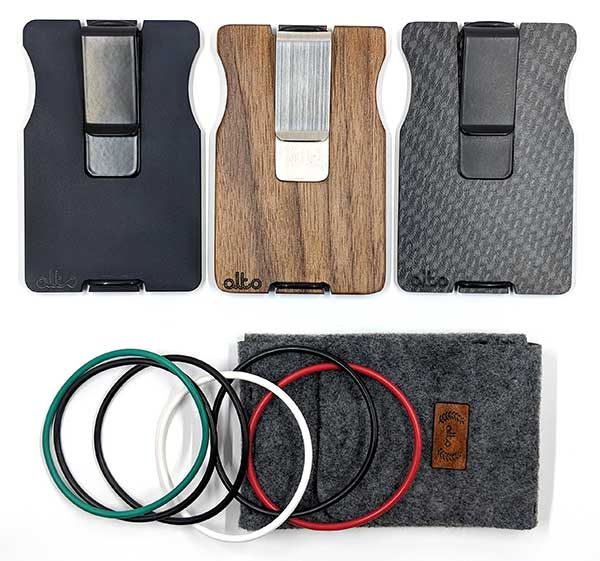
I was sent one of each of the Alto wallets which you can see in the image above. The black aluminum version is on the left, the walnut is in the center, and the carbon fiber Alto is on the right.

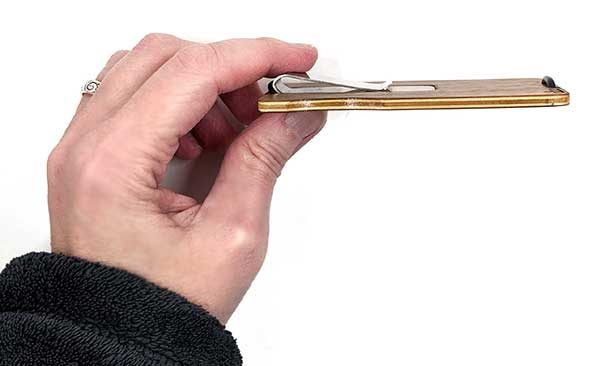
Each wallet has a steel money clip on one side along with the alto brand in the bottom left corner.

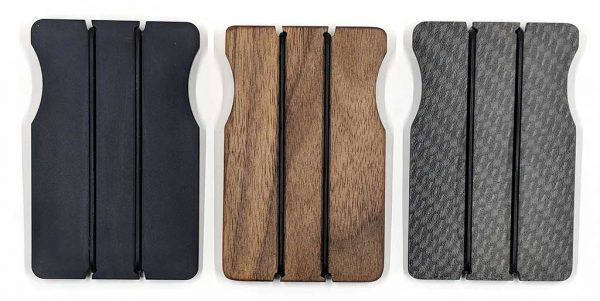
And on the opposite side is a durable nitrile band that can be used to hold your credit cards. The bands are replaceable and each wallet comes with 2 extra bands of different colors so you can customize the look of your wallet.

The Alto wallet making process has several steps which include (depending on the material used) vacuum bonding, CNC cutting, laser cutting, CNC milling, bead blasting, anodizing, and sanding by hand.

The resulting wallet is very well made and is thin but strong. There are no screws, seams, or moving parts.

The nitrile band allows you to securely carry about 1-5 standard sized plastic credit cards. To remove a card, you just slide the stack out from under the bands. I found it a little awkward to do at first, but as I used the wallet for several days it because easier to do.

Cash can be inserted beneath the steel money clip. I found the clip to be really tight even when sliding only a few folded bills.

You can fold the cash in half or twice for a more compact look. Either way, it takes a little practice to side the bills under the tight clip without tearing them. According to the Alto brothers, the clip will loosen slightly after a short break-in period.

What I like

  • Well made
  • Can hold both cash and credit cards
  • 3 styles

What needs to be improved

  • Expensive
  • Can take some effort and practice learning to access cash and cards due to the tightness of the band and clip.

Final thoughts

I really like the look and feel of the Alto Wallets. They are well made and I found no defects, burrs, sharp edges, or other workmanship issues.

I think the wallets are better suited for minimalist guys who have strong hands that can easily insert/remove the cash and cards from the bands and clip. Using the wallets was a little tough for me, so I must have wimpy hands. That said, Alto wallets are made to withstand a lot of everyday wear, tear, and abuse and should stand the test of time with no problems.

Price: $55 – $99 CAD ($43.62 – $78.51 US)
Where to buy: Alto Collective
Source: The sample for this review was provided by Alto Collective.

The post Alto slim minimalist wallets review appeared first on The Gadgeteer.

Filed in categories: Reviews

Tagged:

Alto slim minimalist wallets review originally appeared on The Gadgeteer on April 12, 2018 at 1:00 pm.

Note: If you are subscribed to this feed through FeedBurner, please switch to our native feed URL http://the-gadgeteer.com/feed/ in order to ensure continuous delivery.