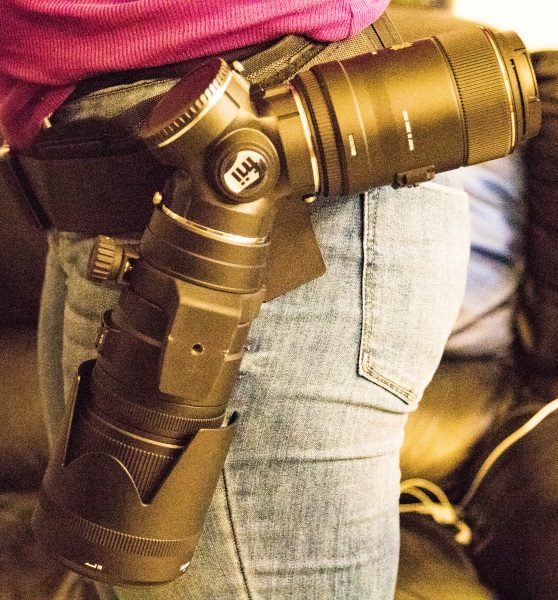
Baseus Wireless Charging Gravity Car Mount review

Mounting your phone where you can see it while driving has become the norm. Whether you’re using it for a GPS system or entertainment, everyone wants their phone easy to get to, or at least within their visual field. I was recently sent a one-hand air vent clip from Baseus in black to test.

Note: Photos may be tapped or clicked for a larger image.

What is it?

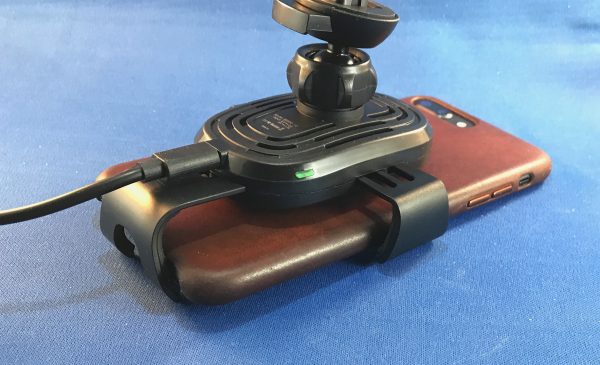
The Baseus wireless charger incorporates a clip-on air vent holder with a one-hand operation gravity holder, and then adds the secret sauce of wireless charging to the mix. The charger itself has a cable that runs to a power source, and the arms are activated by the downward pressure from the weight of the phone in the holder.

Hardware specs

  • Wireless charger
  • Gravity car mount
  • Safe and quick charging
  • One-hand operation

What’s in the box?

  • Clip-on charger
  • USB-A to microUSB cable
  • Instruction sheet

Design and features

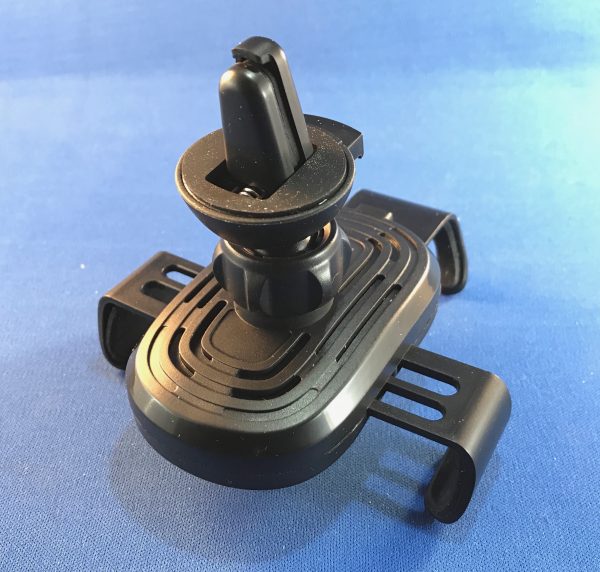
The Baseus Wireless charger at first glance is a bit confusing. The two side arms and the bottom cradle are geared together inside somehow and don’t lock into place. While unboxing it, I moved them around, trying to find the “lock point,” but never got it to work. I plugged it into a spare microUSB cable at my desk and then placed my iPhone 8 Plus into the cradle, just to see if maybe having power would make it lock. When the phone got close to the clip, I felt and heard the familiar “ding” indicating charging. I was a bit surprised that it contacted so easily since I had read and heard on podcasts about how finicky many chargers are.
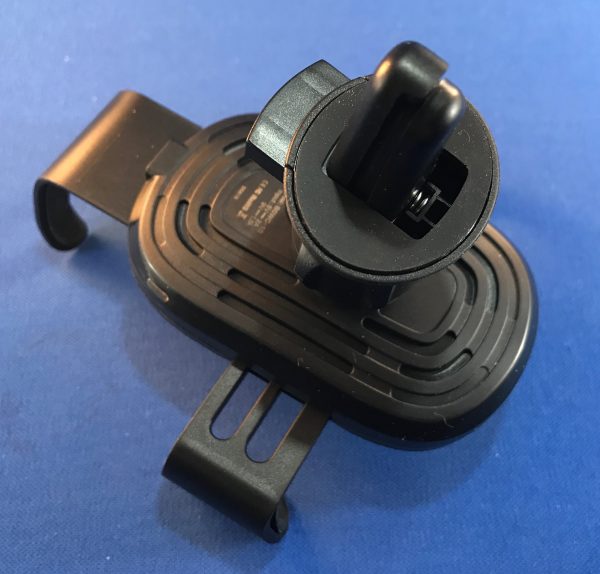

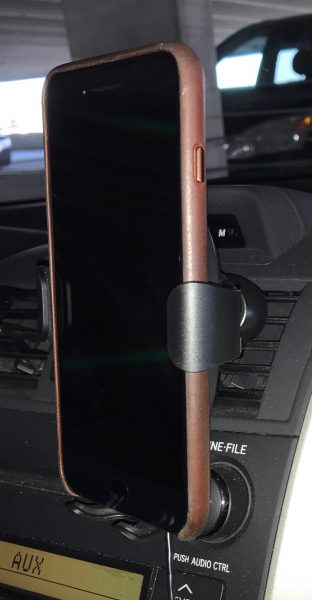
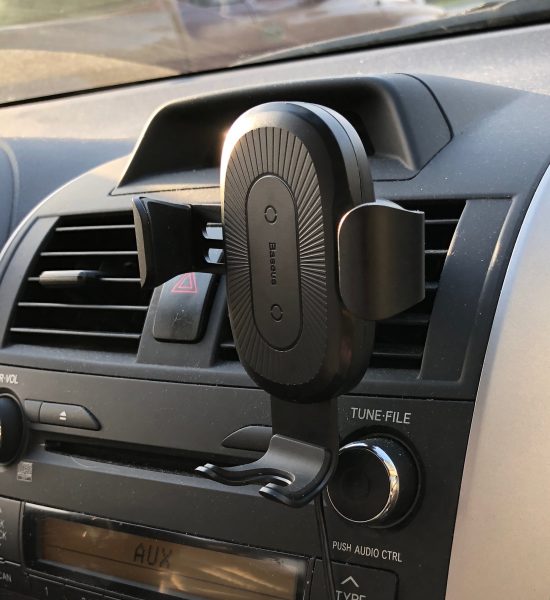
I was still a little confused on how it would lock into place until I put it in the proper orientation. The slight weight of the phone pulled the side arms around the device just enough to hold it firmly. When you grasp the top of the phone and lift it up, the base’s spring-loaded action draws it up slightly, and the arms are pushed outward, releasing the phone. I drove over some pretty bad road construction while testing, and never got large enough bumps to where the phone bounced out of the holder.
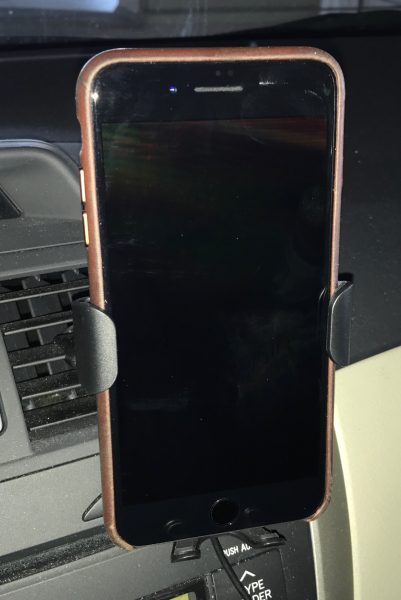

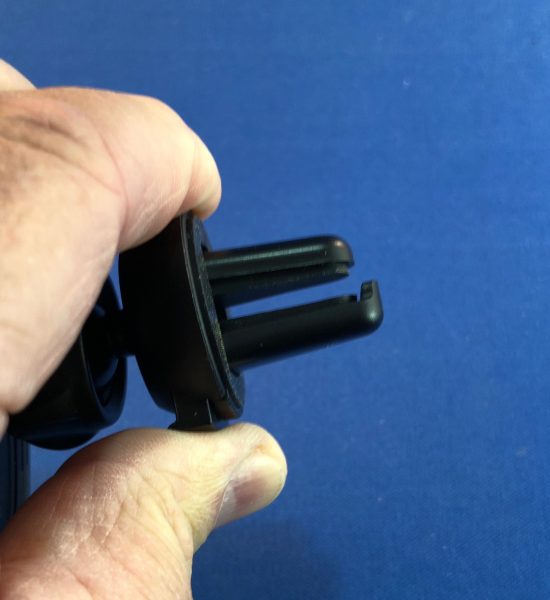
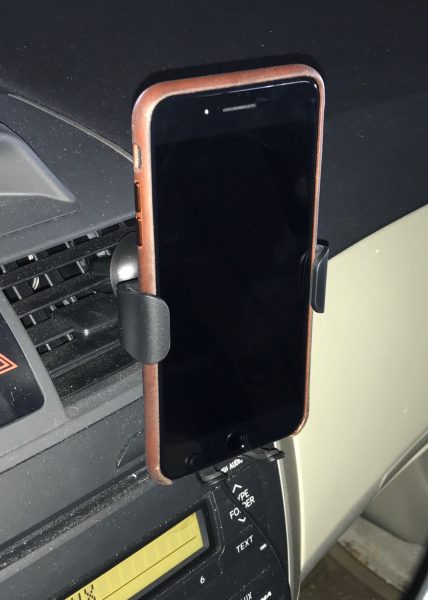
The spring on the air vent clip is quite tight. I could barely get it to open enough to get the prongs onto the vent slat. There is a slight “tooth” sticking up on the lower prong that prevents the clip from vibrating off over time, and foam glued to the inside of the jaws cushions them from scratching your dash. When it’s removed, there is no evidence it was ever there.

Setup

I recommend deciding where you’re going to place the holder first, then deciding on wiring routes. Also, connecting the wire before clipping the holder in place will make your install less stressful. It’s quite difficult to get the angle right on the wire once the clip is installed.

Performance

I cannot overstate how well this unit performed. It started charging every time my phone got within range, and never gave me a moment’s trouble when adjusting it. Once set into place, it is rock-solid, and just became part of my instrument panel, which is exactly what I want from a unit like this.

What I Like

  • One hand operation
  • Charging starts immediately and never stutters
  • Very adjustable, yet sturdy, with no vibration

What needs to be improved

  • Nothing

Final thoughts

As mentioned, I have several iPhone holders for in-car use. None were active when I was sent this unit. I’ve not taken it out since getting it, except to get a few photos of the back that I forgot to get before installing it. I use it almost every day and would buy another one if this one got broken or stolen. Much of that is because it’s so easy to put the phone into and take out. Even though I have to plug in a cable since I don’t have Bluetooth, it’s still far less hassle than any other car mount I have ever used, bar none.

Price: $27.99
Where to buy: Amazon
Source: The sample of this product was provided by Baseus.

The post Baseus Wireless Charging Gravity Car Mount review appeared first on The Gadgeteer.

Filed in categories: Reviews

Tagged: , , ,

Baseus Wireless Charging Gravity Car Mount review originally appeared on The Gadgeteer on April 26, 2018 at 9:00 am.

Note: If you are subscribed to this feed through FeedBurner, please switch to our native feed URL http://the-gadgeteer.com/feed/ in order to ensure continuous delivery.

Neo smartpen M1 review

Do you keep a journal in a paper notebook but wish it had some of the features of a digital journalling app such as search and archiving? There are lots of apps out there for your phone or tablet that will let you keep a journal and write with a stylus, but I have been on a quest to find a hybrid system where I can use an old-school paper notebook with a pen. I recently discovered the Neo Smartpen M1. Let’s check it out.

What is it?

The Neo Smartpen M1 is an ink pen with a built-in camera that digitizes your writing and works with an app on your iOS or Android device to record what you’re writing as you write it in a special paper notepad.

What’s in the box?

  • Neo Pen M1 smartpen
  • 2 D1 size ink refills
  • micro USB charging cable

Design and features

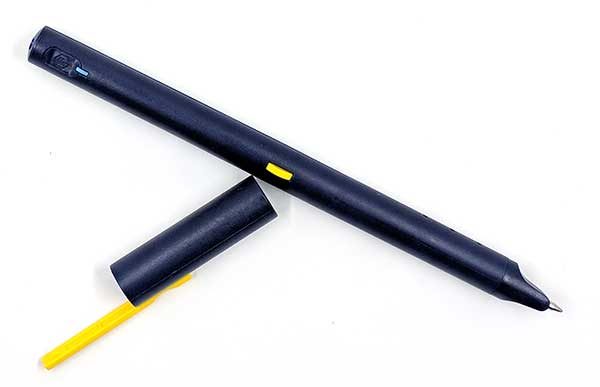
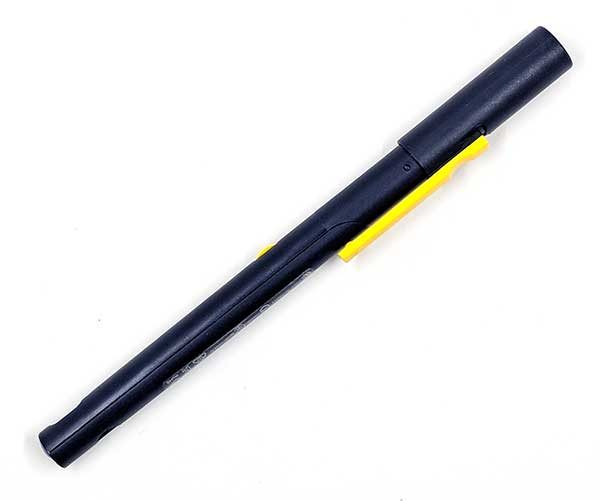
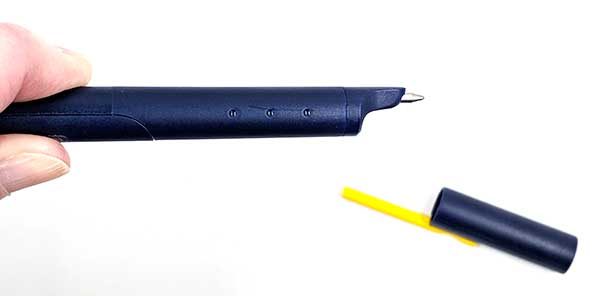
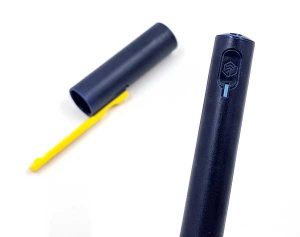
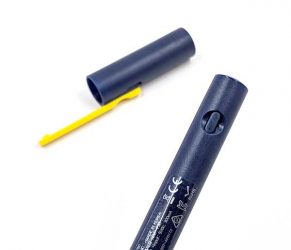
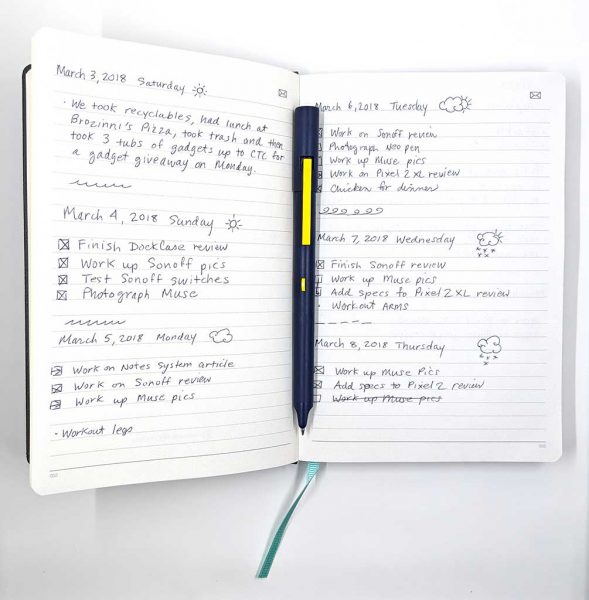
Neo is a company who has been offering smartpens for a while now. Their latest pen is the M1 and it’s a newer version of the pen that Moleskine is using with their Smart Writing Set. The M1 looks like a regular pen, with a cap and pocket clip and is available in 3 colors including the one you see above.

When you remove the cap, you will see a real pen that writes in ink on paper.

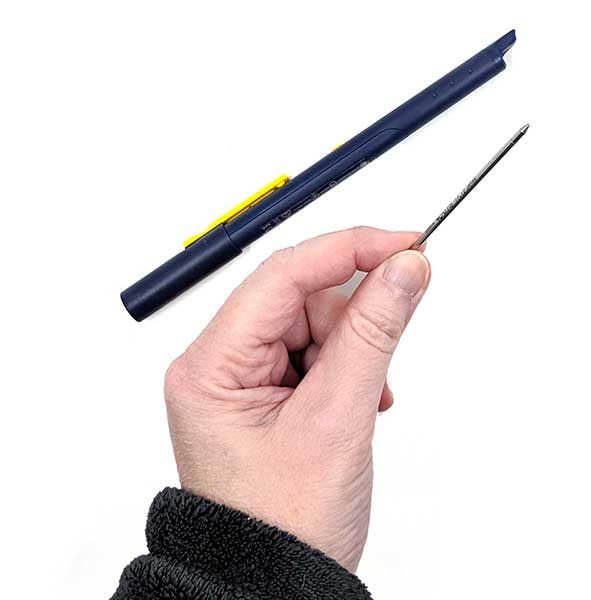
The M1 comes with 2 D1 sized refills that you can buy on Amazon and other retail sites in different colors and point widths. The refills are easy to remove and install. Basically, all you do is grab the tip and pull it out.

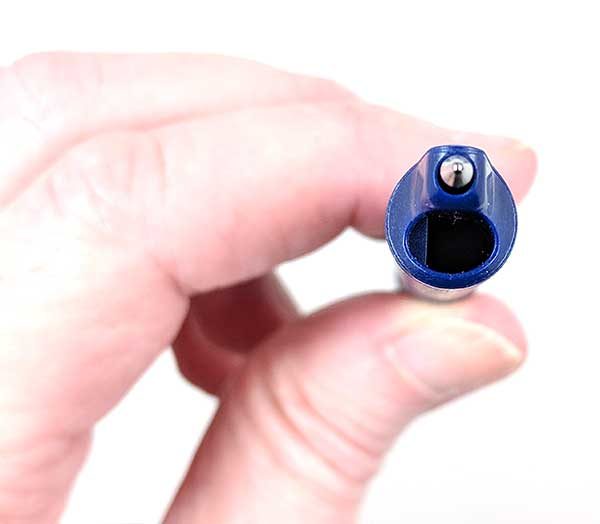
The Neo smartpen M1 has a built-in optical digitizer that is located above the ink tip. That means that you have to write so that this “camera” is pointing down toward the paper instead of turned upward.

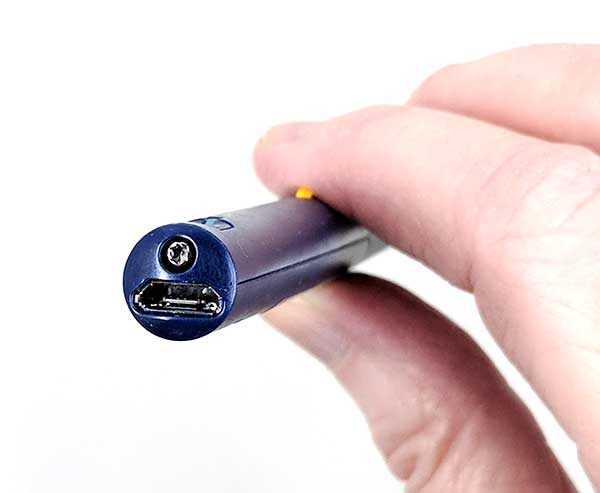
Before you can begin using the M1 smartpen, you have to charge it. There’s a standard micro USB connector on the end of the pen.


A status LED on the barrel glows red while the pen is charging, green when fully charged, and white while the pen is in use.

There’s a small power button on the barrel as well. Once you turn on the pen, you don’t need to press the power button again as the pen will turn off on its own after inactivity and will automatically power back on when you remove the cap or start writing again.

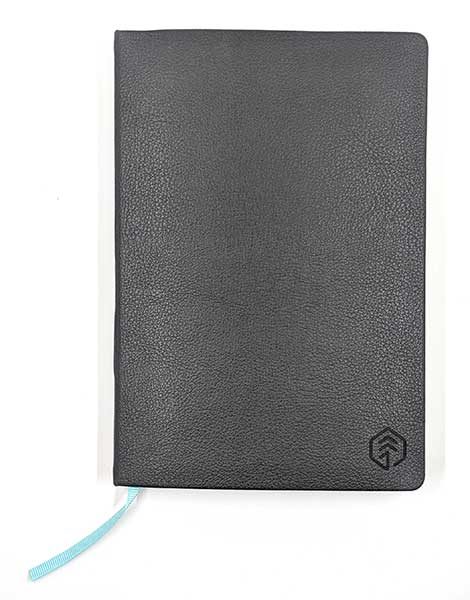
Neo smartpens have to be used with special notebooks if you want your writing digitized. At first glance, these notebooks may look no different than other paper journals. They come in different styles with hard or soft covers, spiral or hardbound, with a bookmark. Neo also offers PDFs that you can use to print your own pages for free. You can see all the pages here.

But if you look very closely at the page, you’ll see tiny grey dots which allow the pen’s digitizer to record your writing and drawings. Click the image above to see the dots.

When I bought the M1 smartpen, I also bought one of the Neo N professional notebooks. These notebooks are pretty expensive ($24.95 from Amazon), but I like hardbound books so I splurged. The N Professional reminds me a lot of my favorite notebook the Leuchtturm1917.

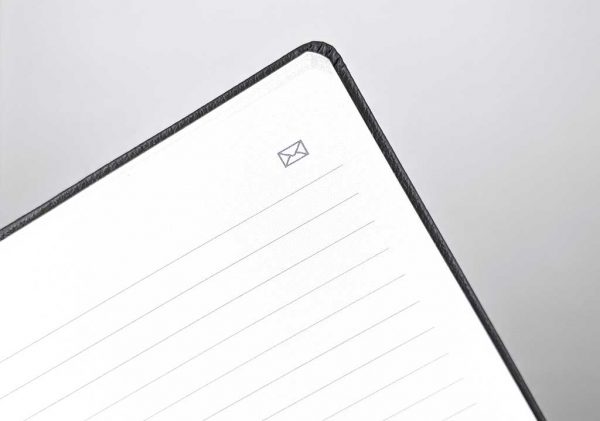
The Neo N Professional notebooks have numbered pages and an envelope icon in the upper corner of each page that instructs the Neo app to email the page.

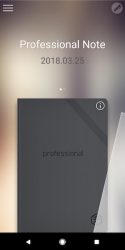
Neo Notes app

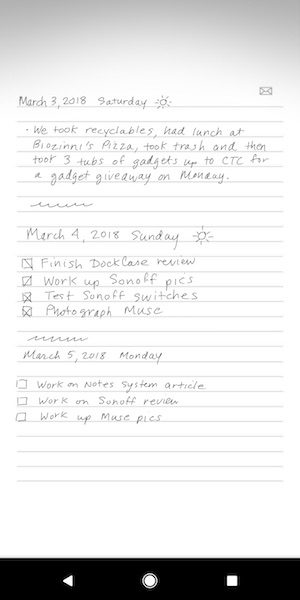
The smartpen can record your text without any extra hardware or software, but without using the Neo app you really can’t do anything with it. The pen syncs to the app so you can view, edit, and search your pages.


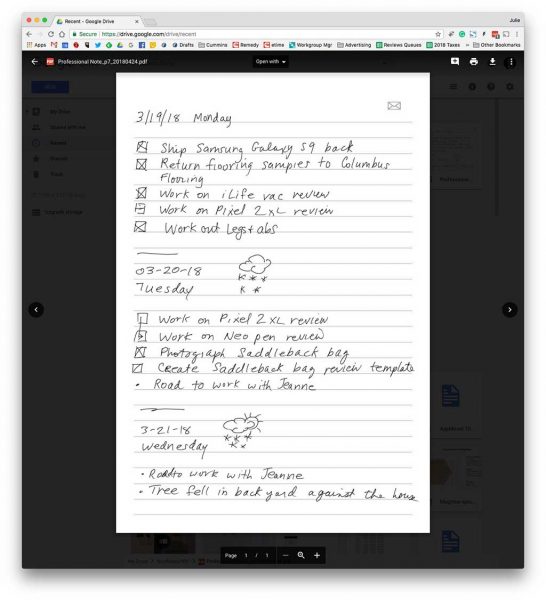
The app allows you to use multiple notebooks if you have them and gives you the option of automatically syncing pages to Evernote, Adobe, OneNote, or Google Drive.


Once a page has been imported into the app, you can edit it with some basic tools that allow you to highlight text, change the color of text, and add more notes to the text with your finger or a stylus.

You can also watch a video replay of what you wrote and when you initiate a recording, it will attach that to the page as well. Just be aware that you have to start the recording from the app AND it’s the phone that records the audio, NOT the pen.


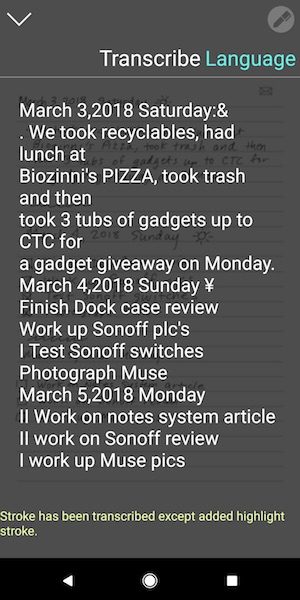
The app will also allow you to transcribe the pages into text but it doesn’t automatically share the transcribed text to Evernote, OneNote, etc.

As you can see, the transcription doesn’t do a perfect job. If you like to doodle or add check boxes, it will try to recognize them as letters and the results might not be what you would expect.


The Neo Notes app allows you to search the text for words is useful and you can also tag pages with keywords for organization/filing purposes. This works pretty well as long as your writing is clear and legible.

Writing with theNeo smartpen M1 is ok, but it’s not nearly as enjoyable as my favorite pens which have a Pilot G2 refill. I’m just spoiled 🙂 That said, the pen does an impressive job of recording your pen strokes. As long as you don’t start writing until you hear the beep after you take off the cap or press the pen to the page, you’ll be fine. If you immediately start writing, the pen might not catch 100% of that first stroke.

What I like

  • Not any larger than a regular pen
  • Easily replaceable ink refills
  • Easy to use app
  • Can automatically sync with Evernote, Google Drive, OneNote,

What needs to be improved

  • Voice recordings use the phone’s microphone and have to be initiated through the app
  • Need a setting to autosave transcribed page text to outside sites like Evernote

Final thoughts

I was excited to try the Neo smartpen M1 after it was suggested to me in the comments for a post I did about switching from analog to digital note-taking. That’s why I purchased the Neo pen. I thought it might be the perfect combo of analog and digital. So how has it worked out for me? The pen is nice. So don’t get me wrong. But, the excitement faded pretty quickly because I am not a fan of the way it feels to write with the pen. It writes fine, but it’s just not as smooth as my favorite pens. I tried a couple different ink refills without any noticeable improvement.

I also found that my weird hybrid print and cursive writing style with doodles and checkboxes doesn’t lend itself that well to transcription or text searches for words.

In the end, I found that although my notes were backing up to the cloud that I wasn’t looking at them after the fact.  I’ve finally come to the conclusion that the best note taking and task system for me is a paper notebook, my favorite pen, and my own version of the Bullet Journal system. At the end of the day or week, if I need to remember something I’ve written, I quickly type it into a note on Google Drive where it will be backed up and is searchable since it’s straight text.

While the Neo smartpen M1 didn’t quite work for me, it’s still a nice pen and I can see that it would be useful for meetings and school.

Price: $129.00
Where to buy: Neo or Amazon
Source: The sample for this review was purchased with my own funds.

The post Neo smartpen M1 review appeared first on The Gadgeteer.

Filed in categories: Reviews

Tagged: , ,

Neo smartpen M1 review originally appeared on The Gadgeteer on April 25, 2018 at 12:00 pm.

Note: If you are subscribed to this feed through FeedBurner, please switch to our native feed URL http://the-gadgeteer.com/feed/ in order to ensure continuous delivery.
Elgato Eve Energy Switch & Power Meter and Eve Button review

I’m particularly fond of home automation and have enjoyed making things light, whirr and spin with a poke at my phone or voice command. Adding the ability to monitor mower is icing on the cake so I was eager to give Elgato’s Eve Energy Switch & Power Meter and Eve Button a try.

What is it?

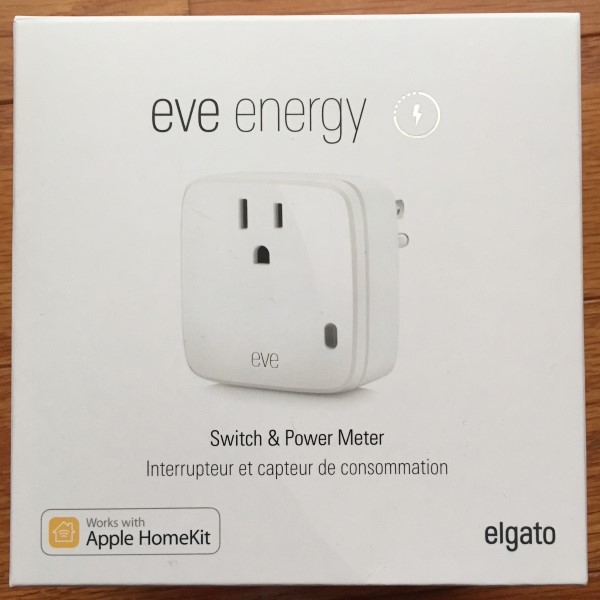
Eva Power Switch & Power Meter devices allow the control of a single socket via a smartphone app or Siri. Equipped with power monitoring functions, the app allows activation/ deactivation and power draw analysis for the connected appliance.

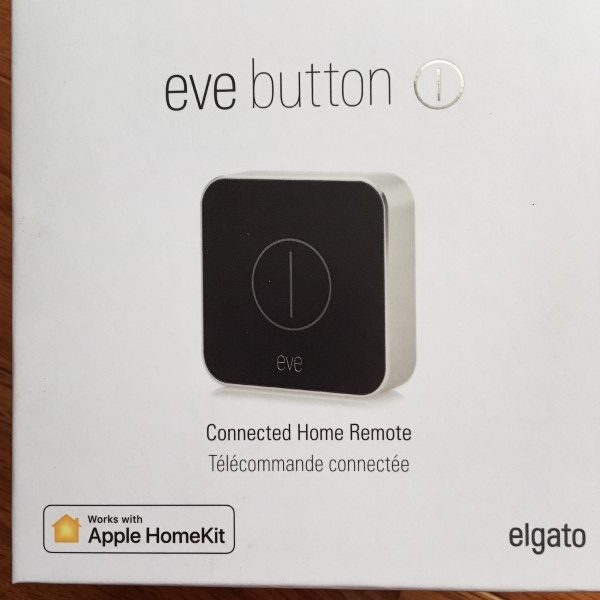
Adding the Eve Button allows remote control of Eve Power Switches without the need of a smartphone…

Hardware Specs

        Eve Wireless Switch & Power Meter

  • Plastic housing
  • Dimensions: 2.6 x 1.9 x 2.6 inches
  • Weight: 3.04oz
  • Power Rating: 120VAC, 15 Amps/1800 Watts maximum load
  • AC Frequency: 50/60Hz
  • Interior use only

Eve Button

  • Plastic and aluminum housing
  • Dimensions: 2.1 x 2.1 x 0.5 inches
  • Weight: 1.28 oz.
  • Power Rating: 3.0VDC, CR2032 lithium coin cell battery included

What’s in the box?

        Eve Wireless Switch & Power Meter

  • Eve Switch
  • Instruction manual
  • Quick-start manual

Eve Button

  • Eve Button
  • Instruction manual
  • Quick-start manual
  • Several sets of device icon stickers

Design and features

The Eve Switch and Eve Button cardboard packaging are full-color and attractive looking. There is ample support to keep the contents from being damaged in transit. The quick-start manuals have easily understood graphics. The instruction manual is very tiny.

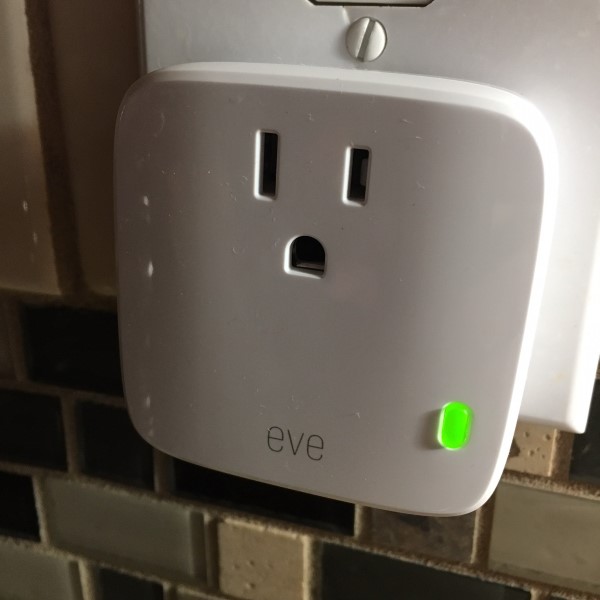
Because of the case design, it’s not possible to plug in two Eve Switches into a single two-outlet socket. However, it is possible for another 3-prong grounded plug to fit in the second socket with the Eve switch plugged into the first. This has been a shortcoming of other manufacturers that Elgato has addressed nicely, although a case design that allows two Eve Switches in a single duplex outlet would be advantageous.

Connecting the sockets to Apple Home was super simple – just plug in, open Apple Home on your iPhone, click the + to add a new piece of hardware, Select “Add Accessory,” Allow the camera to scan the device code, Click the new device “icon,” wait for the confirmation and done and works without installing the Eve app. After successfully adding the switch, Apple Home allows the user to specify the room and give the new switch a name that can be used to verbally turn the connected device on or off. It’s very cool to be able to issue a voice command like,”Hey Siri, turn on the coffee maker.”

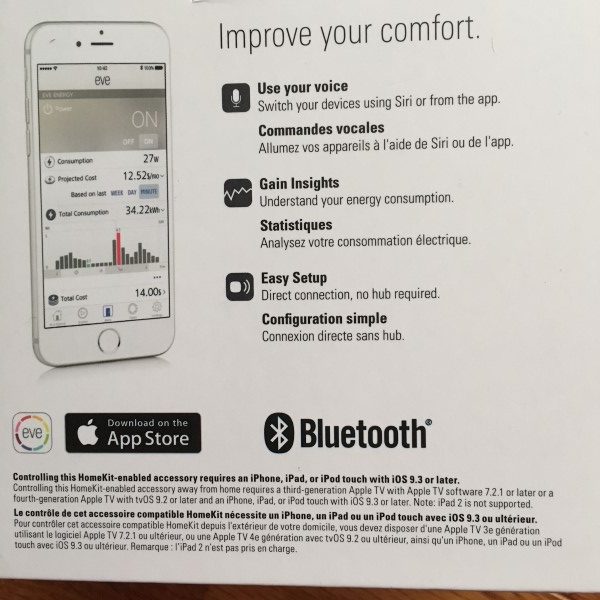
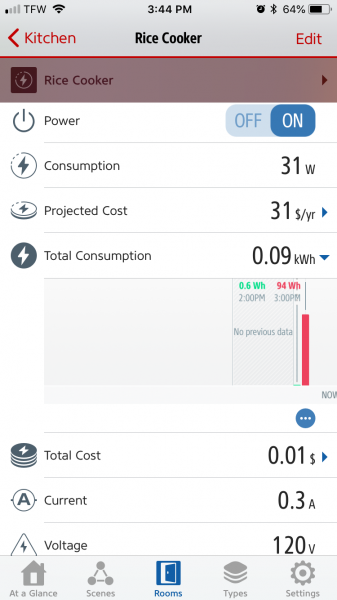
Here’s where the Elgato Eve is different: Once connected and functional, the Eve app shows the status,  power consumption, projected cost, total consumption, total cost (based in my energy rate taken from my electric bill), Current (Amps) and voltage. For someone looking to reduce energy costs, this is a valuable tool to find out what’s sucking the energy out of your home. I connected a small 3-cup rice cooker to the Eve Switch and turned it on. Over the next, I watched the power consumption while cooking and warming modes. The Eve app gave me an overview of my little rice cooker’s usage.

I can see this being a great tool for determining where my home appliances are wasting energy. It will be interesting to use the Eve Switches to monitor parasitic drain devices and reduce electrical costs.

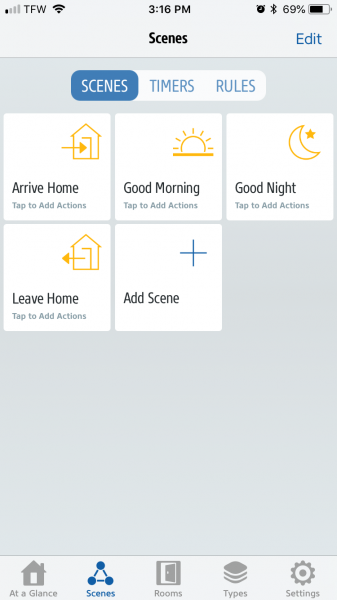
The app also provides a mechanism to create scenes, turning any Apple Home devices on and off dependent on environmental issues. It’s not as comprehensive a list of trigger conditions I’ve seen in other products, but in testing everything works well.

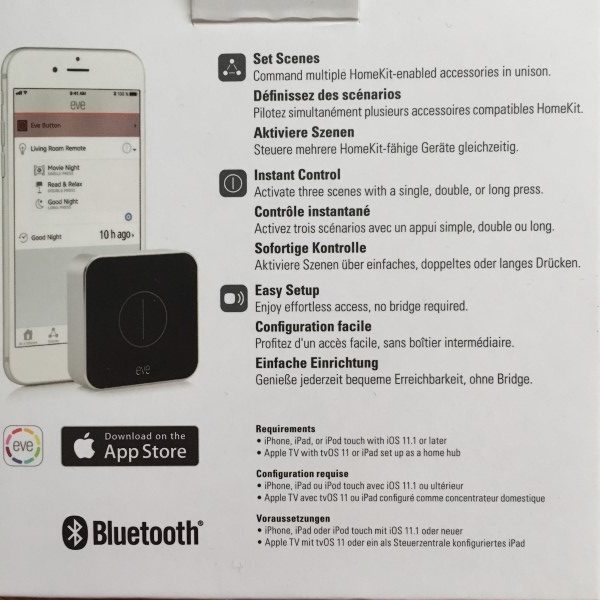
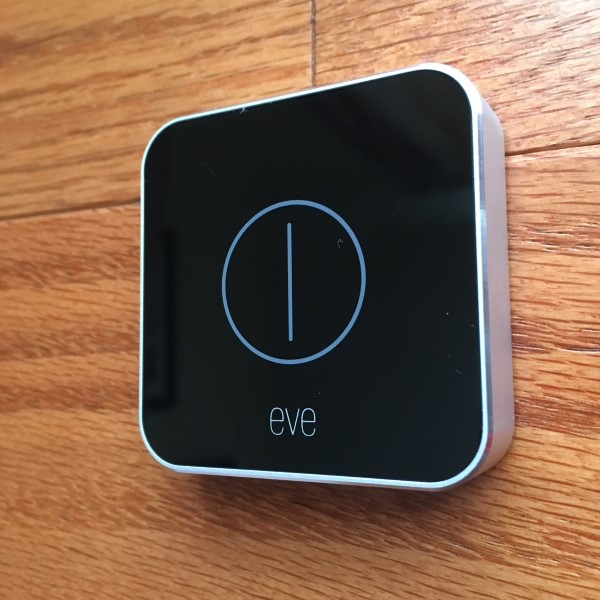
Next, I linked the Eve Button to my Apple Home account. The switch is small and sleek and has three button modes – single press, double-press, and long-press. Each mode can be configured to perform tasks on any Apple Home device but requires an Apple TV hub to configure and use. I don’t have one at the time of this writing, but it’s on my wish list. I envision using the Eve Button to turn an entire house of lights on or off at the end of a busy day without the need to go from room to room. Elgato includes stick-on rubber feet and several sheets of appliance icons that can be applied to the Eve switch as a reminder of what it’s configured to control. A nice touch.


What I like

  • Snazzy looking
  • Easy configuration
  • Only one can be used per duplex socket
  • Capable app with energy usage feedback

What needs to be improved?

  • It would be nice if an Apple TV hub were not needed.

Final thoughts

I found the Elgato Eve Switches and buttons cost-effective, well-constructed and reliable. The switches work similarly to other manufacturers, but the energy collection data is top-notch.  I am looking forward to fully implementing the system and getting the Eve Button working.

Price: Eve Energy Switches $49.95. Eve Button $49.93
Where to buy: Amazon
Source: The sample for this review was provided by Elgato.

The post Elgato Eve Energy Switch & Power Meter and Eve Button review appeared first on The Gadgeteer.

Filed in categories: Reviews

Tagged: ,

Elgato Eve Energy Switch & Power Meter and Eve Button review originally appeared on The Gadgeteer on April 25, 2018 at 10:00 am.

Note: If you are subscribed to this feed through FeedBurner, please switch to our native feed URL http://the-gadgeteer.com/feed/ in order to ensure continuous delivery.
STM Bags Banks 15″ Laptop Backpack review

Who says business casual has to be dull? The STM Banks Laptop Backpack is a great looking daypack designed to organize your work life, with some clever extras to make your daily commute easier. Let’s check it out!

What is it?

It’s an 18L backpack designed to carry your laptop and daily essentials.

Hardware specs

  • Main material(s): 100% polyester
  • Outer dimensions: H 17.9 x W 12.4 x D 6.5 in / H 45.5 x W 31.5 x D 16.5 cm
  • Device space: H 10.04 x W 14.76 x D 1.18 in / H 25.5 x W 37.5 x D 3 cm
  • capacity: 18 L
  • weight: 1.96 lbs / 0.98 kg

Design and features

Hailing from Australia, the STM Banks Laptop Backpack is all about modern style. A trim, squared profile is highlighted by little design elements (like that racing-stripe fabric strip) that add a bit of sportiness to the overall look. This bag fits right in at the business casual workplace.

The form factor of the Banks is a two-chamber top loading daypack. At a compact 18-liter size, it’s made to organize your tech and work essentials. As we’ll see in the walkthrough, there are some bonus “easter eggs” in the design that add even more functionality.

Your laptop rides in it’s own padded compartment that sits closest to your back, and is accessed by a separate top zipper. This chamber uses what STM Bags calls the “SlingTech” design: it’s suspended above and away from the edges in the main compartment of the bag to protect against impacts. A 15” laptop or large tablet (not both) will fit in this space, and two additional padded vertical pockets will accommodate a notebook, a standard sized tablet, or documents.

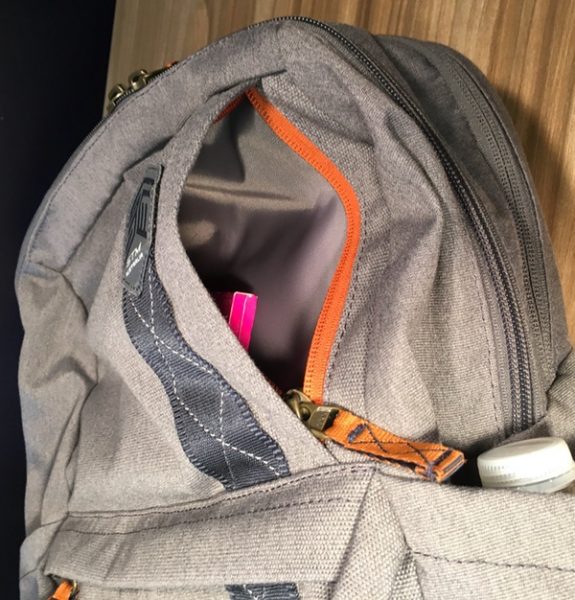
The main chamber is accessed from the second top zipper and serves as your open storage space. There’s an additional padded sleeve on the rear face that will take up to a 12.9” iPad Pro in its case, and a fleece-lined top pocket on the front face for delicate electronics or your sunglasses. The whole chamber is 5” deep, but note that this space is shared with the laptop compartment. You’ll have room for some extras if you add a laptop and a tablet, but things start to get tight pretty quickly. 

Moving to the outside of the bag, you’ll find 4 additional storage areas. A 5” by 9” pocket on either side of the bag is sized up for water bottles, but there’s no elasticity to these pockets to accommodate larger hydration bottles. A 5 1/2” by 9” horizontal pocket at the top of the front face serves as multifunctional quick stash area. 

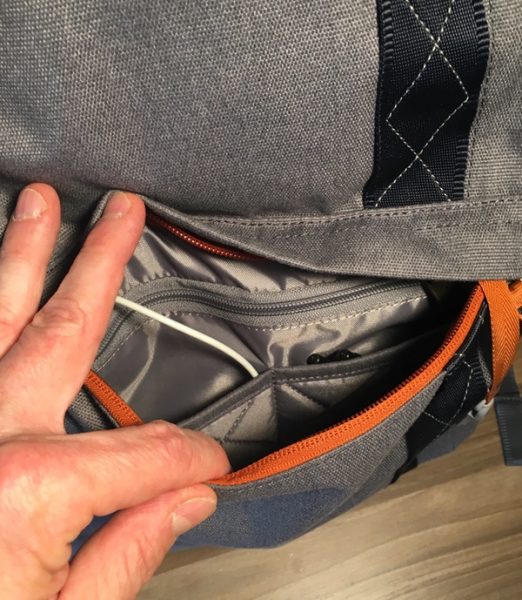
There’s also a 10” by 8” pocket on the bottom of the front  face that’s includes two padded smartphone-sized pockets backed by an internal zippered pocket for smaller bits and doodads. 

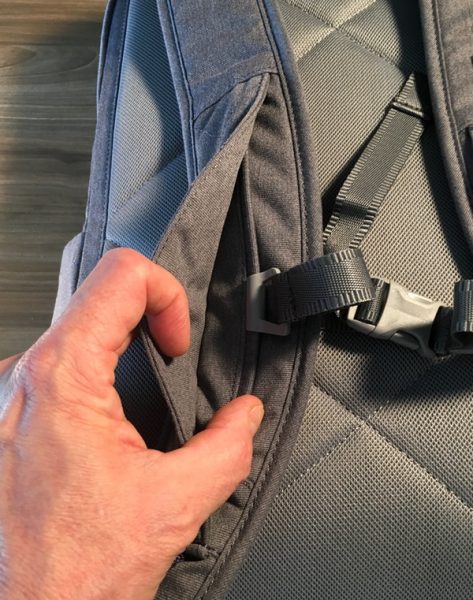
There’s also a key leash hidden in that rear zippered pocket. This is always worth bonus points to me. I love the convenience of key leashes. Every bag should have one.

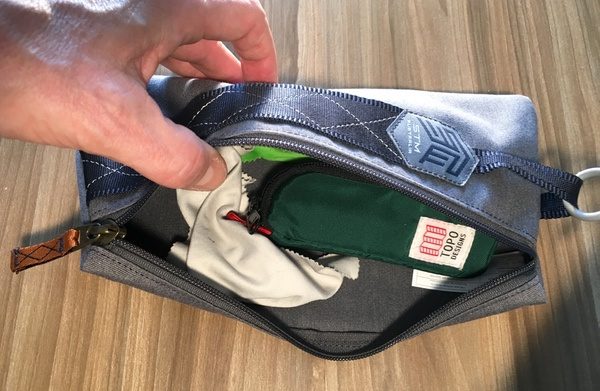
The Banks Laptop Bag also includes a 5” by 10” matching accessory pouch called “The Stash.” It comes attached to an 8” tether in the main compartment, and can be unclipped and removed from the bag if you’d like to use that tether for something else. It’s a generous size for wrangling cables, pens, and any other items that may be less frequently needed.

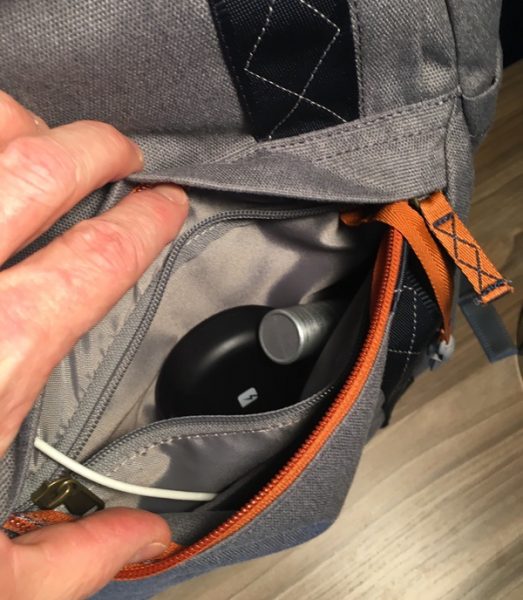
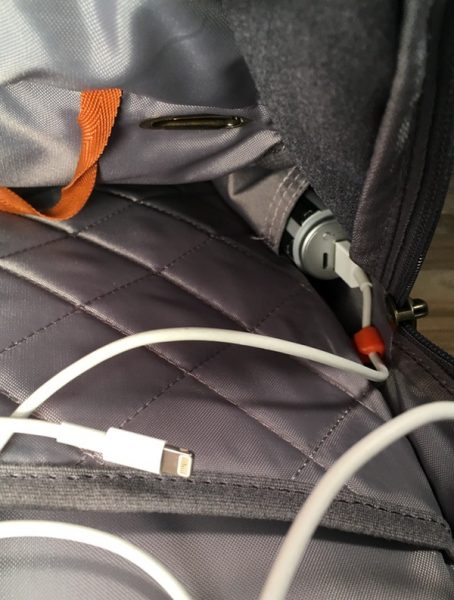
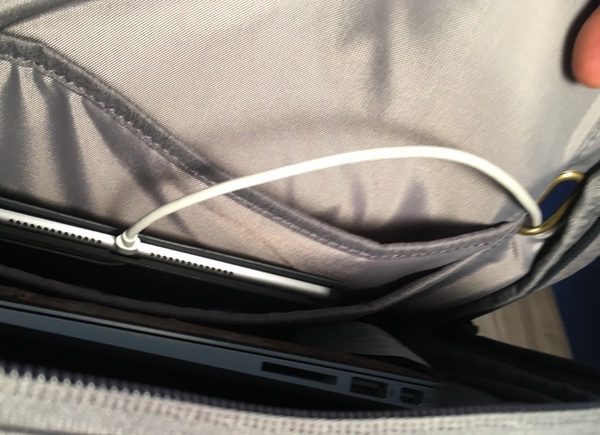
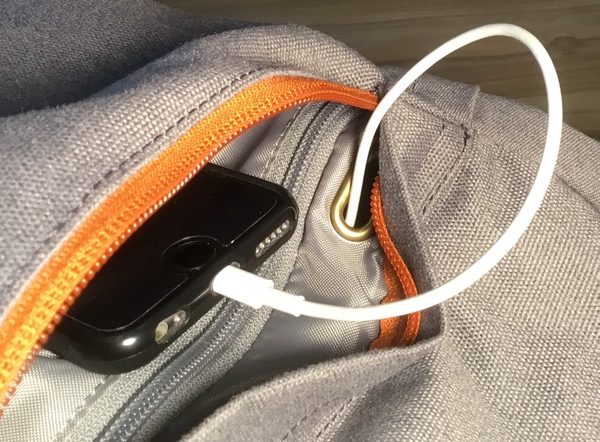
The STM Bags Banks Laptop Backpack also has a feature called “Cableready” organization. Tucked away against the side panel in the main chamber is a velcroed pocket that will hold a portable charger, along with a hook to keep the charging cable attached the side of the bag. Both the laptop chamber and lower front pocket have pass-through portals so that you can charge your accessories on the go. If you have a multi-port charger, you could theoretically charge a smartphone and tablet simultaneously. Very, very clever.

Here’s the charging cable hooked up to my iPad riding in the laptop compartment.

And here it’s been snaked through to the front compartment to charge my iPhone.

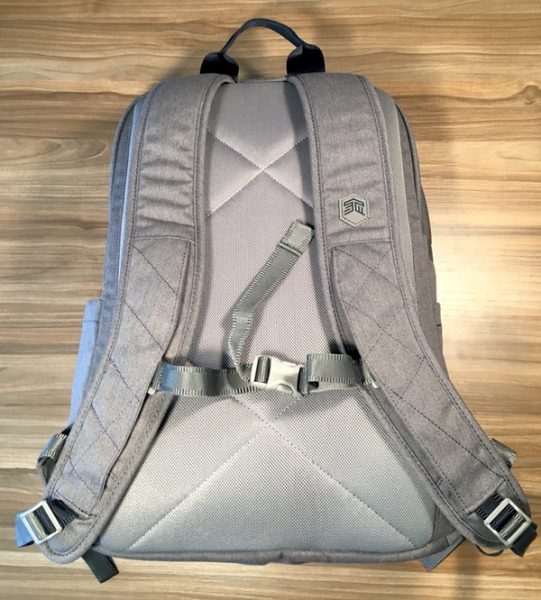
As far as carry goes, the pack features two padded & adjustable shoulder straps and a sternum strap to tweak the harness to your ideal fit. The shoulder straps and back pad both use air mesh surfaces to improve breathability. A nylon grab handle at the top of the bag is also included for quick maneuvers. Padding is generous on both the back panel and the shoulder pads.

I really like the finishing on the STM Bags Banks Laptop Backpack. The primary textured weave material is classy and has a nice soft-touch feel. Internal surfaces are soft with additional quilted padding or fleece lining built into the delicate electronics pockets. Little finishing elements like fabric zipper pulls, angled pockets, and nicely-finished shoulder straps add some class and style to the bag. 

Performance

The STM Bags Banks Laptop Backpack makes for a great compact office daypack. Its trim size rides close to your back, which is ideal for maneuvering in crowds. It will also work perfectly as an under-the-seat carryon. Here are some size pics for reference (I’m 5’10”, 190 lbs.):

Did I mention the business casual style? This is the perfect bag for that look. Not too formal, but not so casual that it looks like you just wandered into the office from the hiking trail.

I really like the layout of this bag for the work essential minimalist. If you’re rolling in with your laptop, tablet, notebook(s), some folders, and the required accessories… you’re good to go. You won’t get your gym gear in here, but you can fit a lunch, a power brick, and some small extras in there even if the laptop area is fully loaded.

Those little design extras really elevate this bag for me. The included accessory bag is great by itself, but including a tether that allows you to pull it out without detaching it from the bag is brilliant (I’m always fumbling for something on the train). The charging solution is equally brilliant, providing a permanent place for your portable charger that stays nicely tucked out of the way. Both of these additions are well thought out for practical use, and I appreciate that level of detail.

If there is one flaw in the STM Bags Banks Laptop Backpack, it’s in the pockets on the front face of the bag. I don’t have especially large hands, but I find myself struggling with the tight openings. Especially that lower front pocket… the opening is a narrow space that constricts access to the two smartphone pockets and the rear zippered compartment. Getting through both layers of zips can be a bit of a wrestling match. It’s actually a plus for keeping out wandering fingers if you’re in a crowded space, but it can be a bit annoying if you’re trying to get to your keys quickly.

What I like

  • Contemporary look.
  • Great size and organization for tech and work essentials.
  • Bonus tethered (and removable) matching accessory bag.
  • Clever solution for charging devices on-the-go (you’ll need to bring the charger).

What needs to be improved

  • Check your daily carry requirements to see if the smaller size will work for you.
  • Water bottle pockets won’t stretch to fit larger hydration bottles.
  • External pockets on the front face have tight openings which may not work for larger hands.

Final thoughts

If you like compact & efficient work organization but prefer a backpack over a shoulder bag, you’ll love the STM Banks Laptop Backpack. A well organized layout, excellent finishing, and little design extras make for a great overall package. Just keep in mind that it is a compact bag, so you’ll need to plan accordingly.

Price: $129.95
Where to buy: But it at the STM Bags Site or on Amazon.
Source: The sample of this product was provided by STM Goods.

The post STM Bags Banks 15″ Laptop Backpack review appeared first on The Gadgeteer.

Filed in categories: Reviews

Tagged:

STM Bags Banks 15″ Laptop Backpack review originally appeared on The Gadgeteer on April 24, 2018 at 11:10 am.

Note: If you are subscribed to this feed through FeedBurner, please switch to our native feed URL http://the-gadgeteer.com/feed/ in order to ensure continuous delivery.
Trilens review

A few weeks ago, I wrote a news story on an innovative piece of photography gear called Trilens. Our readers commented and I promised an in-depth review if possible. Friidesigns is the company that makes the Trilens, and they responded by sending a sample for just such a review.
So, here goes:

What is it?

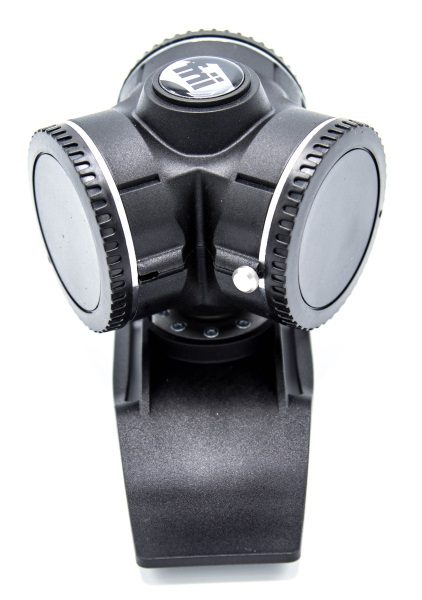
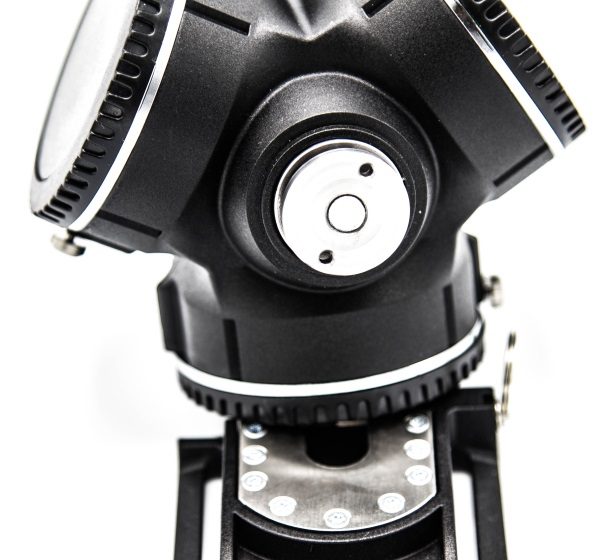
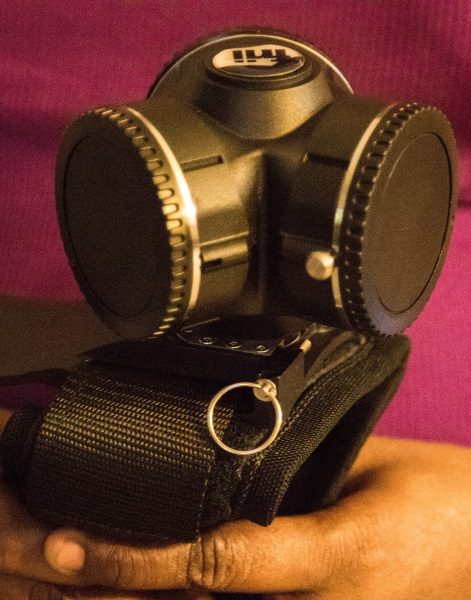
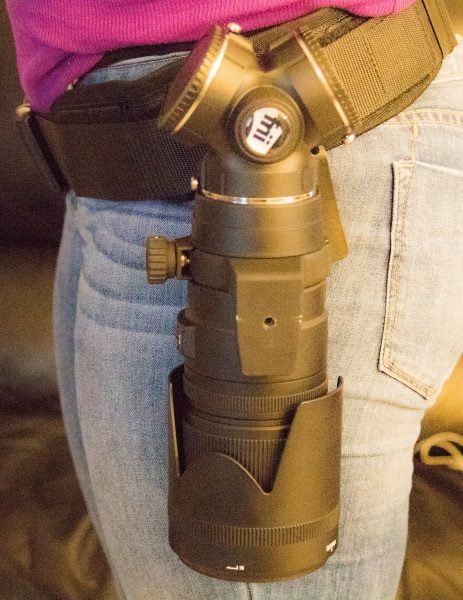
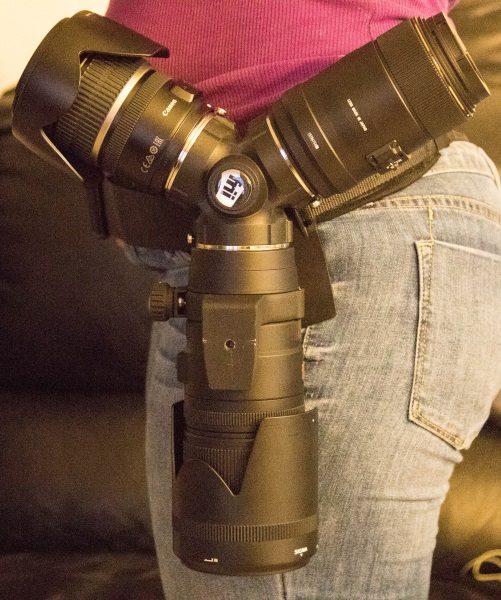
The Trilens is belt mounted rotating lens holder designed for photographers, to securely carry up to 3 camera lens for quick and easy swapping while on the go.

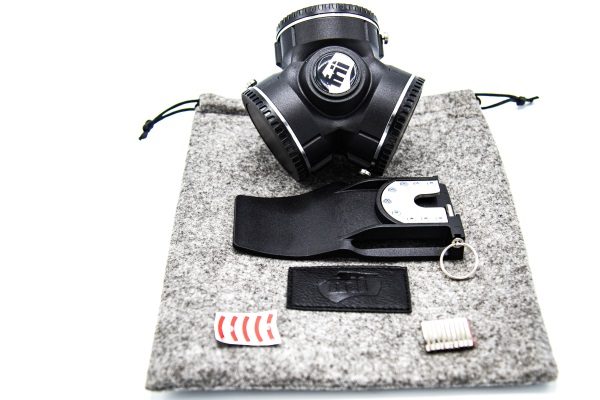
What’s in the box


1 X Trilens
1 x Set of magnets
1 x Adhesive strips
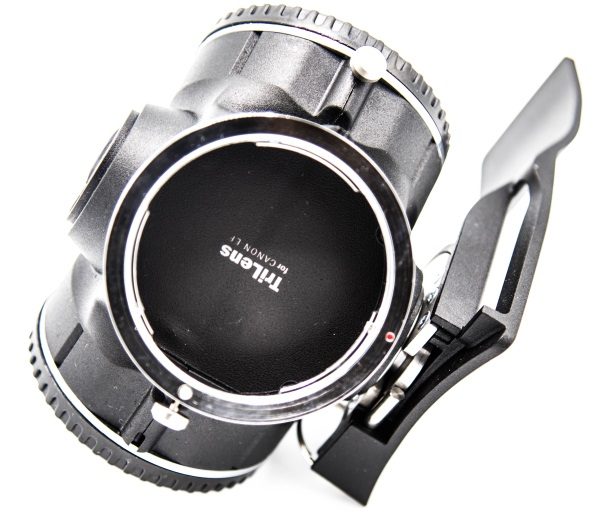
3 x Trilens caps
1 x Belt clip
1 x Carry pouch

Design and features

The Trilens is very well built, and the fit and finish are second to none. The materials that are used make it lightweight but yet solid, and I definitely feel like I can trust it to effectively secure my valuable lenses. Even the inlaid logo is well done and a nice touch. The mechanism that attaches the Trilens to the belt clip is all metal, as well as the body of the Trilens.


The belt clip feels strong and is possibly made of ABS plastic. It includes belt loops and a spring-loaded pin to add or remove the Trilens.

Each of the three lens receptacles comes with a screw on cap and each receptacle is separated and isolated from the other. My sample is designed to accommodate the Canon EF mount, but it is also available for Nikon F or Sony E/FE lenses.

Each lens receptacle has a spring loaded release that must be disengaged to release the lens. While it can be easily and quickly disengaged, it is also very secure. The center of gravity of the Trilens works well, keeping the biggest and heaviest lens at the perfectly balanced position. Regardless of the size or the weight of the lens, the Trilens rotates easily to reach the lens of choice. It can be used with up to 3 lens and remains in place with any combination of lens.


Also included is a set of magnets and adhesive strips that can be attached to the actual lens caps belonging to each specific lens. Once attached, the actual lens caps can be used instead of the included Trilens caps, making swapping each lens much easier and quicker.
When I wrote the news story, one of our readers was concerned about dust getting into the individual chambers/receptacles. I do believe that there is no additional risk because each one is isolated, and the same care that would be used to protect the lens from dust will work with the Trilens.

What I like

I really like the way the Trilens secures the lenses and manages the center of gravity. I like the materials it is made of, and the thought that was put into the design. The belt clip will accommodate most photography gear belts and everything seems built to last.

What can be improved

I am finding it very hard to come up with something that needs improvement on the Trilens. It is well designed and thought out for its intended purpose. I guess the only change I would suggest is that the belt clip could be made from some lightweight metal, to provide and even better level of sturdiness, and less of a chance of breaking.

Final thoughts

The Trilens is simply a well thought out piece of photography gear that works very well and is built to last. The only possible weakness I can determine would be the possibility of issues with the spring loaded releases for the lenses. However, I did not find any current evidence that would suggest such a failure. Regardless, it is now a permanent attachment on my photography gear belt, and will be with me on every shoot when I use the belt, and need to carry and use multiple lenses.

Price: $122
Where to buy: Friidesigns
Source: The sample for this review was provided by Friidesigns.

The post Trilens review appeared first on The Gadgeteer.

Filed in categories: Reviews

Tagged: ,

Trilens review originally appeared on The Gadgeteer on April 24, 2018 at 9:00 am.

Note: If you are subscribed to this feed through FeedBurner, please switch to our native feed URL http://the-gadgeteer.com/feed/ in order to ensure continuous delivery.