PAPAGO GoSafe S37 dash cam review


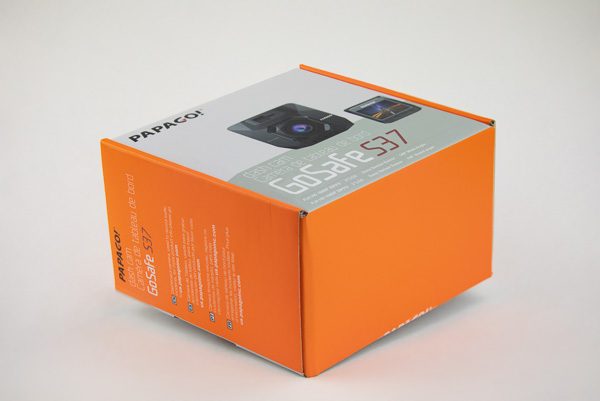
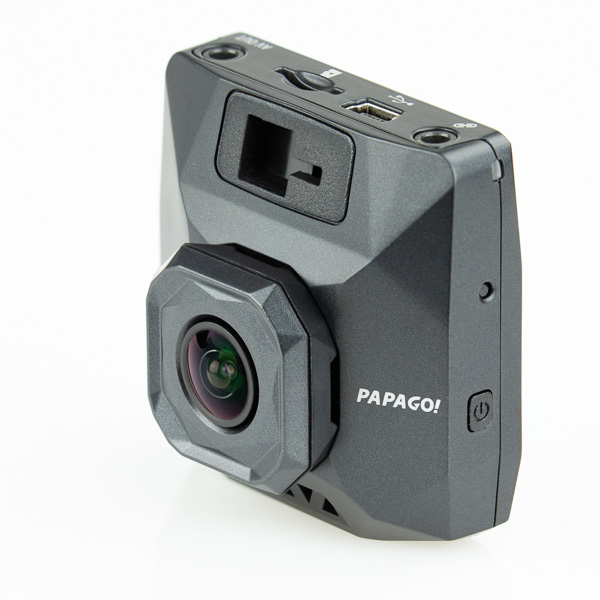
I had the opportunity to review another Papago! dash cam not long ago, so I had a little bit of an idea of what to expect. When the less expensive Papago! GoSafe S37 Dash Camera arrived, I was still surprised by the quality of this camera.

What is it?

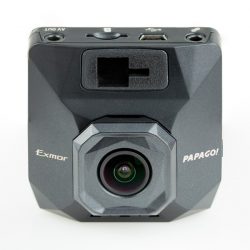
The GoSafe S37 Dash Camera is a Sony sensor based dash cam that records high quality 1080p HD videos at both day and night. Even though it doesn’t have quite the specifications as its more expensive sibling cam, the S780, this one still has a quite a few nice features.


Hardware specs

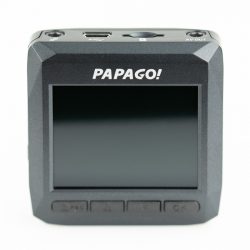
Screen 2.0″ color LCD display screen
Chip Professional Sony image sensor chip
Angle View Front: 140 ° ultra- wide-angle lens F1.8.
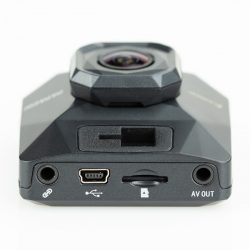
GPS Supports GPS-Antenna (Sold separately)
TPMS Supports PAPAGO! TireSafe D10E TPMS (Sold separately)
Video Format 1920X1080P30, 1280X720P30, 640x480P30 .MOV format
Storage Device MicroSD card (Class 10, 8GB or above. Supports up to 128GB)
Battery Built-in super capacitor
Weight .10 lbs
Dimensions 2.2″ x 2.2″ x 1.2″

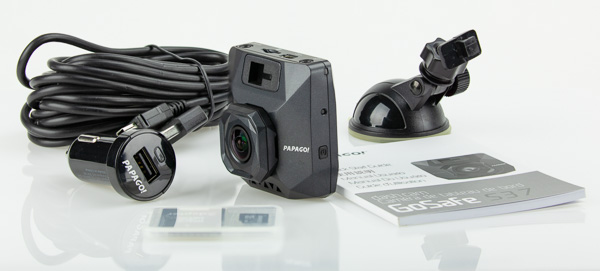
What’s in the box?

  • GoSafe S37
  • Car Charger
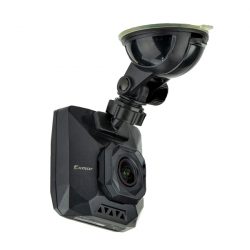
  • Suction Cup Mount
  • 8GB Micro SD Card
  • User Manual
  • Warranty Card

Design and features

The Papago! GoSafe S37 Dash Camera turns on automatically when power is applied and begins recording immediately. It records 5-minute segments of video, replacing the oldest files when the memory card is full. Embedded supercapacitors provide enough power to save the recording when power is lost, either from turning off your vehicle or in the event that a crash disrupts power to the camera. A 16gb memory card holds approximately 90 minutes of video files before the files are overwritten, depending on the file format that is chosen.

While recording you can press the down arrow button for 3 seconds to capture a picture without interrupting the video recording. These are saved to a separate “photos” folder on the memory card and are not overwritten.

There’s also an emergency mode, which is activated by pressing the far left button while the device is recording. This mode will lock the current file so that it is not overwritten when the memory card is full. The locking of the file will also occur when the g-force sensor detects a crash – something I declined to test.

The camera features a SONY Exmore sensor and a 140-degree ultra-wide angle lens. The lens has an anti-reflection coating as well to eliminate flaring when facing bright lights.

The unit supports a GPS antenna (sold separately) to record speed and for GPS logging on your videos, to automatically correct the time, and for other related functions. Also available is an optional accessory called the TireSafe D10E (sold separately), which enabled the unit to display your tire pressure and temperature in real-time. However, you can only use one of these at a time.

Many of the Papago! cameras have the Papago! Driver Assist Features, which include Stop Sign Recognition, Stop and Go, Driver Fatigue Warning, and Headlight Reminder to help you stay safe on the road. For example, when the unit “sees” a stop sign, it will display a stop sign on the screen and give an audible beep. These features are able to be turned on and off in the settings. The stop sign feature worked well, picking up every stop sign, but if you’re going over 25mph you won’t stop in time. I would be nice if it could pick them up a little farther away. The stop and go feature worked well also, giving a lower toned beep when it detects the car in front of you has started moving, but you haven’t.

The S37 has three recording modes: Automatic Recording (Loop recording), Monitor Mode (1 picture per second to save storage space), and Motion Detection(motion-activated recording). The monitor mode is useful to make a hyperlapse video with, as it saves the pictures as frames of the video.

What I like

I’m not sure if the Sony Exmore sensor isn’t quite as good as the S780’s Starvis sensor or if it’s the difference between the S37 using a .MOV file format instead of .mpeg, but the video wasn’t quite as clear as the S780. However, I think for what it’s designed to do it performs extremely well.

I really liked was the extensive menus and settings, if there’s one thing I like its options and more options. Disabling features you don’t want is really nice.

The S37 comes with its own power plug and separate USB cord, which allows you to use an existing plug if you happen to have one that has a couple of ports on it. The cord is 13 feet long, plenty long enough for you to route it behind panels and out of view.

What needs to be improved

  • The Monitor Mode starts a new video every five minutes, instead of every five minutes of recorded video time. This results in a ton of 10 second video clips.
  • I felt the buttons on the camera were a little too hard to push. Being that the camera is normally going to be mounted up and out of the way, I think they could have gotten by with buttons that were a little easier to push so that the unit didn’t move when pressing them.

Final thoughts

Overall I thought this was a really nice dash camera. It’s really a set it and forget it type of device, with subtle audio cues to let you know it’s working.

Price: $139.99
Where to buy: Amazon
Source: The sample of this product was provided by Papago!

The post PAPAGO GoSafe S37 dash cam review appeared first on The Gadgeteer.

Filed in categories: Reviews

Tagged: ,

PAPAGO GoSafe S37 dash cam review originally appeared on The Gadgeteer on May 18, 2018 at 10:00 am.

Note: If you are subscribed to this feed through FeedBurner, please switch to our native feed URL http://the-gadgeteer.com/feed/ in order to ensure continuous delivery.

VentiFresh small space air purifier review

Do you have any small spaces in your home that are stinky? Maybe it’s a trashcan in the kitchen, a closet where you keep your sneakers, or maybe it’s your cat’s litter box? How do you get rid of odors without burning candles or spraying aerosol air fresheners that just cover up the stink with a new odor? That’s what I was wondering until I received the VentiFresh air purifier.

What is it?

The VentiFresh is a very small air purifier that uses photocatalyst technology which is the same tech used on the international space station. According to the VentiFresh website:

Put simply, the UV catalyst core inside VentiFresh decomposes odor through natural photosynthesis and produces clean air as a result.

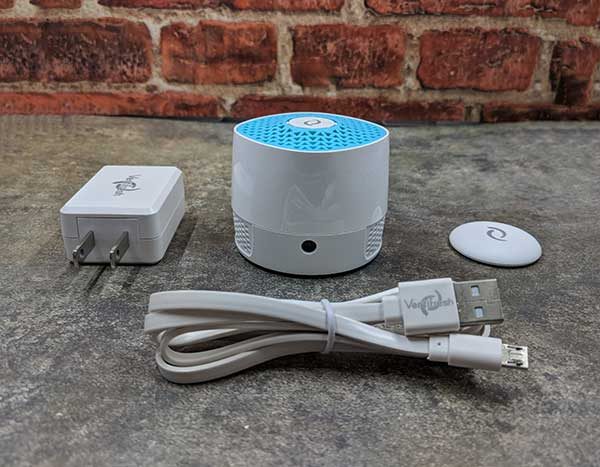
What’s in the box?

VentiFresh air purifier
Mag dot steel mounting button
micro USB power cable
USB AC adapter

Design and features

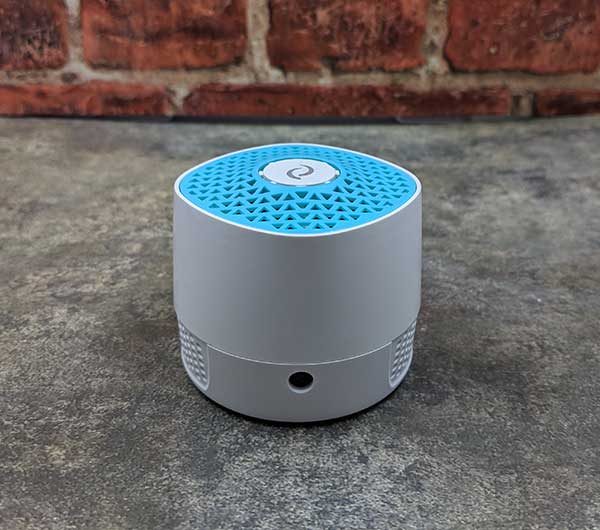
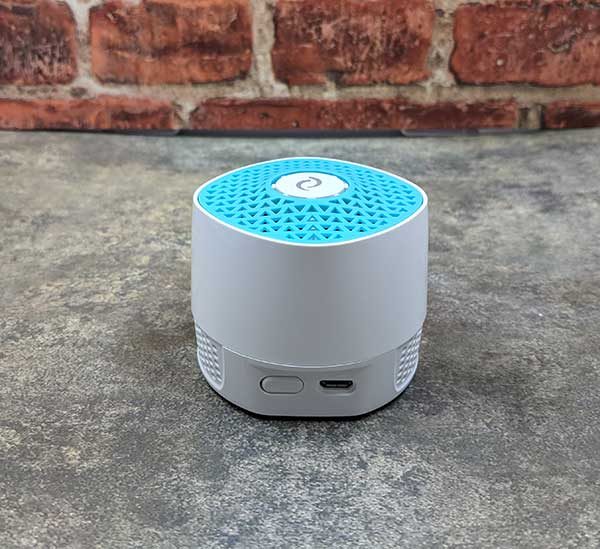
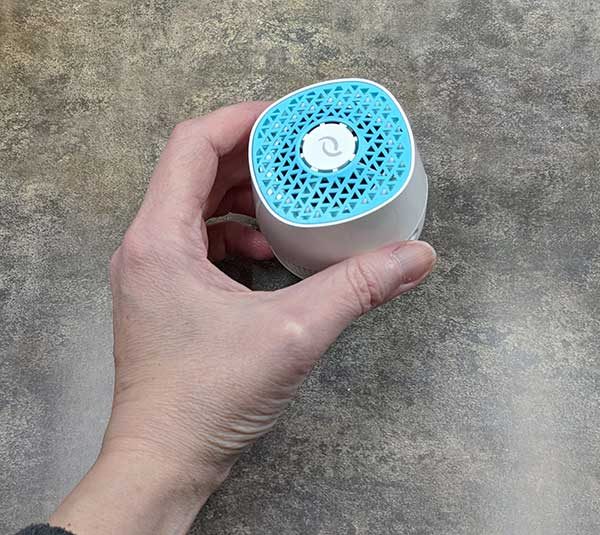
Compared to 99.9% of the air purifiers that I’ve seen, the VentiFresh is absolutely tiny at only 2.5 x 2.0 inches.

It has a white plastic housing with a light sensor on the front and on top is an open blue covering over the built-in fan inside the unit.

On the back of the air purifier is a micro USB connector for power and a power switch.

The VentiFresh air purifier is so small, that it can be placed almost anywhere. You can set it on a flat surface or you can use the magnetic base and the included metal button to mount it on thin material like a trashcan lid or a litterbox cover.

It looks cute, but does it actually work?

I was excited to see if the VentiFresh air purifier would help with cat smells. To give you a little background, I share a house with a 15lb cat named Max. Max is mainly an indoor cat so we have a litter box in our spare bathroom which is now his bathroom. I don’t like going in there because he kicks litter on the floor. That is when he actually takes time to dig in the box.

Jeanne and I spend evenings downstairs on the couch in front of the TV. We’ll be watching a show and all of a sudden we’ll hear Max running around upstairs like a maniac and then he’ll come flying down the stairs. This is his “I just pooped and I’m amazing” celebration.  At this point, we will almost immediately notice the smell wafting its way downstairs because he almost NEVER covers up his mess. In the past, we’ll have to stop what we’re doing, go up the stairs, clean the litterbox, and spray a bunch of air freshener to cover up the poo smell which only masks the smell and doesn’t truly get rid of it. Ick!

As soon as the VentiFresh arrived, I plugged it in and set it up in Max’s bathroom.

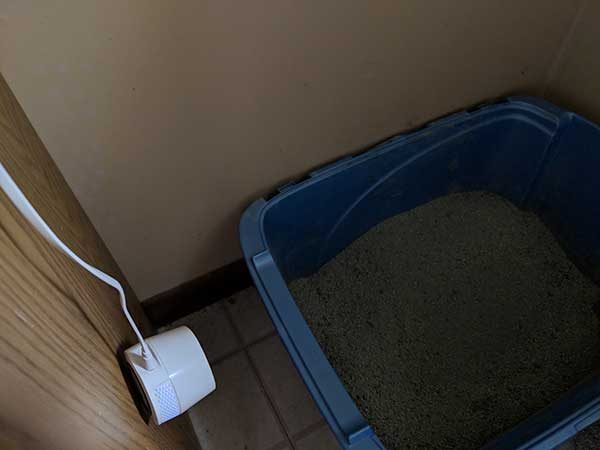
We don’t have a cover over the litter box so I just hung the VentiFresh from an outlet next to the box like you see in the image above.

The VentiFresh didn’t come with much in the way of instructions. Just a small business card sized quick guide that showed how you can mount the unit using the magnetic base and that the unit is supposed to be used in a small space about 1.5 cubic feet in size. Max’s bathroom is tiny, but it’s obviously much larger than 1.5 cubic feet, but I set it up anyway.

Once you plug it in, it will start running when the room is dim. Light will cause the VentiFresh to turn off. But since I have the unit hanging with the light sensor pointed down, it runs continuously. When it’s running you’ll also see a blue light emitting from the vents in the sides and top of the unit. This is UV light and the instructions advise you not to look at it. The unit also has a slight fan noise as it’s running. I didn’t find it loud enough to be annoying, but I do notice it when I walk past the bathroom.

The million dollar question is: Does the VentiFresh actually work? I really didn’t think I was going to be impressed, but I have been very surprised just how well it has tamed Max’s litter box smells. If you have a cat and a litter box, you know what they can smell like even if you clean them every day like we do. With the VentiFresh next to the box, I’ve not smelled any of Max’s “presents” even when he doesn’t cover them up. I’ve even walked into the bathroom done a sniff test right over the box of uncovered “presents” and I can’t smell anything. I think it’s witchcraft and I love it and so does Jeanne. Max doesn’t seem to mind it either.

If you’re wondering about power consumption, it only uses 3W per hour and according to the VentiFresh website, even if it runs 24hrs a day, it’s only going to cost you about 50 cents per month.

What I like

  • Tiny size
  • No consumables
  • Doesn’t use much power

What needs to be improved

  • Nothing needs to be improved except that I want a bigger one for the whole house!

Final thoughts

The VentiFresh air purifier is amazing. No more litter box smells means I don’t have to worry if visitors can smell something bad when they come in my house. I love this little thing. I’m thinking about ordering another one just to have on hand if the one I have now ever decides to die on me. I’ll definitely update this review after a couple of months to let you all know how it’s standing the test of time.

Price: $64.99
Where to buy: Amazon
Source: The sample for this review was provided by VentiFresh.

The post VentiFresh small space air purifier review appeared first on The Gadgeteer.

Filed in categories: Reviews

Tagged: , , ,

VentiFresh small space air purifier review originally appeared on The Gadgeteer on May 17, 2018 at 11:00 am.

Note: If you are subscribed to this feed through FeedBurner, please switch to our native feed URL http://the-gadgeteer.com/feed/ in order to ensure continuous delivery.
Snow Lizard XTREME 8+ iPhone case review

As Apple releases new products, case manufactures rush to add protection and fashion. Some add charging. I was recently sent a case that not only allows plugging into a charger but also has solar cells to charge your phone! It’s called the SLXtreme 8+ (because it’s from a company called Snow Lizard and is for the iPhone 8 Plus). I was sent a unit in Black to try with my new 8 Plus. It also comes in a Mossy Oak camo pattern.

Note: Photos may be tapped or clicked for a larger image.

What is it?

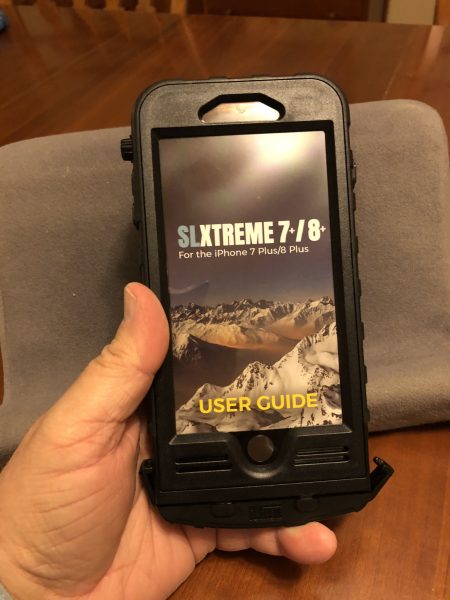
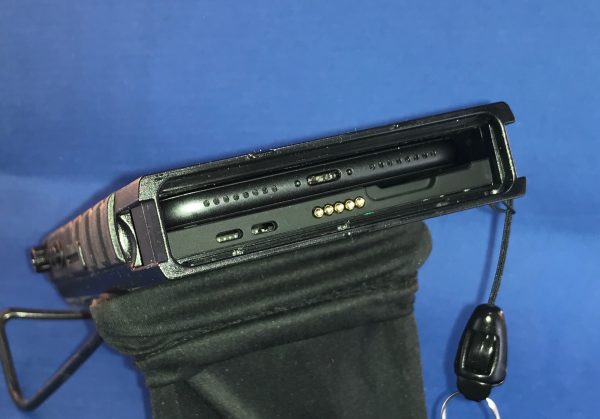
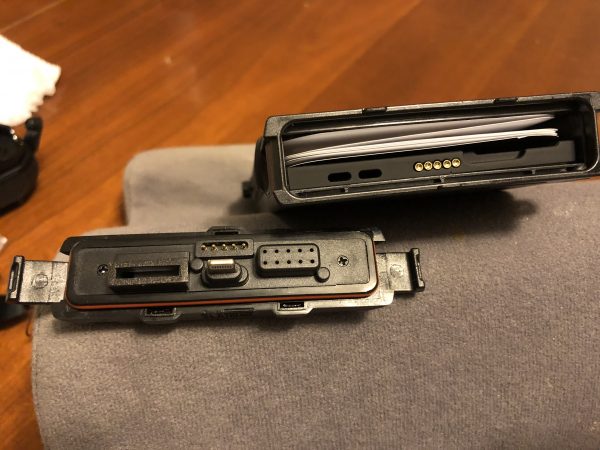
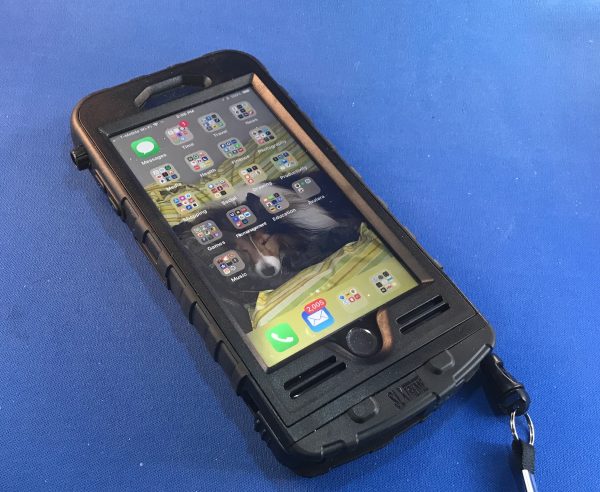
The Xtreme 8+ is a case, screen protector, and charger all in one. The case requires a totally naked phone but fits like a glove. You clamp the bottom on, which contains a Lightning connector and a link to the solar PV cells on the back of the case. There are clear covers for the full screen and a thinner cover over the home button which also allows the phone to read TouchID. There is also a large sealed clear aperture on the back which protects the rear camera and flash unit.

Hardware specs

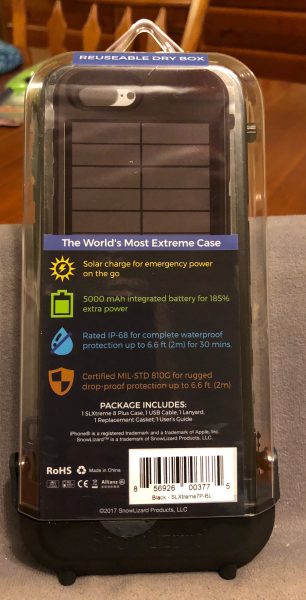
  • Solar powered: Features a built-in trickle charger to keep your battery replenished. The solar indicator helps you position the case for best solar power Collection.
  • Integrated battery: built-in 5000 mAh battery boosts your phone’s power up to 185%, adding 16 hours of Talk time or 12 hours of app activity.
  • Waterproof: fully submergible to 6.6ft (2Ml for L hour). IP-68 Ingress protection rating. Water, mud, dust, snow, ice and sweat proof.
  • Rugged: handles drops up to 6.6ft (2Ml military Spec 810G certified). Newly rubberized grips provide protection against drops, bumps, spills or hammer misses. Screen protector prevents scratches.
  • Packaging reusable as an IP67 watertight, crushproof and dustproof dry box.
  • Compatibility: this SLXtreme case can be used to protect your iPhone 7Plus or iPhone 8Plus.

What’s in the box?

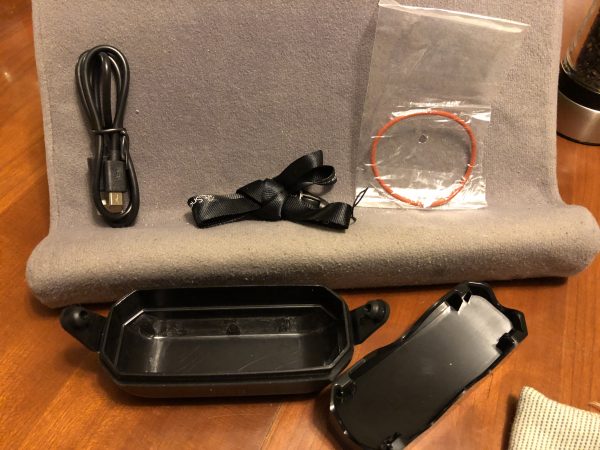
The packaging itself in a reusable, IP67 waterproof box. Inside it are the XTREME SL 8+, a USB A to microUSB cable, a 17” (doubled) lanyard loop with a detachable leash, an extra “O”-ring for the seal, and an instructional card.

Design and features

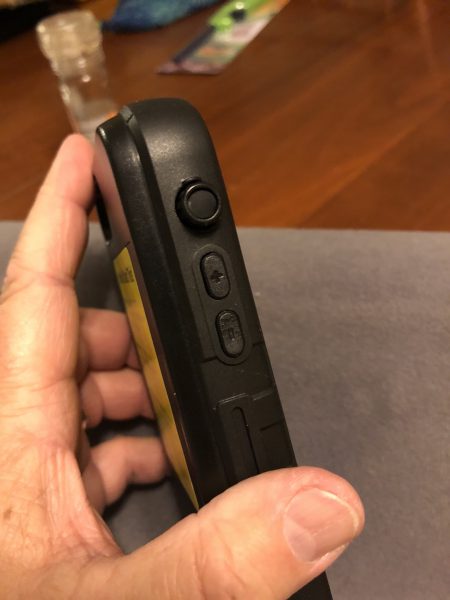
The Snow Lizard Xtreme is a 7.5” x 3.75” x 0.875” sealed case of hard PVC plastic. There are ridges down both long edges for gripping. On the face is a full-view clear touch-through screen cover that allows full view and control of the iPhone screen. There is a thinner membrane over the home button that allows TouchID to function (at least when it’s not underwater, according to the literature.) The bottom has a stopper-sealed USB port and a membrane-covered speaker/mic opening. There are passthrough controllers for every function except the ringer mute. The phone fits in snugly since the screen needs to touch the front for the touch-through to work. No skin or screen protector can be on it when in this case.

On the back, there is a solar panel about the same size as the iPhone 8 Plus’ screen fit flush. At the bottom, there is a rubberized on-off switch for the charger, and 4 blue LED battery capacity indicators. The microUSB connector (which has a waterproof plug) will first charge the phone through the case, then charge the battery.

When it came, I put the iPhone 8 Plus in straight-away, and was really blown away that the TouchID worked without any hesitation. It actually didn’t register with me at first, because I just turned on the phone in the usual way. (And isn’t that just the best way for tech to be implemented? It just does what you expect, NBD.)

Sound through the speakerphone or playing from Spotify is not quite as loud as the naked device or what it would be in the leather Apple case I usually use, but it was plenty loud. I noticed no delays or problems using Bluetooth devices through it.

There is a loop in the plastic on the lower right side for the lanyard to connect with. Be aware that this is a 16.25-ounce package, and that thin ribbon may be tough on your neck, but it’s pretty durable. There is a split-ring loop at the end that you could use for your company ID. It would allow you to unclip your phone and leave your lanyard/ID in place, should you need to set the phone down or connect it to a charging source.

What I Like

  • Smooth, precise fittings
  • Solar charger and battery work together with USB for full charging options
  • Mic, Speaker, and TouchID pass-throughs work very well.

What needs to be improved

  • Can’t think of a thing.

Final thoughts

There are few folks, in my opinion, who really need a full protective case like this, but there are loads of folks who use one anyway. My younger daughter is one – she’s rarely on a bike, kayaking, or doing anything more dangerous for her phone than walking to work in the rain. Yet she has a full-tilt Defender case, “just in case.” This one, however, with the solar and battery option, may be better than her current case.

If you need a “weekend” case for your hiking, biking, kayaking or just picnicking by the river, this would be one to strongly consider. If you’re in construction and away from power outlets, the solar charging is going to keep you charged up all day without having to worry that your phone is sitting on the hood of your truck while you’re 30 feet down a hill taking survey measurements when that sudden shower soaks everything.

Price: $129.99 on company store, slightly less on Amazon
Where to buy: Company website or their Amazon store
Source: The sample of this product was provided by Snow Lizard.

The post Snow Lizard XTREME 8+ iPhone case review appeared first on The Gadgeteer.

Filed in categories: Reviews

Tagged: ,

Snow Lizard XTREME 8+ iPhone case review originally appeared on The Gadgeteer on May 16, 2018 at 11:00 am.

Note: If you are subscribed to this feed through FeedBurner, please switch to our native feed URL http://the-gadgeteer.com/feed/ in order to ensure continuous delivery.
SparkMaker Mini Desktop SLA 3D printer review

I know nothing about 3D printing, except for little models my son has brought home from summer “tech” camps. This tiny desktop 3D printer caught my eye, and only required an SD card for printing. Pretty slick, right? Let’s take a look.

What is it?

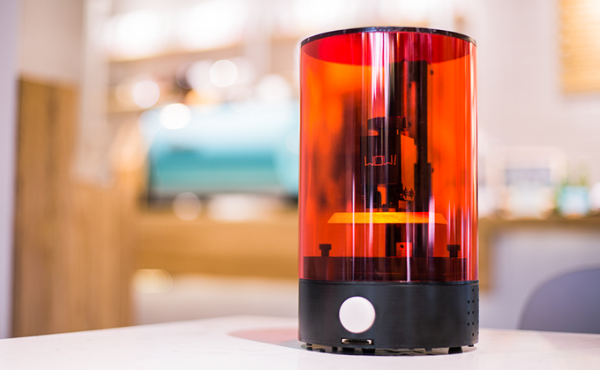
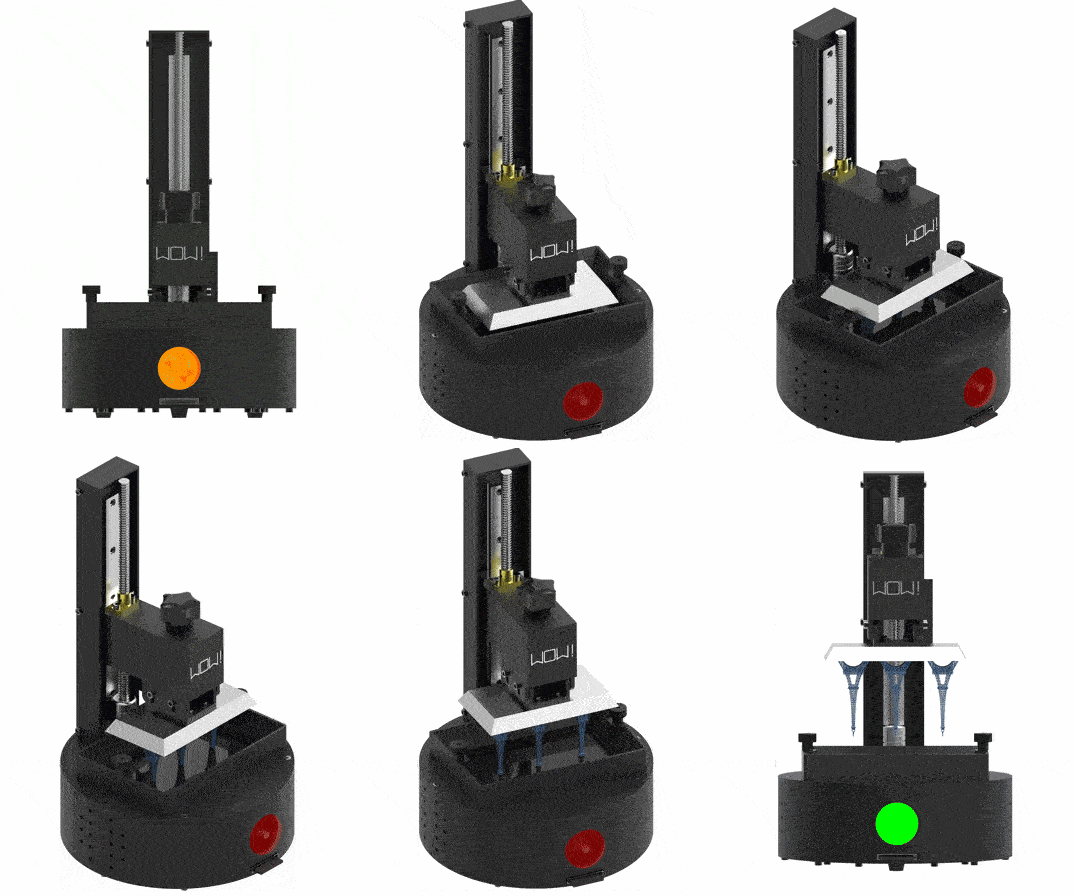
The SparkMaker is billed as a compact, user-friendly desktop 3D printer that doesn’t use the usual filament to “build” models. Instead, it uses a liquid resin to build “up”, and UV lights under the vat harden the model slice by slice. A motorized platform raises the model up from the goo, sort of like the T-1000 Terminator from the second movie.

Hardware specs

  • Height:  10 inches
  • Width: 6.7 inches diameter
  • Print size: 4 x 2.2 x 5 inches

What’s in the box?

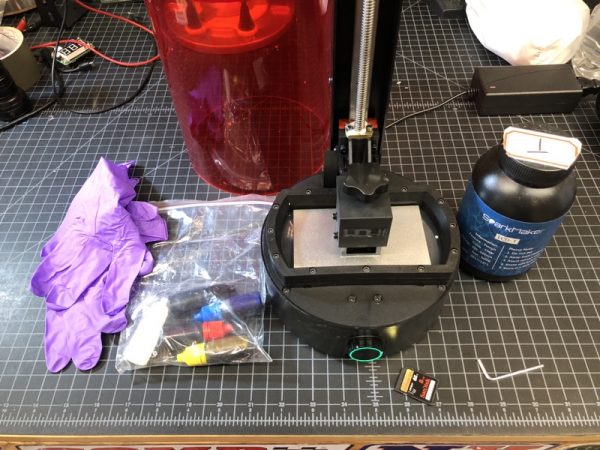
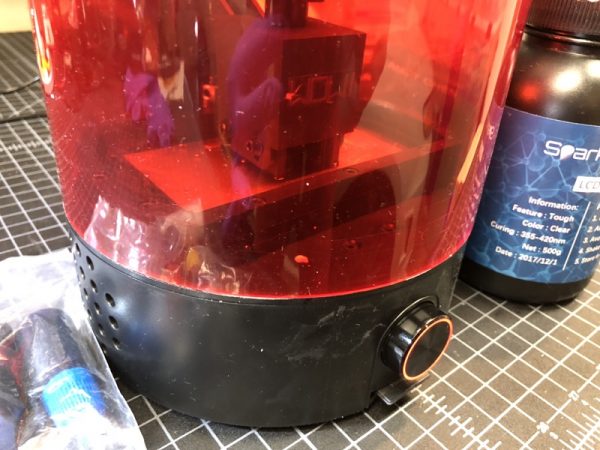
My sample came with just the power supply, hex wrench, and red cover. The resin (LCD-T) and some dyes were shipped separately.

Design and features

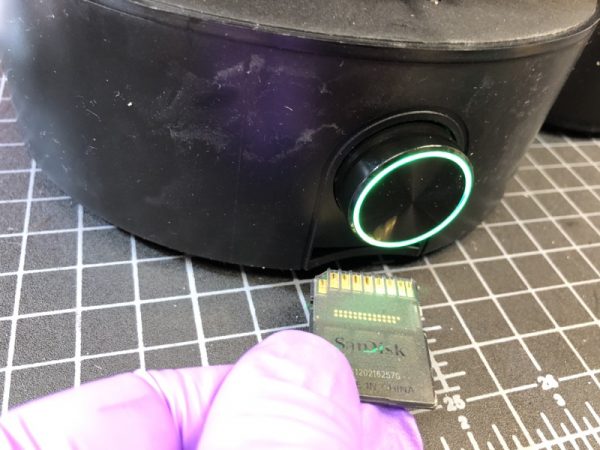
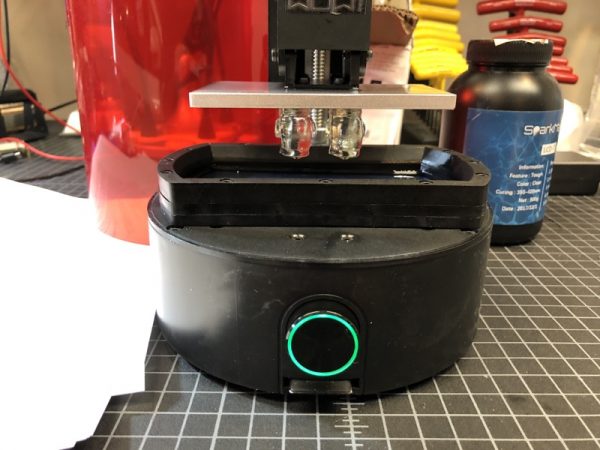
There is no screen on the printer. The only user interface is a single round knob on the front with an LED ring. There’s not even a power on/off switch.

A very long screw extends from the base of the printer. This moves the silver metal platform up and down. The metal platform has no “smarts”. Its only holds the model upside down.

Setup

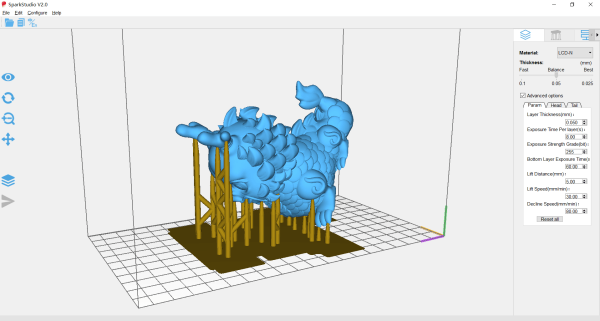
There is a Windows program called SparkStudio where your’e supposedly able to edit files, but I was unable to get it to work. Fortunately, there were several sample 3D files to download. They’re all in “print.wow” file format, which you simply drag and drop to an SD card. The printer recognizes nothing else.

Next, you pour the resin into the vat. Don’t spill any. This is nasty, sticky stuff. I wasn’t exactly sure how much to pour in so I just guessed.

For my print sample, I chose this stout little head. What could go wrong?

The SD card inserts under the button (upside down, mind you).

Is it working? The flashing red circle says it’s working. That’s it!

Performance

If you’re looking for Star Trek replicator speed, forget it. At first, I thought the printer was dead, as the light blinked red. However, the platform did move ever so slowly, as the cooling fan hummed away at the base of the printer.

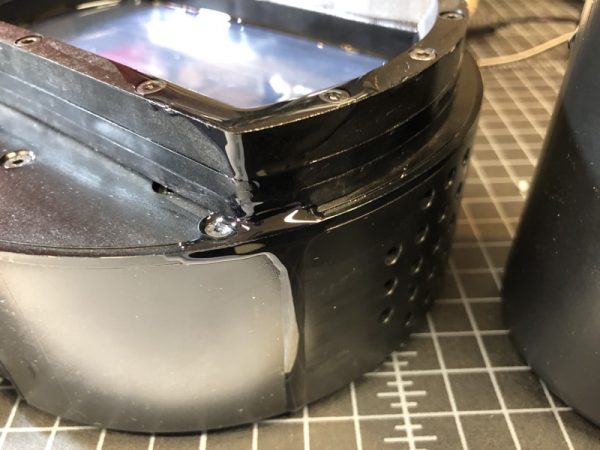
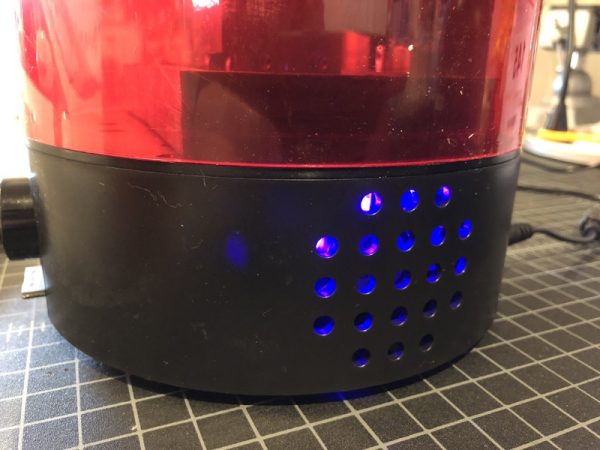
The fan noise isn’t too unpleasant. It’s similar to a noisy laptop at full load. Here you’ll see the UV lights blasting away through the ventilation holes.

A few hours later, I could see the printed objects “rising” from the primordial goo.

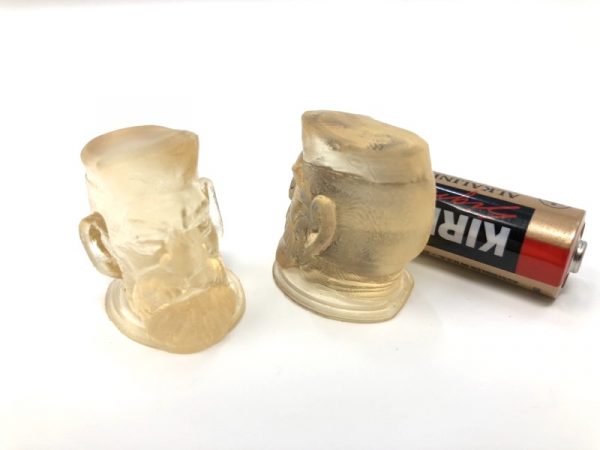
About 4-5 hours later I had two tiny little heads. Two? Apparently, the file was set for two, and I had no way to change that as far as I could figure out.

Next, I scraped off the heads from the metal platform and gave them an alcohol bath…

…And let the bask in the California sun to cure under some UV light.

And here are my two heads. Two heads are better than one, right? They sure turned out smaller than I expected. That’s an AA battery for size comparison. They remind me of novelty guitar knobs.

What I like

Very small and compact. Zero computer skills necessary with the SD card interface.

What needs to be improved

This product is not for first timers. I could not figure out how to edit, find, or upload any other 3D models. This is probably due to my lack of experience in 3D modeling, but the printed documentation is poor which does not impart confidence. Also, liquid resin is just nasty to handle.

Final thoughts

From what I understand, this type of 3D printing provides a higher degree of precision and the SparkMaker is quite a price breakthrough for this medium. Some of the filament-printed things I’ve seen look completely rough-hewn compared to the twin heads I printed for the first time. If you’re a hobbyist in this field and you’re not afraid to dig deeper, the SparkMaker SLA 3D Printer might just whip something up good for you.

Price: $289
Where to buy: OGadget or Amazon
Source: The sample of this product was provided by Ogadget.

The post SparkMaker Mini Desktop SLA 3D printer review appeared first on The Gadgeteer.

Filed in categories: Reviews

Tagged:

SparkMaker Mini Desktop SLA 3D printer review originally appeared on The Gadgeteer on May 15, 2018 at 10:00 am.

Note: If you are subscribed to this feed through FeedBurner, please switch to our native feed URL http://the-gadgeteer.com/feed/ in order to ensure continuous delivery.
Newton Mail review

If you’ve been reading The Gadgeteer for any length of time, you know how I like to drone on and on about how I can’t use a tablet or smartphone as my only “computer” when I travel because of one main reason. That reason is Gmail. I use Gmail as my email client of choice and I consider myself as a power user. On my laptop, I can use multiple inboxes, canned replies, all the stars, and 100’s of labels to organize and keep track of things that I need to get done using the web version of the Gmail app.
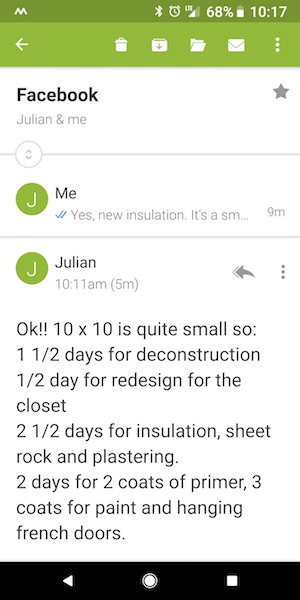
The problem is that I can’t completely unplug from tech when I travel because my inbox would quickly become a disaster within a day due to the number of emails that I receive. Yes, I know that there is a perfectly fine mobile Gmail app. I’ve used it for years. But for some insane reason, Google doesn’t provide the mobile version of the Gmail client with the same power user features as the desktop version of the app. With the mobile Gmail client, I can’t create multiple inboxes by using a dozen different colored stars, I can’t use canned replies, and worst of all, I can’t easily search for messages with certain labels or file emails with existing labels or create new labels. So I end up taking my laptop with me whenever I travel which means that I easily get sucked into wanting to work when I am supposed to be relaxing. Or at least I did that in the past. I’ve recently come one step closer to being able to leave my laptop home since discovering Newton Mail.

What’s Newton Mail?

Newton Mail is an email client for iOS, Android, Windows, and macOS that you can use with different mail services like Yahoo, iCloud, Hotmail, Outlook, and others including Gmail.

Features and usability


Newton Mail has all the features you’d assume an email client should have like the ability send and receive emails. Duh. But it has other features that make it the perfect email client for me and my obsessive compulsive email filing disorder. Yes, that’s a thing… or it should be a thing.


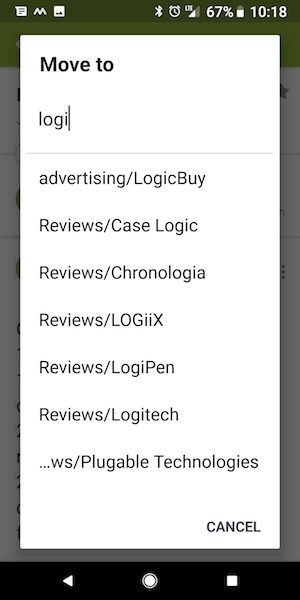
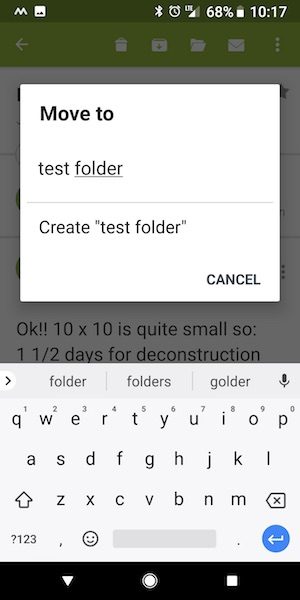
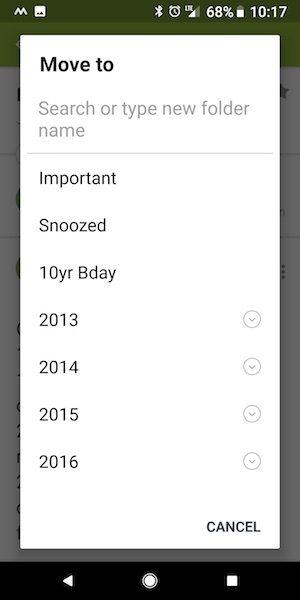
Newton allows you to tag an email to a label without having to scroll through a list of 1000’s of labels just to get to the one you need. Instead, you can start typing the label’s name to narrow down the list. AND, you can create new labels. It sounds so trivial, but this is the first mobile Gmail client that I’ve found that allows you to do this and that’s why I’m so happy to have found it! Being able to type in the label name without having to manually find it saves me a LOT of time.


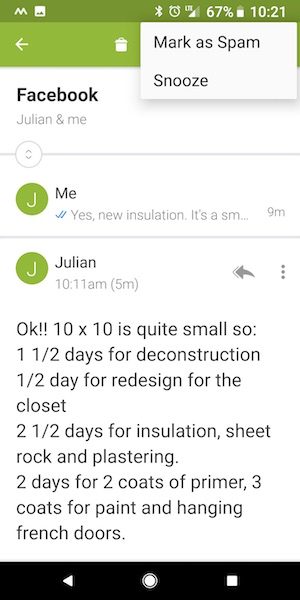
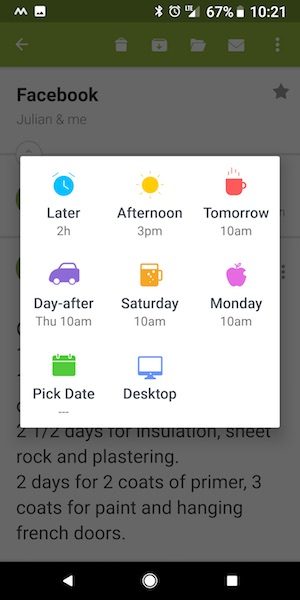
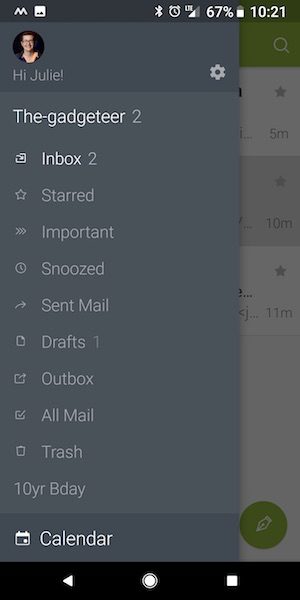
In addition to that very important feature, Newton Mail includes other great features that you I haven’t found with other email apps. One of those features includes the ability to snooze a message. When you snooze a message, it will disappear from your inbox and reappear later at the time, date, or on the platform that you specify. I’ll admit that this isn’t a feature I use because I like to take care of things as they appear. But I do see it as a useful feature that I may add to my workflow at some point.


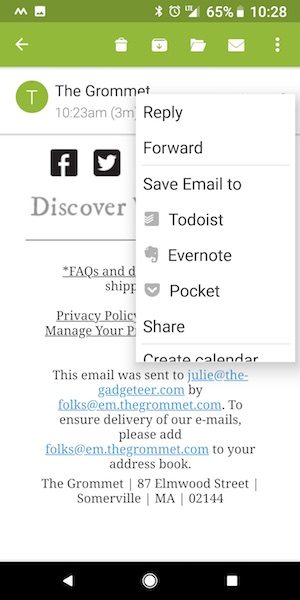
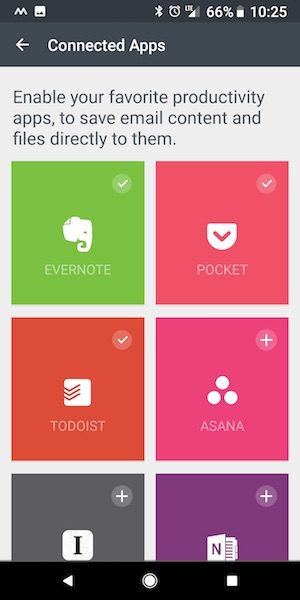
Newton will also allow you to save messages to your favorite productivity apps like Evernote, Todoist, and more.


Calendar access is integrated into Newton Mail too, which means that you can easily pull up your calendar without leaving the app, and you can even create events from within an individual email.


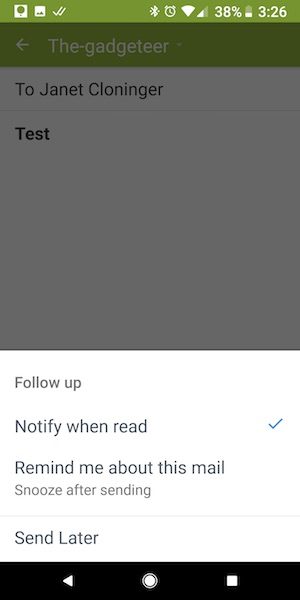
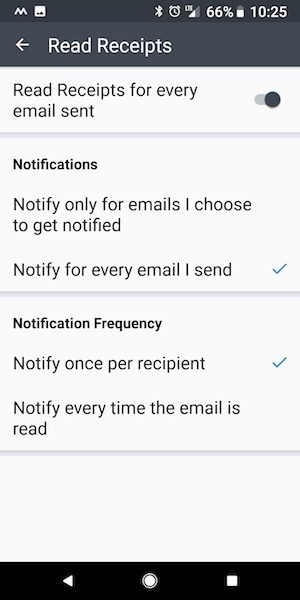
I also like that the app suggests people to send an email to when you compose a new one. If you click the little blue clock icon, you can toggle read receipts, reminders if the person doesn’t get back to you in a specified time, or you can schedule the email to be sent later.


I really like the read receipts so you’ll know when someone has read your email after you’ve sent it to them. You can toggle the read receipts to happen for all emails or on an individual basis if you don’t want to be bothered with too many notifications.


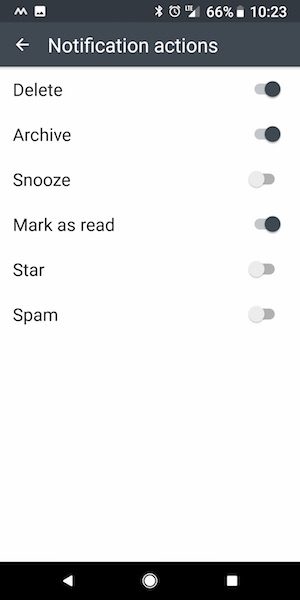
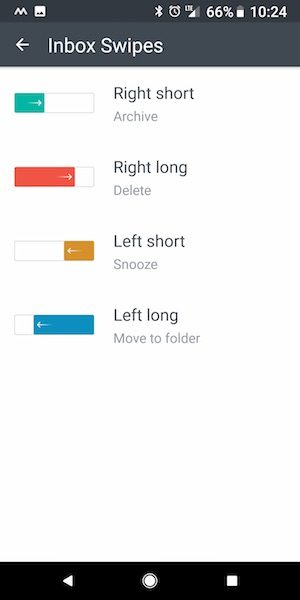
Speaking of notifications, you can even customize how those are handled when you swipe them in the inbox. There are 4 types of swipes for each message and each one can have its own action. Cool right?

All of these features help me achieve email nirvana, which for me means inbox zero or for those who haven’t heard that term, it just means that my inbox is empty and all the messages are stored where they should be.

I’ve been using Newton Mail for the past month and love it. They recently introduced a new feature that they call conversation view which they say gets rid of the sent folder because all the emails to the same person are grouped together including the message that you sent to start the email thread. This keeps you from having to go into the sent folder to look for messages.

I tried this new feature for a few days and didn’t care for it so I turned it off because it made my inbox more cluttered than I liked. I can see the advantages of having your original email in the same place as the responses, but that’s not a priority feature that I care about.

But all this yummy email goodness comes at a price

I’m not a penny pincher, but I don’t like paying for a 100 different subscription services. That’s why I ditched Nest security cameras in favor of WyzeCams and it’s why do regular audits on services I pay for but don’t use enough to justify the monthly or yearly subscription price. Some examples include Hulu. I dumped it when I started using Chromecast from my phone to watch shows on my 65-inch TV and it wouldn’t cast the audio along with the picture. So it went bye bye. I also dumped Evernote when I realized that I was paying $50 per year for a service I was rarely using.

So would I pay $50 per year for Newton Mail just for a handful of features that are missing from the free Gmail app from Google? While I wish the price was less than it is, I think that Newton Mail is completely worth it for me just for the time I save dealing with email when I’m mobile.

What I like

I like Newton Mail because it’s similar to the Gmail app that I know and love but on steroids. The easy label lookup, filing, and the creation of new labels is my absolute favorite feature, but the read receipts is a close second. Add in the ability to snooze emails and send them later and all the other little extras and Newton Mail has swiftly become my favorite email app.

What needs to be improved

While I really enjoy Newton Mail, it isn’t perfect. There are a few features I wish it had to make it even better. Canned responses and multiple stars like the Gmail web app would be awesome as well as Gmail’s reply prompts. Those features would just be icing on the cake though.

Final thoughts

If you consider yourself a Gmail power user and have been let down by Google’s stock Gmail mobile app, you should definitely try Newton Mail. I think you’ll be impressed. Give it a try, you won’t be disappointed. You can test it for 14 days for free.

Price: $49.99 a year (14-day free trial)
Where to buy: Newton
Source: A free membership for this software was provided by Newton.

The post Newton Mail review appeared first on The Gadgeteer.

Filed in categories: Reviews

Tagged: , ,

Newton Mail review originally appeared on The Gadgeteer on May 14, 2018 at 1:00 pm.

Note: If you are subscribed to this feed through FeedBurner, please switch to our native feed URL http://the-gadgeteer.com/feed/ in order to ensure continuous delivery.