MIOU Solar Motion Sensor Light Review

It never fails.  I always seem to forget to take out the trash until after the sun has set.  It also figures that the place where my trashcans are located is a very dark side of our house.  Most of the time I just stumble around hoping to get to the proper trash can (we have 3 – each for a different kind of trash).   Lucky for me I just got the opportunity to review the MIOU Solar Motion Sensor lights.

What is it?

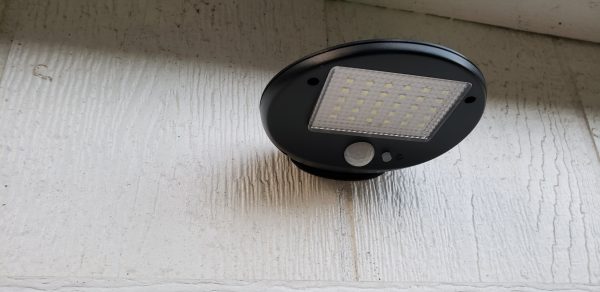
The MIOU Solar Motion Sensor Light is a solar powered light that has 30 LED bulbs inside.  It has a built in Lithium-Ion battery that converts solar energy to power and stores it for use at nighttime.    No external wiring is necessary, you just need to make sure the solar panel on the top of the light has several hours of direct sun access.

Hardware Specs

  • It is IP64 waterproof certified.  I personally tested this by accidentally leaving the unit on the ground where I was initially charging it right where my sprinkler system could easily give it a good shower.
  • It has an automatic motion sensing function that will turn the light on when it senses people or animals coming within 10-26 feet of the light with a 120 degree lighting angle.
  • It has 30 LED bulbs.
  • Internal Lithium-Ion battery that stores energy from solar power.
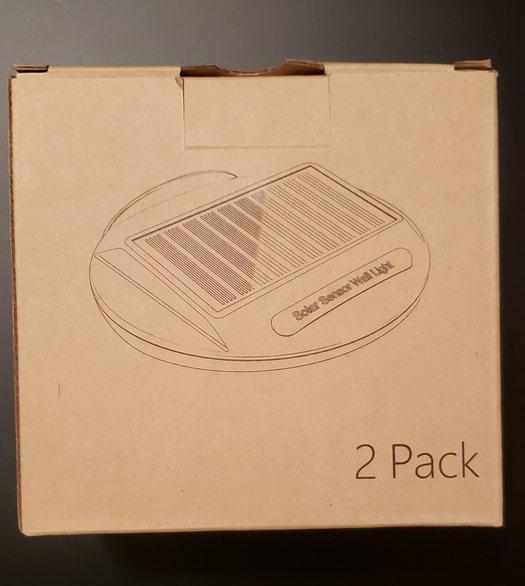
What’s in the box?

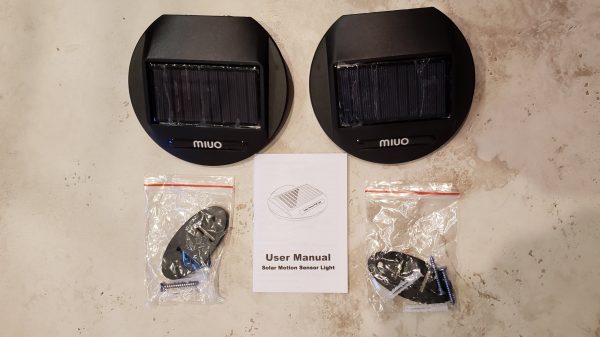
The box itself was a rather plain cardboard box.  Inside the box and very tightly packed there was the following:

  • 2 solar powered lights
  • 2 packages of mounting hardware.  The mounting device for the light, 2 wood screws and two anchors for mounting the light in sheet rock.
  • 1 user manual

Design and features

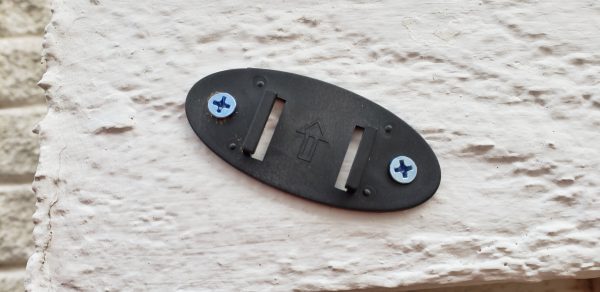
The first thing I had to do before I could use the lights was to give it an initial charge.  There is an on/off button on the bottom of the light that I pressed on to make sure it would light up properly.  Once I confirmed the light was working I then had to place it outside in direct sun for an initial 8 hours.  I did this for both lights and actually spread it out across 2 different days.  While the lights were getting their initial charge, I installed the mounting hardware.   The above picture shows you how simple it is.  Simply have the arrow facing up (although I will admit the light will mount in either direction).  When installing in wood I did drill a small pilot hole first.  That made the install much easier.
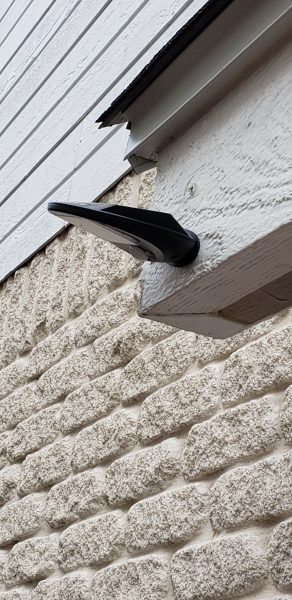
Once the lights were charged, I simply slid the back of the light which had two matching grooves onto the mounting hardware.  You should note that you do want the screws screwed all of the way in or it will interfere with mounting the light.   The picture above shows the light mounted above my trash can area.  I purposely tilted it so that it would better illuminate the area and catch the sun’s rays.

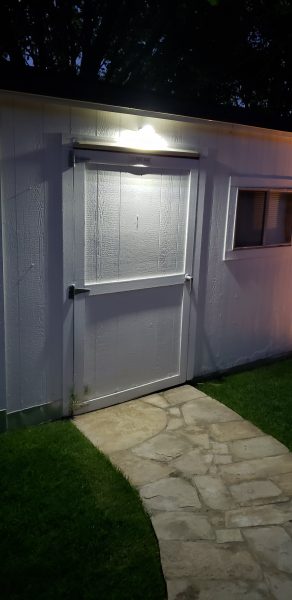
I mounted the second light right above my storage shed door.  That area is also rather dark and I figured the light would make it much easier to find the keyhole when trying to open the shed.   Both pictures above will show you the location of that mount.
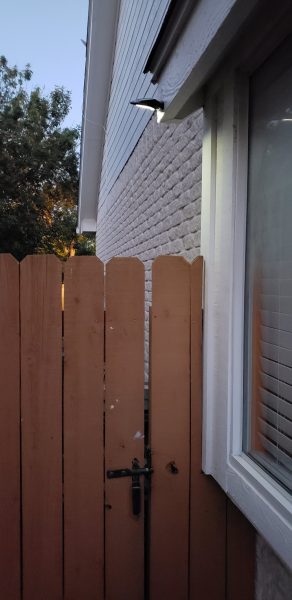
I left the switch on the bottom of both units in the ‘on’ position.  When it is ‘on’ the unit will go into standby with a light glow like the picture above.  It was much darker than what the picture shows, but my camera is trying to do me a favor by adjusting for the light.
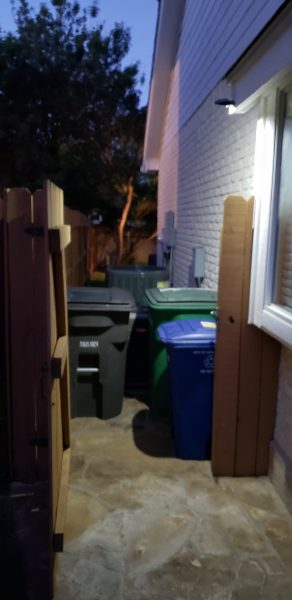
When I approached the gate, the light saw the movement and activated the brighter LEDs.  You can see how well the entire trash can area is lit up.  I am really happy with how it is lit.
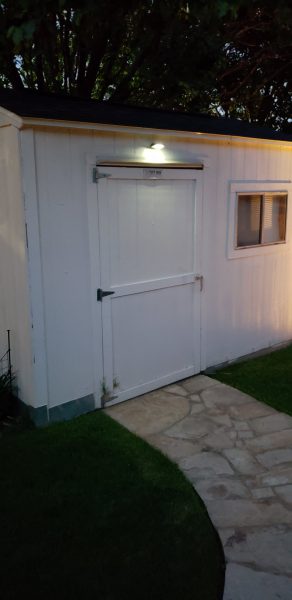
The next two pictures show the lights in the low standby position in the first picture and on bright in the second picture.  Once again you can really tell a difference.

What I like

It was super easy to install.  Having a cordless drill certainly made the job even that much easier.  It is pretty hard to mess up the installation of the mount and the light.  They give you all of the necessary hardware.   I also like that it came with 2 lights.  I had no problem thinking of additional places I would install future lights.

What needs to be improved

The only suggestion I would give is to have an option for the lights to come in white instead of black.  In south Texas, the lights will get extremely hot during the day.  Only time will tell how well the plastic will hold up to the heat.  I had replaced an older solar light in my trash can area and it had been white.  I will be sure to try and give an update on how well they have held up after our predicted super hot Texas summer.

Price: $24.99
Where to buy:  Amazon
Source: The sample for this review was provided by MIOU.

The post MIOU Solar Motion Sensor Light Review appeared first on The Gadgeteer.

Filed in categories: Reviews

Tagged: ,

MIOU Solar Motion Sensor Light Review originally appeared on The Gadgeteer on May 24, 2018 at 10:00 am.

Note: If you are subscribed to this feed through FeedBurner, please switch to our native feed URL http://the-gadgeteer.com/feed/ in order to ensure continuous delivery.

The Ouh Snap SnapBag Daily review

Whether you are an amateur or professional photographer, there are always days when you need to travel light and without any bulky backpack. You just need to take along a basic camera with a couple of lens, or maybe even a small video camera. You also need space for the other knickknacks that you would need while you are out and about. If this describes you, then the Ouh Snap SnapBag Daily may be the perfect match.

What is it?

The Ouh Snap SnapBag Daily is a camera backpack that can comfortably carry all of your daily photography essentials, and other small items, in an organized and convenient way.

What comes with it

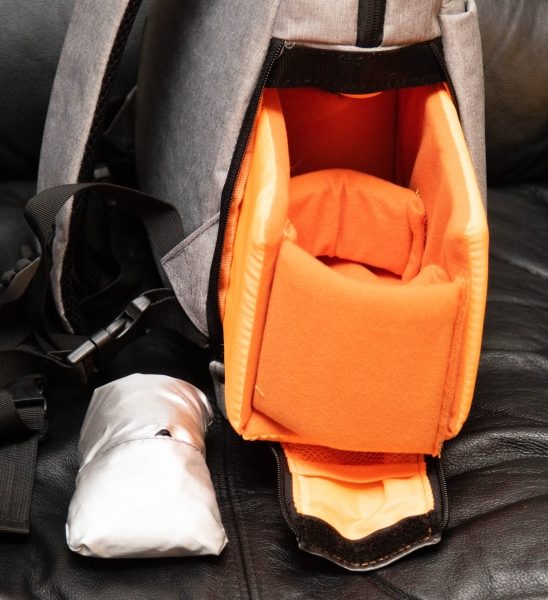
The Ouh Snap SnapBag Daily comes with a removable camera storage compartment, and a rain cover.

Design and features

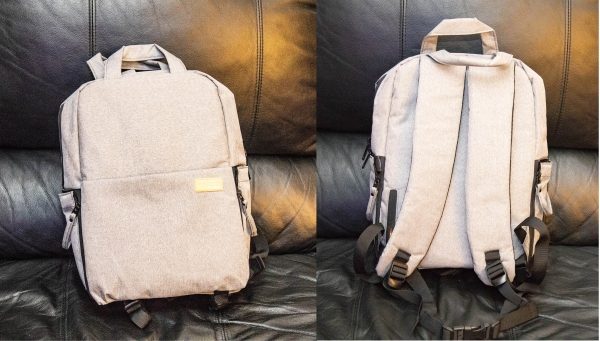
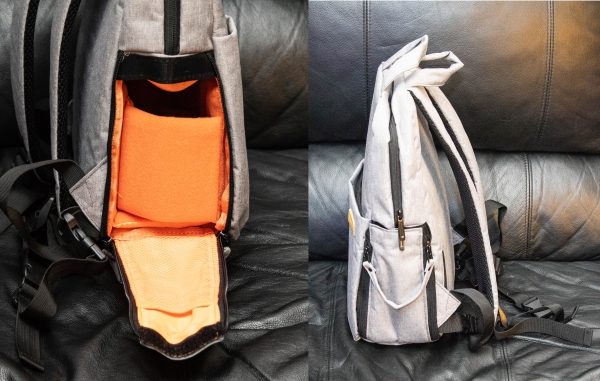
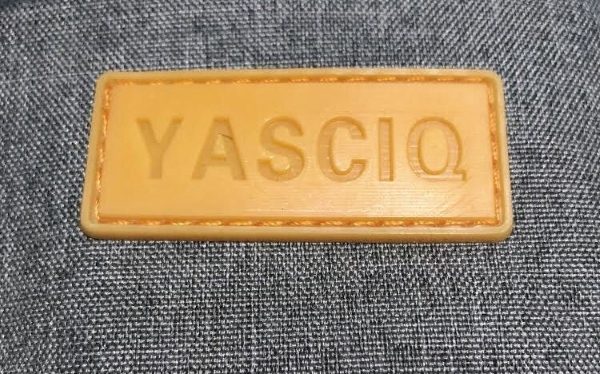
The backpack is well made, with very comfortable adjustable shoulder straps, zippers on each side to allow you to remove the padded camera storage from either side, and brand name tag on the outer zippered pocket.


Once you remove the camera storage compartment, you can fit a mid-size DSLR with a mid-size lens attached. A DSLR with an extended battery grip attached to it, will not fit. There is a removable velcro strap that you can secure over the lens to provide for extra protection.

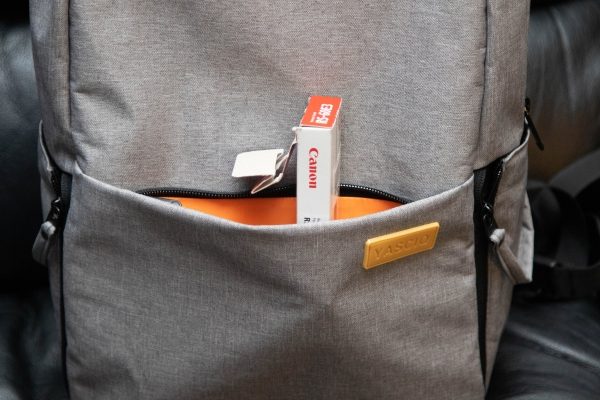
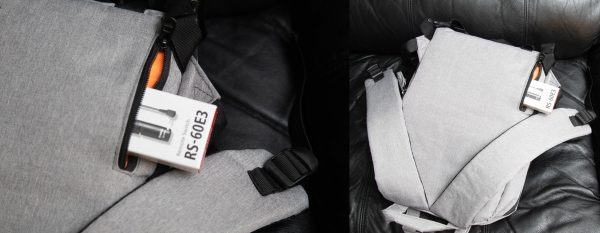
On the front of the bag there is a zippered pocket that can hold accessories like batteries, and keys, memory cards, etc.

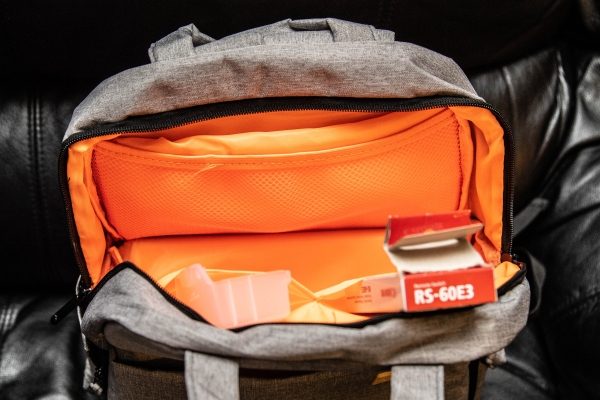
When you open the zipper at the top of the bag, there are several accessory/storage pockets. On one side there are two small pockets that are about five inches deep and each one is about half the width of the bag. The pockets are above the lower camera compartment.

On the other side of the bag there is a pocket that spans the width of the bag and is about five inches deep as well.  It is a fully padded pocket. In front of it, there is a second pocket that has a netted front and a thin cloth divider between the net and the front of the back pocket. These are also great for storage. As you can see in the picture below on the right, there is a divider that separates the top half of the bag from the bottom half containing the camera. This allows you to remove the camera storage container and the divider, and use the entire space as one bag. You also have the option to remove the divider and access the camera from the top of the bag.

As you can see in the pictures below, the top half of the bag offers lots of storage.

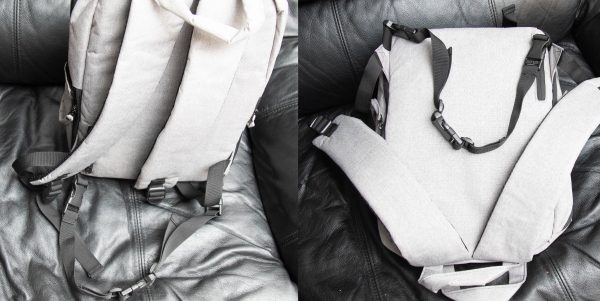
There is a waist strap with buckles that can be secured around your waist, and will keep the bag more stable if you have a need to do so.

On the back of the exterior of the bag, there is another small accessory pocket.

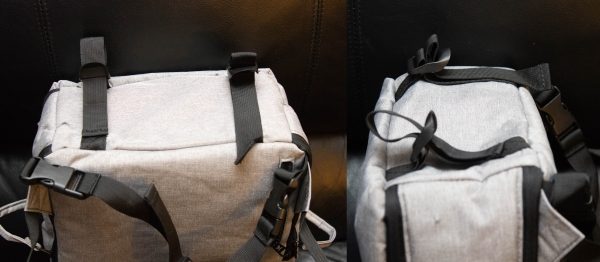
At the bottom of the bag there are two adjustable straps that can be used to carry a small tripod, or a rolled up blanket, or anything else similar.
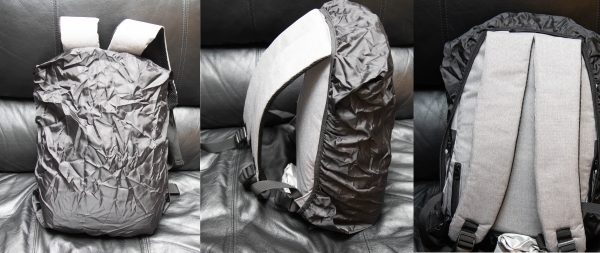
The included rain cover has elastic around the edges, and you simply stretch it over the exterior of the bag to cover the open areas that would not be protected by your back.

As you can see below, the bag fits very well as a backpack, and my wife really enjoys using it.

What I like

• The material used to make the bag
• The fit and comfort it provides
• The padded interior
• The number of interior and exterior pockets
• The removable padded tray for the camera
• The flexibility to keep the bag in 2 sections or to make it one larger bag

What can be improved

The only improvement that I would recommend, is for a better designed rain cover that would include a more secure attachment to the SnapBag, so that it cannot easily come off on its own.

Final thoughts

The Ouh Snap SnapBag Daily is a really nice backpack for carrying your daily photography “stuff” along with some other personal items. The bag is lightweight and well made, and just looks nice. It has become the daily-use backpack for my wife who is an amateur photographer, and a mom. She loves it, and in my opinion, for her to endorse it makes it a worthy bag.

Price: $39.95
Where to buy: OuhSnap
Source: The sample for this review was provided by OuhSnap

The post The Ouh Snap SnapBag Daily review appeared first on The Gadgeteer.

Filed in categories: Reviews

Tagged: , , ,

The Ouh Snap SnapBag Daily review originally appeared on The Gadgeteer on May 23, 2018 at 12:00 pm.

Note: If you are subscribed to this feed through FeedBurner, please switch to our native feed URL http://the-gadgeteer.com/feed/ in order to ensure continuous delivery.
Sena Vettra Folio 360 Rotating leather iPad Pro 12.9 case review

The iPad Pro 12.9″ is a great device.  It has a beautiful screen, works beautifully with the Pencil, and could serve as a laptop replacement for many.  But it’s bigger and heavier than other iPads, as you would expect, which means you’re likely to want a stand for it sometimes.  Sena, known for their leather accessories, of course offers a beautiful leather case / stand for the iPad Pro.  They actually offer the Vettra Folio 360 Rotating leather case for the new iPad, the iPad Pro 10.5″, and both the original and the 2017 versions of the iPad Pro 12.9″.  I was lucky enough to be selected to give it a try.  I requested and received the Vettra for the new version of the iPad Pro 12.9″ in black.

Hardware specs

  • Dimensions:  12.25″ x 9″ x 0.75″
  • Weight: 1 lb, 5.2 ounces
  • Leather book-style design
  • Microfiber lining

Design and features

For some reason, the 12.9″ iPad Pros seem to be marketed as a business device, and most accessories for it seem to always be in somber colors.  Sena follows this trend by offering the Vettra for the new 12.9″ Pro only in black or tan.  I don’t use my Pro for business, but even if I did, I’d prefer a nice blue or a red case for it, because I love color.  The black case is very suited for business, and of course, it’s great for every day use, as well.

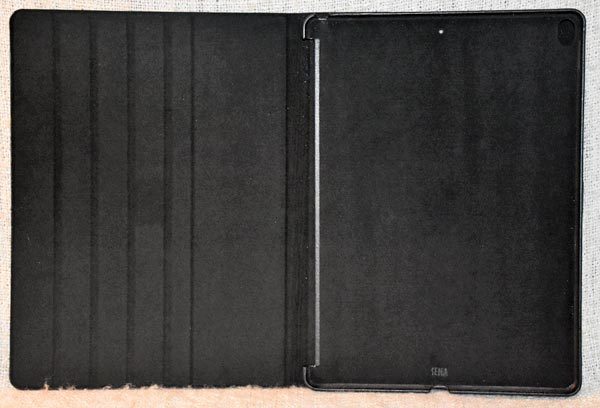
The inside of the front cover is lined with a microfiber material to protect the screen.  The other side has a slightly flexible, snap-in case for the iPad.  The snap-in case is also lined with microfiber to protect the back of the iPad, and the outside edges are covered with the same leather used on the rest of the case.

The grooves on the inside of the front cover are “stops” where the iPad rests when the case is folded into a stand.

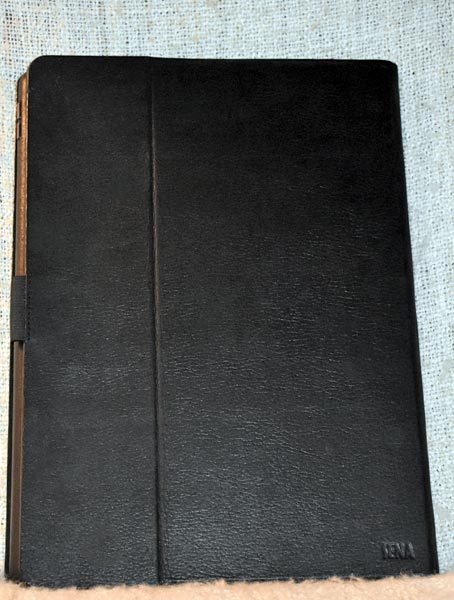
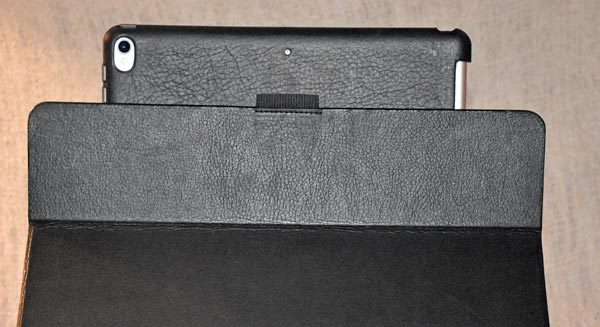
The front of the Vettra is plain, with no product branding.  The leather spine of the case is very soft and flexible, so you can fold the front cover completely to the back.  The vertical line on the front of the case is a fold line for the stand function.

The front cover has magnets that operate the iPad’s sleep/wake function.  They didn’t hold the front cover closed on my iPad Pro, though, perhaps because the front cover with its leather and stiffening was just too heavy for the magnets to hold closed.

The back of the case is branded with the Sena name at the bottom right.  You can also see an elastic loop that holds your Apple Pencil.  The vertical line on the back of the Vettra is another fold line for the stand function.

The bottom has a cutout for the Lightning connector.  I had no trouble plugging in the Apple Lightning cable and charging the iPad while it was in the Vettra case.

What you can’t see in this photo, or even very well in person, are the sets of small holes on each side of the Lightning connector that open up the case over the bottom speakers.

The top of the case also has the small speaker holes, again not visible in this photo.  The sound from my iPad wasn’t muffled by the Vettra case.

You’ll also see cutouts for the headphone jack and a hole at the mid-point for the top microphone.  At the far right is a metal button that covers the iPad’s power/standby button.  You need to be sure to press in the center of this button to easily operate the iPad’s power button.

As you can tell from the name of the case, the iPad can rotate from landscape to portrait orientation in this case.  A couple of details you can see in this close up of the portrait orientation is that the back camera and its flash are left uncovered; the case doesn’t interfere with the camera’s operation.  You’ll need to turn the case into the portrait orientation to be able to use the back camera at all, though.  And this case is big and a bit cumbersome to hold while you take photos with the back camera unless you stand it on a stable surface.

The center of the back has another microphone opening.  And you’ll see two metal button covers on the left side of the image that covers the volume buttons.  Adjusting the volume was easily accomplished with these buttons.

The last thing you need to notice in this image is how the case is cut away on the side opposite the volume buttons.  This leaves the iPad Pro’s Smart Connector exposed, making the Vettra usable with the Smart Keyboard, if you use one.

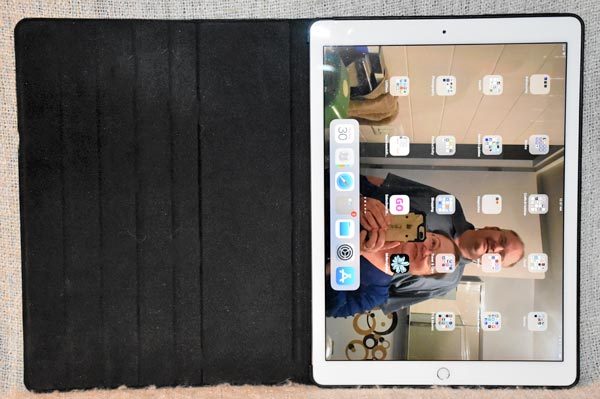
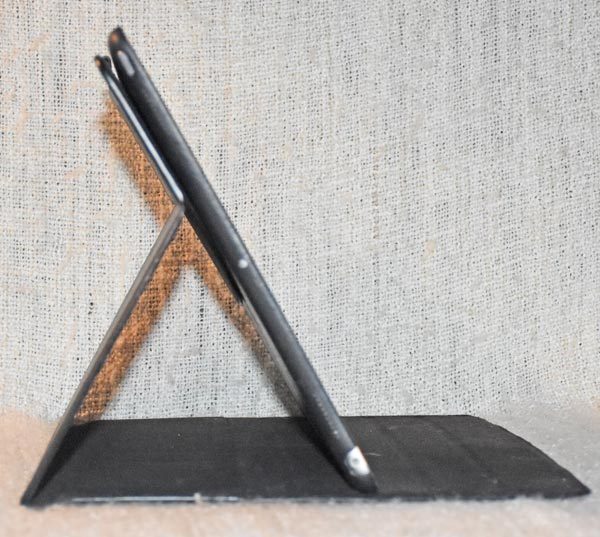
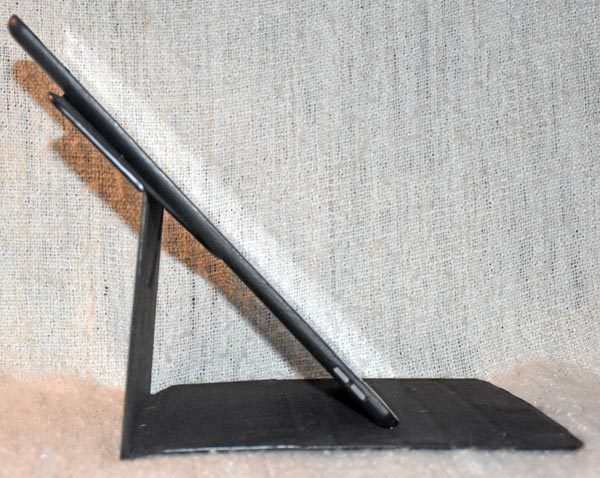
Here’s the iPad Pro standing in the landscape orientation.  The stand was very stable, and it worked well for watching videos on the iPad.  You can use the grooves on the front cover to adjust the viewing angle.

Here’s the iPad Pro in the portrait orientation.  I personally never use my iPad in this orientation, but it seemed that I couldn’t quite get the iPad as nearly vertical as I’d like.  It seems that you would always see a slanted view of the screen in portrait orientation.

I don’t know what type of material was used as the stiffening inside the front and back of the case, but you can see it started to bow after I’d been using the case for a few weeks.  That’s the back of the case you see here.  The front of the case also bowed a bit, but it’s not visible when the case is laying on its front, as it is here.

Performance

The Vettra Folio 360 Rotating leather case for the new iPad Pro 12.9 is sturdy and very protective.  I didn’t worry about the screen at all when I put the iPad in this case inside my bigger gear bag.  I liked the stand function very much, especially the landscape orientation that I primarily use.

The Vettra for the big iPad Pro is heavy, at 1.33 pounds, but that’s because of the quality and the sturdiness of the materials used for it.  However, it does make the iPad Pro 12.9 even heavier, bringing it to about 2.9 pounds.

What I like

  • Sturdy and protective
  • Well made
  • Works well as a stand for watching videos or reading
  • Magnets in front cover operate the iPad’s sleep/wake function

What needs to be improved

  • It’s a bit cumbersome to hold in your hands while using the back camera
  • It makes the already heavy iPad Pro 12.9 even heavier

Final thoughts

The Sena Vettra Folio 360 Rotating leather case for iPad Pro 12.9″ (2017 model) is a sturdy, protective case that also serves as a stable landscape or portrait stand for this big, heavy tablet.  Because of its style and quality, you’ll find it will fit into the business environment beautifully, and it works just as well for more casual environments.

Price: $89.95
Where to buy: Sena Cases and Amazon
Source: The sample of this product was provided by Sena Cases

The post Sena Vettra Folio 360 Rotating leather iPad Pro 12.9 case review appeared first on The Gadgeteer.

Filed in categories: Reviews

Tagged: ,

Sena Vettra Folio 360 Rotating leather iPad Pro 12.9 case review originally appeared on The Gadgeteer on May 23, 2018 at 10:00 am.

Note: If you are subscribed to this feed through FeedBurner, please switch to our native feed URL http://the-gadgeteer.com/feed/ in order to ensure continuous delivery.
Airthings Wave smart radon detector review

You’ve heard of smoke detectors and carbon monoxide detectors, but have you heard about an electronic radon detector? Me neither. So I was surprised and interested when the folks at Airthings offered to send me their Wave smart radon detector for a review. Let’s take a look.

What is it?

The Airthings Wave smart radon detector looks like a smoke detector, but it will let you know what level of the deadly radon gas is in your home or building. Radon is the leading cause of lung cancer among nonsmokers. What exactly is radon gas? According to the EPA:

Radon is a radioactive gas that has been found in homes all over the United States. It comes from the natural breakdown of uranium in soil, rock, and water and gets into the air you breathe. Radon typically moves up through the ground to the air above and into your home through cracks and other holes in the foundation.

Why is radon gas deadly? According to the National Radon Defense site:

Signs and symptoms of lung cancer from radon exposure can include:

  • Persistent cough.
  • Hoarseness.
  • Wheezing.
  • Shortness of breath.
  • Coughing up blood.
  • Chest pain.
  • Frequent infections like bronchitis and pneumonia.
  • Loss of appetite.

Scary right? You may have used a charcoal radon detector kit before. It comes in a small box that you leave in your house for several days before mailing it to a lab for the results. Unlike the charcoal tests, the Airthings Wave smart radon detector will let you see the level immediately anytime you want to check it and it will also tell you the humidity, and temperature level. It even supports hand gestures.

Hardware specs

Power supply: 2x AA alkaline (LR6) or Energizer L91 batteries
Dimensions: Radius: 120 mm (4.72 in)
Height: 36 mm (1.42 in)
Weight: 219 g (incl. 2x E91 batteries)
Radon sampling: Passive diffusion chamber
Detection method: Alpha spectrometry
Operational and storage environment:
Temperature: +4 °C (39 °F) to +40 °C (104 °F)
Relative humidity: < 85 %
Initial Accuracy/Precision at 100 Bq/m3 (2.7 pCi/L):
7 days < 20 %
1 month < 10 %
Measurement range: 0 Bq/m3 to 50000 Bq/m3 (0 pCi/L to 1350 pCi/L)

What’s in the box?

  • Airthings Wave smart radon detector
  • 2 AA batteries

Design and features

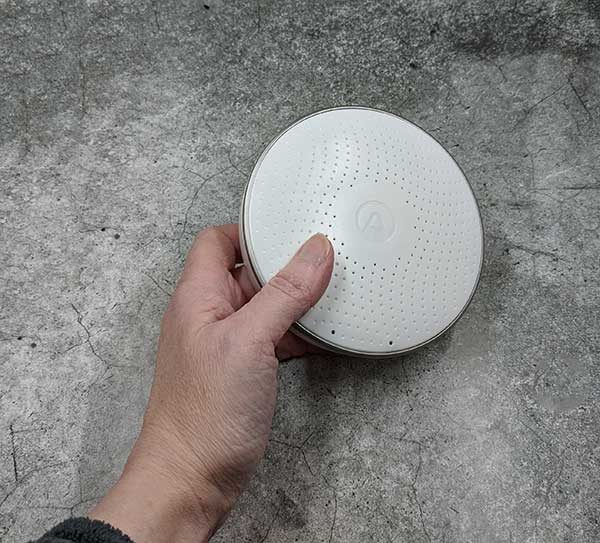
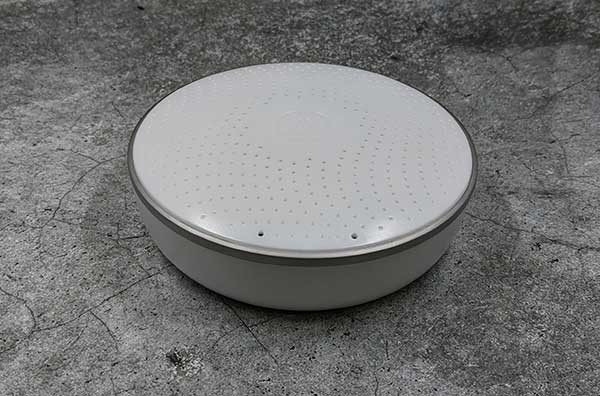
At first glance, the Wave smart radon detector looks like a traditional smoke detector. It’s made of white plastic with a sensor and a built-in color LED indicator on top.

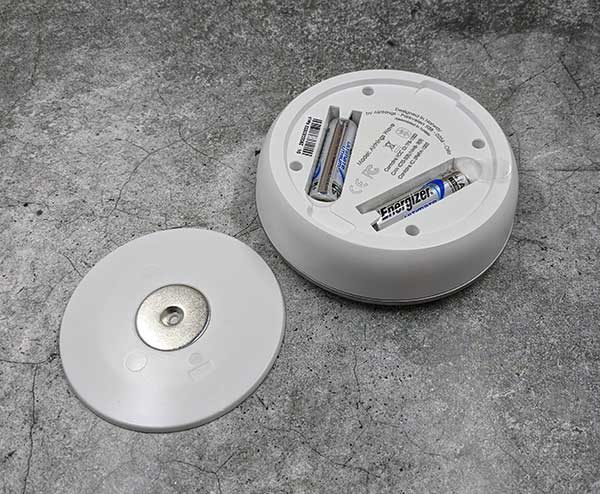
It has a magnetic cover on the base that covers 2 AA batteries which are included with the unit and which should last up to 1.5 yrs before they need to be replaced. The base plate can be attached to the wall or ceiling with a single screw.

How do you use it?

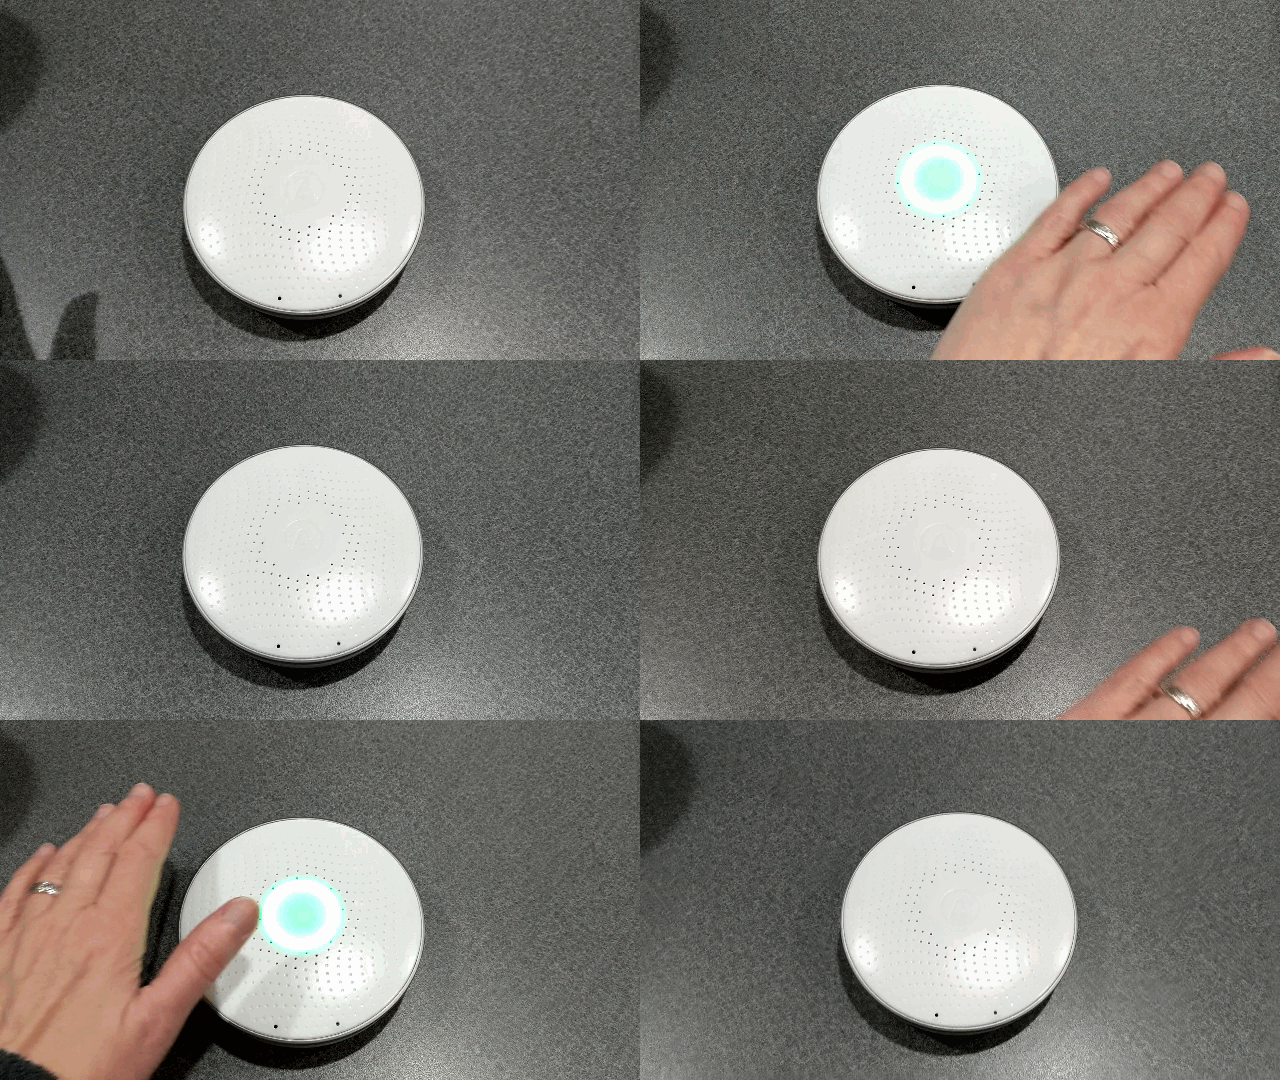
All you have to do is install the batteries, mount it on a wall or ceiling and wait an hour for it to do its initial reading. Then all you have to do is wave your hand over the unit to see if the reading is green which means good air quality (low radon levels), yellow which means the level of radon gas is above the recommended levels and red which means the levels are high and action should be taken which is usually the installation of  a Radon Mitigation fan.

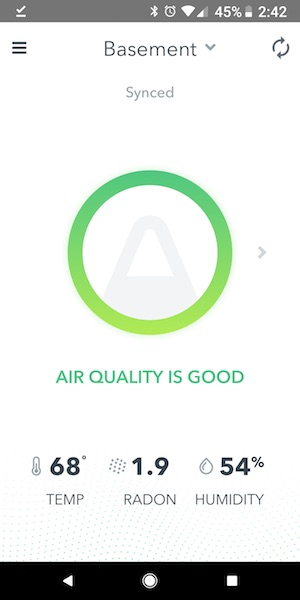
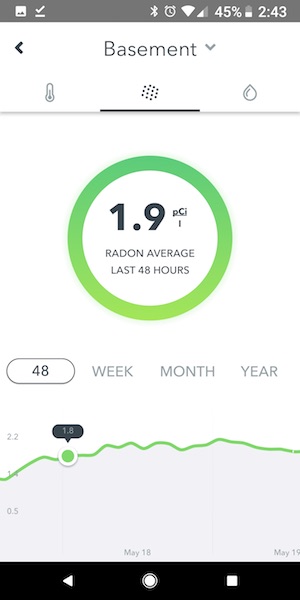
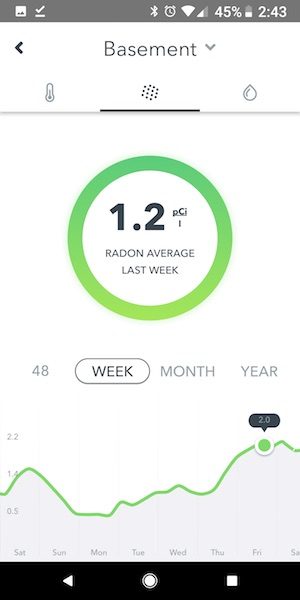
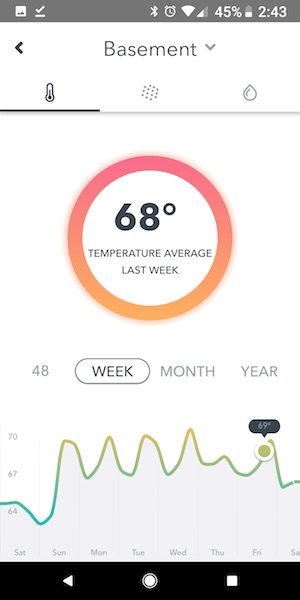
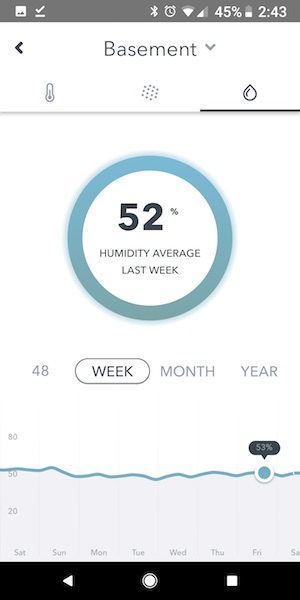
You can use the Airthings Wave smart radon detector by itself, but you can pair the detector with your Android or iOS device and use it with the free Airthings app to automatically record radon, humidity, and temperature level readings so you can see trends over time. This important because just one good reading doesn’t mean you’re home free. Radon readings fluctuate with the seasons and the location of your home.


The app has an easy to understand interface that will immediately show you if there is an issue with radon gas in the area where the detector has been placed.


You can drill down into the data to see averages and trends for radon, temperature, and humidity levels. The Airthings website mentions an audible alarm that will sound if the radon gas levels are unsafe, but I couldn’t find any details about this feature in the app.

If you’d like to read more about the accuracy of the Airthings detector, check out the article below.

Charcoal Versus Airthings – Accuracy

I don’t recall having a radon test for my home when I bought it, but that’s been almost 20 years ago. So, I was a little nervous about trying the Wave detector because I didn’t want to see a bad reading and then worry that we’ve been living with high levels of radon gas for almost 20 years. Luckily that wasn’t the case. I tested the levels in my basement (levels tend to be the highest on the lowest level of your home) and was greeted with very low levels for a couple of weeks.

What I like

  • Really easy to setup
  • Runs on batteries that are included and will last up to 1.5 years
  • Portable, so you can move it from room to room to check levels
  • Can be used alone or with an app to keep a history of the levels

What needs to be improved

  • Expensive
  • Wish it also included a smoke detector, carbon monoxide detector and radon detector in one device for the same price

Final thoughts

I really like the idea of having an easy to use radon detector that can give me a reading immediately instead of having to wait weeks and send a kit in the mail for the results. I also like that the Airthings app will show trends and averages over time so you can see how the radon levels fluctuate during the spring, summer, or winter months.

I gave the detector to a friend of mine who used a radon test kit and found that his house had high levels. He had to have a special remediation fan installed in his house to bring the levels down. The Airthings Wave smart radon detector will see if the fan actually works. Too bad he didn’t have the Wave BEFORE he had the fan installed… Anyway, I will update this review in a few weeks after the detector has collected some data on his house. So stay tuned.

Price: $199
Where to buy: Amazon
Source: The sample for this review was provided by Airthings.

The post Airthings Wave smart radon detector review appeared first on The Gadgeteer.

Filed in categories: Reviews

Tagged: ,

Airthings Wave smart radon detector review originally appeared on The Gadgeteer on May 22, 2018 at 3:55 pm.

Note: If you are subscribed to this feed through FeedBurner, please switch to our native feed URL http://the-gadgeteer.com/feed/ in order to ensure continuous delivery.
PAPAGO GoSafe S780 dash cam review


I’ve only had one previous dash cam, and it was a very cheap one. While I was waiting for the PAPAGO! GoSafe S780 dash cam to arrive, I didn’t have my hopes set very high because I had never heard of the company. When it arrived I was unexpectedly surprised by this high-quality dash cam. PAPAGO! seems to have quite a variety of dash cams and accessories.
What is it?

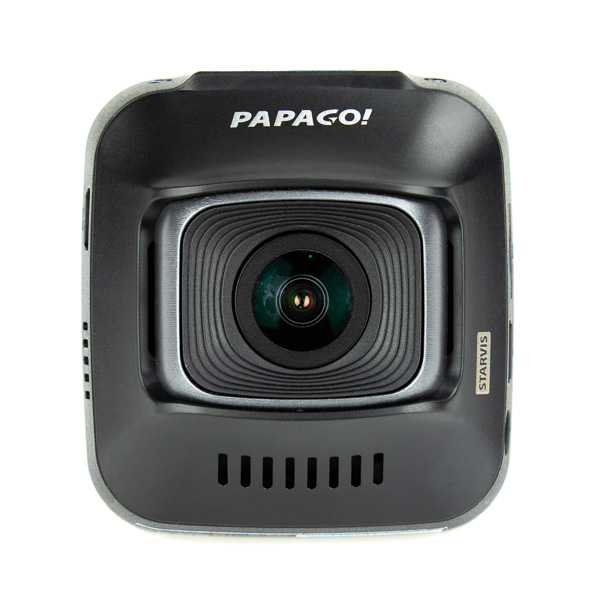
The PAPAGO! GoSafe S780 dash cam isn’t your run of the mill dash cam – it’s a high-quality dual camera, low light dash cam that is capable of great performance regardless of the time of day.

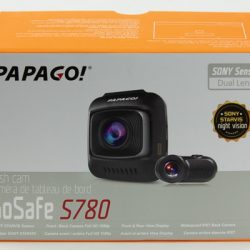
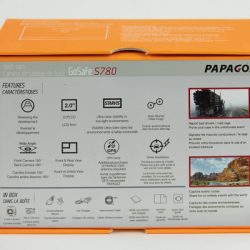
Before I received this product I knew nothing more than its name. Being a photography nerd, as soon as I opened the shipping box and saw the “Sony Sensor” on the front of the box, my hopes suddenly raised. Sony makes some of the best camera sensors on the market.


Hardware specs

Screen 2.0″ color LCD display screen
Chip Professional Sony image sensor chip
Angle View Front: 150 ° ultra- wide-angle lens F1.5. Rear 180° F1.9
GPS Supports GPS-Antenna (Sold separately)
TPMS Supports PAPAGO! TireSafe D10E TPMS (Sold separately)
Video Format 1920X1080P60, 1920X1080P30, 1280X720P30, .MP4 format
Storage Device MicroSD card (Class 10, 8GB or above. Supports up to 128GB)
Battery Built-in super capacitor
Weight .12 lbs
Dimensions 2.2″ x 1.2″ x 2.4″

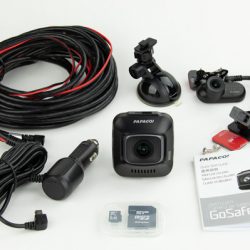
What’s in the box?

  • GoSafe S780
  • Rear Camera
  • Interconnect Cable
  • Car Charger
  • Suction Cup Mount
  • 3m Adhesive Mount
  • Micro SD Card
  • User Manual
  • Warranty Card


Design and features

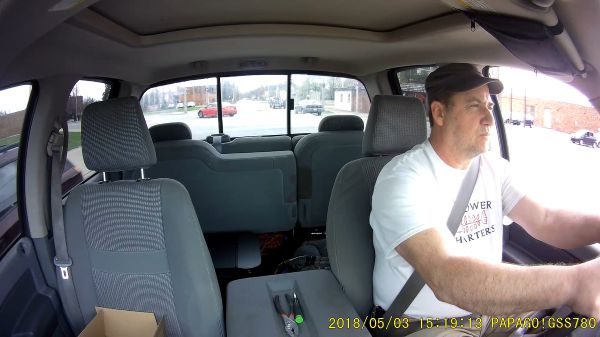
The dual camera design allows you to place the second camera either in a rear-facing position out a rear window or facing the cabin of the vehicle to record the occupants. This is a great feature for rideshare drivers who need an extra level of protection for themselves and their passengers. I occasionally do some YouTube videos, so this will come in very handy for those moments when I don’t have my regular camera running.

You can use the far right button to quickly change which camera(s) the display shows. The modes are: Front, Rear, Front and Rear (like picture-in-picture), and off. Regardless of the mode, both cameras record to separate video files at the same time.

The S780 turns on automatically and starts recording when power is applied to the plug. The camera will record 5-minute segments of video, replacing the oldest files when the memory card is full. Embedded supercapacitors provide enough power to save the recording when power is lost, either from turning off your vehicle or in the event that a crash disrupts power to the camera. A 16gb memory card holds approximately 90 minutes of video files before the files are overwritten.

While recording you can press the down arrow button for 3 seconds to capture a picture without interrupting the video recording. These are saved to a separate “photos” folder on the memory card and are not overwritten.

There’s also an emergency mode, which is activated by pressing the far left button while the device is recording. This mode will lock the current file so that it is not overwritten when the memory card is full. The locking of the file will also occur when the g-force sensor detects a crash – something I declined to test.

The main camera has a SONY Starvis sensor with a 150-degree ultra-wide angle lens, which is not only glass but has anti-reflection coating as well to eliminate flaring when facing bright lights. The quality is really good. You can make out street signs very easily, but license plate numbers were difficult to make out, but I think that’s more a limitation due to the 1920×1080 resolution than it is the camera itself.

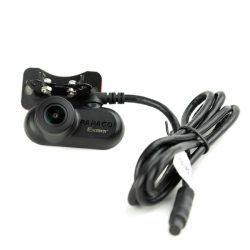
The second camera has a 180-degree view and a SONY Exmor sensor and also features a glass lens and anti-reflection coating. The camera has a wide enough angle of view that even mounted on my rearview mirror, it was wide enough to capture both driver and passenger, seeing slightly out each side window.

Also available is an optional accessory called the TireSafe D10E (sold separately), which enabled the unit to display your tire pressure and temperature in real-time. The unit also supports a GPS antenna (sold separately) to record speed and for GPS logging on your videos, to automatically correct the time, and for other related functions. However, you can only use one of these at a time.

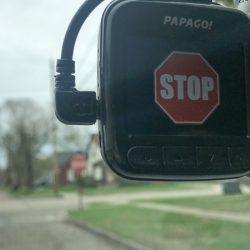
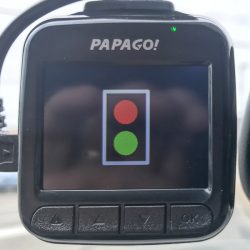
Something I never expected to see in a dash cam is the PAPAGO Driver Assist Features, which include Stop Sign Recognition, Stop and Go, Driver Fatigue Warning, and Headlight Reminder to help you stay safe on the road. For example, when the unit “sees” a stop sign, it will display a stop sign on the screen and give an audible beep. These features are able to be turned on and off in the settings. The stop sign feature worked well, picking up every stop sign, but if you’re going over 25mph you won’t stop in time. I would be nice if it could pick them up a little farther away. The stop and go feature worked well also, giving a lower toned beep when it detects the car in front of you has started moving, but you haven’t.


The S780 has three recording modes: Automatic Recording (Loop recording), Monitor Mode (1 picture per second to save storage space), and Motion Detection(motion-activated recording). The monitor mode is useful to make a hyperlapse video with, as it saves the pictures as frames of the video.

The unit also supports microSD cards up to 128GB which allows approximately 8 hours recording time before it loops over old videos at 1080p30 setting. The unit comes with a 16GB card.

Although there is an included quick start manual, there were no instructions for the wiring of the rear/second camera. After some discussion with Papago support, I found out that the cable for the rear camera has two bare wires that you must connect to ground and the 12 volt backup light signal. If you’re placing the camera at the back of the vehicle that would mean connecting to the backup light wire. If you’re placing the camera in the passenger compartment then you can just leave the wires disconnected, as it’s not really going to do anything for you.

If you don’t have any electrical knowledge this might require some installation help from an auto shop or a friend.

When you have the backup wires connected, the display automatically shifts to the rear camera and provides some on screen distance guides when you place the vehicle in reverse.

What I like

As I mentioned before, the Sony sensors really make this thing. The clarity and dynamic range for both day and night use are really superb. If you’re not into photography like I am, you might not fully appreciate the low light abilities of this dash cam.

One thing I really liked was the extensive menus and settings. This enables you to customize each of the features, and disable features you don’t want on.

The microphone is extremely good, it picked up sound clearly, and from a fair distance away, such as someone standing outside of the vehicle talking to me and the sound of my turn signal.

The primary power plug has a 13-foot cord, allowing you to run the cable behind panels and such so that it’s not in the way. It also has mini-USB connectors and instead of those tiny and fragile micro-USB connectors.

The GoSafe S780 is eligible to receive a lifetime of free upgrades as soon as they are issued, who can’t like that!

I really like the automatic camera view change when going into reverse.

What needs to be improved

  • Needs better instructions about wiring the rear camera.
  • I felt the buttons on the camera were a little too hard to push. Being that the camera is normally going to be mounted up and out of the way, I think they could have gotten by with buttons that were a little easier to push so that the unit didn’t move when pressing them.
  • Both a suction cup mount and a 3M tape mount are included for the main unit, and the rear camera has a 3M tape mount as well as holes and screws for optionally hard mounting it.

Final thoughts

Being one of the more expensive dash cams on the market, I felt as though it was a little pricey for the features it has. Sure, the video and audio it produces are fabulous, but it lacks things that other lower cost cameras have such as touch screens and fewer cords.

Price: $279.99
Where to buy: Amazon
Source: The sample of this product was provided by Papago!

The post PAPAGO GoSafe S780 dash cam review appeared first on The Gadgeteer.

Filed in categories: Reviews

Tagged: ,

PAPAGO GoSafe S780 dash cam review originally appeared on The Gadgeteer on May 22, 2018 at 10:00 am.

Note: If you are subscribed to this feed through FeedBurner, please switch to our native feed URL http://the-gadgeteer.com/feed/ in order to ensure continuous delivery.