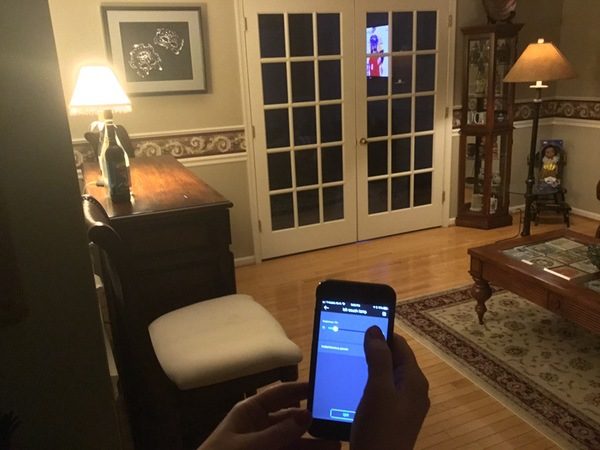
Sengled Element Classic Smart Bulb review

So you’re thinking about dipping into smart home technologies, but want to start simple. The Sengled Element Classic may be just the thing for you. It’s easy to use, sets up in minutes, and is a remarkably inexpensive solution to creating a smart lighting solution for your home. Let’s get illuminated!

What is it?

It’s a smart bulb lighting kit that you control from your smartphone, Amazon Alexa, or Google Assistant.

Hardware specs

Bulbs:

  • 9 W, 60 hz
  • 4.41” by 2.42” (standard socket size)
  • 800 lumens, 2700 K Color Temperature
  • Dimmable with app
  • 240 degree beam angle
  • 25,000 hour lifetime

Hub:

  • 3.07” by 1.02”
  • 2.4 GHz
  • 120 foot range
  • 64 bulb management capacity

What’s in the box?

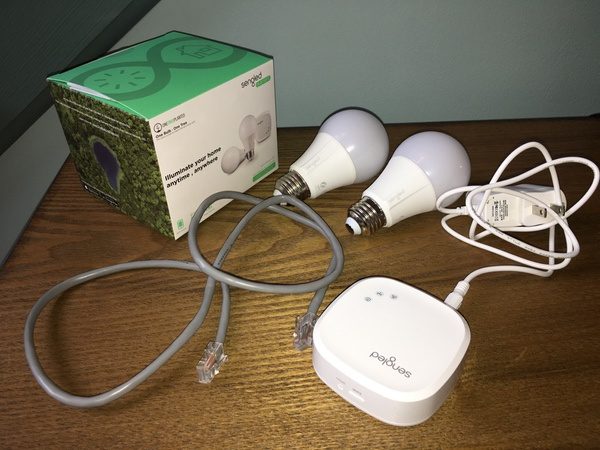
You get two soft-white controllable bulbs, the Element wireless hub, and a power adaptor for the hub. There’s also a network cable to get connected for the setup process.
Design and features

The Sengled Element Classic Starter Kit gives you everything you need to get started with basic smart lighting. The Element hub, when set up on your network, pairs with the bulbs. The app on your smartphone controls the bulb functions. We’ll walk through the setup process and controls in the following sections.

Setup

Setup begins with downloading the “Sengled Element Home” app on your iOS or Android mobile device. You’ll need to create an account with Sengled to get started, after which the app will all you through the setup process.

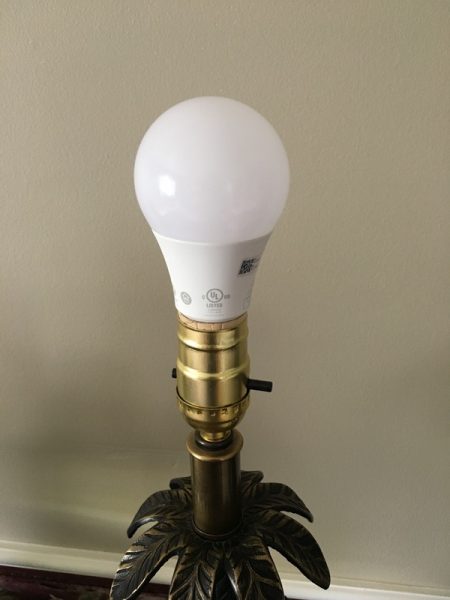
The bulbs that come with my test sample (the “Classic”) are 2 soft-white LED bulbs. While a bit heavier than typical LED bulbs, they have the same form factor and fit in standard lamp sockets. Sengled offers 4-bulb packs, daylight bulbs, tunable daylight/soft bulbs, and multicolor bulbs on their website if you want to get fancy.
The setup process is very straightforward. You’ll plug the hub directly into your router with the Ethernet cable provided in the kit. Power it up, follow the instructions on the app to pair the hub to your network (you’ll need your network password), and the app will let you know when you’re all connected. You then go to the app to identify the locations of your bulbs in the house.
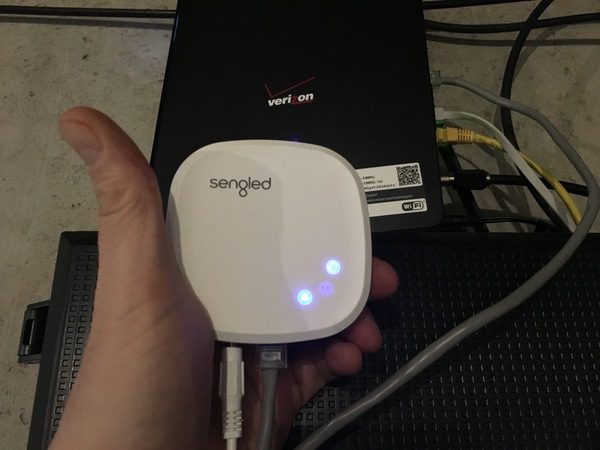
Once you have set up the connection, you can go fully wireless with the hub. Disconnect it from the router, find a discrete place to plug it in, and you’re good to go. It’s a tiny thing at 1” by 3”, so you can tuck it just about anywhere. See it hiding on one of our hallway display shelves below, behind the Flying Dutchman and Mickey…

It’s important to note that the Sengled setup has limited compatibility with third party hubs. I have the Deco mesh network set up in my house, and I could not plug the hub into one of the remote pods to set it up. Once I finished initial setup at the router, however, I switch back to my mesh network on my smartphone to manage things from the app. You can connect the Sengled system to Amazon Alexa or Google Assistant, but these configurations were not tested for this review. You should check out the Sengled web site to learn more about compatibility before purchasing.

Performance

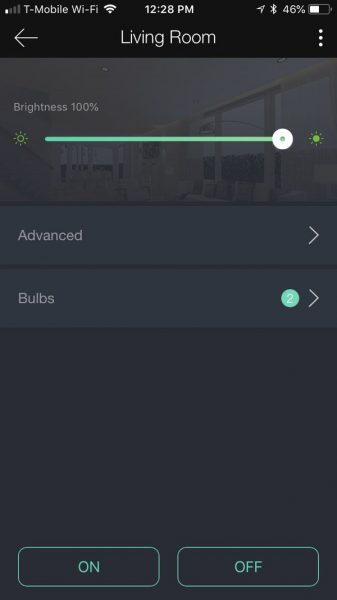
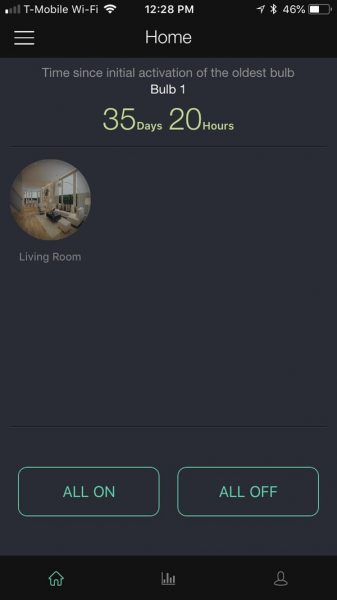
As you set up the app, you’ll identify the room(s) where your bulbs are located. I put both mine in the living room for purposes of the test. Your home screen on the app now serves as your master control:
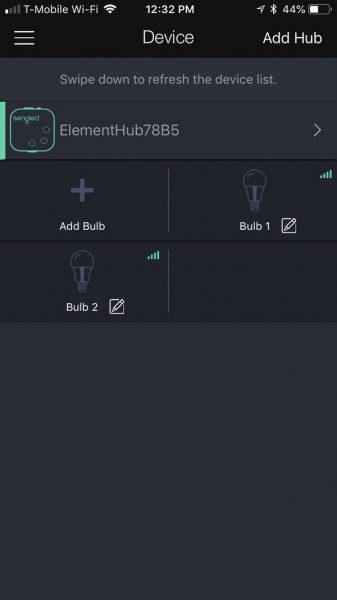
You can also manage your individual bulbs from the app, providing custom names for each bulb. You can expand your setup to include additional bulbs or hubs as well:
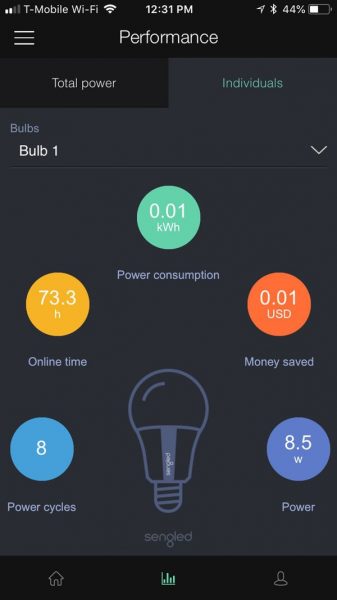
Once established, the app provides monitoring you can use to measure power performance across the setup or at the individual bulb level:
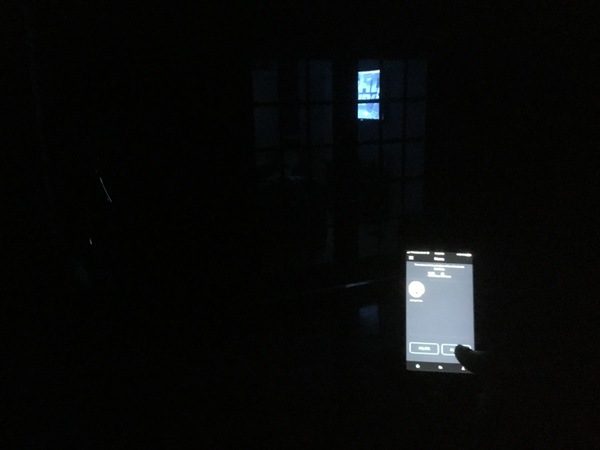
Once you’re in business, you can use the app to power on/off all the Sengled bulbs in a room, including dimmer functions. Here I’m turning everything on at once:
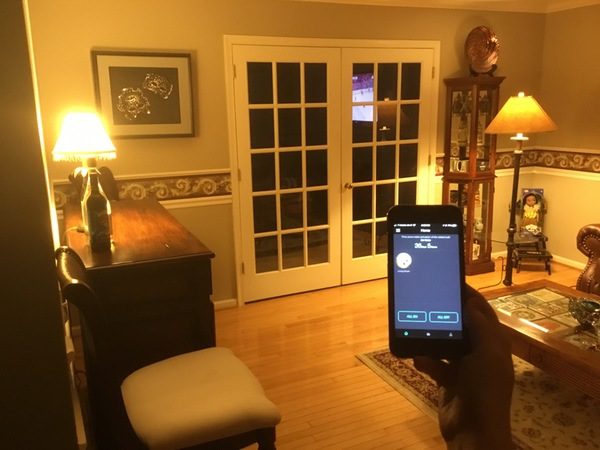
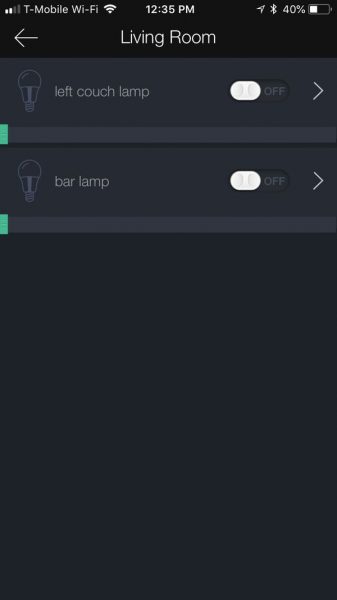
You can also control individual bulbs in the room. Tap on the “Bulbs” button, and you give each bulb a custom name for easy management. You can turn them on and off individually from this screen. Here I went in and turned off the bar lamp for purposes of demonstration:
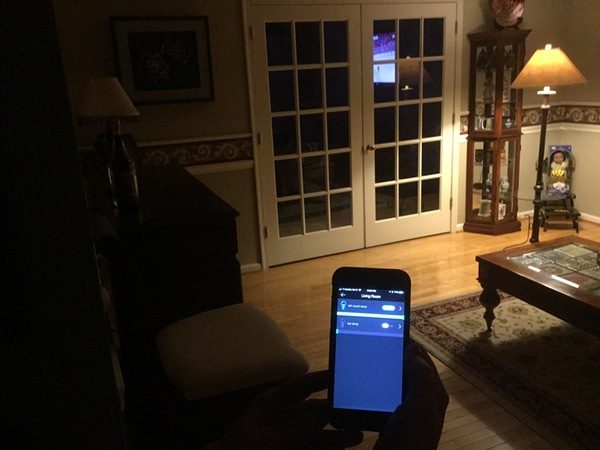
You can also tap the name of the bulb to set individual dimming. The first pic below is both lights at 100% brightness, while the second shows the couch lamp being dimmed to about 20% brightness. (I should note that the couch lamp has a darker shade to begin with.)

In addition to on-demand control, you have the ability to schedule the lighting by room by tapping the “advanced” button. Here you can set a wake up time to turn the lights on, or two different scheduled events. This includes a start time, end time, brightness, and what days of the week to repeat the function. With two scheduled events available, this means that you could set multiple events for a single room if desired.
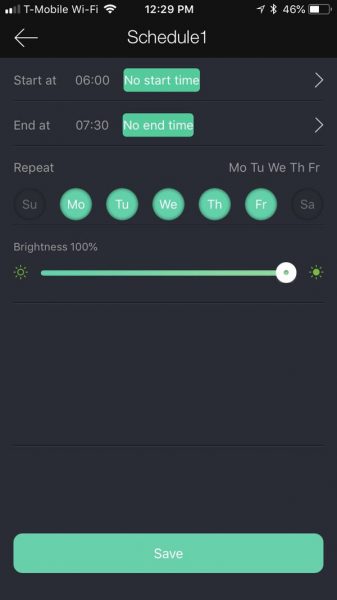
It’s important to note that the scheduled event either happens on the day it is set, or is repeated each day that you select in the interface. You cannot schedule for a specific date range, like a vacation.

According to Sengled a single hub can support 64 bulbs. I don’t imagine needing an additional hub unless you’re pushing the 120 foot range of the hub itself.

Setup with Alexa and Google Assistant also looks pretty simple but, as I mentioned, there’s limited compatibility with other hub networks. Advanced kits are offered that support Xfinity Home and Cox Homelife. Again, check the Sengled web site to make sure that the Sengled will work with your home setup.

What I like

  • Quick and easy to set up
  • Simple, clean app interface
  • Scheduling features

What needs to be improved

  • Limited compatibility with third party hubs
  • Would like to see a date-specific scheduling function for trips

Final thoughts

At $39.99, the Sengled LED Classic Smart Bulb system looks like a great deal to set up some basic smart lighting for your home. It’s easy to set up and use, and has options to expand beyond the basic kit for about $10 per additional bulb. There are a ton of options available in the form of advanced hubs and bulbs if you want to go beyond the basics. You’ll also want to check compatibility with existing systems if you’ve already started investing in smart home technologies. 

Price: $39.99
Where to buy: All Sengled products are available for purchase on Amazon.
Source: The sample of this product was provided by Sengled.

The post Sengled Element Classic Smart Bulb review appeared first on The Gadgeteer.

Filed in categories: Reviews

Tagged: ,

Sengled Element Classic Smart Bulb review originally appeared on The Gadgeteer on May 27, 2018 at 9:00 am.

Note: If you are subscribed to this feed through FeedBurner, please switch to our native feed URL http://the-gadgeteer.com/feed/ in order to ensure continuous delivery.

PACElid (original version) review

Two ideas among many that I am big fan of are hydration and multi-functionality.  Where is this going, you ask?  Allow PACElid to elegantly link these two ideas together.  When I’m out hiking, rucking, traveling or even just running errands around town, I usually have my Nalgene bottle along, and PACElid lets me take a few other small items along for the ride.  How does it do this, you ask?  Let’s check out PACELid in a little more detail.  Gadget on!

What is it?

In military terminology, PACE is an acronym and methodology used to build a communication plan.  PACE stands for Primary, Alternate, Contingency, and Emergency means (i.e. technologies or systems) of communication.  Chris Way, inventor and developer of PACElid, has for the past 20 years “worked and played side by side with some of the most experienced and accomplished athletes, climbers, and military/government operators” and learned the value of trustworthy and reliable gear.   Chris founded Northstar Gear Co. as a way to produce PACElid, which is a screw-on lid for several popular wide-mouth water bottle brands that has its own storage compartment inside, allowing you to take along a few items atop your bottle.  PACElid began as a successful Kickstarter campaign and has since become a successful product in its own right.

Hardware specs

  • Injection-molded high-impact plastic material
  • Watertight screw-down lid
  • 2017 version with universal threads fits wide-mouth Nalgene, Klean Kanteen and Hydroflask bottles. Original version (reviewed here), fits only wide-mouth Nalgene and Klean Kanteen bottles.
  • Available in Black, Red, Green and Blue colors

What’s in the box?

  • PACElid
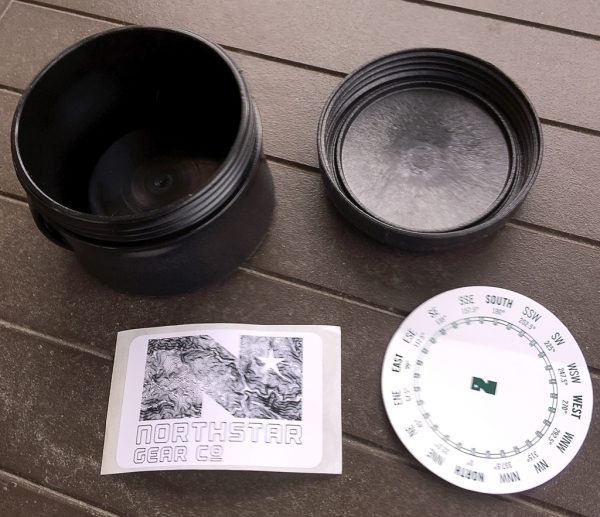
  • Northstar Gear Co. logo adhesive decal
  • Northstar Gear Co. compass adhesive decal

Design and features

Right out of the box, PACElid looked and felt like a very high-quality, durable item, one designed and built for folks who are hard on their gear, go on hardcore adventures, or both.

PACElid has a series of notches around the perimeter of its lid, which makes it easier t0 grip when twisting the lid on or off.  Note that the newer, 2017 version has a series of raised fins around the perimeter, along with the notches.

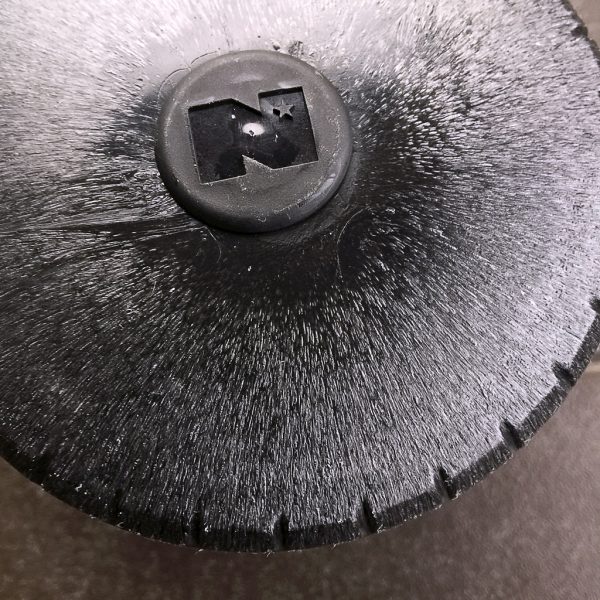
This original version of PACElid has a cool visual appearance molded into it, as seen in the image above (more on this below).  In addition, the Northstar Gear Co. logo is embossed into the top of a small, raised “button” on the PACElid’s lid.

Note that the version being reviewed here is the original PACElid, one that is compatible with wide-mouth Nalgene bottles and Klean Kanteen bottles.  (The latest version, the 2017 version with universal threads fits those plus Hydroflask bottles.)

One of the subtle yet functional features of PACElid is the small loop molded into its side.   This loop can be used to attach PACElid to its bottle (so you don’t lose it), or it can be used to attach items like a carabiner or other fastener.

Above, a closeup of the PACElid’s surface.  While the surface appears as if it would feel “grainy,” it actually doesn’t.  This texture is just below the smooth surface and is visible, but not tactile.


So what does PACElid look like on the inside with its lid removed?  See image above.  It’s basically what you’d expect: a cylindrical space with a raised bottom to allow clearance for the bottle threads.

Above is the Nalgene bottle that I used in my evaluation of PACElid.  It is a standard, wide-mouth 32-oz Nalgene bottle (and Boiler Up! to you Purdue fans out there).

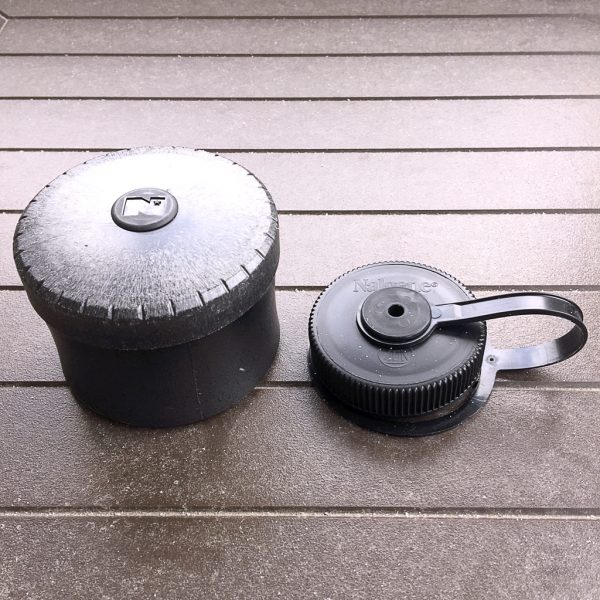
Above is a side-by-side photo of what PACElid (on left) is replacing: the Nalgene bottle’s lid (on right).

And finally, the above image shows the PACElid atop the now lid-swapped Nalgene bottle.  PACElid is obviously a much larger lid than the stock Nalgene lid, but it does have a screw-down compartment inside.

I wanted to try loading PACElid with a few small EDC items to see how much it could hold (see above).  I included my Leatherman Squirt PS4 mini multi-tool, a set of earbuds for my iPhone, a small set of EDC tools, most of which I reviewed here a while back, and a small One-decade Rosary.

As you can readily see in the photos above and below, all of these items fit inside the PACElid’s compartment with a bit of room to spare.

I took the now-filled PACElid on a short wintertime ruck (hiking with a weighted backpack) and it performed flawlessly.  I even dropped PACElid on the hard ground a couple of time and it was not damaged at all, save maybe a few scuffs.  It was really convenient to have the EDC items at hand and readily accessible.

In the above photo, I had taken PACElid on a family vacation where we did a lot of hiking.  I dropped a few handfuls of jelly beans into the PACElid’s compartment, filled my Nalgene bottle, threw it all in my backpack, and took off.  The jellybeans were a nice little “pick-me-up” along the trail.

What I like

  • If you already carry a Nalgene, Klean Kanteen or Hydroflask, PACElid gives you a quick and easy way to store a few items along with it
  • Very reasonable cost

What needs to be improved

  • Even with PACElid empty, the combination of water bottle and PACElid can be a bit top-heavy if the water bottle itself is not full of liquid

Final thoughts

PACElid is a really clever idea that was realized into a really durable, well-built product.  It gives your water bottle a little bit of extra versatility by providing some extra storage space, and couldn’t we all use that?  It’s a great product and I’m looking forward to seeing what else Chris Way and Northstar Gear Co. come up with in the future.

Price: $19.99 (2017 version with universal threads), $24.99 (original version, reviewed here)
Where to BuyPACElid.com (2017 version with universal threads), Amazon (original version, reviewed here)
Source: Item was purchased with the reviewer’s own funds.


The post PACElid (original version) review appeared first on The Gadgeteer.

Filed in categories: Reviews

Tagged:

PACElid (original version) review originally appeared on The Gadgeteer on May 26, 2018 at 10:00 am.

Note: If you are subscribed to this feed through FeedBurner, please switch to our native feed URL http://the-gadgeteer.com/feed/ in order to ensure continuous delivery.
Fuse Side Winder Apple MacBook Charging Adaptor Holder review

I love simple solutions for annoying problems. Take the Fuse Side Winder, for example. It’s like a hose reel, but it’s made for your MacBook charger. Let’s go wrangle those pesky cables!

What is it?

It’s a reel designed to manage the cables for your MacBook MagSafe charger. A model is also available for your USB-C charger.

What’s in the box?

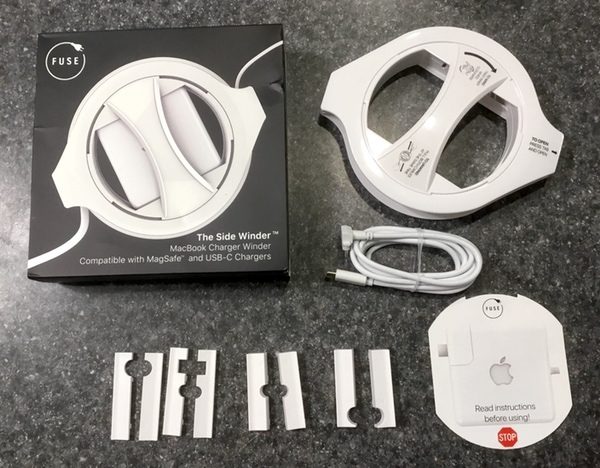
The Side Winder comes with the reel and adaptor tabs for a 45W MacBook Air charger, 60W/61W MacBook Pro charger, or 85W/87W MacBook Pro charger. It also comes with a USB-C cable (this requires the power adaptor & extension cable, which are not included in the package).

Design and features

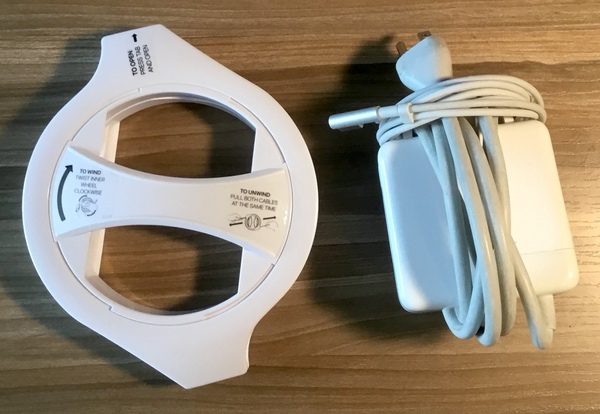
The Fuse sidewinder is a pretty straightforward affair. Your power brick sits in the “hub” of the gadget, which rotates in the housing that reels in your cables. Construction is tight and solid, nicely protecting your cable from drops and bangs as you use it. It’s a nice build.

I appreciate the clear, easy to use instructions. Big type. Simple step-by-step instructions. No going to the Internet. It’s a nice touch:

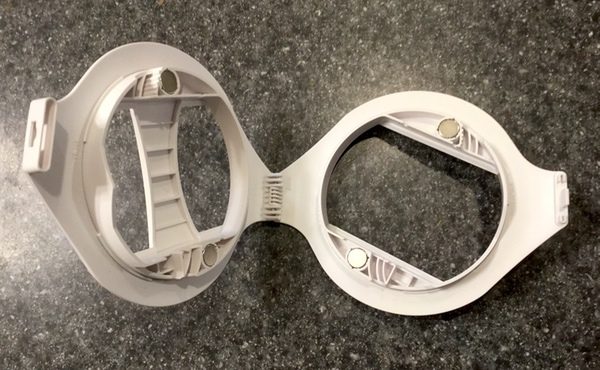
You start by opening the case, and picking the adaptor slots based on your charger type. I’m using an older MacBook air adaptor, so it’s pre-set with those slots out of the box:

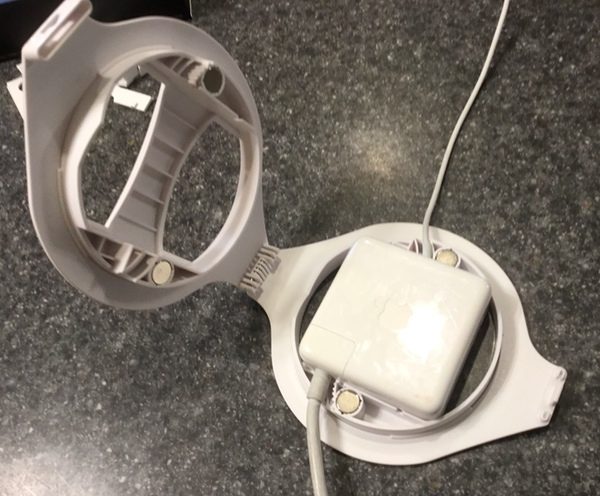
You’ll insert the brick in the hub, and feed the cables through the appropriate slots. The slots are machined perfectly so that there’s no waggle that could cause fraying in use:

The chamber snaps closed the help of a pair of magnets and a locking tab, and you’re good to go:

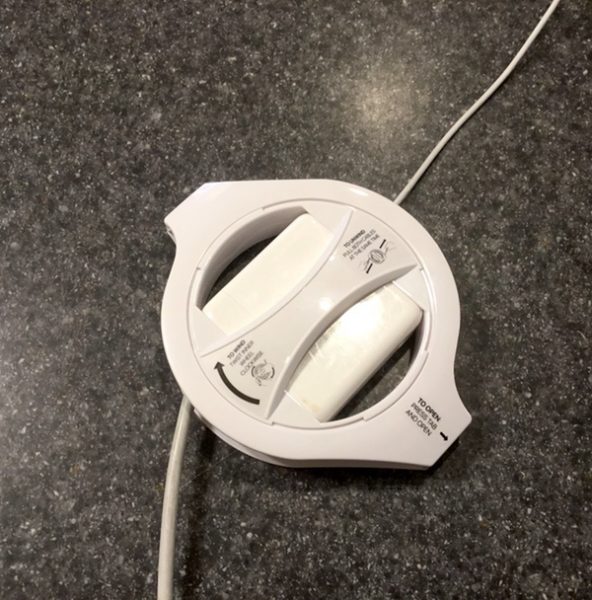
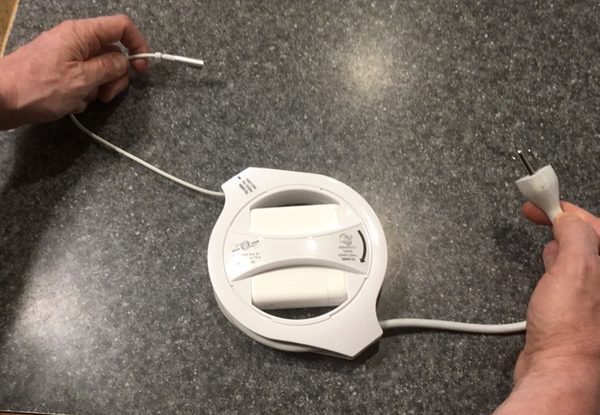
Winding is simple. You hold the outside of the case with one hand, and crank the handle in the middle to wind the cables. There’s a little housing on each side that catches the plug ends so that you don’t overwind:

When you’re ready to pull the cables out, you just grab each and pull:

It’s a very simple, straightforward design that I like quite a bit. There are no springs, coils, or elaborate mechanisms that could fail with repeated use. Just wind and pull. Lovely.

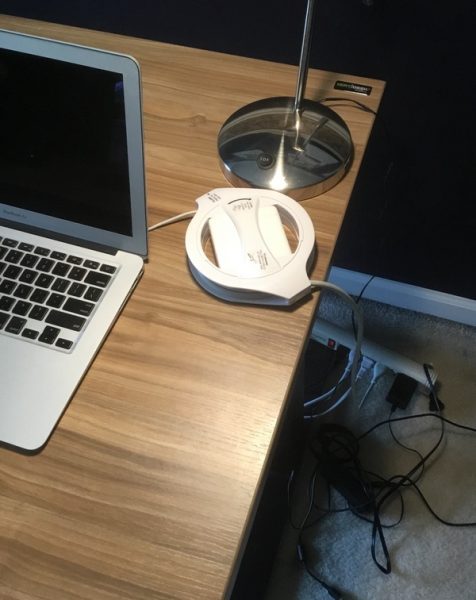
If there’s one thing to keep in mind about the design, it’s that it does add some size to your charger. Here’s a size-by-side pic of my charger coiled up next two the Fuse Side Winder for reference. You’ll notice that the Fuse Side Winder is a bit bigger, but not as thick as wrapping the cables around the charger in the traditional manner:

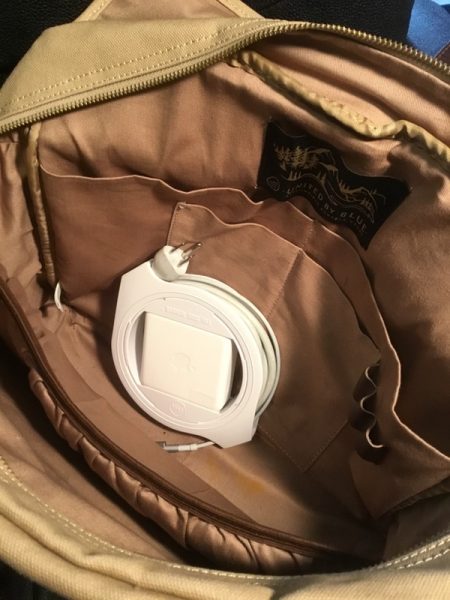
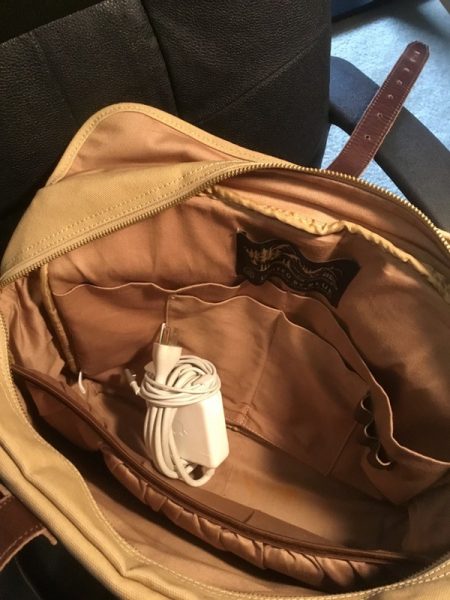
This may or may not be an issue for you, depending on how you carry your gear. I dropped some comparison pics here in one of my briefcases for reference.

See the difference? I actually think that it’s easier to manage with the Side Winder, as it’s slides easily in and out of my bag. This is especially handy if you have a narrower bag (like a briefcase) since there is less chunky depth from wrapping up those cables. Some bags have those smaller charger “garage” pockets, however which may not fit the extra length and width. You’ll want to check your bag type and packing style if this might be an issue for you.

One last note on compatibility: the Fuse Side Winder is sold in two models. There’s one for Magsafe chargers, and another for newer USB-C chargers. Most variations are covered. Check the Fuse web site for a guide to what fits (and which one you need) before you buy!

What I like

  • Well designed with solid construction
  • Easy to install
  • Easy to operate

What needs to be improved

  • Adds some extra bulk to your charger

Final thoughts

A simple solution for a common problem, the Fuse Side Winder is a winner in my book. I’ve been using it for a month, and it does a great job removing the hassle of wrestling with another set of cables. It’s a well-designed piece of gear. Just check the specs to make sure it’s compatible with your charger.

Price: $29.99
Where to buy: Get it at the Fuse web site or Amazon.
Source: The sample of this product was provided by Fuse.

The post Fuse Side Winder Apple MacBook Charging Adaptor Holder review appeared first on The Gadgeteer.

Filed in categories: Reviews

Tagged:

Fuse Side Winder Apple MacBook Charging Adaptor Holder review originally appeared on The Gadgeteer on May 25, 2018 at 1:00 pm.

Note: If you are subscribed to this feed through FeedBurner, please switch to our native feed URL http://the-gadgeteer.com/feed/ in order to ensure continuous delivery.

Logitech C922 Pro Stream Webcam review

I used to write video chat software a few years ago, so I’ve seen my share of webcams. When the chance came along to review the Logitech C922 Pro Stream Webcam I jumped at the opportunity to see how good the latest webcam from Logitech really is.

What is it?

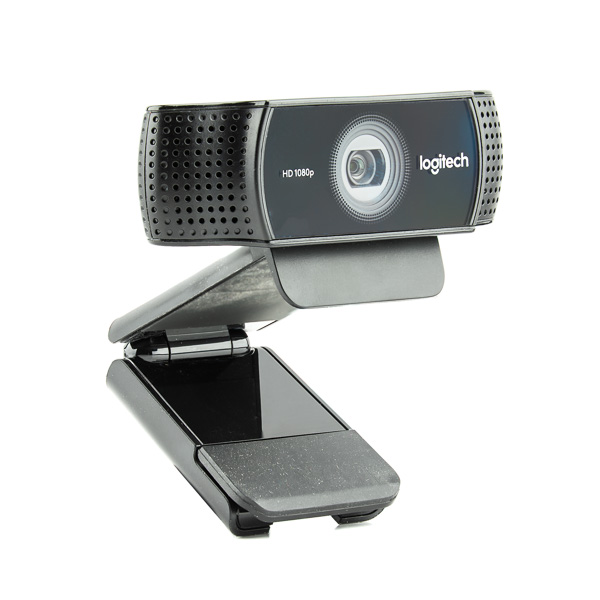
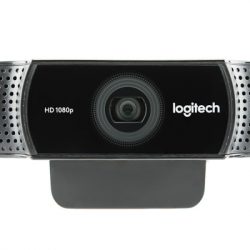
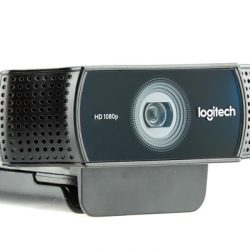
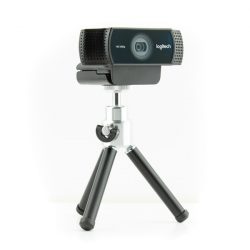
The Logitech C922 Pro Stream Webcam is a full HD webcam with Full HD 1080p at 30fps, 720p at 60fps and 30fps streaming capability. The C922 is optimum for recording, game streaming, or video conferencing – basically all of your webcam needs.


Hardware specs

Dimensions 1.73 in (44 mm) x 3.74 in (95 mm) x 2.80 in (71 mm)
Microphone Type Built-in Dual Stereo
Recording 1080p30fps, 720p60fps, 720p30fps
Lens and Sensor Type Full HD Glass Lens
Diagonal Field of View 78° horizontal
Frame Rate (max) 720p60fps/1080p30fps
USB Protocol 2.0
Image Capture (4:3 SD) Yes
Image Capture (16:9 W) Yes
Video Capture (4:3 SD) Yes
Video Capture (16:3 9) Yes

What’s in the box?

  • C922 Pro Stream Webcam
  • Tripod
  • XSplit 3 month premium license
  • Setup Guide

Design and features

Having owned literally dozens of webcams over the years, I’ve seen webcams ranging from the absolute worst to some of the best. Up until now, I was using a webcam that I paid nearly $200 for about 10 years ago. I thought it was a great webcam (it was when I bought it). As soon as I plugged in the C922 and fired up a video window, I literally said “Oh wow!” out loud. The video was that good!

I do daily video conferences using Google Hangouts with my main client. They immediately noticed that my video was much sharper and had a better frame rate than before. One thing that I noticed right away was the excellent autofocus of the C922, gone are the days of trying to manually focus my webcam, which is very difficult because I sit more than an arm’s length away from it.

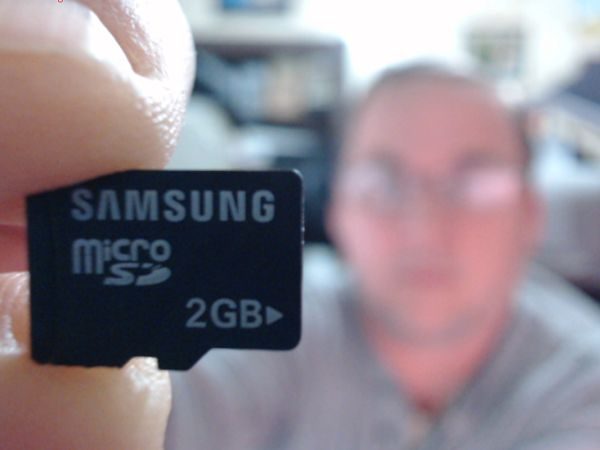
If you’re needing to take close-up video or pictures, this webcam can focus at about 1.5 inches from the lens! The auto focus worked very well for the most part, but I couldn’t get it to focus automatically on the tiny micro-SD card. It did however work very well with larger objects, which is what you would probably be using it for anyway.

Although the camera will work just by plugging it in with modern versions of Windows, you’ll want to download the settings program from the Logitech support pages if you want to adjust the settings which include brightness, contrast, autofocus, color intensity, and white balance. Autofocus and white balance also have an automatic setting (the default).

On Windows, the webcam uses the standard Windows driver, so it will pretty much function with anything that can access a camera through those standard drivers. I used it with Google Hangouts in Chrome and Firefox, OBS, and XSplit broadcaster. The C922 has H.264 capability which is an advanced compression technology that demands less network bandwidth.

The C922 works very well in low light, and the video automatically adjusts to accommodate flickering room lights or multiple computer screens. The screenshot below is lit with just a single browser window.

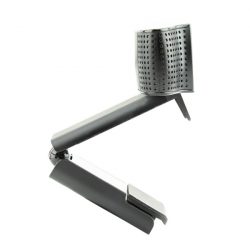
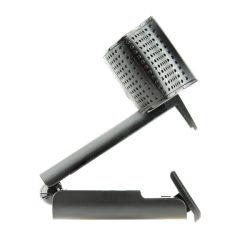
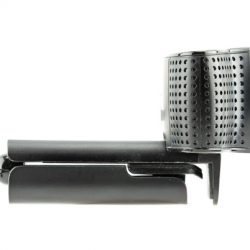
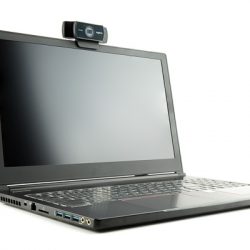
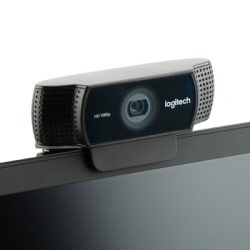
The integrated stand/base of the webcam is quite configurable. It has a standard 1/4-20 thread socket in the bottom for attaching it to a tripod and adjusts to fit monitors up to 2 inches deep. The tripod legs also pull out to double their length and making the footprint a 7″ triangle – plenty stable enough for any use. The base also is designed to just sit on a flat surface and has a rubberized surface to prevent sliding. It can easily fit on top of any modern monitor or laptop screen.


The settings program that can be installed is nothing to brag about. Ordinary users will find it easy to use and adequate. The settings used to be much more complex, but it feels like Logitech has designed it for basic users now. The first tab (Home) has settings for Standard and Widescreen, and anti-flicker control for 60hz and 50hz. The second tab (Advanced) has settings for brightness, contrast, autofocus, color intensity, and white balance.


The ChromaCam software is supposed to allow the replacement of your background, but on Windows 7 in Google Chrome it constantly crashed before I could evaluate it. When it crashed in Firefox it crashed the entire browser, and then repeated that each time the browser started because the page kept reloading automatically. Although it’s probably something particular to my computer, I’ve never seen a software based background replacement solution work very reliably.

The audio captured by the webcam was satisfactory. It wasn’t pro-grade audio, but no one expects that for a camera that costs less than what most pro-audio people spend on just their microphone.

What I like

  • Excellent video picture
  • Can record at 1080p30fps, 720p60fps, 720p30fps
  • Excellent  autofocus
  • LED’s indicating that it’s on
  • Excellent low light performance
  • H.264 streaming

What needs to be improved

  • Settings are limited, advanced users want more settings
  • ChromaCam software was not stable, crashed every time

Final thoughts

If you really want a webcam with a great picture, this is the webcam to get. This is currently the best Logitech HD Webcam, with only the 4K Pro Webcam model ($199) being better. I really wish I had bought one of these a long time ago.

Price: $79.99
Where to buy: Logitech and Amazon
Source: The sample of this product was provided by Logitech.

The post Logitech C922 Pro Stream Webcam review appeared first on The Gadgeteer.

Filed in categories: Reviews

Tagged: ,

Logitech C922 Pro Stream Webcam review originally appeared on The Gadgeteer on May 25, 2018 at 10:00 am.

Note: If you are subscribed to this feed through FeedBurner, please switch to our native feed URL http://the-gadgeteer.com/feed/ in order to ensure continuous delivery.

Belkin Active Pro Backpack review

Commuters. City-walkers. Road warriors. Office samurai. Whatever you want to call them, there’s a good chance if you find yourself working in an office, you have a bunch of stuff to carry with you on a daily basis. There are thousands of options for containing those items, but does your bag hit the perfect trifecta of comfort, content and looks, all at a great value? Belkin’s Active Pro Backpack aims to check off that whole list.

What is it?

The Active Pro Backpack is an unassuming, padded backpack built for protection, organization and on-the-go convenience. It’s well-suited for commuters carrying laptops, tablets and other mobile accessories in a variety of travel conditions.

Hardware specs

  • Dedicated protection for laptop (up to 15”) and tablet
  • Adjustable mesh padded shoulder straps
  • Padded back panel
  • Water-resistant coating on base
  • Reflective strips for visibility in low light
  • Top loading, upright design stands without support
  • Internal organization for ancillary items
  • Vertical pockets allow fast access on-the-go
  • Hidden high security pocket
  • Loop for a bike light
  • Luggage strap fastens bag to trolley or case
  • Knapsack opening for visibility and easy access
  • width x height x depth: 11.8” x 17.3” x 6.7” depth / 30cm x 44cm x 17cm
  • weight: 1.7lb / 776g

What’s in the box?

  • 1x Active Pro Backpack

Design and Features

Whenever I asses the usefulness of a backpack or other bag, I usually split my thoughts into three categories: Looks, Organization (which includes carry capacity) and Comfort. Let’s dive in!

Looks

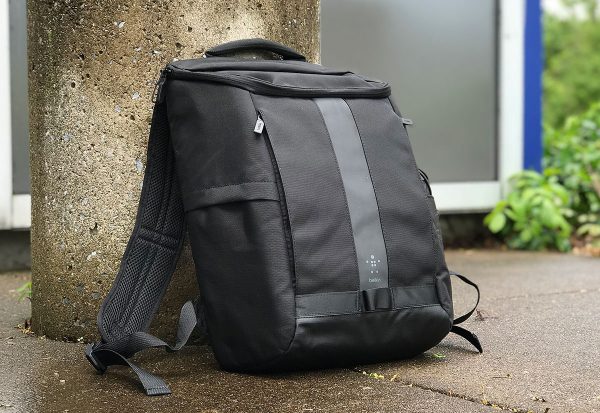
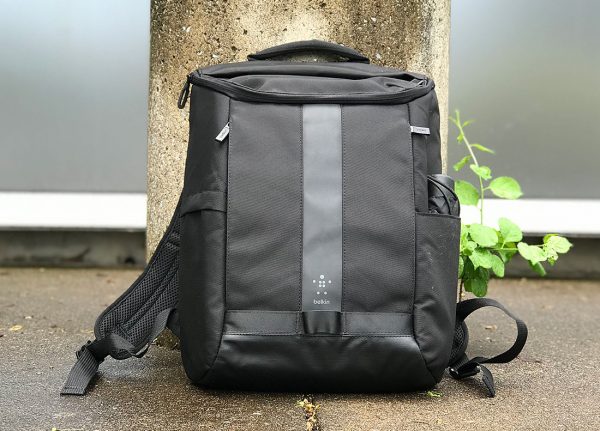
The Active Pro Backpack is relatively unassuming, in a good way. It doesn’t look expensive, but it doesn’t look cheap, either. It looks like the kind of bag you’d see on the back of a regular commuter or city walker that sort of blends right into the rest of their outfit, and to me, that’s exactly what it was designed for. The logo on the outside of the bag is relatively small.
There’s a rubberized coating on the bottom just in case you set your pack into something unseemly.

The bottom of the bag is coated in a rubberized, water-resistant texture. It seems like the bag could handle being set down in a puddle for a bit while protecting the contents, but I wouldn’t call it super-rugged, and certainly not something you’d want to leave out in the rain.

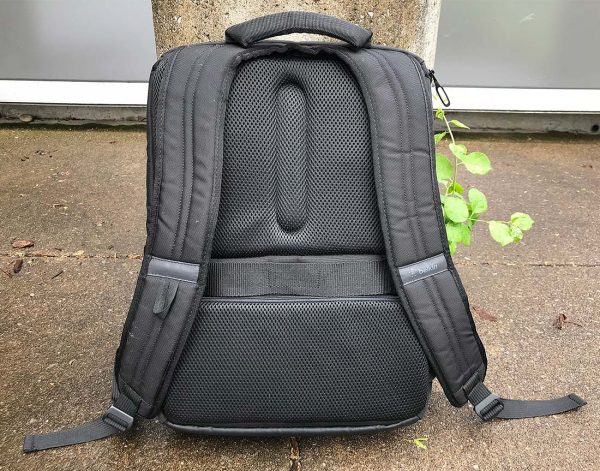
There are a couple of reflective strips on the back and on the shoulder straps to be more visible in a dimly-lit crosswalk.

Overall, it’s not flashy and doesn’t advertise “hey look at me, I got some ‘spensive stuff inside.” It’s forgettable, which is perfect.

Being a black backpack with a rough texture, it did pick up quite a bit of lint and cat hair from the couch-side area I usually store my bag. The material felt a bit more clingy than you’d expect.

Contents / Organization

I get a little thrill whenever I explore a new backpack and find a multitude of pockets and zippers and compartments. Belkin’s Active Pro Backpack has plenty to spare.

Behold! Cavernous space.

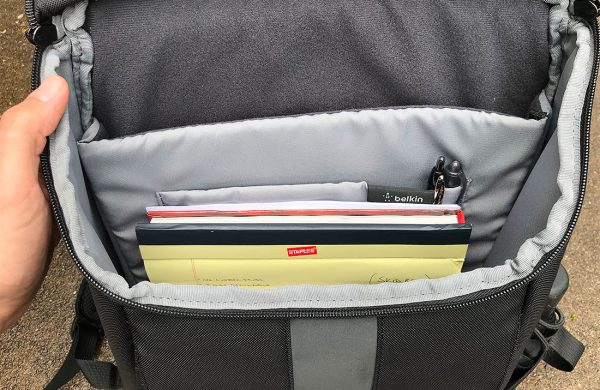
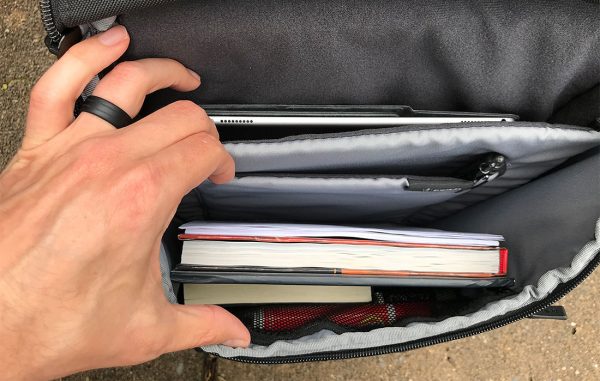
First off, I love the top-loading main compartment. The entire top of the backpack unzips to reveal a wide entry point to the main compartment, which is itself divided into 3 vertical compartments — one padded area for a laptop or tablet, one smaller area for an e-reader or other small books, and a wide main area, flanked by a zippered, netted pocket.

Plenty of dividers and the little mesh, zippered pocket toward the front.

It’s worth mentioning that the bag stands up on a flat surface and doesn’t slump over or fall to one side if the contents are properly balanced. Nothing worse than having to contend with a tipsy backpack while trying to get something out of it.

Probably best not to put anything heavy in this top pocket.

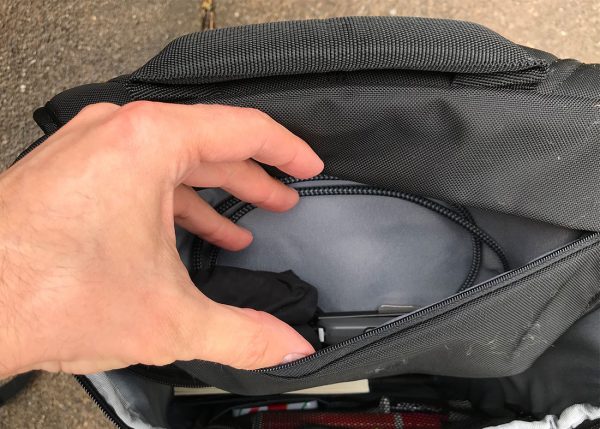
The top flap of the backpack has a zippered pocket. I do appreciate more organization, but this pocket could become somewhat annoying depending on how much stuff you put into it. It basically has to flip the contents of that pocket 180º in order to get into the main compartment. It does easily flip over to the back of the backpack, but all I can think about is all the items in that pocket tumbling over themselves every single time.

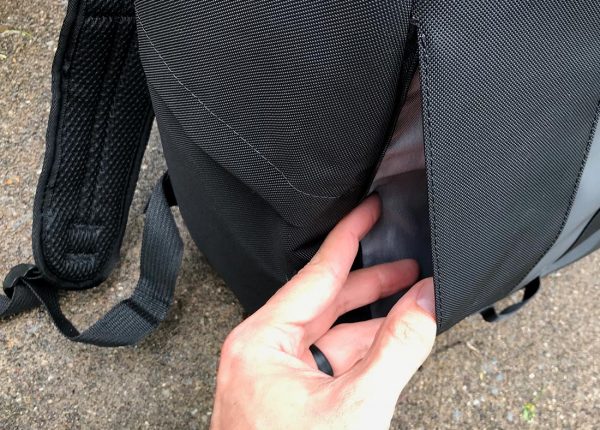
The vertical zippered pockets are actually two separate compartments and are meant to be accessed quickly by swinging the backpack around to the front of your body.

The vertical side pockets are actually two separate areas.

Additionally, there are two narrow side pockets. One is simply an open pocket for storing an umbrella or thin water bottle, and the other has a more secure velcro flap.

Wait… what’s that on the back, is it…?

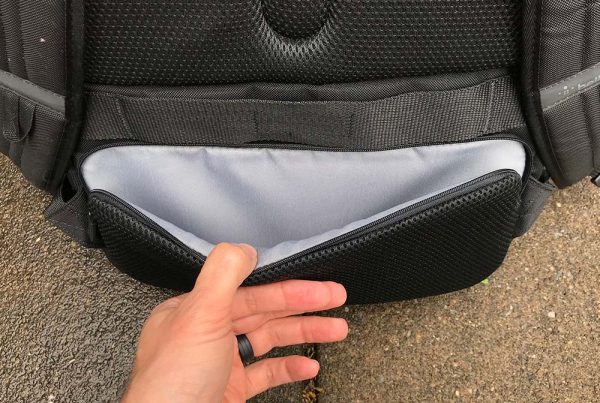
Finally, there is a super-secret, zippered and padded security compartment on the backpack right where it would meet your lower back while wearing it. And wouldn’t you know it, it’s the perfect fit for my Nintendo Switch. I don’t always go looking for a Switch-sized compartment, but I do often take it with me, so when there’s any sort of padded area that can accommodate it, bonus points.

ANOTHER pocket?! This one good for securing something tightly against your back to thwart thieves.

Just for some real-world application, I’ll include what I was carrying in my bag when I took these photos:

  • an umbrella
  • iPad Pro 12.9” size with Smart Keyboard
  • Legal pad
  • 5th Edition D&D Players Manual
  • A multitude of pens and cables
  • A book of writing prompts
  • Small stack of papers

Carry Comfort

All of these features would be practically useless if the bag itself was uncomfortable to wear in a typical commute. Fortunately, the Active Pro Backpack lives up to its namesake and is very comfortable to wear for extended periods of time, thanks to its heavy padding on the shoulder straps and back.

Looks right at home on the back of a regular fella.

I wore the backpack on several hikes around the business park where I work, some of those walks on warm days. My back did get warm, as you’d expect, but not stifling… it still felt like it had breathability against my back.

Your mileage may vary from exactly how much weight you add to the pack, but at least the initial weight of the bag is light.

If you’re a cyclist or are rolling some luggage behind you, there are sturdy luggage straps on the backpack as well.

The straps are stitched on very well and the bag itself seems plenty durable.

Final thoughts

The Active Pro Backpack checks all my boxes for looks, comfort, and organization while also maintaining durability and a fair price. I can wholeheartedly recommend it to anyone in need of a commuter bag.

Price: $49.99
Where to buy: Belkin or Amazon.
Source: The sample of this product was provided by Belkin. You can find out more and see their full line of products on their website.

The post Belkin Active Pro Backpack review appeared first on The Gadgeteer.

Filed in categories: Reviews

Tagged:

Belkin Active Pro Backpack review originally appeared on The Gadgeteer on May 24, 2018 at 1:00 pm.

Note: If you are subscribed to this feed through FeedBurner, please switch to our native feed URL http://the-gadgeteer.com/feed/ in order to ensure continuous delivery.