Roli Lightpad Block M review

What is it?

Roli’s Lightpad Block M is a touchpad for musicians that attempts to and mostly succeeds in removing restrictions and enabling musical discovery. With their Lightpad, all you need is a mobile phone or tablet and your fingers. What you do or create beyond that is completely up to you.

Hardware specs

Dimensions: 94 x 94 x 21.8mm
Weight: 260g
Connectivity: USB-C, Bluetooth LE, 8 DNA connectors
Battery: 4 hour battery life / 2 hour charge time
Bluetooth: 15 meter range
System Requirements: iPhone 6, 6 Plus or newer | iPad Air 2 or newer | iOS 9.0 or above |Google Pixel or Pixel 2 | Mac OSX 10.10+ / Windows 7 / Windows 10

What’s in the box?
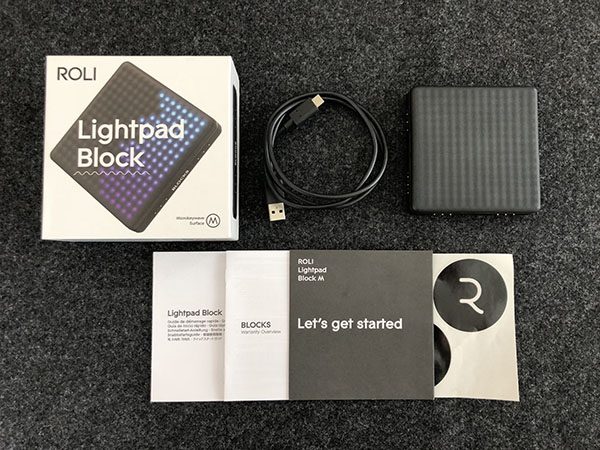
  • Lightpad Block
  • USB-C to USB-A cable
  • Quick start guide
  • Software through registration: Ableton Lite, Equator Player, Strobe2 Player, Tracktion Waveform 8, Blocks Dashboard, Max MSP (3mo. license)

Design and features

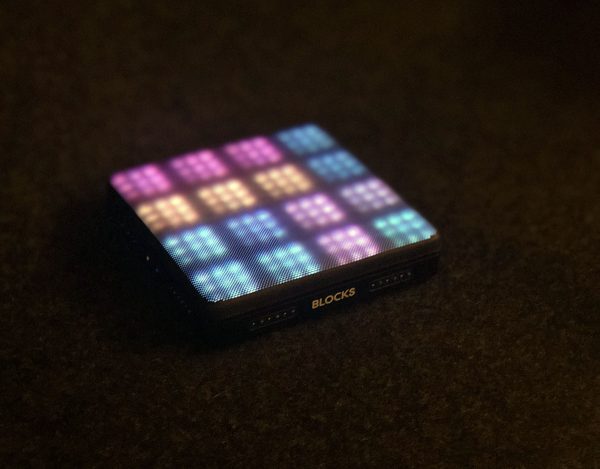
The design of the Roli Lightpad Block M is relatively unassuming at first. It’s square with gently rounded corners and a little under an inch thick. Looking closely at the top surface however you start to uncover what makes the unit (and a lot of Roli’s products) special. It has a dimpled grid formed into the top of a silicon material with a silky texture that your fingers want to slide across.
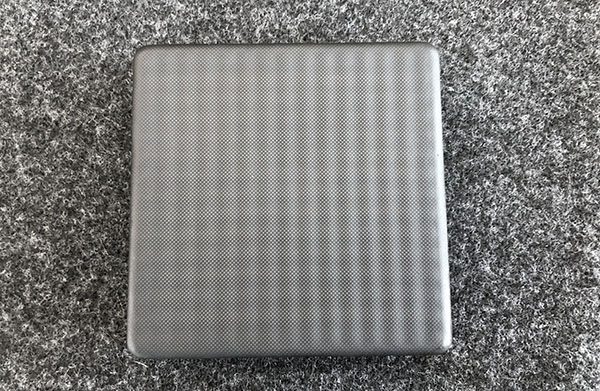
It almost has a memory foam kind of feel to it but satisfyingly firmer. It’s this surface that allows Roli to not only tell where you are touching the block, but also how hard and with what velocity. But, I’m getting ahead of myself. Let’s look at some of the other features.

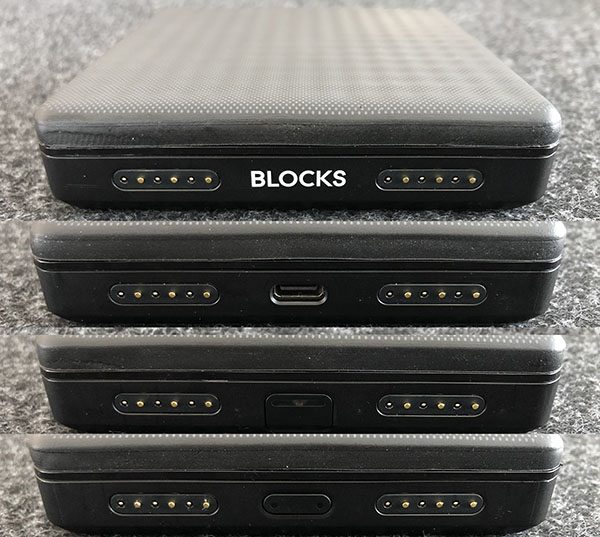
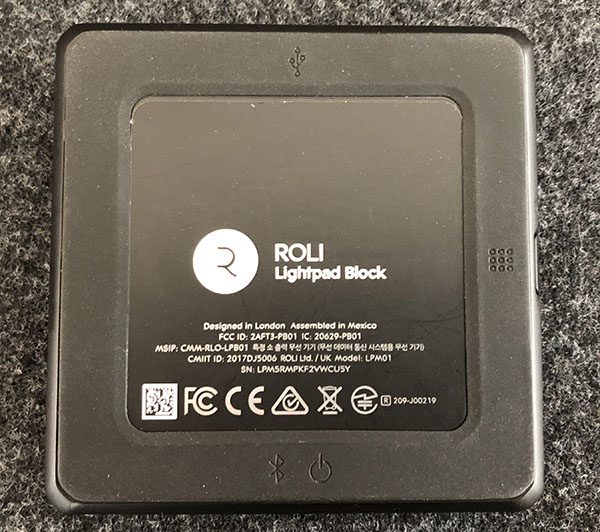
All four sides of the LightPad have a pair of their DNA connectors that allows you to connect other modules from Roli including another Lightpad, their Live or Loop blocks or their Seaboard which applies that same top surface to piano keys. Three of the sides have an additional feature between the DNA connectors. They are a USB-C port for charging or connecting to a computer, a battery status button, and a power/BT pairing button. The bottom of the device has a non-slip foot with identifying logos for each of those features.
As with most connected devices, the Lightpad requires the use of an app, or a computer. The app is the easiest entry point, but also one of the most flexible. The packaging and manuals that came with the Lightpad all refer to their Noise app. Roli has another app called Play which I’d recommend starting with as it has a great introduction to the different movements you can employ while playing. They are Strike, Glide, Slide, Press and Lift. The Noise app is super fun and really gives you a huge sandbox to start creating but it can feel a little overwhelming if you aren’t yet familiar with the surface mechanics of playing. In this review I have not explored much beyond use with an iPhone, so look for an update in the near future with some additional info on use with a computer including some of their other software. All that said, there’s really no wrong way to play this thing. Let’s set it up.

Setup

Getting started is pretty easy.

  • Plug the USB-C end of the cable into the Block and the other end into a USB power adapter or computer to charge the battery fully. This block had almost a full charge on receipt.
  • Download and install the App on your device. I’ll use the Play App for this walkthrough.
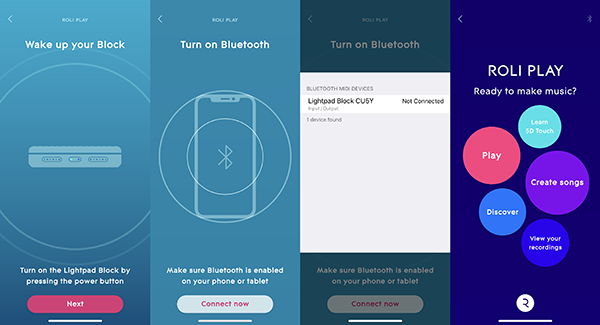
  • Launch the app and it will tell you to press the power button which is the first time you’ll see the lights fly across the surface.
  • On the app, press Connect now and then choose Lightpad Block XXXX from the list. This one said CU5Y instead of XXXX. I’m assuming that changes per block.
  • From there, your Block and phone should connect and you’ll see the Block change to a 3×3 grid of color and the app will give you 5 options where you’ll want to start with Learn 5D Touch.
Performance

As I mentioned before, there’s no right or wrong way to use the Lightpad Block. The app will walk you through learning the gestures and how it’s quite different than striking a key on a piano or even a drum pad. You can strike and hold, and wiggle, and slide or glide as well as use multiple fingers. It gets really fun as you get into using the Noise app as that lets you create loops and melodies and layer tracks. Their Learn section has short videos on how to use all those functions which will help your learning curve significantly. Additionally, there’s the main area for your projects, an area for discovering what other users have created and a store where you can purchase additional bundles and packs of sounds and effects.

The learning curve is actually pretty quick and the hardest part is just getting past that your first couple experiments won’t sound that great. Using the Noise app I was able to quickly lay down a beat and then start layering sounds. I’d get a couple then botch something, but it’s super easy to go back in and remove a layer. The app shows you where you are in the count and helps you align your next layer’s start and stop. You can literally lose an hour to messing around and then find that there’s a whole additional section of sounds or features you didn’t see on first glance.

Tapping and sliding on the surface is really fun. If you’ve ever messed around with a guitar you know that your fingers can hurt a lot until you get used to the pressure of strings and fret positions. Similarly, if you’ve played an action game on your phone for too long, your thumbs or fingers can get pretty sore. It’s possible that can happen here too, but the silicon surface feels wonderful and the interaction with lights showing you where you’re pressing and how you’re moving is really quite something.

Here’s a video of my son using the Lightblock without layering sounds, just having fun with the Happy Drum Kit that’s available for free through the integrated store in the app. As you’ll see the interaction between the Lightblock and the app is pretty important. It shows what you’re doing on the Lightpad but also provides additional controls and settings.

Now here’s a series of videos where he’s exploring layering. You’ll see that it’s easy to get something looping and then experiment on top of that while you find something you like. Then you can record and repeat until you’re happy with the output.

In that second video, he’s layering on top of what he did in the prior vid. There’s also a subtle reminder in this one that you want to turn off alerts and notices when you’re recording as it can totally disrupt the flow. It won’t affect the actual music you’re recording but certainly can knock you off your groove. You can also see that he starts messing with the levels on each layer to help balance and get to the feel he’s looking for.

In this third video, he records another layer, messes with the levels and then changes the layer he just recorded from Darkmass Bass to Guitar Overdrive Lead to get something that stands out more. We both liked that you aren’t stuck with the sound that you recorded. You’re able to go to those individual loops and switch the sound to something new and Roli just makes it work. From that layers screen, you can then turn them on or off one at a time and play the song the way you want to hear it.

What I like

  • The solid build quality and inviting nature of the product
  • Flexibility of what you can do with it
  • Portability. It can go anywhere you want to take it
  • Creative potential. Liberating and malleable in its playability

What needs to be improved

  • Better compatibility with other music programs (like Reason for example)
  • Some areas of the pad seemed to be less consistent than others
  • Interesting and fun, but not precise enough as a midi controller

Final thoughts

As a tool for creation and developing musical ideas it’s a great piece of equipment. It packs a huge punch in terms of it’s size and capability. As a recording tool, the precision can be frustrating as it doesn’t always register touches the way you expect. I do think that Roli has a gateway product here as we both want to see how it works in conjunction with the other blocks that Roli makes. If you’re looking for something that can help with rhythmic and musical discovery, this may be the very thing you’re looking for.

Price: $199
Where to buy: roli.com and Amazon
Source: The sample of this product was provided by Roli.

The post Roli Lightpad Block M review appeared first on The Gadgeteer.

Filed in categories: Reviews

Tagged: ,

Roli Lightpad Block M review originally appeared on The Gadgeteer on June 9, 2018 at 11:30 am.

Note: If you are subscribed to this feed through FeedBurner, please switch to our native feed URL http://the-gadgeteer.com/feed/ in order to ensure continuous delivery.

iMovR ZipLift 42″ Standing Desk review

Get up outta your seat! Standing desks are all the rage for ergonomic workspaces, and convertible standing desks allow you to get healthy without buying a whole new office setup. The iMovR ZipLift Standing Desk we’re looking at is the 42″ wide model, which can handle 2 monitors and a laptop if you’re all tricked out. Let’s raise it up!

What is it?

It’s a desk converter that turns your work surface into a standing desk. It also includes a portable standing mat.

Hardware specs

  • Top Work Surface: 42″ W X 15.7″ D X .5″ H; maximum weight capacity 45 lbs plus 15 lbs counterbalance
  • Keyboard Tray: 26.4″ W X 13″ D X .5″ H; maximum weight capacity 5 lbs.
  • Base: 29.2″ W X 22.2″ D
  • Work Surface Maximum Height: 20 5/8″ 
  • Maximum Monitor Size: 2 x 27″ 
  • Grommet Hole Diameter: 2 inches
  • Keyboard Tilt: +10 degrees, -15 degrees
  • Unit Weight: 45 lbs.
  • Shipping Box Dimensions: 44″ W X 27.5″ D X 8″ H 
  • Shipping Weight: 55 lbs.

What’s in the box?

A fully assembled ZipLift comes in the box, along with the standing mat.

Design and features

The ZipLift converts your existing desk into an adjustable standing desk. Place it on your desk, add your computing gear, and you can adjust the height for sitting or standing use. As we’ll see in a moment, the ZipLift incorporates a number of ergonomic & design details that separate it from the pack.

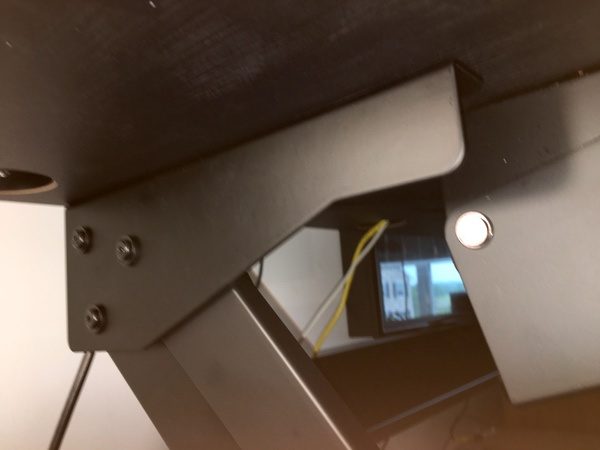
Size and stability tend to be the biggest problems with standing desks, and the ZipLift does a great job of addressing both of these issues. A wide, deep work surface allows plenty of room for dual 27” monitors and a laptop plus accessories. The beefy z-frame lift mechanism and heavy-duty construction can handle 45 pounds of gear, and is extremely stable at any height. It’s a solid piece of gear at a 45 pound net weight; fortunately, it comes pre-assembled and ready to go out of the box. Check out the burly construction under the hood:

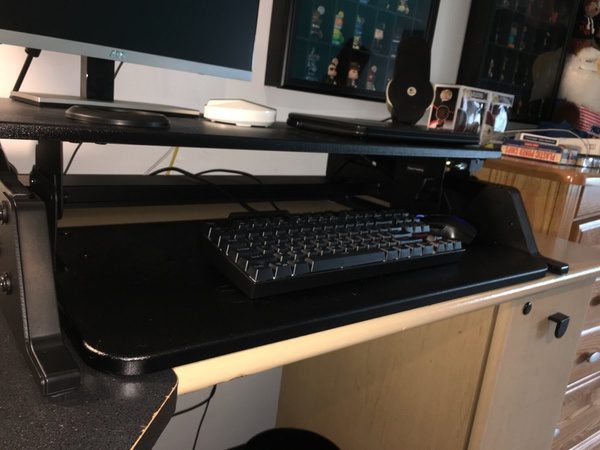
I really like the design of the keyboard tray. The wide, deep tray space will accommodate extra-large keyboards plus a mouse, a feature that I don’t see in all the stands in this category.

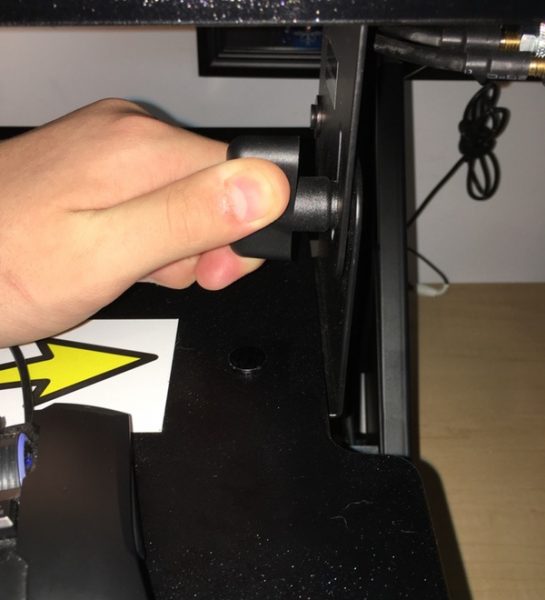
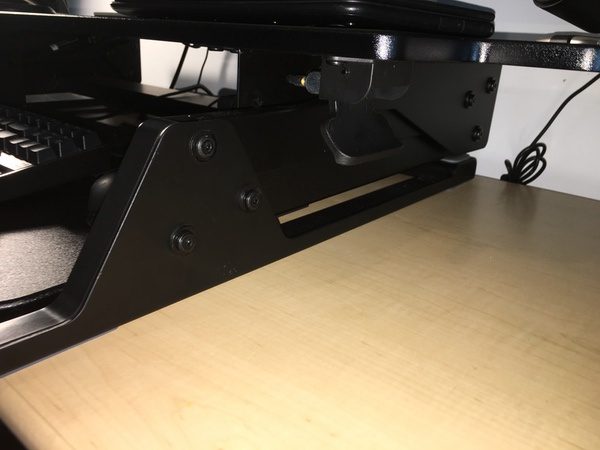
Not only is it big, but the tray can be tilted up to 15 degrees up or down by loosening the adjustment handle. If you spend a lot of time on a standing desk, you quickly learn to appreciate this feature for comfortable ergonomics. Little adjustments make a big difference.

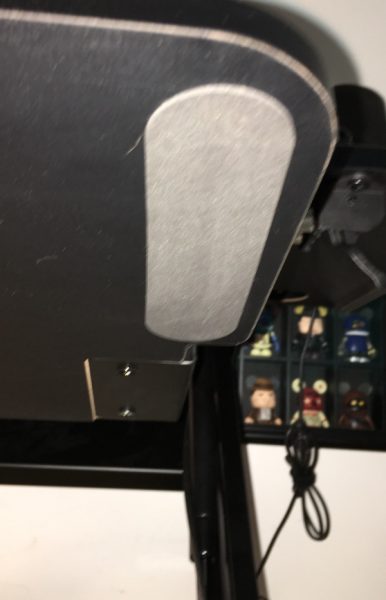
They keyboard tray also includes soft pads on the underside, so it doesn’t scratch up your work surface. A nice touch!

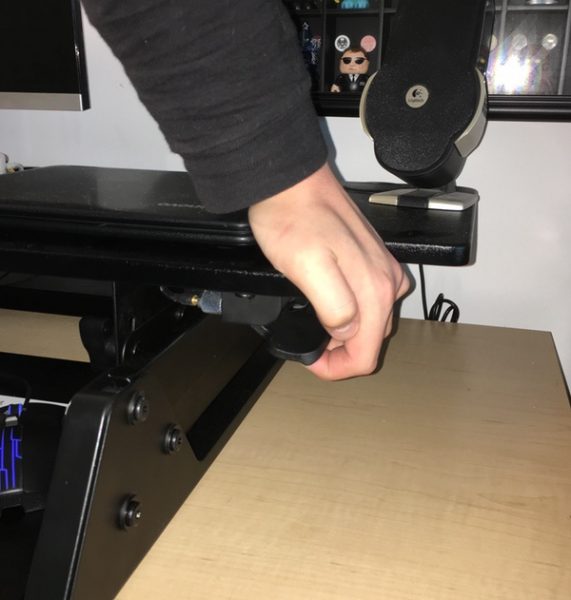
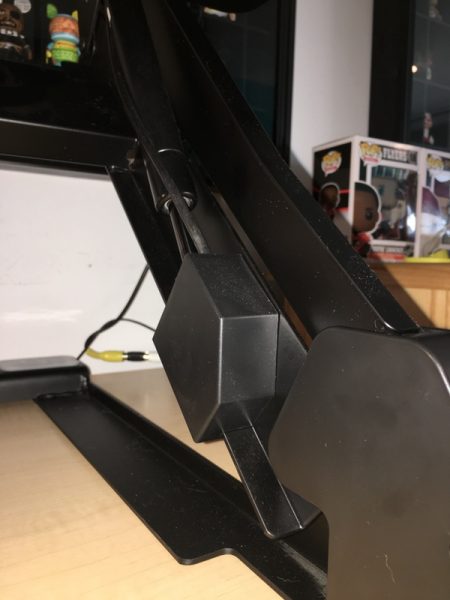
The lift mechanism is operated by squeezing the hand paddle to release the brake on the right-hand side of the desk. With a maximum height of 20 inches the desk will accommodate users up to 6’7” tall, and has an infinite level of height adjustments in between. A 15 pound counterbalance assists with raising the desk, which helps if your desk is fully loaded. The desk lift also brakes during lowering operations so that you don’t get any sudden jolts when you drop it to lower heights. Tracking is silky smooth (and quiet!) across the full range of motion, with no detectable wobble even at maximum height.

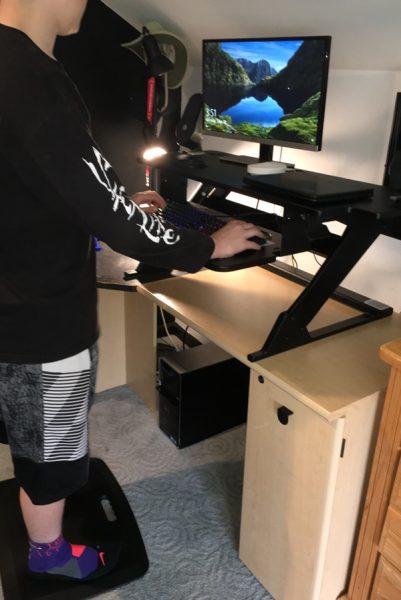
Here’s a comparison shot of the desk in the sitting and standing position, modeled by my 15 year old son. He’s 6′ tall, and I claim no responsibility for his fashion choices. He is a teenager, after all:

It’s important to note that the lift mechanism includes no additional power assist for raising operation. A 42” work space accommodates a lot of gear. While the 15 pound counterbalance helps, it still takes some effort to raise the desk if it’s fully loaded. You don’t need hulk-level strength to make it go, but you’ll want to consider your intended loadout if you have issues with this sort of thing.

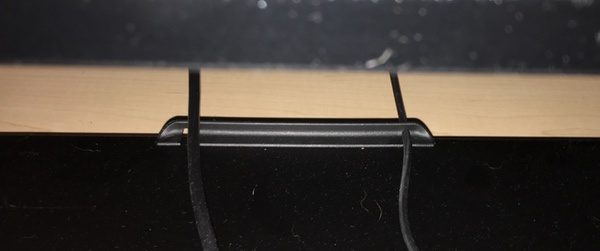
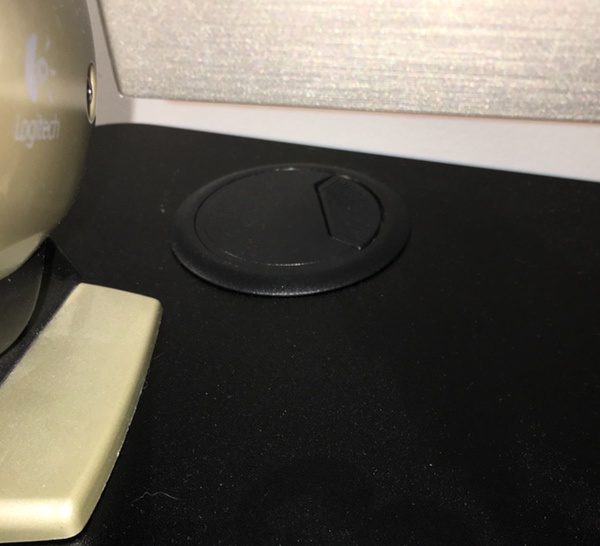
You’ll also find some nice finishing touches in the ZipLift. The keyboard tray includes a couple of slots to wrangle your keyboard and mouse cables if you’re not wireless. There are also three ports in the top surface to organize your power chords and peripheral cables. All the edges are beveled and finished to eliminate sharp edges. The unit is also surprisingly lean and streamlined for such a beefy build. It all adds up to a nice package that, in addition to providing great ergonomics, makes your workspace a clean and organized place to spend your time.

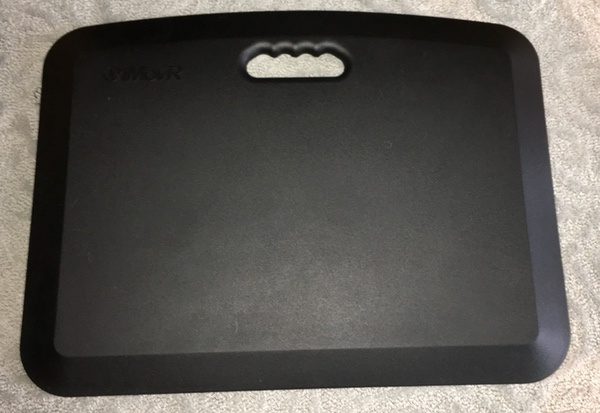
As an additional bonus, ZipLift includes a standing mat with your purchase. The mat measures 18” by 24” and 3/4” thick, and includes a grab handle for portability. It’s a nice addition that adds comfort when standing for long periods of time, and saves you a few bucks in the process.

Speaking of pricing… the ZipLift is not cheap. The 35″ wide model starts at $350, while the 42″ wide model I’m testing comes in at $429 before adding any options (like monitor arms). There are a lot of options at this level including both motorized lift desk converters and full-size adjustable height desks. I think that the build quality and design is worth your consideration, but you’ll want to do a bit of comparison shopping before making the investment.

What I like

  • Huge work surface to handle two 27” monitors, a laptop, and accessories
  • Wide, deep, adjustable keyboard tray
  • Rock-solid construction with little or no wobble at any height
  • Multiple ports and slots to organize your cables
  • Smooth operation with a broad range of height adjustment
  • The inclusion of the standing mat is a great bonus item

What needs to be improved

  • Does require a little muscle to raise the desk if loaded to max capacity
  • Pricey for the category

Final thoughts

The iMovR ZipLift is a great all-around standing desk converter. Build quality is outstanding with excellent ergonomics, while the finishing details in the build (including the addition of the standing mat) make it a worthwhile lifetime investment. It is on the high end of the price scale, however, so you’ll want to make sure that you carefully consider your needs before purchasing.

Price: $369.00
Where to buy: You can purchase the ZipLift at iMovr’s web site. Also available on Amazon.
Source: The sample of this product was provided by iMovR.

The post iMovR ZipLift 42″ Standing Desk review appeared first on The Gadgeteer.

Filed in categories: Reviews

Tagged: ,

iMovR ZipLift 42″ Standing Desk review originally appeared on The Gadgeteer on June 9, 2018 at 9:30 am.

Note: If you are subscribed to this feed through FeedBurner, please switch to our native feed URL http://the-gadgeteer.com/feed/ in order to ensure continuous delivery.
Molekule air purifier review

Each year, millions of people suffer from allergies, and for some, the reaction is so severe that it has a major impact on their quality of life and daily activities. I suffer from allergies every year, and the severity varies from year to year. This year, my allergies have been quite “nasty”, despite the use of 2 large and relatively expensive HEPA filters/air purifiers. When I got the opportunity to test and review the Molekule air purifier, I was very eager to try a new solution. So, here we go!!

What is it?

The Molekule Air Purifier is a new technology air purification system and experience, that has a clean and sophisticated look to match any décor.

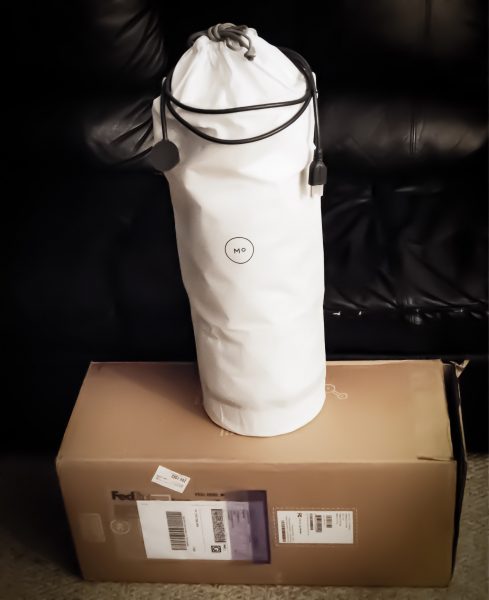
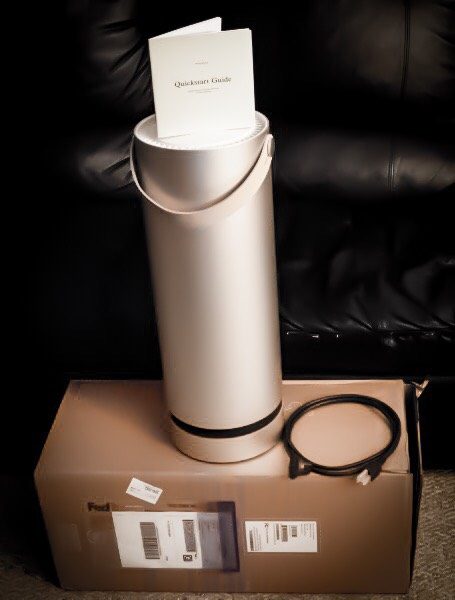
What’s in the box


1 x Molekule Air Purifier
1 x Power cable
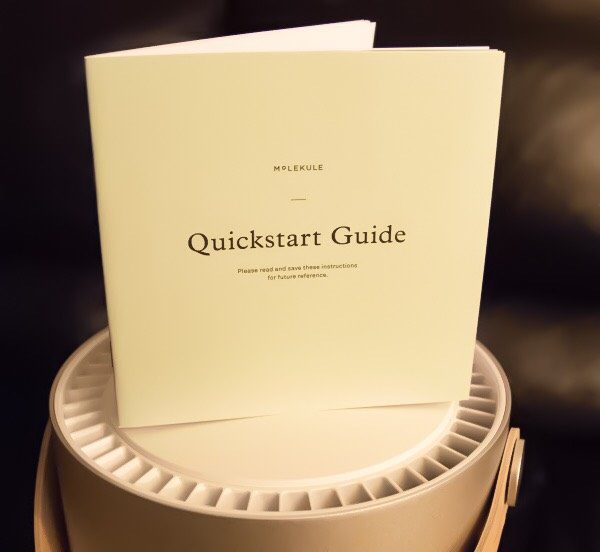
1 x Instruction manual

Specifications

DIMENSIONS: 23 inches in Height x 8.25 inches in Diameter
FILTER COST: Filters are provided on a subscription basis for $129 per year.
POWER CONSUMPTION: 20-85 W (110/220V)
NOISE LEVEL: Normal mode: – 42dBa (Hushed Conversation)
Silent mode: 30dBa (Whispered Conversation)
Turbo Boost: 55dBa (Normal Conversation)
WEIGHT: 18 lbs. (8 kg)

WARRANTY: 1 Year Limited Warranty

Design and features

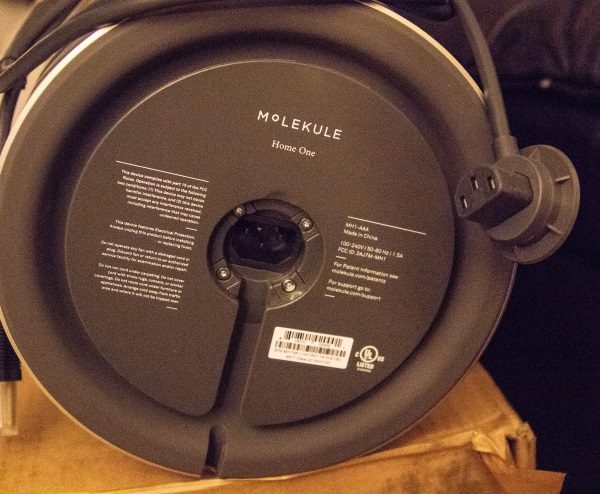
The Molekule comes with a detachable, grounded power cord that plugs in underneath the device, and by design does not allow it to be accidentally plugged out. You will also immediately notice the nice leather handle that is a great touch and makes it easy to move around.

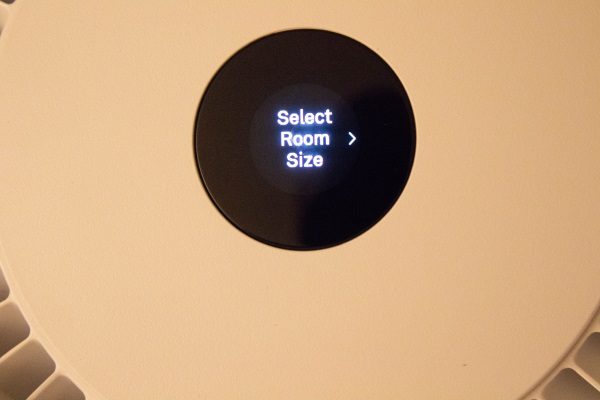
When you first power on the MoleKule, it goes through an initial startup process. Once that process is completed, you have the choice to select the room size.

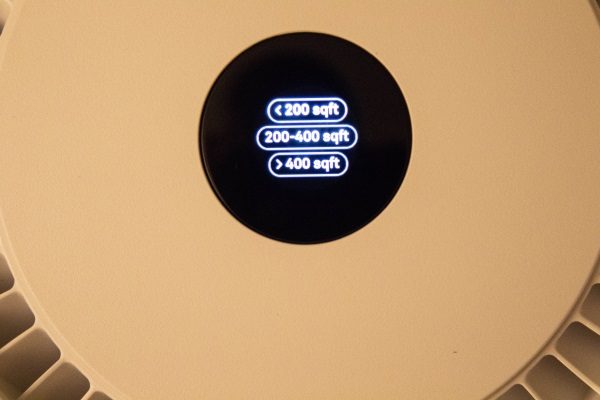
When you touch the screen to select the room size, it moves to the next screen that offers 3 choices of room sizes to select. The choice of 200-400sqft (square feet) was appropriate for me and was used for this test.

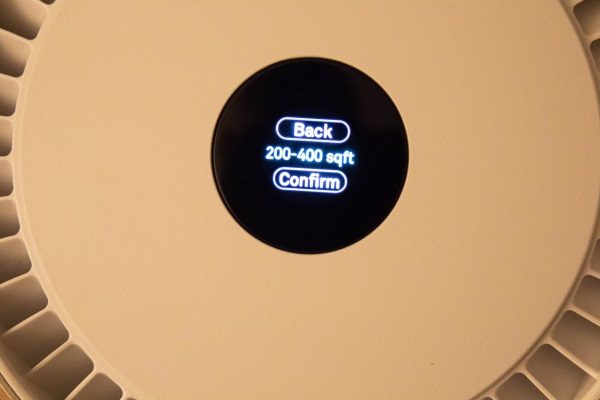
Once you select the desired room size, the next screen that appears gives you the option to confirm or to go back and choose a different room size.

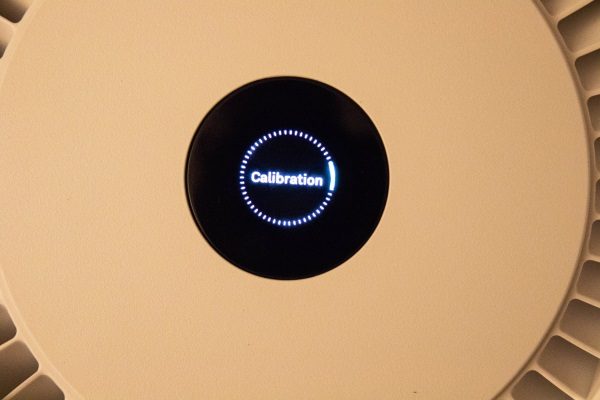
Once the room size is confirmed, the Molekule goes through a calibration process.

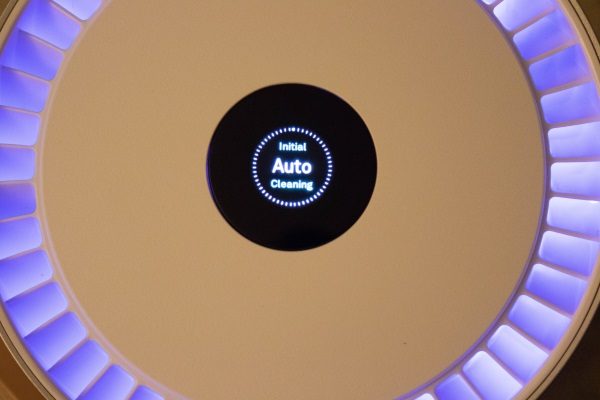
Once the calibration process is completed, there is then an initial “auto” cleaning process that may or may not be dependent on the size of the room selected.

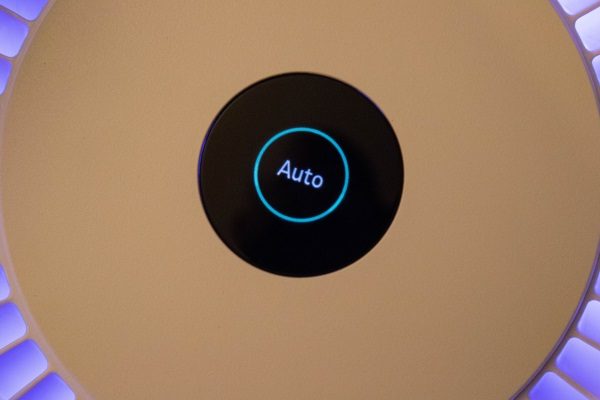
Once the initial “auto” cleaning process is done, the Molekule defaults to the “auto” mode.

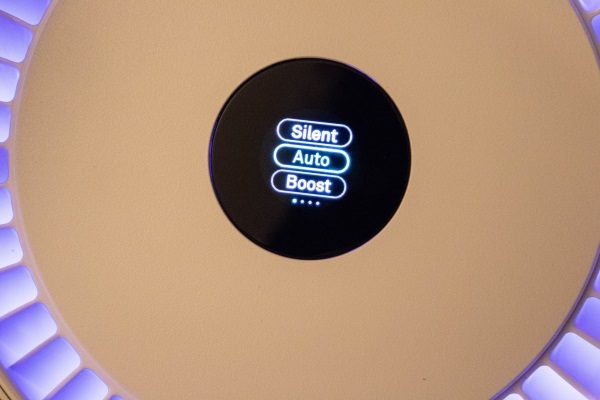
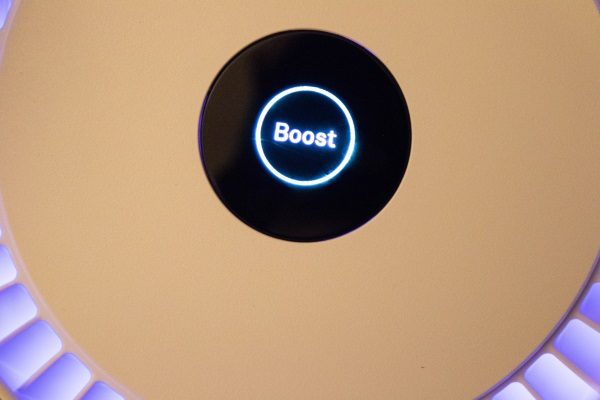
When you touch the screen, you have the option of two additional operational modes which are the silent mode, or the boost mode which is the most powerful, and loudest mode.

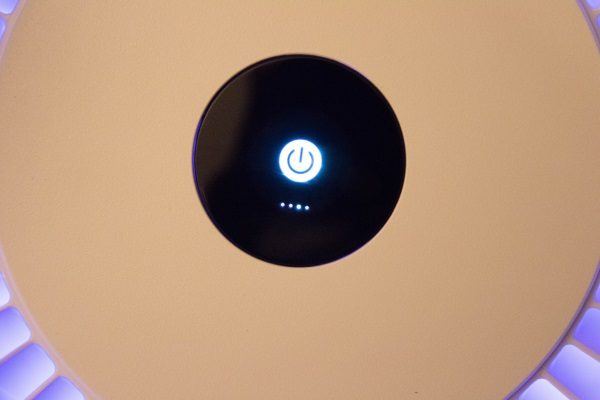
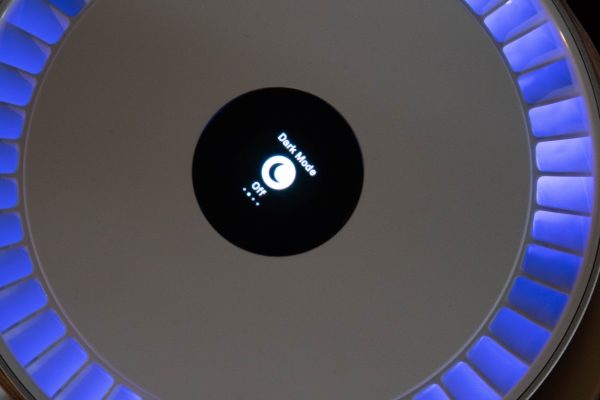
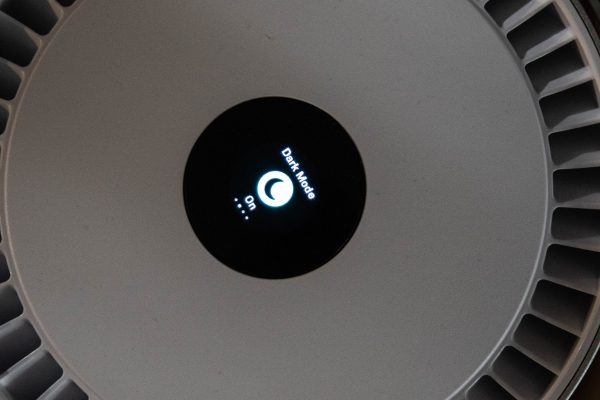
Swiping from right to left provides additional options to turn the surrounding blue LED light (nightlight) on or off, to change the mode, or to turn the Molekule off.

Function and performance

On the Molekule website, the company makes the following 2 major claims:

  • “Molekule destroys pollutants instead of just trapping them on filters where they can multiply and be released back into the air you breathe”
  • “Molekule destroys even harmful microscopic pollutants like viruses and VOCs that are 1000x smaller than HEPA filters can trap”

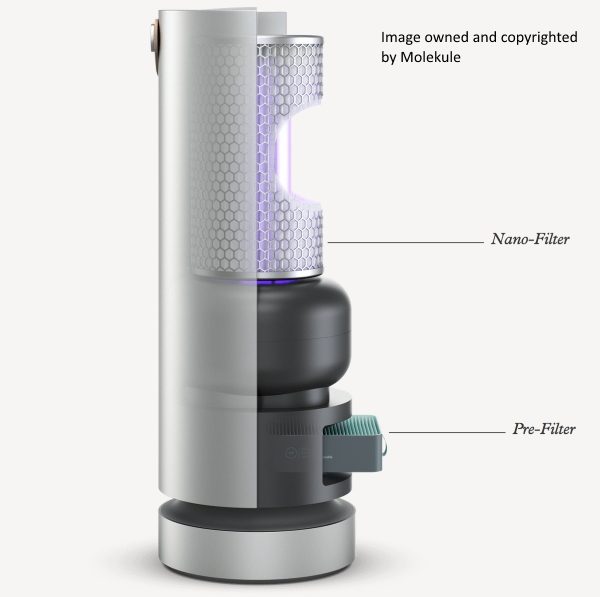
“Molekule’s patented technology, Photo Electrochemical Oxidation (PECO), works at the molecular level to eliminate indoor air pollution”. It includes removable filters that can be regularly replaced via their subscription-based filter replacement program.

When I first tried this air purifier, I was immediately impressed. When I first turned it on, within an hour I began to notice a major difference in the severity of my ongoing allergies. I usually have allergy symptoms like itchy and watery eyes, stuffed up and runny nose, and sneezing. Not too long thereafter, I was no longer suffering from any allergy symptoms while in that room. After trying the unit for several days, I moved it from my room into my kids’ room. This year it seems that my son is suffering less from allergies, but my daughter is suffering severely. I placed the Molekule in their room for the night just before they went to bed, and both kids slept peacefully without waking up during the night for Albuterol treatments, which they have to take every 4 hours when their allergies are severe. What was more remarkable, was that shortly after moving to the kids’ room, my allergies became significant again. I decided to test this further, so I spent some time in the same room as the kids, and once again my symptoms disappeared.

The Molekule operates well and relatively quiet no matter what mode it is in, although the “boost” mode does give off a low fan-like sound.

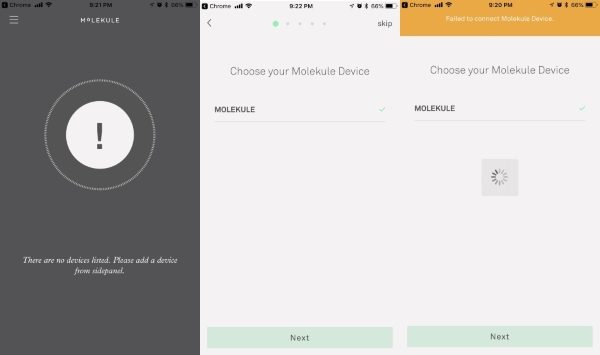
There is also an app that is available for both Android and ios that should allow you to control the Molekule, and monitor its performance. However, up to the time that I completed this review, I was unable to gain a successful connection despite carefully following the instructions.

I do plan to write an update to this review when it is time to change the filters, and at that time I will document the process and comment on the continued consistency of its performance.

What I like

I really like the design and finish of the Molekule and the choice of operational modes. I also love the fact that it has been super effective in relieving my allergy symptoms, as well as for my children. The Touchscreen operation is great, and the built-in handle makes it easy to move it from room to room.

What can be improved

The main issue that I find that needs improvement is the app and the ability to connect to the Molekule. I have tried numerous times and was unsuccessful,  and I eventually gave up since it has no impact on the great performance of the device.


It might have even been a better idea not to include an app. When I checked the app reviews in the ios app store, other users had submitted the same complaint.

Final thoughts

The Molekule Air Purifier is in my opinion, the best air purifier that I have ever tried. I have spent hundreds of dollars on air purifiers with Hepa filters, and on many other devices that turned out to be just gimmicks. While some of them helped my allergies, they ultimately failed to do so well enough that I felt satisfied. This air purifier has given me such relief when I am at home, that no one would even know that I suffer from chronic allergies. This has been the same result for my kids who have suffered from chronic allergies, and asthma as a result of the allergies. While the Molekule is much more expensive than any other air purifier that I have owned, it stands alone at the top of its class.

Price: $799
Where to buy: The Molekule Website
Source: The sample for this review was provided by Molekule

The post Molekule air purifier review appeared first on The Gadgeteer.

Filed in categories: Reviews

Tagged: ,

Molekule air purifier review originally appeared on The Gadgeteer on June 8, 2018 at 11:00 am.

Note: If you are subscribed to this feed through FeedBurner, please switch to our native feed URL http://the-gadgeteer.com/feed/ in order to ensure continuous delivery.
Rollors Yard Game review

Looking for a new game to spice up your outdoor parties? Rollors provides a new take on some classic lawn games, using wooden disks that you roll across the yard. It’s simple & friendly for all ages, and adds an element of chance that evens out the playing field. Let’s play! 

What is it?

It’s an outdoor yard game with wood pieces that combines elements of bocce, horseshoes and lawn bowling.

Hardware specs

  • ASTM toy safety tested and approved
  • Product Weight: 5 pounds
  • Product Dimensions(in inches)15.0 x 8.0 x 5.5

What’s in the box?

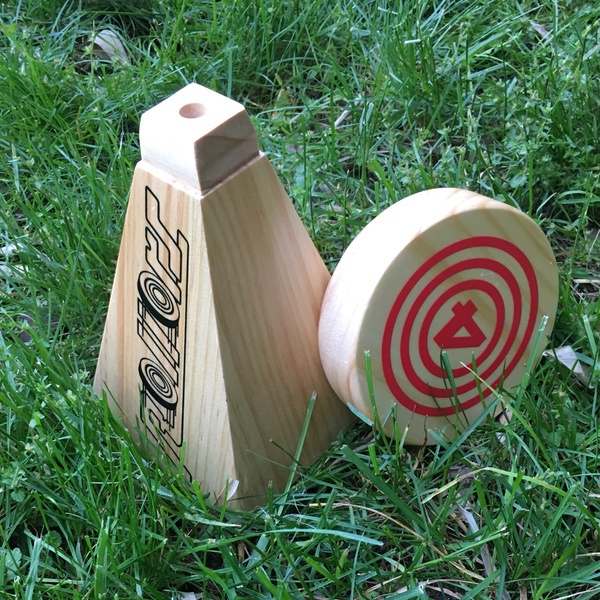
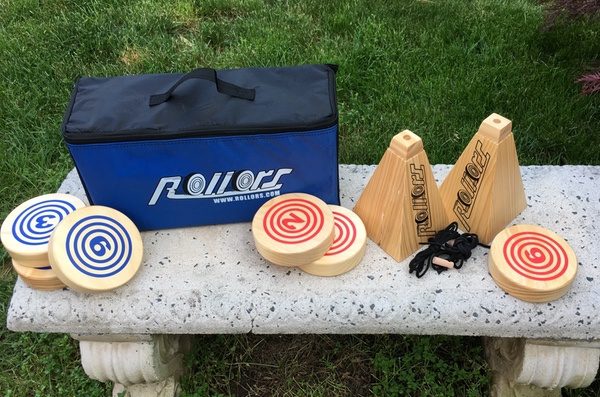
The Rollors game comes with 2 goals, 3 red rolling disks, 3 blue rolling disks, measuring chords and instructions. It’s all packed in a convenient travel bag.

Design and features

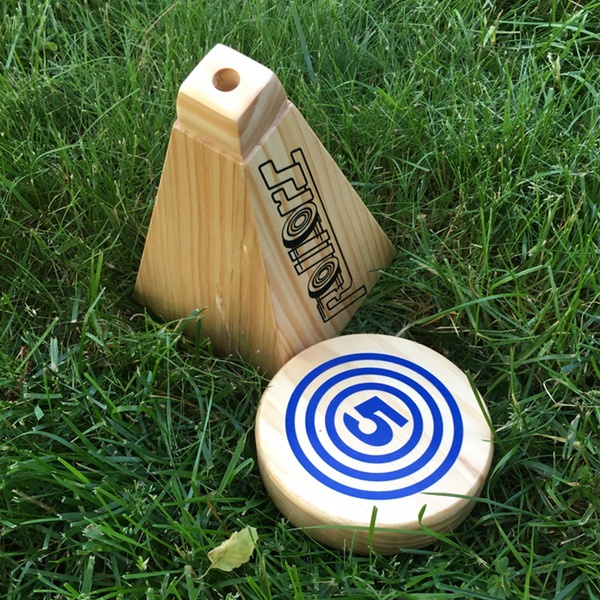
The Rollors game kit is pretty sweet. All the the pieces are made from lightweight wood that can be managed with big and small hands. Friendly graphics are printed on all the pieces. Here’s a close up of some parts. Don’t they look fun?

Gameplay is very similar to lawn bowling or horseshoes. You’ll set up the pylon-shaped goals about 25 feet apart. Each player gets three disks, which they take turns rolling at the goal on the opposite end of the playing field.

The objective is to roll your disks to a stop closest to the goal. After each player has rolled all three disks, the closest disk to the goal within a 5 foot radius scores points equal to the number face up on the disk. The fist player to 21 points wins the game.

Here’s where the element of chance comes into play: each disk is printed with a different number on each side ( 1-6, 2-5, and 3-4 respectively). That means that you could score the closest shot, but points will vary based on which side faces up.

Much like horseshoes, the rules also allow score multipliers. A “leaner” is worth double points, and a disk that scores and remains standing on its edge is worth the total points on both sides of the disk. If you have more than one disk that lands closest to the goal, you’ll get points for each. This means that scoring can add up pretty quickly if you have a good round.

The game also comes with a measuring string. Stick the post in the goal, and pull the measuring string tight. That’s your scoring radius. You can also pinch the line to measure rolls that are comparatively close. It’s a clever addition that will keep things honest if there’s some heavy competition happening.

We pulled out Rollers over the Memorial Day weekend, and it passed the Family Fun Test. Everyone enjoyed the simplicity of the game, which doesn’t require special skill to participate. It’s also quite a bit safer for younger players since the pieces are light and staying on the ground. The disks will also work on sand, dirt or similar rough surfaces without any extra setup, so you can pretty much take it anywhere. It’s a lot of fun.

The only negative that I noticed about the game is that the finishing on the pieces can pick up some nicks and scratches. We hit a rock in the lawn that left a mark on one of the disks. Not a big deal, but a stronger finish on the wood might reduce this issue.

What I like

  • Easy to learn for new players
  • Family friendly for kids and adults
  • Lightweight and portable
  • Certified fun by Bob’s Backyard Play Testers

What needs to be improved

  • The softer finishing on the pieces picks up nicks and scratches

Final thoughts

Rollers is a clever yard game that will satisfy both skilled and novice players. I really like the portability and ease of setup; you can take it just about anywhere. If you’re looking for an alternative to some of the current backyard games, you’ll be sure to keep the crowd entertained with this one.

Price: $49.95
Where to buy: But direct from Rollors or on Amazon.
Source: The sample of this product was provided by Rollors

The post Rollors Yard Game review appeared first on The Gadgeteer.

Filed in categories: Reviews

Tagged: , ,

Rollors Yard Game review originally appeared on The Gadgeteer on June 8, 2018 at 9:00 am.

Note: If you are subscribed to this feed through FeedBurner, please switch to our native feed URL http://the-gadgeteer.com/feed/ in order to ensure continuous delivery.
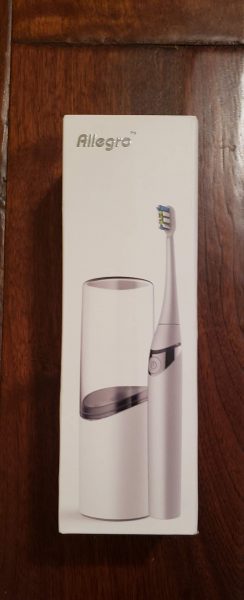
Allegro Sonic electric toothbrush review

Brushing your teeth twice a day can often seem like a chore.  I would often find myself ‘rushing through the job’ in an effort to just get it over with.  That inevitably lead to issues with my gums because I was not spending enough time brushing or just plain brushing the wrong way.  Since then I have been using an electronic toothbrush (Philips Sonicare) and have received some greatly improved results from my dental hygienist.   So I do have a love affair with my electronic toothbrush.  That being said, I am always looking to see if there is some way to improve on what I already have.  When I got the opportunity to review the Allegro Sonic Electric Toothbrush I jumped at it.  Let’s see if it is any better than my current toothbrush.

What is it?

The Allegro Sonic Toothbrush is exactly what it sounds like.  It is an electronic toothbrush a lot like the Philips Sonicare that I currently have.  It does have some added features that the Sonicare does not have.

Hardware Specs

  • Its charging cradle is part of the actual travel kit.  You simply add the clear plastic top and it is ready to pack in your suitcase.
  • Comes in white or black
  • The clear plastic top can act as a cup
  • The charging cradle includes a section that will both sanitize and dry your toothbrush head.
  • Wireless charging
  • IPX7 Waterproof
  • 3 cleaning modes – clean mode, sensitive mode, clean and white mode
  • Will give a short frequency vibration to indicate when you should switch to a different part of your mouth.  This ensures you spend the required amount of time in each area.

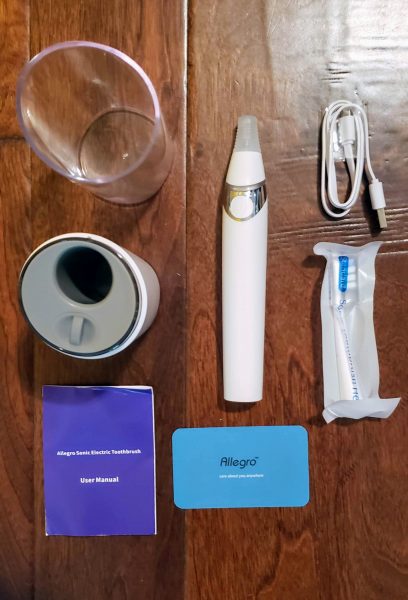
What’s in the box?

The above picture shows what comes inside the box.

  • Clear top cup cap for the charging/sanitizing station
  • The actual charging/sanitizing station
  • User manual
  • Thank you card
  • Electronic toothbrush with a silicone cap over the toothbrush mounting point
  • 1 brush head
  • USB charging cable

Design and features

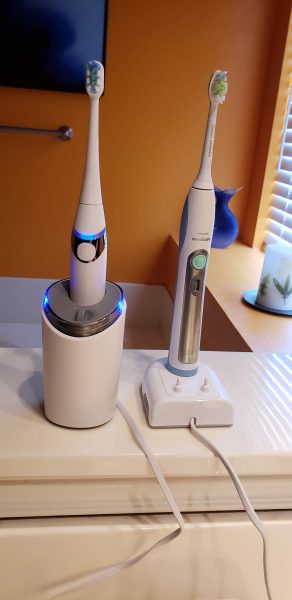
The above picture shows the Allego on the left next to my Sonicare on the right.  You can see that the charging station and the actual toothbrush and brush head are slightly larger.  According to my dentist and contrary to popular opinion I do have a rather small mouth.  So the larger brush head on the Allegro made it seem a bit tougher for me to get it around the sides of my very back teeth.  The bristles on the Allegro brush head were also quite a bit softer than what I was used to.  I use the ‘diamond clean’ version on the Sonicare.  I checked and currently this brush head is the only one they offer at this time.  I think in the future if they were to offer different sizes and hardness levels that would be a great thing to have.   The actual toothbrush body is completely round.  This means when I put it down on the counter to get the toothpaste it had a tendency to want to roll away.  The Sonicare has a couple of notches that make it stay in place which is a feature that would be nice to have.

Of the three cleaning modes, the one that comes closes to the intensity of my Sonicare is the clean and white mode.  Part of that may be because the bristles are softer on the Allegro so the vibrations of the brush do not feel as intense as the Sonicare.  When I was done using it, my mouth felt as clean as  it would with the Sonicare but it is hard to tell.   I would tend to think because the vibrations were not as intense it would maybe not be cleaning as well.  I do know my hygienist said that when brushing with an electronic toothbrush you want to barely be holding it.  You just want the bristles to be hitting your teeth and gums and you should not be putting any real downward pressure.  Too much intense pressure can cause receding gums which is a whole other can of worms.  So maybe even though the vibrations were not as intense, I was still getting a good cleaning anyway.

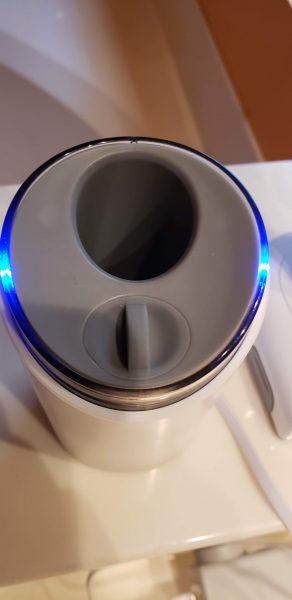
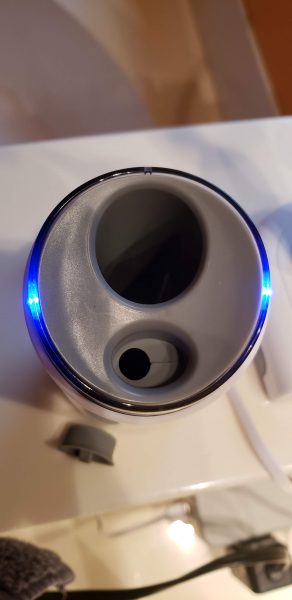
The picture above is showing you the area where you would sanitize and dry the brush head.  The bottom part of the charger has a rubber cap on it.

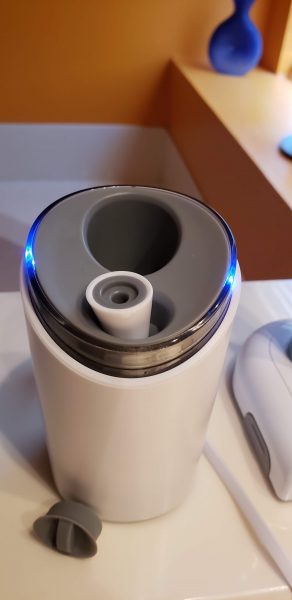
You pull off the rubber cap and it exposes a slot where you place the brush head.

The brush head goes in as pictured above.  There is an automatic sensor that senses when the brush is in place and starts the UV light for sanitizing.  It will run for 15 minutes and the lights on the side turn slightly purple.   Once it is sanitized, it goes into a drying mode for another 15 minutes.

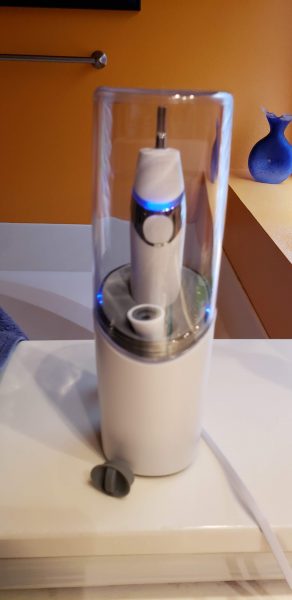
This picture shows the whole thing with the plastic cup on top.  I love that cap feature.  It will protect the toothbrush from the nasty germs floating around your bathroom.

What I like

I love that the entire charging station is the travel station.  My current toothbrush has a separate travel case that only closes when it wants to.  I also love that you can put that cup on top every time and protect your toothbrush from the environment.  I also love the sanitizing and drying feature.  I always hated having to pack up my toothbrush when it was wet to go travel.  Buying a pack of 3 brush heads was also economical at only $14.99 on Amazon.  I also love that it has the special vibration indicator to tell me when to move to a different section of my mouth when brushing.  That way I am sure I am spending the proper amount of time brushing.

What needs to be improved.

They definitely need to offer different types of brush heads.  Also adding a flat spot on the back of the toothbrush to keep it from rolling away would be a nice touch.  Finally, I really think they should include a plug adapter for the USB.  I don’t know many folks outside of my geek friends who would actually have a USB port in their bathroom.  Plugging it in on my computer just seemed rather funny.  I used the plug from one of my many other electronic devices and charged it that way.

Final thoughts

If you don’t already own an electronic toothbrush that you are happy with, I would recommend this one.  I am thinking that when the time comes to replace my existing one, some of the issues I mentioned earlier would be fixed and I would switch over to this toothbrush myself.

Price: $59.99
Where to Buy: Amazon
Source: The sample for this review was provided by Allegro. Please visit their site for more info.

The post Allegro Sonic electric toothbrush review appeared first on The Gadgeteer.

Filed in categories: Reviews

Tagged:

Allegro Sonic electric toothbrush review originally appeared on The Gadgeteer on June 7, 2018 at 10:00 am.

Note: If you are subscribed to this feed through FeedBurner, please switch to our native feed URL http://the-gadgeteer.com/feed/ in order to ensure continuous delivery.