iLife V8s Robot vacuum cleaner review

What is it?

The V8s is a autonomous vacuum and mopping robot with scheduling functions aimed at keeping your house tidy with less effort on your part.

Hardware specs

Dimensions: 330mm x 320mm x 81mm
Weight: 2.7kg (~6lbs)
Capacity: Dustbin: 0.75L | Water tank: 0.3L
Charging type: Auto and manual charging
Cleaning modes: Auto, Point, Border, Max, Path
Battery: 2600mAh
Charging time: 200-350 min
Cleaning time: up to 100min
Grade-ability:15°
Ability to cross obstacles: ≤ 12mm
Applicable ground: Tile, wood floor, carpet
Power: 100-240VAC  50/60HZ  22W
Working voltage(V):14.4

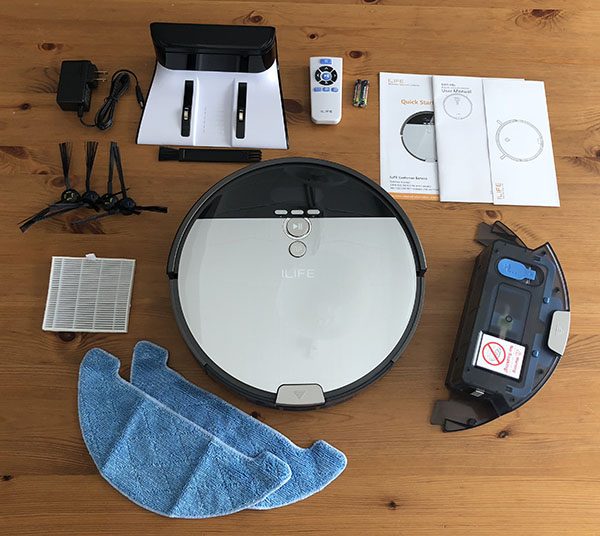
What’s in the box?

  • V8s robot vacuum
  • Charging station/dock/power supply
  • Water tank
  • Mop cloths
  • Sweepers (2 sets)
  • Replacement filter
  • Remote (and batteries)
  • Instruction manuals

Design and features

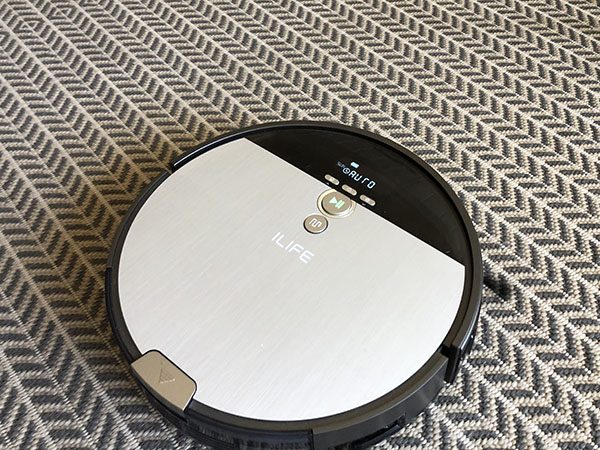
At first glance the V8s looks very similar to other robot vacuums on the market. It’s round, has some function buttons and a display. However, iLife has made some design choices that provide a good bit more functionality when you look a bit closer.

First, this is not just a dry vacuum. It’s also a mopping robot when you install the included water tank and one of the mopping cloths.

The large wheels on the underside make sure that traction is maintained and some pivoting suspension helps avoid getting stuck, perched on obstacles.

The dustbin or the water tanks are interchangeable and easily removed by pressing the eject button at the back of the robot and pulling backwards.

The front bumper gracefully senses objects without a large thud and it covers almost 50% of the circumference of the robot, so it navigates around obstacles really well.

Setup

Setting the V8s for use is as simple as plugging in the included dock and then setting the robot down facing forward so the charging pads make a connection. You can also plug the wall adapter directly into the V8s to charge if needed. Regarding dock placement, iLife does recommend that the dock should have almost 3 feet of clearance on either side and 6 feet of clearance from the front, meaning that it should sit against a relatively open wall.
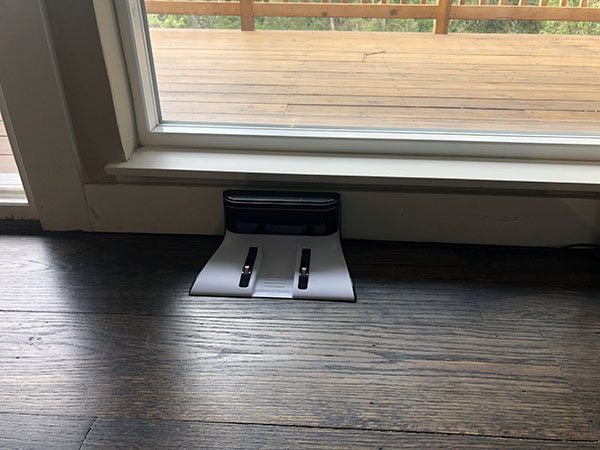
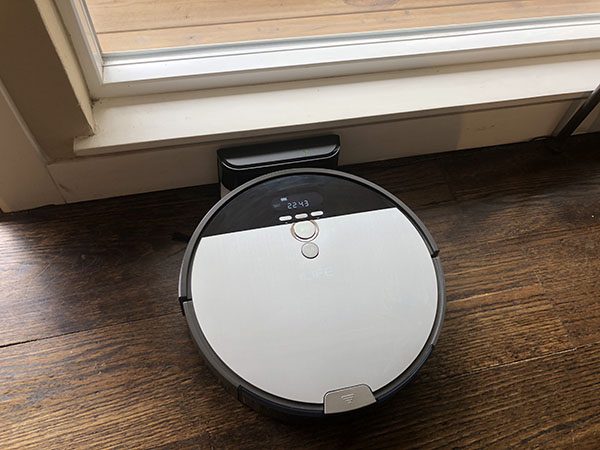
Of note, after about a week, I moved the dock to a less visible place under a bench by our dining room table. It only has about 3 feet before some chair legs, but the V8s hasn’t had any trouble. Ok, next step. After charging it up, the next step is setting the clock. Press and hold the clock icon for about 2 seconds and it will walk you through setting the time. A quick press of the clock icon will let you set up a cleaning schedule. Click through the days and set a time for each day and you’ll be good to go. I have this one set for 10am each morning.

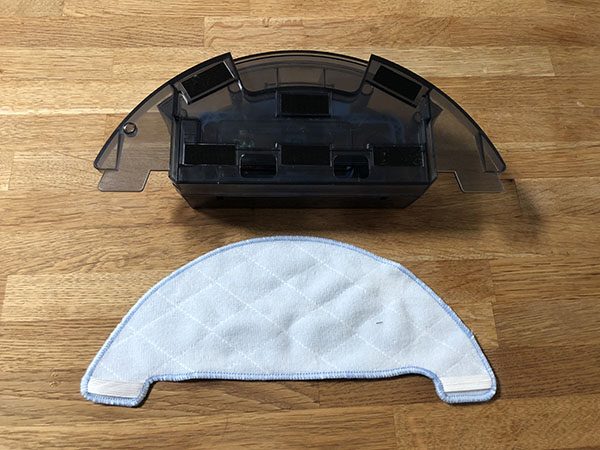
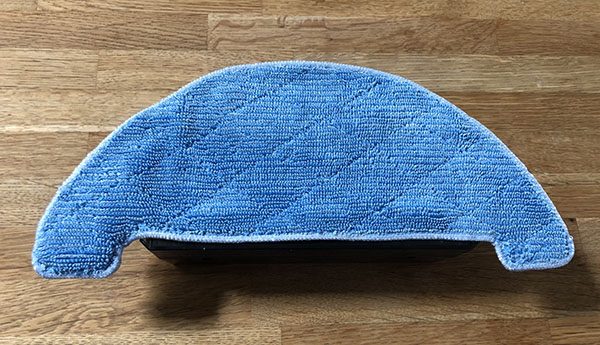
If you’d like the V8s to mop your floors, you’ll need to swap the dustbin for the water tank. To set that up, you need to place the mop cloth on the bottom of the tank, locating the two elastic straps over the outside wings, and then the rest of the cloth secures to the velcro that’s permanently on the underside of the tank. Fill the water tank up, and swap it out for the dustbin in the robot using the ejection button at the back of the robot.
Starting either a dry or a wet cleaning operation is a quick press of the “play/pause” button on either the robot or the remote. Auto Mode is the default and it will just go about its business. It automatically returns to its base when finished or when low on battery. There are a couple of other useful cleaning modes that may work better depending on the particular room you want to be cleaned. Point Mode (swirl icon) is helpful when there’s a specific mess to clean up. It will basically spiral outward from your starting point until the area is clean. Border mode (squarish icon) will do what it sounds like it should; clean the border of your room. Max Mode (fan icon) will tackle heavier dust and dirt by turning up the suction power. Path Mode (squared arrow icon) starts the robot on a more back and forth, logical lawnmower-type path.

Performance

I purchased an iLife V5 about 2 years ago that has been in steady service until the opportunity to review this unit popped up. The V8s definitely outperforms my old iLife in every aspect. Between navigation, climbing up and over edges and obstacles, dealing with a lot of pet hair and the ability to mop, it’s hard not to recommend the V8s out of the gate. Let’s look at some more specifics though because there are a few scenarios that you may want to be aware of.

I set up the V8s in our main room which is basically the main living area of our house. It’s one big open room that’s part living room, part dining room, part kitchen and entry from the front door. The floor is dark hardwood with two large area rugs. As far as the layout, I almost feel bad for this robot. Here’s a quick diagram of the room.
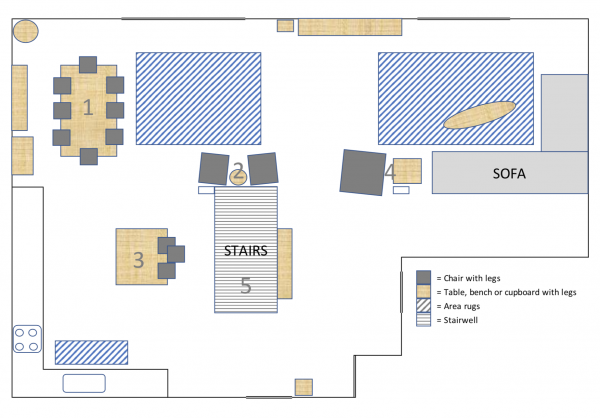
As you can see, there are a couple of trouble spots. There are three “forests” of table/chair legs (1, 2, 3), an armchair/side table “prison of solitude” (4) and a mysterious stairwell near the center (5). The V8s does pretty well with the forests although it can waste a good chunk of time under the main table with the combined 28 legs. Definitely helps to flip the chairs upside down on the table if I remember to do that. The armchair/side table combo will also trap it for a while as there’s only one entry to the side table and two to the armchair since the front is too low and the right side is next to the table. There’s also usually some cables in this area which put up a pretty good fight and occasionally win. Lastly is the stairwell which is surrounded on 3 sides by a metal railing that the V8s has no problem detecting. The first step down is actually before the start of the railing so it’s a true cliff on three sides (and possibly not to building code). The V8s has yet to fall into the step that regularly took out the v5. The first time I ran the V8s it spent almost an hour going around the perimeter of the stairwell looking for a way into that square footage. I finally turned it off and haven’t caught it doing the same thing again.

The dustbin is easier to clean than the V5 I had as the door just flips down and you can either manually extract the debris or tap it out if your trashcan is larger than the opening (mine isn’t). (Warning alert: pretty gross pet hair shot here. Nasty things lay under the chairs where you can’t see.)
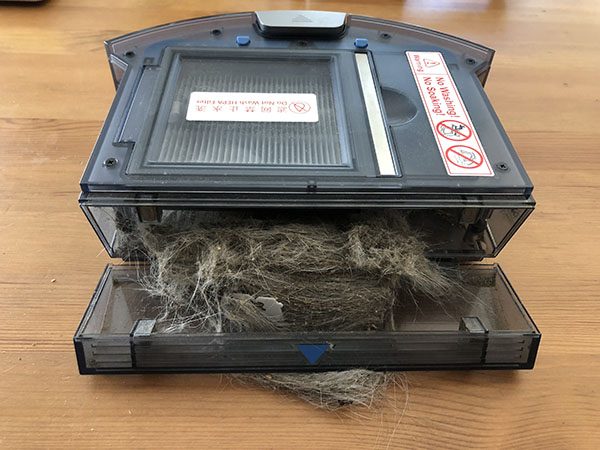
The filter area is a bit funky though. There’s a hinged lid which exposes the multiple filters. A high-effective filter, a foam layer and a primary filter (mesh screen).
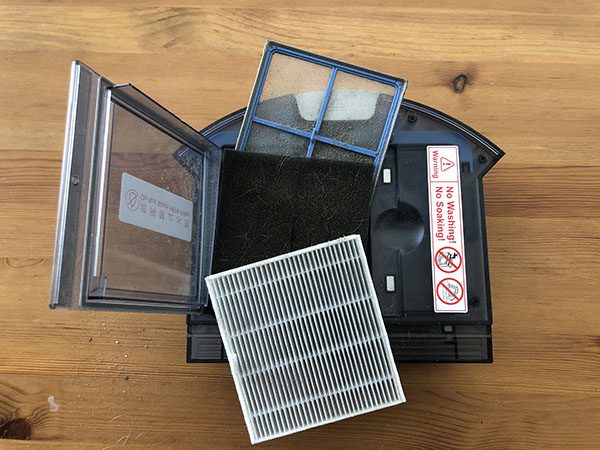
All 3 of these trap dust, dirt and pet hair, which makes cleaning them out a bit messy. It feels like this could be a single part or a cartridge to be removed and cleaned, but at least it is trapping and filtering so it’s working.

The mopping function is great. Unlike vacuuming, it’s very easy to see where it has been as the wet floor is a dead giveaway (especially on this dark hardwood).
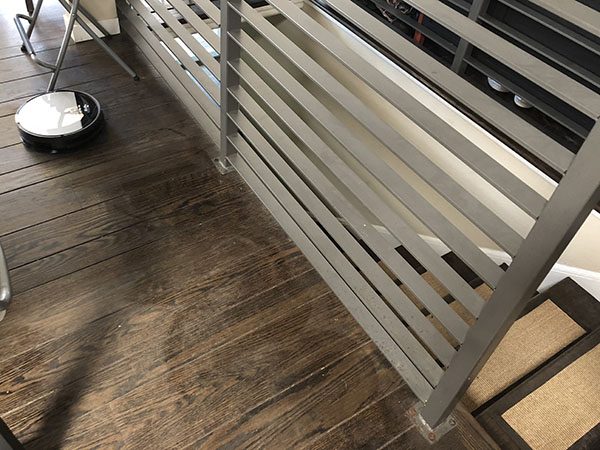
It has a built-in feature that will mop a 7m x 7m directly in front of where you set the V8s down, so 3.5m to the left and right of the robot and 7m ahead. iLife recommends that you fold over the edge of rugs to deter the V8s as it will just start mopping the rug too. My rugs are too thick to do that. For my scenario (needing to avoid area rugs) if I set it down in front of the oven, about 3.5m to the right of the area rug leaving about 2.5m to the sink it does the trick. It works pretty well, but I find myself wishing for a couple small beacons or reflectors that I could place at a threshold I want it to stay within.

Here are a couple of additional detail photos.
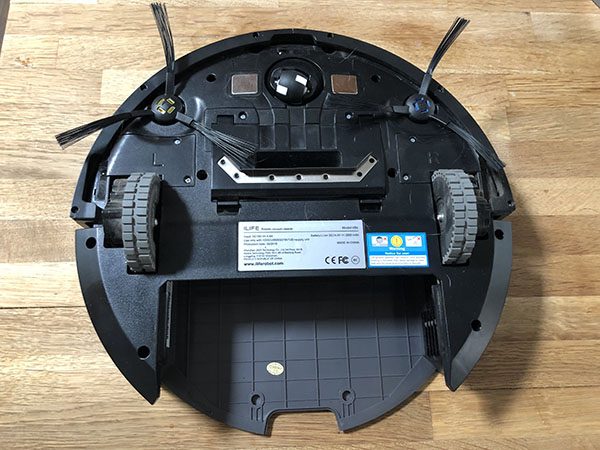
The bottom shows the sweepers, charging contact pads, front ball-wheel, drive wheels and the vacuum intake.
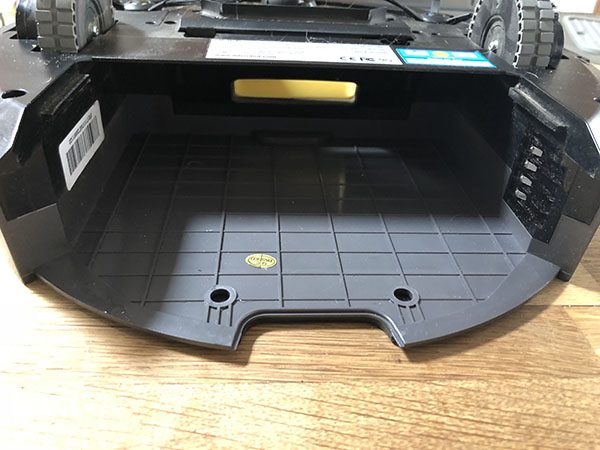
The receiving area for the dustbin or water tank.
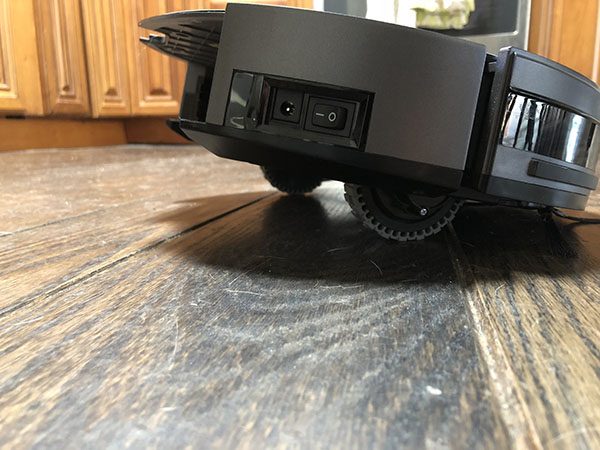
A good shot of just how much lift the grippy, drive-wheels have to keep the V8s moving. You can also see the manual charging port and the power switch (which basically stays on).

There are really only a few things to watch out for. On stiff area rugs, the edge of the rug can get trapped between the sweeper brushes and the underside of the robot which results in it kind of limping sideways until it finally clears the end of the rug. Another is that there’s no alert when the dustbin is full. It’ll just keep trying to suck debris into a completely full bin. Best practice is just to grab the dustbin when it’s done and empty it out in preparation for its next mission.

It’s also fun to watch it work and wonder what it’s thinking. I find myself contemplating if it thinks all obstacles are non-moveable so that it’s thoroughly confused when it runs into things that slide or roll a bit and then stick. Or, when I hit the home button why it will sometimes head directly away from the base for about 5 minutes before eventually making its way back to the dock. I also may be starting to possibly understand why people might put costumes on these and give them pet names. (Again, possibly…)

One final word of caution (for any robot vacuum…) to my knowledge none of them are sophisticated enough to avoid pet “messes” and I’ve heard some horror stories that I’ll save for another time.

What I like

  • Scheduling function / daily cleaning
  • Relatively quiet
  • Dry and wet/mopping functions
  • Handles pet hair very well

What needs to be improved

  • Area rug edges can get stuck in the vertical space between the sweepers and robot floor
  • No alert for being too full
  • No real solution for creating boundaries when mopping
  • Filter area is unnecessarily complicated
  • Remote doesn’t look like it belongs to this robot (very different aesthetic)

Final thoughts

The iLife V8s is a really good vacuum, but for a different reason than might be implied. The traditional vacuum cleaner we have is going to do a better job if measured head to head against the V8s. In my book, the V8s wins because at 10am every day it’s going to kick on and clean the floor. If I’m sitting here when it starts, it’s a quick reminder to pick up quickly so it can do its job. Without it, I’d go back to just vacuuming on the weekends. When it comes to mopping, I’m more likely to fill up the tank and hit start than I am to get a mop and bucket out, so that’s win number two. Autonomous cars may still be a few years out for the general public, but robot vacuums like the V8s are ready to go to work for you today.

Price: $249-$279
Where to buy: Amazon
Source: The sample of this product was provided by iLife.

The post iLife V8s Robot vacuum cleaner review appeared first on The Gadgeteer.

Filed in categories: Reviews

Tagged:

iLife V8s Robot vacuum cleaner review originally appeared on The Gadgeteer on June 12, 2018 at 10:00 am.

Note: If you are subscribed to this feed through FeedBurner, please switch to our native feed URL http://the-gadgeteer.com/feed/ in order to ensure continuous delivery.

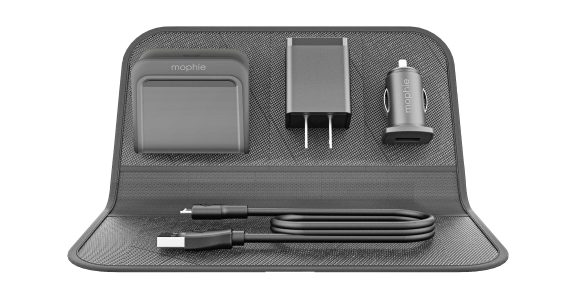
The Mophie Charge Stream Travel Kit will keep you up and running!


In this continuously evolving and advancing technology-driven world, many of us have become very dependent on our smart devices to manage our daily tasks. Our Smartphones, tablets, and PCs dominate our lives and are with us just about all day and every day.

One of the many challenges of living the “technology” lifestyle is to keep our devices charged so that we always have readily available access to the web. In response to this demand, many companies have developed power packs and charging solutions in every shape, size, and capacity to meet the need.

Mophie is just such a company, and in addition to their numerous models of power packs and charging devices that are already available, they now offer the Charge Stream Travel Kit. The aim of this kit is to provide everything that you would need to charge your smart devices when away from home, and all in a small and compact package. The kit includes a 2.4A wall charger, a USB-A to Micro USB cable, a 2.4A car charger, and the new Charge Stream Mini Pad. The Mini Pad provides a 5W charge to Smartphones compatible with QI wireless charging and can be purchased separately or as a part of the kit.

If you would like to purchase the Mophie Charge Stream Travel Kit, you can pick one up from the Mophie website or from Best Buy for $49.95. The Charge Stream Mini Pad can be purchased separately for $24.95.

The post The Mophie Charge Stream Travel Kit will keep you up and running! appeared first on The Gadgeteer.

Filed in categories: News, Reviews

Tagged:

The Mophie Charge Stream Travel Kit will keep you up and running! originally appeared on The Gadgeteer on June 12, 2018 at 8:00 am.

Note: If you are subscribed to this feed through FeedBurner, please switch to our native feed URL http://the-gadgeteer.com/feed/ in order to ensure continuous delivery.
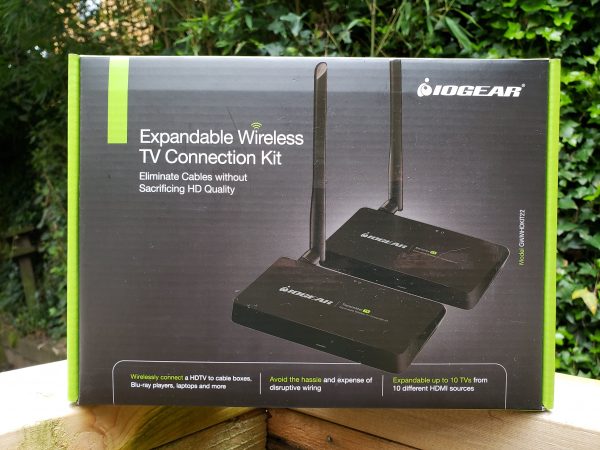
IOGEAR Wireless TV Connection Kit review

We love to entertain, and with our recent house remodel we added an outdoor movie theater to enjoy those cool Seattle summer nights.  With a small backyard it is hard to put the entertainment everywhere our guests are without an abundance of wires.  The IOGEAR Wireless TV Connection Kit promises to solve that problem and do it in full HD.  How does that claim stack up against reality?  Read on to find out…

What is it?

The IOGEAR Wireless TV Connection Kit is a transmitter and receiver combo which allows you to stream video via an HDMI connection from a source like your laptop or a cable/satellite receiver to a display device like a TV or projector.  It does so without wires up to a claimed 150 feet, and at a full 1080p and 60 frames per second without sacrificing sound or picture quality.  It uses the 5.8 GHz frequency so it should not interfere with any existing wireless networks, Bluetooth devices or home automation hubs.

What’s in the box?

The kit includes a clearly labeled transmitter and receiver plus associated antennas.  You also get 2-3 foot HDMI cables (HDMI 1.3), 2 power supplies, and an IR Blaster (for the transmitter to control your device remotely) and an IR receiver (plugged into the receiver, it transmits commands from your remote back to the transmitter).

Design and Features

Our intended use is for our outdoor movie theater, and our projector is a full 1080p model.  In order to support simulcasting on our living room TV, we need a transmitter that also supports this.  Our original design included a 45 foot run of HDMI cable from a media connection box in the backyard, an HDMI splitter to handle one signal to two devices, and the ugly notion that we would end up cutting holes in the outside of the house, the open basement beams, and the living room floor to accommodate the cable run.

So, when IOGEAR offered this kit for review, I jumped at the opportunity to try it out.  Did it solve my problem?  In a word, yes.  As with any solution, there are some gotchas waiting along the way.  But nothing at all earth-shattering to overcome.

The kit comes with two boxes – one transmitter and one receiver.  Because the kit was originally intended to connect a cable box or satellite dish receiver to a TV, the box also includes an IR blaster and extender to allow you to remote control your input.  As my setup is driven by my laptop, these were not important – I tested them on my cable box and they work as well as any IR setup will.  If you use a Roku or other streaming setup that uses a different connection technology, though, you will have to come up with an alternate solution to remote control.  Thankfully there are apps to cover most of these scenarios, but your mileage may vary.

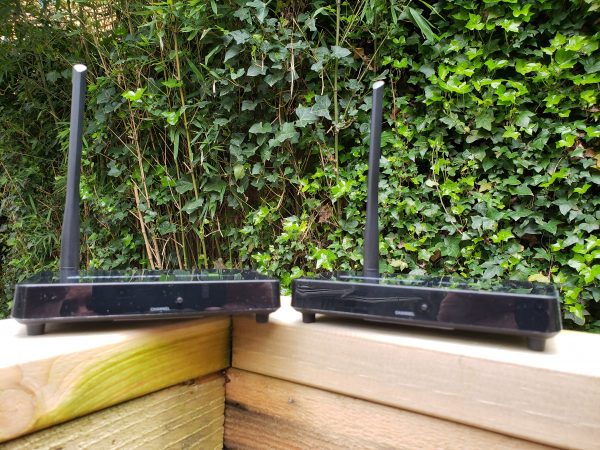
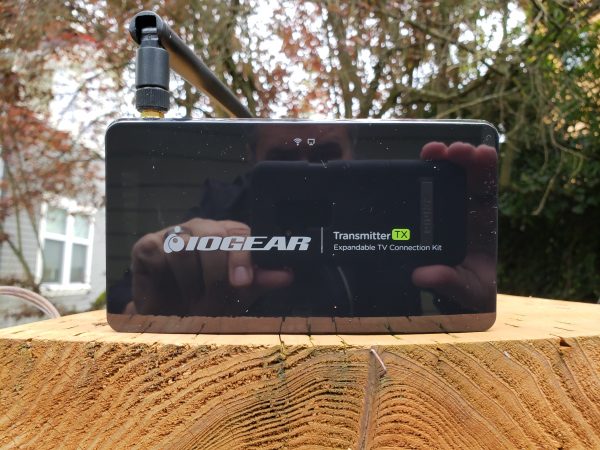
The antennas on each unit are omnidirectional, so you do not need to worry about orientation other than just being up.  The back of each unit has the antenna barrel connector, power input, IR blaster receiver/transmitter input and an HDMI connection.  Pretty simple.  The front of the unit has a power indicator and a channel button.  More on that in a moment.  Unless you have been living in a Luddite bubble for the last dozen or so years, setting this up should be drop-dead simple.  And the boxes tell you which is which, so again – easy to set up.

With the receiver connected to my TV, I plugged the transmitter into a USB-C cable with an HDMI plug running from my laptop.  Windows 10 immediately recognized the transmitter as an HDMI-capable device operating at 1080p and mirrored my desktop to the transmitter.  Here is where I ran into my first “issue” (and I put that in quotes because it is easily overcome, but may take a little sneaker-work if you are doing this alone).  The transmitter and receiver have to operate on the same channel, and unfortunately, there is not a channel indicator on the device – nor is there a scan feature that I could find.  This means you have to press the channel button on one unit and then see if the devices sync.  Best to have someone help you if there is a gap between the transmitter and receiver that won’t allow you to see both at the same time.

Once synced, however, both devices displayed my desktop in great color.  This being a still image, the real test is in handling video.  So I fired up VLC and started playing Black Panther.  And I have to say I am impressed – if you didn’t know otherwise, you would swear the connection was wired.  No artifacts, no interference, no lag – just a clear, bright signal with perfectly synced sound.

My laptop was running in my backyard and the TV/receiver combo was in my living room.  The signal had to go through my kitchen and a brick fireplace.  Total distance was about 25 feet, so I figured I would see what a little distance and the walls of a 101 year old house would do to the performance.  I took my laptop out the back fence and then set up a monitor just outside my front fence.  In addition to the house, there were trees, dogs and all manner of other signal disruptors.  The total distance between the transmitter and receiver was about 65 feet, with my wifi network, microwaves, smart home appliances, and Bluetooth devices in between.

The IOGEAR devices never skipped a beat.  Clear, strong signal with no apparent lag or artifacting.  The thing just worked.

What I Like

  • Very easy to set up and use
  • Even at 60+ feet through walls and foliage, the signal was strong, the audio clear and no static
  • If I wanted to use this inside with a hidden cable or satellite receiver the IR Blaster would likely work
  • It is a very cost-effective solution to a specific problem

What needs to be improved

  • Channel selection and synchronization between the transmitter and receiver can be tricky – a display on the front of the transmitter and receiver would remedy this

Final thoughts

Some things to keep in mind: if you are using this with a computer of any sort you will want to mirror your desktop, not extend it – unless, of course, you are able to see the receiver.  Without mirroring you will be unable to see where your cursor or windows are on the receiver.

Also, your receiver will only be as good as your transmission device – if the device hooked up to the transmitter does not run at a full 1080p or if the sound coming from the HDMI is not stereo, this device will do nothing to help you (to be fair, this is true of most devices in this class unless the transmitter specifically states that it will upscale the image).

And finally, if you use protected content (say a Blu-ray disc on your computer) you may have problems with security protocols built into those devices.  This means that a computer will likely not transmit the signal from a Blu-ray disc playing on it like a standalone Blu-ray player will because of the High-bandwidth Digital Content Protection (or HDCP) built into devices.

At $170 this is a great solution to a specific problem.  If you share my situation and are looking for a way to get a 1080p signal across a distance without a cable run, the IOGEAR connection kit could be your answer as well.  I did have to contact technical support during the course of this review, and I found their team responsive and highly supportive, so you can be assured if you run into issues there is someone on the other side of the sale ready to help you.

Price: $169.95 as described
Where to buy: IOGEAR’s web site has additional information and you can buy there or at Amazon.
Source: The sample for this review was provided by IOGEAR.

The post IOGEAR Wireless TV Connection Kit review appeared first on The Gadgeteer.

Filed in categories: Reviews

Tagged:

IOGEAR Wireless TV Connection Kit review originally appeared on The Gadgeteer on June 11, 2018 at 9:00 am.

Note: If you are subscribed to this feed through FeedBurner, please switch to our native feed URL http://the-gadgeteer.com/feed/ in order to ensure continuous delivery.
CHOETECH Wireless Charging Pad review

While wireless phone charging is certainly not new (Android phones have this capability for some time), it has exploded in popularity in the past several months due, arguably, to the iPhone 8, iPhone 8 Plus, and iPhone X having incorporated the wireless Qi charging standard into their newest feature sets.  With this has come a veritable tech tsunami of wireless charging devices for Qi-enabled phones of all types.  Here, we try out the CHOETECH Wireless Charging Pad.

What is it?

The CHOETECH Wireless Charging Pad is a simple, low-cost, wireless charger that can be used with any phone that supports the wireless Qi charging standard.

Tech specs

  • Model number = T511
  • Color options = Black (reviewed here), Rose Gold, Blue, Red
  • Qi charging standard certified
  • Input = 5 Volts @ 2 Amps
  • Output = 5 Watts
  • Dimensions = 3.5 x 3.5 x 0.4 in
  • Over-current, over-voltage and over-temperature protection
  • Compatible with iPhone 8 / 8 Plus, iPhone X, Samsung Galaxy Note 8 / S8 / S8 Plus, S7 / S7 Edge and other Qi-enabled devices
  • Location of manufacture = China

What’s in the box?

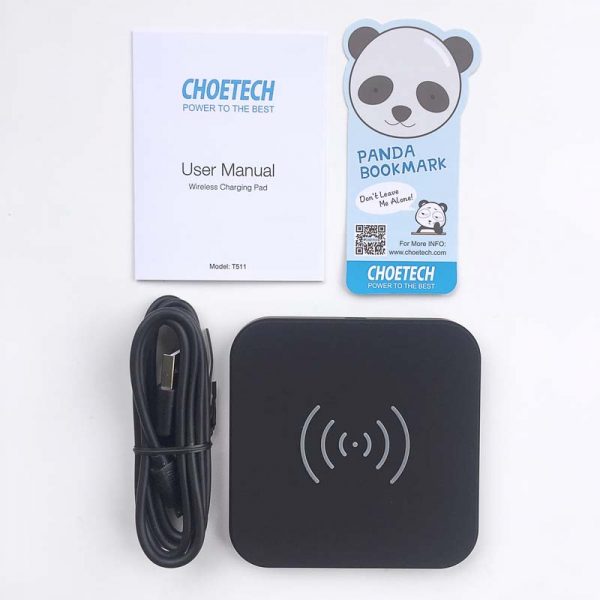
Inside the box were the above items show in the image above and listed below:

  • CHOETECH Wireless Charging Pad
  • Micro USB cable
  • User Manual
  • Adorable Panda bookmark

Design and Features

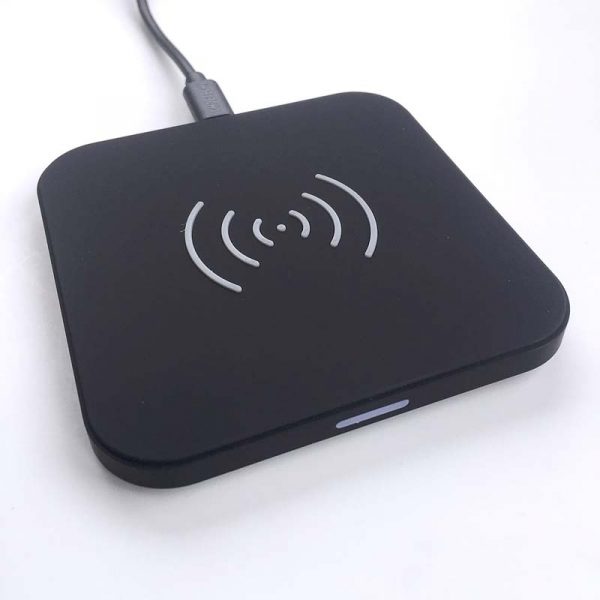
The CHOETECH Wireless Charging Pad is a slim design with a square footprint.  It has a soft-to-the-touch satin finish and in its center it features a gray silicone dot with two sets of gray silicone “waves” emanating outward from either side.  This dot and waves are intended to act as a target to aid the user in positioning their Qi charging-enabled phone onto the pad to align the charge transmitting and receiving hard for best charging results.  Assembly consisted of simply plugging the included micro USB cable into its port on the back of the charging pad.  Note that the CHOETECH Wireless Charger does not include any type of power adapter, and CHOETECH recommends a 5V/1.5-2.4A adapter for best result.

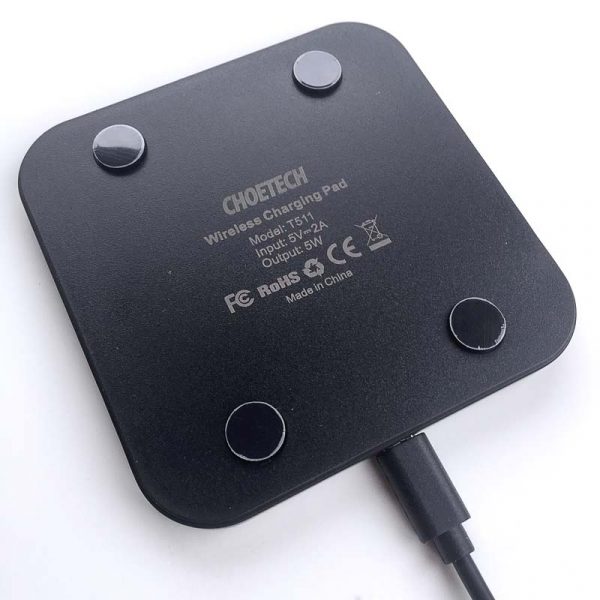
The underside of the pad features a small rubber foot located at each of the four corners.  These pad help prevent the pad from slipping around while placing your phone onto or removing your phone from the pad.  However, don’t be like me and forget to remove the thin plastic layers protecting the feet (as seen in the image above)—the foot pads grip much better with the plastic removed. 🙂

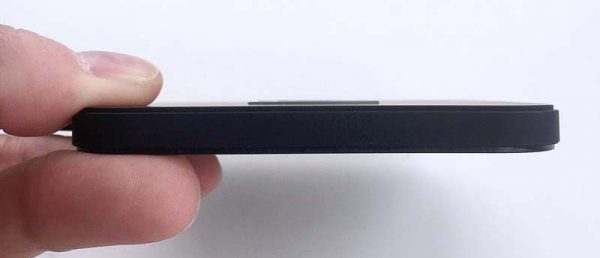
As mentioned above, the CHOETECH Wireless Charging Pad is quite slim, as seen in the image above.  It is only 0.4 inches (about 10mm) thick.

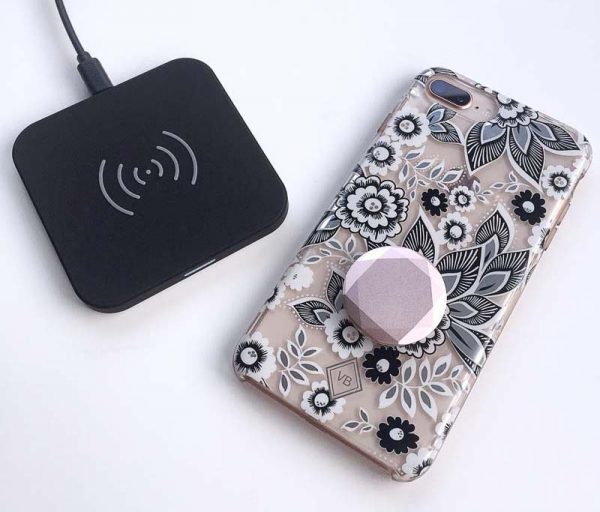
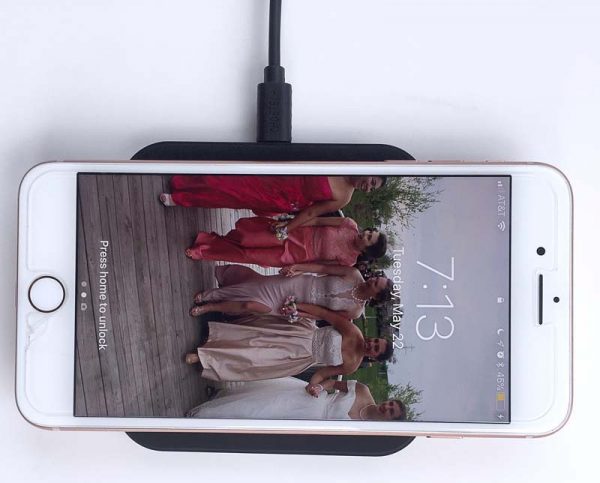
The first phone that I tested with the CHOETECH Wireless Charging Pad was my daughter’s iPhone 8 Plus.  She typically protects her iPhone 8 Plus in a case (currently a floral-print Vera Bradley case), and she has also attached a Pop Socket to the outside of the case.  See above for details.

With the case and the Pop Socket attached to the iPhone 8 Plus, it sat quite a bit off-center of the pad, as seen in the images above and below.

The Pop Socket prevented the CHOETECH Wireless Charging Pad from actually charging her iPhone 8 Plus.  My guess is that the location of the Pop Socket prevented the Qi charging hardware in both the iPhone and charging pad from aligning properly, thus preventing transfer of energy between the pad and iPhone.

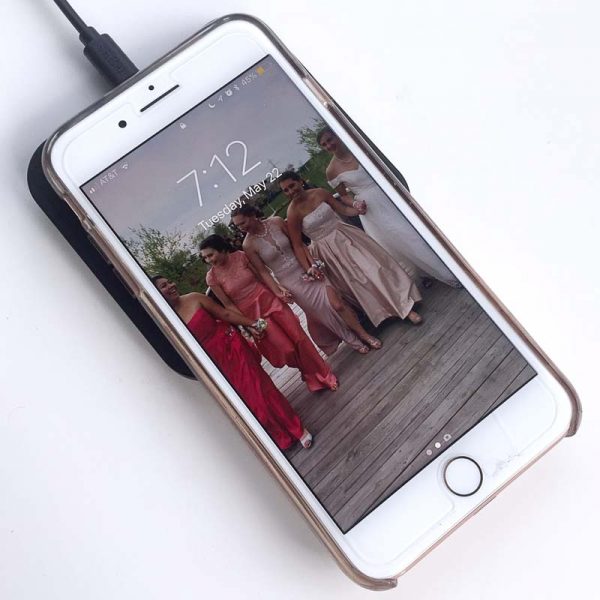
Next, I removed my daughter’s iPhone 8 Plus from her case and placed it back on the CHOETECH Wireless Charging Pad, as shown in the images above and below.

As can be seen in the previous two images, the pad charged her iPhone with no issues once the case and attached Pop Socket was removed.  With the Pop Socket no longer blocking proper alignment between the charging hardware in the iPhone and the pad, it charged as expected.  Additionally, the iPhone 8 Plus charged with no issues in either the horizontal or vertical orientation.

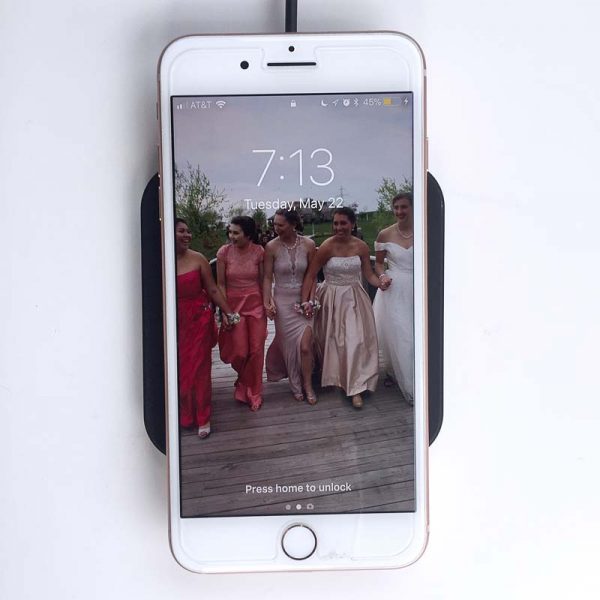
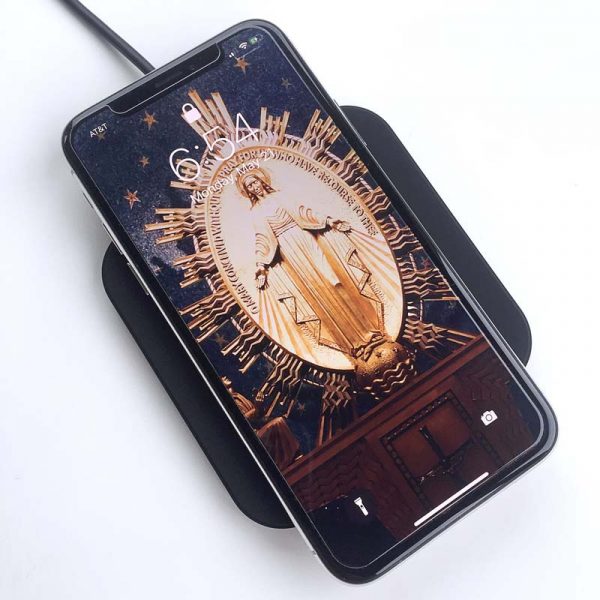
Next, I tried out the CHOETECH Wireless Charging Pad with my wife’s iPhone X.  My wife does have her iPhone X in a case, but does not have a Pop Socket on it.  I found that without the Pop Socket but even within the case, her iPhone X charged as expected, as seen above.  In fact, I had a fair amount of freedom to position her iPhone X, provided that it was roughly centered on the pad, and still achieve a charging connection.  Charging the iPhone X while in the case didn’t seem to slow down the charging speed, but it did seem to produce a bit of heat on the surface of the case.  So, although the pad’s User Manual recommends removing your phone from a case to charge it, this did not seem to impede the charging of my wife’s iPhone X.

In the interest of being thorough, I then removed the case from my wife’s iPhone X and as expected, it charged without issue.  I even varied the position from vertical to horizontal relative to the pad (see images above and below) and it didn’t seem to affect the charging, as long as the iPhone remained fairly centered on the pad, using the dot and waves to help align it properly.


In the image above, you can see the blue indicator light on the front of the charging pad, which illuminates when a positive charging connection has been made.

After using the CHOETECH Wireless Charging Pad for several weeks, my wife reported that she really likes it.  It doesn’t charge as fast as a cable connection, but its level of convenience is increased over plugging in and unplugging a cable.  She just lays her iPhone X—while in the case—on the pad and, ensuring that it is properly aligned, it charges every time, and when she wakes up in the morning, she can just grab it and go.   It should be noted that this charger does not support rapid charging, so if you have a phone that supports this feature, you will not be able to take advantage of it with the CHOETECH Wireless Charging Pad.  I didn’t really miss this feature because Apple has yet to include rapid charging in the latest iPhones.

What I like

  • Simple, clean, thin design
  • Works with or without a case, though the phone must be aligned with the pad properly.

What needs to be improved

  • Nothing that I can report at this time

Final thoughts

The CHOETECH Wireless Charging Pad is a simple, functional wireless charging device that seems to work well for its relatively low price.

Price: $12.99
Where to buy: CHOETECH or Amazon
Source: The sample for this review was provided by CHOETECH.

The post CHOETECH Wireless Charging Pad review appeared first on The Gadgeteer.

Filed in categories: Reviews

Tagged: ,

CHOETECH Wireless Charging Pad review originally appeared on The Gadgeteer on June 10, 2018 at 2:48 pm.

Note: If you are subscribed to this feed through FeedBurner, please switch to our native feed URL http://the-gadgeteer.com/feed/ in order to ensure continuous delivery.
AIRFREE P2000 Air Purifier review

As I continue to look at as many as possible air purifiers to combat the allergies that my kids and I battle against every season, I “jumped” at the opportunity to test and review another one. Let’s see how it stands up to the test.

What is it?

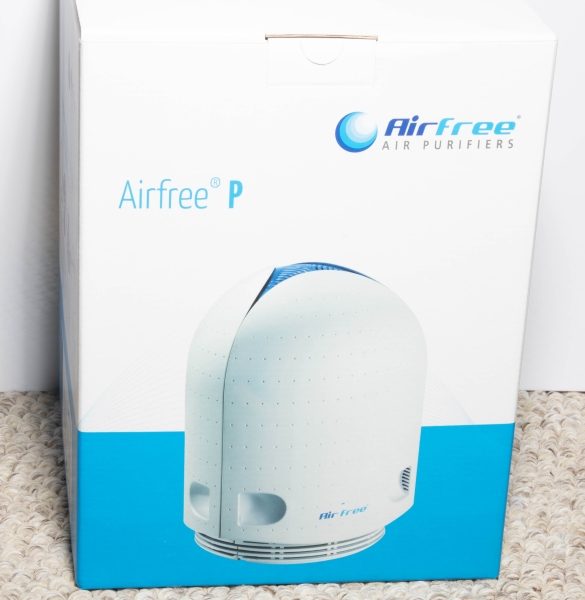
The AIRFREE P2000 is an air purifier that as per the manufacturer “destroys mold, dust mites, bacteria, viruses, pollens, pet dander, tobacco and other organic allergens”.

What’s in the box


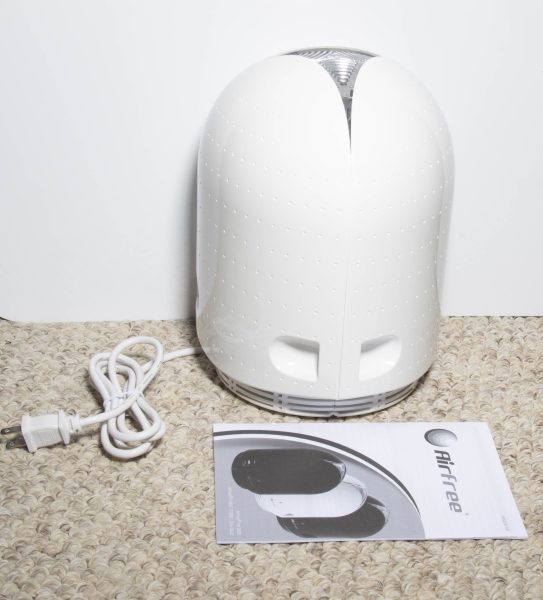
In the box, you will find the AIRFREE P2000 Air purifier and the instruction booklet.

Design and features

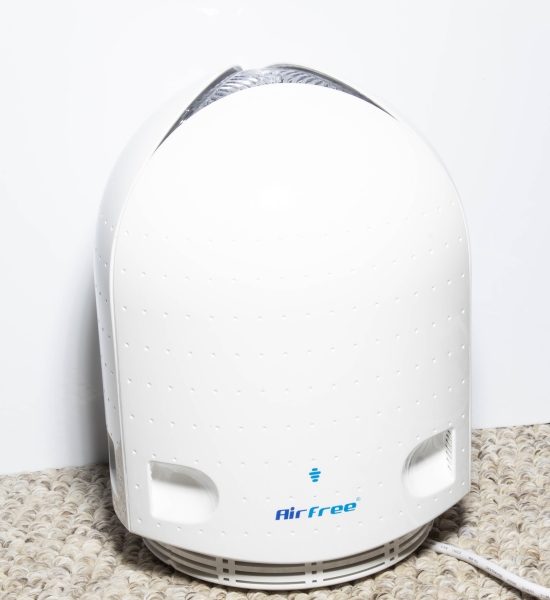
The AIRFREE P2000 is a small compact air purifier that is made of sturdy plastic with a built-in power cord. It is approximately 10 inches high and 8 inches in diameter and weighs only 3 1/2 pounds. The manufacturer’s specs state that it is effective in any room up to 550 square feet, and it has a small enough footprint that I think would allow it to blend in well with almost any decor. It is filterless and completely silent and requires no maintenance.


At the back of the P2000, there is the brand name, a few air vents, a touch sensor above the brand name that controls the adjustability of the night light, and the power cord.


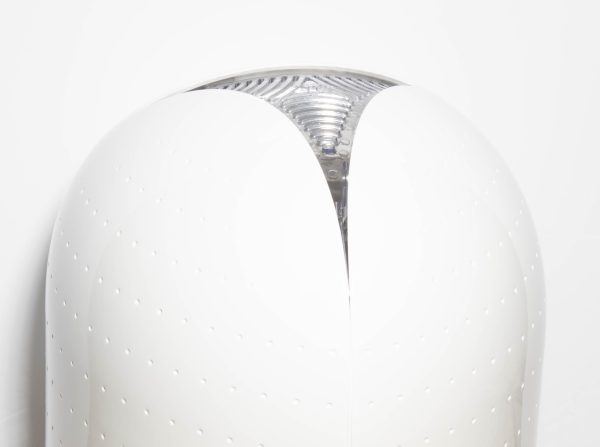
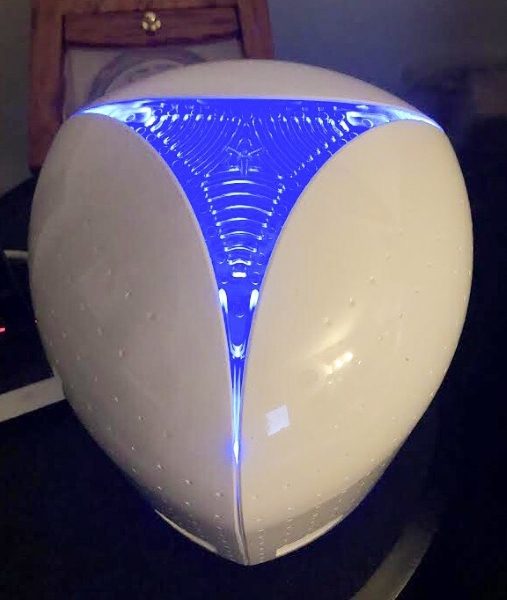
On the top of the P2000, there is an adjustable night light that as you increase the intensity via the touch sensor, goes from white light to an intense blue light.

Performance

After plugging in the AIRFREE P2000, I began to feel the difference after about 2 days. I normally suffer from allergies that include symptoms like watery and itching eyes, sneezing, and the occasional rash and runny nose. This air purifier seems to do a pretty good job and at remarkably reducing those symptoms. It is completely quiet, and the built-in night light is a plus. It is filterless, so there is no maintenance, but I do wonder how I would know if the filtering process ever failed, other than the possible clue if my symptoms return. Otherwise, the performance so far has been good, and I will keep paying attention to see how long it remains noticeably effective.

What I like

I like the compact size of the P2000, and the fact that it is filterless thus cost-effective, and completely silent.

What can be improved

In my opinion, the P2000 seemed to take almost 2 days before I began to feel its effectiveness, albeit that after that it did work quite well. Also, if it ever stopped working properly due to some unknown factor, there should be a display that could relay the status. Otherwise, as a filterless system with nothing to check, it would just be plugged in continuously as if working and regardless of its status.

Final thoughts

This is the second Air Purifier that I have tested since ditching my conventional HEPA air purifiers, and I must say that I am pleased with both devices. While the first one is simply amazing, more effective and more capable than the AIRFREE P2000, it also costs $800. For a room that is 200 to 300 square feet, this Air Purifier works quite well, and will now serve as the allergy deterrent in my living room.

Price: $269
Where to buy: The Air Purifier Store website and Amazon.
Source: The sample for this review was provided by The Air Purifier Store.

The post AIRFREE P2000 Air Purifier review appeared first on The Gadgeteer.

Filed in categories: Reviews

Tagged: , ,

AIRFREE P2000 Air Purifier review originally appeared on The Gadgeteer on June 10, 2018 at 9:00 am.

Note: If you are subscribed to this feed through FeedBurner, please switch to our native feed URL http://the-gadgeteer.com/feed/ in order to ensure continuous delivery.