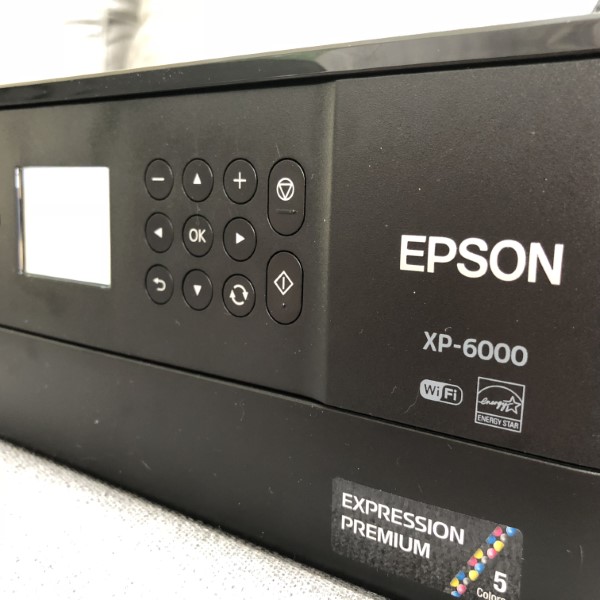
Epson Expression Premium XP-6000 All-In-One Printer review

I remember watching the original Star Trek series on TV as a lad. Every time someone wanted to look at some kind of media, it was always presented on a tablet-looking device. We’re not there yet, but until we get there, a good printer, like Epson’s XP-6000 fills the void nicely

What is it?

Epson’s Expression Premium All-In-One XP-6000 printer is a wireless computer printer, with fax, scanning, photo printing, and dual-sided capabilities. Multiple paper trays allow borderless 4” X 6” and 8-1/2” X 11” printing.

Hardware Specs

• Printing Method:  Epson Micro Piezo™ print head

• Nozzle Configuration: 360 Nozzles Black, 180 Nozzles per Color

• Minimum Droplet Size: 1.5 Pl, With Variable-Sized Droplet Technology

• Ink Technology:  Claria™ Premium Ink

• Printing Resolution: 5,760 x 1,440 DPI

• Application: Home, Photo

• All-in-One Functions:  Print, Scan, Copy

• Printing Speed ISO/IEC 24734:  15.8 pages/min Monochrome, 11.3 pages/min Color

• Printing Speed:         32 pages/min Monochrome (plain paper 75 g/m²), 32 pages/min Color (plain paper 75 g/m²),15 Seconds per 10 x 15 cm photo (Epson Premium Glossy Photo Paper)

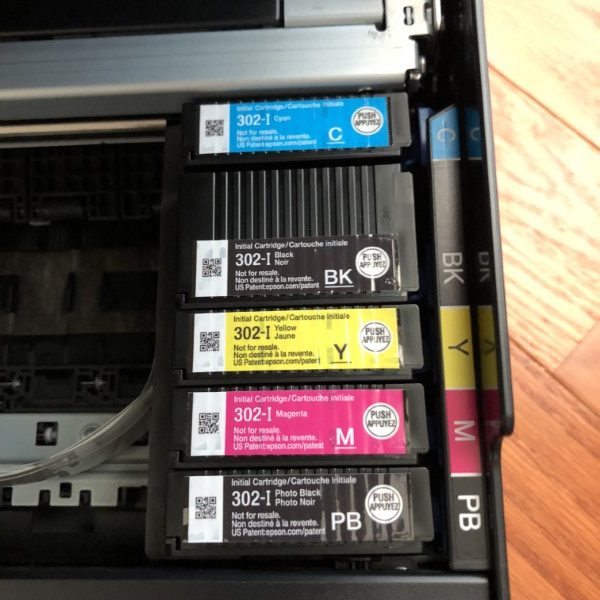
• Colors: Black, Photo Black, Cyan, Yellow, Magenta

• Scanning Resolution: 1,200 DPI x 4,800 DPI (Horizontal x Vertical)

• Scanner type:  Contact image sensor (CIS)

• Number of paper trays: 2

• Paper Formats: A4, A5, A6, B5, No. 10 (Envelope), Letter, 10 x 15 cm, 13 x 18 cm, 16:9, Legal, 9 x 13 cm, 13 x 20 cm, 20 x 25 cm, DL (Envelope), C6 (Envelope)

• Duplex: Yes (A4, plain paper)

• Print Margin: 0 mm top, 0 mm right, 0 mm bottom, 0 mm left (Wherever margin is defined. Otherwise 3mm top, left, right, bottom.)

• Multifunction: 100 Sheets Standard, 20 Photo Sheets

• Media Handling: Automatic duplex (A4, plain paper), Borderless print, CD/DVD print

• Energy Use: 18 Watt (standalone copying, ISO/IEC 24712 pattern), 0.7 Watt (sleep mode), 6 Watt (ready), 0.2 Watt (Power off), ENERGY STAR® qualified

• Supply Voltage: AC 220 V – 240 V

• Product dimensions: 349‎ x 340 x 142 mm (Width x Depth x Height)

• Product weight: 6.6 kg

• Noise Level: 4.6 B (A) with Epson Premium Glossy Photo Paper / Photo RPM mode – 33 dB (A) with Epson Premium Glossy Photo Paper / Photo RPM mode

• Compatible Operating Systems: Mac OS X 10.6.8 or later, Windows 10, Windows 7, Windows 8, Windows 8.1, Windows Vista, Windows XP SP3, XP Professional x64 Edition SP2

• Included Software: Epson Easy Photo Print, Epson Print CD

• Interfaces: WiFi, USB, Wi-Fi Direct, USB host

• WLAN Security: WEP 64 Bit, WEP 128 Bit, WPA PSK (TKIP), WPA PSK (AES)

• Mobile and Cloud printing services: Apple AirPrint, Google Cloud Print, Epson Connect (iPrint, Email Print, Remote Print Driver, Scan-to-Cloud, Facebook print)

• Housing Color: Black

• LCD screen: Color, Diagonal: 6.1 cm

• Memory Cards: SD, SDHC, SDXC, MicroSD*, MicroSDHC*, MicroSDXC*, MiniSD*, MiniSDHC* (* Adaptor required, not included)

• Features: Red-eye removal, Photo Enhance, Direct print from USB, Wireless PictBridge

• Warranty: 12 months Carry-in

What’s in the Box?

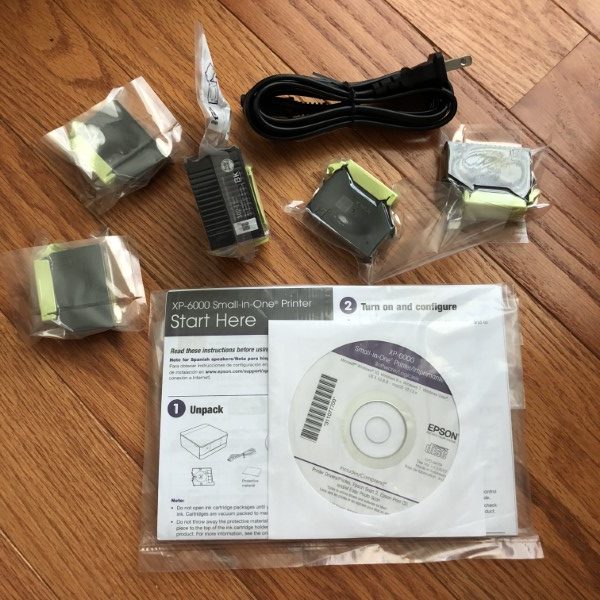
  • Individual Ink Cartridges
  • Printer
  • Power Cable
  • Setup Guide
  • Software CD
  • Warranty Card

Design and features

Epson has been a household name in printing for many years. In fact, my first color printer was an Epson some 20 years ago.
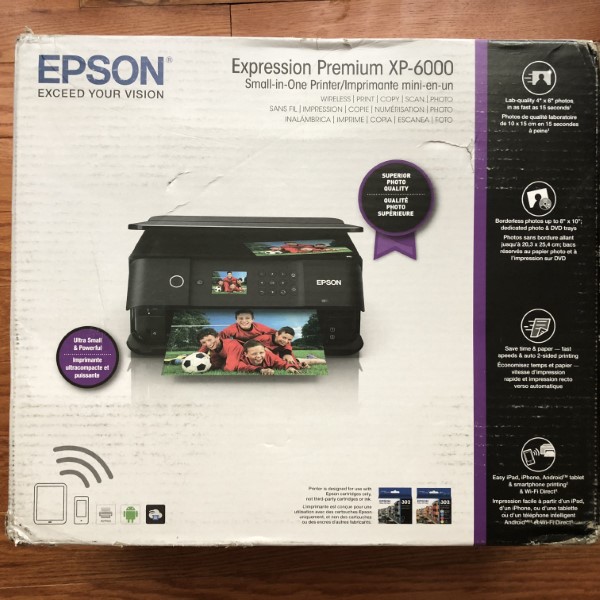
The XP-6000 printer arrived in a full-color, well-padded box with hand grips in the sides –always helpful for the bulky gadgets. Epson was gracious in including several types of paper for this review.

I removed what seemed like dozens of blue tape tabs to secure the printer during transport, unwrapped and installed the ink cartridges and plugged in the printer for its maiden voyage.
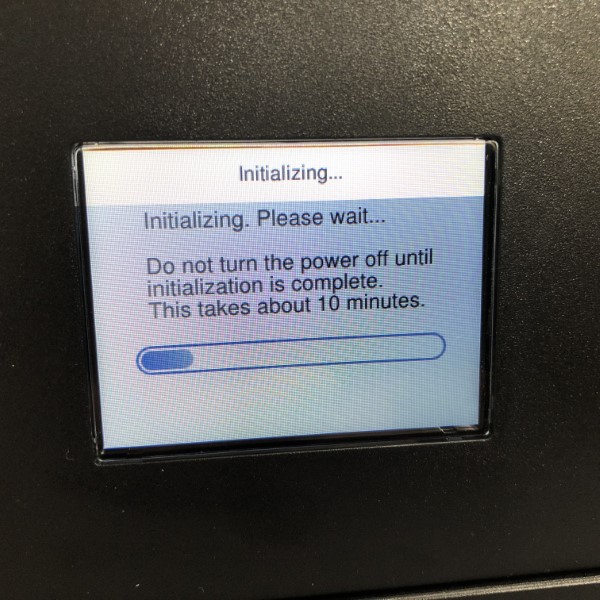
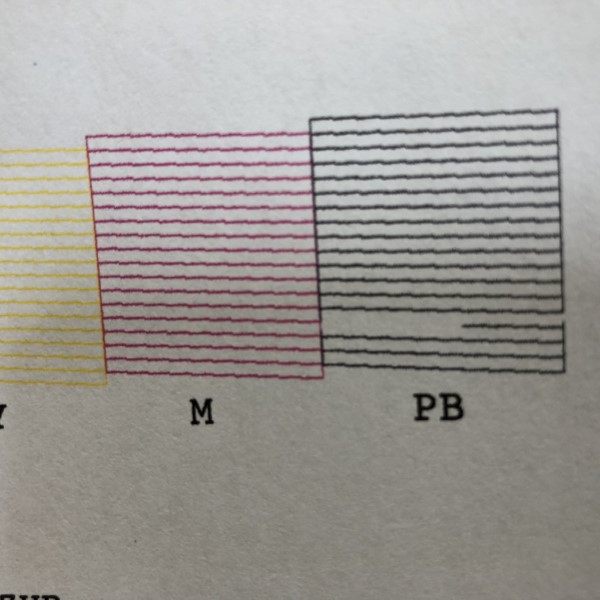
The printer starts with a number of print quality and head alignment tests which took about 10 minutes.
Several pages were printed which asked me to provide answers to my preferred printed squares, blocks, and colors. Connecting the printer to WiFi was a bit cumbersome scrolling through alpha-numeric screens using the keypad cursors and “ok” button.
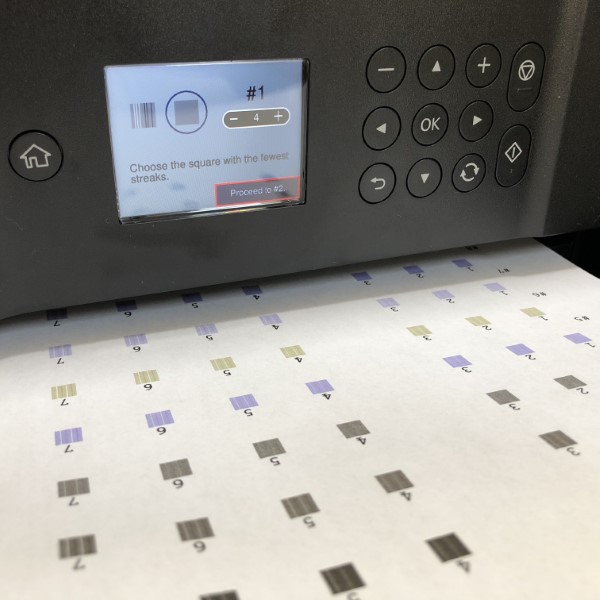
The printer is very “boxy” with not very many protrusions in its resting state. I like this clean unencumbered design.
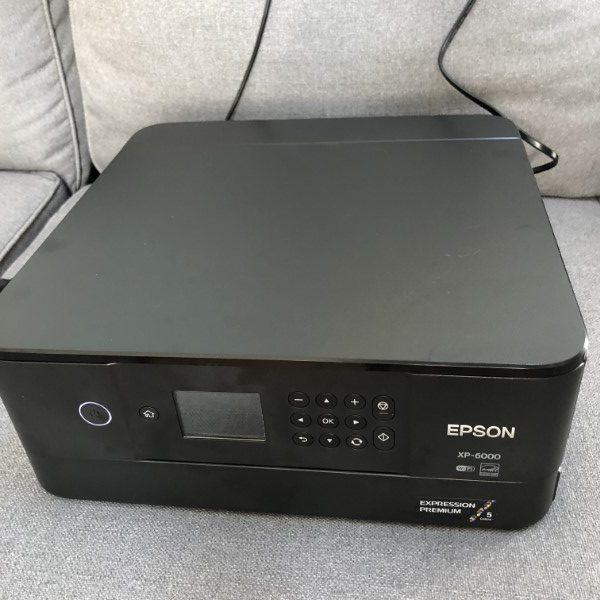
To start printing, the front of the printer must be opened and the collection tray extended. This might pose a problem if someone sent data to the printer, but didn’t make sure the collection tray was not extended. With the tray closed, the printer is very compact and quite sexy (can I use “sexy” to describe a printer?)
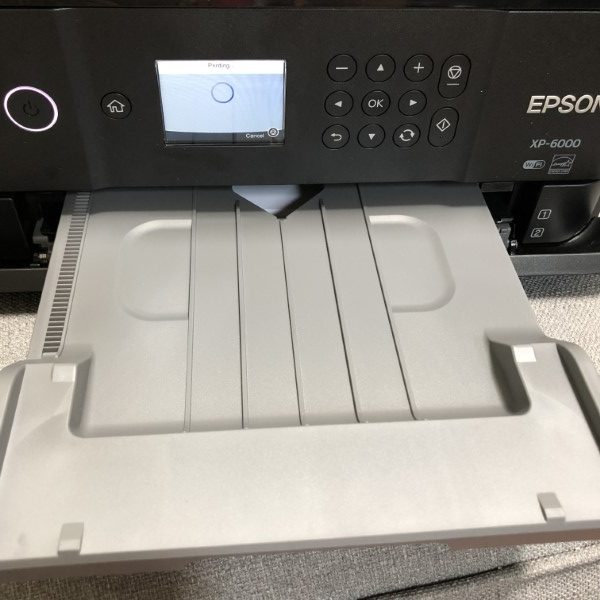
I loaded plain paper and 4 X 6 photo paper and selected a few images from my iPhone. The printer isn’t a speed demon, but the output was sharp and clear, I was particularly impressed with the subtlety in the greys in the photo of my daughter’s pet bunny.

A few more printed 4 X 6 and 8 X10 photos were proof enough for me that the printer is very capable. Like all inkjet printers, ink can be expensive and has a limited shelf life. Inks for the XP-6000 are comparably priced with others on the market. It’s worth noting this printer has four colors, black, cyan, magenta, yellow and photo black that can be purchased in multi-packs.

Next, I chose a two-sided color text document on plain paper. Output was quick and quiet, with only short delays between pages.

I installed the included software on my computer to gain access to the scanning and CD printing capabilities and found the software to be intuitive and easy to use. There are separate apps for CD Printing, scanning and a very comprehensive user guide.
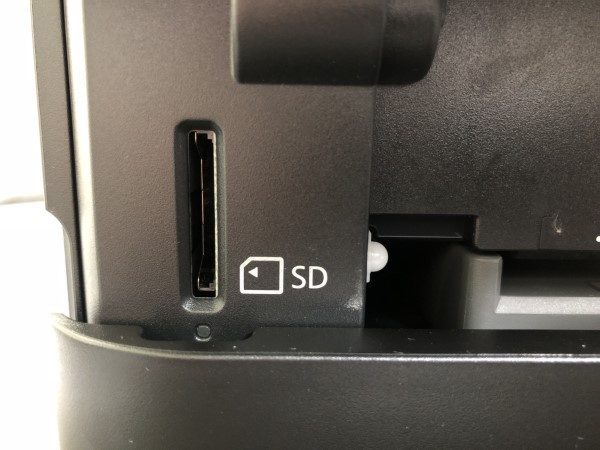
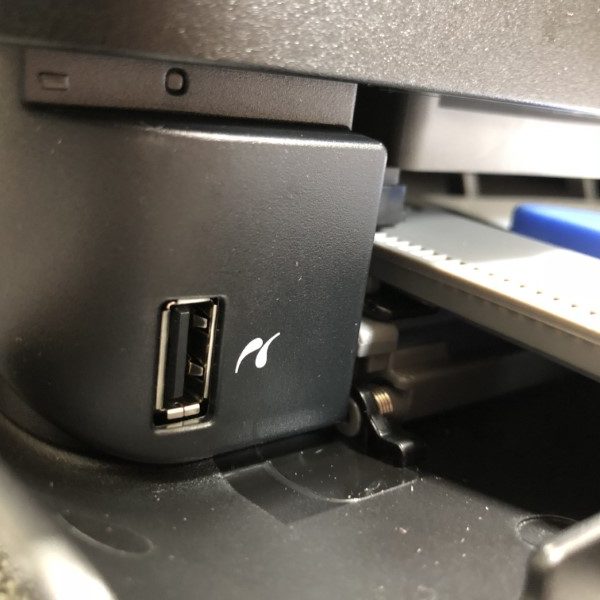
The printer also boasts direct-to-disk printing for CD/DVD/Blu-ray an SD card slot (micro SD cards will need an adapter that isn’t included) and a USB port.
The CD print tray is cleverly housed under the 8-1/2 X 11 tray. The CD printing app works well with lots of options. I’m big on home video so I might have to re-burn all my discs to give them a more polished look.

Computer-free printing is as simple, pop in a USB or SD card, and work through the menus – select the photos, number of prints, finish quality and, poof – done, just don’t forget to extend the output tray.

What I like

  • Attractive styling and compact size
  • Plenty of print options
  • CD printing and tray included
  • Great performance
  • Reasonably priced

What needs to be improved?

  • The ink alignment and head cleaning process can take a while and uses precious ink.

Final thoughts

Epson’s XP-6000 All-In-One printer is solid, offering a great design, CD, two photo sizes and plain paper printing. The apps are well designed and easy to use. Since this printer lacks a document feeder, it’s more geared towards the casual user. The pull-out trays are a bit quirky to get accustomed to, but not onerous. Overall, I really liked the XP-6000 and give it a solid recommendation. It’s not Star Trek yet, but with a snazzy printer like this, I can wait.

Price: $89.99
Where to buy: Amazon
Source: The sample for this review was provided by Epson.

Filed in categories: Reviews

Tagged:

Epson Expression Premium XP-6000 All-In-One Printer review originally appeared on The Gadgeteer on June 19, 2018 at 11:00 am.

Note: If you are subscribed to this feed through FeedBurner, please switch to our native feed URL http://the-gadgeteer.com/feed/ in order to ensure continuous delivery.

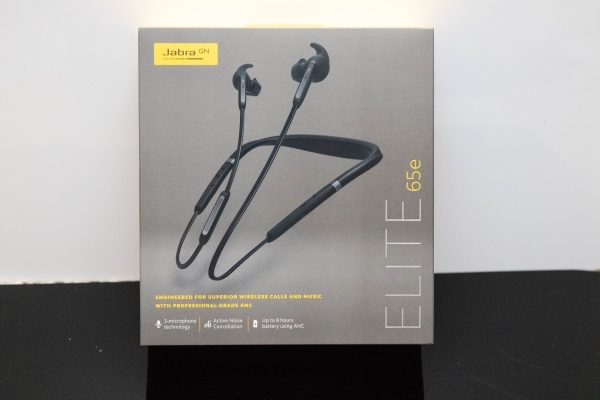
Jabra Elite 65e headset review

I am a fan of wireless Bluetooth earbuds, and these types of earbuds have been the focus of my search to find the best fit for me. When I first got the chance to review the Jabra Elite 65e Wireless headset, initially I was not very interested because the design included a wire from earbud to earbud. However, I decided to give them a chance. Here is how things worked out.

What is it?

The Jabra Elite 65e headset is a wireless Active Noise Cancelling headset that provides access and functionality for music listening and cell phone functions via Bluetooth.

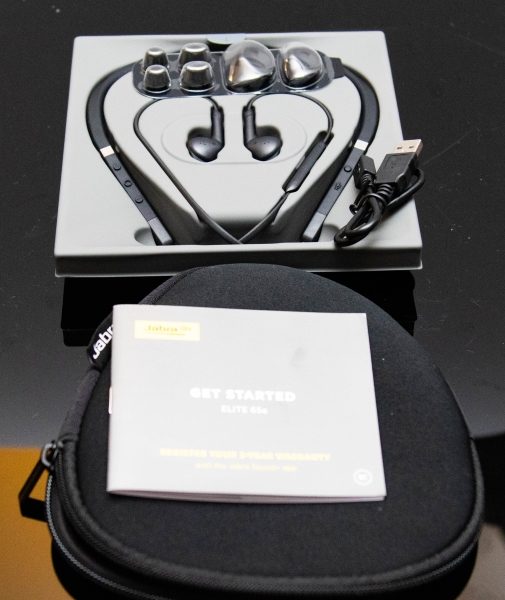
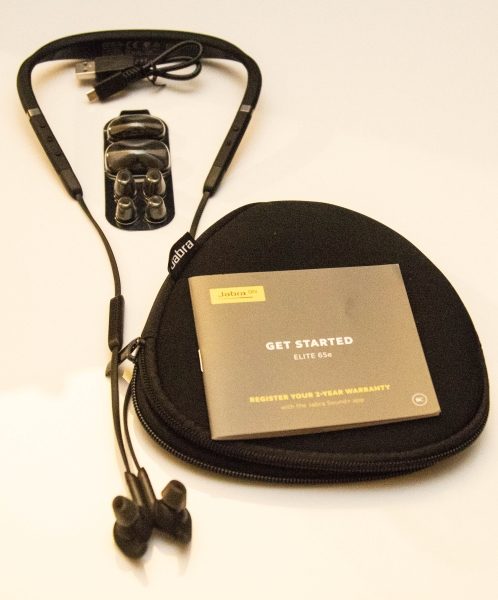
What’s in the box


1 x Jabra Elite 65E Headset
3 x Pairs of EarGels
3 x Pairs of EarWings
1 x Micro USB Charging cable
1 x Storage Pouch
1 x Instruction Booklet

Design and features

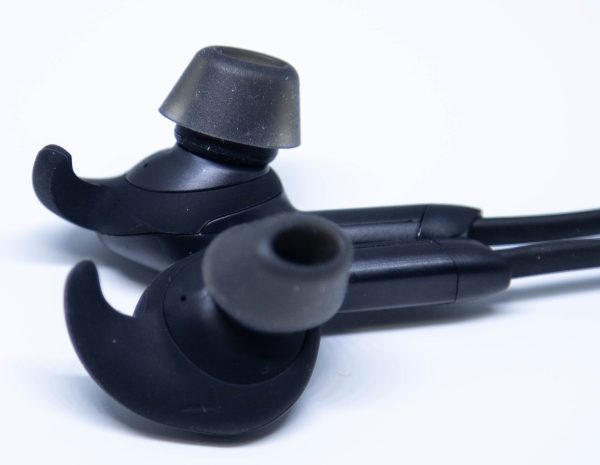
The Jabra Elite 65E headset is designed as 2 earbuds that are connected by a wire that incorporates all of the controls and the charging option. The middle of the wire is built thicker and of a rubber material, and forms the neckband that when worn properly, rests around your neck. The included pairs of EarGels and EarWings come in 3 different sizes and can be easily interchanged for the best fit.

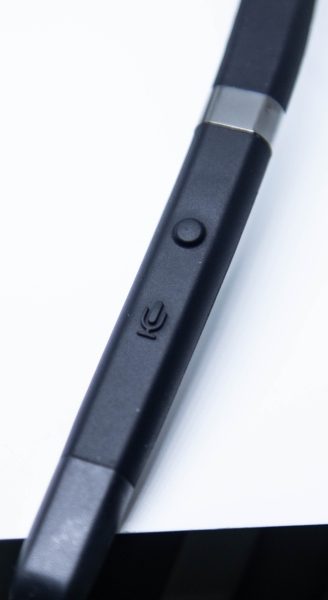
When worn correctly around your neck, the left side of the neckband contains 2 controls and a LED. The top round button pictured below is the Active Noice Cancellation/HearThrough Button. Holding this button down for 2 seconds will toggle this feature on or off.

The microphone symbol button below is used to activate Siri or Google Now, and to mute and unmute the microphone. In addition, when the headset is on, holding down the microphone button for 5 seconds will toggle the voice guidance on or off.

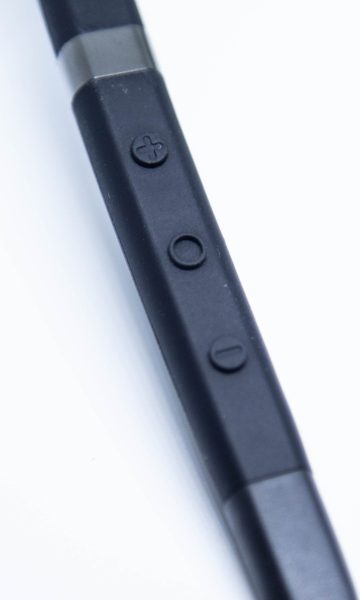
On the right side of the headset neckband, there are 3 buttons as pictured below. The button in the center of the 3 buttons, is the Multi-function button. When you first use the headset, you have to hold this button down for 3 seconds to turn on the headset and to put it in pairing mode. From there, the pairing process is the same as any other Bluetooth device. Once the headset is paired, the Multi-function button handles the following for calls and music:
– Hold down for 1 second to turn on the headphones
– Hold down for 3 seconds to turn off the headphones
– When listening to music, pressing this button will pause or play music
– When using the phone, this button will answer or end the call
– Double pressing this button will reject a call

The Multi-function button also handles multiple calls:
– Press to end a current call and answer an incoming call
– Hold down for 1 second to put the current call on hold and answer an incoming call
– Hold down for 1 second to switch between an active call and a call on hold
– Double-tap to reject an incoming call when you are already on a call

The + and – buttons control the following functions:
– Use the + or – button to adjust the volume when listening to music or on a call
– When using a Smartphone/Tablet and listening to music, press the + or – button for 1 second to skip a track forward or backward.
– When not listening to music or when not on a call, press the + or – button to hear the battery status.

Above the buttons, there is a status LED that indicates battery level for full, medium, low and very low, and pairing mode and resetting.


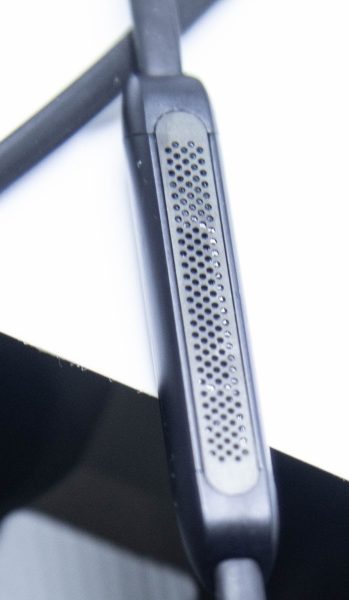
On the right side cable between the neckband and the earbud, there is a microphone in the middle.

As a part of the earbud section of the headset, each earbud has a magnet built-in. The magnets allow you to attach the 2 earbuds together when wearing them for added security, cable management, and power management. If you connect the earbuds together via the magnets while listening to music or on a call, the music will be paused or the call will be ended. If you are receiving a call, separating the earbuds will answer the call.

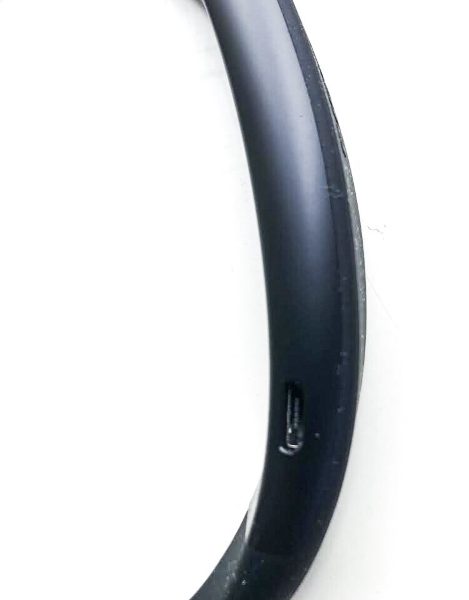
The thick part of the neckband that sits around your neck includes the charging port, and it also vibrates when powered on or off, when the headset connects to your Smartphone or computer, etc., and when there is an incoming call.

Performance

Although I am a big fan of completely wireless earbuds and not a big fan of the neckband, I must say that I LOVE this Jabra headset. It remains charged for quite a long time and recharges quickly. However, those features are just the tip of the iceberg. When placed around my neck, the headset fits so well that I forget that it is there. The fit of the earbuds in my ears is comfortable and secure, and I can wear them for a long time. The buttons function well, and the voice commands are clear and make sense. In terms of the sound, the lows, mids, and highs are well balanced and just sound great, and there is a built-in volume limiter that limits how loud they get. At first, I was a bit annoyed about the limiting, but the volume is more than adequate, and this feature will likely preserve my hearing. Phone calls are clear on both ends, and the Bluetooth connection is very reliable with very few disconnects. The accompanying Jabra Sound+ App is a nice feature, and the ability to equalize your music especially when switching genres is nice. I listen to Contemporary Jazz, R&B, Gospel, Easy Listening, some “borderline” classical music, etc.

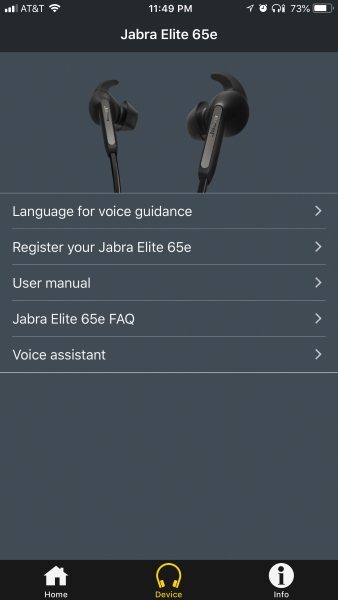
Jabra Sound+ App

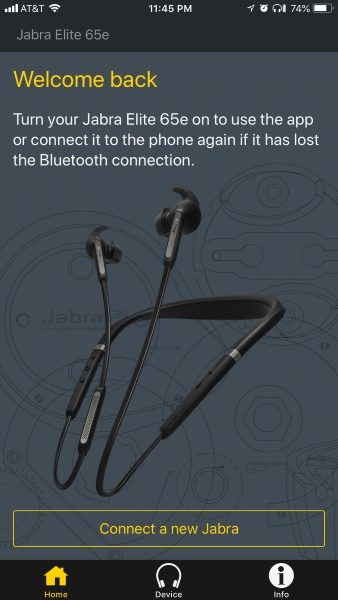
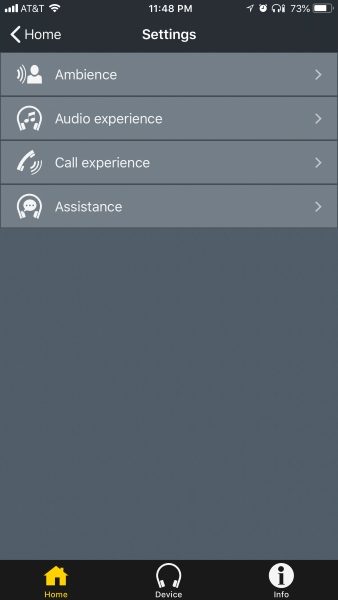
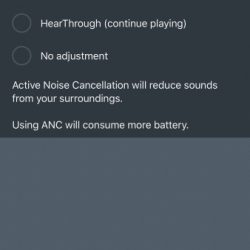
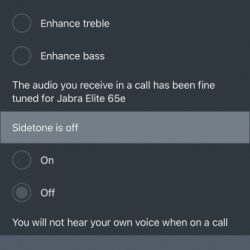
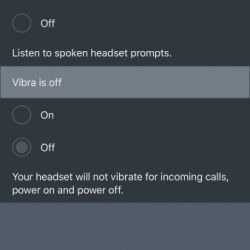
The Jabra Sound+ App allows you to customize your music along with handling other functions. You can manage the Automatic Noise Cancellation/HearThrough, enable or disable vibration, manage voice prompts, equalize your sound, as well as register your headset for the 2-year warranty and get any firmware updates. The pictures below show some of the available screens and choices.


What I Like

I love the quality of the build of this headset, the built-in features and functionality, and the fit and finish. Holding them in my hand just gives the feel of a quality product. The sound reproduction is pretty darn good, and they are really comfortable to wear.

What can be improved

I do think that while this headset is well built, the magnets that hold the earbuds together could be a bit stronger. I am not sure how that would affect performance, but they do constantly separate while I am wearing them, and on a couple of occasions, the headset fell from around my neck after the magnets separated.

Final thoughts

In a market that is saturated with wireless earbuds of every shape and size and gimmick, the Jabra Elite 65e headset stands out as a quality product in just about every way. It is well built, produces well-balanced sound and most of all remain reliable use after use. If anything changes, I will be sure to write an update, but in the meantime and until I find earbuds that can do better, this headset holds on to the #1 position in my growing collection.

Price: $199.99
Where to buy: Jabra and Amazon
Source: The sample for this review was provided by Jabra.

Filed in categories: Reviews

Tagged:

Jabra Elite 65e headset review originally appeared on The Gadgeteer on June 19, 2018 at 9:00 am.

Note: If you are subscribed to this feed through FeedBurner, please switch to our native feed URL http://the-gadgeteer.com/feed/ in order to ensure continuous delivery.
Denon C820 Dual-Driver In-Ear Headphones review

I’m a big fan of high-end headphones and jumped at the opportunity to review Denon’s C820 ear candy. Just the specs alone made me want to pull up my most sublime musical selections.

What is it?

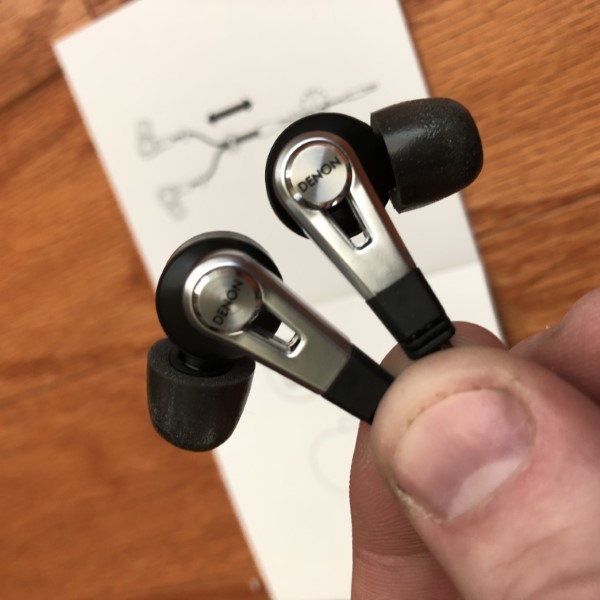
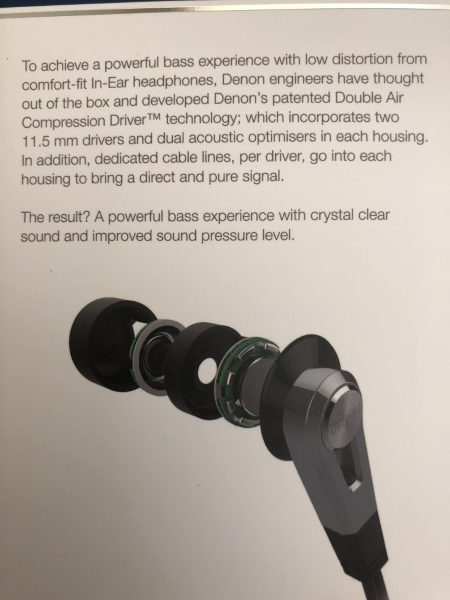
The Denon C820s are “dual-air compression” dual wired earbud type headphones that fit snugly and deliver sweet, sweet music into your ear-holes.

Hardware Specs

  • Impedance – 16 ohm
  • Sensitivity – 115 dB/mW
  • Frequency response – 4-40,000 (Hz).
  • Maximum power input – 250 mW
  • Weight – 10.4 g (not including cable)
  • Aluminum, die-cast resin construction

What’s in the Box?

  • C820 Headphones
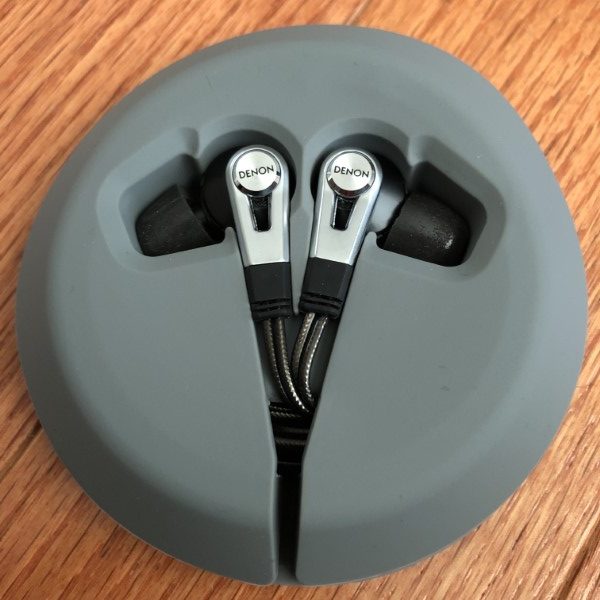
  • Rubbery earphone holder
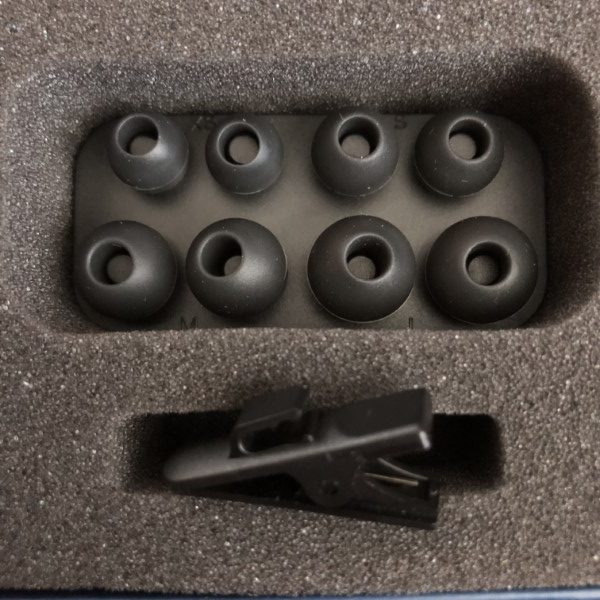
  • Four extra ear tip pairs of various sizes
  • Instruction manual
  • Cord clip


Design and features

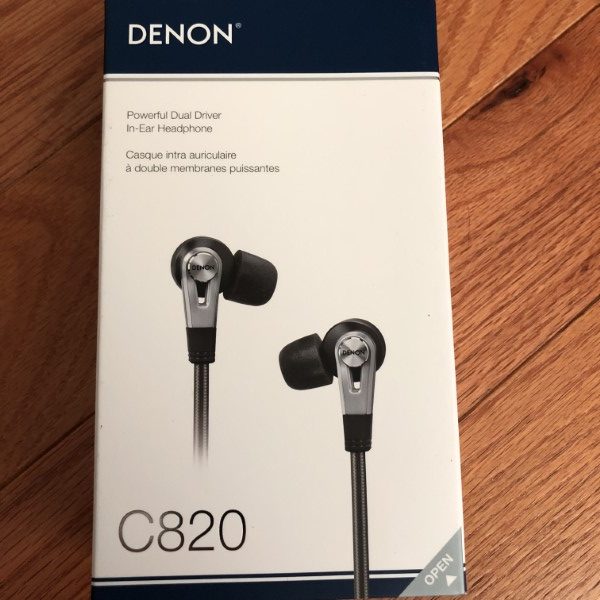
The C820 headphones arrived in blue and white boxing nestled into a rubbery-feeling holder. A number of different size ear tips are included.

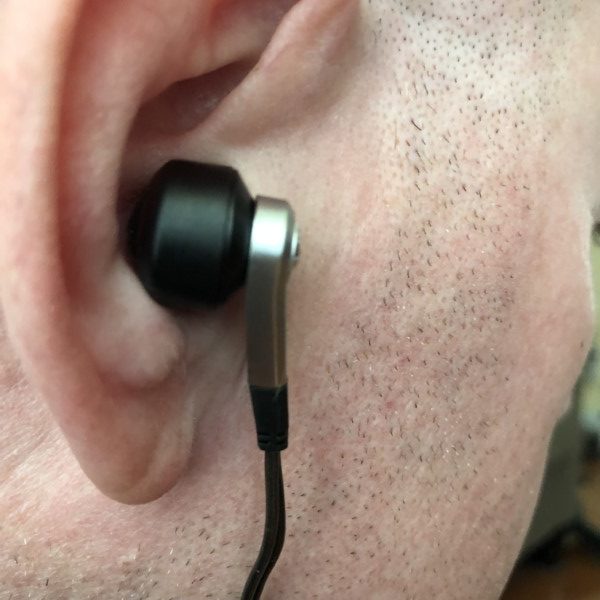
I tried several pairs and decided the default memory-foam ones were the most comfortable and provided the best sound isolation. I was a little worried that the angled metal bits that the cords connect to would cause some discomfort, but I was pleasantly surprised. No problem there. Please excuse my scruff.

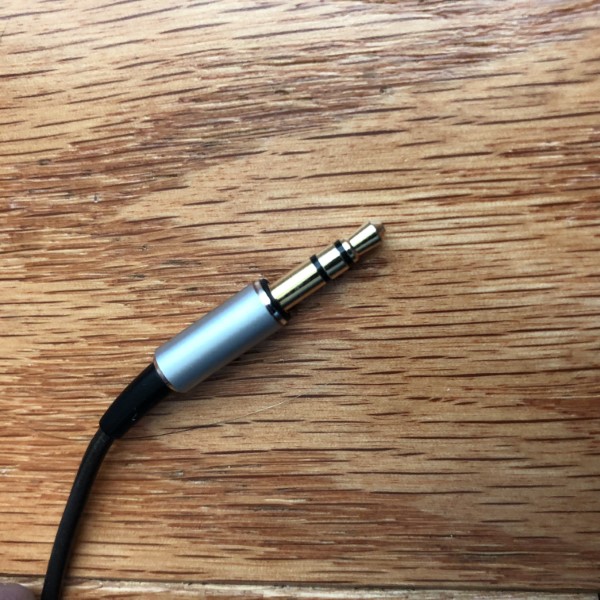
The cords are heavy duty and should hold up well for years of being tossed into my pockets or day bag. These headphones FEEL sturdy. They are metal and have some decent heft to them. Rapid head movements might make them pop out, but I had no troubles even when using them while mowing the lawn. I used the cord clip for a bit of added security, Good sound isolation means I can keep the sound at a safe level even with the mower blades engaged. The 1/8″ stereo jack is narrow enough to fit into most cases without the need of an adapter.

I pulled up a relatively eclectic parcel of tunes. Music of the Koto, Eric Clapton, Handel’s Messiah, and Kenji Kawai’s “Making of a Cyborg” from the 1995 Ghost in the Shell anime film were a few of my choices.

These headphones are impressive. Even at reasonable volumes the bass booms. In fact, I had an odd sensation during a particularly bass-filled passage. The specs indicate full spectrum sound down to 4Hz and Denon wasn’t kidding. These headphones produce sound you can feel. You know that sternum-vibrating bass you feel when you go to a live concert? These headphones gave me that bass-shaking felling in my ears that I expected to feel it in my torso. Delicious!

Treble is also well-represented with crystal-clear highs. I was easily able to pick out tiny details featuring the triangle in the percussion section of orchestral pieces.

Great sound, tough construction, and good sound isolation, what more could one ask?

What I like

  • Metal construction
  • Tough cords
  • Extremely wide frequency response
  • Comfortable

What needs to be improved?

  • Nothing. These headphones are works of art.

Final thoughts

While testing these headphones, I accidentally bumped the volume bar while listening to Family Force 5’s “Put Ur Hands Up.” I actually scared myself! I felt the same way I did as a kid when I visited the stereo section in the department store and turned on a stereo to find someone had spun the volume knob all the way to the upper limit and everyone in the entire store knew some unsuspecting chump had punk’d.

I’ve been a long-time fan of balanced-armature headphones with their flat frequency curves, luscious bass, and crisp highs. For many years my Etymotic ER-4 headphones have been my go-to choice. I believe Denon’s C820 headphones with their comfortable fit and “dual air-compression” drivers may have usurped my beloved ER-4s as my new audio buddy.

Price: $159.00 and worth every penny
Where to buy: Amazon
Source: The sample for this review was provided by Denon.

Filed in categories: Reviews

Tagged:

Denon C820 Dual-Driver In-Ear Headphones review originally appeared on The Gadgeteer on June 18, 2018 at 11:00 am.

Note: If you are subscribed to this feed through FeedBurner, please switch to our native feed URL http://the-gadgeteer.com/feed/ in order to ensure continuous delivery.
VAVA E-Touch Phone Holder for Car, Electric Auto Lock iPhone Mount review

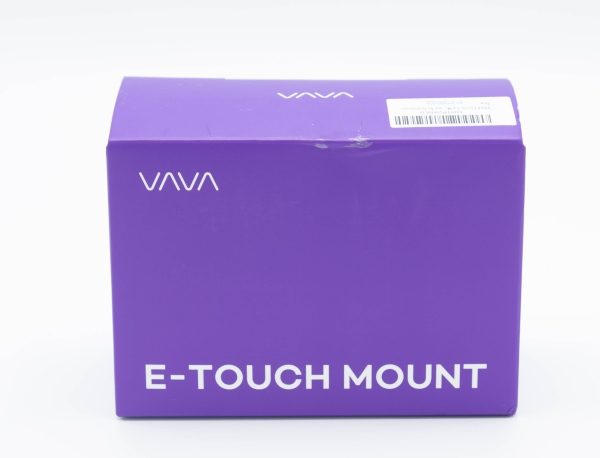
These days, our phones are an extension of our daily lives, and we take them with us everywhere we go. I am no exception, and when in my car, I usually lay mine on my center console/armrest and just have the charging cable draped wherever and plugged into my USB power jack. Whenever I need to glance at my phone, it has been an issue since I would either quickly glance down at my center console while driving, or grab the phone as soon as I am at a traffic light or stop sign. While many dash mount phone holders are available, my issue has been that I have always hated fiddling with the buttons that need to be depressed to remove the phone, or fiddling to depress the phone correctly in the holder to engage the manual mechanism to lock it in securely. The VAVA-Touch Phone holder aims to resolve these issues, so, let’s see how it did.

What is it?

VAVA E-Touch Phone Holder for Car, Electric Auto Lock iPhone Mount, is a dash mountable cell phone holder that electronically manages to secure and release your phone.

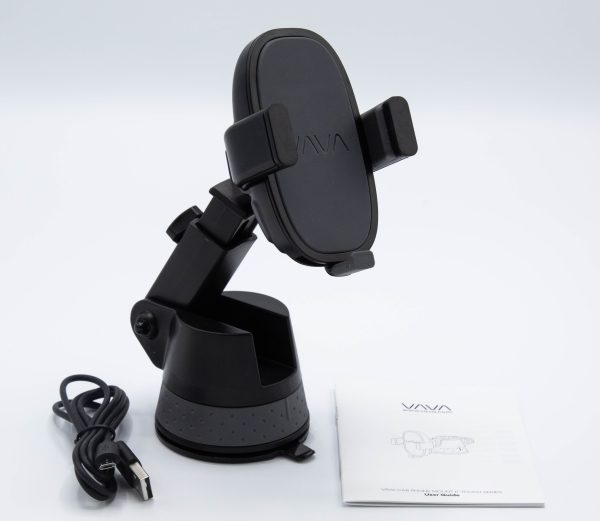
What’s in the box


1 x Phone Holder
1 x Micro USB Cable
1 x Instruction Booklet

Design and features

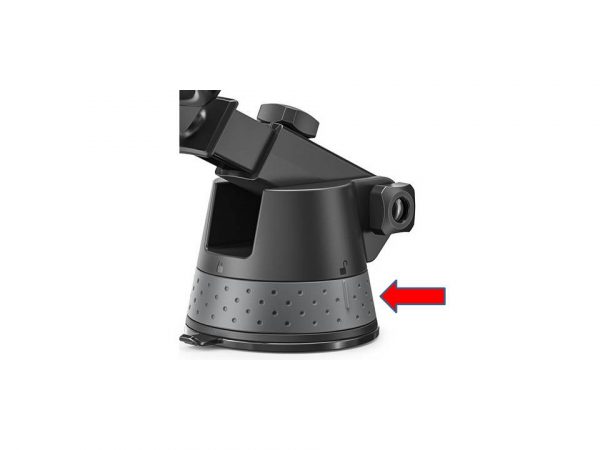
This is a typical vehicle cell phone holder, with a suction cup at the bottom, that in this design is secured by pressing the base onto the dash and turning the gray colored part of the base clockwise to secure and counter-clockwise to release.
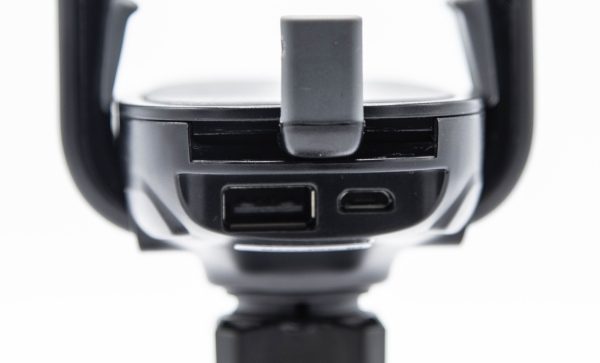
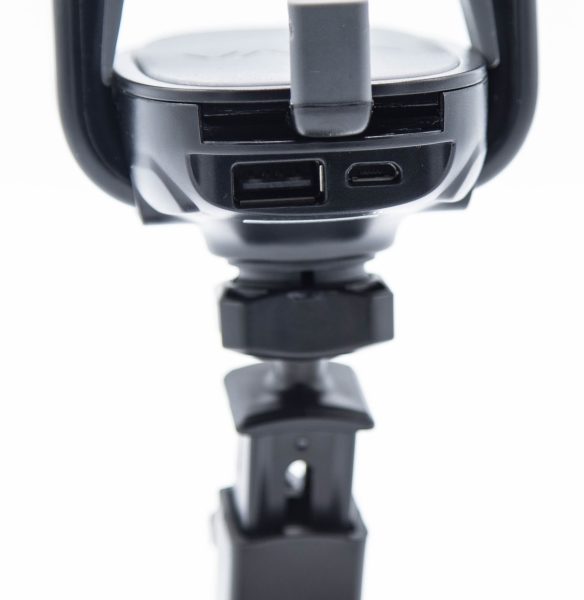
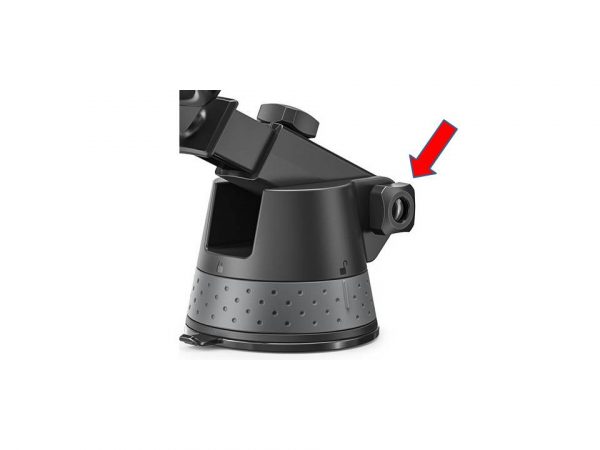
At the bottom part of the holder mechanism, there are two ports, one USB, and one micro USB. The micro USB port is used to power/charge the battery that is built into the holder, and the regular USB port can be used to power/charge your cell phone or any other USB accessory. The built-in battery means that once charged, the holder can operate and charge your device without being plugged into a power source.


Just below the phone holder, there is the arm that holds the phone holder mechanism, that can be extended to move the phone and holder closer to you or further away from you.


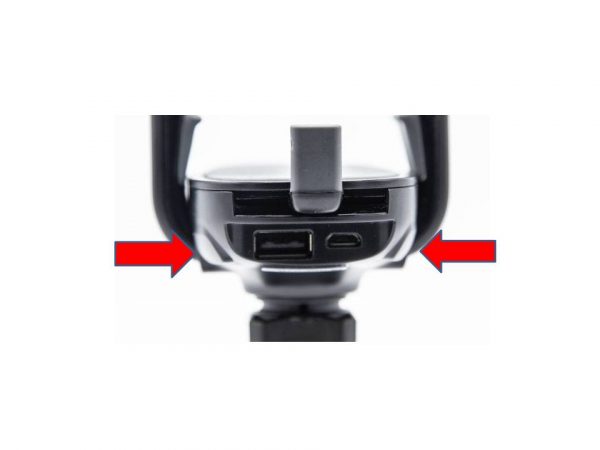
To the right and left of the ports, you will notice a “bulge” on the surface of each side. These “bulges”, are actually the touch-sensitive areas that disengage the arms of the holder to release the phone. When the phone is placed in the holder, the arms automatically and electronically close. This is accomplished by the pressure that is placed on the back of the holder when the phone is inserted.
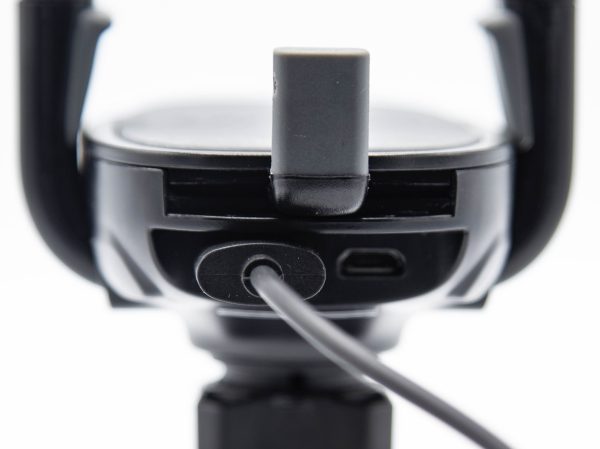
The picture below shows the accessory charging cable plugged into the bottom of the holder. This cable can be used to charge any accessory that can be charged via USB, or to power any such device.


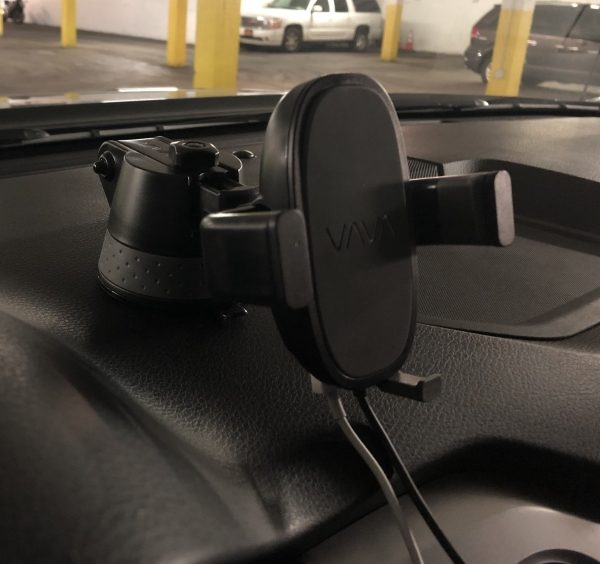
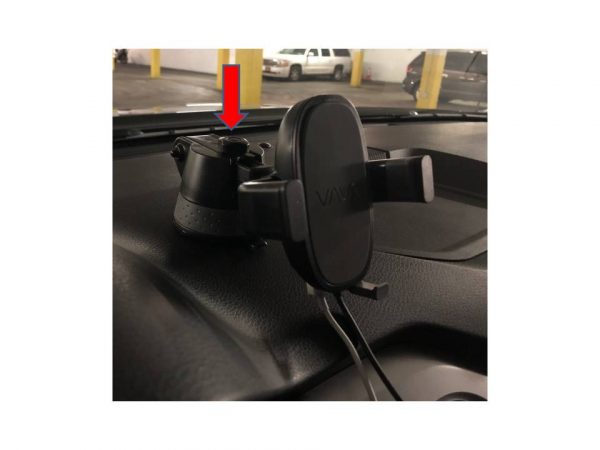
VAVA E-Touch Phone Holder mounts to the dash or windshield if so desired. The following picture shows the side view of the holder, mounted to my dash with both the power cable and my iPhone lightning cable attached. On the top of the arm behind the holder is the knob that secures or releases the extension arm.

To the right of the top knob is another knob that releases and secures the arm so that you can raise or lower it to the desired position.

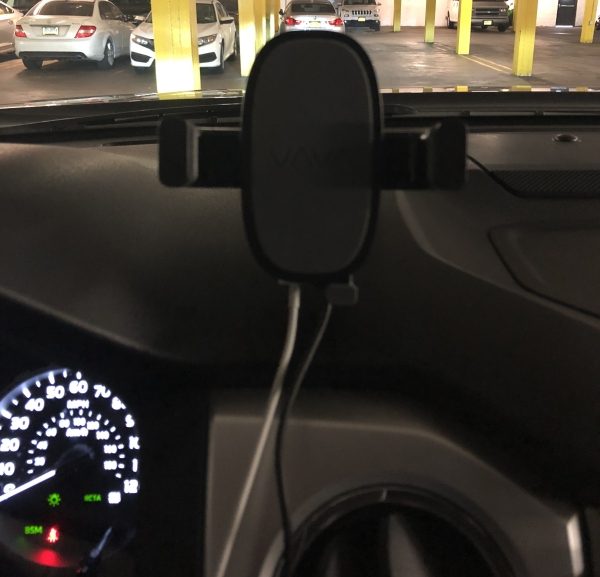
This next picture is just a front facing view, with the cables attached. This is what you see from the Driver’s perspective before you attach the phone. Notice the gray pad at the surface of the back of the holder. That surface is the pressure pad that is engaged when you place your phone into the holder. The pressure on the pad activates the arms to securely close onto the sides of your phone


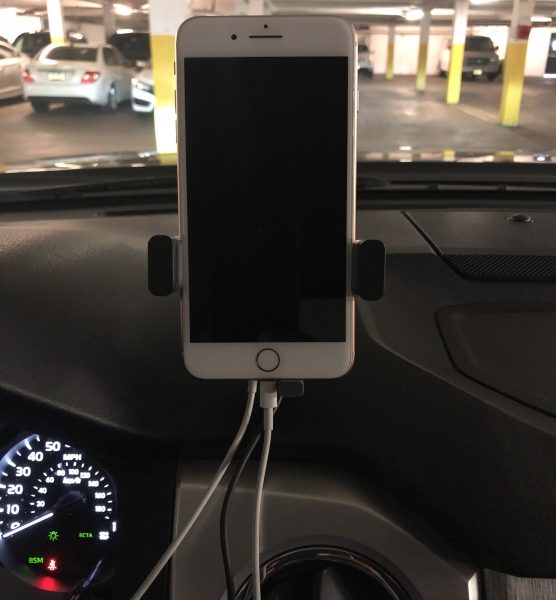
Once the phone is seated in the holder, the securing arms automatically close. In the following picture, I have my iPhone in the holder, with the lightning cable attached to charge the phone.

What I like

I like that the holder mounts in a very sturdy way to the dashboard, and when I tested it while driving on very rough NYC roads, the vibration was minimal. It is well built, and the electronic mechanism for opening and closing the securing arms works well.

What can be improved

What can be improved and what is my biggest disappointment with this holder, is that QI wireless charging is not built-in. The ability to place my phone in the holder, and have it charge wirelessly would make this a 5-star review.

Final thoughts

The VAVA E-Touch Phone Holder for Car, Electric Auto Lock iPhone Mount is a well-made mount, and it adds ease and convenience to secure your cell phone to the dash or windshield while maintaining it within proximity for easy viewing and access. The fact that it stays well secured to my dashboard and is not very affected by vibration makes it easy and practical for me to use. I currently have it installed in my car, and I use the charging port to power/charge my iPhone. I do believe that I will continue to use it at least until one with QI wireless charging is available. However, I am not convinced that the convenience of the powered security arms makes it a great value at its current price point when compared to other available holders that while not powered, are much cheaper.

Price: $29.99
Where to buy: Amazon
Source: The sample for this review was provided by VAVA.

Filed in categories: Reviews

Tagged: ,

VAVA E-Touch Phone Holder for Car, Electric Auto Lock iPhone Mount review originally appeared on The Gadgeteer on June 18, 2018 at 9:00 am.

Note: If you are subscribed to this feed through FeedBurner, please switch to our native feed URL http://the-gadgeteer.com/feed/ in order to ensure continuous delivery.
Minger LED Smart TV Backlight kit with Camera review

It’s hard to get the same movie-watching experience at home as you have at the theater.  Some things are better at home (cheaper popcorn, more comfortable seats, no talking strangers), but other aspects, like ambient lighting, are more difficult to control.  Room lights can wash out the TV screen, but watching in a dark room can cause eyestrain and means bathroom trips without those neat little pathway lights theaters have.

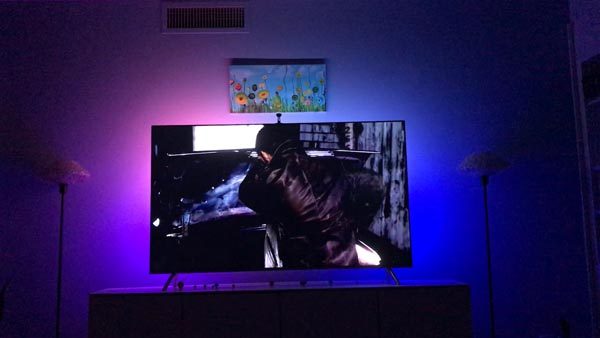
Dr. Andrew Weil describes an experiment that determined people experience less eyestrain when they watched a movie against a lighted wall.   I don’t know about your setup, but there’s no room behind my TV for a lamp to light the wall.  A lot of ingenious companies have come up with LED light strips that attach to the back of the TV to wash the wall with light.  Some of these are static lights of a single color, but some companies have come up with systems to wash the wall in moving colors that match what’s on the TV screen.  The Gadgeteer was recently offered the chance to review the Minger LED Smart TV Backlight kit with Camera which promises to wash the walls with moving colors.  Since I was already looking for a backlight for my TV, I asked to be given the chance to review the Minger kit.  Let’ see how it works.

What’s in the box?

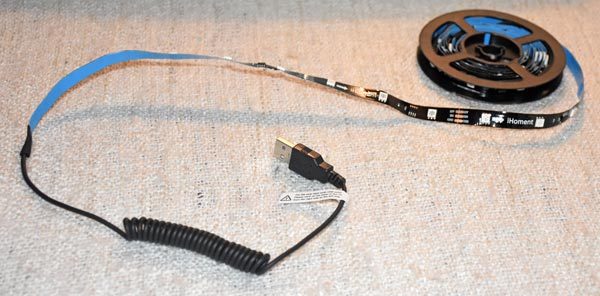
The first component is the 8.5 feet of LED strip lights.  This kit is sized to fit a TV with a 55″ – 65″ screen.  They also offer a kit for a 46″ – 55″ screen.   I received the larger kit for my 65″ Samsung TV.  The strip was nicely coiled around this film reel, so there were no kinks.  The back of the strip has a press-to-stick adhesive to make applying it to the TV simple.  It’s actually three strips of lights, with permanent connectors already joining the strips.  This makes fitting it around the corners at the sides of the TV a snap.

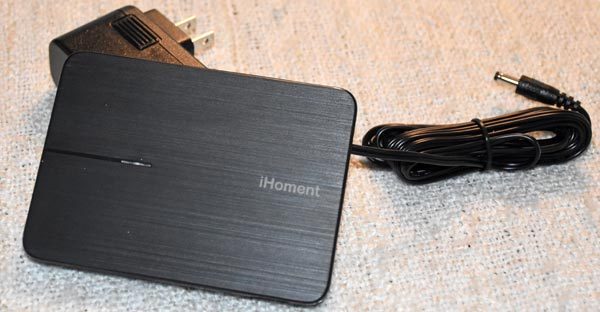
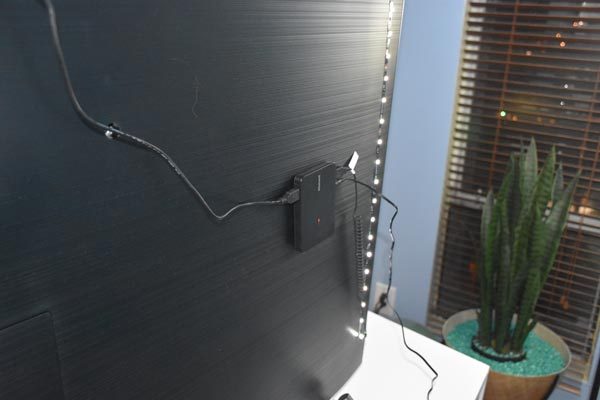
The controller box also has adhesive on the back to attach it to your TV.  There are three connectors on the box.  Two USB connectors attach it to the camera (on top of box) and to the light strip (bottom of box).  You also attach the included AC power supply to the bottom of the box.

Please note that the seller calls this the Minger system, but some of the components are marked iHoment, and the controller app is called iHomentLight.

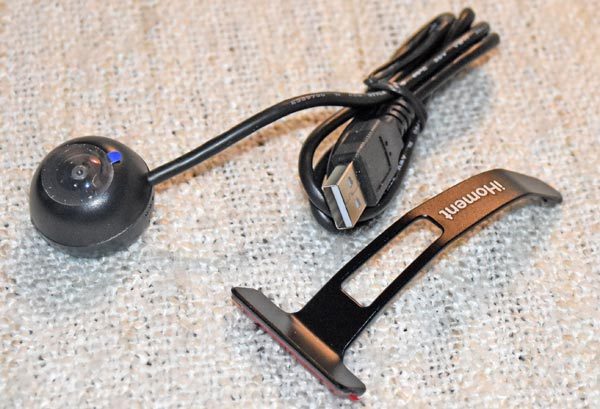
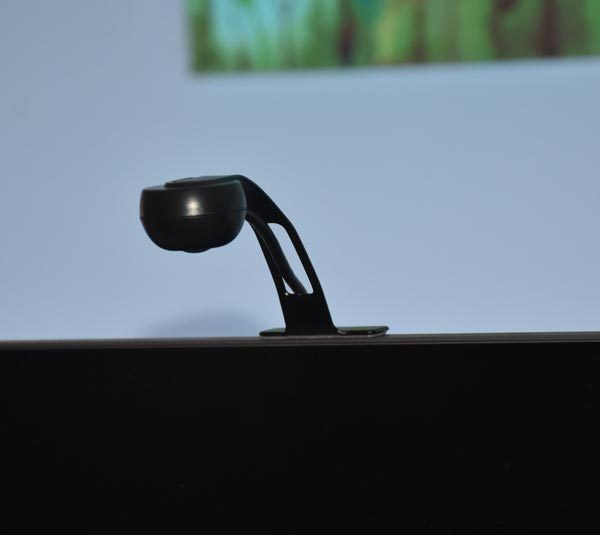
Instead of reading signals through the TV’s HDMI cable, and thus limiting the equipment it can work with, the Minger system attaches a camera to the top of the TV to “see” what’s on the screen.  The stand attaches to the TV with an adhesive base.  The camera plugs into the iHoment controller attached to the back of the TV.

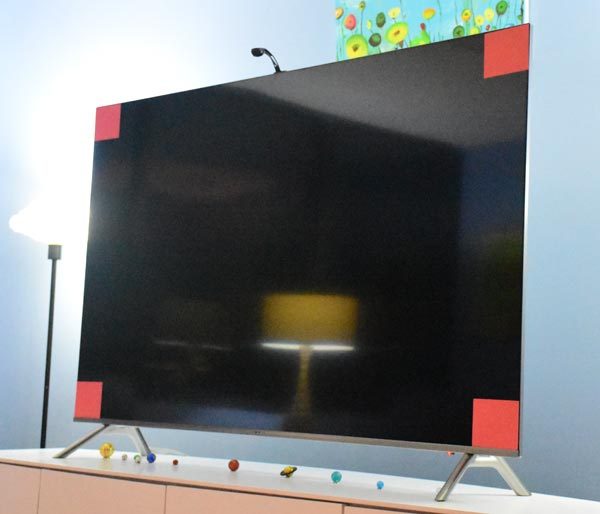
These four red cards are used for calibrating the Minger system.  They have adhesive strips on the back so you can attach them to the four corners of the TV’s screen.  They remove without leaving behind a residue.

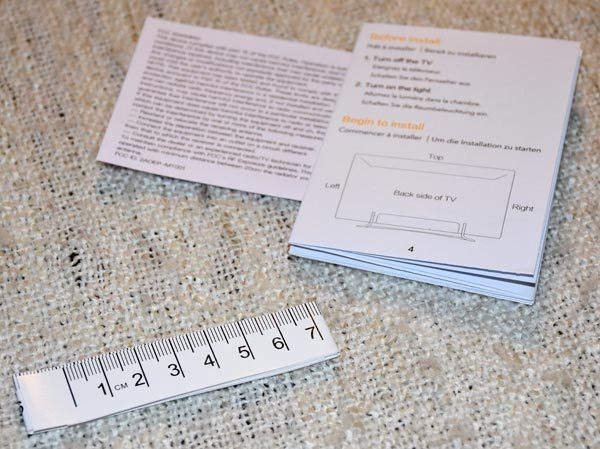
Lastly, you’ll get a detailed set of installation instructions.  The included paper tape measure is needed for installation.  You’ll use it to find the middle of the top of the TV so you can apply the strip lights evenly on the top and sides of the back of the TV.

Setup

The installation guide has illustrations and instructions in three languages for each step.  You first find the midpoint of the top of the TV, and center the long strip to the top using the adhesive back.  The short strips attach to the sides, with the end with the USB plug on the right side (as you face the back of the TV) and the end with no connector on the left side.

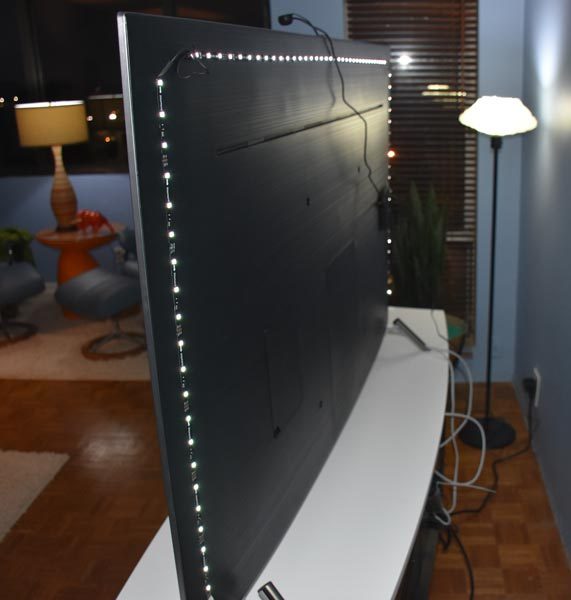
The adhesive on the strips attaches easily with light finger pressure.  The back of my TV isn’t smooth plastic; it has thin, raised lines on the surface.  I’ll need to periodically check it for a while to be sure it’s sticking well to the textured surface over time.

I couldn’t move the TV far enough from the wall to get a great picture, but you can see the installed light strips from this angle.

The pictures on the manufacturer’s website show the controller box beautifully centered on the TV, but I can’t do that with my TV for two reasons.  First is there’s a bunch of connectors and plugs in the center of my TV, and they are hidden behind a removable door.  Secondly, my TV has a cable guide system to hide all the cables so nothing is visible below the TV.  I need to guide the power cable over to one of the TV’s legs so I can conceal it with the rest of the cables.  I’ll probably end up just using some 3M Command cable guides to run it down the back of the leg and behind my media cabinet.

This is the camera adhered to the top center of the TV.  I was really unhappy at first about having something sticking up off the TV in front of my picture my daughter painted for me, but the camera is pretty discreet.

Here’s the TV with everything installed and ready for calibration.  I turned off the TV and left on the room lights so the camera could “see” the color of the calibration patches, as instructed.  I pushed the TV and media cabinet back into place so the TV would be lighted as it normally is in my living room.

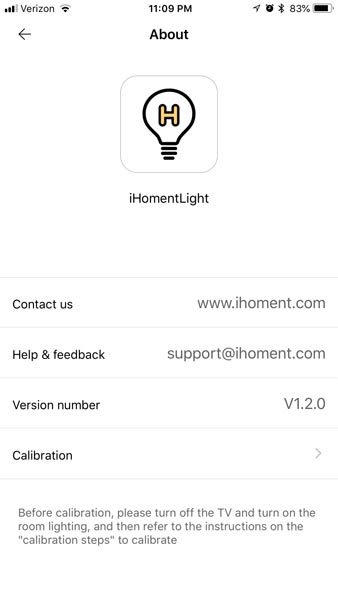
I downloaded the iHomentLight app from the Apple App Store to my iPhone 7 Plus.  (The app is designed to fit the iPhone screen, but it will run on the iPad, if needed.  There’s also an app for Android.)  After connecting to the iHoment controller via Bluetooth, I was able to select the calibration setup from the app.  The app walks you through every step of calibration.

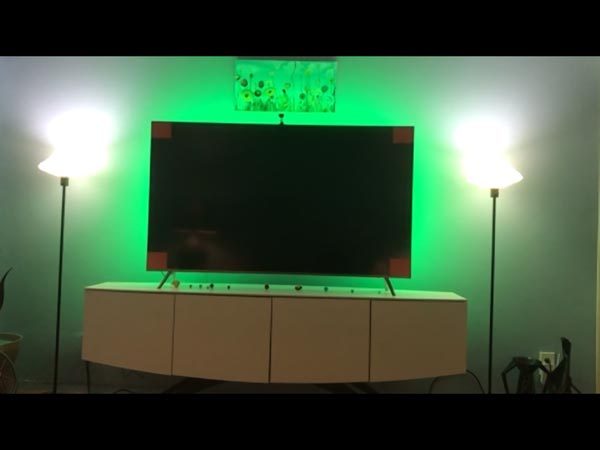
During calibration, the lights blink and change.  When calibration is complete, the backlights turn to steady green.

I’m ready to start watching TV!

Performance

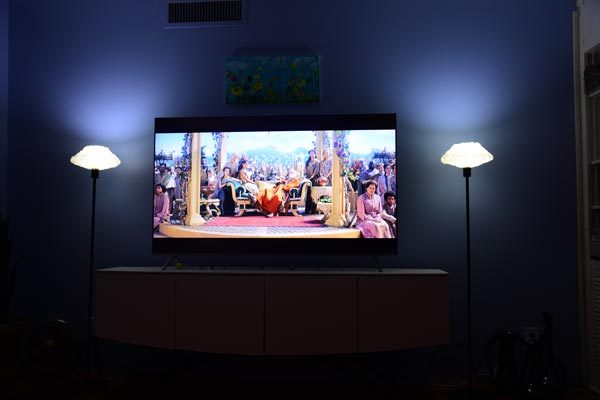
This is how my living room normally looks while I watch TV.  I turn off all the other lamps in there because they cause screen glares and reflections.  I leave on the lights flanking the TV so we can see if we need to leave the room.  It’s okay this way, but the two lamps can be a bit harsh, even when I dim them.  The lede photo (at the top of this review) shows my TV with the Minger lights in use.

By the way, the images you’ll see in photos and in the short videos are from Thor: Ragnarok, Annihilation, and episodes of the Supernatural TV show.

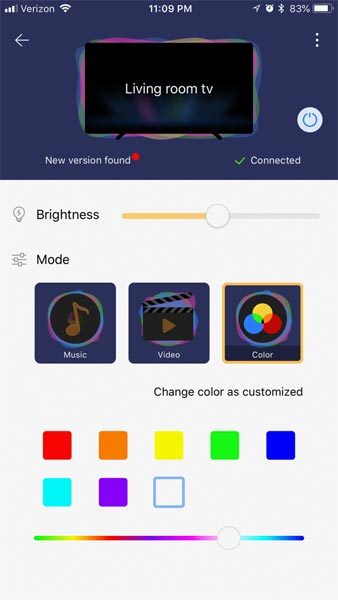
There are three modes for the light strips.  First up is the Color mode.  This allows you to choose a color by selecting one of the pre-selected colors or by scrubbing the slider bar to choose a custom color from the gamut.

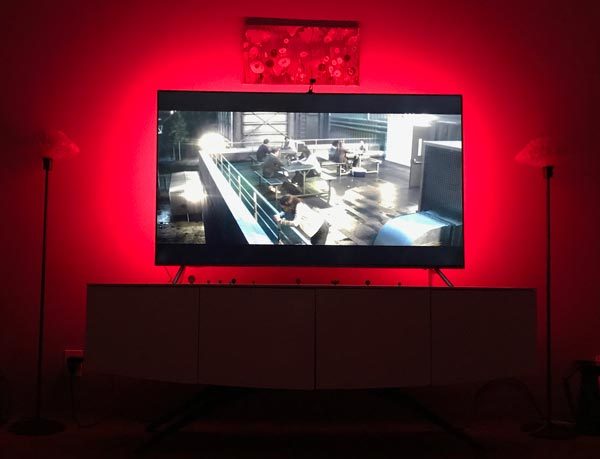
For this picture, I choose the static red color, with the brightness setting maximized.  I wouldn’t use red, but the static color is a nice way to add some light to the room without using those lamps to the side of the TV.  If I were going to use static, I’d select a blue and dim it down a bit.

By the way, my living room is painted a medium blue.  This color will impact the appearance of the colors the Minger system is shining onto the wall behind the TV.  They will differ from the actual color and brightness you’d see against a white wall.

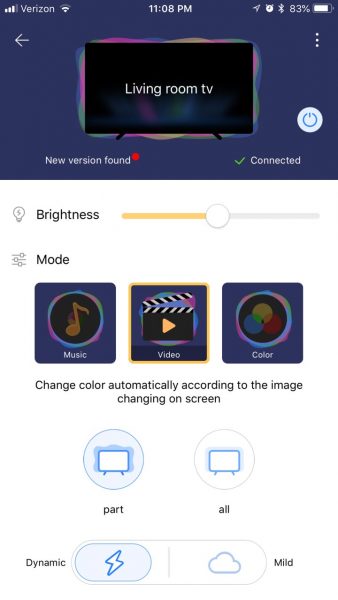
The next mode is Video.  This mode uses the camera to monitor either Part of the screen (the edges) or All of the screen to select the colors for the strips.  With All selected, the camera seems to select the color in the center (from left-to-right) of the screen, about a third of the way down from the top to use for all of the lights on all three strips.  With Part selected, the camera monitors the edges of the screen and selects different colors for the various positions of the light strips, so it seems the color is bleeding off the TV screen onto the wall.  Part monitoring is shown in the above video.  All other clips for the Video mode show All monitoring.

You can also choose Dynamic or Mild for the speed of the color changes.  The Dynamic changes are quick and abrupt – suitable for action movies, especially.  The Mild changes are slower and less abrupt.  Again, I’ll try to show this in videos.

Something I noticed that didn’t depend on the settings in Movie mode was that the color changes seen on the wall lagged a bit behind the color changes on the screen.  (I’m sure this was an artifact of the time needed for the camera to read the color, send it to the controller box, where it was evaluated, and instructions then sent to the light strips.) This was especially true when the action on the screen was changing rapidly.  While I was carefully watching the performance of the Minger system for this review, I was aware of the lag.  When I was just watching a show, I wasn’t really aware of the color lag.  It didn’t bother me that the color on the wall didn’t match what was showing in that portion of the screen when using Part mode any more than having the entire wall washed with a single, but changing color when using All mode.

I did enjoy the changing color display on the wall behind the TV regardless of what mode I was using.  I didn’t prefer the Part or All option over the other.  I just liked the movement of the colors that mimicked the action on the screen.

I didn’t dislike having a single, unchanging color on the wall with the Color mode.  That was actually a nice ambient light that was easy on the eyes, but I did prefer the motion of the Video mode.

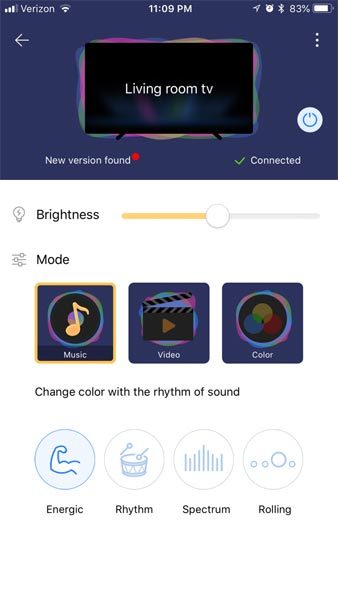
You’ll notice a power button at the top of the app screen.  Because the light strips aren’t plugged into the TV itself, you’ll need to open the app and turn on the lights manually each time.  This also means that you can use the light strips even with the TV off.  The system uses a microphone to “listen” to ambient sounds and creates a light show based on what it hears.

My video shows the color display while listening to Gary Numan’s I Am Ruin from his Savage (Songs from a Broken World) album.  The lights were also just as happy to dance to the sounds of a conversation I was having with my husband.  I can’t imagine what it would do at a party with music playing and a lot of people all talking at once! 😉

I’m sure that there are many other light kits on the market that do what the Minger system does, but most of the other kits I’ve seen cost much more than the $60 this system costs.  I haven’t tried any of the other systems, but I think they’d have a hard time performing so well that I’d be willing to pay a premium for them when the Minger kit does such a great job.

What I like

  • Easy installation
  • Neat installation with only one wire coming off the TV
  • Lots of color modes so I can customize how I like it best
  • Nice ambient lighting for the room without reflections or glare on the TV screen or bright lights shining in your face
  • Can create a light show for music without having the TV on
  • Could even use the kit as an accent light for the room without watching TV or listening to music
  • Using a camera means you don’t have to insert it into the cabling path of your home theater setup
  • Camera also means you can use it with older TVs without HDMI

What needs to be improved

  • Some people may be bothered by the slight lag in the color change, especially action movie fans

Final thoughts

The Minger kit is still installed on my TV, and it will stay there.  My husband, daughter, and I all agree that the Minger LED Smart TV Backlight kit with Camera makes watching TV and movies at home more like going to the theater.  It’s a keeper!

Price: $59.99
Where to buy: Amazon 20% Off Code on Amazon: WFW5U34K (Expired 07/15).
Source: The sample of this product was provided by Govee for Home

Filed in categories: Reviews

Tagged:

Minger LED Smart TV Backlight kit with Camera review originally appeared on The Gadgeteer on June 17, 2018 at 10:51 am.

Note: If you are subscribed to this feed through FeedBurner, please switch to our native feed URL http://the-gadgeteer.com/feed/ in order to ensure continuous delivery.