AirTame HDMI display enabler review

Given that we’re all probably carrying around more video and photo data than graced the entire planet 20 years ago, I’m sure we’ve all been somewhere and wanted to show a group of more than 2 people a great shot. Perhaps you’ve wanted to actually present to a group, and you only had a phone with a pdf and a TV, and no cable to connect them. The folks at AirTame have seen your plight and have concocted a solution, in the form of an HDMI dongle that needs no setup other than with your phone or another device. It fits in the space of your earbuds, but it has a lot more hidden superpowers than this….

Note: Photos may be tapped or clicked for a larger image.

What is it?

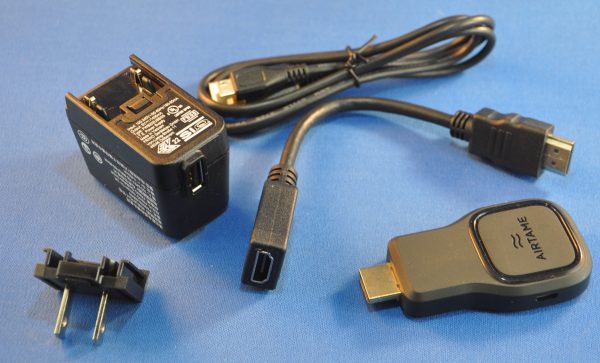
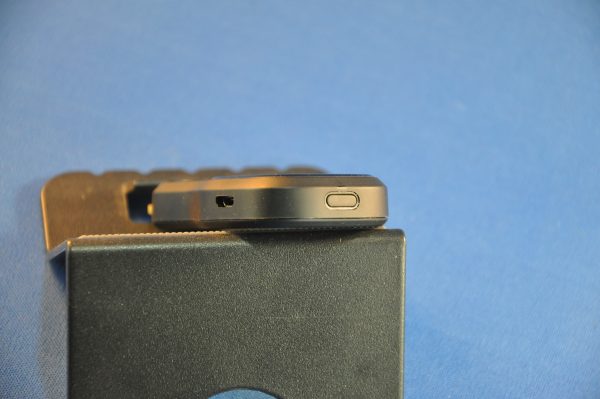
The AirTame is a black dongle 3”x1.5”x.5” with an HDMI plug on one end. It looks like an HDMI thumb drive. On one of the sides, there is a microUSB port for power, and opposite the plug, there is a small button to power it on. When it’s connected and powered on, your device’s images show up on your HDMI display. Once it’s on your wireless or Ethernet network, however, it is also available to be seen by full computers (Mac, Windows, Linux) or ChromeOS. These devices can share full screen live screens.

What’s in the box?

AirTame device
USB-A< ->microUSB power cable (1m)
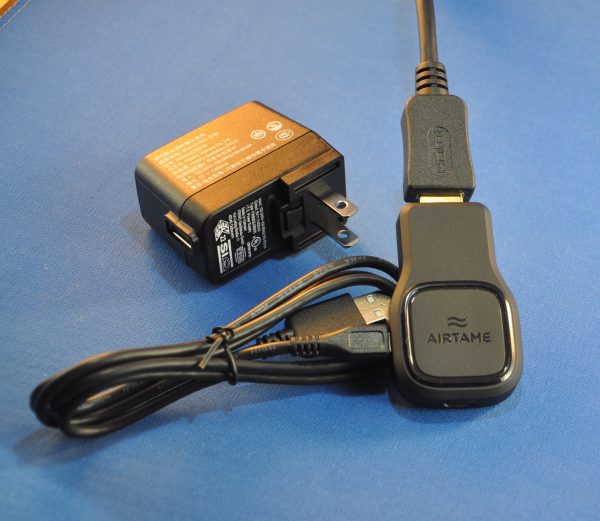
USB power brick with plugs for US, UK, and EU (US only is shown above.)
7.5” HDMI extension cable

Design and features

The AirTame is easy to set up, easy to carry along, and easy to use. I’ll cover the setup below. Once it’s set up, there’s little to do. As long as you are connected to the same network, you can send PDF and JPG files to any HDMI source from your iOS or Android device, using their app. If the files are on your device, you give the AirTame app permission to read them, and you’re off to the races. If you want to store them in a DropBox account, the design is there to allow you to access that account. (During testing, I ran into a snag with changes that are happening with the DropBox app, but I feel sure this will be worked through in due course. The solution is to open the PDF in your device’s PDF reader, and “Open In” AirTame. This will copy the document to the Files section of the AirTame app, where it can be accessed and displayed.)
For computers and ChromeBooks, the dongle is much more powerful. You can do full-screen sharing. You can use the app to find any AirTame on your network, and send your video to it. This is fantastic for tech support, training, or viewing remote computers (servers, network monitors, etc.).

Setup

Setup is simple. Connect to an HDMI port on your display of choice and connect the AirTame to power using a microUSB cable. These things can be problematic, however, due to the placement of the display, or other cables that are already in place. There is an extension cord in case the HDMI of your display won’t allow the wide and long AirTame to attach directly. In many conference rooms and boardrooms, you may need to invest in a gender changer, since the only option available may be an HDMI plug, rather than a port. Other than private displays, I can’t remember the last time I had access to the port itself.
AirTame’s idea, however, is to have organizations put one of these devices on every HDMI screen in an organization. The pricing model changes rapidly from 1-3 to 4-9 and more than 10. Being able to remotely log in to any display in your company or campus and show your screen can make for quick resolution of issues where groups need to be shown something. (Audio can be turned on or off.)

Performance

I found the performance to be acceptable. Since video files are not supported with iOS/Android devices, the display rate isn’t going to be a problem. Bringing up a multi-page PDF document allows a PowerPoint / Keynote-like screen on your device where you see the current and next thumbnails, rather than the full screen being the current image. If you export your slide deck to PDF, you’ll only lose the animations and sound/video links, but those have lost favor of late. (Clicking the green button in the multi-page PDF document below leads to a screen-by-screen slide deck presentation.)


For computers, there is a bit of a lag over Wifi. (The company offers ethernet adapters that will allow direct connection to a router, which will speed up screen motion and video display. I was not sent this to test.) It’s not really that bad unless you’re trying to show video or any other high-frame-rate media.

What I Like

  • Very easy setup and installation
  • Fast, clear display
  • Supports virtually all platforms

What needs to be improved

  • Device gets hot after 30 minutes or so
  • Limited file formats supported on iOS/Android
  • Would benefit from a battery that lasted 15-20 minutes for traveling users

Final thoughts

Presenting to a large screen seems to be the modern curse, and I see no end to it in our current businesses. Presenting from something other than a full computer, however, is quite nice, and this device covers the basics of getting an image before a group with little to no roadblocks. If you need sound, animations, active video display (for training or visualization of content), this device paired with any modern computer will most likely fill the bill. If you can be happy with images and PDFs from your handheld, this is a worthy consideration.

Price: $299.00 (quantity discounts available)
Where to buy: Manufacturer website and Amazon
Source: The sample of this product was provided by AirTame.

The post AirTame HDMI display enabler review appeared first on The Gadgeteer.

Filed in categories: Reviews

Tagged: , , ,

AirTame HDMI display enabler review originally appeared on The Gadgeteer on June 29, 2018 at 9:00 am.

Note: If you are subscribed to this feed through FeedBurner, please switch to our native feed URL http://the-gadgeteer.com/feed/ in order to ensure continuous delivery.

Hubsan H501A X4 Air Pro Advanced Drone review

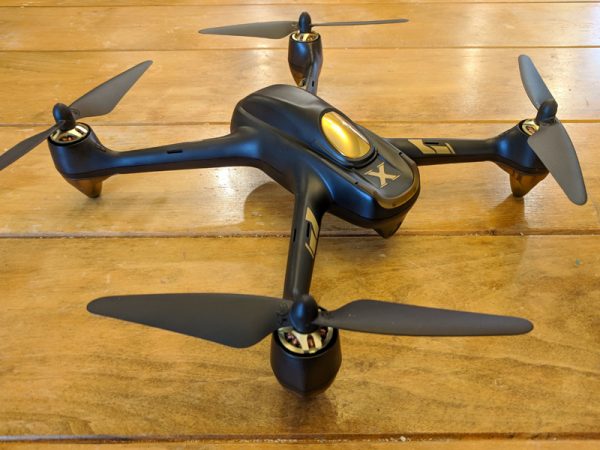
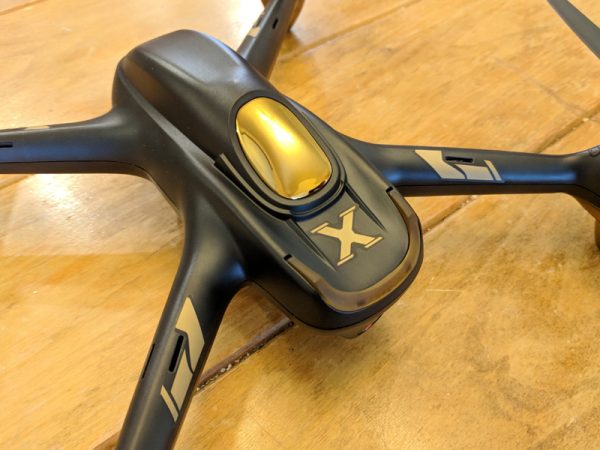
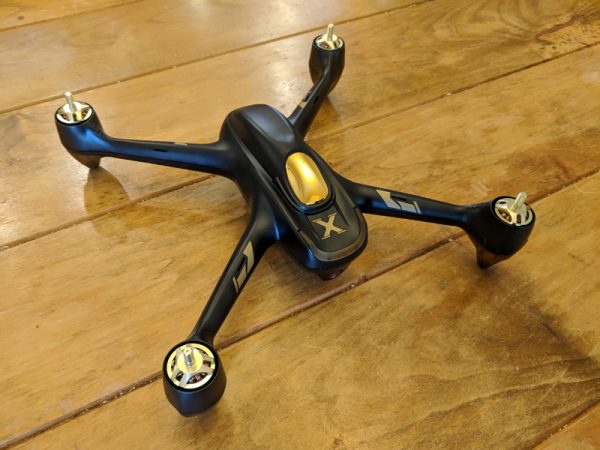
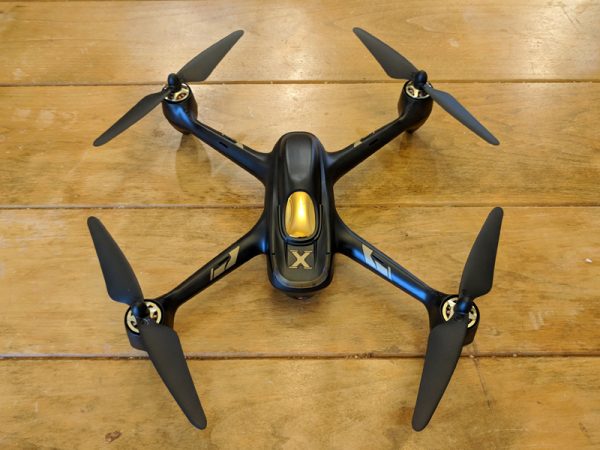
Drone technology has exploded in the last few years as cameras have gotten smaller, batteries have gotten bigger and cool new features have been developed. The Hubsan H501A X4 Air Pro Advanced Drone has a lot of the latest tech packaged in a sleek, powerful little frame. It’s fun to fly, if you have the patience to get through the ridiculously frustrating setup and can handle the anxiety of knowing that your drone can (and will) stop responding to your commands at random times. The amount of features you get packed into this drone for around $200 make it a great buy on paper, but in reality the low-end tech never really delivers on its promises.

What is it?

The Hubsan H501A X4 Air Pro Advanced Drone is marketed as a GPS waypoint-enabled, FPV (first person view) quadcopter. The manufacturer, Hubsan, is known for making affordable, fun, and reliable, albeit somewhat disposable, drones. With products like the H501A X4, Hubsan is now venturing into the high-end drone space to compete with heavyweights like DJI and Yuneec.

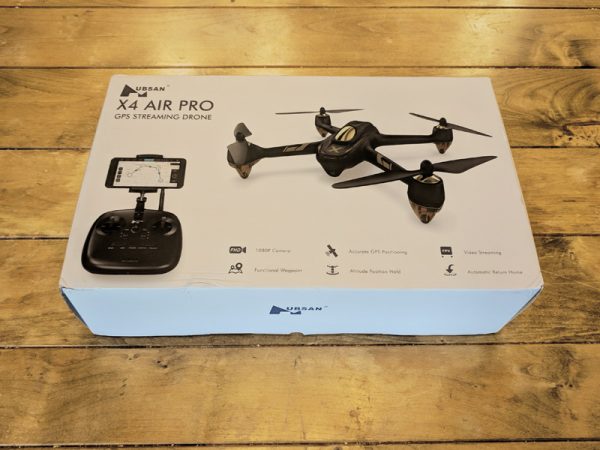
The H501A X4 Air Pro arrives packaged in a nice box featuring photos of the drone and included controller as well as a quick list of the drone’s advanced features.

Everything comes pre-assembled, aside from the rotors, and fits perfectly back into the box after use. The box has a handle as well, so it functions great as a basic carrying case.

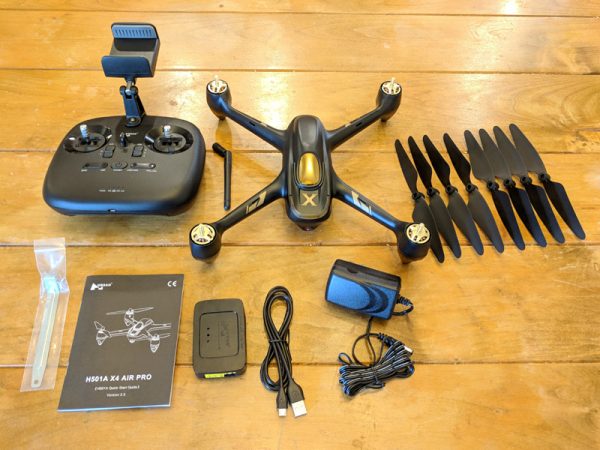
What’s in the box?

  • 1 x H501A Aircraft Body
  • 1x HT011A Remote Control
  • 1 x 7.4V 2700mAh LiPo Battery
  • 4 x Propeller A
  • 4 x Propeller B
  • 1 x USB Charging Cable
  • 1 x AC Adapter
  • 1 x Balance Charger
  • 1 x Prop Wrench
  • 1 x Instruction manual

Hardware specs

  • Size: 8.6″ x 8.6″
  • Flying Weight: 450g
  • Battery: 7.4V 2700mAh Li-Po
  • Charging Time: 210 minutes
  • Flight Time: 20 minutes
  • Max Flight Distance: 400 meters
  • Motors: 4 x Brushless KV1650 PM1806
  • Camera Resolution: 1920 x 1080
  • Main Rotor Diameter: 7.3″
  • Frequency: 2.4G
  • Supported SD Card Types: Micro SD max 16-32 GB. Class 10 or UHS-1 rating required

Design and Features

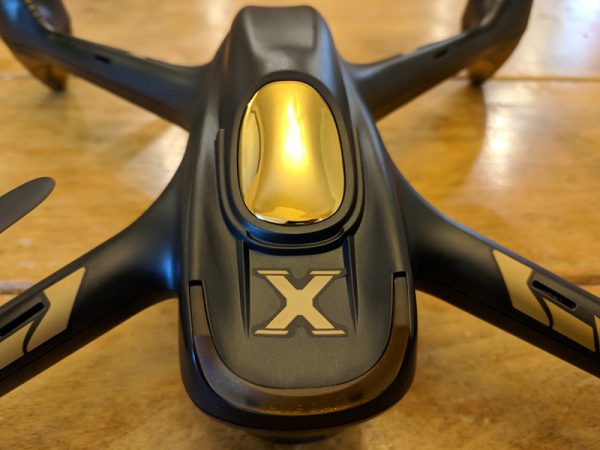
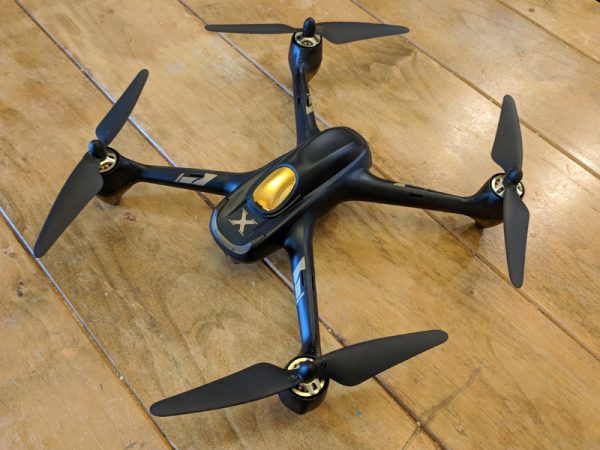
The Hubsan H501A X4 Air Pro Advanced Drone is a sleekly designed FPV drone with a bunch of GPS based features like Follow Me, Automatic Take-Off, Orbiting, Return-to-Home and Waypoints. In my testing, I couldn’t get a majority of those features to function properly, but even without them, the drone itself is expertly designed for standard recreational flying.

Setup

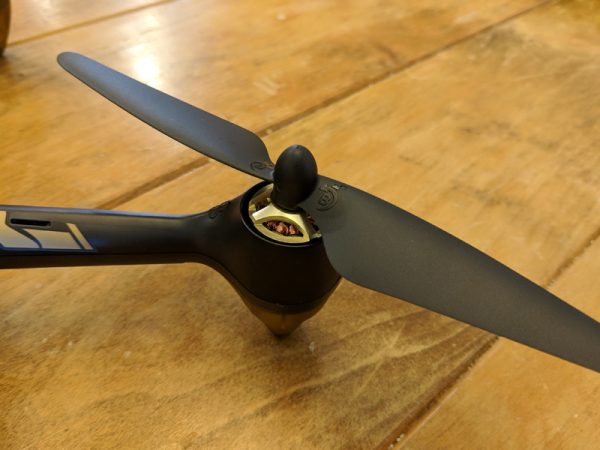
Since the H501A X4 arrives preassembled, all that remains for full functionality is to attach the propeller blades to the motors before flight.

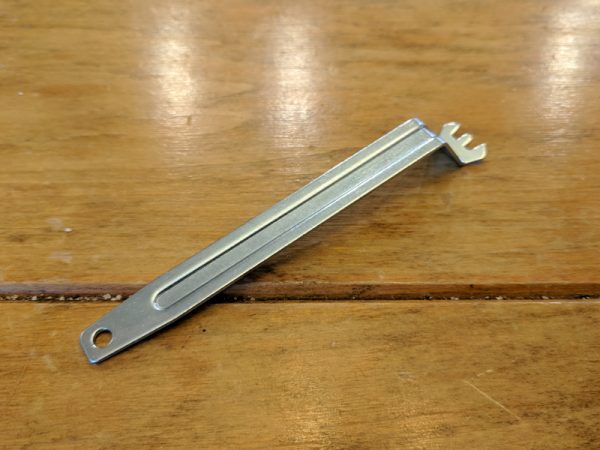
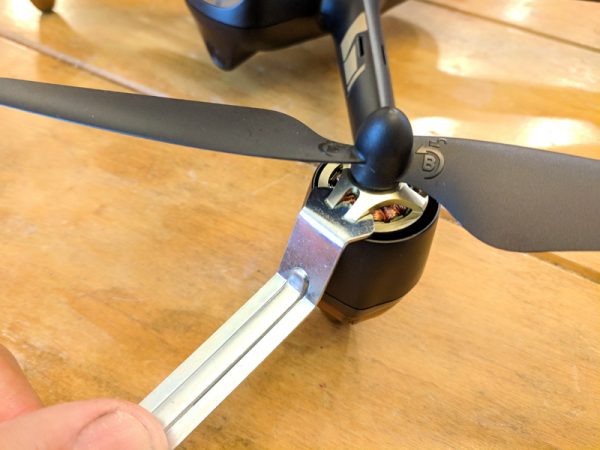
Luckily, the H501A X4 comes with a prop wrench for safely attaching and removing the propellers. There are four propellers and the drone comes with four replacement propellers as well.

The prop wrench fits perfectly into grooves on each motor and holds the motor in place so that the propeller can be rotated on.

Each motor and propeller is labeled A and B. It’s vitally important that only the A propellers are attached to the A motors and likewise for B. The propellers screw on in opposite directions for A as opposed to B. It’s also important that the propellers are not tightened too much, otherwise they can be damaged.

Once the propellers are attached properly it’s time to set up your controller.

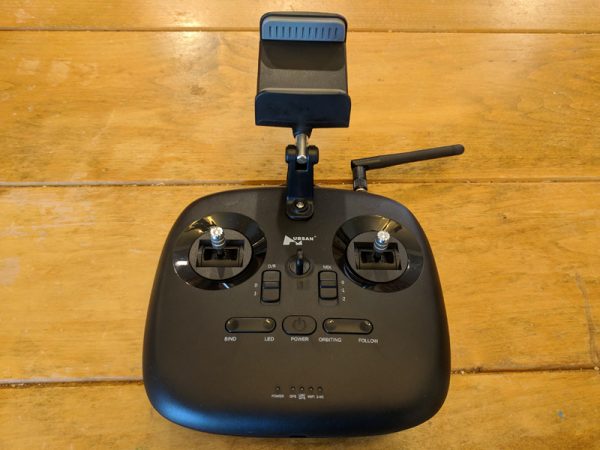
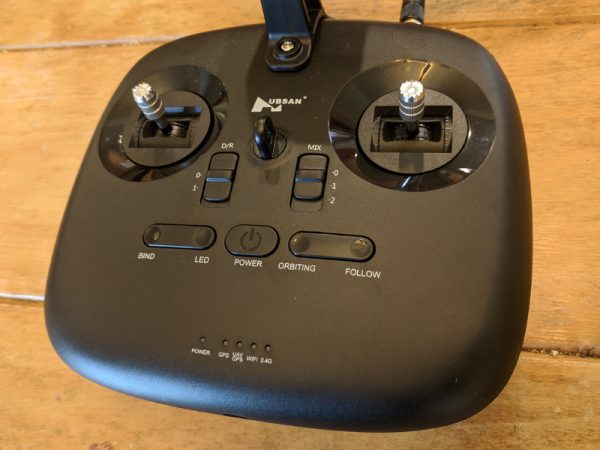
This version of the H501A X4 comes with the Hubsan HT011A controller. The HT011A can control your drone via WiFi or 2.4G. You can run the drone with the controller alone, but for full functionality, you’ll need a smart device running Hubsan’s X-Hubsan app, which is available for Apple or Android devices.

The directions in the manual are pretty useless for the controller setup, but if you’re lucky, you can stumble through the process of linking the controller to the drone via the X-Hubsan app. Basically, this involves powering up the drone and controller, allowing the app to connect to the drone via WiFi and then connecting to the controller’s WiFi signal which should bind the two together. In my testing it took about four attempts to get this to work properly.

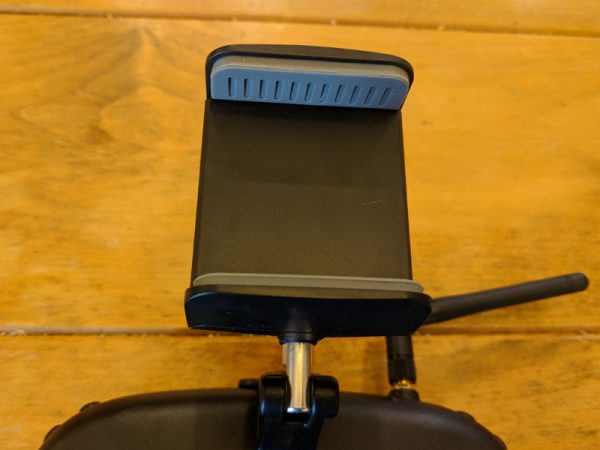
The HT011A holds your smart device in place with a spring-loaded clamp mounted to the top of the controller. While the documentation says that you can use a tablet, the clamp opens just barely enough to snugly hold a smartphone. Also, the design of the clamp is such that if your smart device has volume keys on its side, they will be continually activated by the clamp’s pressure.

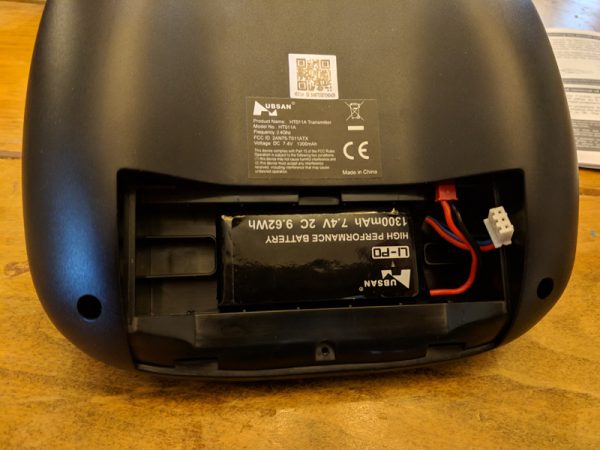
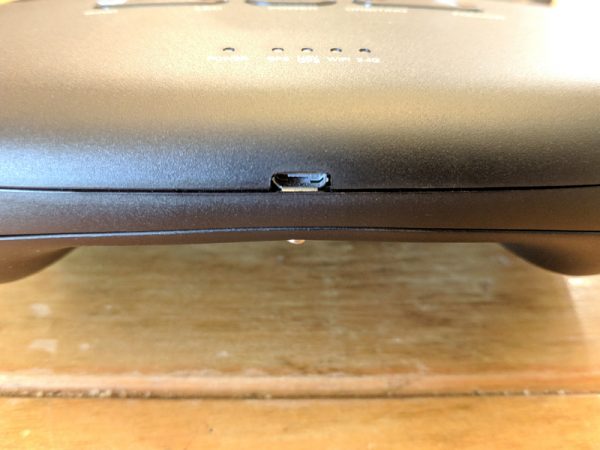
The controller is powered by a 1300mAh Li-Po battery similar to the one that powers the drone. There’s a micro-USB port on the bottom of the controller, and you’d think this is how you charge the battery, but no, this port has no functionality. What’s so frustrating is that you’d have to scour the poorly written, small font directions to find that information. And, the drone only comes with one Li-Po charger, so you can’t charge your drone and controller concurrently.

Since it takes over three hours to fully charge the drone, having to then charge the controller is a real bummer. Also, unless you buy extra drone batteries, three hours is a long time to wait between the short 15-20 minute flights the battery powers.

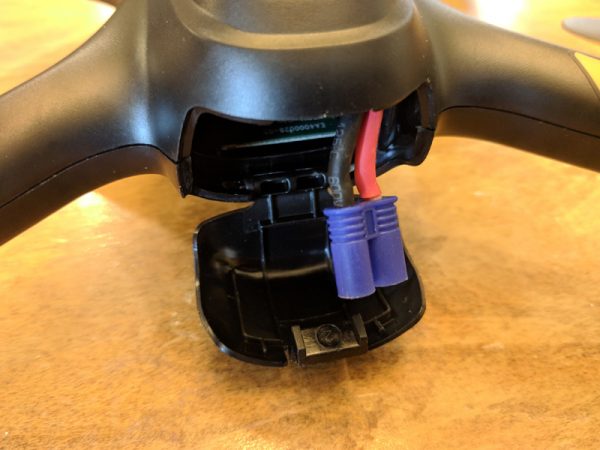
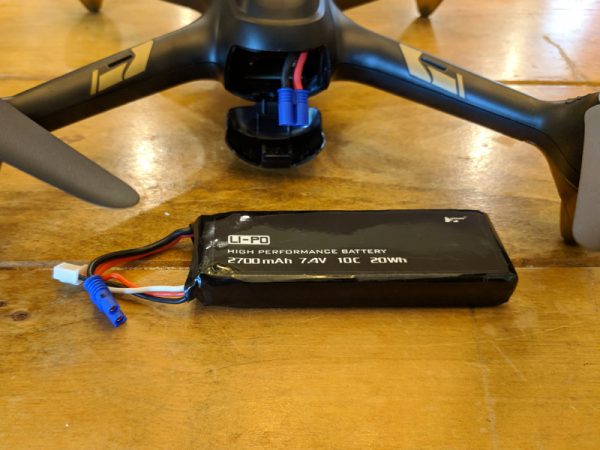
The drone’s battery sits inside a rear compartment accessed by a latch. The LiPo battery connector hangs out just enough to snugly fit the battery inside.

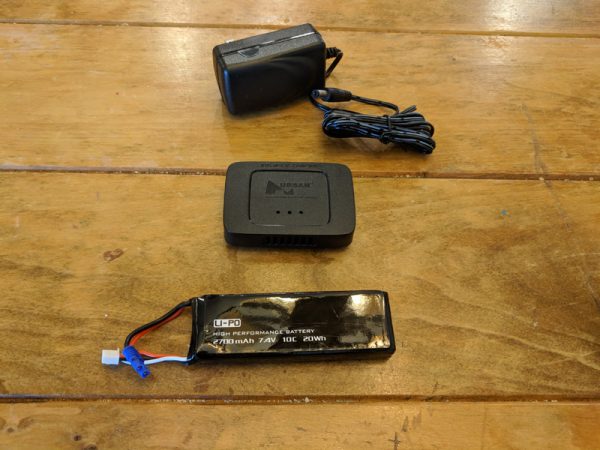
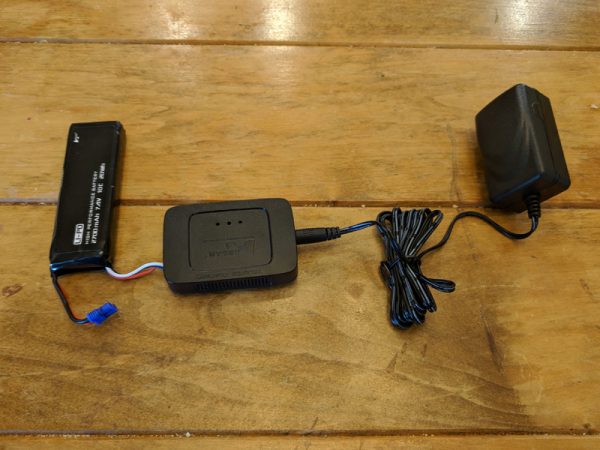
While most newer drones arrive with some type of USB charging solution, the Hubsan uses a standard LiPo brick and charger.

There are two wires on the LiPo battery, one for connecting to the drone and a smaller white plug that connects to the charger.

The setup makes for an ungainly solution, but it does works.

Performance

The HT011A controller does feel great in your hands and the controls are very crisp and responsive. Buttons on the controller mimic some of the control options from the app. You can toggle the drone’s lights, change the control scheme, or activate the some of the GPS functions like Orbit and Follow (even though in my testing I never got any of these functions to work properly).  A string of LEDs on the bottom of the controller let you know if the GPS, WiFi, or 2.4G options are active.

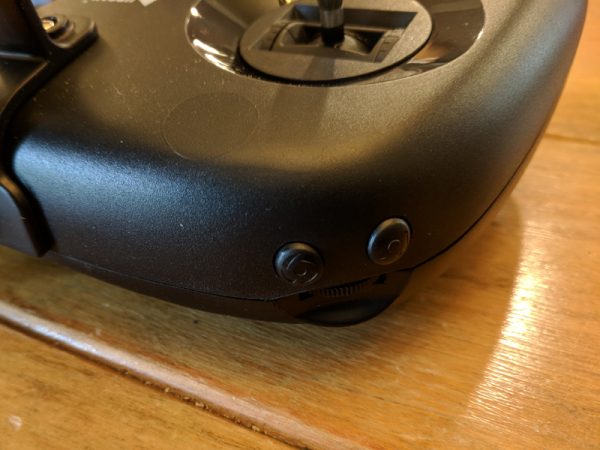
There are additional buttons on the shoulders of the controller to activate the drone’s camera. you can switch between photo and video as well as start and stop recordings.

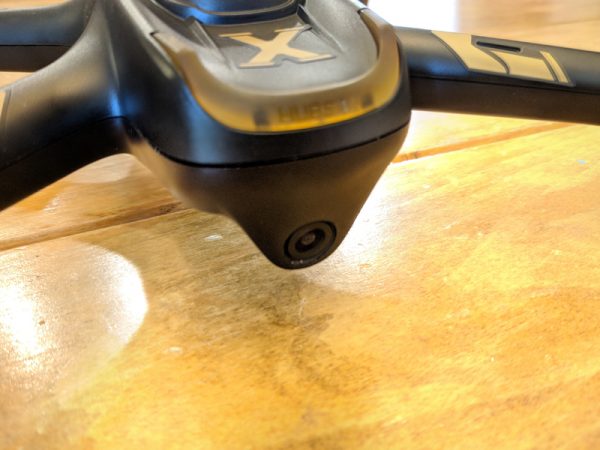
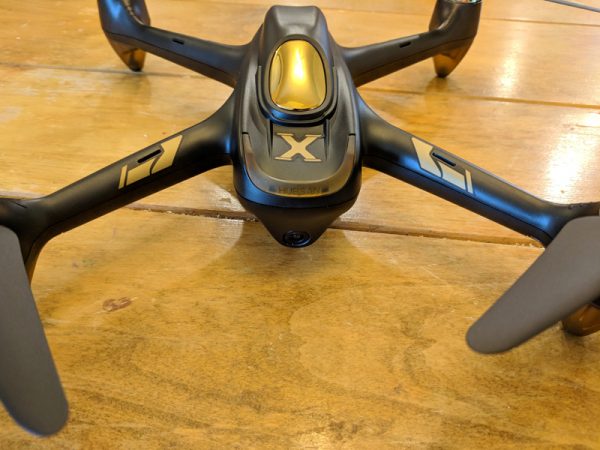
The H501A X4 has a great 1080p front-facing camera. The photos and videos it records are bright with vibrant color and clarity.

The auto white balance on the camera blows out in some areas of sunlight, but overall the camera produces some stunning pictures.

There’s a slight cyan cast over the raw images and a clear distortion from the fisheye lens, but for a tiny drone camera, this is expected.

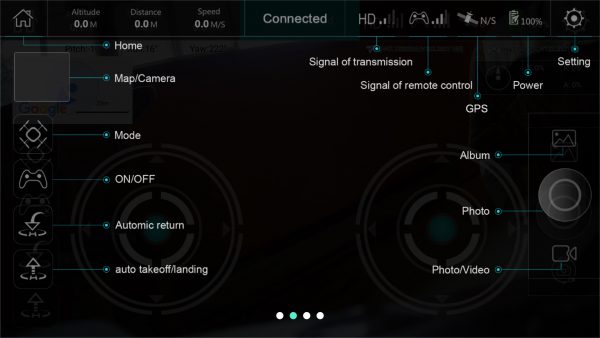
Once you take flight with your drone, the main screen of the app conveys all the info you need to safely fly. You can see your signal levels, the drone’s distance, speed and altitude.

Flying the drone is a lot of fun. The H501A X4 is quick and powerful enough to shoot up to altitude pretty quickly. The problem is that, occasionally, especially at altitude, the drone just stops responding. There’s no indication on the app that control has been lost, which is why it’s always important, when flying ANY drone, to always have a visual line-of-sight to your drone.

Luckily, I didn’t experience any fly-offs with the H501A X4, but other reviewers have reported them. When I lost control, the drone simply stayed exactly where it was. It was still pretty scary and frustrating, especially when the drone was at a higher altitude. This happened a number of times and each time, after about a minute or two of switching the app and controller off and on, I was able to regain control of the drone and land it safely.

In all my attempts to test the GPS functions, the drone and app failed to respond. A few times when I tried the Return-to-Home function the drone stuttered in place, like it was trying to initiate the function, but it never succeeded.

The other functions like Waypoints and Orbit just never gave an indication that they were activated, whether they were initiated from the app of the controller.

What I like

  • Fun to fly
  • Sturdy construction
  • Great camera quality

What needs to be improved

  • Difficult set up
  • Frequent loss of control
  • Poor instructions
  • Single charger for remote and drone

Final thoughts

The Hubsan H501A X4 Air Pro Advanced Drone is fun to fly and it has a great camera, good for recording all types of exciting photos and videos during your flights. Unfortunately, the setup is pretty frustrating and there’s a good chance the drone will lose its connection frequently during your flights. The H501A is reasonably priced though, so if you can put up with the drawbacks, it might be worth checking out.

Price: $219.99
Where to buy: Hubsan and Amazon
Source: The sample of this product was provided by Hubsan.

The post Hubsan H501A X4 Air Pro Advanced Drone review appeared first on The Gadgeteer.

Filed in categories: Reviews

Tagged:

Hubsan H501A X4 Air Pro Advanced Drone review originally appeared on The Gadgeteer on June 28, 2018 at 11:00 am.

Note: If you are subscribed to this feed through FeedBurner, please switch to our native feed URL http://the-gadgeteer.com/feed/ in order to ensure continuous delivery.
SOUL Electronics X-Shock wireless earbuds review

As my search continues for the perfect wireless earbuds for “me”, I was happy to review another contender. Here we go:

What is it?


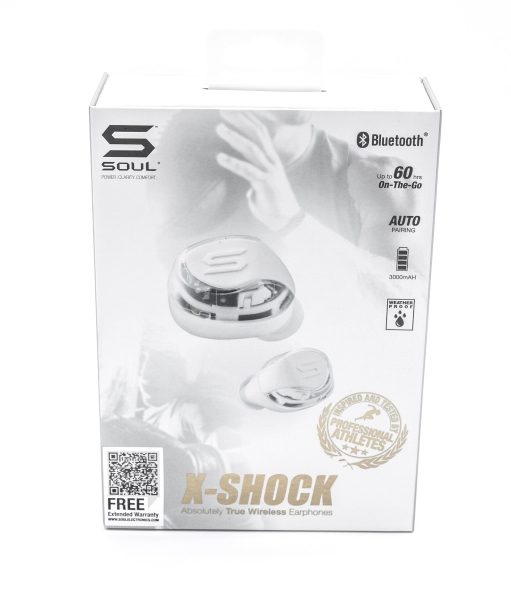
The SOUL Electronics truly wireless earphones – the X-Shock Earbuds are a pair of Bluetooth wireless earbuds for listening to music and other audio from any audio device with Bluetooth capability. These earbuds also handle mobile phone call functions.

What’s in the box?


1 x Pair of X-Shock Bluetooth Wireless Earbuds
1 x Charging Case
4 x Booklets (Instructions, Warranty, Quick Start, Additional Info.)
1 x Micro USB Cable
1 x Carabiner
1 x Storage Pouch
2 x Pair Exchangeable Ear Tips

Design and features

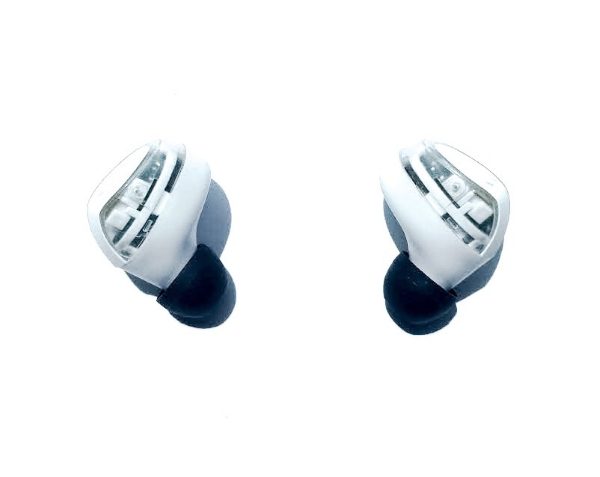
The X-Shock earbuds are a pair of white earbuds with clear accents that cover the blue and white LED indicators. They are lightweight and well built. The white charging case feels well built and “expensive’ in your hands, and the magnetic clasp that closes the case works without issue. On the side of the case there is a loop, that allows you to connect the carabiner so that for your convenience, you can hang the case from your belt loop or any such type of place. The charging case measures approximately 3 1/2 ” x 2 1/2″ x 1″, and with the cover open, on the front from left to right, there are 4 LEDs that indicate the charge level as well as the charging progress, an output USB port for charging other devices, and an input micro USB port for charging the case.

The X-Shock earbuds come with 2 pairs of white translucent Ear Tips.

Specifications

Bluetooth Version: 5.0, Range: 10 meters
Full charge: 1.5 hours
Playtime approx.: 3.8 hours x 16
Standby Time: 200 hours
Charging Case Capacity: 3000mAh

Performance

As with any wireless earbuds, you first receive them, you should charge them fully. Once they are charged, when you first take the X-Shock earbuds out of their charging case, they automatically go into pairing mode and show up in the Bluetooth selections on your phone.

These earbuds perform very well. The lows, mids, and highs are very well balanced and the maximum volume is more than adequate while never overwhelming. The earbuds only come with 2 pairs of Ear Tips, and neither pair proved to be a good fit for me. They were not big enough to provide the necessary seal, and when I first tried them, I was very disappointed until I realized the issue. Since I have tested several other earbuds, I was able to “borrow” a pair of larger Ear Tips (black) that were provided with another pair, and they worked perfectly with these X-Shock earbuds.
After that, my experience was just great. There have been very few Bluetooth disconnects, and whenever they occur, it is always in a known high interference area. Here are the operational functions of the earbuds:

Master Earbud: Left earbud
End Call: Press once on the left earbud
Refuse Call: Press twice on the left earbud
Redial Call: Press three times on left earbud
Answer Call: Press once on the left earbud
Turn on/ off: Hold for 6 seconds on either earbud
Siri/ Google Assistant: Hold one second on left earbud to turn on/off
Forward call: Double press on left or right earbud
Play or Pause: Press once on left or right earbud

I always seem to encounter quality issues when I use wireless Bluetooth headsets or earbuds for phone calls. the party on the other end of the call always knows that I am using a device. While the call was very clear on my end and clear enough on the other end, I still had the same issue. I am beginning to suspect that this issue may somehow have something to do with me rather than the devices 🙂

Nevertheless, my main and most frequent use is always for music, and these earbuds excel in that area. What puts these earbuds “over the top”, is that after I first charged the case, I used these earbuds for 90 minutes daily for 5 days each week, and after one month the case still is more than 50% charged. The case battery seems to last forever.

What I like

I absolutely love the sound, fit and feel of these earbuds, and how well they function is just about every area. I really like the design of the charging case, and the ability to use its internal battery to charge other devices via its USB port. I also like that they automatically go into pairing more once removed from their charging case. Of course, I must mention the case battery that seems to keep the earbuds charged forever 🙂

What can be improved

These earbuds should come with more than just 2 sizes of Ear Tips so that there are more options for the best fit.
Also, when charging the case, the cover has to be left open to accommodate the charging cable.

Final thoughts

I absolutely love these X-Shock earbuds, They sound great and function very well. They are reliable and the design and style are great. As I always say, the perception of sound and sound quality is subjective, and there is no one type or size, or style for all. However, I feel very comfortable recommending these.

Price: $149.99
Where to buy: Soul Electronics Website
Source: The sample for this review was provided by Soul Electronics

The post SOUL Electronics X-Shock wireless earbuds review appeared first on The Gadgeteer.

Filed in categories: Reviews

Tagged:

SOUL Electronics X-Shock wireless earbuds review originally appeared on The Gadgeteer on June 28, 2018 at 9:00 am.

Note: If you are subscribed to this feed through FeedBurner, please switch to our native feed URL http://the-gadgeteer.com/feed/ in order to ensure continuous delivery.
Oittm Apple Pencil Stand review


Lately, it seems that I have so much to do when I am at work, that I use several devices to accomplish my tasks. By the time I set up to get started, there are wires from power cords and devices running everywhere. What makes things easier for me, is having certain “tools’ at the ready and at my fingertips. I constantly use my Apple Pencil with my iPad Pro 12.9, and I was very happy when I got the chance to review this product.

What is it?

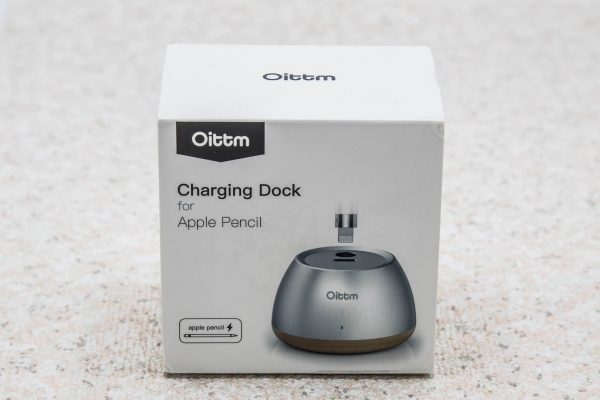
The Oittm Apple Pencil Stand is a weighted, nicely designed, wooden and metal charging stand for the Apple pencil.

What’s in the box


1 x Oittm Apple Pencil Stand
1 x Instruction Booklet
1 x Foreign language Leaflet

Design and features

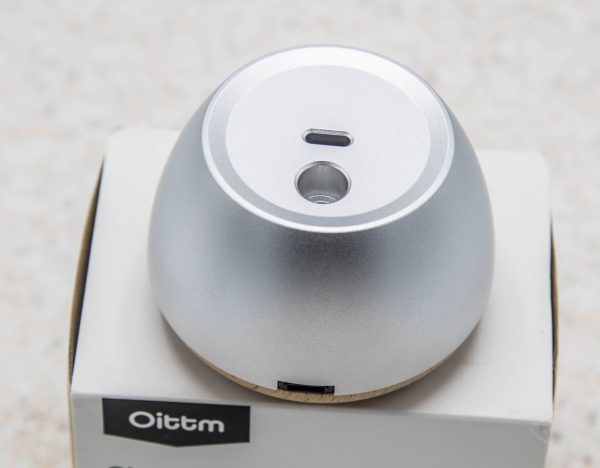
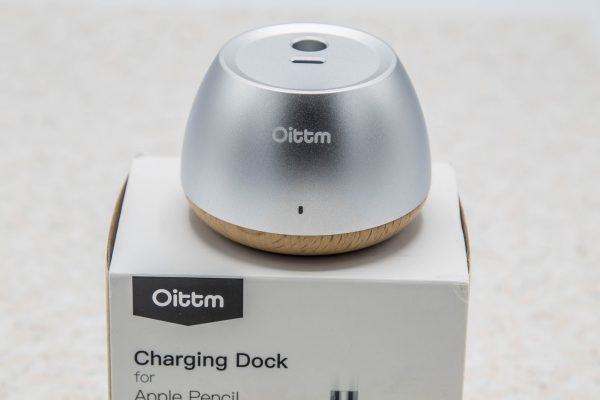
The Oittm Apple Pencil Stand is an all-in-one stand and charger for the Apple Pencil. It is very sturdy and has a wooden base and what seems to be an aluminum top. On the top, there is the female lightning jack for charging the pencil and a holder for the pencil cap.

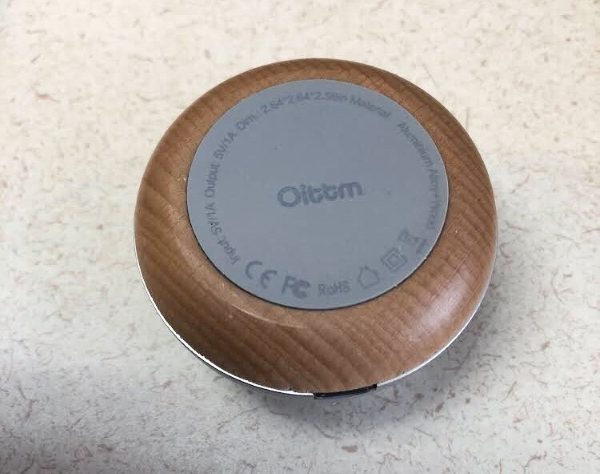
Underneath, there is a wooden base, and a rubber pad to prevent slipping.


On the front of the stand, there is a small LED on the lower half that indicates the charging/power status.


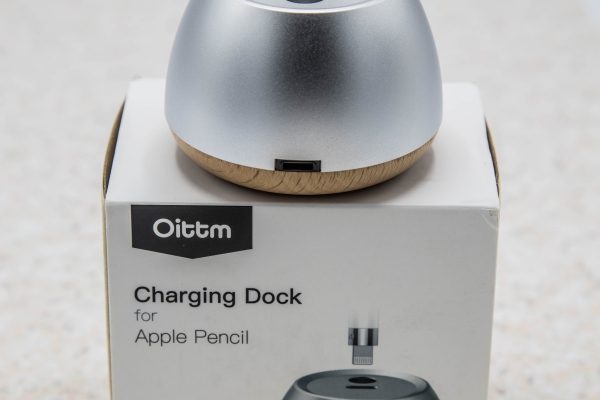
On the back of the stand, there is a lightning port for the lighting power adapter.


The picture below shows the power adapter attached, the pencil plugged in, and the pencil cap sitting in the pencil cap holder. The pencil cap can be placed in the pencil cap holder with either the open side up or the opposite.


When the charging stand is plugged in, and the pencil is not being charged, the LED on the front lights green. Once the pencil is plugged in to be charged, the LED lights orange and stays that color even after the pencil is fully charged,


What I like

I like the build quality and the weight of the stand. I also like that it has a rubber pad on the bottom that keeps it from sliding on my desk. It does the job.

What can be improved

The only improvement that I would like to see is maybe a USB output jack so that the one adapter can be used to charge both the pencil and maybe the phone at the same time.

Final thoughts

The Oittm Apple Pencil Stand is well built and a nice addition to the decor of my desk. It works exactly as it should and adds a nice level of convenience to my workflow. While some may think it is a bit pricey for what it is, in my opinion, the craftsmanship and materials used make it worthy of its price. I definitely recommend it.

Price: $19.99
Where to buy: Amazon
Source: The sample for this review was provided by Oittm.

The post Oittm Apple Pencil Stand review appeared first on The Gadgeteer.

Filed in categories: Reviews

Tagged:

Oittm Apple Pencil Stand review originally appeared on The Gadgeteer on June 27, 2018 at 4:15 pm.

Note: If you are subscribed to this feed through FeedBurner, please switch to our native feed URL http://the-gadgeteer.com/feed/ in order to ensure continuous delivery.

Kizik Handsfree New York Shoe review

Every once and a while, and more often on The-Gadgeteer, a product comes along with a description that is entirely unique and intriguing. The Kizik shoe is one of those gems: a luxury handsfree sneaker designed for men. It has the sole (and soul) of a sneaker, the materials of the shoe and a little technical secret. I’ve been wearing them for a month now. Read on to see what I think!

What is it?

As described in the news post here, the Kizik shoe is a luxury handsfree sneaker designed for men. The shoe’s materials include 100% top grain leather and other premium textiles to ensure they are durable enough to provide enjoyment for many years. They come in three styles and multiple colors and textures for men and will be expanded to include a women’s line in the fall of 2018.  The shoes are step-in and are different from sandals which are slip on. They grab your feet like a laced shoe and don’t have that loose-fitting feel of a loafer. The end result is a shoe that is not too tight or too loose and goes on without any adjustment.

What’s in the box?

Kizik Shoes
F.A.S.T Pamphlet

Design and features

Specifications

Sizes:  7, 7.5, 8, 8.5, 9, 9.5, 10, 10.5, 11, 11.5, 12, 13, 14
Styles: Boston, Dubai, New York
Colors: Black, Coffee, Date, Castle, White (Not all styles are available in all colors)

Design of the Kizik New York Shoe

The shoes feature a patented design that Kizik has dubbed F.A.S.T.® (Foot Activated Shoe Technology). The elements of F.A.S.T. include a wing at the top of the heel to let your foot in and out, a heel which collapses to let your foot in, a rigid tongue to ensure a hands-free experience, and an adjustable width set by velcro on either side of the tongue. After the rear of the shoe is compressed by the heel when donning the shoe, a titanium wire spring returns it to the upright position. As a result, the shoes fit automatically without using complex mechanics or electronics. The F.A.S.T. pamphlet is reproduced below. (click to enlarge).

The picture below shows the spring and tongue in more detail.

Of course, neither the spring not the plastic tongue is visible on the inside of the shoe. The image above is like an x-ray showing the rigid skeleton beneath a leather skin. Actually, the inside is nicely lined and padded:

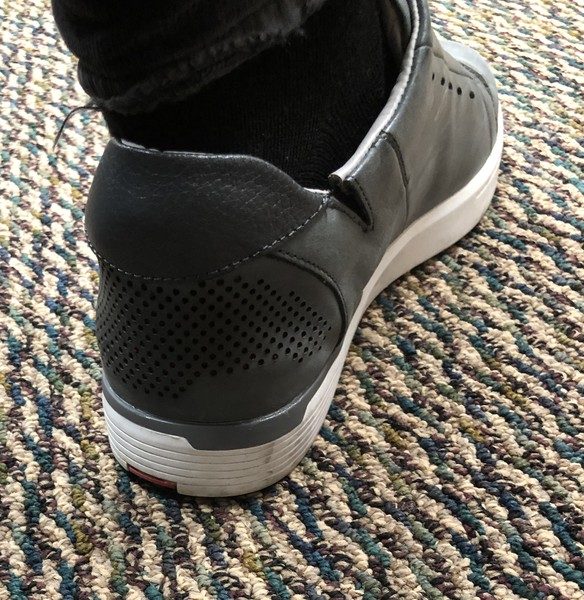
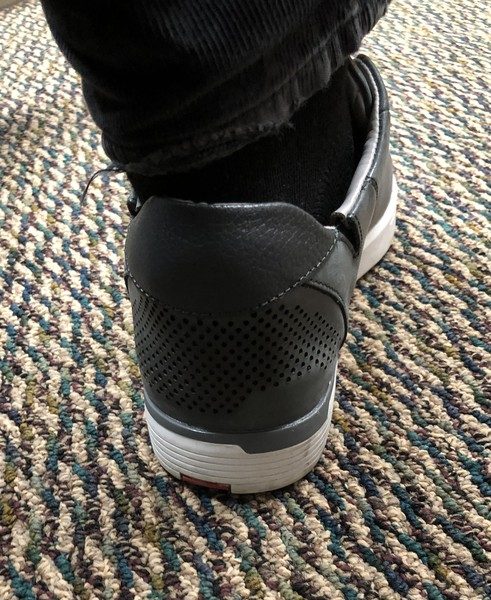
The outside of the heal is perforated leather to allow it to collapse as the heel compresses it. A second layer of leather on the inside protects the heel and ensures that the shoe is fully enclosed. On these shoes the inside leather panel is colored red. An elastic strip runs along the top of the shoe in a groove and keeps the heel in line with the sides of the shoe when it is being worn. The groove is what allows the heel to expand downwards when the shoe is stepped into. normally it is closed. Both the perforated leather and elastic groove can be seen in the picture below.

This is a picture of the inside of the shoe and shows the red leather heel

The shoe comes with a contoured and padded insole too.

The only adjustment that can be made on the shoe is the width of the opening at the top of the tongue; the location where the laces are usually knotted. The adjustment is made with two heavy duty Velcro closures. I found that you can separate the panels and adjust them when your foot is in the shoe. if a tighter fit is desired then fine-tuning adjustments can be made without the foot inside using some trial and error. The Velcro is designed to work in one direction: narrowing and widening the opening for the foot. However, the Velcro may also be fastened slightly ahead or behind the centerline, moving ahead or holding back the tongue. 

Putting on the shoe is really as simple as the video below indicates

Taking them off is easy too if you use the toe of one shoe to hold the heel down of the show you’re pulling your foot out of. This is the same way you would remove loafers.

The operation of the technology behind the sneaker seems straightforward and the mechanism seems elegantly simple. These characteristics are fundamentals of great technology: technology should be so simple that it doesn’t even seem like it’s present and the complexity of the technology should not impact the design of how it is used. For instance, few realize they are operating a computer when using an iPhone or Android – everything behind the screen is hidden from the user. Similarly, one doesn’t realize that there is a self-tensioning heel that holds these shoes on your feet – they just work.

Style

The shoes I evaluated are a castle grey. At first, I thought that they would just be useful for outfits with jeans, but they complement many different styles and colors of pants. I’ve had several people compliment me on them and they have turned into a bit of a conversation topic.  They look more dignified than black lace-up shoe imposter sneakers and more formal than dockers. The Sole features a front to back eye-catching red stripe.

Here are a few pictures I took wearing the shoes in a conference room.

Performance

So first off, I need to gross you all out by showing you my feet:

I have rather wide feet with a relatively low arch.  However, the shoes don’t come in various widths. I ordered the shoes based on the guidance of the Kizik website, which indicated that the sizes for the New York are in line with normal sizing. Initially, I felt that the shoes I ordered may be too small. I went to Michaelson’s Shoes to see if my sizing was correct.  The next larger half size up fit better in front but lifted out of the rear. Jerry Michaelson, one of the shoe store owners, endorsed the Kizik shoe but explained that the design of the shoe, with a more traditional profile, may not be the best fit for my feet. He continued to explain that the leather of the show will give over time and may provide the desired fit. I have historically worn wider shoes than the standard design, knowing full well that compared to normal shoes, my feet generally more closely resemble the box the shoes come in. So I endured wearing tight shoes for a couple of days and it turned out that over time the fit improved substantially.

My Garmin Vivosmart HR shows in the last 30 days I’ve taken about 327,000 steps over about 176 miles. I estimate that I’ve worn these shoes about 70% of the time. Also on the days I have worn them I put them on and take them off two to three times. Additionally, I have used them as my quick-step-into-the-garage shoes so I may put them on and take them off two to three times about every day. So over about 125 miles and about 75 wearings, I can say that I’m very happy with these and they have performed very well.

There are a couple of exceptions that I will mention here. Once, with wet soles on a wood floor, I was unable to generate enough traction to put the shoes on. I needed to keep the front of the shoe in place with my other foot. This only happened once but it begs the point that it is important to keep balance on the stationary foot just in case the foot going into the shoe slips. I do think that the sneakers have a good grip for urban use. I wouldn’t take these onto a trail but the sole has a good balance of pliability and traction on finished surfaces. I did wear them to walk across a notoriously slippery set of brick pavers and felt that I had good traction the entire time.

The silver F.A.S.T. logo on the back of the insole has rubbed off with my sock and now the entire inside has this silvered appearance.

Over time the shoes have developed a weathered appearance. I like the look but I’m not quite sure how to take care of these. Polishing them isn’t quite the right answer.

The outsole is also starting to show it’s age. It still has all of the mechanical integrity that it started with but the red stripe is more of a maroon these days.

Lastly, I’m not sure of how well these would do if they got completely drenched. In a brief shower this happened:

The shoes look like the water dried out without staining, but I’m unsure what a more substantial wetting will do to them.

What I like

  • Hands-free use
  • Stylish

What needs to be improved

  • offer in more widths
  • water-resistance

Final thoughts

The Kizik shoes are an interesting new take on one of the oldest technologies out there. They look good, feel great, and are really easy to put on and take off.

Price: $180 – $190
Where to buy: They are available for purchase on KIZIK.com as well as in 17 locations nationwide, including select Dillard’s stores and Dillards.com.
Source: The sample for this review was provided by KIZIK.

The post Kizik Handsfree New York Shoe review appeared first on The Gadgeteer.

Filed in categories: Reviews

Tagged:

Kizik Handsfree New York Shoe review originally appeared on The Gadgeteer on June 27, 2018 at 11:00 am.

Note: If you are subscribed to this feed through FeedBurner, please switch to our native feed URL http://the-gadgeteer.com/feed/ in order to ensure continuous delivery.