AlphaCool instant cooling towels review

REVIEW – As an avid fan and reviewer of audio products, I got the opportunity to review … towels. Yes, towels. Unexciting, right? Well, it depends on how you look at it.

What is it?

AlphaCool instant cooling towels are a series of absorbent towels made of different materials that provide extra cooling during hot and sweaty yard work, exercising or just enduring the dog days of summer.

Specs

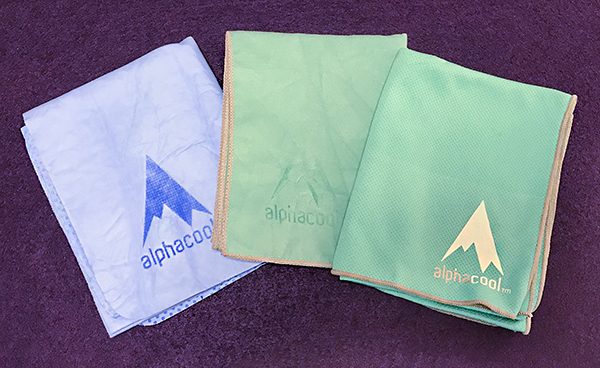
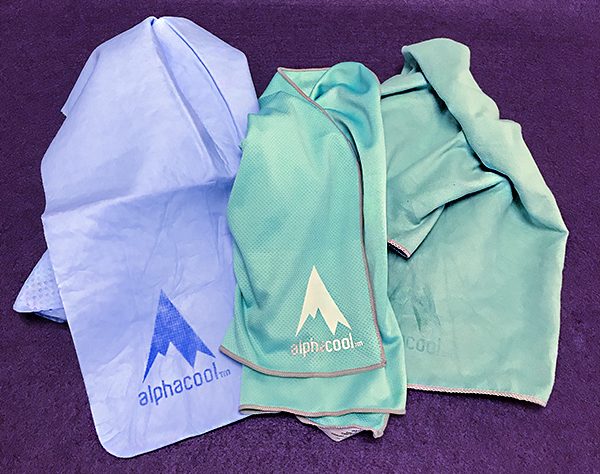
There are three towels I’ve been testing for this review.

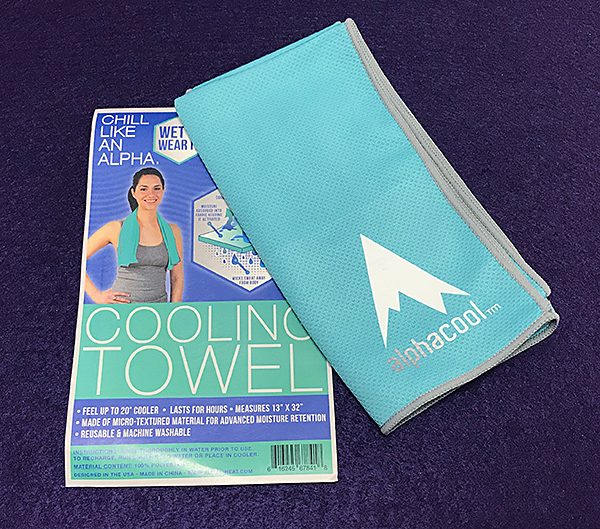
1. The AlphaCool cooling towel is made of a lightweight textured polyester cloth.

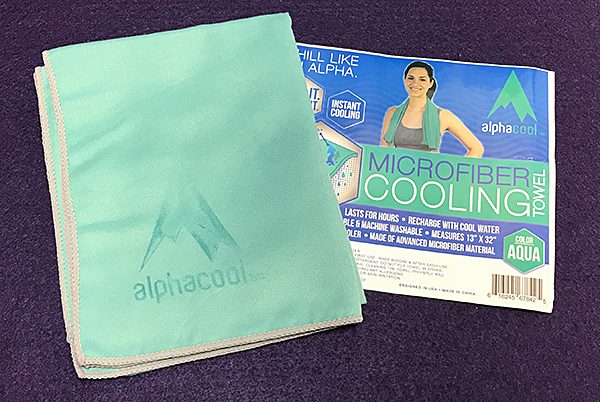
2. The AlphaCool microfiber cooling towel is exactly what it says it is—a towel made of microfiber.

3. The best towel offered is the AlphaCool PVA cooling towel. However, it may not be the one for you.

Design and features

I live in Central Florida where it gets quite hot and even more humid half of the year. Doing hours of yard work each week can wreak havoc on the body, especially as I age. I am never without my BubbaKeg filled with iced tea and a wet terrycloth towel to wipe my overly sweaty face and head. After using the AlphaCool towels for a few weeks, their advantage over terrycloth became apparent.

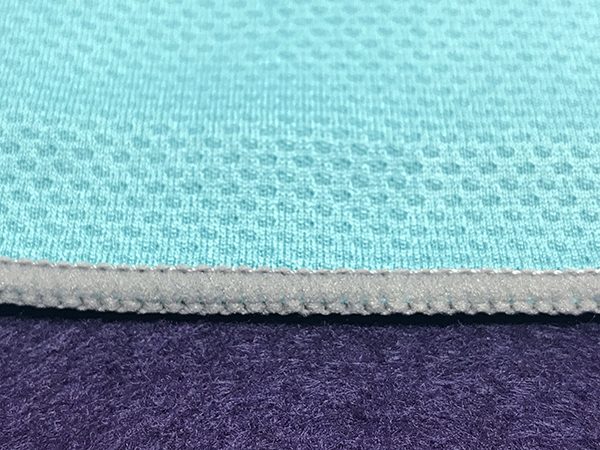
Each towel measures 13” X 32”, which is an odd size, but fits nicely around the neck and shoulders. Both the regular and microfiber towels feature finished edge stitching for extra durability.

So why are they called “cooling” towels? To activate the cooling effect, you can either wave it around or quickly pull both ends apart creating a snapping effect. This makes the towels feel much cooler against the skin than before. AlphaCool states that it feels 20° cooler. The accuracy of that statement is anyone’s guess, but it does feel cooler than just a terrycloth towel used as a comparison. Note that the towels must be wet or damp for the cooling effect to happen.

There are only a few color choices available per towel—I received both blue and aqua colors. All three towels will cool as advertised, but do so at varying degrees (pun intended) of effectiveness. Here’s a breakdown of each:

The regular AlphaCool towel performs as well as the more expensive microfiber towel, but it dries out quickly requiring it to be re-wet often—if that’s what you want. If you’re looking for a towel to dry quickly between wiping sweat from your face and neck, it does a great job. The lightness of the towel makes it good for workouts that don’t produce a ton of sweat. It has a textured surface that easily wicks away moisture from skin.

Next is the PVA cooling towel. This is a weird feeling towel, but it became my favorite for one main reason—it feels the coolest and stays damp the longest by a big margin. PVA stands for polyvinyl acetate. Even though this material will stay wet longer, it feels mostly dry. Plus, because it retains water so well, it won’t soak your clothes while wearing. The PVA towel is textured and feels more like rubber than cloth. But it works! Mowing my 1acre backyard isn’t any less strenuous, but I’m now a bit cooler while mowing and I cool down quicker when done. That’s counts for a lot. When dry, the PVA towel will get quite rigid and almost brittle feeling. Once wet though, it soften’s right up.

I get that the feel of this towel may not be for everyone, especially if you are looking for a towel that will dry quickly for wiping the sweat off your face because it remains wet longer. Since I want my towel to remain damp longer for effective cooling, it has become my go-to towel for yard work.

Then there is the AlphaCool microfiber towel. This towel costs more than the others and its easy to see why. It’s soft and remains so throughout use. It has a satisfying bulk to it that allows more water retention while keeping a fairly quick drying time, so it’s good for heavy workouts or extra warm yard-work days. I liked that I could re-wet the towel and it would keep me cooler for a good while, but again, the PVA towel performed even better—if you want a towel to remain damp and cool rather than dry out quickly. If you want a towel that will dry off your sweaty face and neck while still pampering you with its soft texture, then this is your towel.

What I like

 AlphaCool offers different kinds of towels depending on your preferences. Each type of towel is affordable, so it’s easy to have more than one type for various uses.

What needs to be improved

If AlphaCool can develop a microfiber towel with the advantages of the PVA towel, it could be the perfect towel.

Final Thoughts

AlphaCool has managed to get me to ditch my collection of old terrycloth rags in favor of these more modern and better cooling towels. My outdoor chores are already more manageable despite the summer heat.

Price: AlphaCool towel – $9.99; PVA towel – $9.99; microfiber towel – $9.99. All prices US.
Where to buy: Amazon
Source: The samples for this product were provided by AlphaCool.

Filed in categories: Reviews

Tagged:

AlphaCool instant cooling towels review originally appeared on The Gadgeteer on July 15, 2018 at 9:30 am.

Note: If you are subscribed to this feed through FeedBurner, please switch to our native feed URL http://the-gadgeteer.com/feed/ in order to ensure continuous delivery.

B-Hyve Hose Faucet Timer review

REVIEW – Smart watering? Yup, it’s a thing. The B-Hyve system allows you to manage the watering chores around your property from anywhere you have Internet access. I challenged it to keep my garden alive while I spent most of the month of June traveling. How did it work out? Let’s see!

What is it?

It’s a smart watering system that enables you to schedule and manage your watering with an app on your smartphone.

Hardware specs

Faucet Timer:

  • IOS, Android and Alexa compatible
  • Powered by 2 AA batteries (not included)
  • IP34 waterproof rating
  • 10-100 PSI valve flow rating

WIFI Hub

  • Standard 2.4 Ghz WIFI
  • 200 foot range
  • Compatible with standard 100V outlet
  • Capacity for 64 connected units

What’s in the box?

The box contains the faucet timer, WIFI hub, and a quick start instruction guide.

Design and features

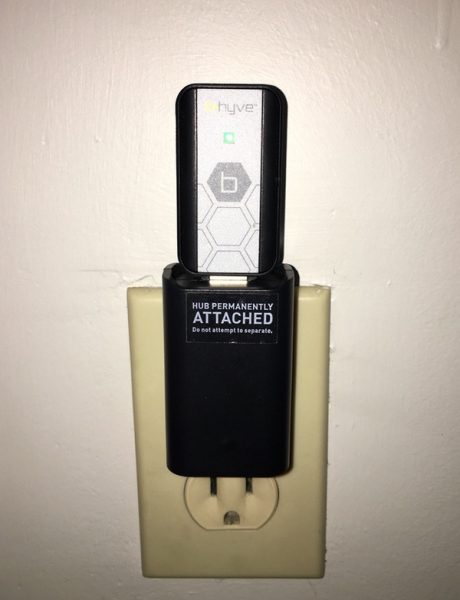
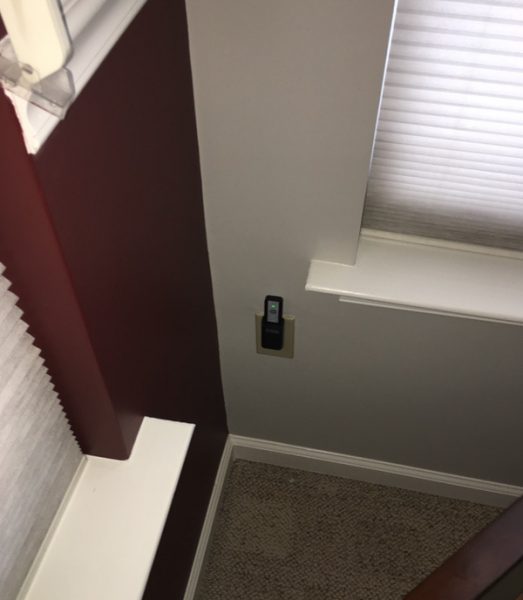
The B-Hyve Hose Faucet Timer consists of two parts. First, you have a WIFI hub that plugs into a standard outlet in your house, preferably near the exterior faucet you wish to manage. It’s a tiny little one-piece unit about the size of a plug-in night light.

I have mine plugged into the corner of my family room. The exterior faucet is below the window on the left, about 5 feet from the hub. It has a range of 200 feet, but is also extended by your home network:

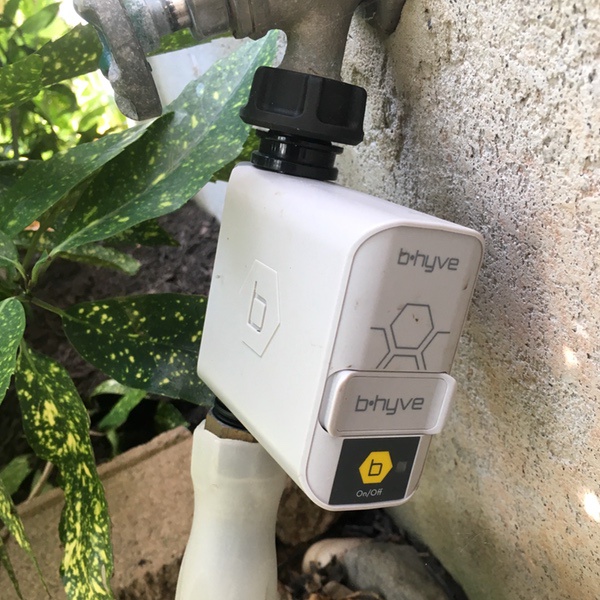
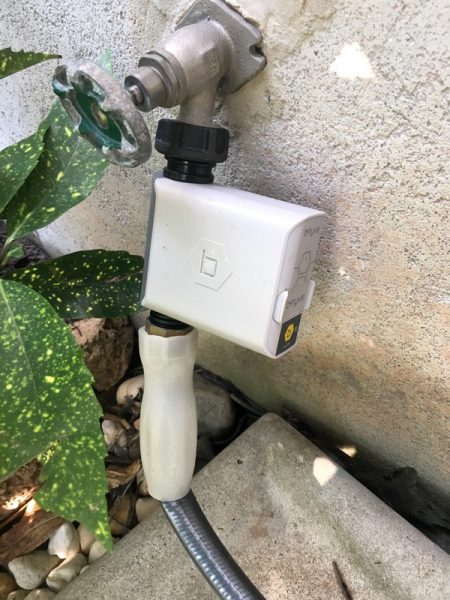
The second component is the timer unit. Powered by 2 AA batteries, the timer is completely self-contained and waterproof. That yellow button on the right in the photo below is a multifunction manual operation and pairing button. You’ll attach the unit to the faucet and turn on your hose; an internal valve in the timer now controls the water flow.

You’ll set the whole system up with the B-Hyve app that you download to your smartphone. The app wizard walks you through the process of pairing the components, installation, and setting up your programs. It’s so simple that I won’t walk through it here… know that you’ll be up and running in about 5 minutes. 

You now have the ability to control all of your watering functions from anywhere in the world with the B-Hyve app. It’s a beautifully executed app from a usability perspective, with features and capabilities I haven’t even fully explored yet after a month of use. Let’s start with the basics, and I’ll show you some of that extensibility.

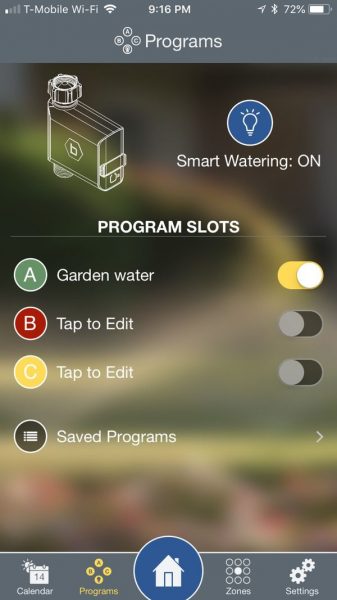
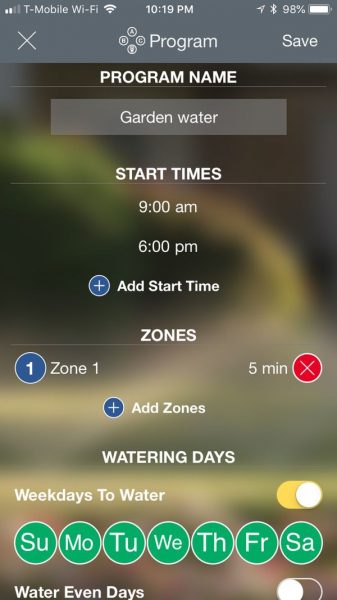
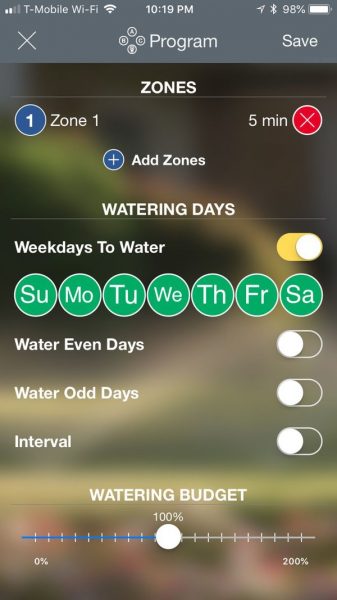
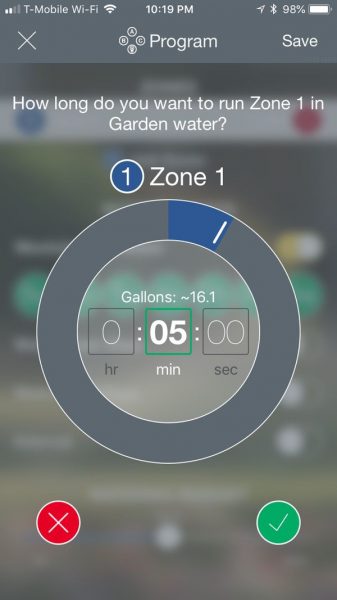
You’ll begin by setting up your automated watering program. Name your program, set the days of the week to water, start times, and duration. The setup below is for my garden (twice daily, 5 minutes per watering):

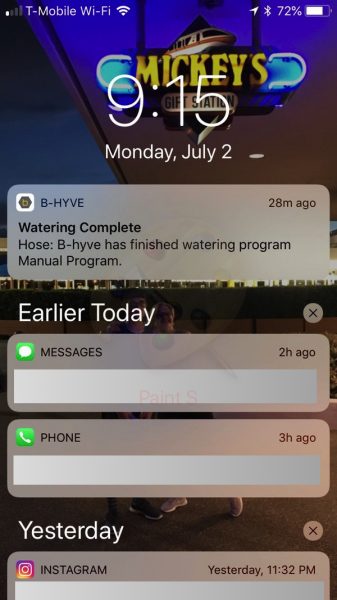
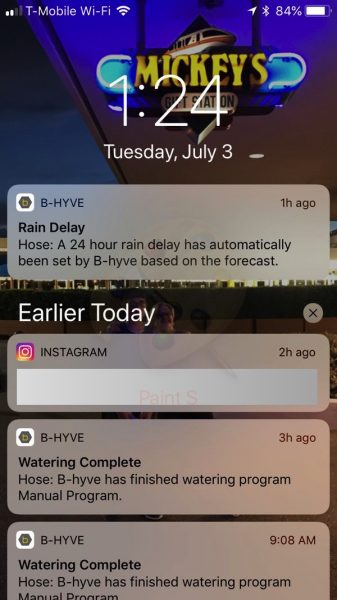
Once you’re set up, the app will notify you as it goes about it’s scheduled activities. You can also manually run watering cycles if your plants seem a bit thirsty. In either case, the app logs every event and sends notifications to your phone when each watering session is completed:

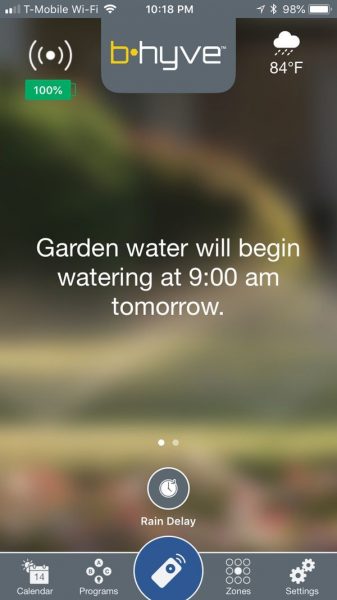
Here’s where things get really cool. The B-Hyve app integrates active monitoring of your local weather into the system if you wish, and will cancel or delay scheduled watering events if Mother Nature is going to do the work for you!

Pretty cool, right? It’s important to note that the app is based on forecasts, so it might miscalculate if that storm bypasses your immediate area. We found it to be pretty accurate in our actual tests, however, and we could manually trigger a watering if the storm passed us by.

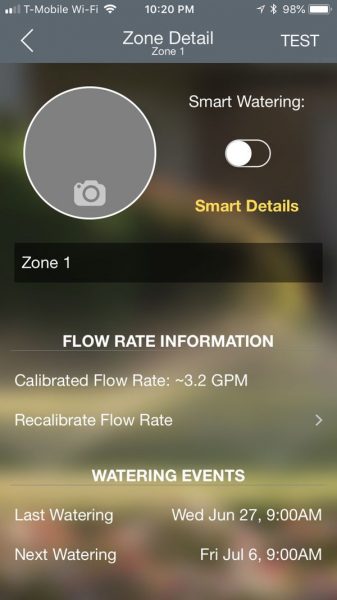
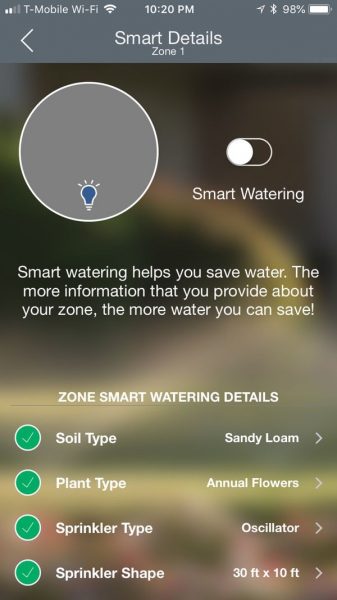
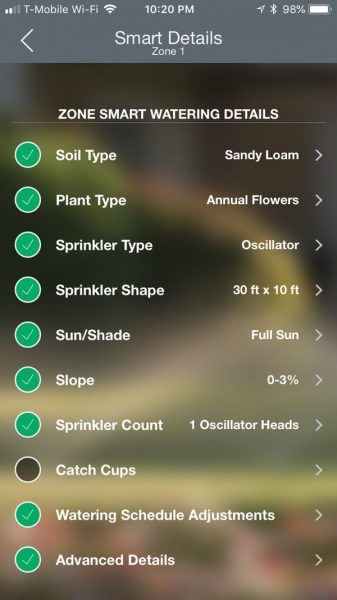
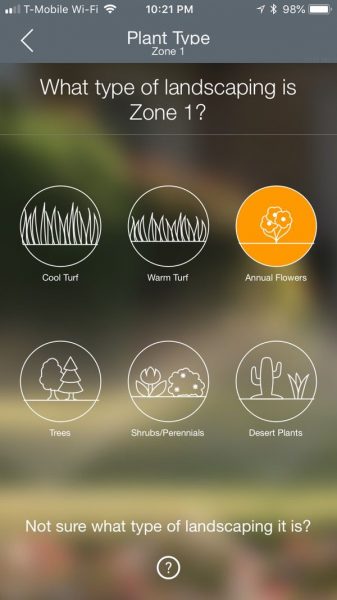
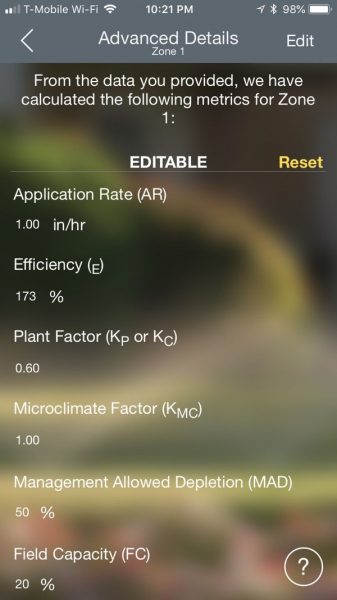
If you want to get really deep into watering management, you can fully customize your options. You’ll identify “Zones” for your watering. In each zone you can provide all of the details about the environment and conditions (plant types, ground slope, sprinkler type(s), sun coverage, soil type, etc.) and the app will automatically calibrate a watering program based on the zone’s requirements. Check out the screenshots below to get a taste of the available customizations:

What does this all mean? Well, you could add multiple timers to all of the watering/irrigation systems around your house (garden, lawn, flowerbeds, etc.), set up the zones, and get professional-level water management and optimization from a single app for every aspect of your landscaping and climate conditions. That’s really impressive.

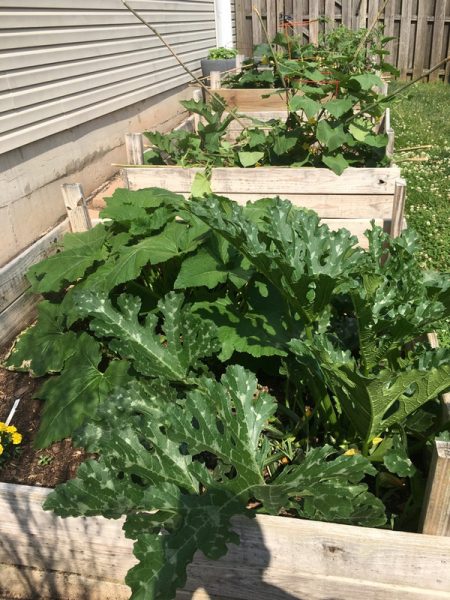
I haven’t had a chance to test all of these features yet, but we did set up a month-long test of the system on my vegetable gardens. I spent most of the month of June traveling between vacation and business trips. While I was roaming the Earth, I trusted the watering of my garden to then B-Hyve and a standard oscillating fan sprinkler. The system took care of all the watering needs, using the Smart Watering features to adjust for weather. I haven’t lost a single planting. These were all starter plants five weeks ago:

If I need to use the faucet for something else (like power washing), I can also turn the faucet on or off by pressing that button on the timer to do some other work without removing the unit. Other than that, I can control everything from my living room, or my hotel room, or WIFI at the airport. Impressive. So impressive, in fact, that I think I am going to look into multiple units and hydration systems to make the whole operation more efficient next summer.

What I like

  • Simple installation and setup
  • Well-executed app usability
  • Robust functionality that you can manage to your desired level of complexity
  • Ability to handle expanded/upgraded watering solutions
  • Well-built hardware looks like it will stand up to multiple years of use

What needs to be improved

  • None to be found so far

Final thoughts

I really like the B-Hyve Hose Faucet Timer so far. The hardware looks to be very solid after 6 weeks of operation, and setup is a snap. The management app is excellent and has the ability to accommodate both simple task-oriented users and power users who want to set up a whole watering management system (with easy expansion to multiple units for a whole-home solution). It’s a great tool to help conserve water as well. I’d strongly recommend it.

Price: $69.00
Where to buy: Visit the B-Hyve web site or buy it on Amazon. Also available at many home retail stores like Home Depot, Wal-Mart, and Lowes.
Source: The sample of this product was provided by Orbit B-Hyve.

The post B-Hyve Hose Faucet Timer review appeared first on The Gadgeteer.

Filed in categories: Reviews

Tagged: ,

B-Hyve Hose Faucet Timer review originally appeared on The Gadgeteer on July 14, 2018 at 10:00 am.

Note: If you are subscribed to this feed through FeedBurner, please switch to our native feed URL http://the-gadgeteer.com/feed/ in order to ensure continuous delivery.
Floyds of Leadville CBD recovery protein powder review

REVIEW – I workout 3 times a week and immediately after each workout, I drink a protein shake. Why? Because taking in protein after a workout starts the repair process on the muscles that you just thrashed. Even though I drink protein after every workout, about 75% of the time, my muscles will be somewhat sore the next day from the micro tears that happened during the previous day’s exercise session. And sometimes they will be very sore. So, when I was approached by Floyd’s of Leadville with an offer to review their Recovery Protein with CBD which they claim takes the edge off post-exercise pain by reducing inflammation and easing muscle soreness and joint stiffness, I said heck yeah! Did it work? Keep reading to find out.

What is it?

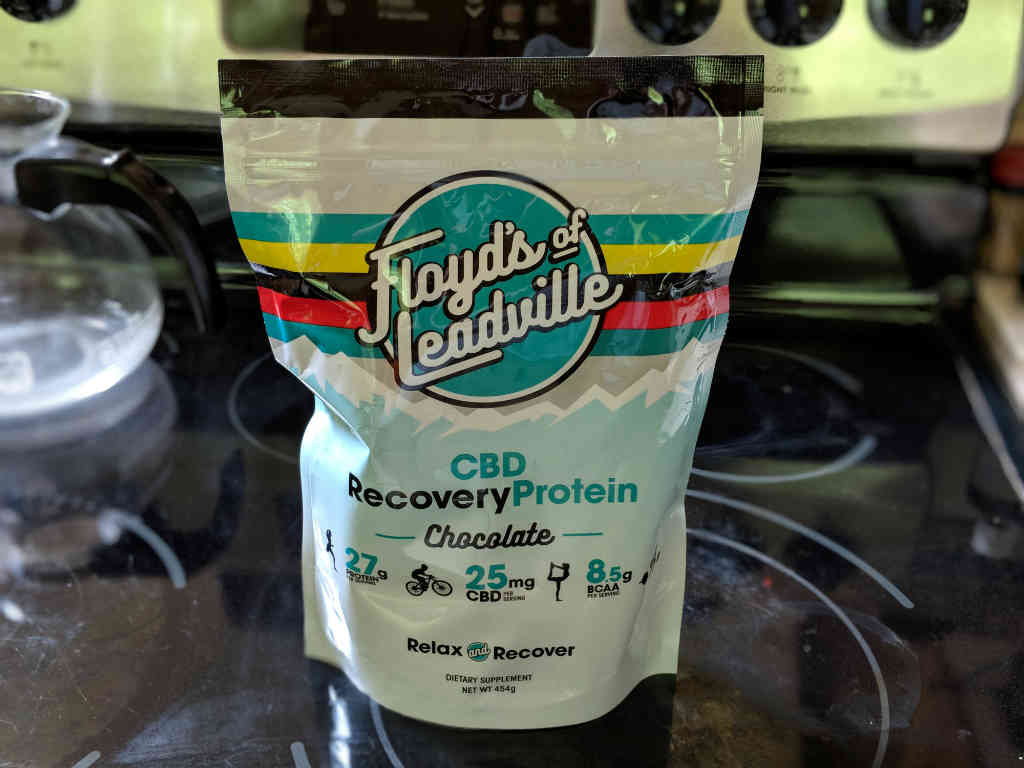
The Floyd’s of Leadville CBD recovery protein powder is a fine whey protein powder that comes in either vanilla or chocolate flavors and mixes with water or milk. But the special ingredient is the CBD aka Cannabidiol. What is Cannabidiol? It’s an extract from the hemp plant and the hip new ingredient being used in products and touted to provide a variety of added health benefits. Some claim that CBD helps with stress, pain, inflammation, and more.

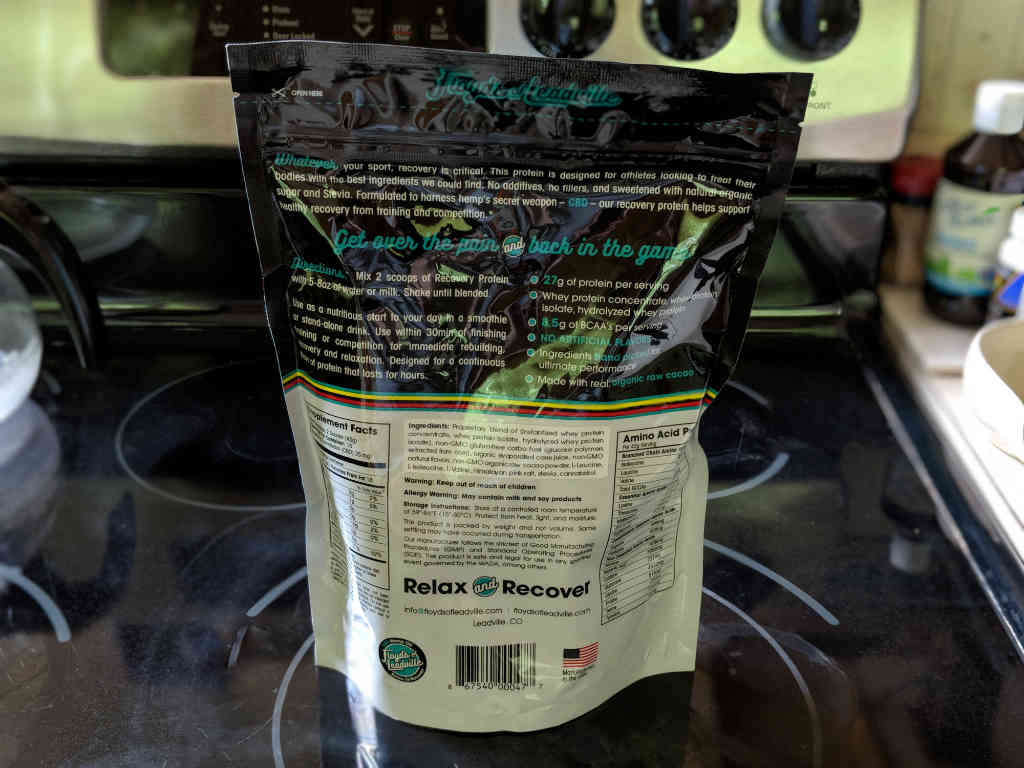
Nutritional info

27g of protein per serving (a serving is 2 scoops)
Whey protein concentrate, whey protein isolate, hydrolyzed whey protein
Cannabidiol (CBD) 25mg
8.5g of Branched-chain Amino Acids (BCAAs) per serving
No artificial flavors
Made with organic raw cacao
Sweetened with stevia

Calories, 180
Calories from Fat, 18
Total Fat, 2g / 2%
Saturated Fat, 1g / 5%
Trans Fat, 0g
Cholesterol, 0g / 0%
Total Carbohydrate, 10g / 3%
Dietary Fiber, 0g / 0%
Sugars, 5g
Protein, 27g / 52%

Will this stuff make me high?

When you read that the Floyd’s of Leadville protein powder has CBD in it and read that CBD stands for Cannabinoid you probably thought of Cannabis AKA Marijuana, and thought no wonder this oil makes you feel better, it’s because it makes you stoned. Actually, no, CBD oil will not get you high because it does not provide any psychoactive effects (the “high” or “stoned” feeling) that THC, the other Cannabinoid that will get you high provides.

Will CBD cause me to fail a drug test

From what I’ve been reading, the standard serving size of 25mg CBD in this protein powder will not cause you to fail a drug test. According to one article that I read, you would need to consume between 1000 and 2000mg of CBD for it to show up on a drug test. And another article also talked about how it would be highly unusual for there to be any problems with a drug test when taking products that have CBD in them. But it’s also important to understand that very high doses may result in a positive urine test. Ultimately, you need to be fully aware of the regulations posed by your employers and consume CBD products accordingly.

Is this product legal to buy?

Yes, it ships legally to all 50 states.

Let’s workout and see what happens!

With all that out of the way, let’s get down to how it tastes and if I noticed any differences after my workouts when using this protein powder. I have to preface this part of the review by saying that I’m only relating my own experience using this product. I have no idea how or if it will work for you or how you will interpret the taste.

As I already mentioned, I workout 3 times a week on Monday, Wednesdays, and Fridays. Each time I pour about 8 ounces of Blue Diamond regular almond milk into a Ninja blender cup, add two scoops of the Floyd’s CBD protein powder, a few ice cubes, a little water and then I blend it for a few seconds to mix it all up and break up the ice. Then I stick the shake in the fridge while I do my 30-minute workout. As soon as I’m done working out, I blend the shake again for another couple of seconds and drink it. I’ve done this routine 7 times so far using this powder and I’ve felt zero muscle soreness the next day. For me, this is highly unusual because I almost always feel at least a little sore/stiff the next couple of days after a workout. I even tried working out harder just to make sure I wasn’t going easy on myself, but I still wasn’t sore. I know this isn’t a scientific test, but just from what I know about my own body, I can say that the CBD seems to work for me so yay!

As for taste, I was sent the chocolate version of the powder and it tasted like… chocolate. 🙂 It was sweet without being too sweet. I like the flavor.

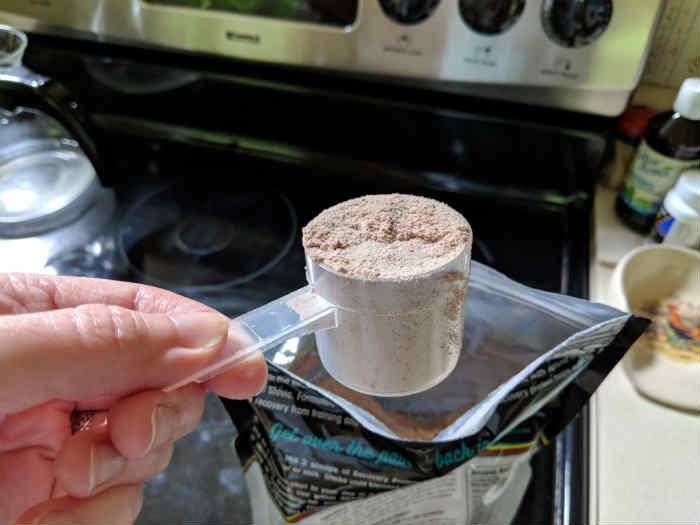
The powder mixes very well and I didn’t notice any clumps or grittiness.

Compared to my regular protein powder, I didn’t feel any different mentally after drinking the shake made with the Floyds of Leadville CBD recovery protein powder. I didn’t get the munchies or feel paranoid either 😉 Seriously though, it tasted just like 100’s of other protein shakes that I’ve made and consumed over the years.

What I like

  • Mixes easily with no clumps or grit
  • Tastes good
  • Eased/erased my post workout soreness

What needs to be improved

  • Expensive

Final thoughts

CBD is the hot new ingredient that is being added to what seems like everything right now and I am skeptical of things like that. But at least for my simple try it and see what happens tests, drinking the Floyds of Leadville CBD recovery protein powder after my workouts meant that I would not feel any soreness or stiffness the next day or two. That’s the good news. The not so good news is that the powder is expensive compared to the powder that I normally use. It’s $4 per servings with only 10 servings per bag at a total cost of $40. When I compare that to the protein I normally buy, Floyd’s powder is about 4 times more expensive per serving. For that reason, I will not continue buying it, but if your protein budget is larger than mine, this powder is definitely worth trying if you have issues with sore muscles after your workouts.

Price: $39.95
Where to buy: Floyds of Leadville
Source: The sample of this product was provided by Floyds of Leadville.

The post Floyds of Leadville CBD recovery protein powder review appeared first on The Gadgeteer.

Filed in categories: Reviews

Tagged: ,

Floyds of Leadville CBD recovery protein powder review originally appeared on The Gadgeteer on July 13, 2018 at 10:00 am.

Note: If you are subscribed to this feed through FeedBurner, please switch to our native feed URL http://the-gadgeteer.com/feed/ in order to ensure continuous delivery.
Click & Grow Smart Garden 9 review

REVIEW – When you grow your own food, you not only nourish your body, but you nourish your mind and your spirit from the effort and time spent tending the plants. Unfortunately, not everyone has the outdoor space to create a garden plot. So for them, we have the Click & Grow Smart Garden 9. Let’s check it out this indoor gardening gadget.

What is it?

The Smart Garden from Click & Grow is a self-contained garden that is perfect for even the smallest indoor spaces to let you grow up to 9 different plants and is also available in a smaller version that can grow 3 plants.

What’s in the box?

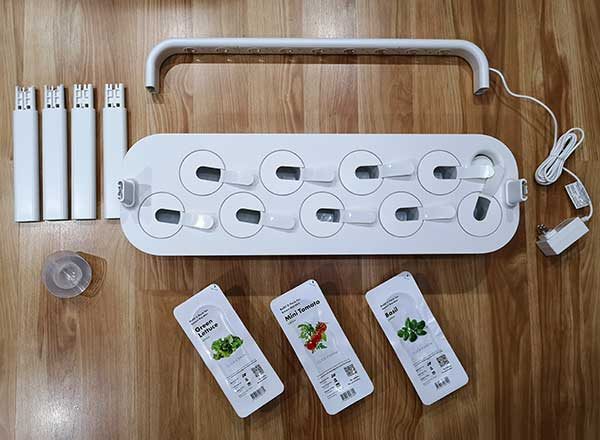
Click & Grow Smart Garden 9
Individual pots
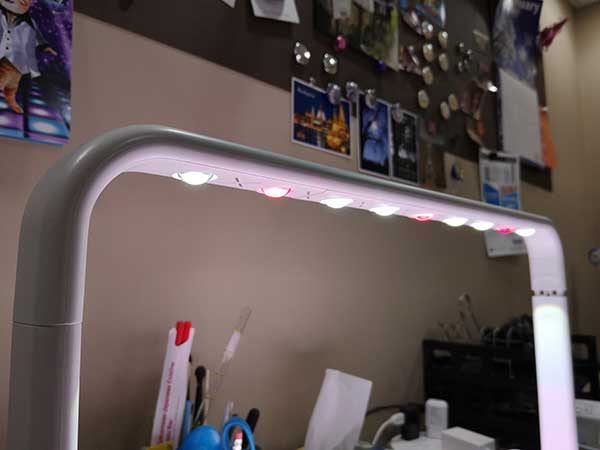
Light bar
4 Light bar supports
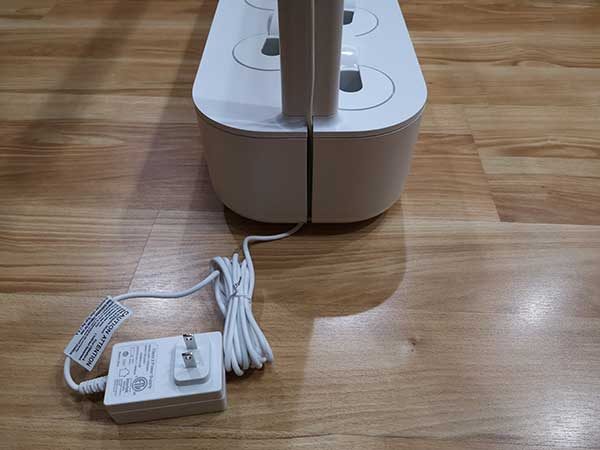
AC adapter
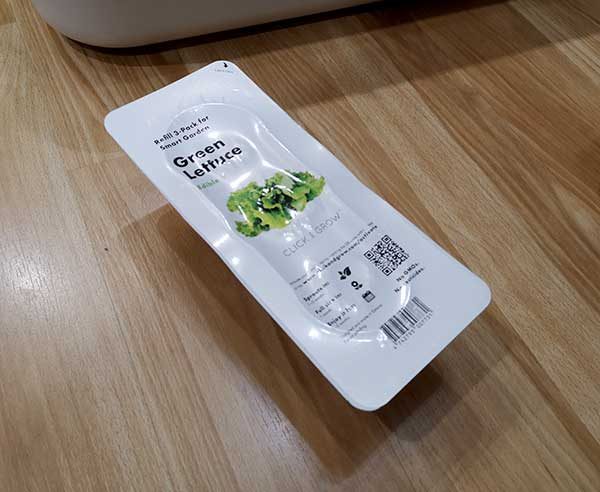
3 plant capsules that each have 3 pods per pack

Design and features

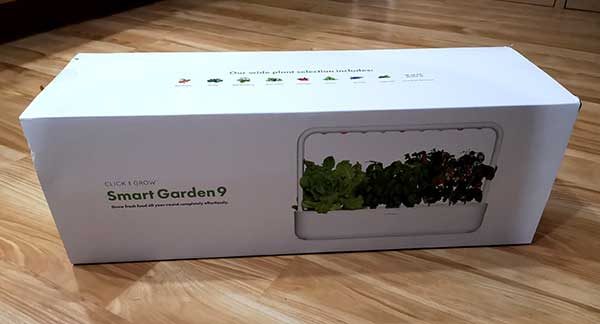
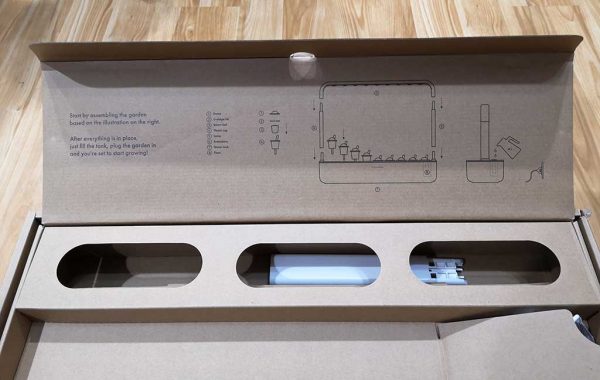
The Smart Garden arrives in a package that has the instructions printed right on the box. Setup is easy but does require some minimal assembly.

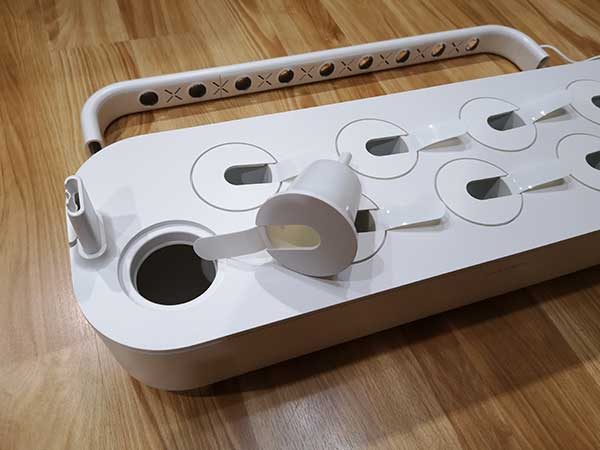
First, you remove the tank which is designed to automatically water the plants and holds 9 plant capsule holders which are already in place.

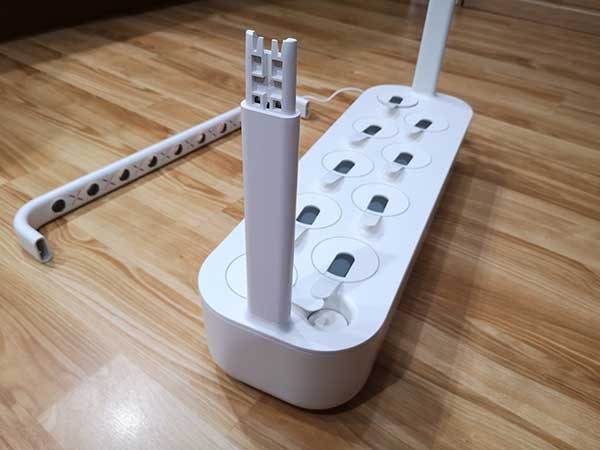
The next step is to attach the grow light stand to the tank. The Smart Garden 9 comes with 2 sets of arms so you can adjust the height of the grow light as the plants get taller. The arms just press on the tank without the need to use tools. I did run into a small issue with the arms that I’ll discuss later.

Then you route the power cord down a channel on the side of the tank.

Next, you open one of the plant capsules. The Smart Garden 9 ships with Green Lettuce, Basil, and Mini Tomato 3-pack capsules but you can buy refills of other plants as they offer 40 different capsules that include plants, flowers, and herbs like: a variety of pepper plants, kale, dill, dwarf peas, wild strawberries, and many more.

I don’t see why you couldn’t create your own plant pods to grow other plants too and I may try that at some point and share the results with a review update.

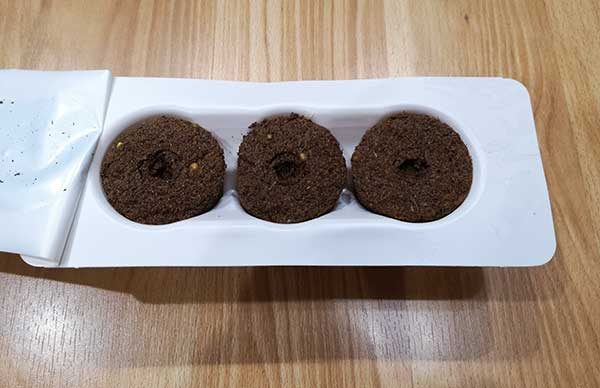
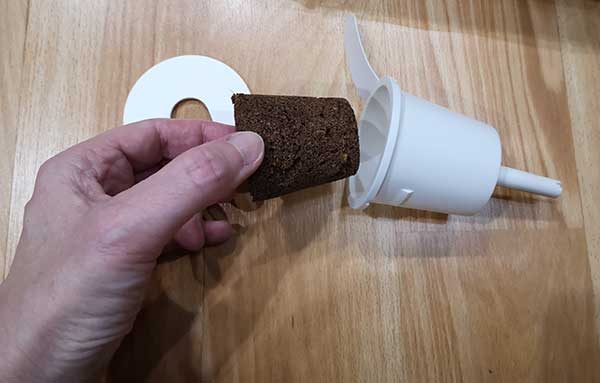
When you open one of the plant packages, you find 3 little brown pods. Each pod contains everything needed to grow a plant even if you think you have a black thumb. The pods contain NASA inspired smart soil and the seeds which are already planted inside the pods.

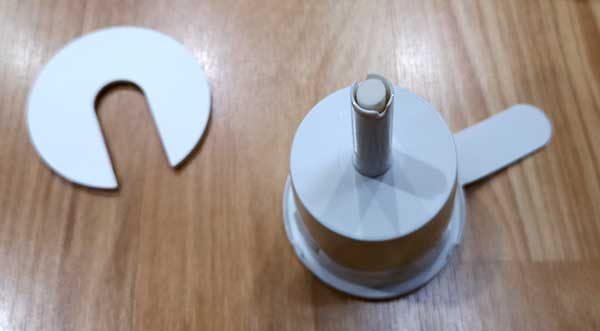
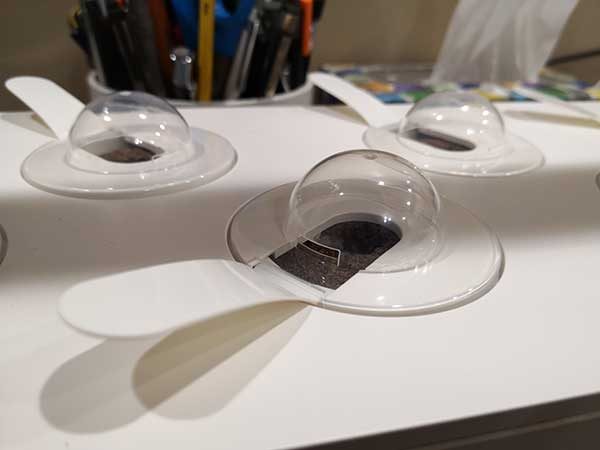
All you need to do is remove one of the plastic capsule holders from the tank and remove the lid.

If you turn over the holder, you’ll see a wick on the bottom that automatically sucks up water from the tank to water the plant.

The plant capsule fits in the holder.

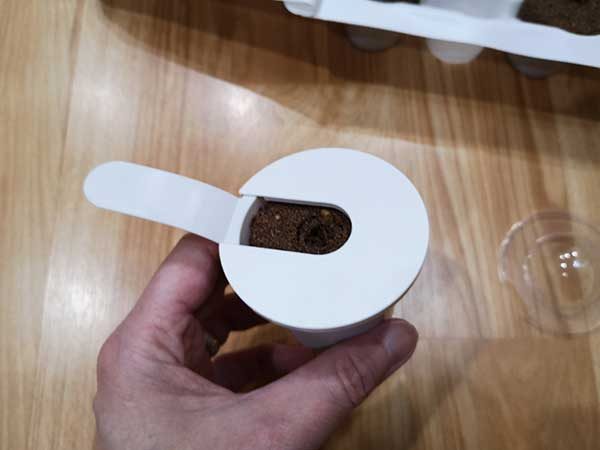
The lid goes over the holder.

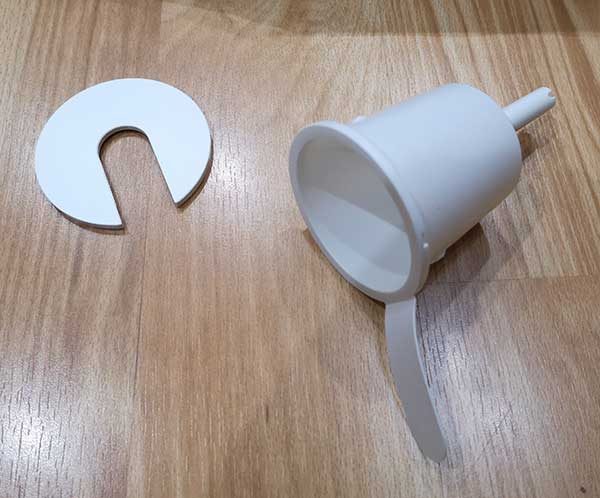
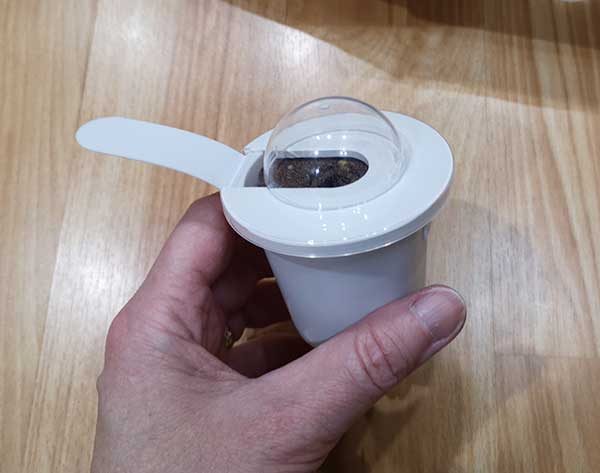
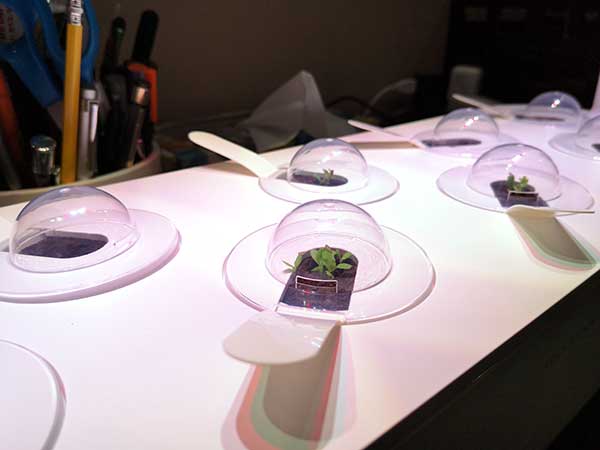
Then a clear plastic biodome lid snaps over the top.

The biodome lids create a tiny terrarium-like environment which helps the seeds in the capsule to sprout. It should be obvious that the little biodome lids should be removed as soon as the seedlings are big enough that they start touching the “ceiling” of the lid.

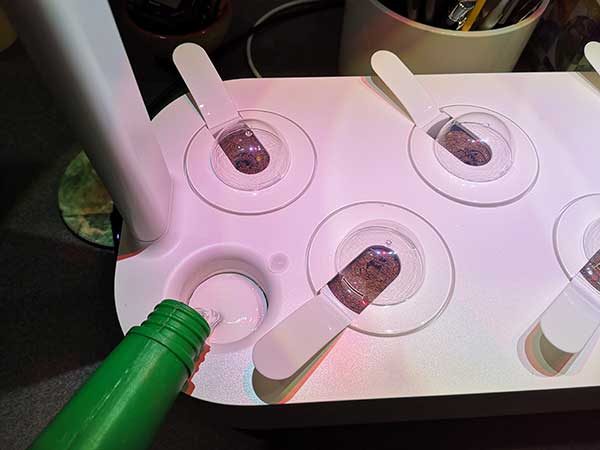
All that is left to do is fill the tank with water by pouring water directly into the receptacle in the lower left corner.

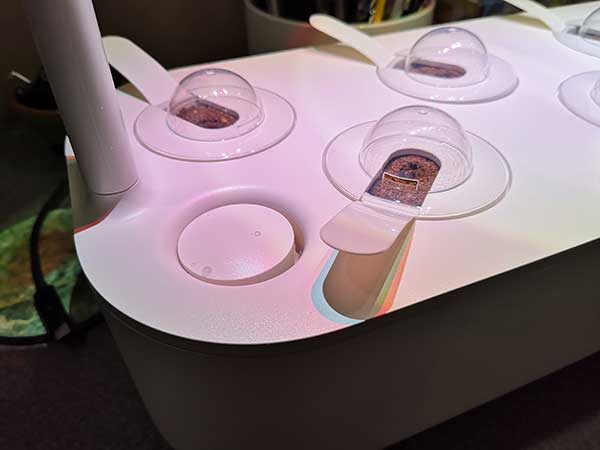
The water receptacle has a built-in water level indicator that rises as you add the water. If you press on it, it bobs up and down to let you know that there is still enough water in the tank. Here’s a 10-second demo showing how that works.

As the water is used by the plants, the water level indicator sinks into the receptacle to let you know that it’s time to add more water. The design is both genius and simple.

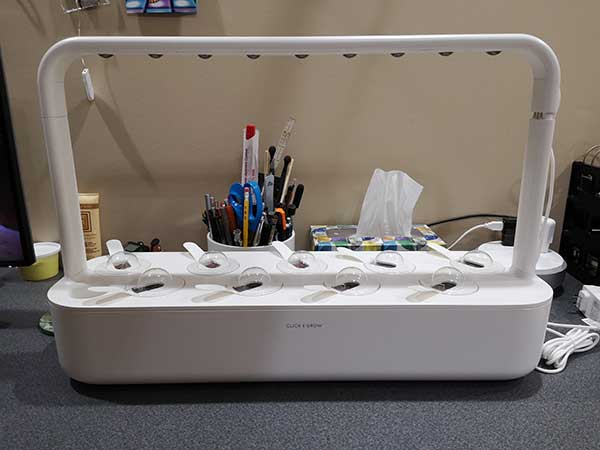
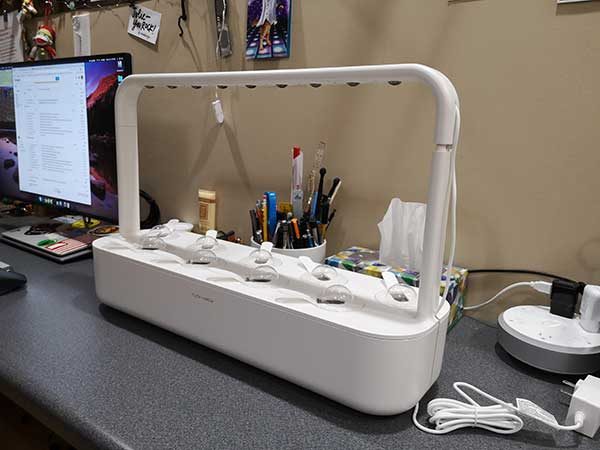
Earlier, I mentioned that I had an issue with the support arms for the grow light. Can you see the problem in the image above? If you can’t see it, look at the right support arm. See how there’s a gap where the grow light attaches to the top of the arm? That gap is there because I can’t get it to seat completely and I’m afraid I’ll break something if I put even more pressure on it. I’m equally worried that I won’t be able to detach the grow light when the time comes to add the other support arms to increase the height of the grow light when the plants get tall enough.

The grow light itself has 9 white and red LED lights which are programmed to turn on and off at different times of the day in order to provide the needed light for the plants to grow. I happen to have the Click & Grow Smart Garden set up in Gadgeteer HQ which is in a basement office. For that reason, I really don’t care when the grow light is active or inactive because I don’t sleep down there. But if you have a very small living area, that might be a consideration as to where you decide to place this indoor garden because there isn’t a way to customize the light schedule.

It’s time to grow the veggies!

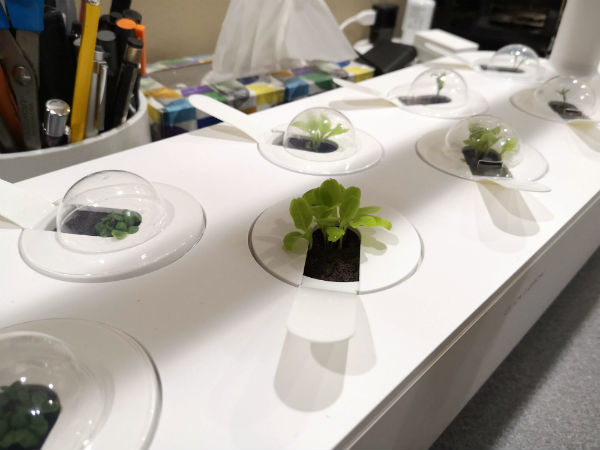
I set up the Smart Garden on 6/28/18 and the lettuce seeds were the first to start sprouting just a few days later on 7/1/18. It is funny how exciting something non-digital can be! 🙂 A couple days later the basil sprouted and then finally when I was almost ready to give up, the mini tomato seeds sprouted.

I thought it would be fun to create a time-lapse video showing the growth progress of the plants, so I set up the Brinno TLC200 Pro time-lapse camera and here is a quick 1-minute video showing 9 days of the Click & Grow Smart Garden 9.

It’s really cool when plants grow and you had to do was add the water. So I have my little garden going inside the house and Jeanne has a 50 x 50 foot garden outside. So far my garden is doing better than hers but don’t tell her that I said that!

What I like

  • Completely automatic, just add plant capsules and water

What needs to be improved

  • No way to customize the grow light timing
  • Grow light extension arms can be too tight to connect fully
  • Refill plant capsules are expensive at almost $10 for a 3 pack

Final thoughts

It’s going to take several weeks before the plants are big enough to harvest and eat. Especially the mini tomatoes. So I decided to go ahead and post my review now and then follow up with updates as time goes on to show the progress. That said, I’m impressed so far by how easy the Smart Garden is to use.

Price: $199.95
Where to buy: Click & Grow and Amazon
Source: The sample for this review was provided by Click & Grow.

The post Click & Grow Smart Garden 9 review appeared first on The Gadgeteer.

Filed in categories: Reviews

Tagged:

Click & Grow Smart Garden 9 review originally appeared on The Gadgeteer on July 12, 2018 at 10:00 am.

Note: If you are subscribed to this feed through FeedBurner, please switch to our native feed URL http://the-gadgeteer.com/feed/ in order to ensure continuous delivery.

Canvaspop PhotoBooks review

REVIEW – When I’m not writing code, my primary hobby is photography. I’ve never created a photo book, so when the chance to review the Canvaspop Photo Books product came along, I jumped right at the opportunity.

What is it?

The Canvaspop Photo Books is an iOS app that you use to create a 6″x6″ photo book in either softcover or hardcover.

Design and features

The Canvaspop Photo Books app is a pretty simple app. You start by selecting either the softcover or hardcover product. Next, you select between 20 and 30 photos, and then a cover photo.


You can tap and hold a photo to drag and switch it with another photo or tap a photo to either crop it or replace it with another photo.

When I initially started to add photos, I noticed that if a photo was added to your phone album after you start the app the list of photos in the app did not refresh, so make sure you have all your photos on your device before you start. There is also an option to add photos from your Instagram account.

You can also apply a filter at this point to all of the photos, available filters are: Natural, Black and White, Vivid.


After arranging your photos, tapping “Done” takes you to the checkout where you can set your quantity and start the checkout process. Both Apple Pay and credit cards are accepted. The rest of the checkout was pretty standard and my book arrived in about two weeks.


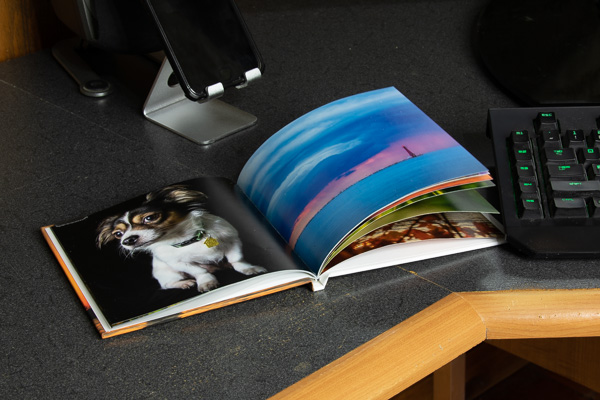
The photo book arrived in pretty minimal packaging but was in perfect condition. Overall I’m really happy with both the quality of the book materials and the actual printing and color.

The cover has an almost flat finish, whereas the pages have a slightly glossy appearance which I found to be perfect.

The app does not have any ability to add any text to any of the pages or covers, so you’ll want to edit an image with such information if you wish to have that included in your book. There’s also no ability to span an image across two pages, so if you want that you’ll have to create two images and add them to each facing page.


I did find that there was quite a bit of dust/crumbs in the book, probably from the trimming process, however that wiped of fairly easily.

What I like

  • Color accuracy was perfect.
  • Quality printing and binding.

What needs to be improved

  • App needs the ability to add text (title) and copyright information.
  • App needs the ability to save the book layout so you can finish or reprint it later.
  • No Android app is available yet.
  • There’s no ability to span an image across two pages.

Final thoughts

I am extremely pleased with the photo book, and the shortcomings of the app aren’t too big of a deal since if you know about them you can work around most of them.

Price: $15 to $25
Where to buy: Canvaspop
Source: The sample of this product was provided by Canvaspop

The post Canvaspop PhotoBooks review appeared first on The Gadgeteer.

Filed in categories: Reviews

Tagged:

Canvaspop PhotoBooks review originally appeared on The Gadgeteer on July 11, 2018 at 11:00 am.

Note: If you are subscribed to this feed through FeedBurner, please switch to our native feed URL http://the-gadgeteer.com/feed/ in order to ensure continuous delivery.