Nixplay WiFi Cloud Frame review

REVIEW – Several years digital photo frames were a popular gift idea. I reviewed at least a dozen of them until their popularity grew stale. But what’s old is new again and today digital photo frames are making a comeback. One new frame that I’m going to show you today is the Nixplay WiFi Cloud Frame. Let’s take a look.

What is it?

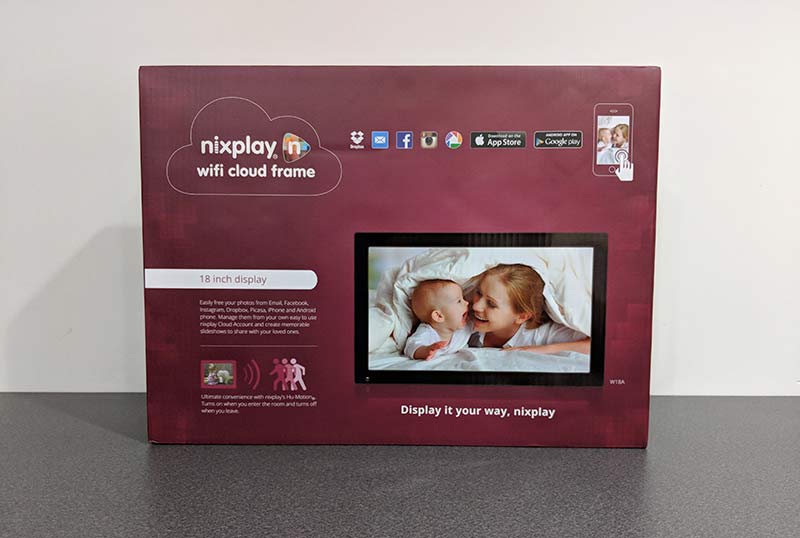
The Nixplay WiFi Cloud Frame is a digital photo frame that can be used to view your favorite images. Nixplay makes a variety of frames but their  Cloud Frames are available in 15 and 18-inch screen sizes. I was sent the 18-inch version.

Hardware specs

Screen Resolution: 1366 x 768 pixels
Aspect Ratio: 16:9
Brightness: 350 cd/m2
Supported Photo Format: JPEG / JPG / PNG
Supported Video Format: H.264 HD 720p
Speakers: 2 x (1.5W) Stereo Speakers, 3.5mm Stereo Headphone Input
Ports: USB Drive / SD / SDHC
Wireless: 802.11 b/g/n
Width: 18.4 inches (467mm)
Height: 11.4 inches (290mm)
Depth: 1.3 inches (33mm) – without stand, 4.5 inches (115mm) – with stand
Weight:2.72kg – without stand, 2.80kg – with stand

What’s in the box?
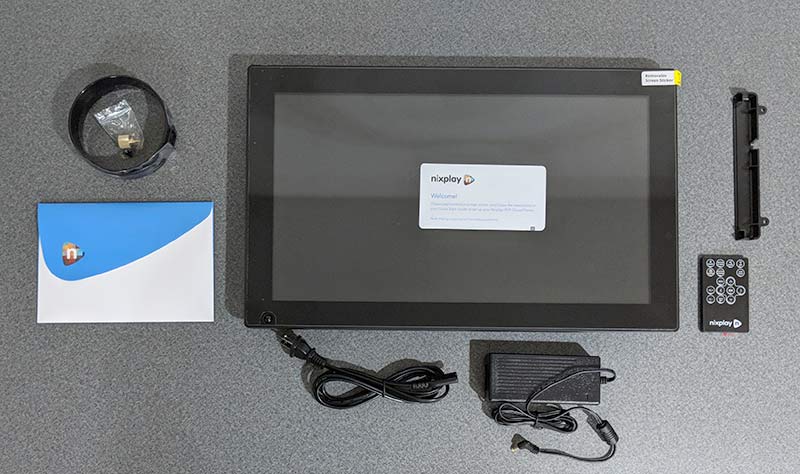
Nixplay WiFi Cloud Frame
Screw in stand
IR remote
AC adapter
Quick start guide

Design and features
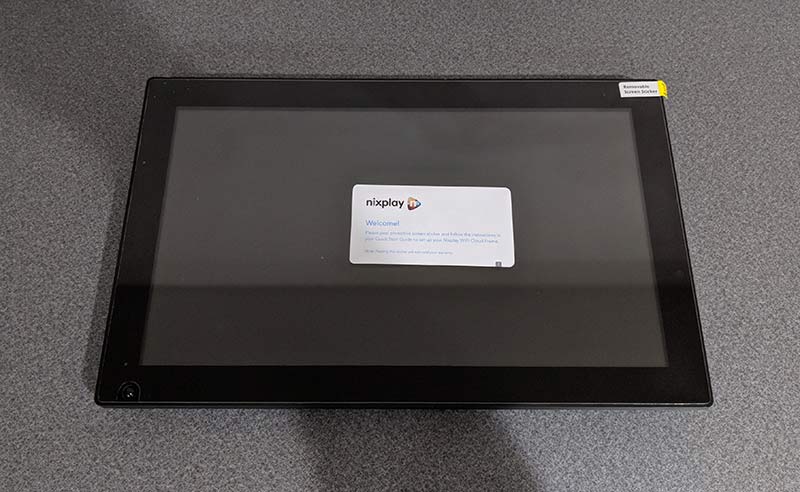
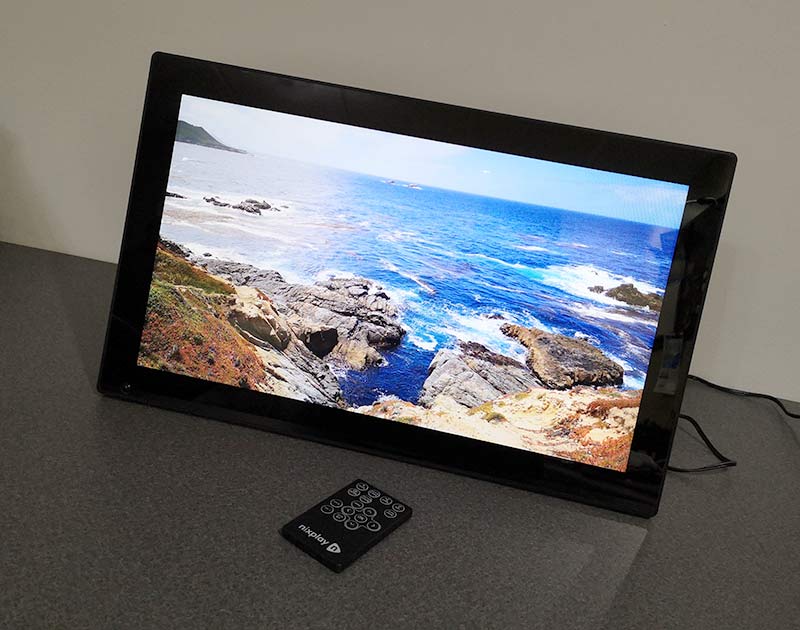
This is the largest digital photo frame that I’ve reviewed and I have to say that if you’re going to buy a digital photo frame, go big or forget it. This 18-inch frame is big and well made. It has black 1-inch bezels on all sides to make it look like a picture frame.

The Nixplay has two sensors that are built into the lower part of the frame. In the lower left corner is the motion detection sensor and there’s also the IR sensor for the included remote control.
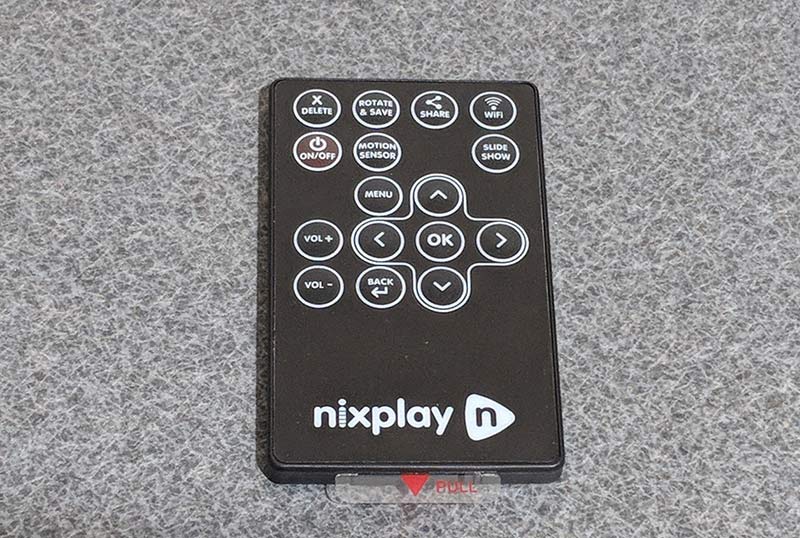
The remote control has a membrane style keypad with functions to control the photo slideshow and video playback.
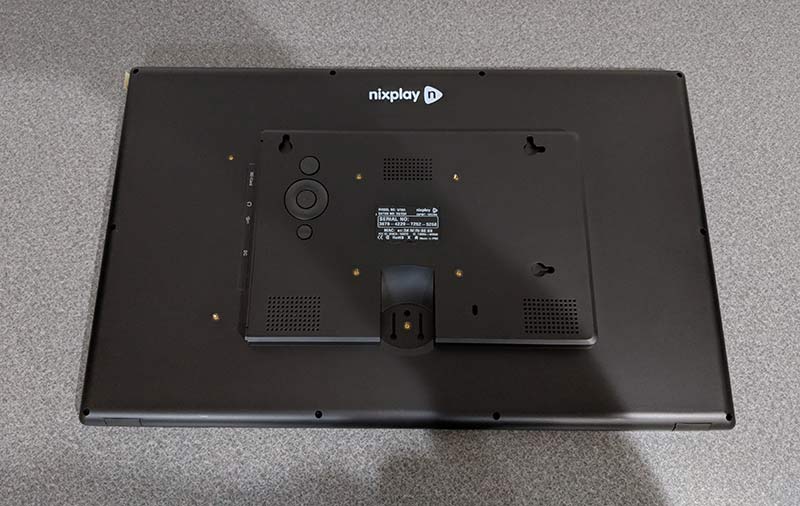
The back of the Nixplay Cloud WiFi Frame has mounting slots to help you mount the frame on a wall in either landscape or portrait orientation.

There are also speakers built into the back of the frame and a set of control buttons in case you lose the IR remote control.
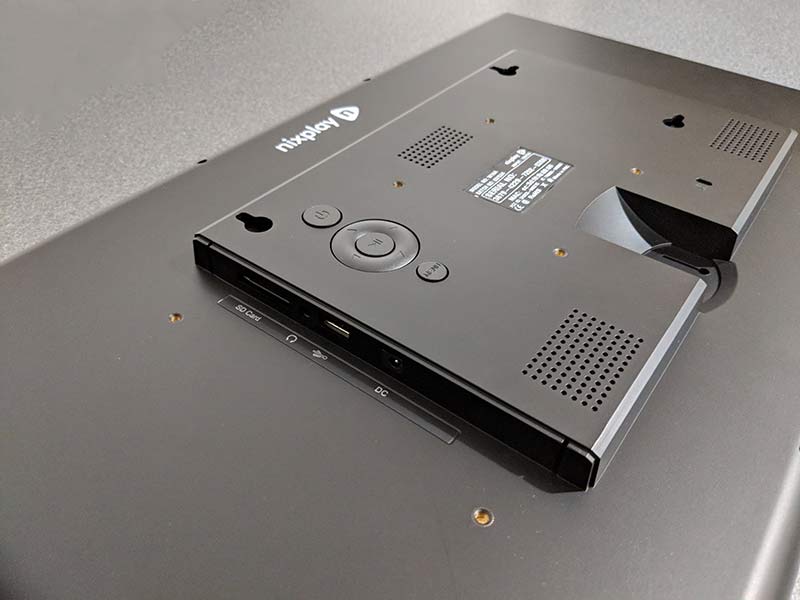
The back of the frame has an SD card slot and a USB port if you want to load your own images from flash memory. There’s also a 3.5mm headphone jack and the power port.
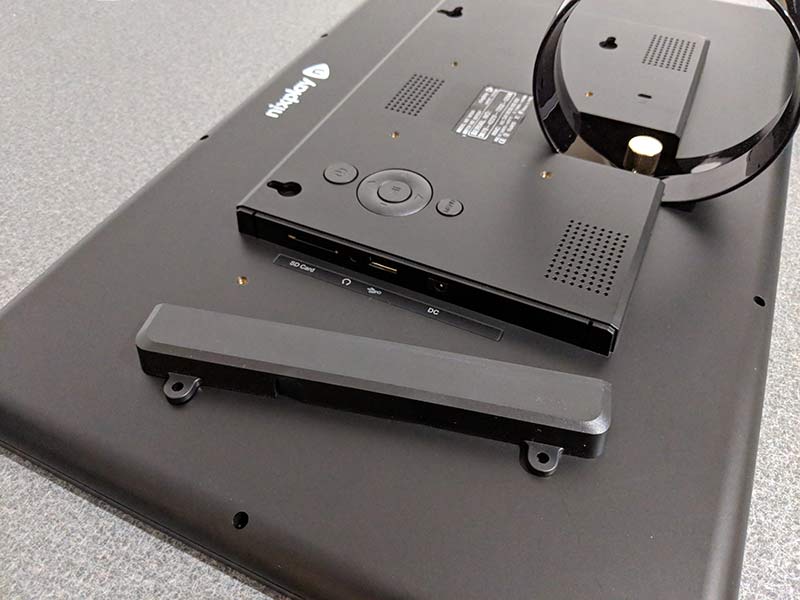
If you don’t want people messing with the ports, you can block them by using the included cover.
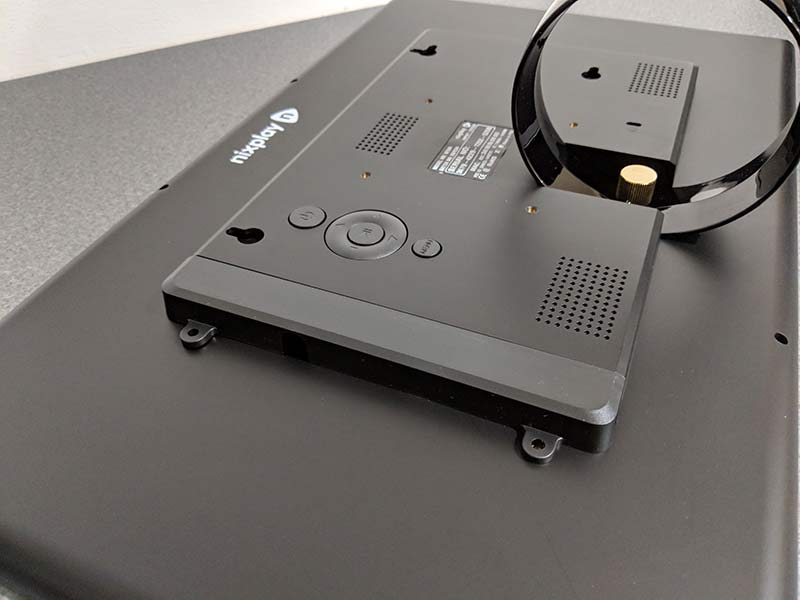
The port cover is secured by two screws.
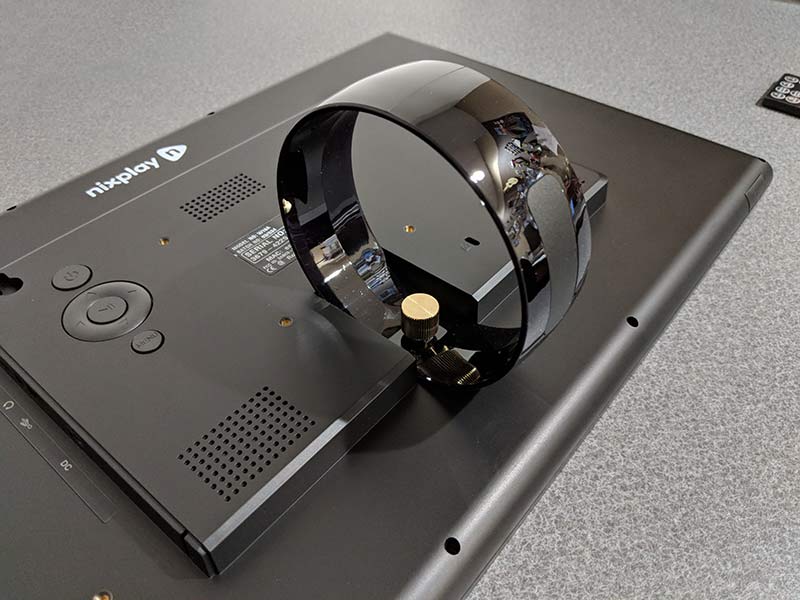
If you don’t want to mount the Nixplay on a wall, you can attach the included stand which snaps into the back of the frame and is secured by a brass thumb screw.
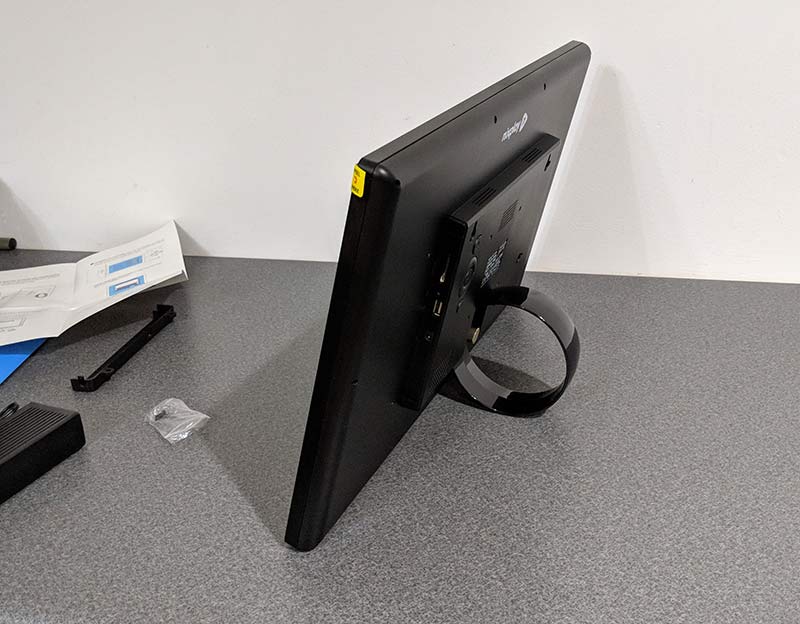
I opted to do my testing of the frame with the stand. However, by using the stand, you can only use it in landscape orientation.

Loading your images and videos into the frame
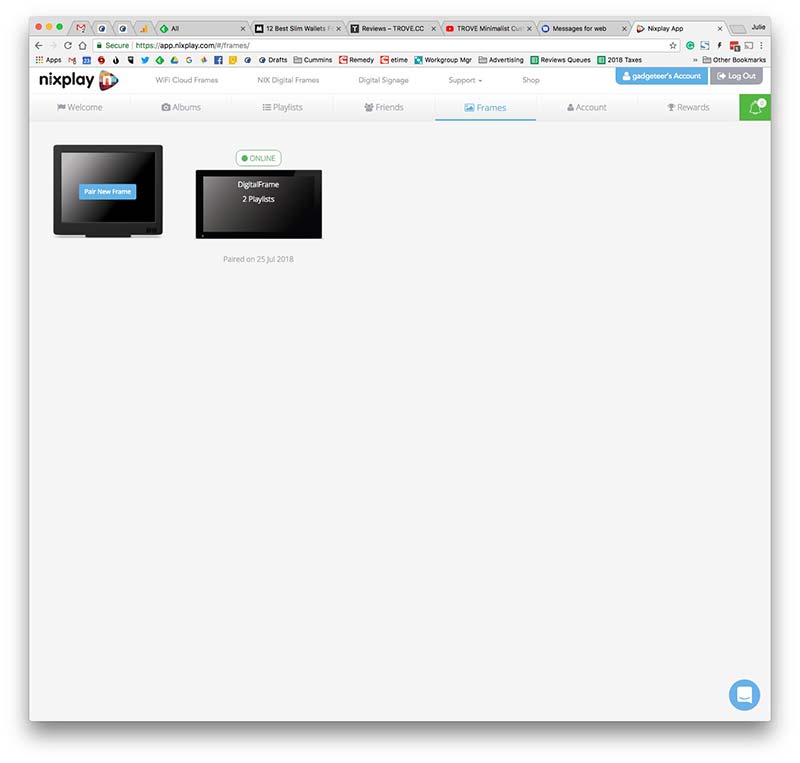
To see slideshows of your favorite images and video, you can load them on an SD card, a USB flash drive, or you can connect the frame to your wireless network and then load images from a selection of social media sites like Dropbox, Facebook, Google Photos, Instagram, Flickr, and Verizon Cloud by using the Nixplay web app. Note that except for the Dropbox dynamic playlist, the other social media sites will not automatically sync new images to the frame. You will need to update the playlists when you add new images that you want to show up on the Nixplay frame. Don’t worry though, it’s as easy as dragging and dropping the images into the playlist from the Nixplay web app.

Another way to get images into the frame is by email. Each frame has an email address assigned to it once you create a Nixplay account. Images sent to the frame using this address will be added to a special playlist.

Last but not least, you can install the Nixplay app on your smartphone or tablet and send images from your device to the frame that way too.
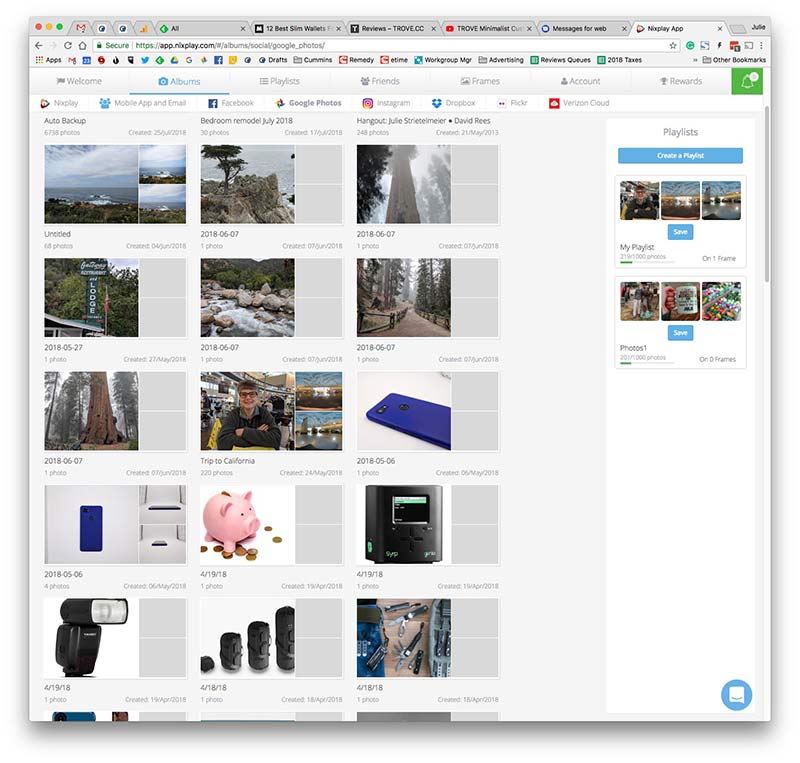
Before you can use the frame, you’ll need to create a Nixplay account which is free and allows you to easily configure a variety of settings on the frame. The free account also allows you to create and modify playlists of up to 10GB of photos for up to 5 different Nixplay frames. If you need to manage more frames, Nixplay offers a Plus account where you’ll have 10 frames per account and 30GB of storage.

For example, if you load an album of photos from Instagram or Google Photos like I did, you can remove images that you don’t want to see or disable the playlist altogether.

Note that the images will be loaded on to the frame itself so that even if you log out of the Nixplay account or lose WiFi connectivity, the frame still continues to work.

Most nicer digital photo frames allow you to set a sleep schedule so that the frame goes into standby mode during the nighttime hours when no one would be seeing it anyway. The Nixplay will allow you to either have the screen turn off or it can display a clock during the sleep schedule hours. But that’s not all. The Nixplay WiFi Cloud Frame goes even one step further by implementing a motion sensor that will put the display in sleep mode when it senses that there’s no one in the room. I love this feature and have found that it works really well.

Another feature worth mentioning is that you can control your Nixplay frame with Alexa. You can ask it to play specific playlists just by using your voice. I don’t have an Amazon Echo set up to test this feature, but you can find out more about it by visiting the Nixplay site.

Display quality
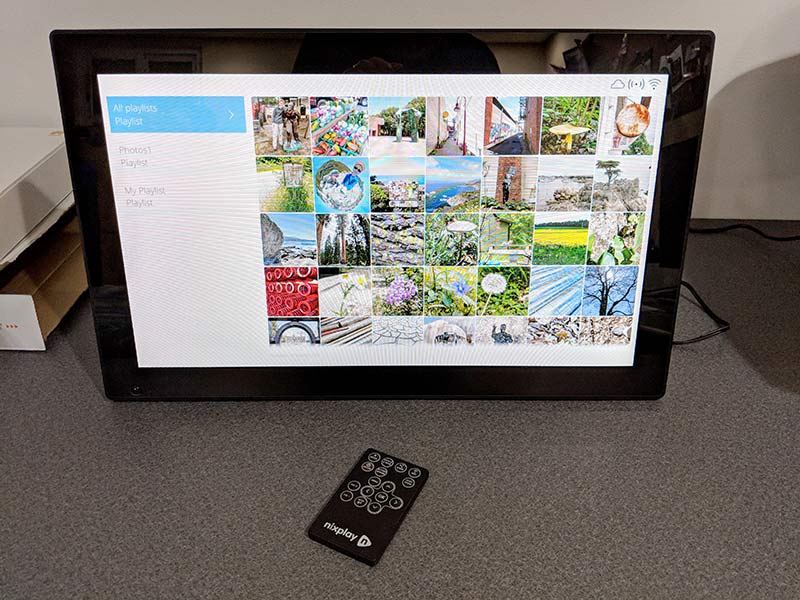
A digital photo frame is only as good as the display quality right? Well, there’s nothing to worry about with the Nixplay because the glossy LED-backlit display is bright, crisp, and vibrant with excellent viewing angles so that you can see image details even if you’re not directly in front of the frame.
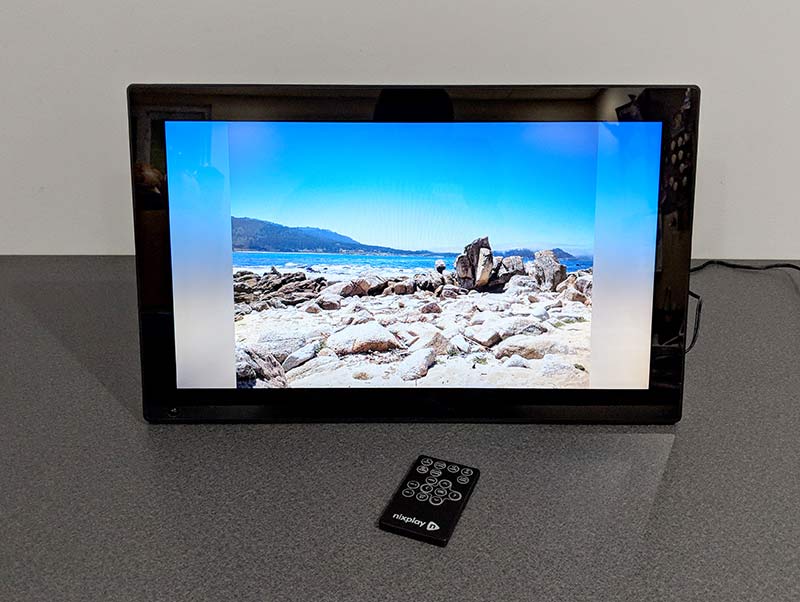
The frame has a 16:9 aspect ratio so images that you take with your phone will probably not fill the screen and you’ll send up seeing bands on the sides or the top and bottom of the screen. The cool thing is that Nixplay makes the color of the bands match the image on the screen.
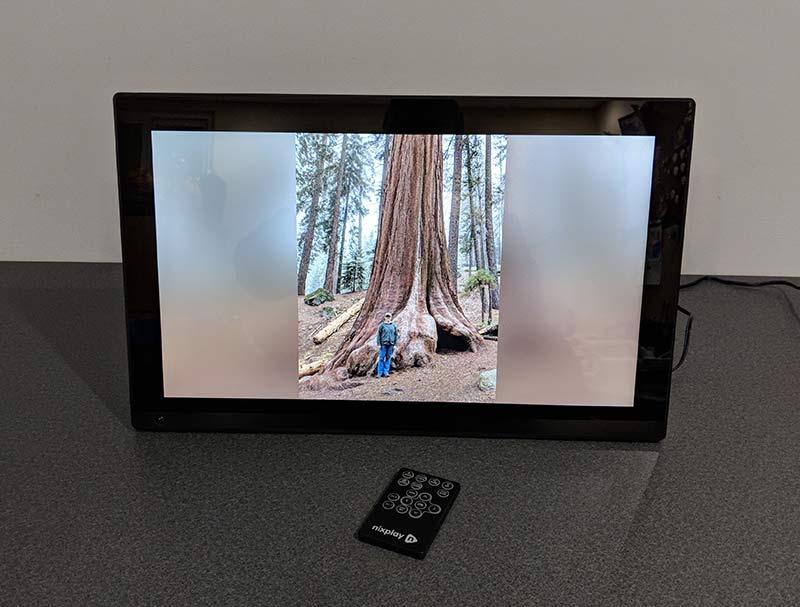
This way the bands aren’t just white or black.
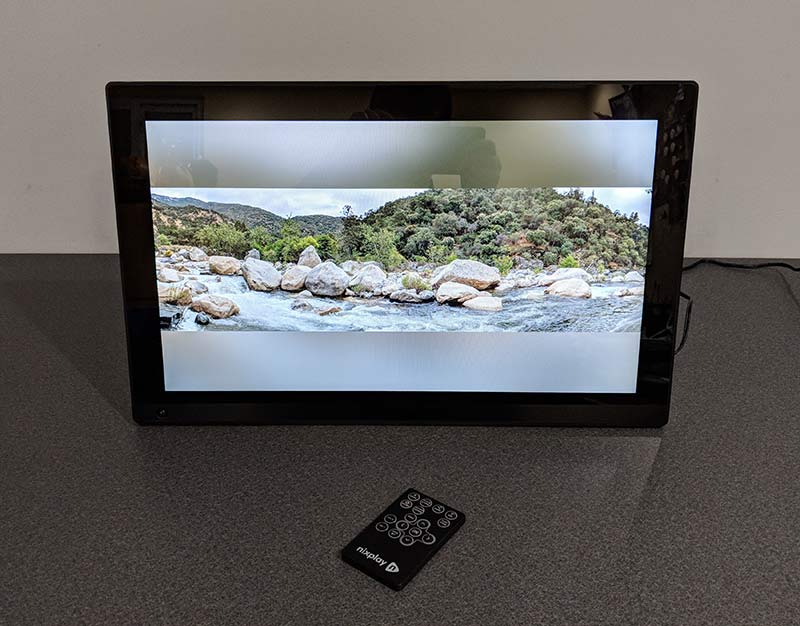
Here’s an example of a panoramic image that I took while on vacation in Three Rivers California. See how the Nixplay is showing top and bottom bands?

Here are some other examples. Click the pics to see the full image.


You’re probably wondering if there’s a way to fill the screen with the image to get rid of the bands and yes, there is. Actually, there are a few other ways to display your favorite pictures on the Nixplay frame.
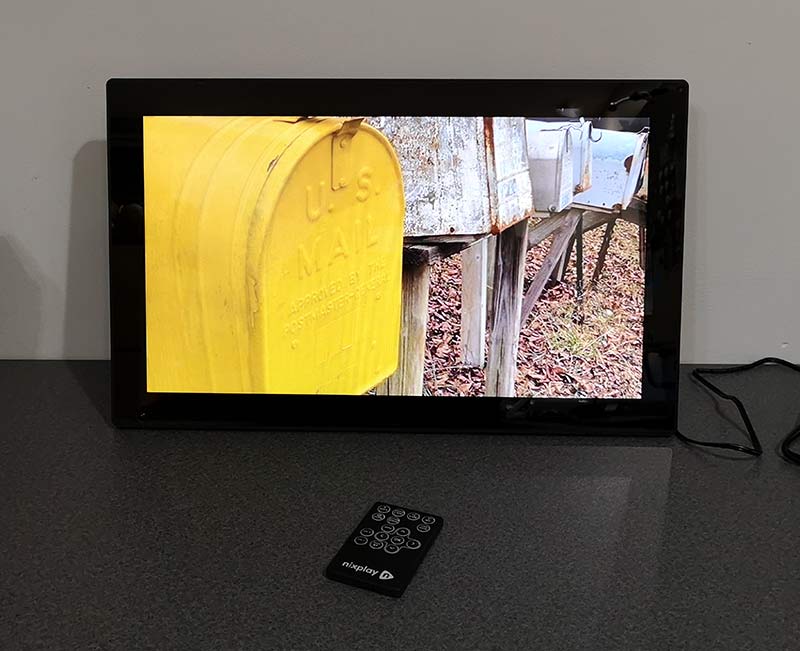
You can set the images to fill the frame which Looks good as long as the subject of the image is in the center of the picture and is small enough that certain details don’t get cut off with the image fills the frame. See the image above, it’s an Instagram picture which is typically a square image. I’ve set the image to fill the screen.
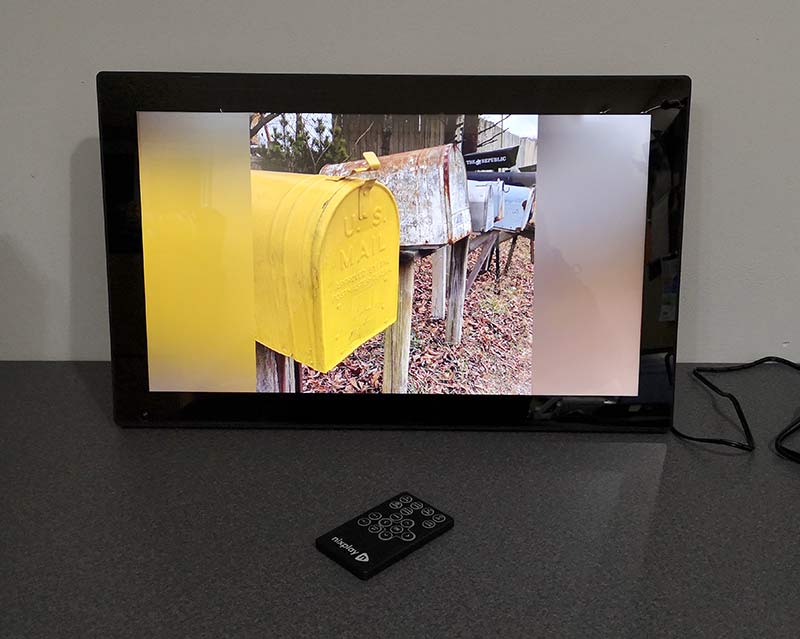
And here’s the original image. See how the tops of the mailboxes are cut off when it’s using the fill display mode?
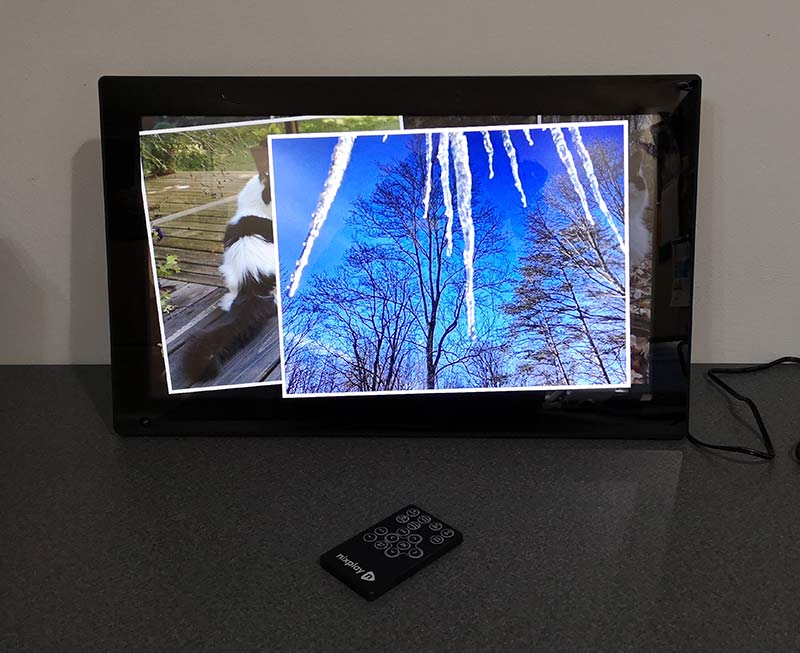
Here’s the snapshot display mode which shows each new image on top of the previous image.
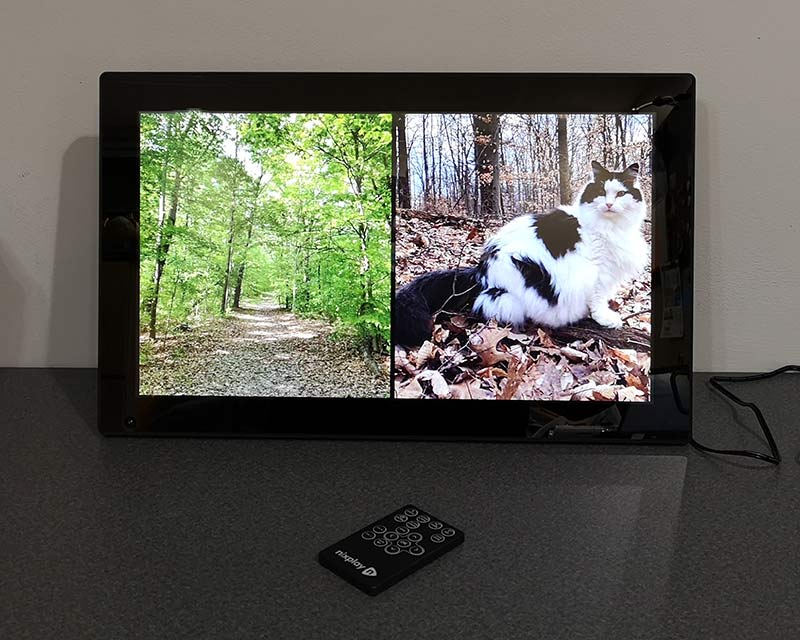
And here’s the tile display mode which shows two images side by side. This mode works great for images that are up and down (portrait) instead of wide (landscape).

In addition to the multiple viewing styles, the frame also has 11 different transition styles when it loads a new image. You can specify the one you like best or just set it to random so it uses all of the styles.

What I like

  • Great display
  • Doesn’t require a paid subscription
  • SD card and USB readers
  • Alexa enabled
  • Motion sensor

What to consider before buying

  • Price

Final thoughts

As I mentioned in the opening paragraph of this review, I’ve reviewed at least a dozen digital photo frames in the last 2 decades, but the Nixplay is the first digital photo frame that has actually impressed me on all fronts. It makes my images look great and the built-in features like motion detection and sleep schedules make this an enjoyable digital photo frame to use.

Price: $279.99
Where to buy: Nixplay and Amazon
Source: The sample for this review was provided by Nixplay.

Filed in categories: Reviews

Tagged: , ,

Nixplay WiFi Cloud Frame review originally appeared on The Gadgeteer on July 31, 2018 at 12:00 pm.

Note: If you are subscribed to this feed through FeedBurner, please switch to our native feed URL http://the-gadgeteer.com/feed/ in order to ensure continuous delivery.

YI Cloud Home Camera review

REVIEW – When the YI Cloud Home Camera review offer came along I thought it would be nice to review and contrast it with other cameras that I have reviewed. Sometimes you win, sometimes you lose – keep reading to find out which this was.

What is it?

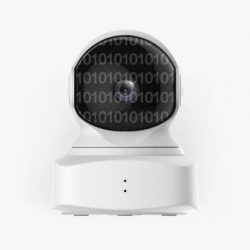
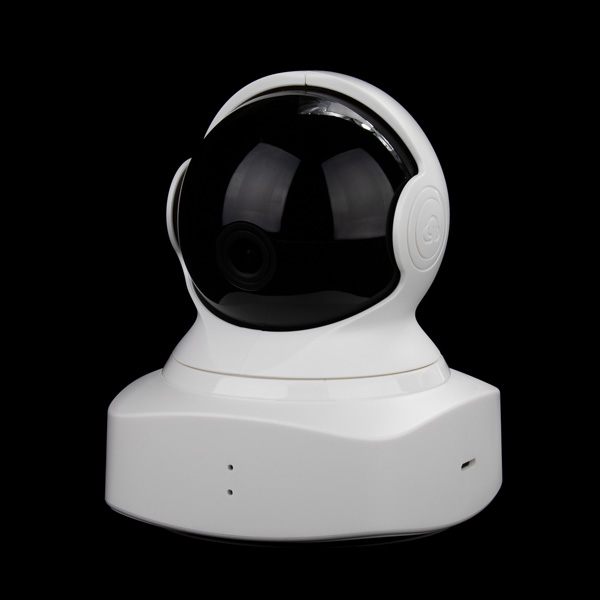
The YI Cloud Home Camera is an indoor surveillance camera that has quite a few useful features including motion tracking and cloud storage.

What’s in the box?

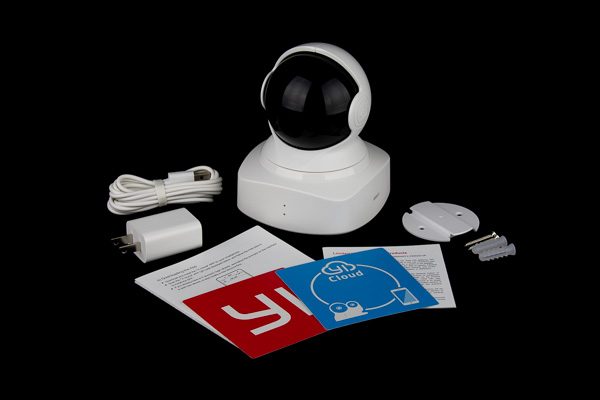
  • YI Cloud Home Camera
  • Power cord and wall plug
  • Quick connect sheet
  • Window stickers
  • Wall mount bracket

Design and features

The YI Cloud Home Camera features a 1080p full HD camera with “Complete 360° Coverage”, enhanced night vision, smartphone control, baby crying detection, motion detection and real-time activity alerts as well as two-way intercom audio capability.

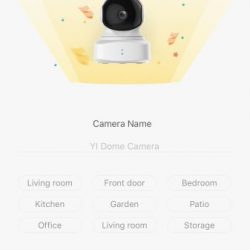
The YI camera was fairly simple to set up. The process begins with signing up for a YI account and verifying your e-mail with a link they e-mail to you:


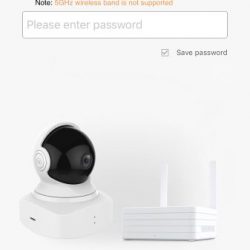
After a pointless 4 page intro, you simply tap the “+” to add a camera and follow the simple on-screen directions to connect to the camera and your home wi-fi.


The camera has a much-too-small QR code on it that you must scan with the phone camera to pair it to the camera, it took it a little while to finally focus well enough on the camera to get it to connect. The camera has audible voice prompts as well, which I thought was a nice touch.

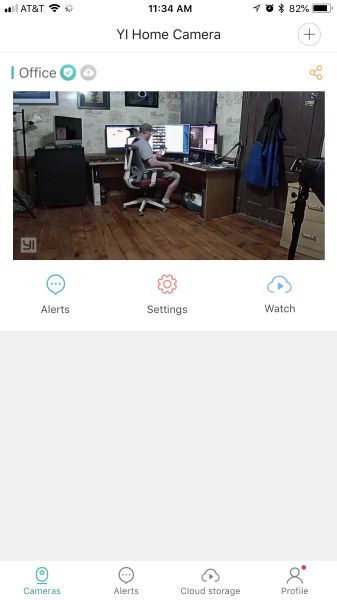
Once connected you’re presented with the default screen for the app, which is a list of the cameras you have connected, which also features an image from the last session as well as options for viewing Sharing, Alerts, Settings, and Watching cloud-stored video. Tapping the image starts the viewing of live video from the camera.

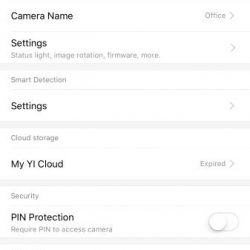
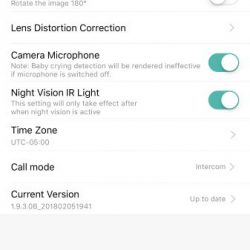
The settings section for the camera is fairly extensive, providing quite a bit of control and options.


I liked how that during viewing of the camera, you can choose between SD and HD video or choose the Auto option to have the app decide, presumably on your available bandwidth. Other controls include the microphone, record video, take photo, take a panoramic photo, and view full screen. There are also three icons at the bottom of the screen that allows for manual camera positioning, motion tracking, and alert viewing.

Full screen viewing

The manual camera positioning is a nice feature, however, it is slow to respond, which makes the positioning of the camera less than easy. The motion tracking feature works very well and is able to track a person as they walk through the room and was even sensitive enough to pick up my motion while just sitting at my desk.

The panoramic photo feature is very poor. When you take a pano image, the camera rotates and takes a picture, repeating this throughout a full rotation and then stitches the images together to produce a 360° image. However, the image stitching is very poor, often leaving gaps in the image coverage up to 3 feet wide.

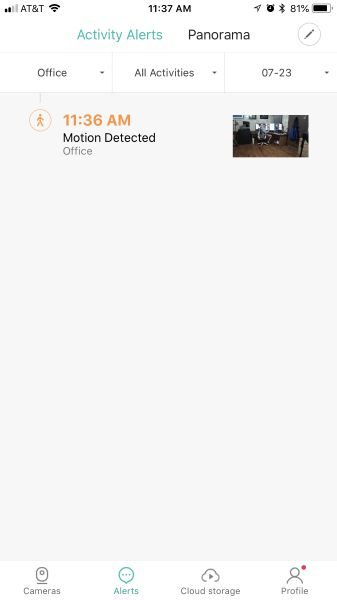
Another thing that the app needs to improve on is the turning on and off of the motion detection/alert feature. You have to go into the Camera Settings, then once in the Camera Settings you have to tap on the Smart Detection settings, then toggle the Motion Detection setting. This would be really annoying if you had multiple cameras. There is also no indication from the main screen of the app that the camera is set for Motion Detection, so you have to go through the above steps just to see if its on.

Perhaps one of the biggest drawbacks of the YI Cloud Home Camera is the cloud storage subscription price. The options range from $8.66 a month for 7-day storage to $19.99 a month for 30-day storage. You can choose to either upload motion detected videos only (up to 5 devices) or 24/7 around-the-clock upload for only 1 device. I thought these prices were a bit high. The camera also supports a micro-SD card, but that wouldn’t do you any good if the thieves also steal your camera.

The app also notifies you of new logins to your account, which is a nice security feature.

What I like

  • Audible “Waiting to Connect” voice prompt when turned on
  • Activation link email
  • High quality still photos
  • Manual camera control
  • Login notifications

What needs to be improved

  • Very poor pano stitching
  • Alert frequency ranges from low, medium, and high with no indication of what that time period is
  • Notifications are inconsistent. I did not always get a notification while using the app, even if I was not viewing the camera at the time. There’s just an in-app Alerts icon that gets a red dot over it
  • Works only with the app, no website or IP camera capability
  • Motion Detection setting is too buried in the app

Final thoughts

Although the YI Cloud Home Camera features look inviting and seem to have everything you’ll want, the actual use and storage options may be a bit of a turn-off. However, if you’re looking for a budget camera for casual monitoring, this camera might be one to consider, it really depends on what you intend to use it for.

Price: $44.99
Where to buy: Amazon
Source: The sample of this product was provided by YI Technology

Filed in categories: Reviews

Tagged:

YI Cloud Home Camera review originally appeared on The Gadgeteer on July 31, 2018 at 9:00 am.

Note: If you are subscribed to this feed through FeedBurner, please switch to our native feed URL http://the-gadgeteer.com/feed/ in order to ensure continuous delivery.
PadMate PaMu wireless earphones review

REVIEW – Listening to music on your smartphone is probably the most frequent use case, with the possible exception of social networks. One reason for this is that you can listen to music while doing other things. With the removal of the ancient yet still viable headphone jack, a few manufacturers have managed to anger a huge swath of their customer base. Stepping into this vacuum, several existing and new companies have started offering totally wireless earbuds that connect to these devices and each other via Bluetooth. One such company, PadMate, sent us a pair of their earbuds, called PaMu, to test.

Note: Photos may be tapped or clicked for a larger image.

What is it?

The PaMu are a pair of earbuds with a charger designed to seal off outside sound and to resist sweat and vigorous motion in use. While I did have to open the Bluetooth setting to initially pair, from then on, they always found the phone and paired without fail, unless I had paired them with another device. More on this under Performance.

Hardware specs

(from product website)

  • Type: In-ear Headphones with Mic
  • Colors: Black / White
  • Connection: Bluetooth Version 4.2
  • Frequency Response: 20Hz – 20KHz
  • Sensitivity: 97±2dB(SPL)
  • Transmission Range: 10 Meters Without Obstacles
  • Charging Time: 2 Hours
  • Headphone Dimensions: 22.5 x 10.5 x 26mm

What’s in the box?

  • Earbuds
  • Charger
  • One-foot long USB2< ->microUSB cable to charge charger
  • Earbud tips in 3 sizes and ear hooks for a custom fit
  • Instruction pages

Design and features

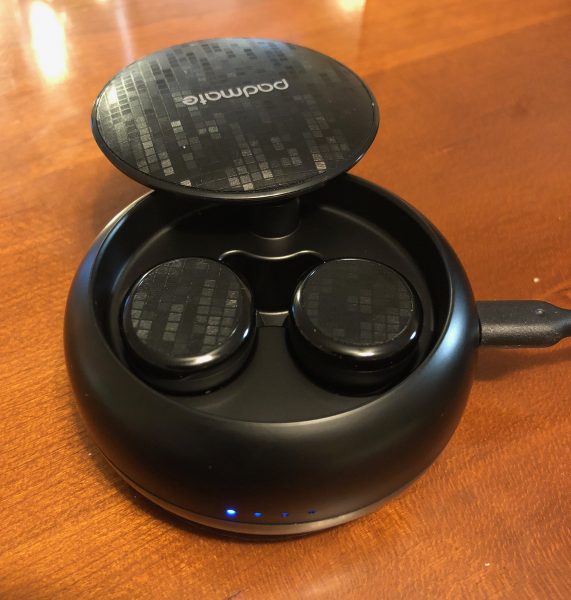
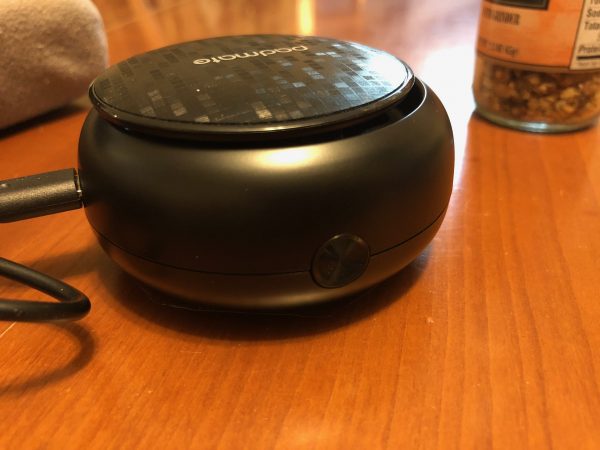
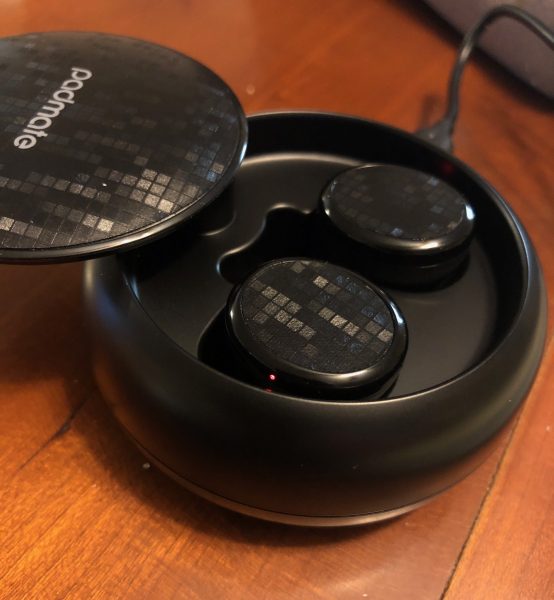
The earbuds are housed in a 2.75” diameter biscuit-shaped docking case with a pop-up cover. Around the outside are three interfaces: a button to release the top, a microUSB port for charging, and a series of four LEDs that indicate the amount of charge remaining in the onboard battery when you remove/replace an earbud or plug the charger in. These are located at 12, 3, and 6 o ‘clock positions, respectively. The case is just over 1.25” thick.

The top surface of the PaMu case has a patterned piece of vinyl material with the “padmate” name printed on it. When you push the lid release button, this entire top pops up and can be swiveled out of the way, revealing the earbuds below.
The earbuds are subtly marked on the back side with an L and R for the proper ear. The docking areas also have a letter for correct placement as well. You can’t place them in the wrong dock. There are two retractable pins in the form-fitted docking area for each bud. The outer surface of each earbud is covered in the same patterned vinyl as the cover of the charger, but there is no overprint. There are no markings or visible buttons of any type showing on either earbud, and only the tiniest pinhole LED glowing a solid red until they are fully charged. (Irritatingly, this LED slowly pulses blue while the earbuds are in use.)


They are held in the charger magnetically, which is a nice touch. There is no doubt which orientation is correct, or whether you have made good contact. You don’t even have to insert them – they are pulled in when you get close. A tiny red LED appears on the outside of each bud to indicate you have placed it in the dock, and the power LEDs on the case light up for just a second or two to let you know they are charging. (see photo below) Very subtle.


When you remove the earbuds from the base, they start talking to you immediately. They announce which channel they are, and, once they are both inserted, when they are paired with each other. They also announce that they are
“connected” to your device. The voice is very pleasant and clear. This is my third pair of wireless earbuds, and, I must say, the most seamless and impressive set to date. Even the Apple Airpods, which I bought after losing the charger for my first pair, is only on par, not ahead of the PaMus.

Under the vinyl cover of the left earbud, there is a button that will play/pause your device’s sound, or answer/end a call. It doesn’t show at all, and you can’t feel it, but when you tap it, it does what it should. It’s not programmable but does let you stop play in order to speak to someone.

The single thing that bothers me with the PaMus is this: the case feels cheap. The pop-up top feels like it will break off if I sneeze at it. The plastic of the rest of the case just feels thin and cheap. This doesn’t carry over to the earbuds themselves, thankfully. They feel solid and well-made and fit into my ears with a good, sound-insulating seal. The seal is better and far more comfortable than my Apple AirPods, which for sound and comfort are the third-best of the three sets I have used.

Setup

Setup is straightforward. Pairing, disconnecting, and pairing with a second device all work as expected. If you put the PaMus in the case to charge, it releases the device. When you next wake them, it will reconnect to the same device, if it’s in range. If that’s not the device you wanted, you’ll have to disconnect it from that one. Such is the pain of BlueTooth – a true first-world problem!

Performance

The sound is full and, due to the excellent seal, very clear. The bass is good, but they are still earbuds, not large speakers, so it doesn’t jar your body, but it doesn’t get muddy, either. I found the difference between these and the built-in speakers for my iPhone and iPads lacking after having the PaMus in, mostly because of the base. Usually, you go from earbuds to the speaker, and it’s a slight bit tinny, or you notice a little background noise. These are like opening up a window and letting in the traffic noise and kids playing outside. Without the sound isolation, the PadMate buds offer, you can’t really hear your music as deeply.

What I Like

  • Easy to set up and pair.
  • Long play time.
  • Impossible to get the wrong bud it the wrong ear **

What needs to be improved

  • Charging case feels very, very cheap. I’m afraid I will break the lid every time I open it.
  • Earbuds have a tiny blue slow-pulse LED that I couldn’t find a way to turn off.

Final thoughts

I was very interested in trying this product. As mentioned, I bought a set of wireless earbuds (Erato Muse 5) a while back (before Apple had released their AirPods), and liked them a lot. About six months back, I lost the charging dock, so have been unable to use them. I got a set of AirPods for a slight discount from Target or BestBuy or similar, and have been using them, but they don’t seal off outside sound like the Eratos I had been using. The PaMus have the auto-on and easy pairing of the AirPods with the sealed sound isolation of the Muse 5s. With their magnetic auto charge placement, they don’t have the irritating loose fit in the charger that would find one of the Muses not charged after an hour or two. For the price, the PaMus beat out both the AirPods and the Erato Muse5 hands down. I just hope the case doesn’t break.

Price: $109.00 on sale currently for $79.00
Where to buy: PadMate and Amazon.
Source: The sample of this product was provided by PadMate.

**Unless you don’t know that the “Left Channel” should be in your left ear and “Right Channel” should be in your right ear!

Filed in categories: Reviews

Tagged:

PadMate PaMu wireless earphones review originally appeared on The Gadgeteer on July 30, 2018 at 11:00 am.

Note: If you are subscribed to this feed through FeedBurner, please switch to our native feed URL http://the-gadgeteer.com/feed/ in order to ensure continuous delivery.

Plex Pass review

REVIEW – With all the internet streaming available online, it’s nice to be able to have a place to aggregate all of your favorite media that you might still own. This can include home videos taken by your parents or grandparents, old DVDs, or those CDs you’ve been wanting to rip for ages. Plex Media Server is the perfect way to keep all of your old media in one central location and allow it to be seen on any digital device. The Plex Pass gives you even more options, so let’s take a look to see what it has to offer!

What is it?

The Plex Pass is video streaming, DVR, and podcast software.

Hardware specs

This is a tricky question since the answer will be what you’re streaming and what you’ll be doing with your Plex server.  From Plex’s support article it states that at minimum, if you’re not doing any transcoding, you will need an: Intel “Atom” 1.2GHz or higher. For reference, I’ve set up a small Ubuntu 16.04 server with an ASRock AM1B-ITX with AMD Athlon 5350 AM1 CPU and 8GB of RAM and am able to run all of my videos just fine.

Design and features

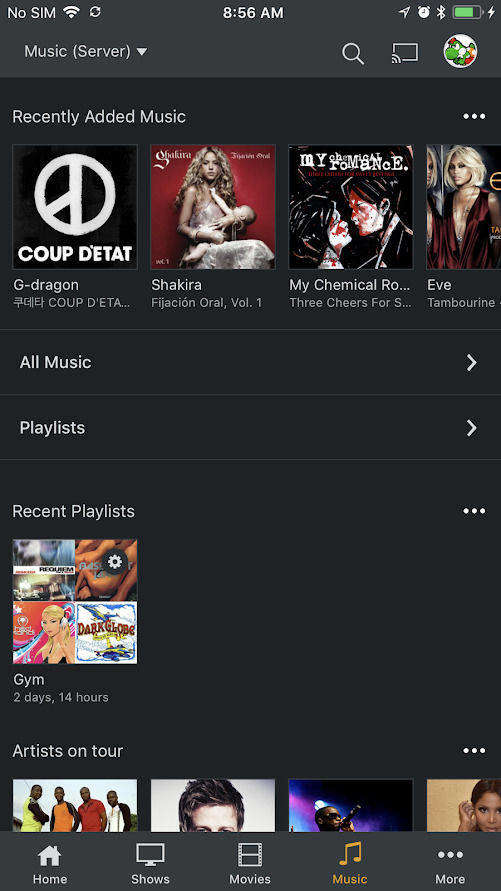
The free version of Plex offers a ton of features as-is. If you need basic video streaming for within your home, you can get started on that already. This includes casting from a smartphone, tablet, or computer to any Chromecast. You can organize your media into various libraries such as movies, photos, music or create your own. I created a custom “Home Videos” library for all of our old VHS home videos from when I was a kid. You can also create playlists much like any other media service.

You can view almost any video format in Plex, which gives you lots of flexibility. It also included 4K support if you happen to own a 4K tv or create your own 4K content.

As for the premium version of Plex – called Plex pass – you can take advantage of tons of nice features:

There are premium photos, which lets you get auto-tagging and places to sort photos and albums, similar to Google Photos. You can do automatic backup of photos to your media library. This is awesome for me since I do that with and Google Photos, but it’s really nice to have another option and upload it straight to a personal media server. I already do this with my own install of Nextcloud, but can eliminate the need for another bit of software since I can do it with Plex Pass!

You can use cloud sync, which lets you save a copy of your media to the Plex mobile app, so you can view or listen offline.

A nifty feature I like is premium music, where you can create playlists, mix songs by mood and display song lyrics. It reminds me of what Spotify premium does, but you can do it with your own music library instead.

With Plex Pass perks, you can get access to promos and discounts on partner products such as digital tuners and other hardware to use with Plex Pass.

For the parents out there, (or for those of you who have snoopy roommates) you can enable parental controls for your Plex media library, as well as create multiple users to keep everyone separate. I use this feature and love it.

You can also watch live broadcast TV directly on your device or mobile app with Plex Pass. You will need an antenna and compatible tuner. If I get a chance to get my hands on a digital tuner, I will update this review. You can also record free HD broadcast channels right to your library and watch them on any device, anywhere.

Setup

To set up a Plex media server, all you need is a relatively modern computer (at least an Intel Atom processor equivalent and higher), with 2GB or RAM or more. You can view more options here, as well as via the Plex Forums. You can install Plex on Windows, Mac and Linux. There are multiple NAS manufacturers that support Plex as well.

Performance

As mentioned before, I run Plex on a very inexpensive AsRock/AMD motherboard combo running Ubuntu 16.04 and I’ve had no problems running Plex locally or remotely from anywhere. All my video plays well with no buffering.

What I like

I really enjoy everything about Plex. I’ve used the free version of Plex for years with a basic server, just to hold my home movies and music, but with Plex Pass it makes the deal even sweeter by enabling auto upload of my photos, lyrics and mixing for my music, and allowing everything that I use streaming services for already and enabling it for me at home. I love that I can keep everything private as well. If you’re a digital tuner user, I can imagine it being even more awesome.

What needs to be improved

The one thing I did try about Plex Pass but wasn’t af an of was the news and podcast features. News for me was not the best quality, although it did pull from various sources online. I’d rather jump into Youtube or read the web to get news video. As for the Podcasts Beta feature, it was nice to be able to sync the podcasts to my phone, but I already have a bunch of podcast apps to do this. Sync did work well however.

Final thoughts

I really enjoy using Plex Pass for the extra bells and whistles it has to offer. If you are a person who still likes to keep your own personal copy of music, movies, photos, and all various media to your own server, I’d definitely recommend getting the Plex Pass for extra nifty features.

Price: The costs for Plex Pass are monthly ($4.99/month) and yearly ($39.99/year) options, but the lifetime price ($119.99) is well worth it for constant updates and new features.
Where to buy: The Plex Pass is available to purchase via their website.
Source: The Plex Pass for this review was provided by Plex. For more information, visit Plex.

Filed in categories: Reviews

Tagged: ,

Plex Pass review originally appeared on The Gadgeteer on July 30, 2018 at 9:00 am.

Note: If you are subscribed to this feed through FeedBurner, please switch to our native feed URL http://the-gadgeteer.com/feed/ in order to ensure continuous delivery.
Tekto Gear Amber Automatic Knife review

REVIEW – I have reviewed my fair share of great EDC knives here at the Gadgeteer but for the most part they have all been fancy pocketknives. For this review, Tekto Gear has sent me one of their automatic knives with a blade that snaps in and out the front of the handle with a flick of the thumb. While Tekto Gear offers many automatic knives, the Amber is one of two variants recently released made from hardwood and steel creating an excellent old world look and feel.

What is it?

The Tekto Gear Amber is an Out the Front (OTF) automatic knife, where the internal mechanism ejects the blade out the top of the handle and locks it into place and retracts it with the opposite motion. The Amber is made from a reddish hardwood and high-quality steel giving it a classic look and feel compared to other lightweight, high-tech knives (aka carbon fiber or titanium).

Before I write a knife review, I consult several of my friends who are knife aficionados who educate me on the nuances of what I am looking at more often than not. In this case, this is the feedback I received on the Amber…

A switchblade swings out from a folded position and needs to be manually reset. A stiletto is spring loaded straight out and can be retracted automatically. Much faster and efficient… The heels 👠 on the shoes were named after the knife.

…cause I totally thought/assumed that an Out the Front (OTF) automatic knife was a switchblade but apparently not.

Design and features

Craftsmanship and build quality:

As I stated above, the Amber automatic knife is made from two pieces of reddish hardwood that sandwich five plates of stainless steel. The seven layers of the handle are stacked and held together by six hex bolts. The build quality is very good though not as precisely machined as most other knives I have reviewed. But that is just fine with me…the Amber has an old world, Game of Thrones’ vibe to it.

The two-tone blade is 3.8 inches long and very sharp. Tekto Gear uses chrome in their steel blades that adds greater rust resistance, strength, and durability. In this case, they powder coat the blade, then machine it giving a great metal and black color scheme. When deployed, the blade has a slight wiggle in all directions. I believe that is due to how the spring mechanism is engineered. The movement isn’t bad but noticeable when you jiggle the knife.

Specifications:

  • Colors: Black, Red
  • Total Length: 8.9″ (228mm)
  • Blade Length: 3.8″ (97mm)
  • Blade Thickness: 0.06″ (1.6mm)
  • Weight: 0.58lbs  (263g)
  • Material: Chrome Steel

Feel & function:

The Amber knife has an excellent weight and quality feel to it. The contoured handle holds very well in the hand with the wood exterior giving it a smooth, natural feel. At over half a pound, the Amber has a nice heft to it when held but is definitely heavier than your typical EDC knife.

I say this with a bit of hesitation, I recognize the Amber automatic knife is dangerous and could be lethal in the wrong hands. That said, as my first automatic knife, it is surprisingly fun to use. When I was a teenager I received a Safeway bag filled with M-80’s and for a month I blew stuff up…no one was hurt and I still have all my fingers. But it was some serious (destructive) fun nonetheless. Even with more than 3 decades under my belt since then, this automatic knife is just as much fun to flip in and out. Silly as that sounds.

The switch is firm and takes a decent amount of force to fire/retract the blade, making accidental deployment less likely. Since I received the Amber OTF automatic knife, I have flipped it in and out countless times. The spring mechanism seems very solid and does not give any indication of failure. Though the system does need to be maintained, Tekto has a page dedicated to walking you through how to clean and lubricate mechanism.

The Amber automatic knife has an integrated window breaker and a rigid, well-made belt clip on the butt end of the handle.

What I like

  • Excellent build and material quality
  • Made from hardwood and stainless steel
  • Chrome steel blade
  • Great weight and old world feel to it
  • Smooth action and easy to use
  • Integrated window breaker and belt clip

What needs to be improved

  • The blade does not lock perfectly into place, has a slight wiggle in all directions

Legal or not legal:

Tekto Gear does a good/solid job trying to keep buyers on the straight and narrow road. One of their forums is dedicated to helping you determine if it is legal to own an automatic OTF knife based on where you live. This page goes state by state on the legal details of ownership.

Final thoughts

The Tekto Gear Amber automatic knife is very well made with an excellent old world feel. Its OTF and hardwood/steel design would certainly add a bit of uniqueness to your EDC gear. The stainless, chrome steel blade is extremely sharp and nicely machined. It cut through paper, wood, meat, etc. with relative ease. If this sort of knife is legal where you live, it is definitely worth considering.

Price: $165.99
Where to buy: You can buy the Amber automatic knife direct from the Tekto Gear.
Source: The sample of this product was provided by Tekto Gear.

Filed in categories: Reviews

Tagged:

Tekto Gear Amber Automatic Knife review originally appeared on The Gadgeteer on July 29, 2018 at 11:00 am.

Note: If you are subscribed to this feed through FeedBurner, please switch to our native feed URL http://the-gadgeteer.com/feed/ in order to ensure continuous delivery.