Thinkware F70 dash cam review

REVIEW – I will admit this guilty pleasure up front: every now and then I watch dash cam videos from around the world. These videos make people look like the worst drivers in the world. I also know that the good ole’ USofA has its share of people who should not be on the road (don’t get me started on drivers staring at their phone while driving). When I was offered the Thinkware F70 dash cam to test, I was intrigued. I’ve never used a dash cam before, but I thought that in the event of an accident, a dash cam could help prove my innocence—or guilt. What I discovered was that dash cams are cool, but have an issue I naively did not ever consider.

What is it?

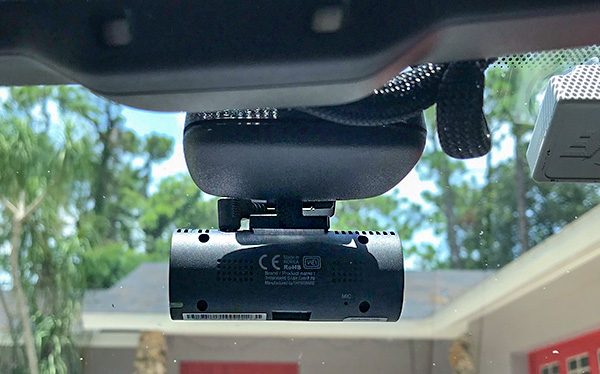
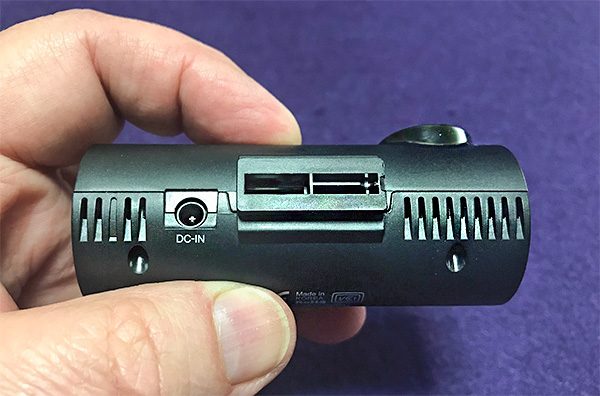
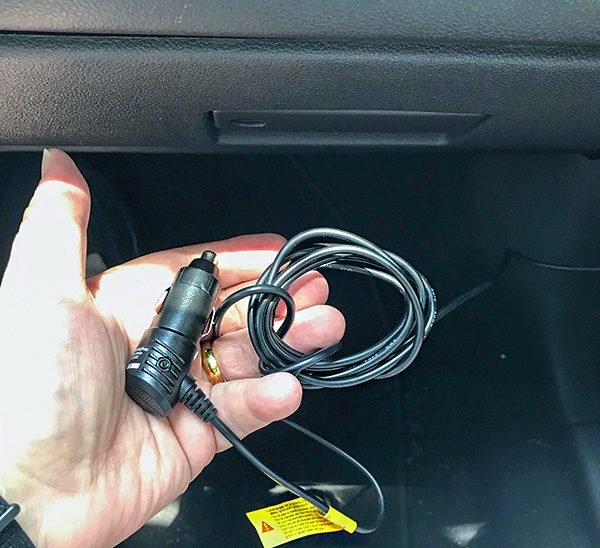
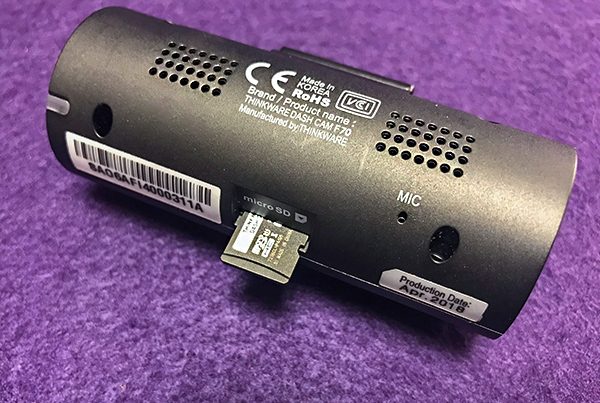
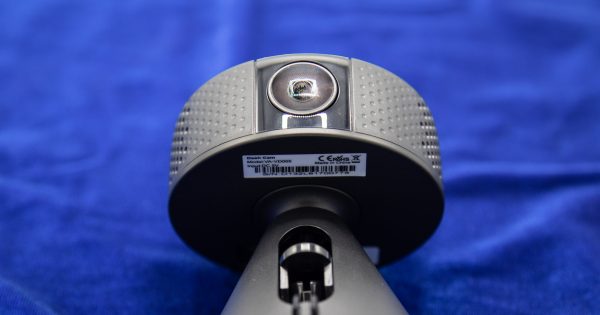
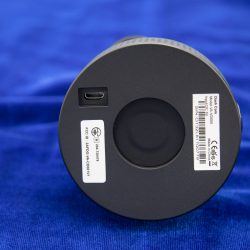
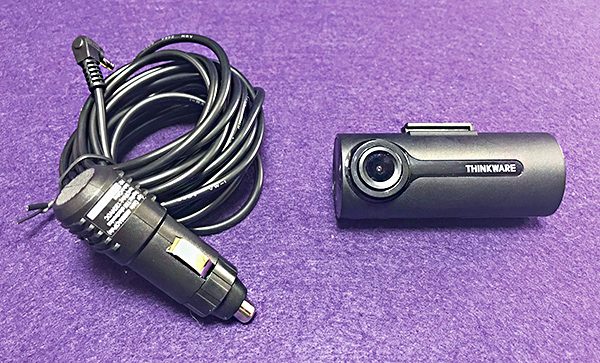
The Thinkware F70 is an entry-level front facing dash cam. A dash cam records what you see as you drive. If you are involved in an accident or are witness to one, it will be recorded—as long as it happens in front of you. A separate rear camera is necessary for seeing behind you. The F70 attaches to the windshield via a mounting base and is powered by a 12V (I still call it the cigarette lighter) port.

As an entry level cam, the F70 does not come with GPS (optional if you want it), Wifi or other higher-end features. However, it does have 1080P HD video, 140° Wide Angle, Thermal Protection and incident detection.

Hardware specs

  • Camera: Sony Exmor CMOS 2.12M
  • Resolution: 1080p Full HD (1920 x 1080)
  • Capacity: Micro SD Card 8GB(class 10), 16GB/32GB/64GB(UHS-I)
  • Recording Modes: Continuous Recording, Incident Recording, Manual Recording, Audio Recording, Parking Surveillance Recording
  • Sensor: 3-Axis Accelerometer G-Sensor (3D, ±3G)
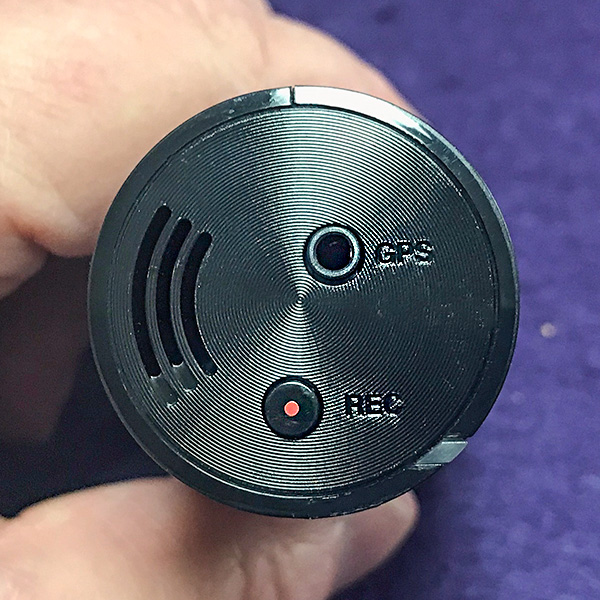
  • GPS: External GPS Antenna (Optional)
  • Power: Input Power: DC 12/24V
  • ETC: Operation Status LED

Design and features

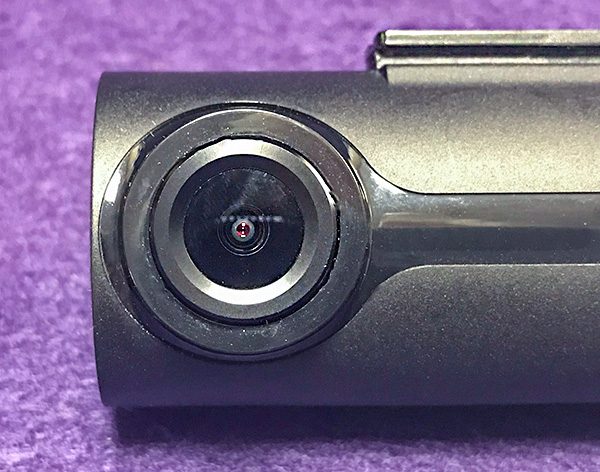
The F70 is a small cam. I’m surprised that it records the image quality it does. When looking at recorded material, I did have trouble reading some license plates on moving cars, but I could clearly make out plates when stopped at red lights. One reason for this is the 140° viewing angle. While it gives you a commanding view of the road, it also makes items appear smaller, so details can get lost. At least the 1080P recording quality helps. 


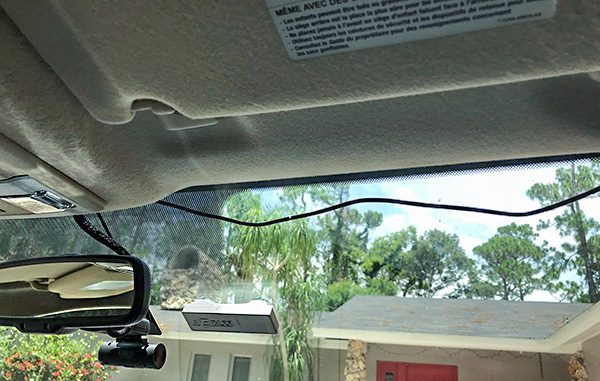
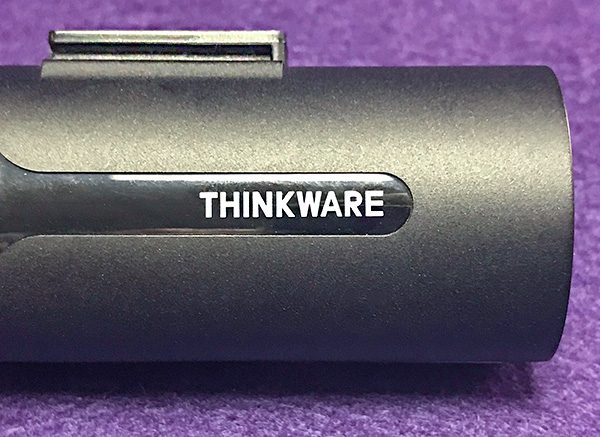
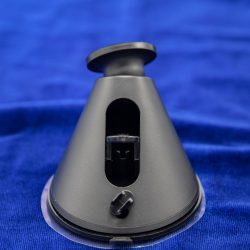
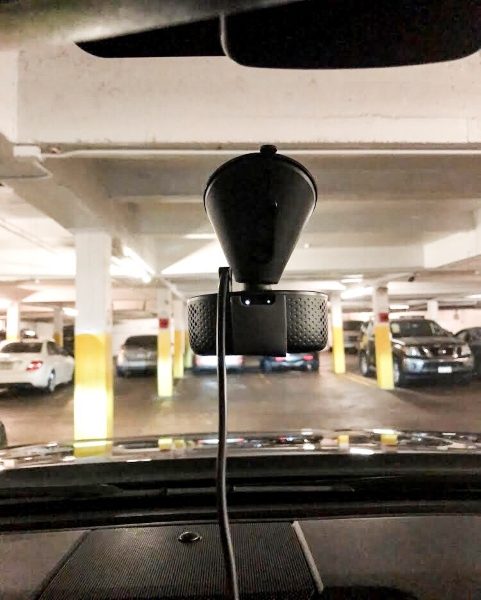
The cam base mounts in the upper-center of the windshield using a strong adhesive. Once it’s attached, the cam easily slides on and off the base. One major (for me) issue is that the F70 dash cam is not wireless. Call me slow, but that never occurred to me. I have since found out that most—if not all—dash cams are wired because of thermal issues. The heat that can build up in a closed car can harm batteries, so wired it is. 

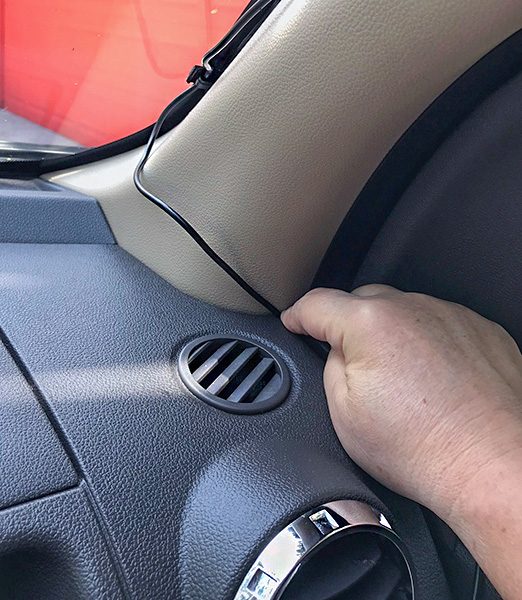
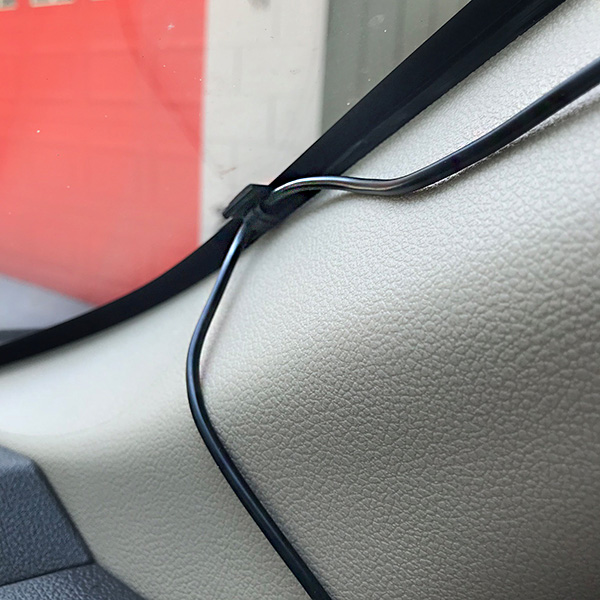
The wiring is supposed to be tucked under the trim around the windshield, but that didn’t work with my car, so I had to resort to some included adhesive wire clips that hold wires out of the way along the edge of the glass. However, Thinkware only gives you three tabs and I needed about 10-15 tabs—I kid you not. The result is an ugly display of hanging wires—not a good solution. Thinkware offers additional wire clips; five to a pack at 15 bucks/per pack or in my case—$45. That’s almost half the price of the cam! 

Note: Certain car audio shops will perform hardwiring (that will be hidden) for an extra charge. I would only consider that if I had a top-of-the-line dash cam, not an entry-level model. But that’s me.

Once I decided to live with wires hanging down, the F70 dash cam performed flawlessly. In fact, because of its small size and where it was mounted, it became almost invisible—except for the wires. The only reminder I had a dash cam was an audible message I heard when the car was started that told me it was recording. 

Since the F70 plugs into the 12V port, I had to remember to unplug it when I parked the car. Otherwise, it will keep recording even while parked, thus drawing power from the car battery. This could become an issue if the car is parked for a long time. Thinkware does offer an optional external battery that allows 16 hours of parking mode recording.

The F70 has a Front Vehicle Departure Warning.  In case you’re day-dreaming at a red light or looking at your phone (shame) the FVDW warns you that the vehicle in front of you has started to move. This can cut down on those embarrassing honks behind you when the light turns green and you’re still sitting there.

There are three recording modes—Continuous, Manual and Event. Continuous is what it says—it records all the time. Manual only starts when you press the record button. Event is interesting, It has what Thinkware calls Active Impact Monitoring System. It will automatically store video ten seconds prior to and after an event (such as a  collision). I didn’t have to experience Event mode, thank goodness. I decided to set the mode on Continuous and leave it there. 

I muted the audio recording of the car interior. It creeped me out knowing that the F70 was recording private conversations or me (badly) singing along to the music. 

Note that many of the setting changes can only be made through a free Dashcam Viewer app—available for either Mac or Windows. Thinkware calls the app PC viewer, but the app itself is called Dashcam Viewer.

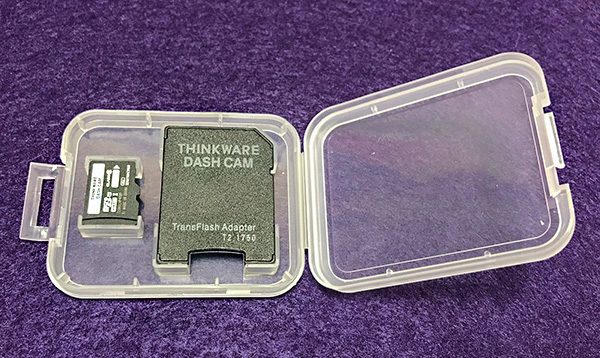
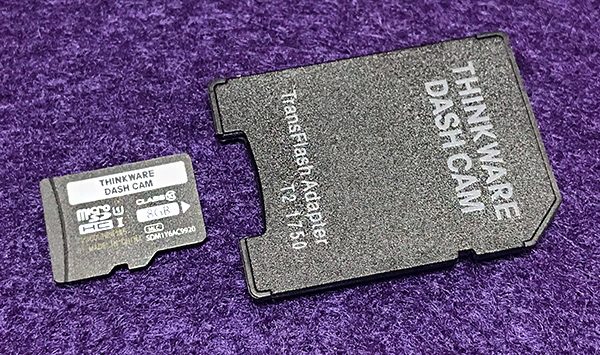
The Dashcam app is a mixed bag. I never could get the video to show up in the app window. Since I have a mac, all I had to do was load the MicroSD card into the included adapter and insert it into the back of my iMac. There is a folder on the card that holds all the videos. 

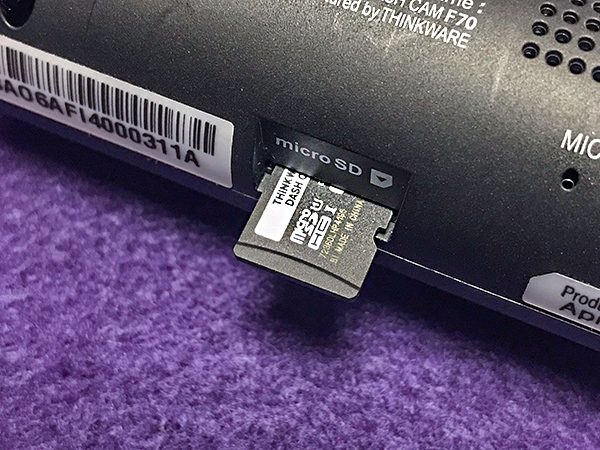
There are a couple of things to note here: all videos are in 60-second chunks, so a 5-minute trip will be 5 videos. This allows for easy searching and no video is so large that it limits sending or streaming. Also, the provided MicroSD card is only 8GB so it fills up fast. Once the card becomes full, the oldest recording gets overwritten. This allows continuous recording. If you want to save more recordings, just get a MicroSD card with more capacity. The F70 will accept cards up to 128gb.

What I like

The F70 is a simple to use, no nonsense starter dash cam. It’s light, strong, and can be mounted out of the way. If you can tuck the wiring out of the way—great!

What needs to be improved

More adhesive wire clips (at a reasonable price) would be welcome. 

Final Thoughts

I can foresee a future when every car has built-in cams. Until that day, we have dash cams. If you’re undecided about whether you want to live with a dash cam, I recommend trying the Thinkware F70 first. Then, if you decide a cam is right for you, you can always upgrade later to a better model with more features. Thinkware makes many different cams with advanced features like built-in GPS, night vision and more, depending on the budget. 

Price: $109.99
Where to buy: Amazon
Source: The sample of this product was provided by Thinkware.

Filed in categories: Reviews

Tagged: ,

Thinkware F70 dash cam review originally appeared on The Gadgeteer on August 7, 2018 at 9:00 am.

Note: If you are subscribed to this feed through FeedBurner, please switch to our native feed URL http://the-gadgeteer.com/feed/ in order to ensure continuous delivery.

Tablo DUAL 64GB OTA DVR review


REVIEW – As I continue to seek out cord cutting options to either lower or completely eliminate my cable TV bill, I readily accepted the opportunity to test and review this device that promises to take me one step closer to my goal.

What is it?

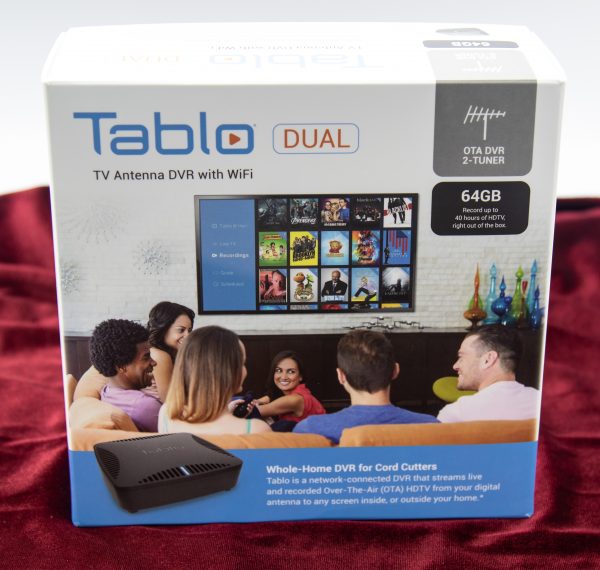
The Tablo DUAL 64GB OTA DVR is a 2 tuner streaming box with DVR capability to record 2 channels simultaneously via a connected OTA antenna.

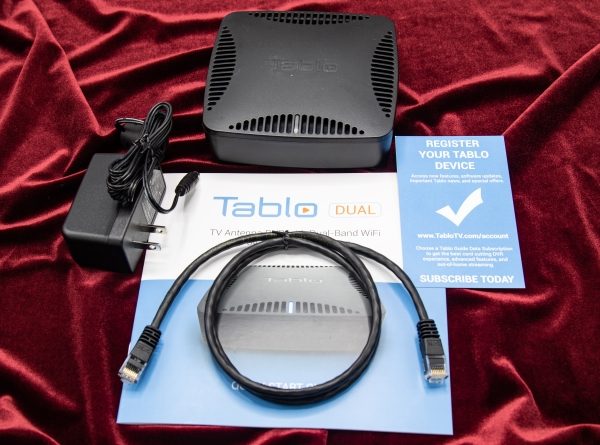
What’s in the box


1 x Tablo DUAL 64GB OTA DVR
1 x AC Adapter
1 x Ethernet Cable
1 x Instruction Manual
1 x Registration Information Card

Design and features

The Tablo DUAL 64GB OTA DVR works as a DVR for the entire home and can be connected via either WiFi or Ethernet to stream live over-the-air channels and recorded content via the Tablo app to any compatible connected devices inside your home. If you choose to pay the subscription of $4.99 monthly, or $49.99 yearly or $149 lifetime, you get the added bonus of a 14-day TV guide with thumbnails, out-of-the-home sharing anywhere you have high-speed internet via the Tablo Connect app, and the ability to schedule automatic recordings for entire series.

Here is a chart of Features based on subscription:

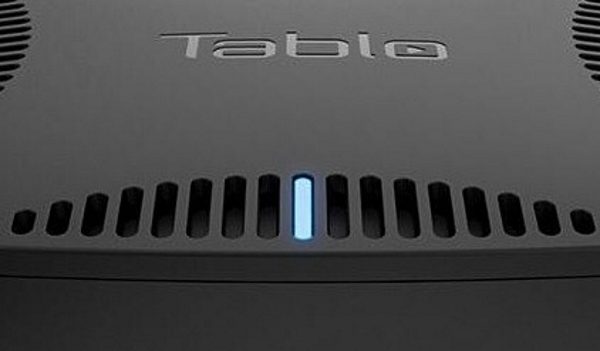
On the top front of the Tablo, there is a blue LED that indicates that the power is on.


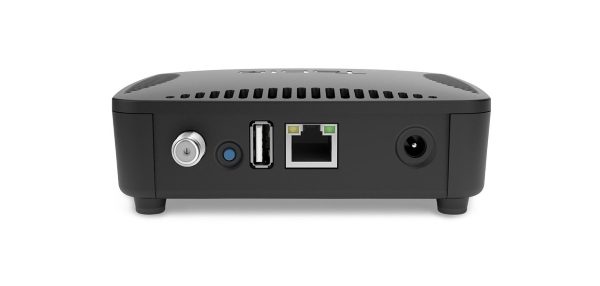
On the rear of the Tablo from left to right, there is the coaxial antenna jack, a reset button, a USB port, an Ethernet jack and the power port.
Here are some addition specs:
Storage:
64GB onboard storage
Support for up to 8TB USB hard drive

Processing:
512 MB RAM
64 GB Flash

Networking:
100 Mbps Ethernet
802.11n dual band WiFi with MIMO

Dimensions:
Height – 37 mm (1.46″)
Width – 125 mm (4.93″)
Depth – 123 mm (4.84″)

Weight:
210 g (7.4 oz)

Video Format:
H.264 (HLS: HTTP Live Streaming)

Setup and Performance:
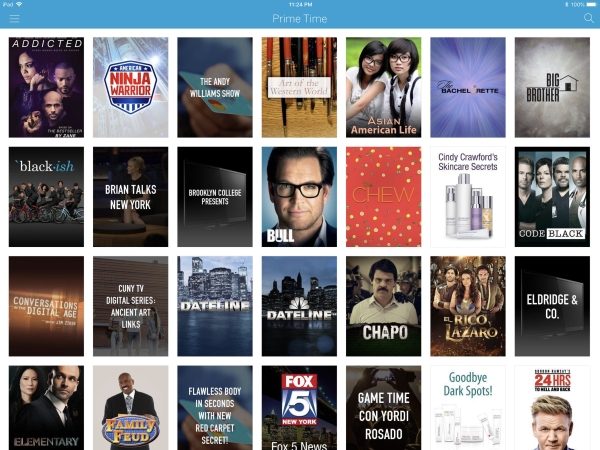
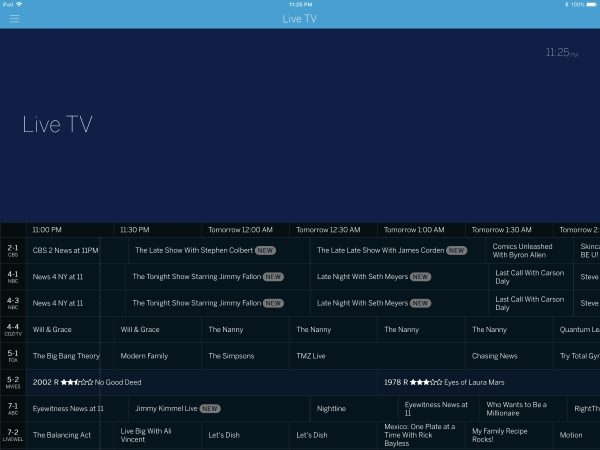
Once the Tablo is connected to your network (in my case I connected via an Ethernet cable), and you download the app, connecting is easy. It quickly connects to your network and allows you to create an account and log in. Shortly thereafter, it populates the screen with the thumbnails, and the current TV guide for all of the OTA channels is quickly available. See the App screens in the “App” section right below.

App

Connection screen:

The main screen once connected:

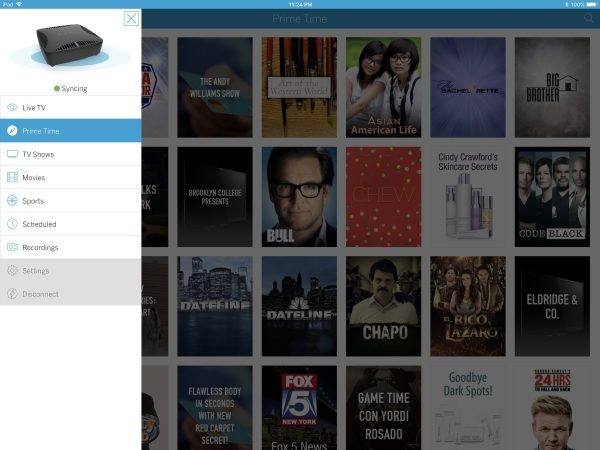
Toolbar: (By selecting the icon in the upper left corner of the Main screen)

Live TV Guide:


Whenever you make a new selection via the Tablo app, it takes a few seconds to populate the screen. However, this device works flawlessly for me, and the ability to record and schedule recordings is great. Many of the channels that I watch and that broadcast my favorite shows are free channels that I receive over-the-air. The ability to add up to an 8TB hard drive and to record and keep my shows with little regard for the usual storage space concerns of the conventional cable box is simply great.

Tablo has just announced a new feature for Tablo OTA DVRs which is the addition of 5.1 Surround Sound. Once your device is updated to the latest Tablo firmware update (version 2.2.22), it will be capable of passing Dolby 5.1 Surround Sound audio through to supported viewing devices. It is important to note that not all streaming devices will initially support this new feature.

To see what streaming devices support this new feature and how to enable it, click here.

What I like

  • The DVR capability from 2 channels simultaneously.
  • The size and weight.
  • The Ethernet\WiFi function that eliminates the need to connect to any TV.
  • The app availability on multiple devices
  • The readily available and organized thumbnails for the guide.
  • The onboard 64GB storage for recorded content and the ability to add up to 8TB.
  • The out-of-home streaming capability (with monthly subscription)

What can be improved

  • The added ability to stream other available content like Netflix, free internet channels, etc. (Even if the DVR capability has to be disabled for the “other” content). In my opinion, the added ability would help to justify the subscription and the cost of the device.
  • The cost of the device.

Final thoughts

As I continue my efforts to find the best devices to replace at least a part of my cable services and eventually completely replace all services, I realize that there is no single solution that can replicate cable TV. However, I have found that utilizing the inputs on your TV with multiple devices is beginning to close the gap. As things stand right now, the Tablo DVR definitely helps because of its OTA channel streaming capability coupled with its DVR functionality. Many of the TV shows that I watch are on the local Prime Time channels, and the Tablo allows me to DVR tons of episodes and shows with no restrictive space limitations. If this device also hosted streaming channels, it would then be miles ahead of any other device in the game, but obviously, there would be the issue of recording and sharing copyrighted content that the networks definitely don’t want us to do. Until a better solution comes along, the Table DVR box definitely adds value. I think that the question for most will be whether the value is worth it based on their individual TV viewing habits and preferences, and the cost of this device.

Price: $175.00
Where to buy: Amazon
Source: The sample for this review was provided by Tablo.

Filed in categories: Reviews

Tagged:

Tablo DUAL 64GB OTA DVR review originally appeared on The Gadgeteer on August 6, 2018 at 11:00 am.

Note: If you are subscribed to this feed through FeedBurner, please switch to our native feed URL http://the-gadgeteer.com/feed/ in order to ensure continuous delivery.
Audew Multi-function Flashlight review

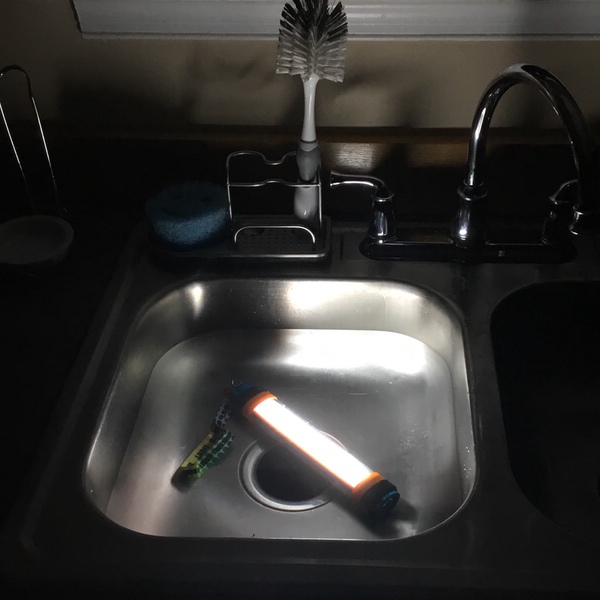
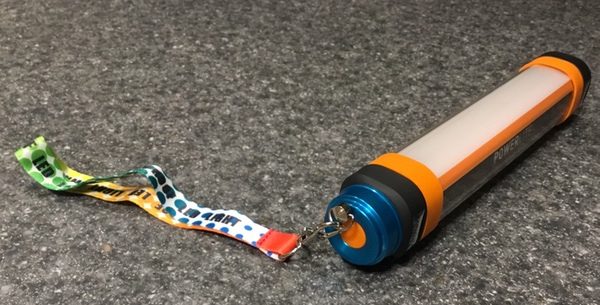
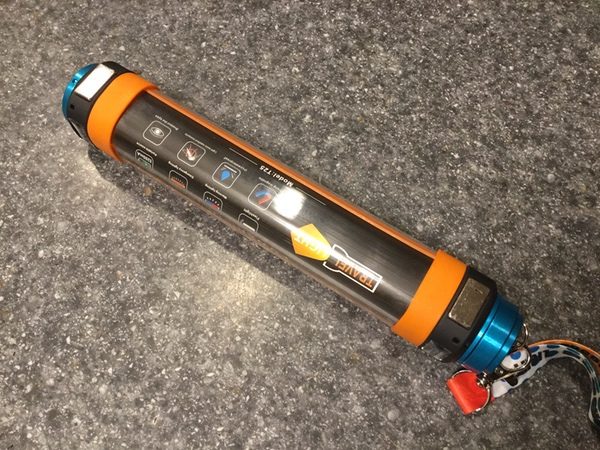
REVIEW – Yes, that’s a flashlight submerged in a sink full of water. That’s the kind of thing we do! The Audew Multi-function Flashlight has multiple light functions, clips on metal surfaces with magnets, and can even charge your smartphone in a pinch. And it’s completely waterproof. It’s very handy to keep around. To the review!

What is it?

It’s a waterproof, rechargeable, multi-function flashlight that can also charge your devices. Did I mention it’s also submersible?

Hardware specs

  • 9.4 inches long
  • 8.5 ounces
  • IP68 waterproof rating (submersible to 3 meters)
  • Rechargeable lithium battery
  • 5200 mAh capacity and built-in USB port for device charging
  • Magnetic base for attaching to metal objects

What’s in the box?

The Audew Multi-function flashlight comes with the flashlight, a carry lanyard, and a USB-to-microUSB cable for charging.

Design and features

A lot of multi-function electronic gizmos are a mixed bag of performance, slapping all kinds of components together In a package that may (or may not) work as a whole. I’m happy to report that the Auley Multi-function Flashlight is NOT one of those. It’s all about lighting your way, and it does the job very well with a few bonus features that enhance it’s utility.

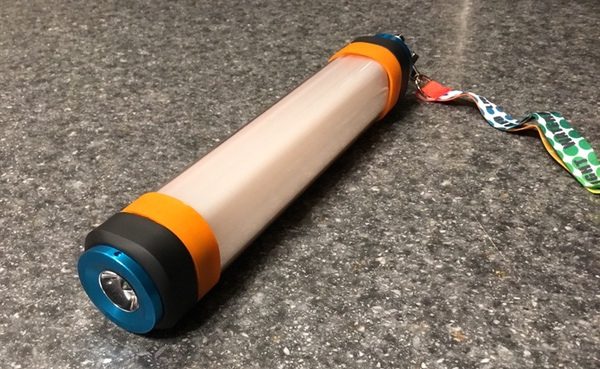
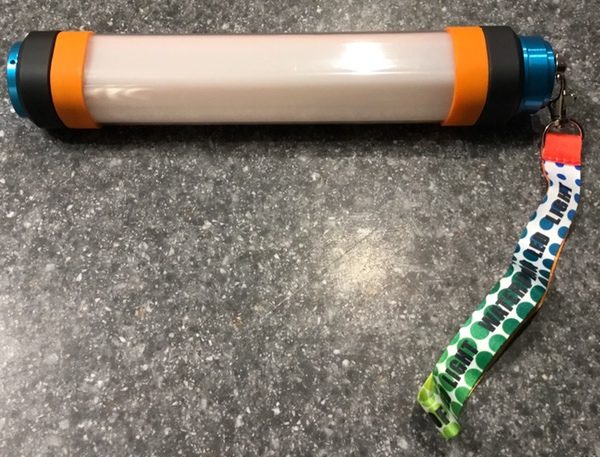
The baton-like form factor of the Audew Multi-function Flashlight is great to handle. It’s made from durable thermoplastics with metal caps and rubberized rings at each end that, along with the squared body, make it easy to grip. It’s also extremely lightweight at a mere 8.5 ounces and 9.4 inches long, so you can toss it in your glovebox or toolbox without adding all that battery weight. The vinyl leash is also handy for carrying around.

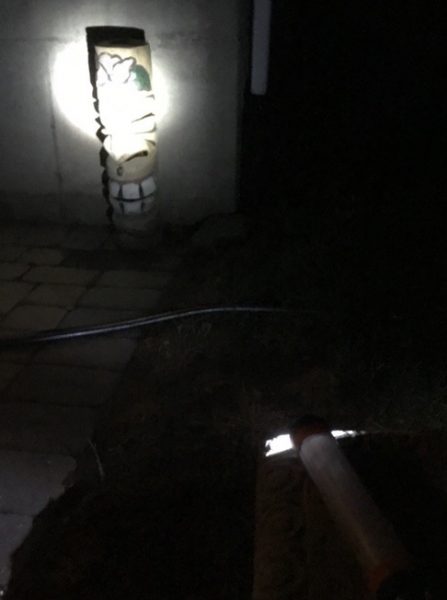
The Audew features multiple lighting modes, activated by pushing the rubberized button on one end. There’s a traditional flashlight mode with the bulb on the opposite end, and a bar-style light that runs the length of the body.

Flashlight mode is pretty straightforward. I caught this Tiki sneaking around my back yard…

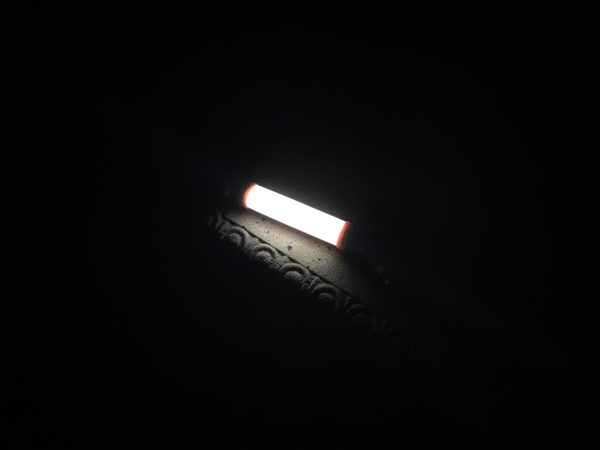
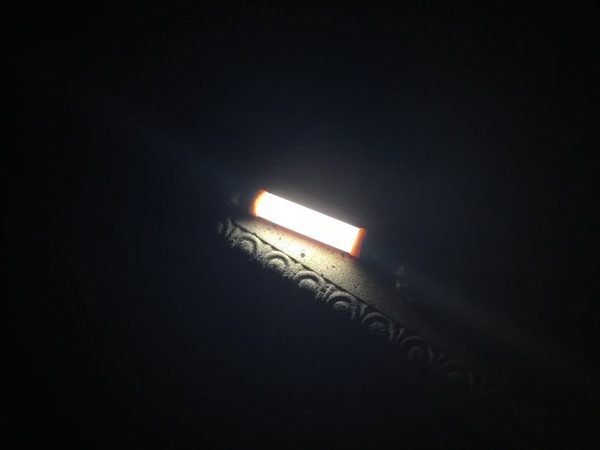
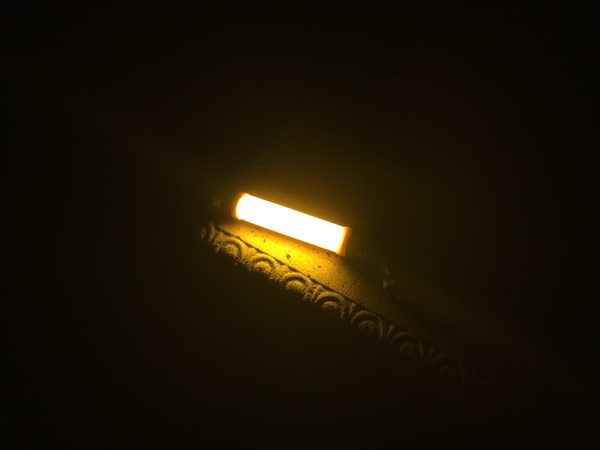
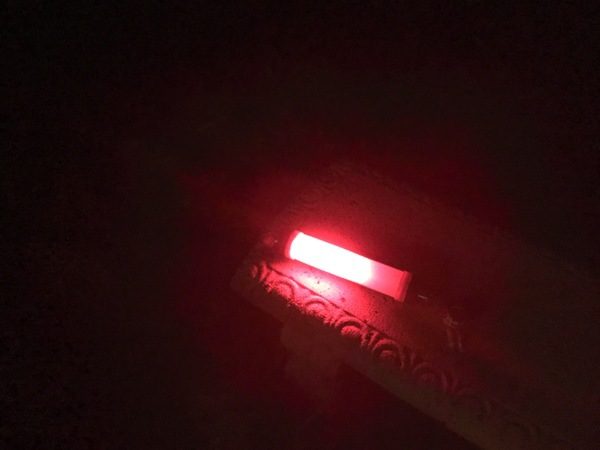
The bar light features 5 different lighting modes: low/medium/high brightness white lighting, an orange bug-repellent light mode, or an emergency mode that alternates blue and red flashing lights. You can cycle through the modes with a click of the button, or press and hold the button to turn it off. You can go for 10-35 hours between charges based on which lighting mode you are using.

Here’s low and high white-light mode, useful for lighting up your campsite or work area:

Here’s “bug light” mode, which claims to repel mosquitos:

There’s also and emergency that flashes between blue and red. I was having trouble catching the switch on my camera, but it would be very useful to stick on the hood of your car if you were changing a tire in the dark:

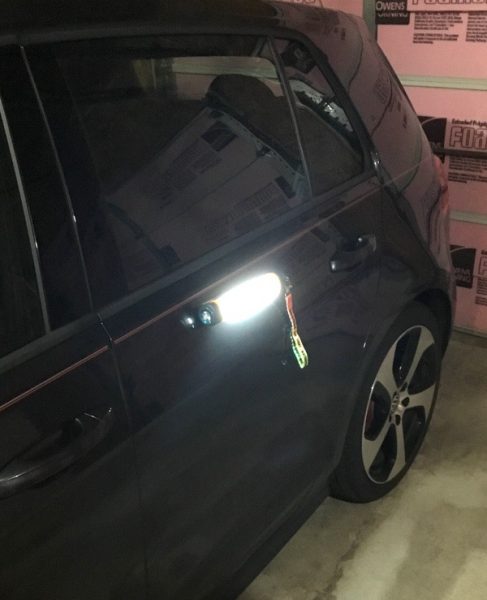
In addition to multiple lighting modes, the Audew has a few more tricks that add to its utility. There is a pair of magnets side of the flashlight so that you can attach it to any metal object like a car hood or metal toolbox. There’s a D-ring on one end with a lanyard so you can hang it inside your tent, lash it to a tree branch, or attach near your workspace.

Here I have it attached to the door of my car. If you’ve got one of those all fiberglass bodies, it won’t help much… but you could attach it to any bit of metal:

It also has an IP68 waterproof rating, which means it is submersible up to 3 meters, both end caps are sealed so that you don’t have to worry about leaks. Drop it in a puddle, tie it to the side of your boat, get it wet… Audew doesn’t care. I dropped it in a sink full of water for 10 minutes, dried it off with a towel, and it laughed at me. Been using it ever since. I can’t say that about every “waterproof” electronic device I’ve tested.

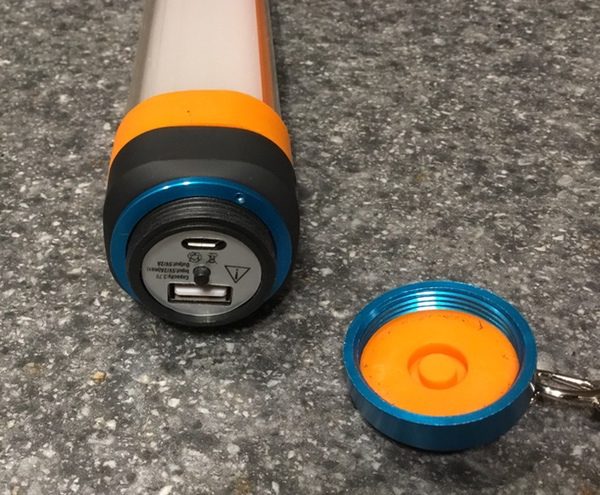
The charging port is located under the cap with the control button. Unscrew the cap to charge the flashlight with the included USB to micro-USB cable. There’s also a USB port stashed there that you can use to charge your electronic devices. It’s rated at a 5200 mAH capacity. That won’t get you very far as a charging device (roughly 2-3 charges on your iPhone 6 at full charge), but it’s a great feature if you’re stuck in a pinch or lose power in the house (or car).

Performance

The Audew Multi-function Flashlight is a great little lighting multitasker that has a whole bunch of practical uses. I love this little guy as a general work light, especially for tight maneuvers like working under a sink. The waterproof feature is also great if that pipe just won’t stop leaking. We’ve all been there. Its solid construction will take some bumps and bruises if you have butterfingers as well.

I really like the idea of getting one of these for each of our cars as an emergency light. I tested the light at full charge and full bar-light brightness and got more than the 8 hours of rated run time before it faded. It will go longer in lower power modes, up to 35 hours in the low-light setting. Good to have in an emergency. That blinky red-blue mode would also be useful if I ran into a roadside issue.

We’ll be going on a camping trip in August, and I’m looking forward to testing it out in the great outdoors around the campsite. It doesn’t have a super-low light mode for use as a night light, but you can clip it to a carabiner at the tent peak for interior lighting. Not having to lug a bunch of replacement batteries in my gear bag will be a nice space saver, and I’ll be interested to see how the bug-repellent orange light mode works around the campfire. I’ll post updates on this as we test it. I also plan on testing this with my product photography over the next few months; the ease of handling and multiple hanging modes will make it ideal for adding background lighting.

All in all, it’s a great tool that also comes at a great price. You can pick one up for under 25 bucks on Amazon Prime. I’ll test the long-term durability over the next few weeks, but it looks like a keeper so far.

What I like

  • Durable, lightweight, and compact
  • Long-lasting charge
  • Multiple ways to hang and carry
  • Backup charging for your smartphone in an emergency
  • Waterproof

What needs to be improved

  • None to be seen so far!

Final thoughts

I really like the Audew Multi-function Flashlight. It’s mission-focused and has a set of nicely related functions that work well together. The tough construction is ready for some punishment, and the waterproofing means I can use it for all kinds of household projects and outdoor activities. I’m going to pick up several more of these for the house and the cars.

Price: $22.99
Where to buy: Amazon.
Source: The sample of this product was provided by Audew.

Filed in categories: Reviews

Tagged:

Audew Multi-function Flashlight review originally appeared on The Gadgeteer on August 6, 2018 at 9:00 am.

Note: If you are subscribed to this feed through FeedBurner, please switch to our native feed URL http://the-gadgeteer.com/feed/ in order to ensure continuous delivery.
ILive – Voice Activated Clock with Amazon Alexa Review

REVIEW – I am normally an early riser by nature and will often wake up before my alarm clock even goes off.  However, there are those occasions where I apparently needed the extra sleep and was glad I did have an alarm clock set to make sure I got up on time.  I had recently replaced an alarm clock I had been using for literally over a decade with a new alarm clock.  Much to my disappointment I found that the alarm was so high pitched I did not hear it in the morning (I wear earplugs at night, but that is a whole other story!).  So when the opportunity came to review the new ILive Voice Activated Clock with Amazon Alexa I jumped on it.  Let’s see if it worked for me and made sure I was out of bed on time.

What is it?

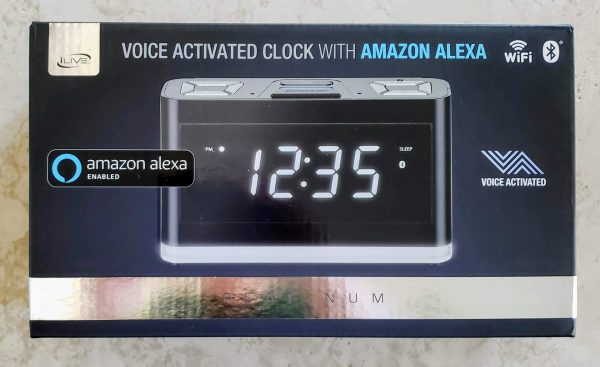
The ILive Voice Activated clock is exactly what it is named.  It is a voice-activated clock that works with Amazon Alexa.  You can give it voice commands like any other Amazon Alexa enabled device as long as you have signed into your Amazon Alexa account through their app.  You can tell it to set alarms, cancel alarms, ask it a plethora of questions, play music and play Audible books.  It has a really nice speaker that has both left and right channels on it and it gives a much better sound than any other Amazon Alexa device that we have in the house.  We have the original Echo, Echo Dot, and the newer Echo Show.

Hardware Specs

  • Amazon cloud-based Alexa service
  • Voice activated
  • Wi-Fi and Wi-Fi direct
  • Bluetooth connectivity
  • Support for multiple streaming services like Pandora, Spotify and IHeartRadio
  • Nightlight at the bottom of the clock
  • USB port for phone charging
  • Multi-room and multi-user capable
  • High-performance speaker
  • ILive Wifi App

What’s in the box?

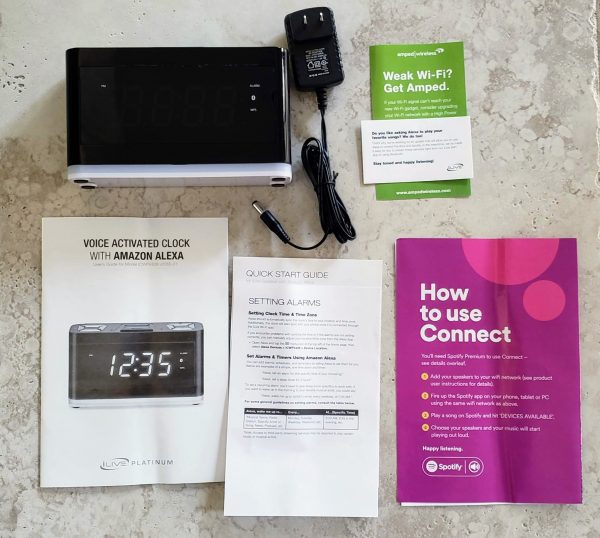
In the picture above you can see what comes in the box.  You get the clock radio (the light colored band at the bottom is the night light).  You also get an ac adapter,  an advertisement for a WiFi booster service, instruction booklet, quick start guide and an advertisement for Spotify Premium.

Design and Features

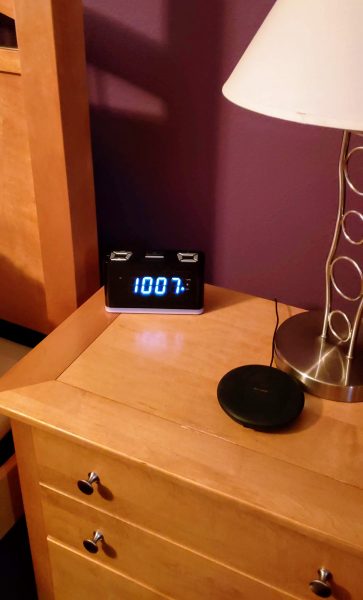
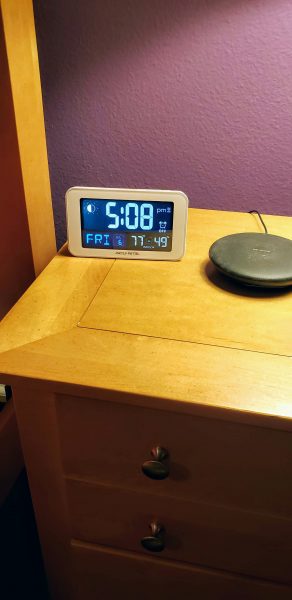
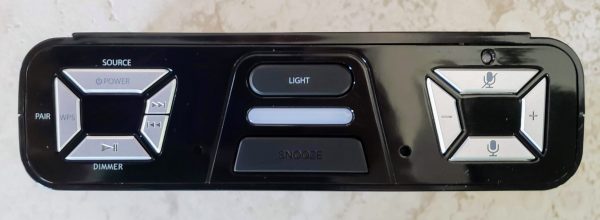
In the pictures above you can see my original alarm clock on the right and the new ILive alarm clock on the left.  The ILive is definitely larger but still does not take up a lot of space on my bedside table.  The next two pictures below show images of the top and back of the device.  There are a lot of buttons on this alarm clock.    Many of the buttons have dual features as you can see.   Starting from left to right on the left picture the top button is the power button.  I found this particular button rather deceiving.  When I plugged the clock in, it immediately lit up and displayed 12 am which made me think the clock was on.   I was unable to begin the configuration process until I pressed the power button and the light bar between the light and snooze button started blinking.   Also worth noting is once the clock is all set up and connect to your WiFi, if you were to lose power and have it come back on, the device will self-power back on after 2 minutes.  It sits with the 12 am display and will eventually start to self-search for its WiFi connection.  If it finds it, it will display the proper time again and pull back any alarms you set from Alexa.  So no battery backup is necessary.

Going clockwise the next two buttons let you control music playback manually on the clock itself.  The bottom button will control the LED clock display brightness (only 2 settings – light up the whole room and only slightly less light).  The last button on the left will let you pair with Bluetooth or a WiFi protected set up device.

In the middle, you have the light button that will let you turn on the night light at the bottom of the clock.  There are three levels of brightness for that.  The big button at the bottom is the snooze button.

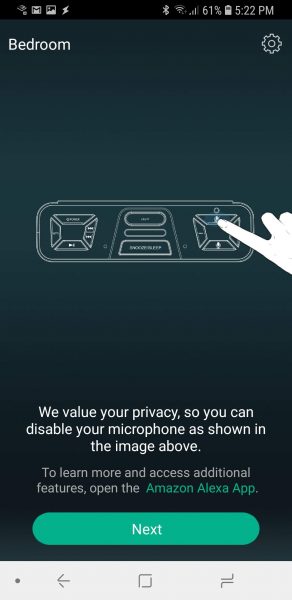
To the right, you have a microphone mute button if you don’t wish to have Alexa listening to you. The plus and minus buttons control how loud the alarm and how loudly Alexa responds.  The bottom button with the microphone picture is just a manual button you can press to activate Alexa if you don’t want to call out her name first.

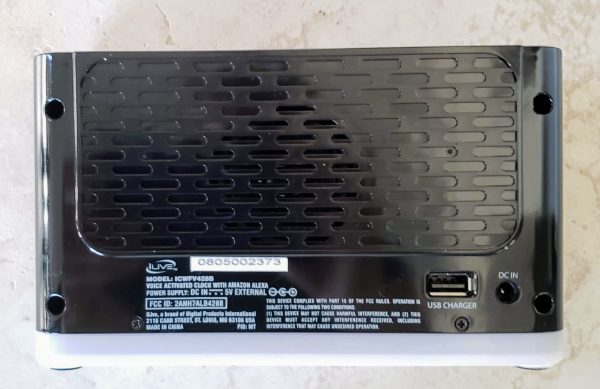
In the back of the unit is a USB port in which you can charge your phone and a DC in port for the power adapter.  I did note that when I plugged the USB from my wireless charger for my Galaxy S9 that it did not have enough juice to support fast charging.

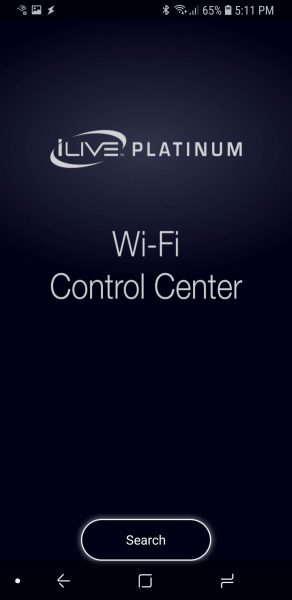
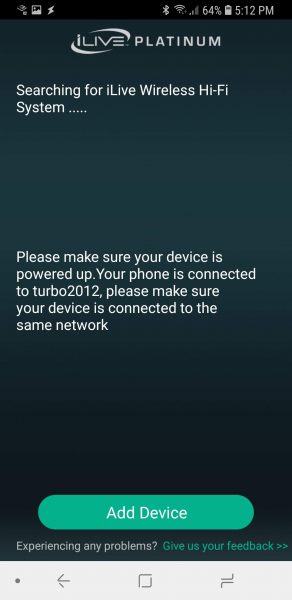
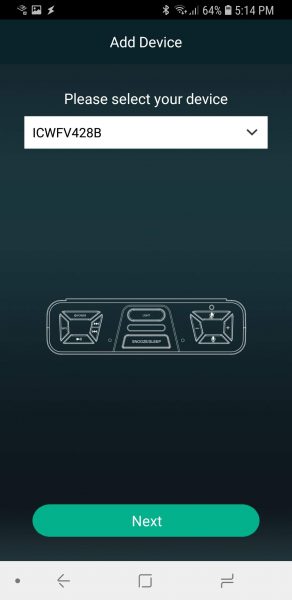
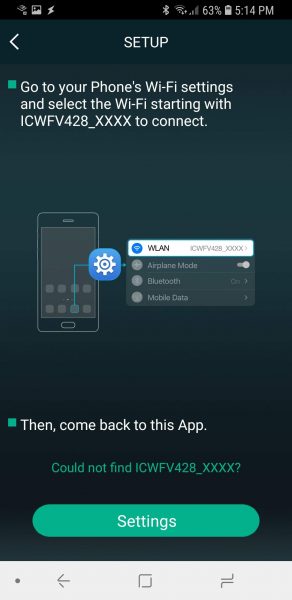
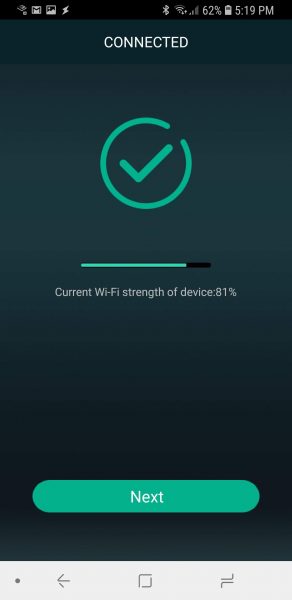
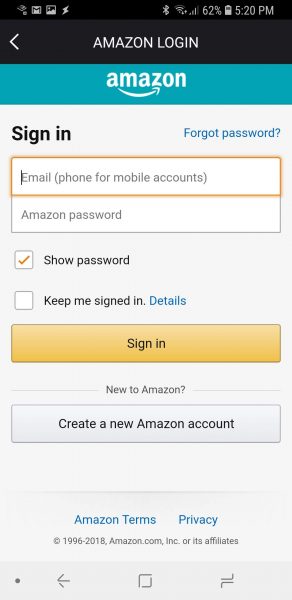
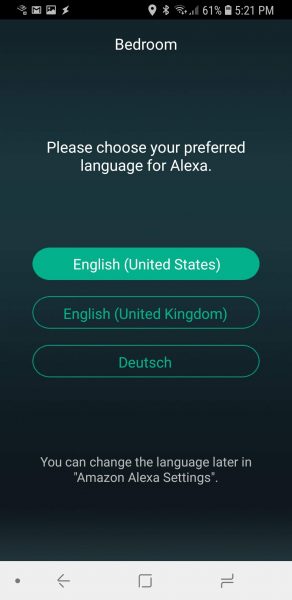
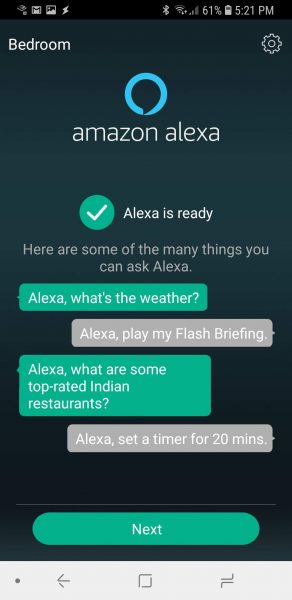
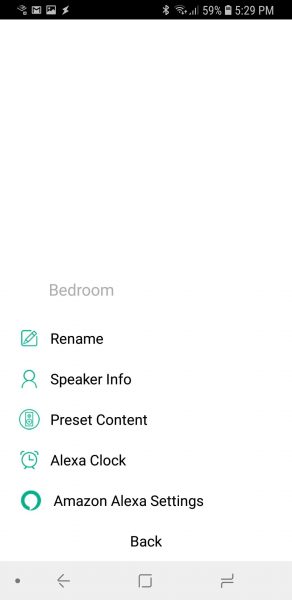
The next series of pictures show you the process to get the clock connected to your WiFi.  It is a pretty standard setup where you actually connect your phone directly to the WiFi coming out of the clock itself then provide the clock with the home WiFi password.

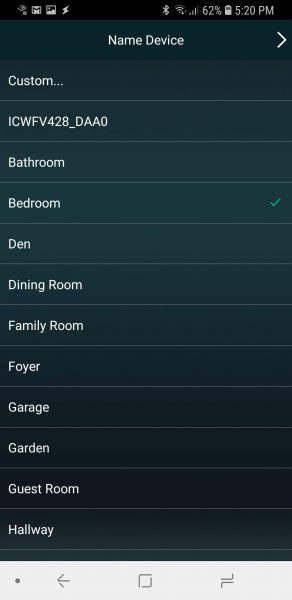
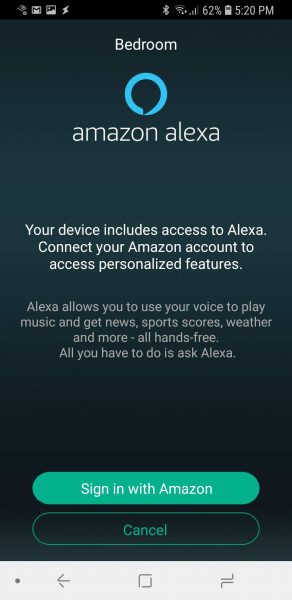
Once connected you get the opportunity to name the device.  Then you proceed to connect to your Amazon Alexa account.  You give the app permission to access the Alexa voice service.   You even get the choice of specifying which language in which you want Alexa to speak to you.

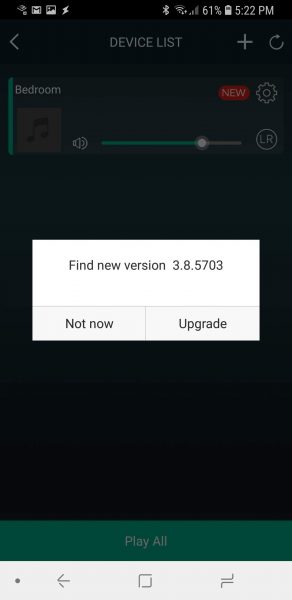
Once I was through all of that I was then prompted for a firmware upgrade for the device which I did apply.

A nice feature which I mentioned earlier is the microphone mute button.  If you really don’t want Alexa listening in to the fun you are having in your bedroom you can mute her.

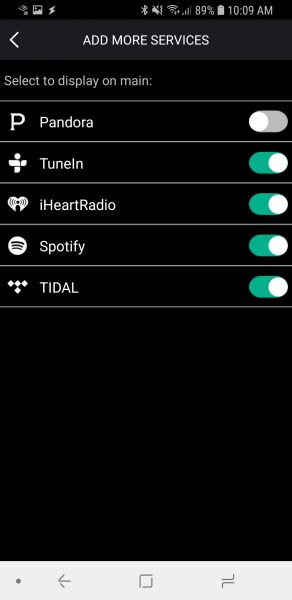
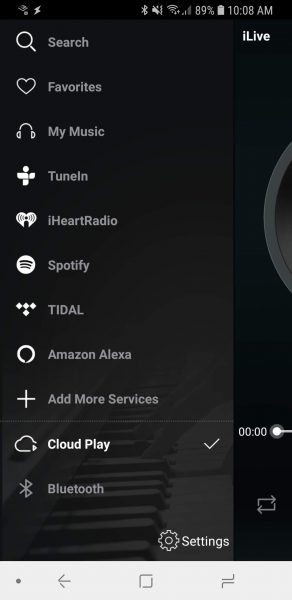
The next few screens show the plethora of playing options provided by the app to the clock.  I personally did not have any of those streaming accounts available, but I did have the clock read my Audible book to me.  I have to say I was really impressed with the sound that came out of the device.  It had a great base quality and was very clear compared to our existing Echo devices.

What I like

I love that it connects to Amazon Alexa.  We are a big Echo use home.  We own five existing echo devices, so using this clock came very naturally for me.   Just before going to bed telling Alexa to set an alarm for the next day is so easy.  You can even tell her to set the alarm for all weekdays if you like.  Alexa also now gives you the ability to set multiple alarms if you have two people using the same clock.  When it goes off you can talk and tell Alexa to stop the alarm or press a button on the clock to stop it that way.  I love that I do not have to remember to replace batteries in the clock to handle the battery backup issue.  That is also a con which you will see below.  The speaker on this clock is amazing for its size.  I often use it when I bring a load of clothes into the bedroom to fold.  Listening to music or a book certainly makes that job go much faster.

What needs to be improved

I really think that the clock could benefit from an actual battery backup.   A possible weak spot is that this clock is very dependent on WiFi in your home.  If you WiFi goes out, your alarm will not go off.   Another weak spot is if you wake up before the alarm goes off you only have two choices to cancel the alarm.  One is to talk to Alexa to cancel the alarm which can be loud for the other person still sleeping in the room.  The other is to open the Alexa app and cancel that way.  It would be awesome if there could be some way to configure a manual button press to cancel the alarm before it goes off.  Another issue is also dealing with the power issue.  If the power goes off in the middle of the night and comes back on, the clock will reconnect with your WiFi if your WiFi is available.  However, it is a noisy process with the clock talking and giving you a status along the way.  I would rather it do that soundlessly so it would not wake me up in the middle of the night.   My last issue is a pet peeve with pretty much all newer alarm clocks.  Dang those LED displays are bright.  I see people complaining that even the lowest display setting is still too bright for a dark room.  This clock is still pretty darn bright.  I will most likely be buying a film to place over the display to hopefully dim that sucker down.

Final thoughts

All in all, I really do like this alarm clock.  It will stay on my nightstand and become my personal alarm clock.  Fortunately for us we rarely lose power so the backup issue is not that big of a deal.  I just really love the sound that it produces and I can actually hear the alarm in the morning.

Price: $71.07
Where to buy: Amazon
Source: The sample for this review was provided by iLive.

Filed in categories: Reviews

Tagged: ,

ILive – Voice Activated Clock with Amazon Alexa Review originally appeared on The Gadgeteer on August 5, 2018 at 9:30 am.

Note: If you are subscribed to this feed through FeedBurner, please switch to our native feed URL http://the-gadgeteer.com/feed/ in order to ensure continuous delivery.
VAVA 2K Dash Cam review


REVIEW – With the advancement of technology in today’s world, we have the ability to automate numerous tasks and to better manage our security. A Dash Cam is becoming more common and necessary for recording accidents or interactions with other individuals. It also allows you to take scenic pictures and videos as you drive. While there are many models available, I am looking for one that takes great quality video and is easily removable for storage when I am not in my vehicle. The VAVA Dash Cam 2K seems like it could work, so let’s see.

What is it?

The VAVA Dash Cam 2K is a windshield mounted dashcam that records video as you drive and is capable of snapshots either via the app or by using an optional remote.

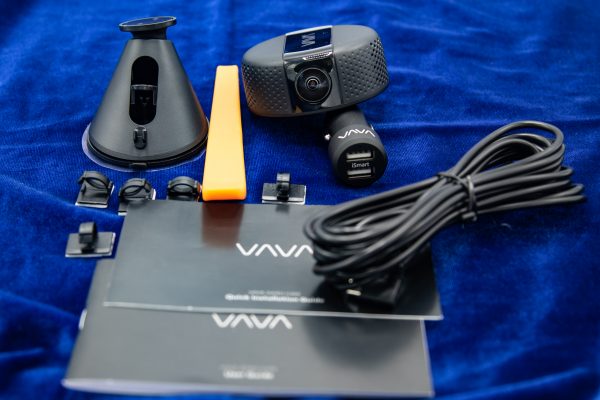
What’s in the box


1 x VAVA Dash Cam
1 x Car Charger
1 x Windshield Mount
1 x Micro USB Cable
1 x Pry Bar
5 x Cable Clips
1 x Instruction Manual
1 x Quick Installation Guide

Design and features

The VAVA Dash Cam 2K is a small, compact and lightweight dash cam that connects magnetically to its mounting base. This type of mount allows you to swivel the camera 360 degrees to record your entire surroundings. It  records in either 2560 x 1440p 30fps QHD or 1920 x 1080p 60fp.


The base attaches to the windshield via the usual suction cup action, and on the other side where the Dash Cam connects, there is the magnetic circle for that attachment, and the micro USB port for the power connection via a micro USB cable and a DC car lighter adapter. The micro USB cable is very long, with enough length for you to use the provided pry bar to run it around the perimeter of the roof and pillars of the car, hiding it in the process. I did not install mine in this manner since I am testing it and did not want a permanent installation. The cable clips that are included are for this purpose.


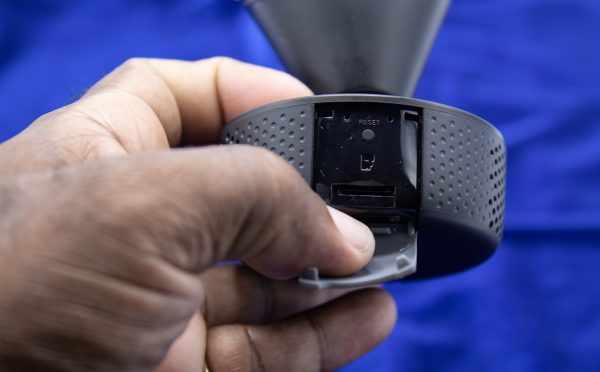
On the opposite side of the camera lens, there is an SD card port (Supports Class 10 or Above SD Cards up to 128GB), a reset button and two LEDs, one for wifi connection indication and one for power indication.

Performance

The Vava Dash Cam has a 320mah Built-In Battery that allows the 3-axis G-sensor to activate and start recording footage even in parking mode. Both the video recordings and the snapshots are very clear, and the video stabilization is very good.

Snapshots:

Videos: (The following 2 videos were exported directly from my smartphone and then uploaded to YouTube)
On the daylight videos, it is quite easy to see the license plate of any vehicle in front of you. While the nighttime videos are clear as well, the reflection of opposing car lights make that task somewhat harder.

Each time you hit the brakes suddenly or hit a pothole, the Dash Cam detects it as a possible collision and starts an emergency recording. You do have the option in the settings to set the sensitivity for this action. When viewing the camera live on my phone, I noticed that every minute or so the screen would get completely grey and refresh. I did not see this in actual recordings on the SD card. I am not sure if the connection would be different and require less frequent refreshing if it was Bluetooth instead of WiFi.

App

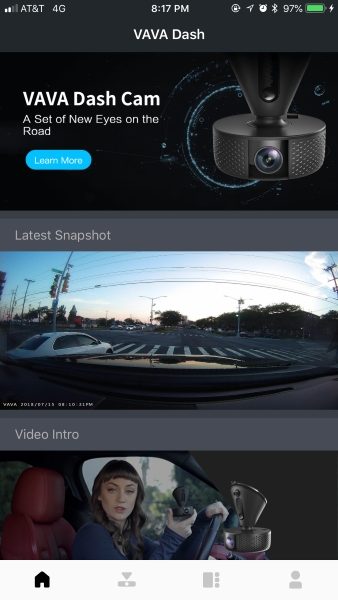
Both iOS & Android Mobile Apps are available for this Dash Cam. Use of the app allows you to Preview, share, download, and edit photos and videos directly from your smartphone. You can also purchase a GPS module separately for GPS tracking. Once you download the VAVA Dash App and select it, you are on the Home Screen as shown first below. There are 4 icons at the bottom of the screen.


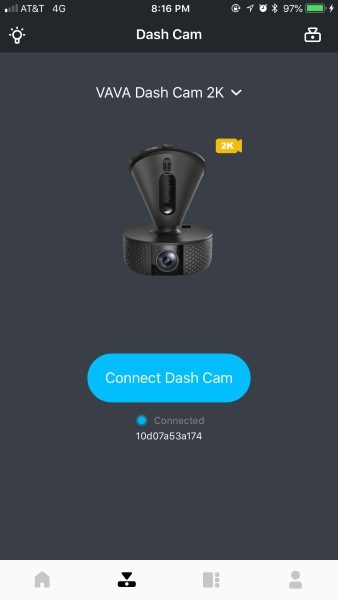
The second icon from the left takes you to the Dash Cam connect screen. The app sees the Dash Cam once it is powered on, and the manual provides the default password to connect to it. It connects via WiFi and not Bluetooth. You can also choose the video resolution from the “connect” screen.


Once you connect to the Dash Cam, you have the option to play the live real-time video, and below the video display screen, there are 4 icons. the top 2 icons allow you to take a snapshot of record a quick scene video just by touching them. You can also purchase a snapshot button that would allow you to instantly capture a photo. The bottom 2 icon allows you to view the videos or pictures recorded.

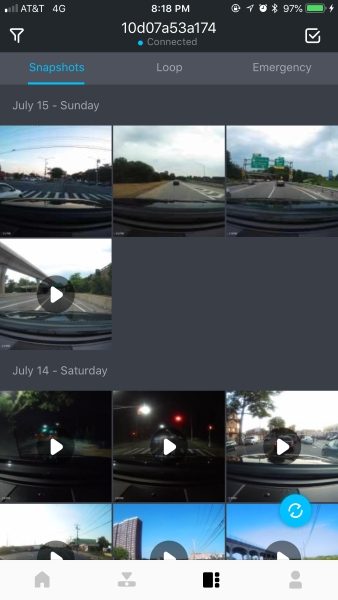
The 3rd icon at the bottom of the app takes you to a screen that allows you to view the recorded Snapshots, loop video, and Emergency videos.

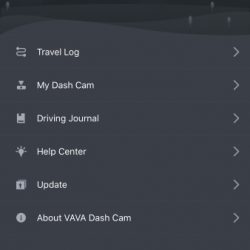
The 4th icon to the bottom right takes you to the Register/ login screen. This screen also includes access to several other data and configuration screens.


With the use of the app and your smartphone, you can manage the recorded media directly without removing the SD card. These functions include previewing, sharing (you can share to social media platforms), downloading and editing photos and videos directly from your smartphone.

What I like

  • The size of the Dash Cam.
  • The great versatility created by the magnetic mount which is really just a great design.
  • The video resolution choices and the quality of the recorded video.
  • The built-in battery and the Parking mode.

What can be improved

  • Provide video resolution up to 4K

Final thoughts

The VAVA Dash Cam 2K is arguably one of the best dashcams that I have tested. And while I will admit that I have not tested more than 5 or 6 dashcams, I really like this one and the features that it offers. The ability to attach and detach the actual camera from the base magnetically is one of the best designs I have seen for this type of device. I no longer have to unscrew anything to remove the dash cam, and I cannot stress enough the convenience and efficiency of this quick release capability.

Another great feature is the availability of optional add-ons. I am about to purchase the optional GPS module so that I can always journal my trips and in the unlikely event that my whereabouts are ever challenged, I will have some level of proof. While it would be great to be able to record up to 4K, 2K is more than enough, especially since the recordings will eventually record over previous recordings. In my opinion, this dashcam is a great bang for the buck.

Price: $99.99
Where to buy: Amazon
Source: The sample for this review was provided by VAVA.

Filed in categories: Reviews

Tagged: ,

VAVA 2K Dash Cam review originally appeared on The Gadgeteer on August 4, 2018 at 9:30 am.

Note: If you are subscribed to this feed through FeedBurner, please switch to our native feed URL http://the-gadgeteer.com/feed/ in order to ensure continuous delivery.