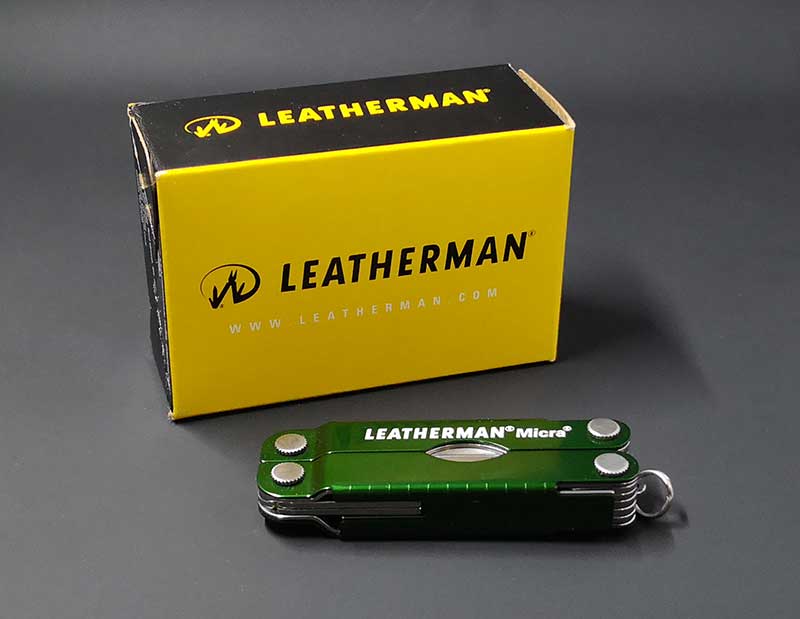
Leatherman Micra multi-tool review

REVIEW – I’ve been carrying a little red Leatherman Squirt multitool in my gear bag for several years but I’ve always wondered if I might like the Leatherman Micra more than the Squirt. I now have the answer to that question because I’ve been using a Micra for the last few weeks. Let’s take a look and find out.

What is it?

The Leatherman Micra is a keychain-sized multitool made of 420HC Stainless Steel in several colors that features spring-action scissors, and a variety of other tools.

Specifications

Closed Length 2.5 in (6.5 cm)
Weight 1.8 oz (51 g)
Blade Length 1.6 in (4.06 cm)

Design and features
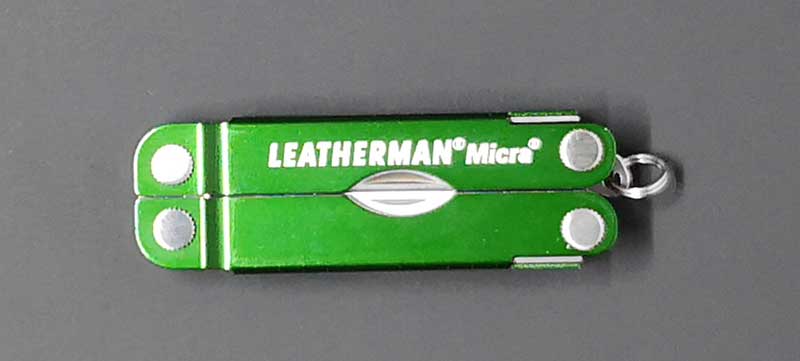
The Leatherman Micra is available in 7 colors that include plain stainless steel (silver) and the green version like you see above.

The Micra has the Leatherman Logo and model name painted on the side and a split ring hanging off the end to make it easy to add to your keychain.
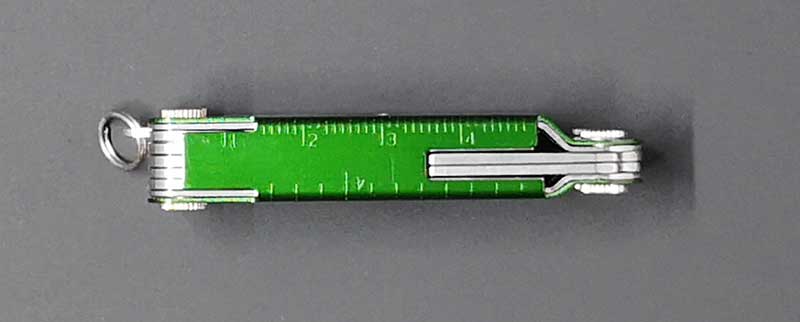
If you check out the sides of the Micra multitool, you can see the 4.7 inch (12.0 cm) ruler that is etched into the handles.
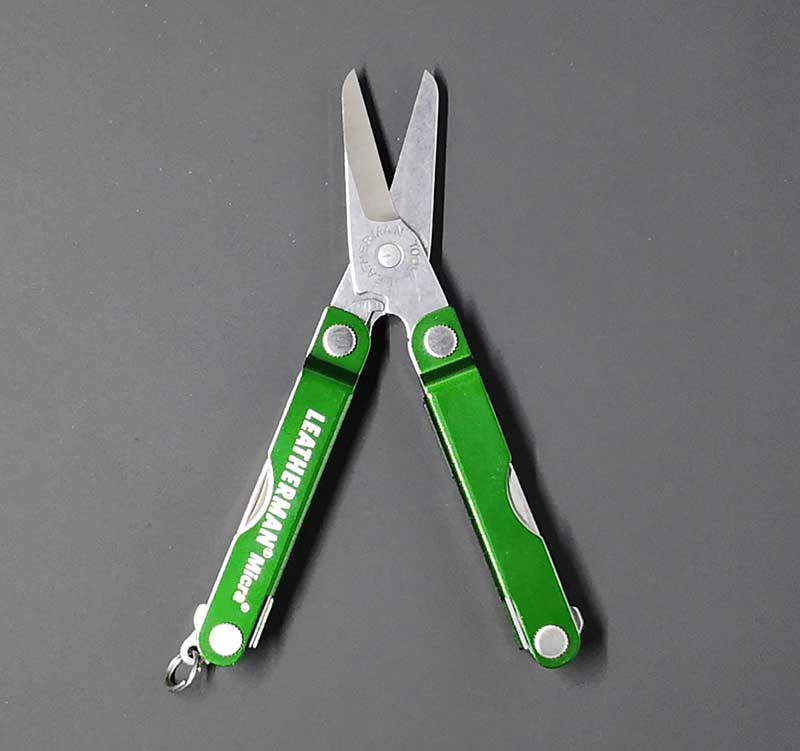
To use the Micra, you need to unfold the handles. When you do so, the folded multitool turns into a pair of spring-assist scissors. Even for their small size, they work just fine for string, threads, paper, cardstock, etc. However, I would not want to use them to try to cut really heavy cardboard.
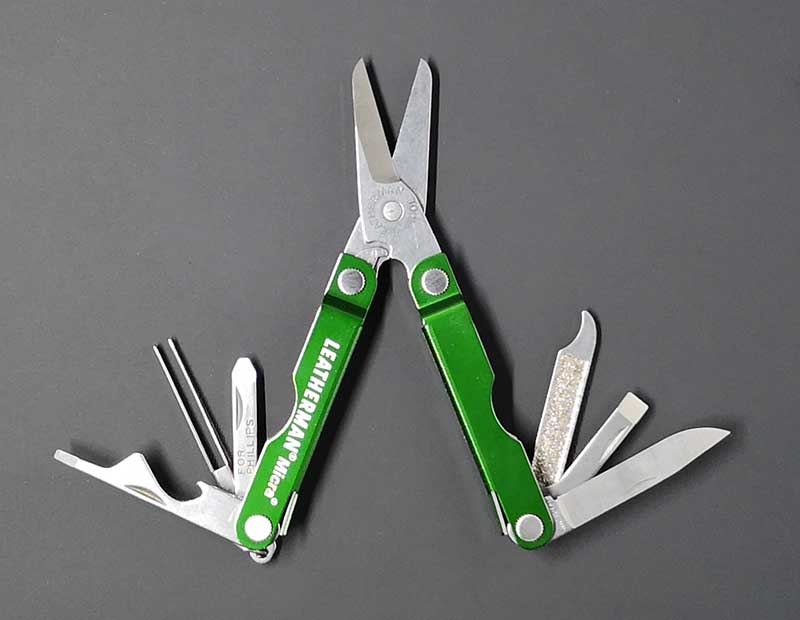
In addition to the scissors, the Leatherman Micra has 9 other tools that unfold from the handles. The tools include:

Scissors
Knife
Ruler
Flat/Phillips screwdriver
Nail cleaner
Tweezers
Bottle opener
Nail file
Medium screwdriver
Extra small screwdriver

Having used a Leatherman Squirt for so long, the first thing I noticed about the Micra is that you can’t get access to the knife without unfolding the handles first. That makes the Micra multitool less convenient to use compared to the Squirt.


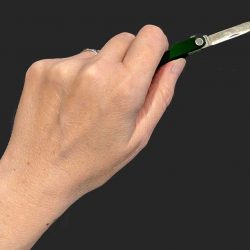
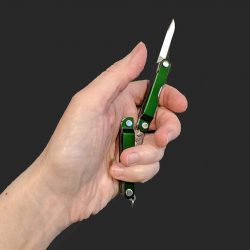
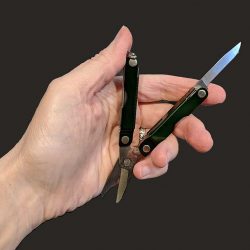
It’s also awkward to use the Micra knife due to the handle being in the way. The easiest way I found to use the knife is to only unfold one handle as shown in the first 2 images above. If you unfold both handles, you’ll have to deal with the open scissor blades which might cut the palm of your hand while you’re trying to use the knife.
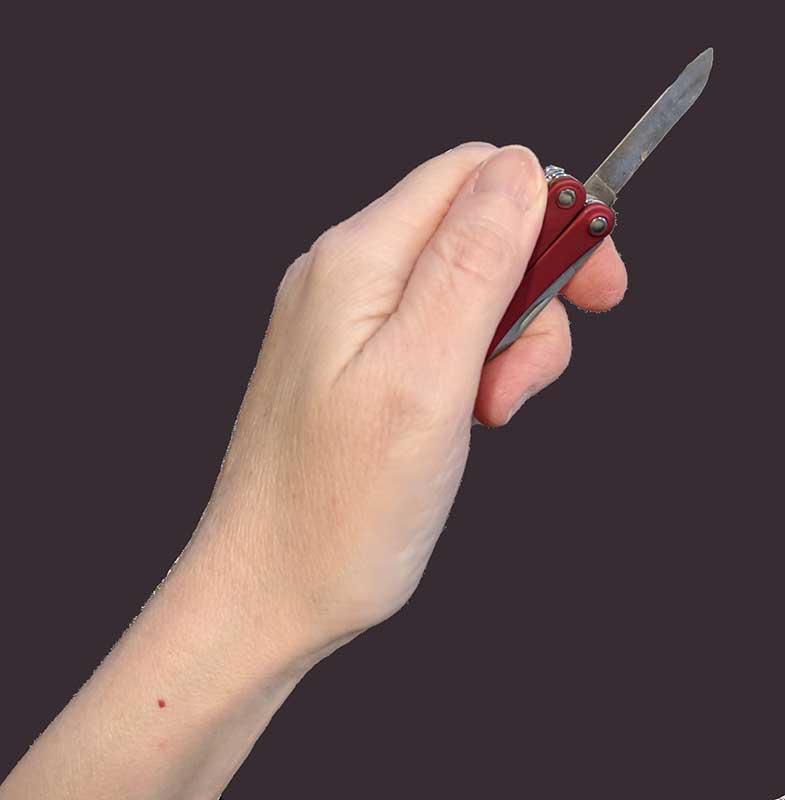
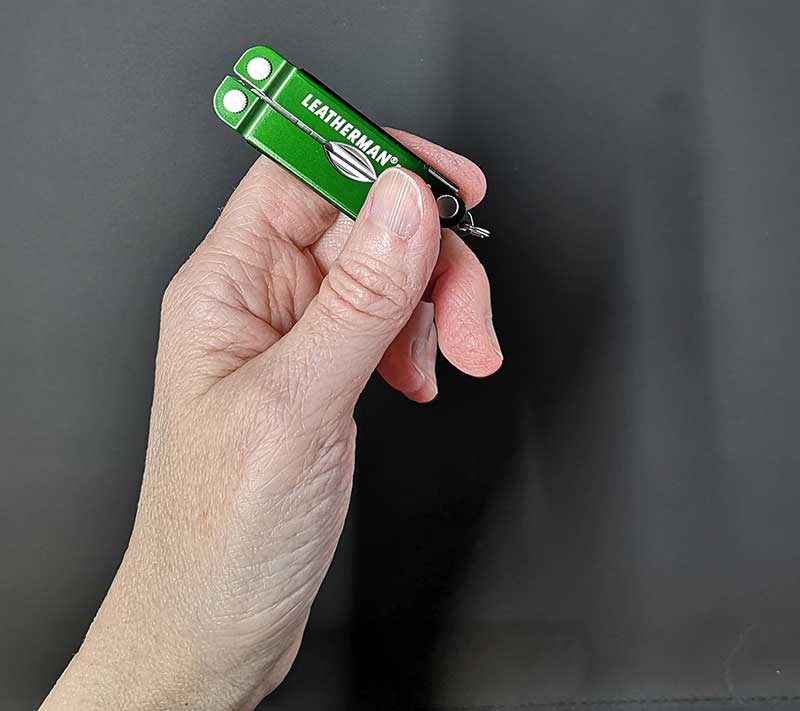
For comparison, here’s what it’s like to hold the Leatherman Squirt with the knife blade extended. It’s much easier to access and use.
What I like

  • Compact
  • Spring-action scissors
  • Available in a variety of colors
  • 25-year limited warranty

What needs to be improved

  • The knife blade  and other tools can only be accessed by unfolding the handles

Final thoughts

Like other Leatherman tools that I’ve used and reviewed in the past, the Leatherman Micra is well-made and offers a variety of functionality. But the fact that I have to unfold the handles to access the tools (especially the knife blade), it makes the convenience of the Micra multitool a step down from the Squirt. That said, the Squirt has pliers instead of scissors. The scissors on the Squirt are much smaller than the Micra scissors. If you think you need scissors more than pliers, that’s a reason to consider the Micra over the Squirt. For me, I’m sticking with my Leatherman Squirt.

It’s also important to note that neither the Squirt or the Micra is TSA approved, so frequent travelers will need to make sure that they remember to put these multitools in their check-in luggage if they don’t want a TSA agent to confiscate it.

Price: $29.95 MSRP
Where to buy: Amazon
Source: The sample for this review was provided by Leatherman.

Filed in categories: Reviews

Tagged: , ,

Leatherman Micra multi-tool review originally appeared on The Gadgeteer on August 27, 2018 at 1:10 pm.

Note: If you are subscribed to this feed through FeedBurner, please switch to our native feed URL http://the-gadgeteer.com/feed/ in order to ensure continuous delivery.

Hawkeye Firefly 8SE 4K Touch Screen Action Camera review


REVIEW – Since the launch of the GoPro action cameras, many other companies continue to produce similar products with comparable features for much less of a purchase price. Here is the result of another similar action camera that I reviewed.

What is it:

This is a GoPro type 4K action camera that takes both video and photos using its 170-degree lens to provide high-resolution wide-angle footage.

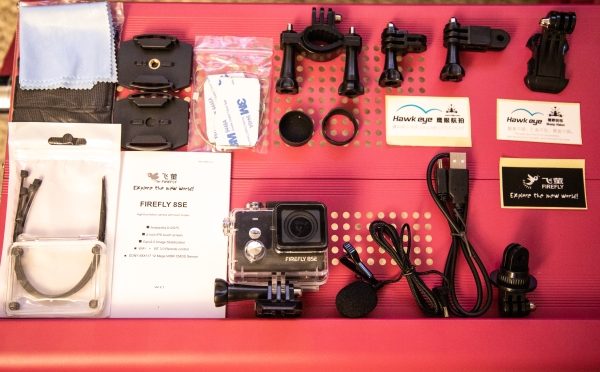
What’s in the box

1 x Hawkeye 8SE Action Camera
1 x Waterproof Case
1 x Waterproof Case Front Cover Case
1 x Bicycle Stand
1 x J Base
4 x Strap
1 x Plastic Tie
1 x Long Connector with Screws
1 x Short Connector with Screws
1 x 1/4 inch Adapters Set
2 x Mounting Base
1 x Battery
2 x Adhesive Tape
1 x Metal Cable Tie
1 x Cleaning Cloth
1 x Lens Protection Frame
1 x Lens Protective Cover
1 x Microphone
3 x Stickers
1 x English User Manual

Design and features

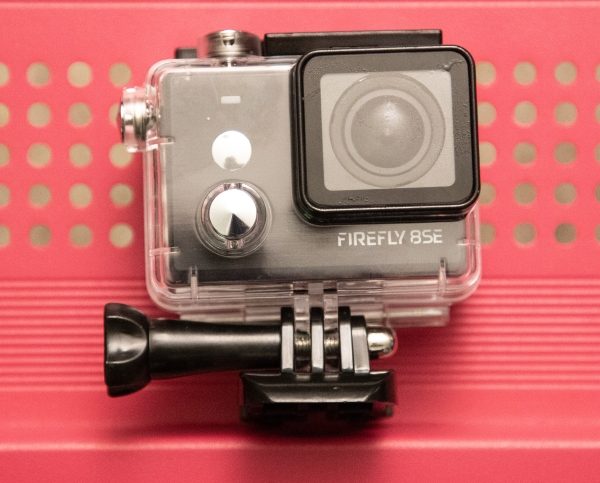
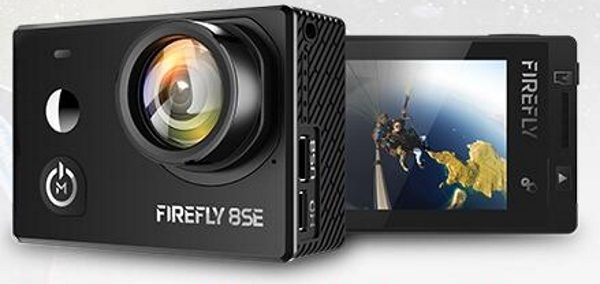
The Hawkeye Firefly 8SE 4K Touch Screen Action Camera is a normal styled action camera and it comes with its compatible waterproof housing. Just as with other GoPro style action cameras, it can be used in a variety of ways including as a dash cam, a surveillance camera, an aerial camera, a selfie camera, etc.


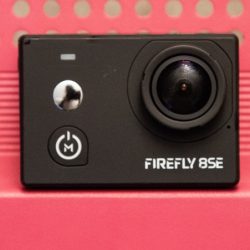
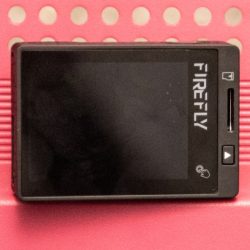
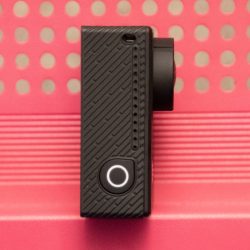
On the front of the camera on the left from top to bottom, there is a LED that lights green for photo mode and blue for video mode. Below the LED there is a circular selfie mirror. Below the selfie mirror is the power/mode button. On the back of the camera, there is the touch screen, the micro SD card slot, and the Playback button.


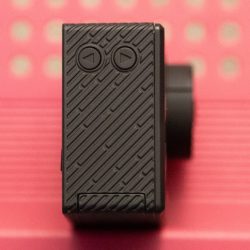
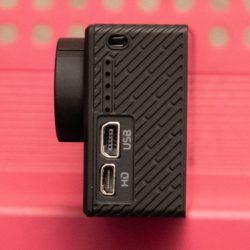
On one side of the camera, there are 2 up/down buttons to navigate through the settings and other screens. On the other side there a micro HD output jack and a mini USB power jack.


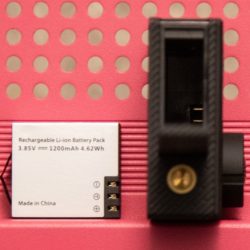
On the top of the camera there is the OK/selection button, and on the bottom, there is a 1/4-20″ threaded mount and the battery compartment and door.


Performance

Specifications:
Chipset: Ambarella A12S75
Chipset Name: Ambarella
Model: Firefly 8SE
Type: Sports Camera
Type of Camera: 4K
Max External Card Supported: TF 128G (not included)
Screen resolution: 320×240
Screen size: 2.0inch
Battery Capacity (mAh): 1200mAh Li-ion Battery
Battery Type: Built-in
Charge way: USB charge by PC
Charging Time: 2.5h
Standby time: 5h
Working Time: 1.33h
Lens Diameter: 12mm
Image Format: JPG
Video format: MP4
Video Resolution: 1080P (120fps),2.5K (60fps),2.7K (30fps),4K ( 3840 x 2160 ) 30FPS,720P (240fps)
Water Resistant: 20m underwater with the waterproof case
Waterproof: Yes
WIFI: Yes
Bluetooth: Yes
WiFi Distance : 10m
Camera Timer: Yes
Anti-shake: Yes
Aerial Photography: Yes

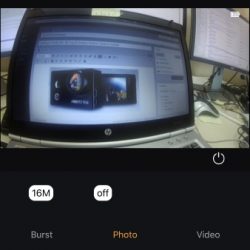
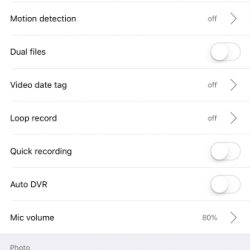
The Hawkeye Firefly 8SE 4K Touch Screen Action Camera works like most other action cameras and it has a lot of settings to control the recording and photo modes. The waterproof housing is, in fact, waterproof, and the buttons built into the housing work well to manage the controls. They do not require much extra effort to engage and are well placed. When the camera is not being used in the housing, the touch screen works very well and is very responsive. The settings screens offer much of the same in terms of functionality and capability, and I like that there is a “rotate” option that can be turned on when using the camera upside down such as when it is being used as a dash cam. The design features both Bluetooth and Wi-Fi capability to allow remote control from their app or an optional remote control (to be purchased separately). I am very impressed with their app, and its functionality, and it is just about the best I have seen so far. Here are some of the screens from the app:


Pictures: It takes clear pictures with the usual fiseye perspective.


Videos: I do like the quality of the videos even the one below from the smoggy underground railroad platform.

What I like

  • The size and built quality
  • The responsiveness of the buttons even when in the waterproof housing
  • The Wi-Fi and Bluetooth Capability

What can be improved

  • The mini USB power jack should be changed to the more current and popular micro USB standard

Final thoughts

The Hawkeye Firefly 8SE 4K Touch Screen Action Camera works very well and is really a nice GoPro alternative. While I am not a big fan of the fisheye view, the wide lens works very well. It is lightweight but feels well made and I do think that it is well priced. Unlike several other action cameras that I have tested so far, it has not responded negatively to being on my windshield in the direct sunlight, but that is not to say that it may not eventually do so. If you want a nice action camera with nice features to use in various relevant scenarios, this camera should meet most of your needs. It has handled my scenarios well, and since it comes with a nice collection of accessories, I still have a few more ideas yet to try.

Price: $129.99
Where to buy: Gearbest
Source: The sample for this review was provided by Gearbest.

Filed in categories: Reviews

Tagged:

Hawkeye Firefly 8SE 4K Touch Screen Action Camera review originally appeared on The Gadgeteer on August 27, 2018 at 9:00 am.

Note: If you are subscribed to this feed through FeedBurner, please switch to our native feed URL http://the-gadgeteer.com/feed/ in order to ensure continuous delivery.
Renogy 10,000mAh Solar Panel Water Resistant Power Bank review

REVIEW – Voice in your Head: Here we go again, another portable charging solution.  Me: Ah, but this one has a bit of a twist.  The Renogy 10,000mAh Solar Panel Water Resistant Power Bank has not only a solar panel for backup charging, but is also water-resistant.  Other products may offer one or the other of those features, but how well did Renogy combine them?  Let’s check it out!  Gadget on!

What is it?

The Renogy 10000mAh Solar Panel Water Resistant Power Bank is a water-resistant, shock-resistant and dustproof portable phone charger with a solar panel backup.

Hardware specs

  • Battery = 10,000mAh lithium battery
  • Dual USB output ports, 2.1A for tablets, 1.0A for phones
  • Micro USB input port
  • Water- and shock-resistant
  • Solar panel for backup charging
  • Dimensions = 5.4 x 2.9 x 0.6 inches
  • Weight = 8 ounces

What’s in the package?

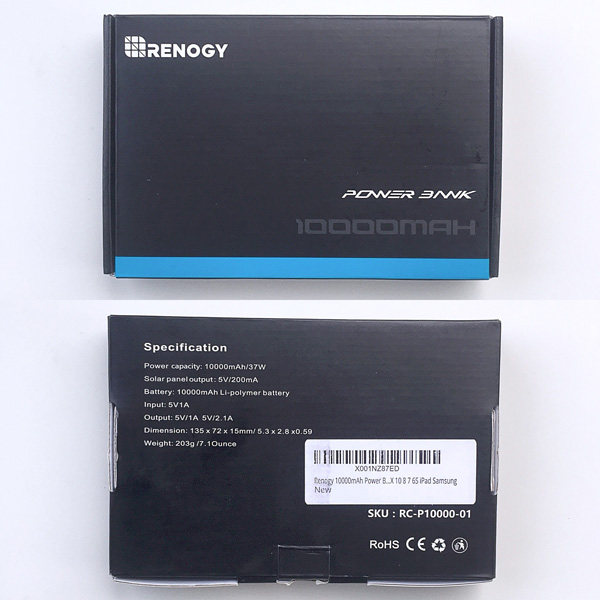
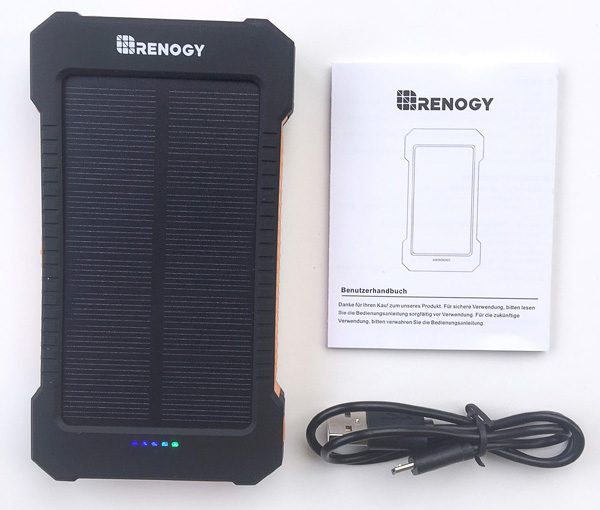
The product packaging is shown in the photo above.

The photo above shows the contents of the package, which are as follows:

  • Renogy 10000mAh Solar Panel Water Resistant Power Bank
  • USB to Micro USB cable
  • Instruction booklet

Design and features

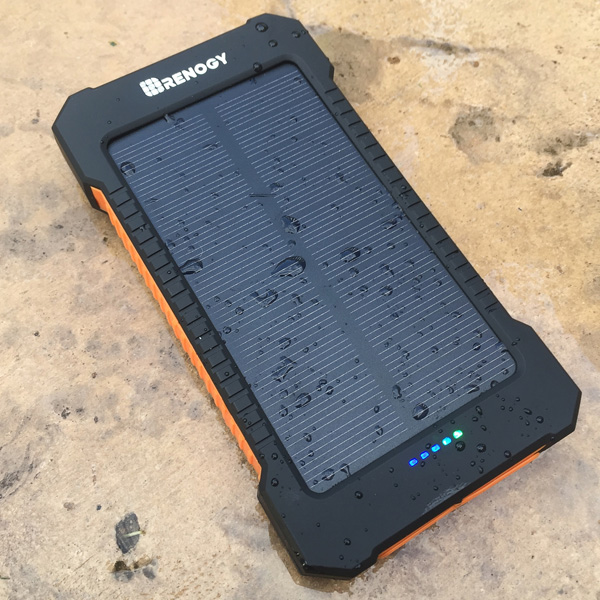
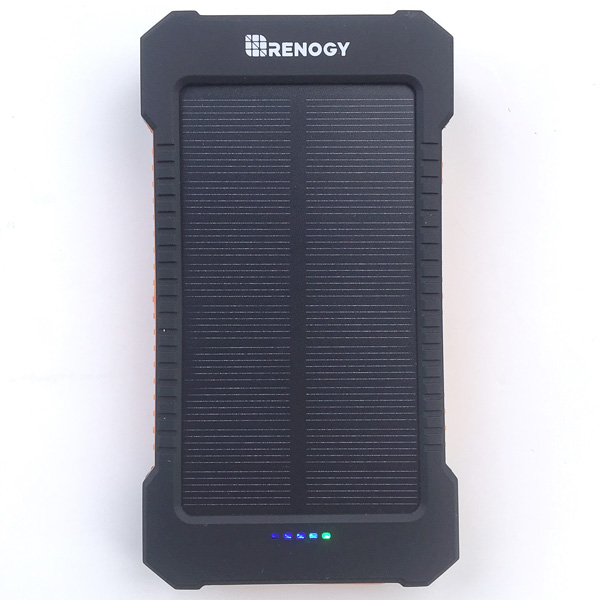
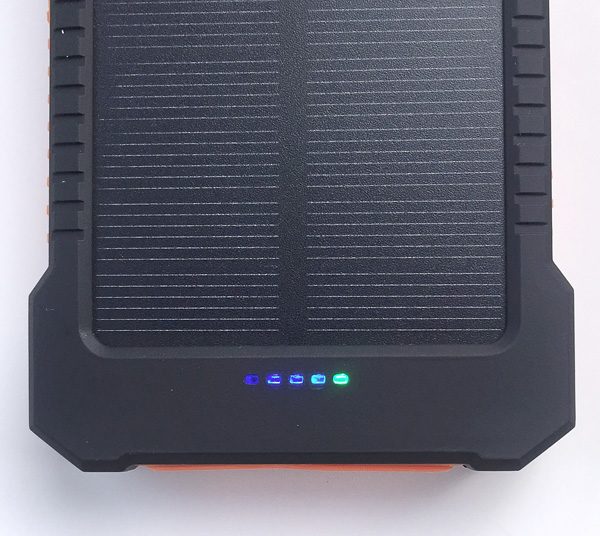
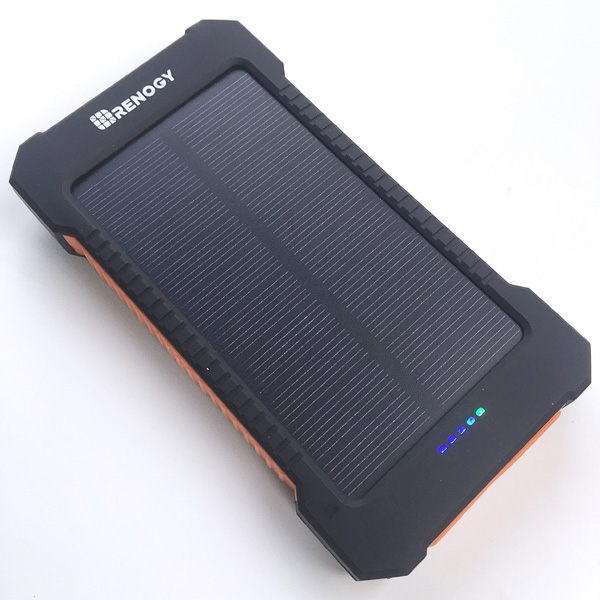
The very first thing I noticed above the device was its soft, matte finish, which felt very comfortable to the touch.   Additionally, a solar panel covers most of the top of the device, as seen in the photo above.

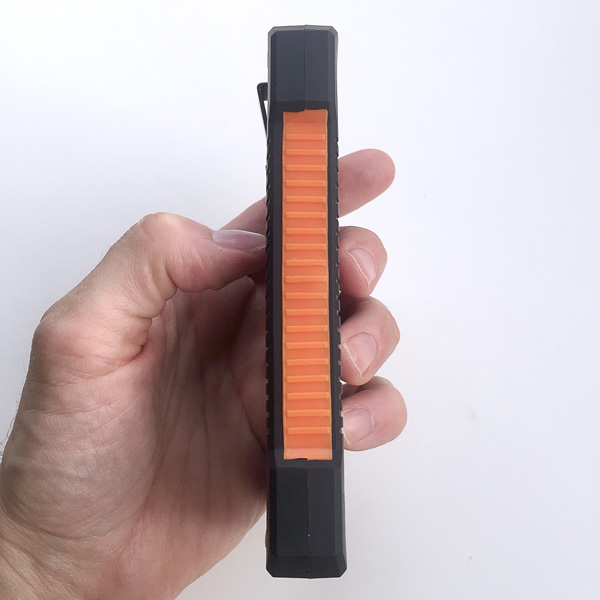
Also, despite it having a water-, shock- and dust-resistant case, the device had a nice size and relatively slim profile, and looked rugged.  In addition, each of the corners is built-up to provide additional shock- or drop-resistance.

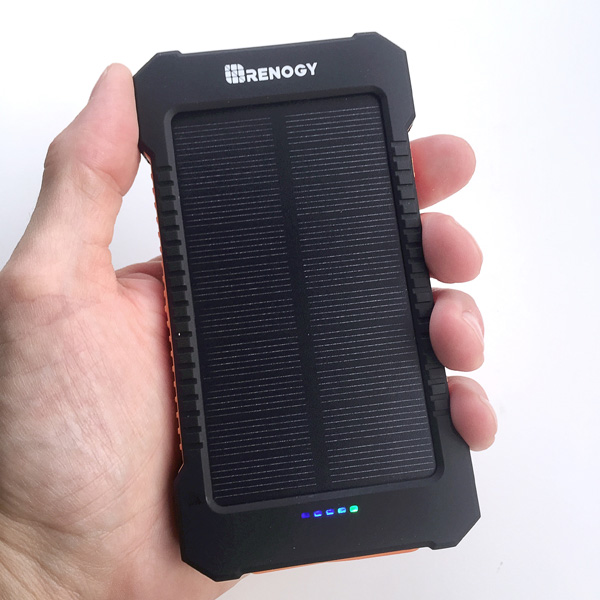
The device is a nice size and fits well in my hand.  I also like the side notches as well as the scallops on the front and back.  All of these contribute to providing a bit more grip on the device.

The sides of the device have orange silicon panels which not only aid in grip, but also give it a bit of visibility.  Why is this useful?  Because I found myself digging around in the bottom of my EDC bag for this device on a couple of occasions when the lighting was sub-par, and the various orange silicon panels held me locate it.

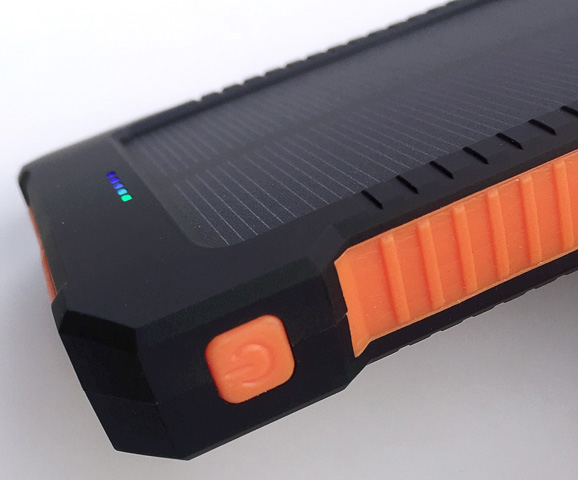
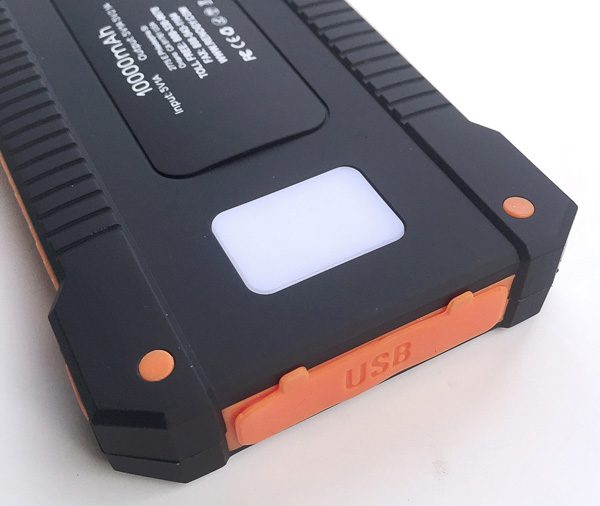
There is a single push button-style power button along the side corner of the device.  It has the same orange silicone coating as described above, which contributes to the device’s water- and dust-resistance.  This button can be pressed to activate charging if it does not begin automatically when something is plugged into it, as I found occasionally happens.

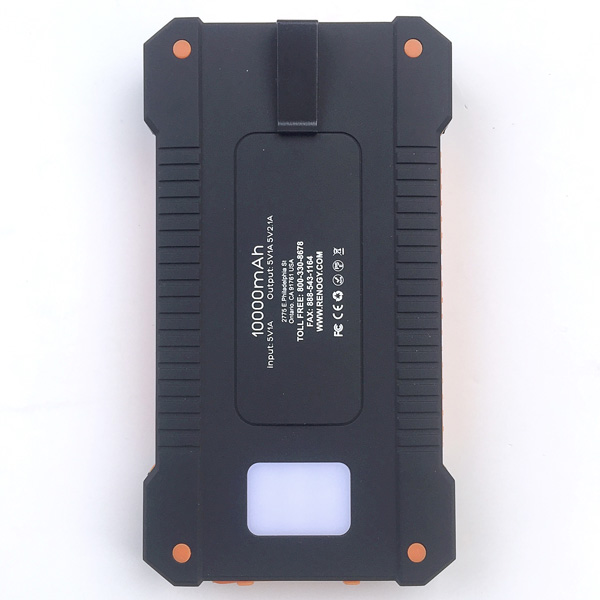
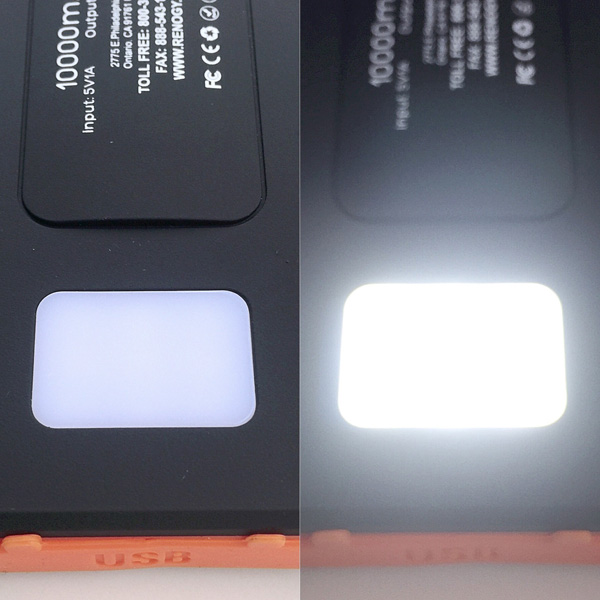
The device is equipped with a light on the back, which is activated by holding down the Power button for a few seconds (see photo above).  Once illuminated, the light can be made to flash in an emergency strobe mode by holding down the button for another xx seconds.  Another press deactivates the light.  The light is bright enough for nearby, but not bright to light your way through a dark woods on a moonless night (it doesn’t throw light very far).

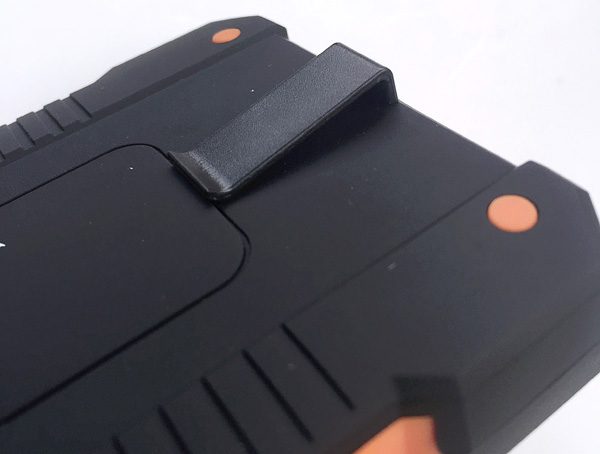
There is a small plastic clip on the back of the device.  Because it’s plastic, it looks and feels a bit flimsy.  I haven’t broken it (yet), but it feels as if it were flexed too far it would simply snap off.

The device’s power level indicator consists of a row of five tiny LEDs.  During charging, the LEDs illuminate to indicate charging status; when the LEDs turn off, the device is fully charged.

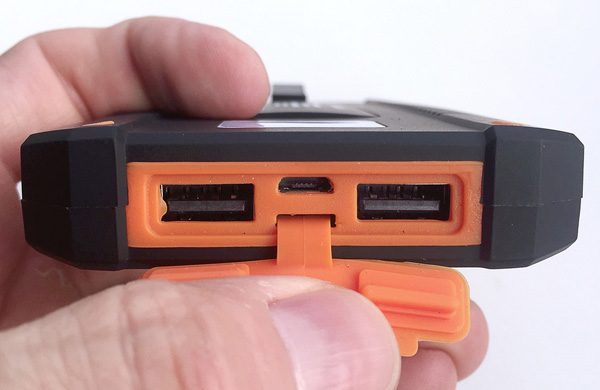
The device has a cover made from the same flexible orange silicone material as described above.  This cover protects all of the ports (see photo below) from dust, water splashes or perhaps even a light rain, but I have my doubts that it would protect the ports against a heavy rain and certainly not against full submersion, at least for very long.

As seen in the photo above, the device has two (2) USB output ports positioned to the left and right a single Micro USB input port. One of the USB output ports provides 2.1A for charging tablets while the other provides 1.0A for charging phones.  I like that it has two output ports to allow charging of two devices simultaneously, but there is no indicator as to which is the 2.1A and which is the 1.0A.  Frustrating.

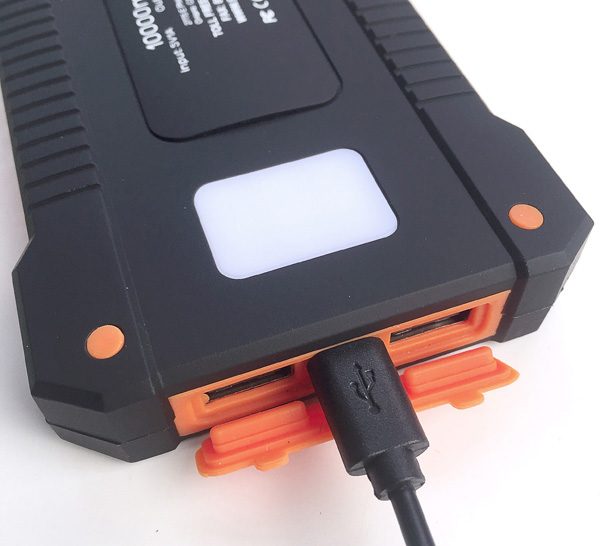
The instruction booklet recommends that the devices primary charging method is via the micro USB input port (see included cable plugged into the input port in the photo above), which does charge the device faster than the solar panel.

The device’s instruction manual recommends solar charging as a backup/emergency charging method only, because it is slower than wall charging via the micro USB port.  However, I noted that the device basically charges any time the solar panel is exposed to a light source, whether it be direct sunlight or artificial light.  As with USB cable charging, when the device is turned toward a light source, the bank of LED lights illuminate to indicate charging status.

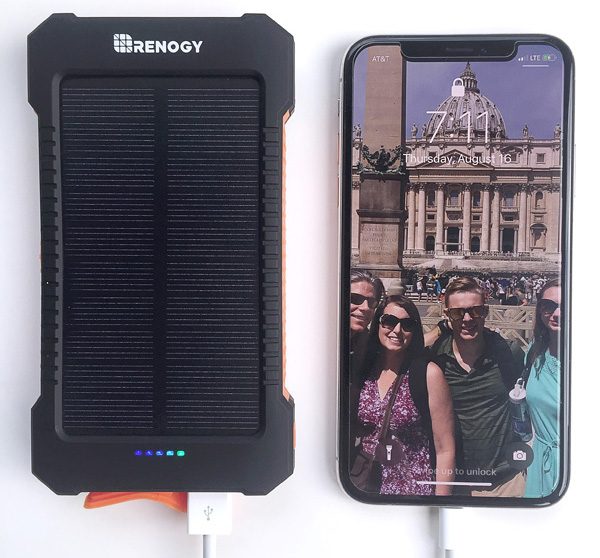
I used the device to charge both my wife’s iPhone X (pictured above) and my iPhone 6 Plus, and it charged both phones at a reasonable rate.  It also charged my Garmin Fenix 3 HR GPS watch without an issue.  However, this device does not include pass-through charging, meaning it cannot be used to charge a device while being charged itself.  This is a big minus for me as when I travel I often take a single portable power bank that has multiple USB ports and use it to charge multiple devices while I charge the power bank itself, rather than take several individual chargers.

What I like

  • Backup solar charging
  • Water-resistant
  • Light with emergency flash mode

What needs to be improved

  • No pass-through charging
  • No way to identify the 2.1A vs. 1.0A USB output ports

Final thoughts

The Renogy 10,000mAh Solar Panel Water Resistant Power Bank is overall a well-built and useful piece of gear.  I like that I can toss it into my EDC ruck and have not only a backup power source for my devices, but the solar panel means I have an emergency source if necessary and also I don’t have to be as concerned about getting it wet or dropping it as I would be with devices that are less rugged. Overall, for its fairly unique feature set, its price of $20.99 seems like a pretty good deal.

Price: $20.99
Where to buy: Amazon
Source: The product sample for this review was provided by Renogy.

Filed in categories: Reviews

Tagged: ,

Renogy 10,000mAh Solar Panel Water Resistant Power Bank review originally appeared on The Gadgeteer on August 26, 2018 at 10:57 am.

Note: If you are subscribed to this feed through FeedBurner, please switch to our native feed URL http://the-gadgeteer.com/feed/ in order to ensure continuous delivery.
GEKO STARLIT S200 Full HD 1080p Dashcam review


REVIEW – I’ve reviewed a couple of dash cams, but both were from the same company (PAPAGO), so I jumped at the opportunity to review the Geko Starlit S200 dash cam so I could see how other cams measured up to those. Turns out the Geko is also made by or at least owned by PAPAGO, so I’m not sure if this is really “another brand”.

What is it?

The Geko Starlit S200 dash cam is a vehicle dashcam that can record day or night Full HD video, or capture photos. It features a 140-degree wide-view lens, Sony Starvis sensor, and a 64GB SD card capability.

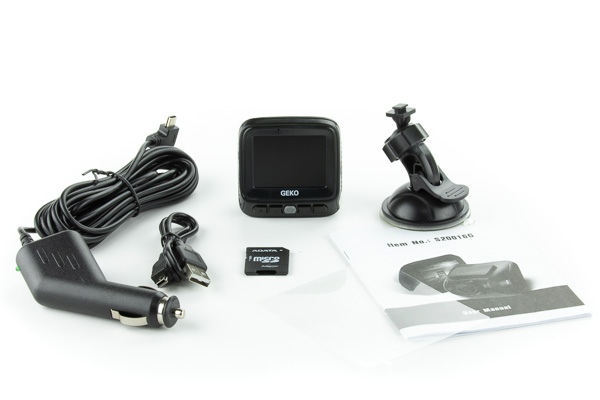
What’s in the box?

  • Geko S200 dash cam
  • Adhesive mount
  • Suction cup mount
  • Window Mount sticker
  • Power cord
  • Mini-USB cord
  • 16GB micro SD Card and Adapter
  • User Manual


Design and features

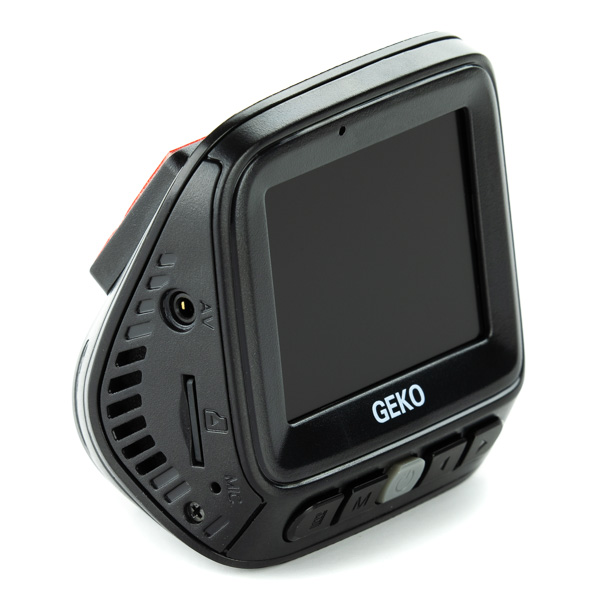
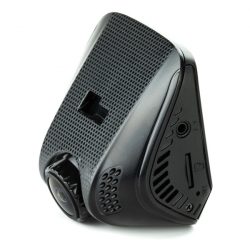
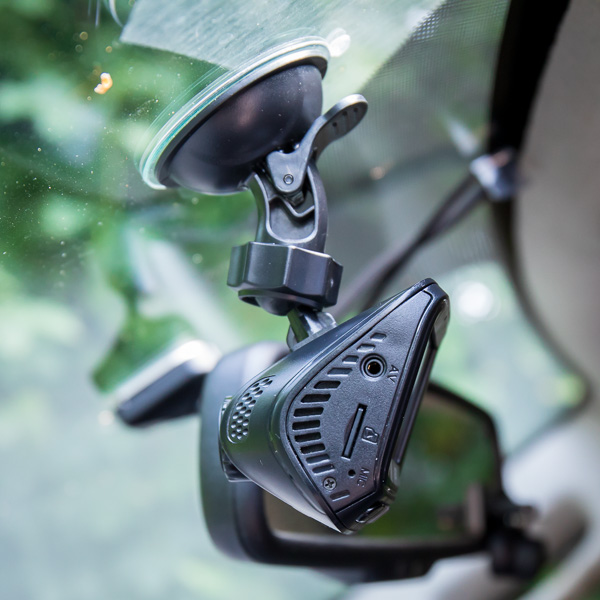
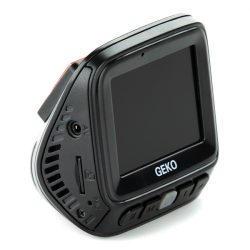
The Geko S200 is pretty much your typical dash cam, featuring a 2-inch screen and five control buttons. It comes with 2 mounting options, a window sticker with an adhesive mount and an adjustable suction cup mount.

The S200 can record in 1280×720, 1920×1080, or 1728×1296 resolutions. The photo capture mode can record in various sizes up to 14mp. The video mode can capture in 1080p at 30 frames per second, h.264 mov format.

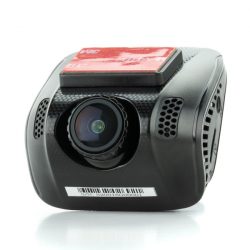
I had difficulty using both mounts in my pickup truck. The adhesive mount wasn’t the correct angle for my windshield and the suction cup mount would not adjust to an angle that I could see the screen correctly, however, the camera view was correct. The lens pivots and adjusts, but it doesn’t appear to stay where you put it. It appears as though they designed this camera to be high on the windshield and for a driver that sits lower in the seat.

The video captured by the camera is outstanding. The Sony Starvis sensor in this camera really is one of the best. Signs and license plates could be made out at a fair distance, and the image was clear even when driving into the setting sun.

Daytime
Sunset
Night time

The Geko S200 has the ability to playback captured video and photos, which is something that the other dash cams I reviewed didn’t do. I had assumed that was simply because it took more processing power to playback than to record, but apparently, it is possible in these small devices.

I found the buttons a bit hard to press. When you press them it requires enough force that it also moves the camera position. There’s no reason to have such buttons on a device like this where you won’t really be accidentally pushing the buttons.

The Geko S200 has three modes: Video, Photo, and Playback. The video mode is self-explanatory, capturing video as you drive. The photo mode will take a single photo, or multiple photos at specified intervals of 2, 5, or 10 seconds. The Playback mode will allow you to view videos and photos that reside on the memory card.

It took me quite a while to figure out how to get the camera to switch between video, photo or playback mode while it was plugged in. The menu system gets locked at various times, which is indicated by a key icon on the screen. To enter the settings, you have to press the power button to unlock it. That’s very non-intuitive.

The S200 also has G-Sensor-enabled recording that detects impacts, drastic braking, or sharp turns and will save the video so it will not be overwritten. As a typical dash cam does, when the memory card is full, it deletes the oldest clips so that you’re always recording. The camera can record loops in the following lengths: None, 3 min, 5 min, or 10 min.

The following is a list of the menus. The included manual includes what settings are possible with each menu. You can download the manual PDF here.

Video Mode Menus
Resolution
Loop Recording
HDR
Exposure
Motion Detection
Record Audio
Date Stamp
GSENSOR
Date/Time
Parking Monitor
Beep Sound
Language
Screensavers
Frequency
Format
Default Setting
Version

Camera Mode Menus
Capture Mode: Single, 2, 5, 10-second intervals
Resolution: 2M to 14M
Sequence: On/Off
Quality: Fine/Normal/Economy
Sharpness, White Balance, Color, ISO, Exposure
Anti-Shaking: On/Off
Quick ReviewOff/2 sec/5 sec
Date Stamp: On/Off

One thing that I really didn’t care for is the on-screen icons that are always visible. This includes a battery icon that is always blinking when the camera is plugged in.

Sample Video

Night video starts at 3:00 minutes into the video.

What I like

  • Excellent video quality
  • Video playback capability

What needs to be improved

  • Too many on-screen icons
  • Mounting bracket needs to be designed differently
  • Constant blinking battery icon
  • Hard to press buttons

Final thoughts

The S200 records great video and photos, which would be expected for an item at this price point. The playback feature is very nice and could be quite handy if you needed to transfer a video file via a smartphone or tablet while away from home. However, the camera and screen positioning features leave much to be desired unless you just happen to have the right vehicle.

Price: $159.99
Where to buy: BestBuy
Source: The sample of this product was provided by Geko.

Filed in categories: Reviews

Tagged: ,

GEKO STARLIT S200 Full HD 1080p Dashcam review originally appeared on The Gadgeteer on August 26, 2018 at 9:00 am.

Note: If you are subscribed to this feed through FeedBurner, please switch to our native feed URL http://the-gadgeteer.com/feed/ in order to ensure continuous delivery.
Moshi Tego Slingpack bag review

REVIEW – Messenger style bags are my favorite type of gear bags. I sometimes think I want to try switching to a backpack, but as soon as I do, I go right back to a messenger bag. I like them because they have one strap that you can wear cross body and they typically have a large flap that you can flop back for full access to all the stuff inside. But what about when I want to travel light and don’t want a full-sized messenger bag hanging off my back? For those times, I’m trying to find something smaller like the Moshi Tego Slingpack. Let’s check it out.

What is it?

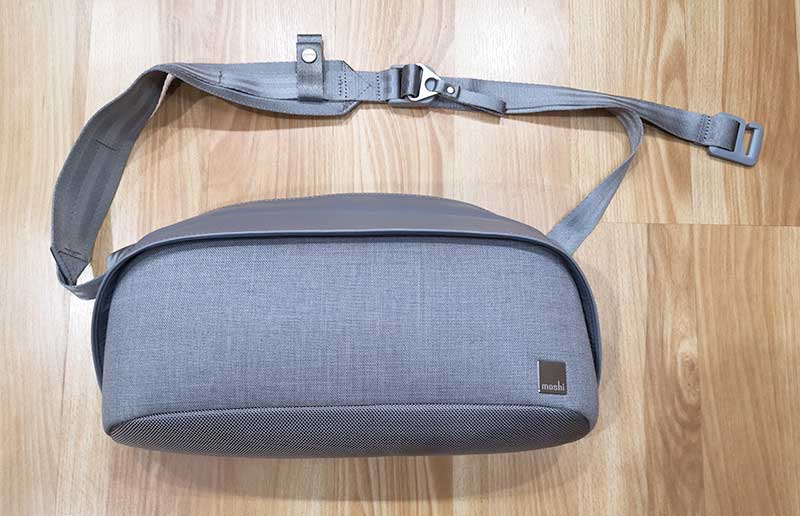
The Moshi Tego Slingpack is basically a miniature (12.8″ x 3.54″ x 9.45″ (32.5 x 9 x 24 cm)) messenger bag that is available in 3 colors including the stone grey version that was sent to me.

Design and features

The Slingpack is small. Much smaller than my everyday messenger bag. But the Slingpack isn’t designed to hold a lot of gear, it’s designed to allow you to carry just the essentials.

It’s made of a weather-resistant material that is cut resistant and has a 3M Scotchlite reflective strip so people can see you at night.

The front of the bag has a small metal Moshi badge on one corner but that’s all. There aren’t any zippers on the front because the bag has been designed to be theft resistant.

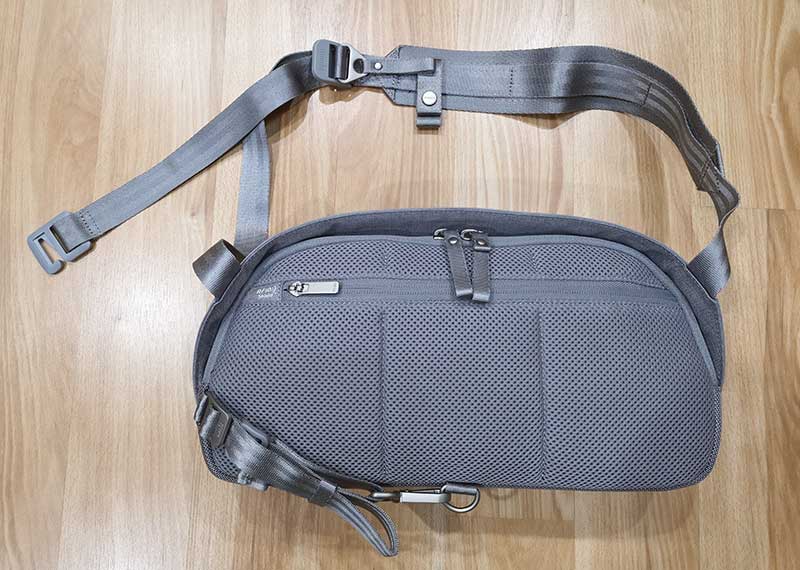
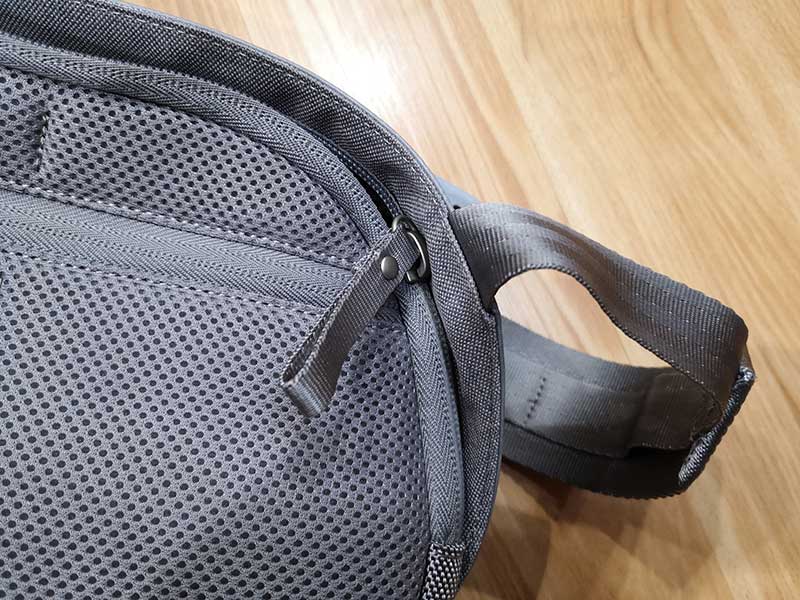
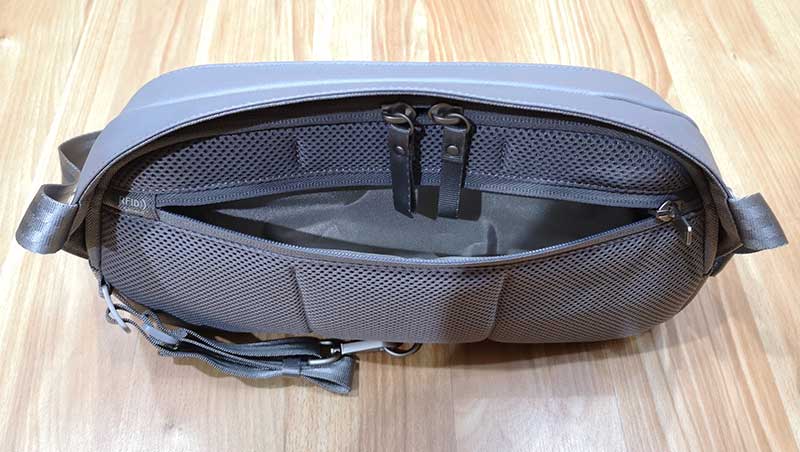
The zippers are located on the airmesh padded back side of the Slingpack which will be against your body when you’re wearing it.

There are two sets of zippers. There are dual zippers that open the main compartment and there’s another zipper which provides access to a flat RFID protected pocket that you can use to hold your wallet or credit cards.

I immediately had a problem with the Moshi Tego Slingpack when I tried to unzip the main compartment. Although there are two zippers with handy pull loops, pulling the zippers around the corners of the bag is awkward and close to impossible while wearing the bag and it doesn’t seem much easier if you take the bag off to unzip it. I tried pulling and twisting the zipper in different ways but no matter what I tried, unzipping around the corners is not quick and not easy.
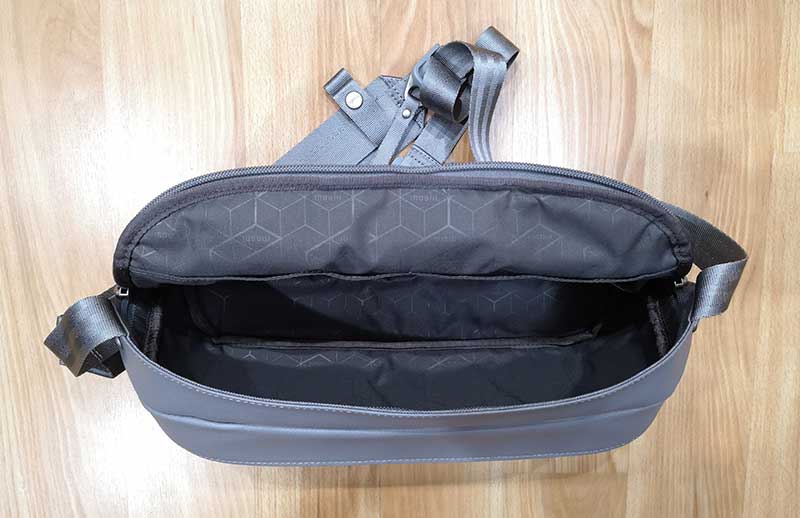
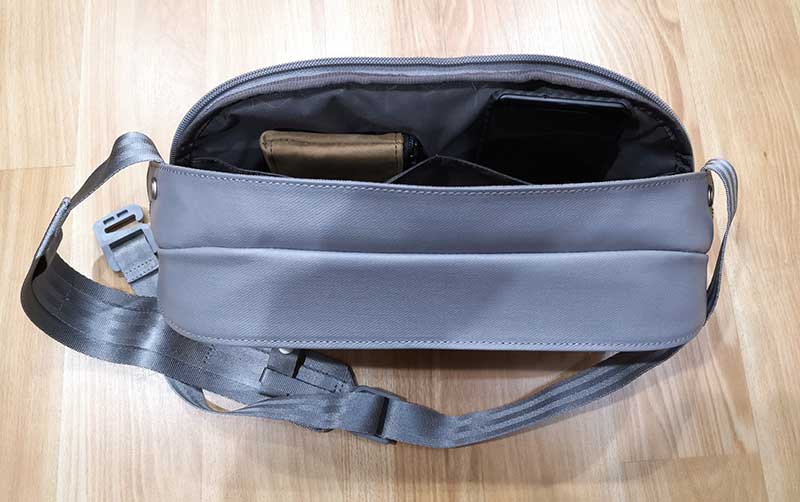
Once you are able to fully unzip the main compartment, you’ll be greeted with a deceptively small but roomy storage area with two organization pockets on the back wall of the bag.
The pockets are sized to be able to hold a phone, wallet, etc. Shown in the image above, I have a Waterfield Design Finn Access wallet in the left pocket and a Pixel 2 XL smartphone in the right pocket.

The other zippered pocket on the back of the Slingpack is RFID protected, so it’s handy for storing your wallet or passport so people can’t steal your info.

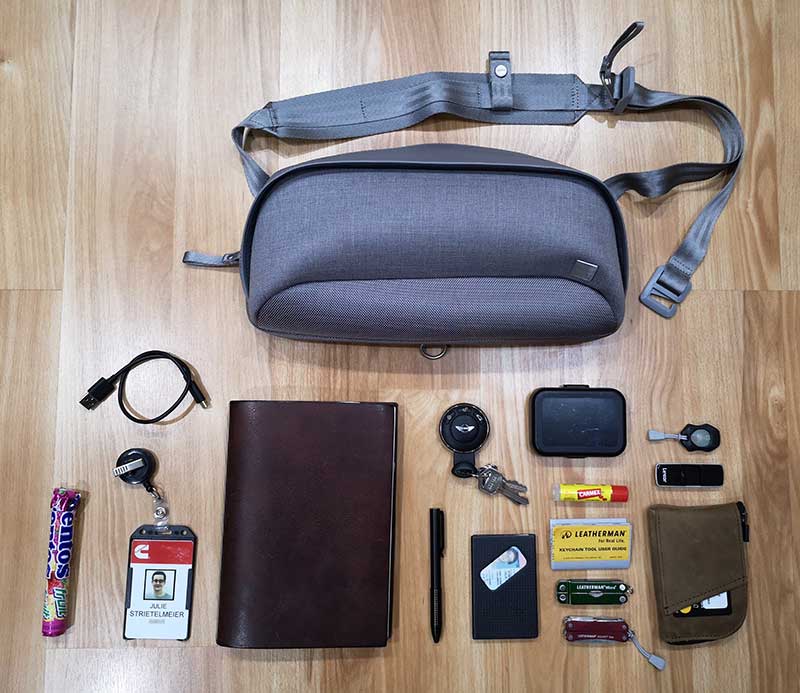
To give you an idea of what this bag can hold, here’s a picture of what I’ve been carrying in it while I’ve been testing it. This little bag can hold quite a bit of gear.

From left to right: Mentos fruit candies, short USB-C charging cable, Cummins badge, X47 journal, Big Idea Design TI Pocket Pro pen, MINI Cooper car fob, Identity wallet, Dunu Titan-1 earphones, Carmex lip balm, Leatherman Micra user guide, Leatherman Micra, Leatherman Squirt, Photon X-Light Micro LED flashlight, Lexar USB flash drive, and a Waterfield Design Finn Access wallet. Not pictured is my Pixel 2 XL.

If you have an 8-inch or smaller tablet, Moshi says that it will fit in the Slingpack. I don’t have a tablet that small so I wasn’t able to test this claim.

The Moshi Tego Slingpack is designed to be worn crossbody style like you can see above. To give you an idea of the size of the bag vs. my size. I’m 5 foot 6 inches and weight about 129 lbs.

The adjustable seatbelt style shoulder strap is comfortable and features a quick release system that makes it easy to loosen and tighten with just one hand. Note that the bag is configured to be worn across your left shoulder and can’t be switched.

There’s also an ActiveStrap that can be used to provide extra stability if you wear the bag while riding a bike and don’t want it to shift around. Note that the ActiveStrap can be removed if you don’t want or need to use it.

What I like

  • Attractive and compact
  • Comfortable to wear
  • Despite the small size, it can hold a lot of gear
  • RFID pocket

What needs to be improved

  • Zippers to the main compartment are difficult to fully unzip

Final thoughts

The Moshi Tego Slingpack is well made and looks great. If it wasn’t for the awkwardness of the zippers for the main compartment, I’d say that it is a great little crossbody style bag. But the zipper problem pretty much killed it for me. If I can’t quickly get to the contents in my bag then I’m not going to use the bag.

Price: $119.95 MSRP
Where to buy: Amazon
Source: The sample for this review was provided by Moshi.

Filed in categories: Reviews

Tagged:

Moshi Tego Slingpack bag review originally appeared on The Gadgeteer on August 25, 2018 at 11:00 am.

Note: If you are subscribed to this feed through FeedBurner, please switch to our native feed URL http://the-gadgeteer.com/feed/ in order to ensure continuous delivery.