AirSelfie2 flying camera review

REVIEW – Everyone either has or wants a drone and it’s hard to fault them because drones are both fun and useful. They are fun because you can capture awesome video from locations that you would otherwise never be able to do. And drones are useful because you can use them to see things like your roof, gutters, etc, without climbing a ladder. All this fun and usefulness can also equal an expensive and bulky gadget. Let’s check out the AirSelfie2 pocket-sized flying camera and see if it’s just a toy or a worthy pocket drone.

What is it?

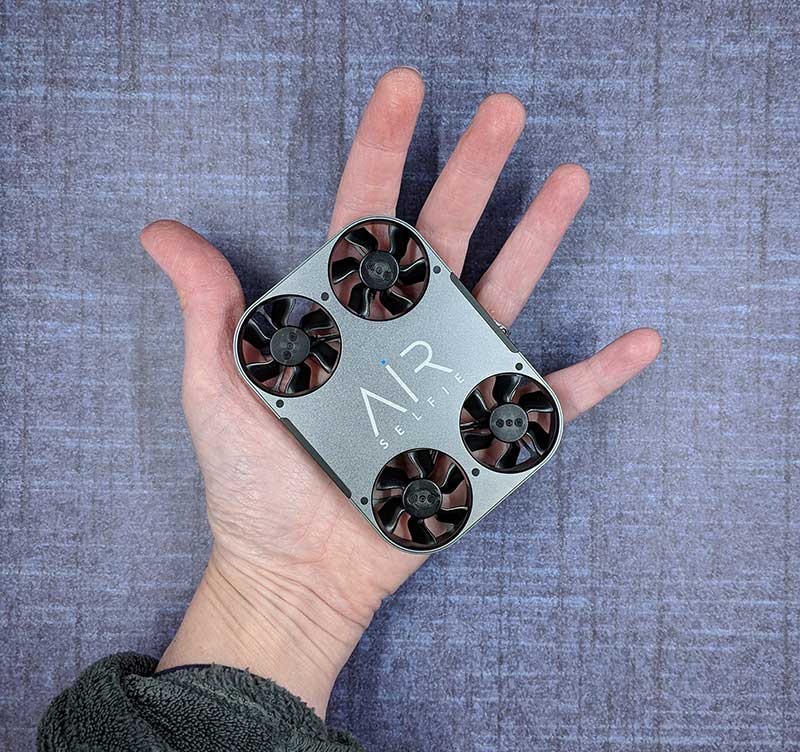
The AirSelfie2 is the 2nd generation AirSelfie flying camera which is a small playing card deck-sized drone that is designed to… you guessed it… take selfies and capture video.

What’s in the box?
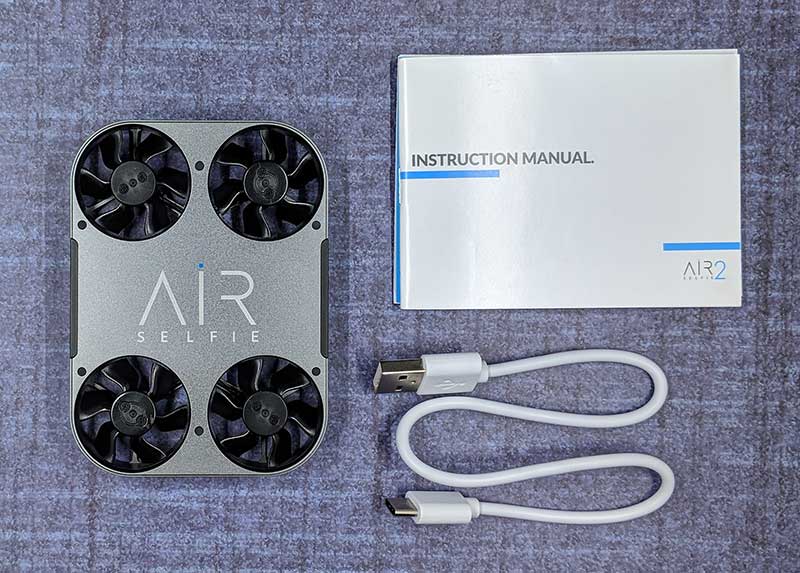
  • AirSelfie2 drone
  • USB-C charging cable
  • Storage case (this was missing with my sample)
  • Instruction manual

Hardware specs

Video:1080p 30fps – Photo:12MP wide-angle (81°)
Wide-angle: ƒ/2.0 aperture
Gyro/Barometer/Geomagnetic sensor
Brushless motor
Built-in Micro SD card 16GB
400mAh 7.4v Built-in Battery
2.4G Wi-Fi
Control distance 65 feet / 20 meters
Size:98.5 x 71.2 x 13.6mm (3.8”x2.8”x0.5”)

Design and features
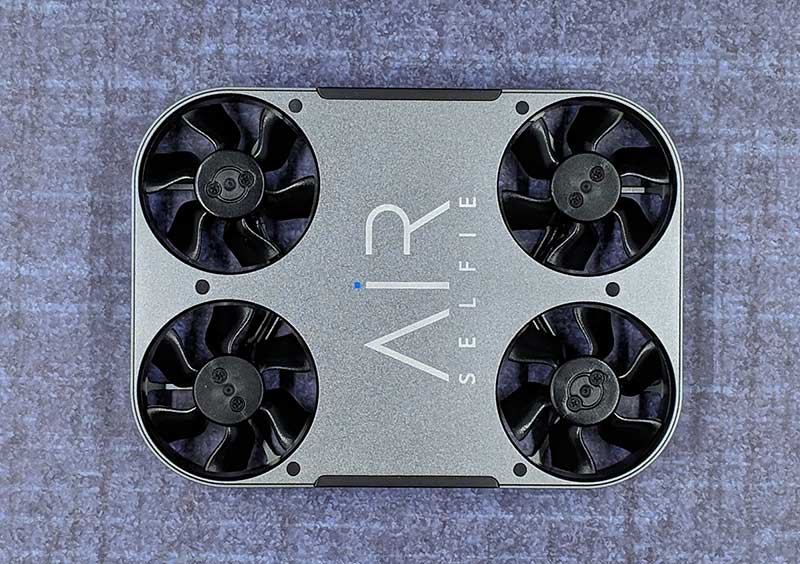
The AirSelfie2 is a sharp looking little drone with a gray metal colored aluminum housing and four propellers.
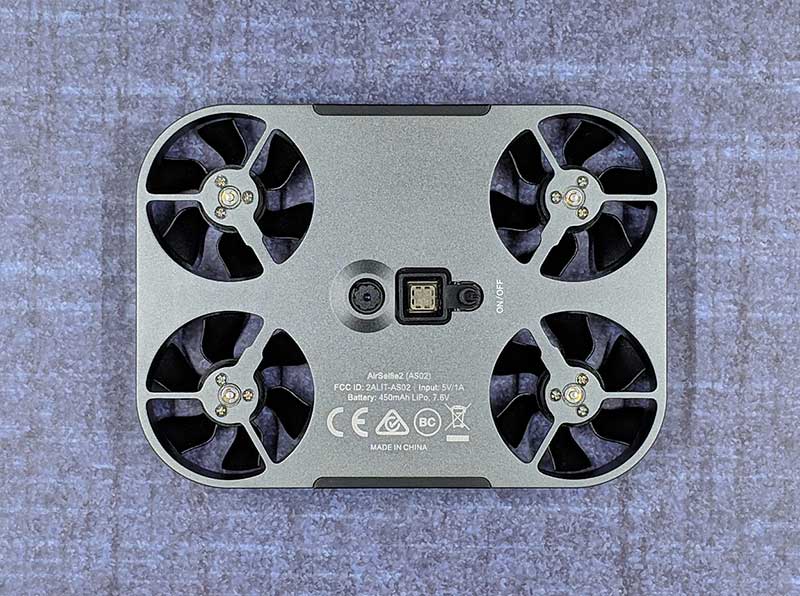
On the bottom side of the drone, you find two sensors and the power switch. The round sensor on the left is the visual sensor and the square sensor next to it is the sonar sensor. The small button on the right is the power switch which you have to hold in for a few seconds to toggle power.
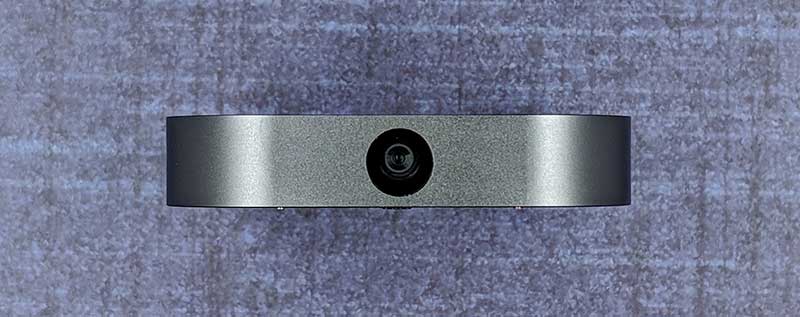
There’s a 12MP camera one end.
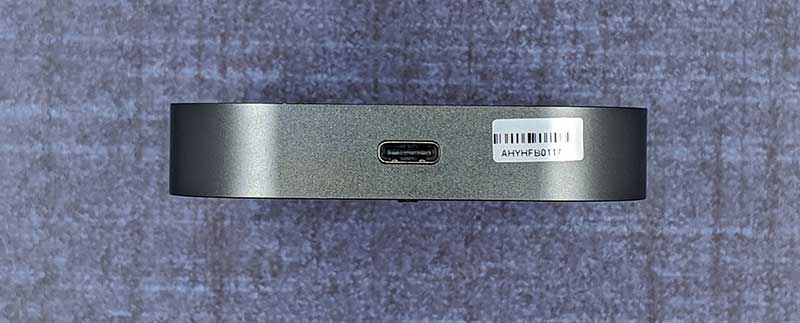
And on the opposite end, you’ll find a USB-C charging port.

The AirSelfie2 looks like a gadget that James Bond would use on a mission. Although it’s lightweight, it doesn’t look or feel like a toy. It’s well made and the design looks much more robust than some small plastic drones I’ve tested in the past.

Let’s fly!
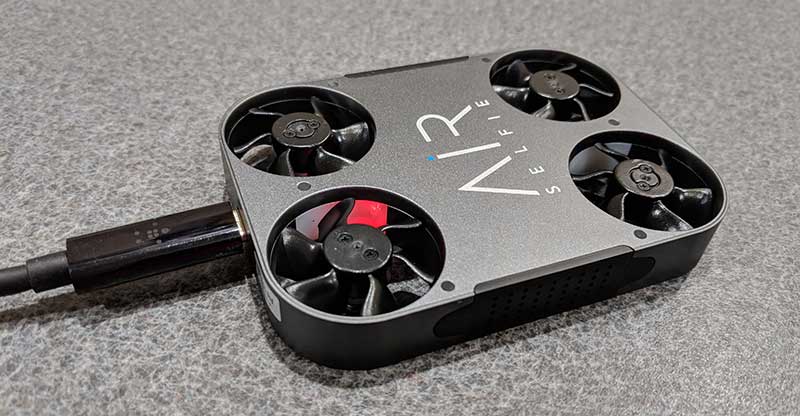
Before you can fly the AirSelfie, you have to charge it using the included (or any) USB-C charging cable. It takes about an hour to fully charge the battery from fully empty to full which provides up to 5 minutes of flight time. While charging, an LED in one of the propeller areas glows red. When charging is complete, the LED turns off. This status LED also glows blue when the AirSelfie is powered on.

You will also need to install the iOS or Android Airselfie app on your phone or tablet. I tested the AirSelfie2 with my Pixel 2 XL.


The app doesn’t use Bluetooth to control the drone. It generates its own WiFi connection. Each time you want to fly the AirSelfie, you have to power it on, launch the AirSelfie app, and then go into your WiFi settings to connect to the AirSelfie’s WiFi.


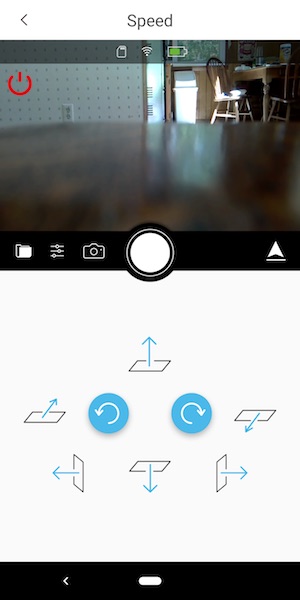
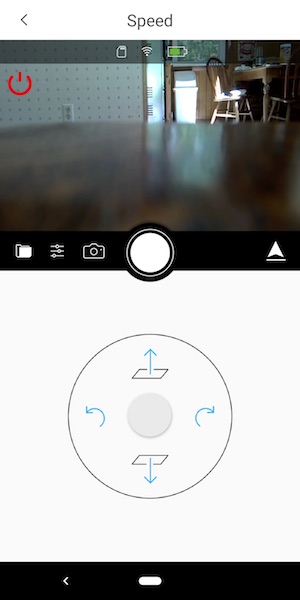
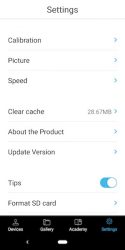
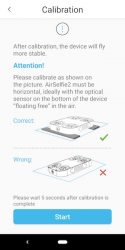
The app is pretty basic, It offers 3 different flight control styles, a way to calibrate the drone, and a few settings that you can customize. The flight control styles include an easy one-handed version shown above on the left and a slightly harder one-handed version on the right which controls the drone by physically tilting the phone in the direction that you want it to fly.
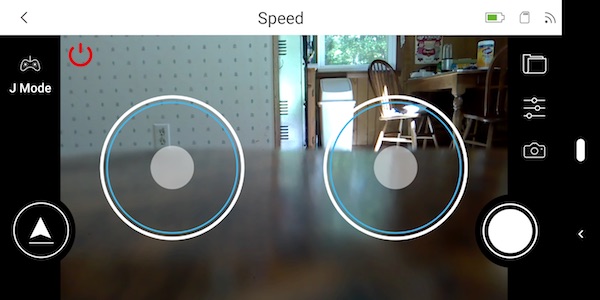
The other two control styles are two-handed joystick style touchscreen controls.
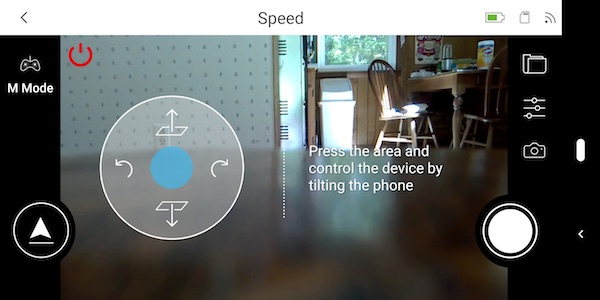
I tried all of the control styles but I kept going back to the easy (first style) because it’s easier. Go figure 🙂

I thought the AirSelfie sample that was sent to me was defective because I couldn’t get the propellers to spin up when I would press the arrow button in the app. It took me a while to figure out that you need to press and hold that button for a few seconds to start the propellers. Then you have to place the drone on your flat palm with the camera facing you and toss it gently in the air. It might sound scary, but launching it is easy. Landing it is a bit harder. You’re supposed to bring your hand up under it and grab it. Most of the time when I did this, the propellers would spin fast like the AirSelfie was a captured bug trying to get away. I finally learned that you have to grab it and raise your hand to signal it to turn off.

Pics and video


Since the AirSelfie2 is marketed as a flying camera, I had hopes that it would be a good flying camera and taking pictures and capturing video with the app was easy when it worked. But regularly, I’d see a capture failed message on the screen when I’d tap the shutter button. To fix this issue, I would have to restart the app and/or cycle power on the AirSelfie. I found this to be an annoying problem that seemed to happen right when I could have captured a decent selfie.


Most of the time my selfies were at weird angles or chopped off half of my body. Indoor selfies just look ok although I think they are a little dark and on the flip side, outdoor selfies can be completely blown out if it’s a sunny day. Click the images above to see the full-sized picture.

The AirSelfie2 can also capture video. Video without sound though… which is to be expected because the propeller noise would drown out any other noise. Check out the video below that shows how to fly it and video from the AirSelfie2 itself.


From the short video, you can tell that the AirSelfie2 is NOT a stealth drone. It makes quite a bit of noise and the video capture quality is about the same as the image capture quality – not stellar. It also drifts while hovering, so you end up cutting off half a person when you press the shutter button.

What I like

  • Tiny pocket size
  • Good build quality

What needs to be improved

  • Image and video quality
  • Drifts while hovering
  • Short flight time (3-5mins)
  • Would be nice to have a self-landing feature so you don’t have to grab it out of the air

Final thoughts

I tested the AirSelfie2 on multiple occasions and had the same results each time. The images that this little flying camera capture just arn’t that good for a $200 camera. Yes, the device is cool, but cool only goes so far. My advice is to save your money and buy a drone from a brand name that has 3 initials and a built-in gimbal 🙂

Price: $199.95
Where to buy: Amazon
Source: The sample for this review was provided by AirSelfie.

Filed in categories: Reviews

Tagged: ,

AirSelfie2 flying camera review originally appeared on The Gadgeteer on September 14, 2018 at 9:00 am.

Note: If you are subscribed to this feed through FeedBurner, please switch to our native feed URL http://the-gadgeteer.com/feed/ in order to ensure continuous delivery.


Blue Yeti Nano USB microphone review

REVIEW – What if you took the Yeti USB microphone and took a shrink ray to it? That was my thought when I saw the Blue Yeti Nano microphone. But how does it sound, and what features would be missing from the smaller package? I tried out the Nano to find out.

What is it?

The Yeti Nano is a high-quality USB microphone designed for professional podcasting that comes in four different colors.

Hardware specs

Power Required/Consumption: 5V 150mA
Sample Rate: 48kHz
Bit Rate: 24bit
Capsules: 2 Blue-proprietary 14mm condenser capsules
Polar Patterns: Cardioid, Omnidirectional
Frequency Response: 20Hz – 20kHz
Sensitivity: 4.5mV/Pa (1 kHz)
Max SPL: 120dB (THD: 0.5% 1kHz)
Dimensions (mic w/stand): L: 4.29” (10.9cm) W: 3.78” (9.6cm) H: 8.31” (21.1cm)
Weight: 1.39lbs (0.63 kg)
Headphone Amplifier
Impedance: >16 ohms
Power Output (RMS): 130mW
THD: 0.009%
Frequency Response: 15Hz – 22kHz
Signal to Noise: 100dB
System Requirements
Operating System: Windows 7, 8.1, 10 or macOS (10.10 or higher)
USB Compatibility: 1.1/2.0/3.0

What’s in the box?

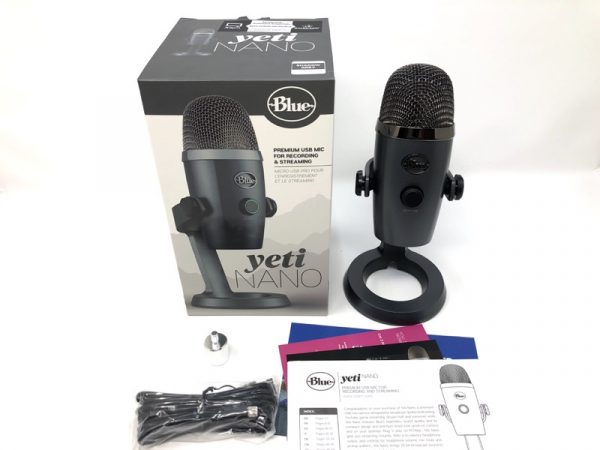
Yeti USB microphone (including desktop stand), USB cable, 3/8” to 5/8” adapter

Design and features

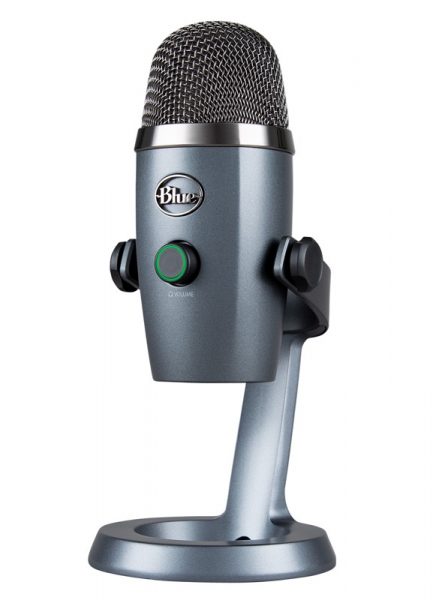
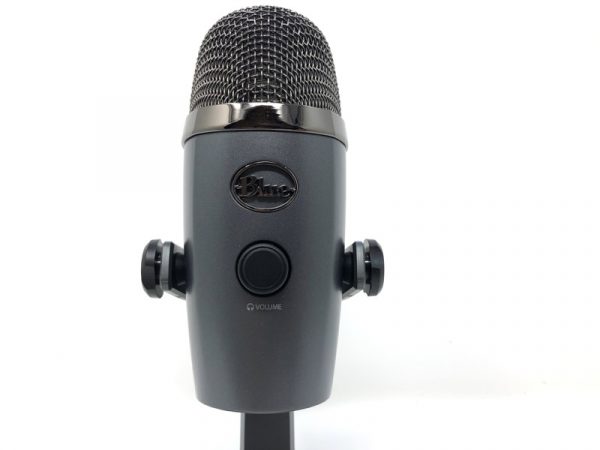
The Nano really does look like a smallish version of the regular Yeti. It comes attached to a handsome desk stand.

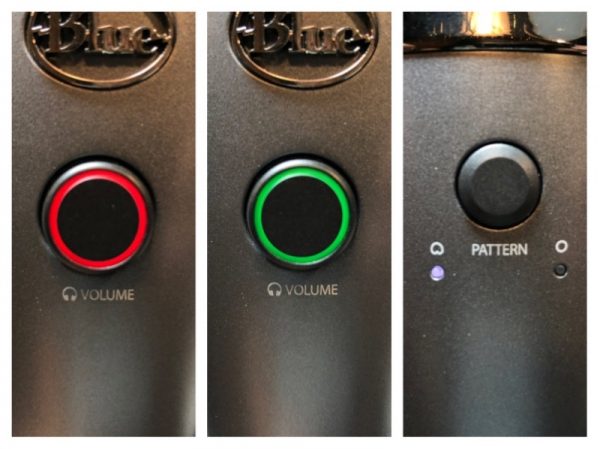
The only control on the front is a volume knob. It also doubles as a mute button.

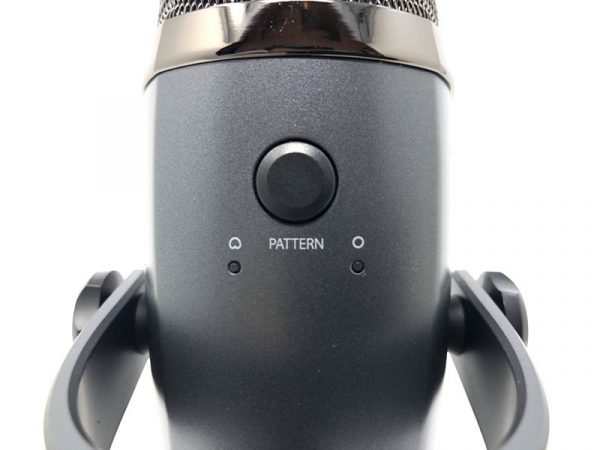
There’s only one button on the back to select between microphone patterns. You can choose between cardioid or omnidirectional.

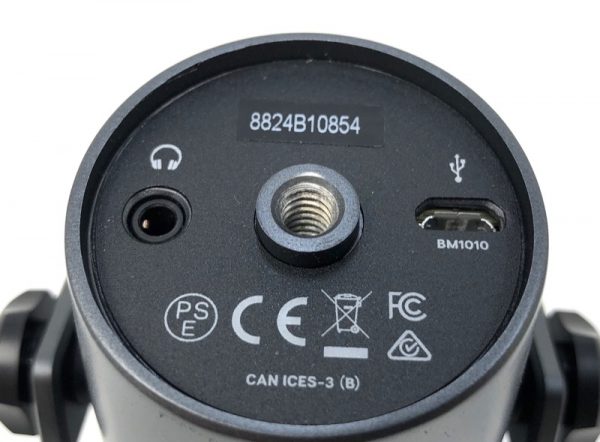
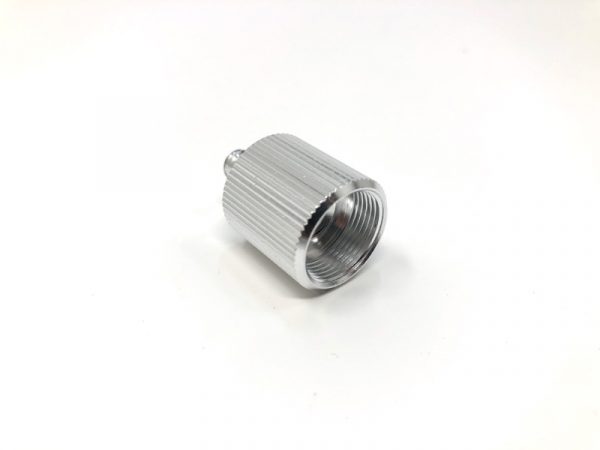
I was elated to find a threaded adapter on the bottom for boom stand users like me. There’s also a low-latency headphone jack and a microUSB port.

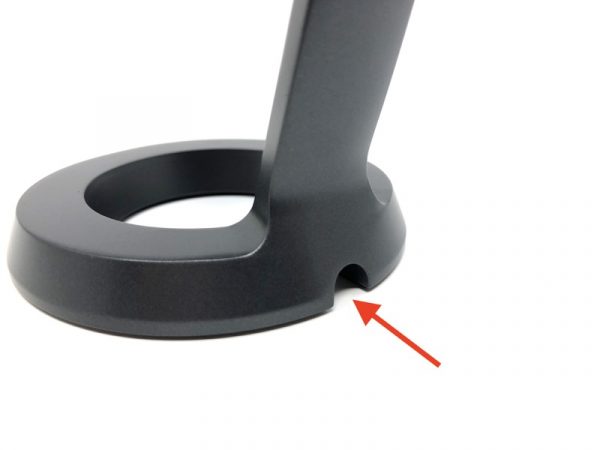
Here’s a nice design feature: There’s a notch at the base of the stand to allow your cables to exit gracefully. I like it!

Blue was good enough to include a threaded adapter so you can use a standard microphone stand.

Setup

The Nano was detected by my Apple laptop without issue. Once powered up, the volume knob turns red for mute, and green for on. Pressing the rear button toggles between mic patterns.

Performance

I returned to my recording booth and placed the Nano next to my studio mic, the Neumann TLM103 connected to a tube preamp.

Then, I spoke an excerpt from “Mrs. Frisby and the Rats of NIMH” and recorded on both mics simultaneously. No processing was done whatsoever. The Nano was plugged directly into the computer with no further modification.

What I like

I have no complaints about the sound quality of the Nano- unless I compare it to my studio mic. It’s a very unfair comparison because my Neumann mic setup plus tube preamp costs over 10x as much vs. the Nano. However, there’s a LOT of fiddling involved to get my studio setup dialed in just so. There’s virtually no setup at all with the Nano. It is the closest thing to plug and play.

I also noticed that the Nano “only” comes with two mic patterns (cardioid and omni), but it’s all most podcasters or voiceover artists would need. If you need a figure-8 pattern for interviews with a single mic, you’d be better off with the standard Yeti.

What needs to be improved

None. For this price, it’s hard to go wrong.

Final thoughts

If you’re looking for a starter USB mic that has everything you need and nothing you don’t, the Yeti Nano is a fine choice.

Price: $99.99
Where to buy: Blue Designs and Amazon
Source: The sample of this product was provided by Blue Designs.

Filed in categories: Reviews

Tagged:

Blue Yeti Nano USB microphone review originally appeared on The Gadgeteer on September 13, 2018 at 11:30 am.

Note: If you are subscribed to this feed through FeedBurner, please switch to our native feed URL http://the-gadgeteer.com/feed/ in order to ensure continuous delivery.
Etymotic ER3XR earphone review

REVIEW – Etymotic is not an audio company the public knows much about. However, they’ve been around for a while and are famous among hard-core earphone fans. Part of the reason is that Etymotic has a sound signature they strive for and nothing will cause them to deviate from it. Each of their models—from the early ER4 line of earphones to the latest—have supported their mission of replicating music as realistically as possible, even if that alienates some people. You see, many feel Etymotic earphones are light on bass, but it’s more accurate to say that most people like and want artificially enhanced bass—and that’s not what Etymotic does. Heck, even I’m guilty of wanting that extra bass kick—even if it is fake. So with the new ER3XR earphone, Etymotic has attempted to please some bass fans while still adhering to their core goal of accuracy. Did they succeed?

What is it?

The Etymotic ER3XR earphones are an earphone that has been enhanced with what Etymotic calls an extended bass response. This intrigued me because it almost sounded sacrilegious what Etymotic was selling. To get to the chase, my worry was premature. Etymotic has managed to retain their uber-accuracy while slightly warming up the sound … and I do mean slightly. 

Specs

  • Frequency response: 20Hz-16kHz
  • Driver: Balanced armature micro driver
  • Noise isolation: 35-42 dB
  • Impedance: 22 Ohms
  • Max. Output: 120 dB
  • Cable: 4 ft. detachable
  • Warranty: 2 years
  • Custom-fit option: Yes

Design and features

A few things immediately become apparent regarding the ER3XR earphones that make them seem like a throwback to earlier times (like, two years ago):

  • They are not wireless
  • There is no microphone or remote control
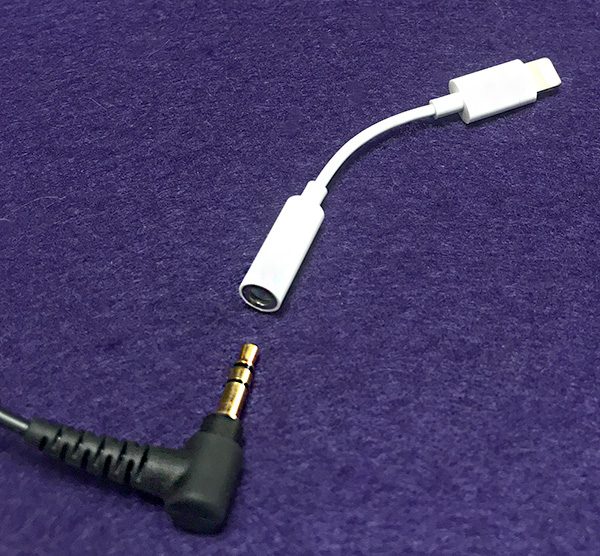
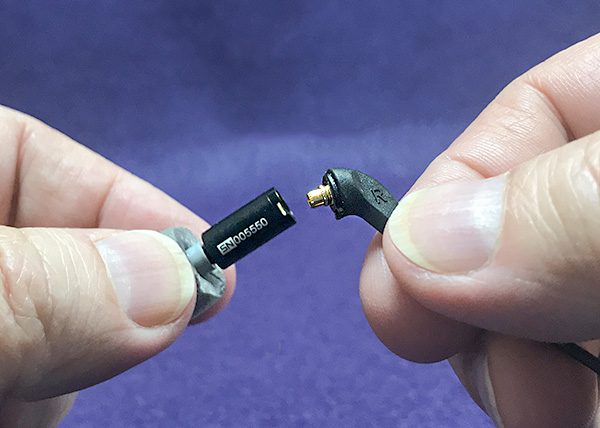
  • They have a mini plug meaning that if you have a smartphone without a jack, you’ll need a dongle

Having said that, there is nothing “retro” about the sound. As I said earlier, the ER3XR earphones retain that Etymotic sound signature—but slightly different.

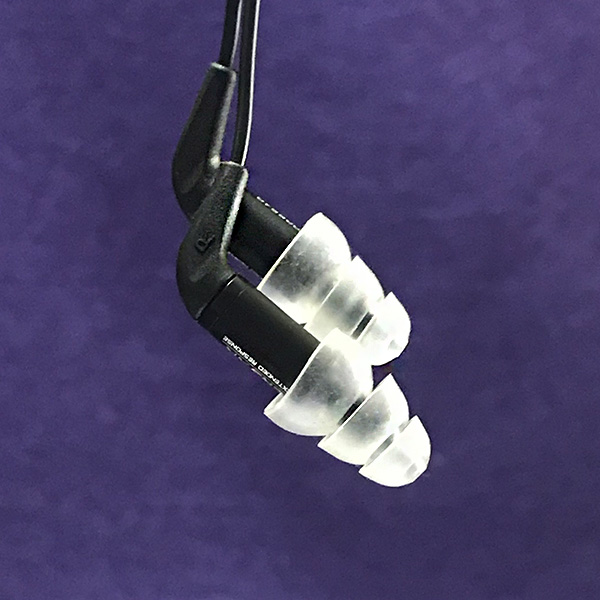
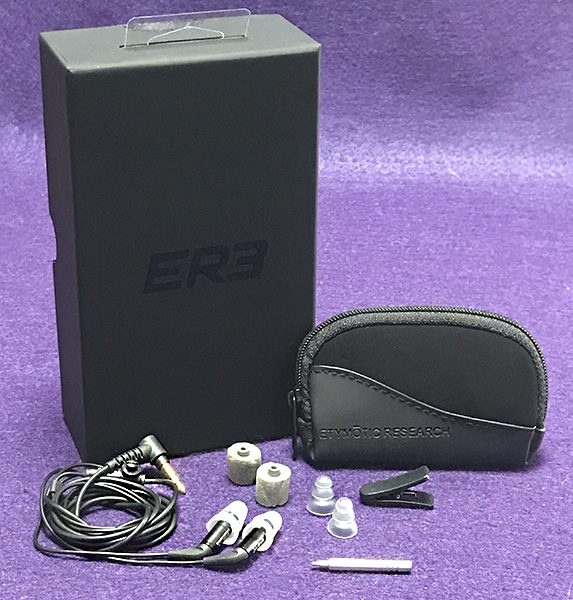
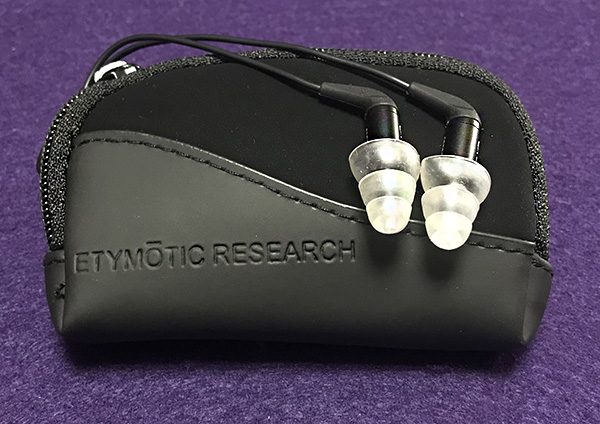
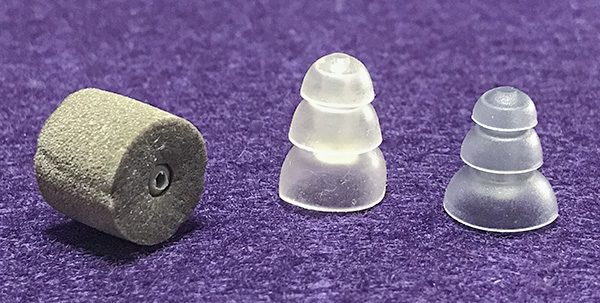
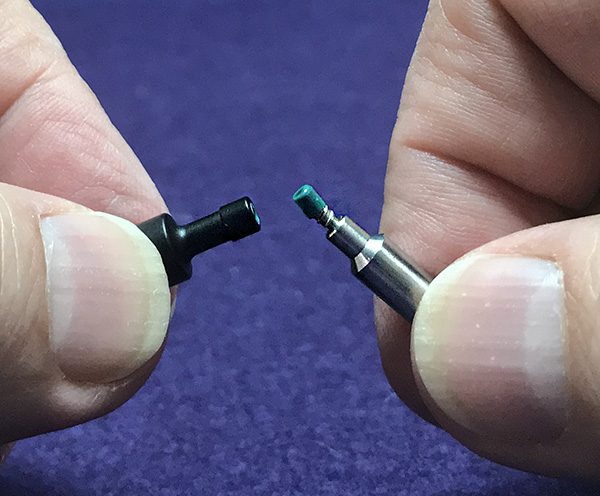
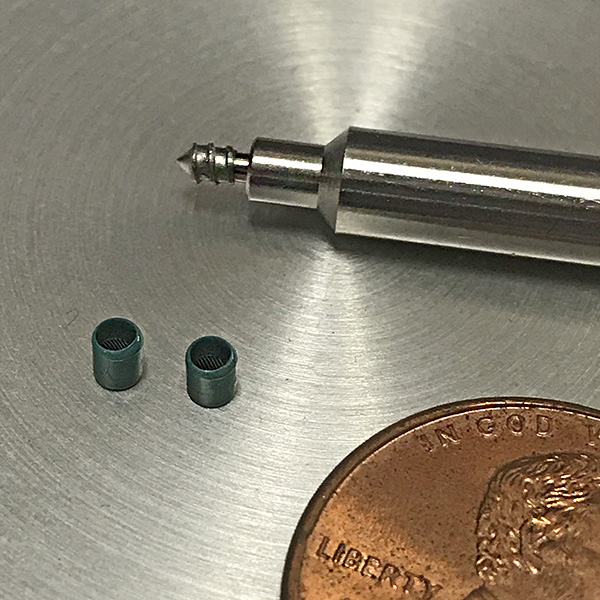
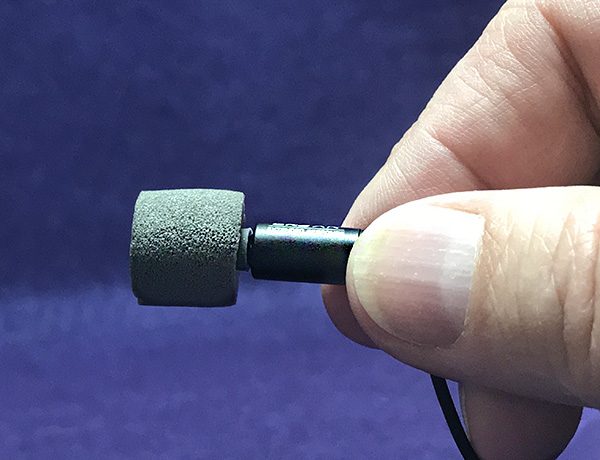
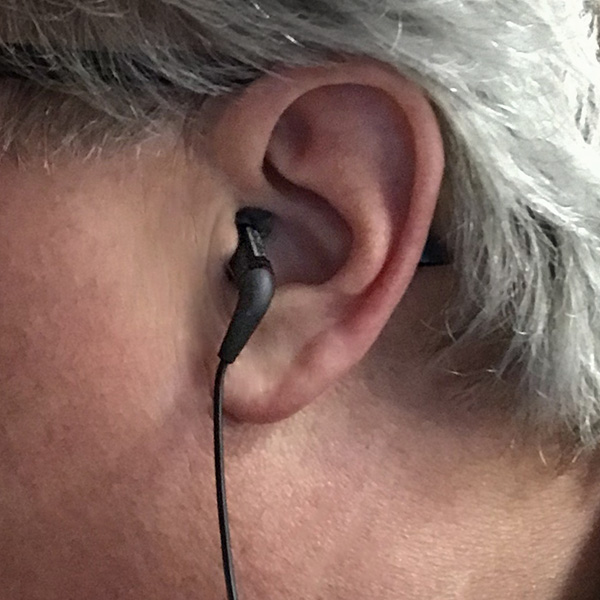
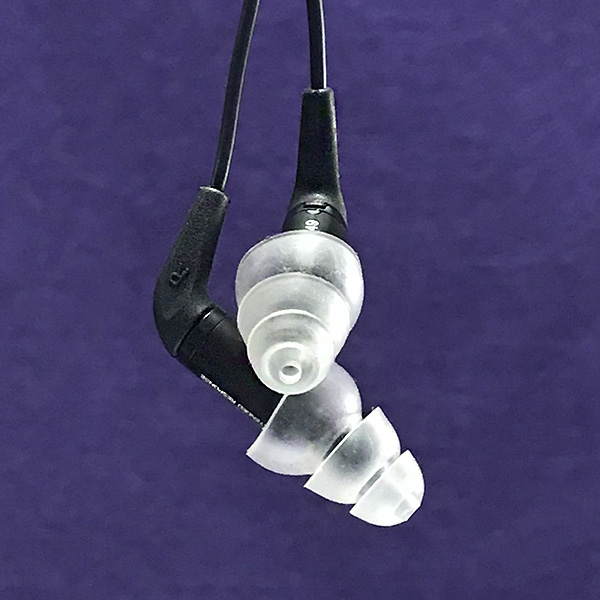
The ER3XR earphones come with a minimum ear tip selection. There are two sizes of triple-flanged silicone tips and one pair of squeezable foam tips that are great at isolation. Also included are extremely tiny filters that protect the interior of the earphone shell and a tool made for swapping them out. There is an included zippered carrying case for keeping the earphones clean. The cable is detachable—a nice change for Etymotic at this price level. 

The ER3XR earphones are an armature-based speaker design. What does this mean? Armature speakers come from the hearing aid industry. The drivers are tiny and operate in a different way than the more common dynamic speaker drivers. Dynamic speakers look just like tiny versions of familiar speakers. Dynamic speakers are usually less expensive, a bit smoother and more bass friendly, but this comes at the expense of audio clarity. Armature speakers cost more to produce and have a lot of detail, but can be weak in bass. Keep in mind that these explanations are a gross generality—I’ve heard dynamic speakers with much detail and armatures that had decent bass, but you get the idea. 

Even though the ER3XR earphones are tuned for enhanced bass, it’s relative. If you are used to the Beats-type bass-heavy sound, then these are not for you. Etymotic earphones are famous for accuracy over boosted bass. However, if you’ve been previously put off by other Etymotic earphones too-bright sound, you will be pleasantly surprised by these. 

Note that Etymotic makes a visual twin to the ER3XR; the ER3SE. It features a higher level of sensitivity without the bass boost. Both cost the same but I chose the ER3XR specifically because of that bass boost. I’m glad I did, too. On certain songs, even the ER3XR earphones are too bright for comfort—but that’s rare.

How much enjoyment I get from the ER3XR earphones is dependent on what I’m listening to. For instance, early Beach Boys did not have prominent bass in their surf songs. As a result, the songs are not that great sounding. But a later song like “Kokomo” sounds terrific. Here’s why: the armature speakers in the ER3XR earphones do not smooth out any rough edges in a song. If it’s there, the earphones will reproduce it—good and bad. That’s the downside to portraying detail in music, which the ER3XR‘s do. Be careful what you wish for.

Don’t get me wrong. I appreciate how much the ER3XR earphones reveal, I just have to be more selective when I hit the play button. With these earphones, I stick to higher resolution files that I’ve ripped as opposed to lower resolution streaming.

I’ve said it before but it bears repeating: 90% (a made up number) of how a recording sounds comes from the mastering and mixing of the song/album. So if a song sounds too bright or bass heavy, it sounded that way before the public ever heard it. Music can later be tweaked with an equalizer, but only so much. For me, I usually either turn off EQ or set it to flat. It’s the most realistic way to hear music as it was intended. Plus it’s a pain to constantly adjust so I leave it. 

Another plus for the ER3XR earphones are audiobooks or spoken content. If you (like me) spend time with audiobooks, the ER3XRs don’t “bass up” the vocals, which makes the narrator sound much more natural and easier to understand. 

What I like

Even though some music may sound too bright, I like the detail and musicality of the ER3XR earphones. Given the right music, they are a pleasure to listen to and have reminded me that Etymotic is still in the game—big time. 

What needs to be improved

At times, I would have preferred a smoother approach to music, but in this price range, you can’t have an overall smoothness and the kind of detail the ER3XR earphones provide. It’s a minor issue for my ears.

Final Thoughts

The Etymotic ER3XR earphones are not cheap, but they are priced well for what you get. Plus, the cables are now detachable—always a welcome addition. These earphones are made for that choosy listener who cares as much about a music file’s resolution as how the recording was made. 

Price: $179.00
Where to buy: Amazon
Source: The sample of this product was provided by Etymotic. Visit etymotic.com for more information.

Filed in categories: Reviews

Tagged:

Etymotic ER3XR earphone review originally appeared on The Gadgeteer on September 13, 2018 at 9:00 am.

Note: If you are subscribed to this feed through FeedBurner, please switch to our native feed URL http://the-gadgeteer.com/feed/ in order to ensure continuous delivery.
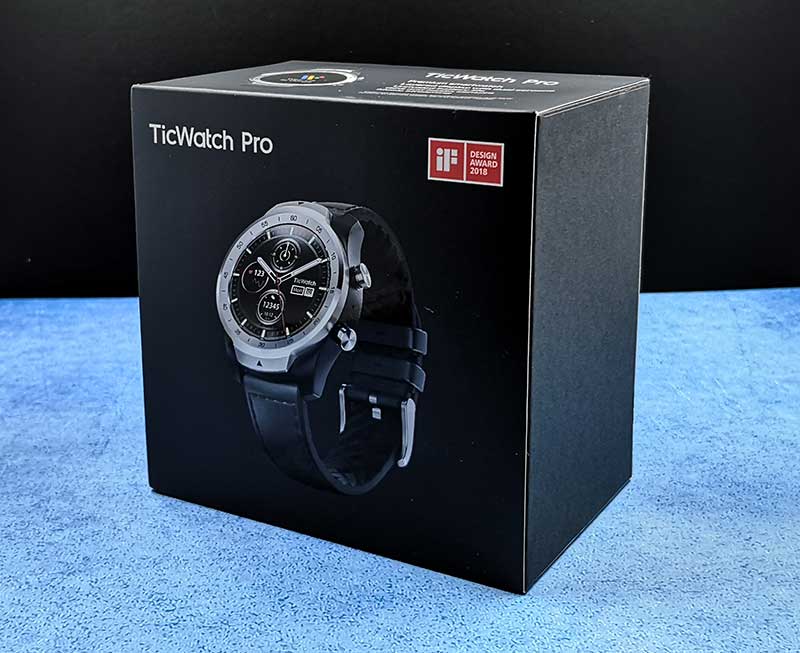
TicWatch Pro smartwatch review

I enjoy looking at watches and reading about watches, but I don’t actually wear a watch. Weird right? I used to wear a watch every day but that was back before smartphones. Now I don’t really need one. Or do I? That’s a question I planned to answer by reviewing the TicWatch Pro from Mobvoi. For the answer to that question, keep reading.

What is it?

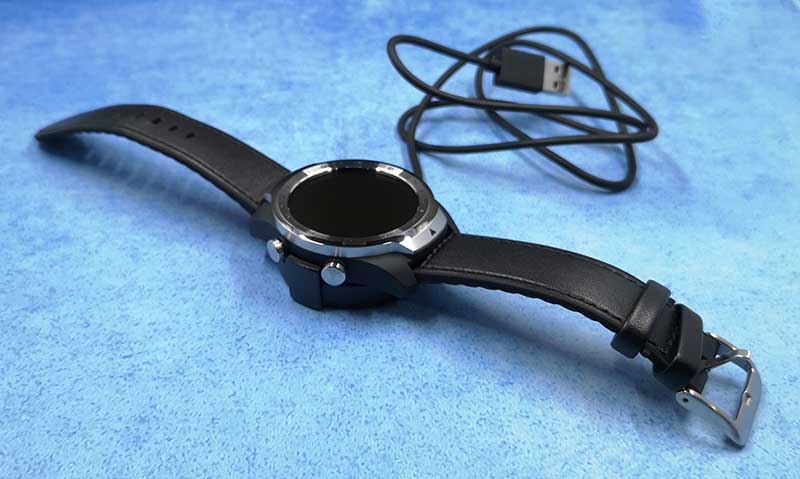
The Mobvoi TicWatch Pro is a smartwatch powered by Google’s Wear OS that runs for 5-30 days on a single charge due to it utilizing two different display technologies which are layered on the watch face.

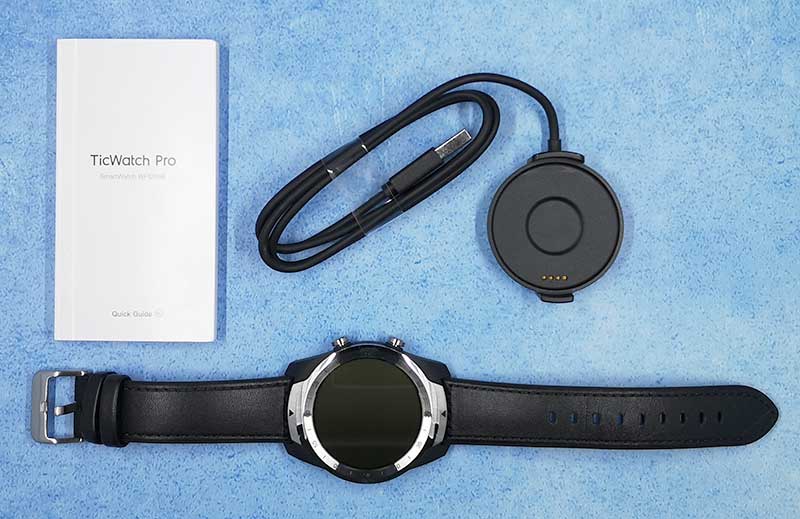
What’s in the box?

TicWatch Pro smartwatch
TicWatch Pro Charge Dock
User Manual

Hardware Specs

Operating System: Wear OS by Google™
Dimensions: D45mm x 14.6mm
Display: 1.39” AMOLED 400 x 400 + FSTN display
Chipset Qualcomm® Snapdragon Wear™ 2100
Memory RAM: 512MB / Storage: 4GB
GPS / AGPS
NFC payments: Google Pay™
Connectivity: Bluetooth: 4.2 / Wi-Fi: 802.11bgn 2.4GHz
Sensors: Accelerometer, Gyro, Magnetic Sensor, PPG Heart Rate sensor, Ambient Light Sensor, Low Latency Off-Body Sensor
Battery and Charging Capacity:415mAH Charging method: Dock with USB cable
Battery Life Smart Mode: 2 days;
Essential Mode: 30 days
Mixed usage: between 5-30 days
Water and Dust Resistance: IP68

Design and features

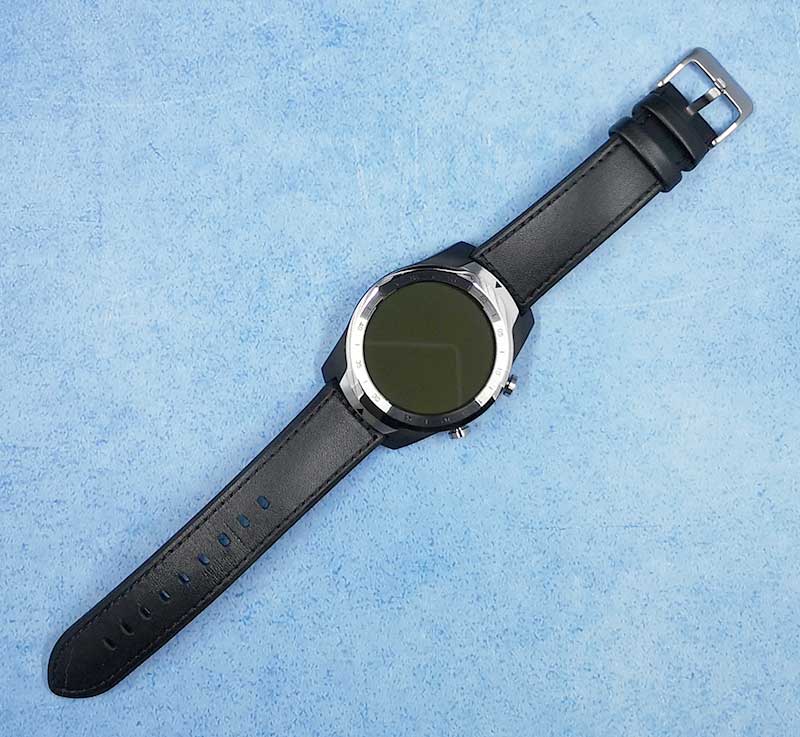
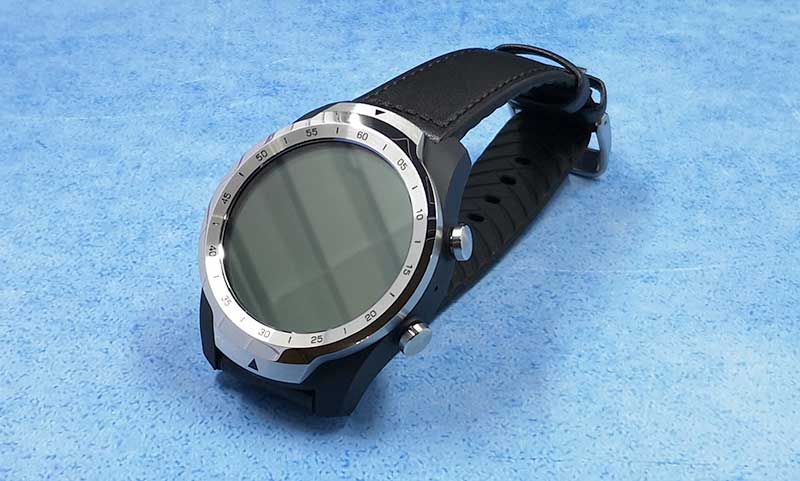
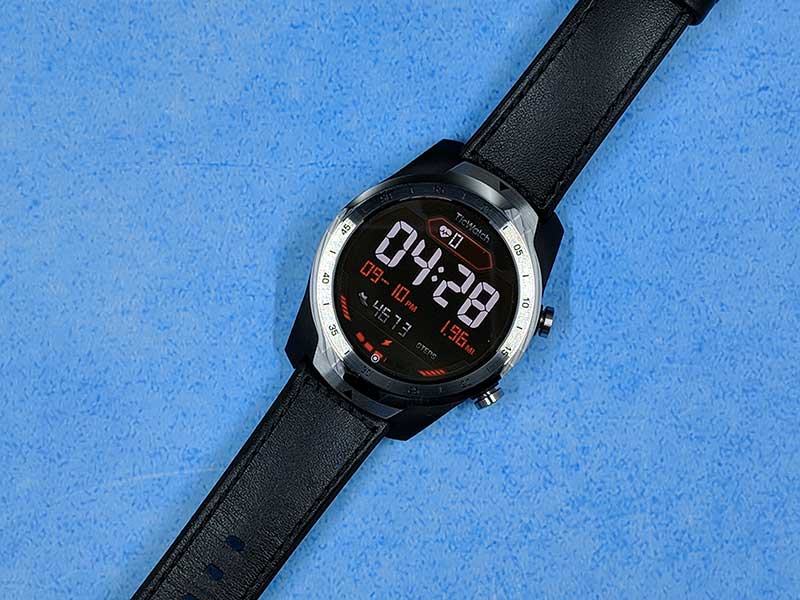
The TicWatch Pro is available in two colors. A silver and black version like the one that was sent to me and is shown above, and an all-black version. I think the silver and black version is a nice looking premium smartwatch. Most of the silver metal part has a brushed finish and the nylon and glass fiber black part has a matte finish, so you won’t have to worry too much about fingerprints and smudges.

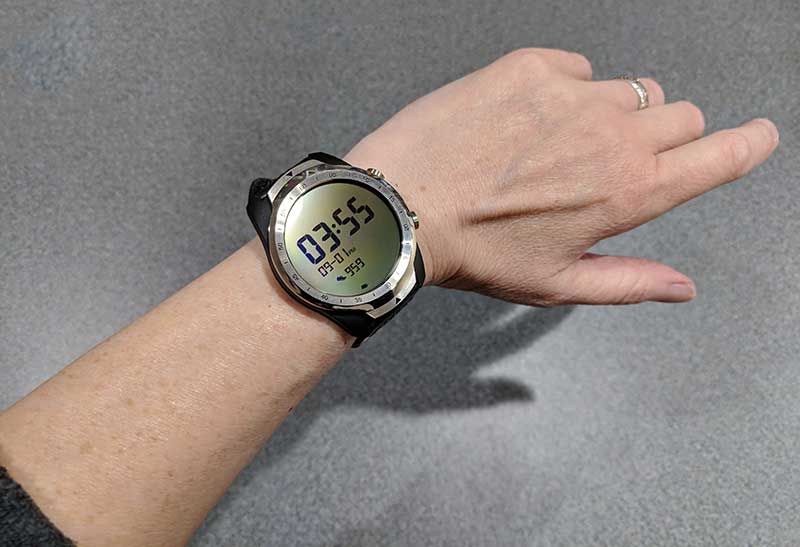
The smartwatch comes with a 22mm leather and silicone buckle style wrist strap that is easy to use and comfortable to wear. As you can see from the image above, the TicWatch Pro swallows my puny wrist, so it’s not the most flattering watch for women. It’s also chunky and heavy. But even so, I wore it for a couple of weeks and didn’t notice the weight and bulk most of the time.

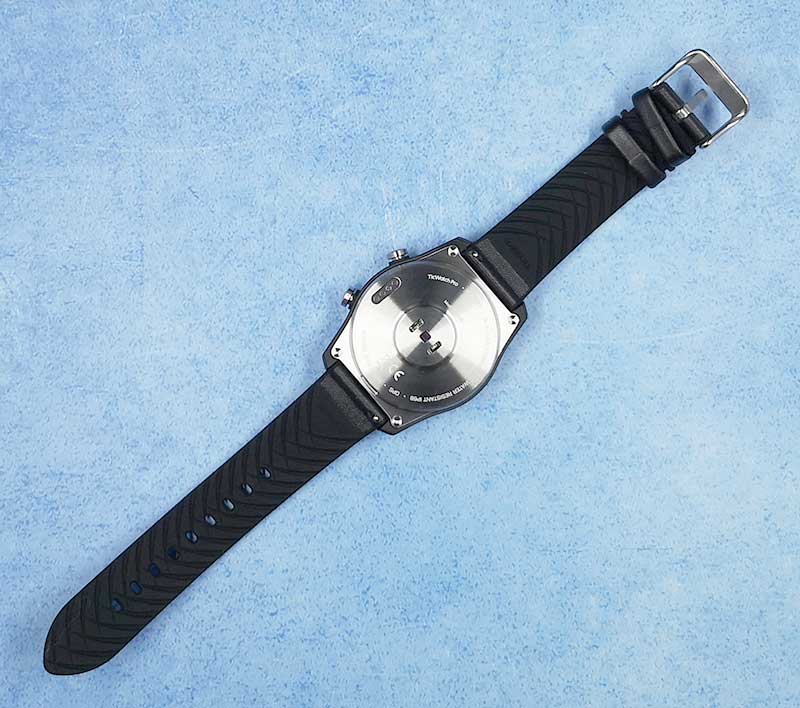
The back of the watch has a built-in heart rate sensor in the center and electrical contacts on the edge for the included charger. There’s also a speaker on the back of the watch near the connection point for the left side of the watch band (non-buckle end).

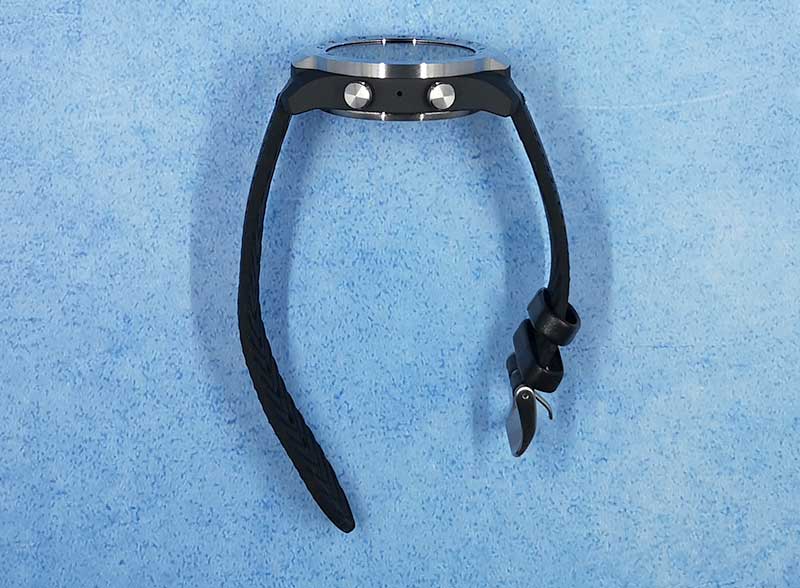
There are two large easy to press buttons on the side of the watch. The top button is the power button, voice assistant activation button, and app list view button. The bottom button can be programmed to launch a favorite app when pressed once, double-clicking the button launches the payment app, or pressing and holding the button will launch the shortcut menu.

The tiny hole between the two buttons is the TicWatch Pro’s built-in microphone.

The TicWatch Pro’s most notable feature is its dual-layer AMOLED/FSTN display that enables you to continue to use this watch even after the battery is too low to power the watch in Smart mode. A typical smartwatch can be used for a little over 2 days before you have to charge it. But with the TicWatch Pro, you can continue using this watch in what Mobvoi calls Essential mode for an additional 27 days.

Of course, you won’t be able to interact with the Wear OS apps when the watch is in Essential mode, but it will still function as a regular watch with a step/activity counter and a heart rate sensor. So it doesn’t turn into a totally “dumb” watch when it switches to Essential mode.

Charging the TicWatch Pro is quick and easy with the included magnetic charger. Just click it in place and it recharges to 100% in about 2 hours.

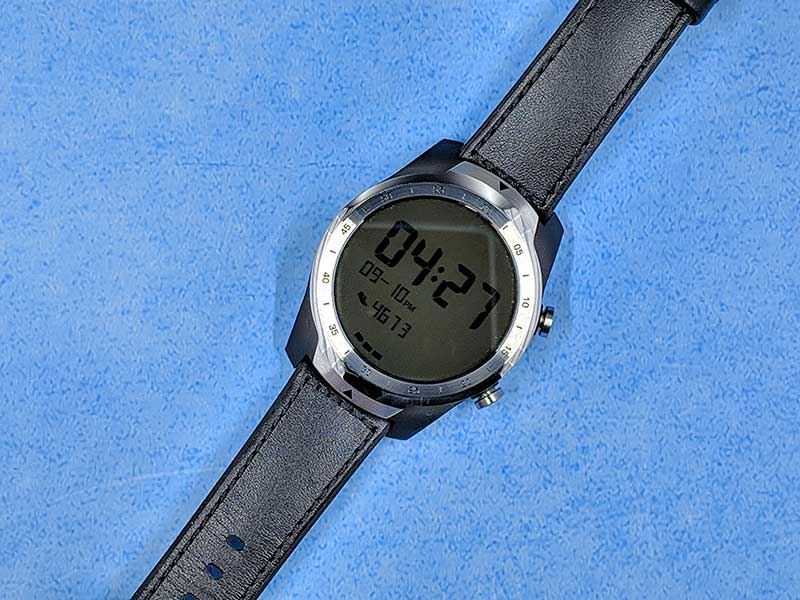
Here’s the watch in idle/Essential mode. It looks like a “dumb” LCD watch with an always-on display that shows the time, date, and step count. Pressing the button on the side while in Essential mode will turn on the heart rate sensor and will show your current heart rate above the time.

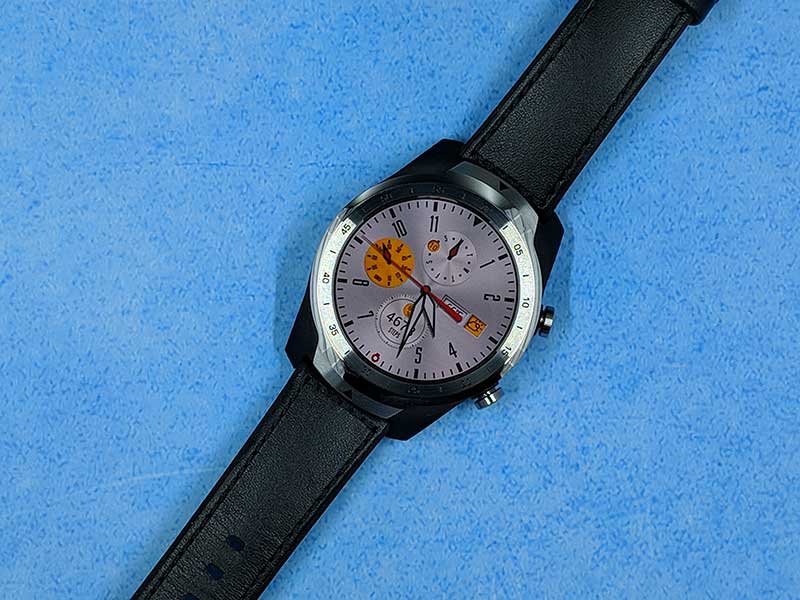
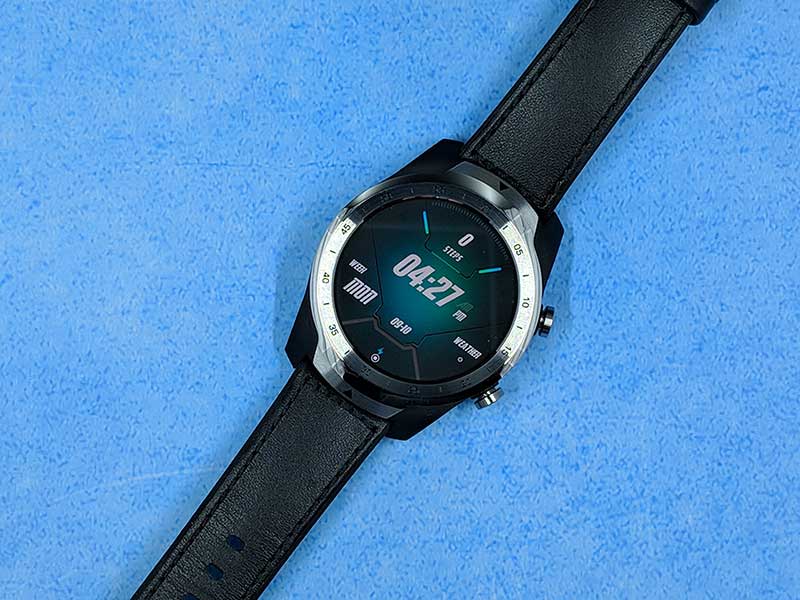
When the battery has enough juice, it will operate in Smart mode which will show the AMOLED display in full color when you either press one of the buttons on the side of the phone or tilt your wrist to see the watch face.

A swipe across the watch face from left to right will let you choose from a variety of watch faces like the ones you see here.

You can find more watch faces by using the Wear OS app on your phone.

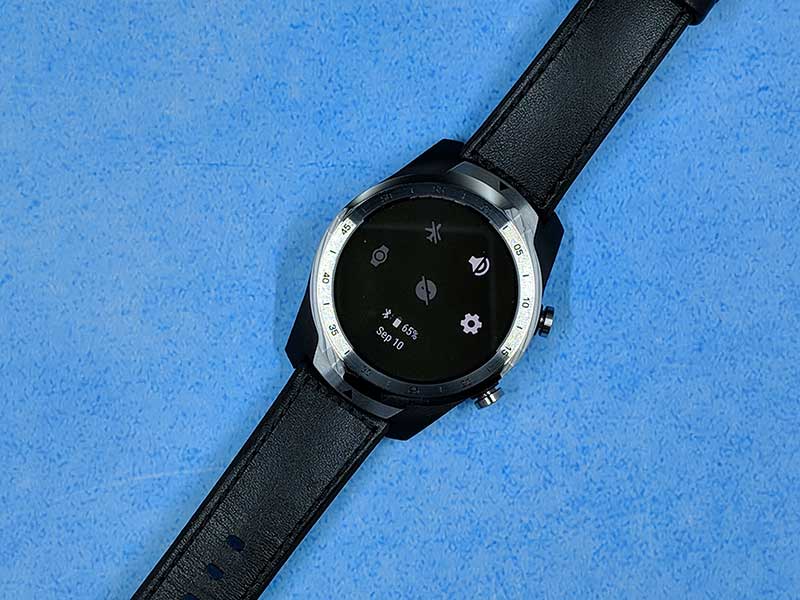
Swiping the watch face from top to bottom will show the settings icons and will let you see the battery capacity if the watch face you’re using doesn’t already show that info.

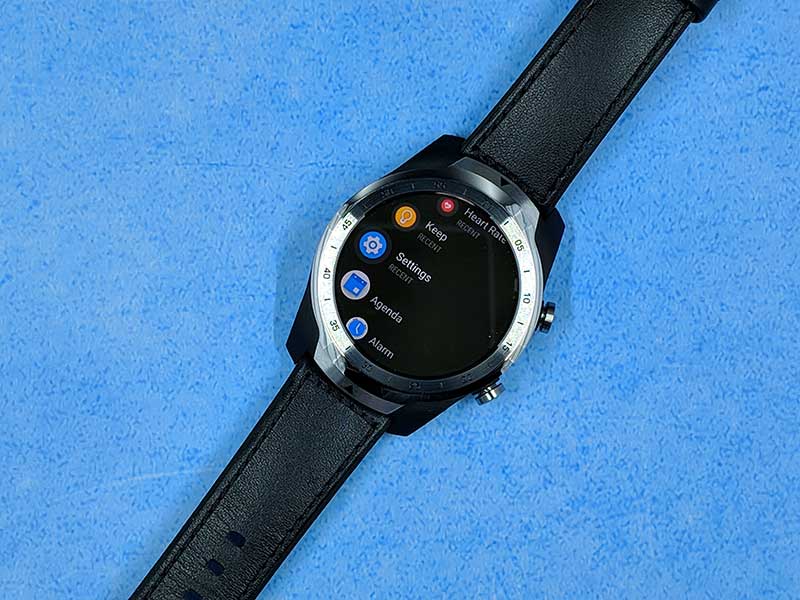
Clicking the top button on the side of the watch will bring up the app list that you can scroll through to launch the apps that you install through your Android phone on to the watch. Pressing the top button while you’re in an app will exit back to the main clock screen.

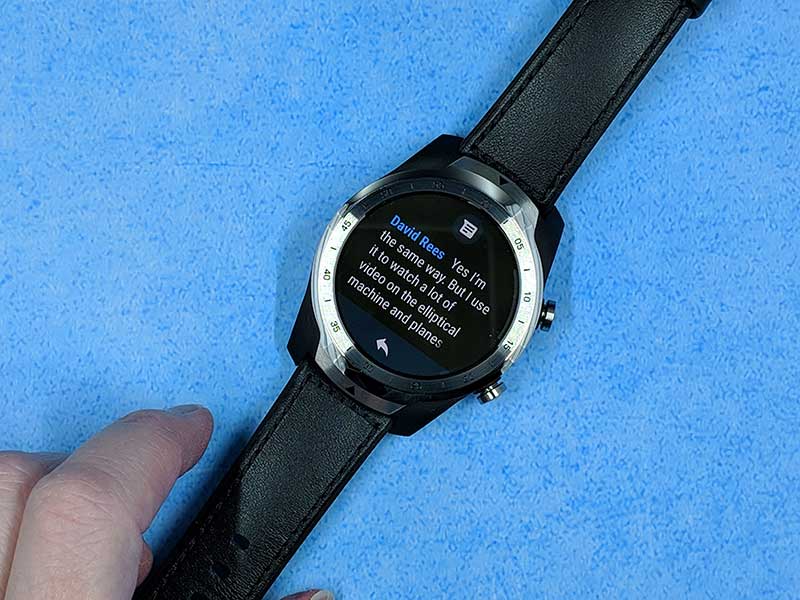
When notifications pop up on your phone, your watch will vibrate so you don’t have to take your phone out of your pocket to see the notification. Just swipe up from the bottom of the watch face to scroll through the notifications from apps, text messages, etc. You can even interact with text messages and read emails, etc. You can swipe individual notifications away to remove them, or you can scroll through all of the notifications and click the Clear All button to remove all of them at once.

It’s probably obvious that due to the small size of the watch face, that you’re not going to want to read all your emails on the watch. But it’s handy to be able to have that option if you can’t get access to your phone for some reason.

Mobvoi App

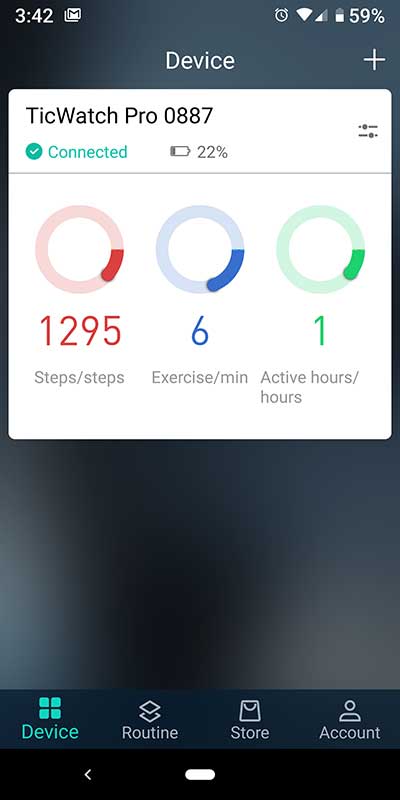
To use the TicWatch Pro you’ll need an Android smartphone and you’ll need to install the Wear OS app on that phone. But you’re also required to install the Mobvoi app which is kind of weird because the app really doesn’t offer much functionality at all.

It will let you see your fitness data and it has an online storefront if you want to buy other Mobvoi products, but other than that, it’s pretty meh. There is a Routines option that seems to allow you to create some automation macros, but from what I could tell, it doesn’t work yet.

Making and receiving calls with the TicWatch Pro

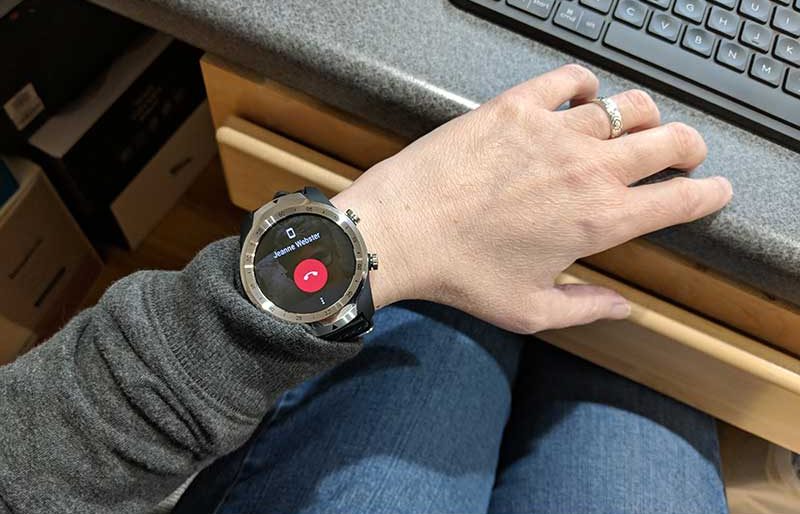
Yes, you can use this watch to make and receive phone calls. Of course, you have to have your smartphone in your pocket to do this because the watch is just acting as a hands-free Bluetooth speakerphone. How’s the sound quality? The sound quality isn’t horrible but let’s just say I am not going to be using it for calls on a regular basis.  Mainly because I’d look like a dork talking to my wrist. But, if your phone is on your desk and you’re a short distance away when a call comes in, it does work just fine in a pinch.

Other ways to use the watch for more than checking the time

  • Read notifications
  • Check alarms
  • Listen to music with paired Bluetooth earbuds without needing your phone
  • Use it as a fitness tracker with built-in GPS features

Battery life

I’ve tested the Smart mode battery life a few times so far with this watch and am finding that it lasts around 2 – 2.5 days. After that, the watch will automatically change over to Essential mode. Mobvoi says that the watch will work in Essential mode for an additional 27 days or so for a total of 30 days of use on one full charge.

What I like

  • Doesn’t become useless once the battery is too low to power the smartwatch functions
  • Can be used up to 30 days before charging
  • Even in Essential mode, the watch still offers a few smart features like activity tracking and heart rate sensor

What needs to be improved

  • Mobvoi app isn’t useful
  • Notifications don’t show up in the Essential mode

Final thoughts

I think most people are in one of two camps. They are either in the smartwatches are awesome camp or they are in the why do we need a smartwatch when we already have a smartphone camp. Which camp am I in? I’m still in the why do we need a smartwatch camp. I’d rather just pull my phone out of my back pocket and interact with it instead of a watch on my wrist because it’s much easier to interact with the larger touch display on a phone vs. a watch.

But hold on a sec… let me say that I do like the TicWatch Pro smartwatch quite a bit. I liked using the TicWatch Pro with the Google Keep app while shopping for groceries because having the watch on my wrist to tick off items is more convenient to use than my phone. I also like using it to check the time while in a theater or while talking to someone as it isn’t as conspicuous as using a big smartphone. I also like using it to check notifications while on a daily walk.

If I was in the market for a Wear OS smartwatch, I would seriously consider the TicWatch Pro over other brands for the main reason that it is still quite useful as a regular watch (with extra features) even after the battery is too low to use the smartwatch features.

Price: $249.99
Where to buy: Amazon
Source: The sample for this review was provided by Mobvoi.

Filed in categories: Reviews

Tagged: ,

TicWatch Pro smartwatch review originally appeared on The Gadgeteer on September 12, 2018 at 11:00 am.

Note: If you are subscribed to this feed through FeedBurner, please switch to our native feed URL http://the-gadgeteer.com/feed/ in order to ensure continuous delivery.
Douni A5 Bluetooth speaker review


REVIEW – Each day, my life always seems to be very hectic, and I have to be very proactive and create a moment to rest and relax and to unwind. Music is “the medicine for my soul” and if I cannot use earbuds, a Bluetooth speaker is often the perfect alternative. Each night, I like to fall asleep to my favorite music on Pandora, but I find it very uncomfortable to sleep with headphones or earbuds. A Bluetooth speaker on the nightstand is my solution.

What is it?

The Douni A5 Bluetooth speaker is a 25-watt Bluetooth speaker that also supports hands-free 2-way phone conversations including the ability to answer and hang up. It also supports its use as a wired speaker via its auxiliary port.

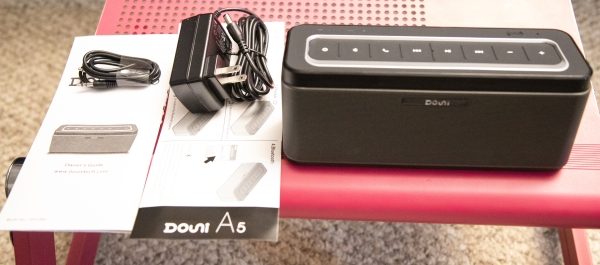
What’s in the box?


1 x Douni A5 Bluetooth Speaker
1 x AC Power Adapter
1 x Audio cable
1 x User Manual

Design and features

This Douni A5 speaker has a nice rich and clear sound with nice rounded bass. The well-rounded sound is produced via two 12.5 Watt speakers and sounds much like surround sound style speakers and without any distortion. The built-in 6600mAh battery not only makes it portable but allows it to play music for up to 12 hours depending on the level of the volume. It has a good wireless range of up to 66 feet and pairing is simple and automatic, including the initial pairing process. If you have a NFC compatible device, you can tap the check-in area at the top right of the controls to connect your phone, after you have performed the initial pairing function. The built-in microphone produces clear calls for both parties on the phone, and as a bonus, Siri is supported for iPhone users. If you are using the speaker at night and in the dark like I do, there is a thermal sensor across the top of the speaker that activates the buttons backlights when it detects the heat from your hands. Douni stands behind this product by including a one year warranty.

Layout

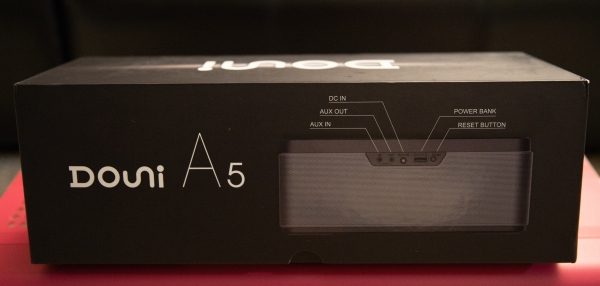
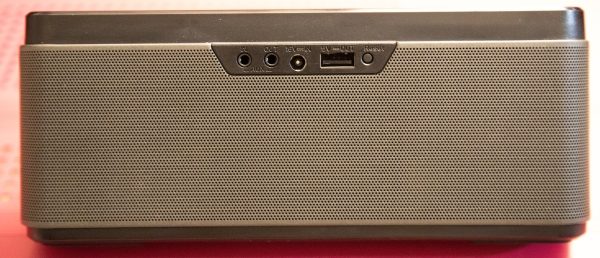
On the side of the speaker where the ports are located, from left to right there is an Aux-in port, and Aux out port, the DC in port, the USB jack for charging from the power bank, and the reset button.


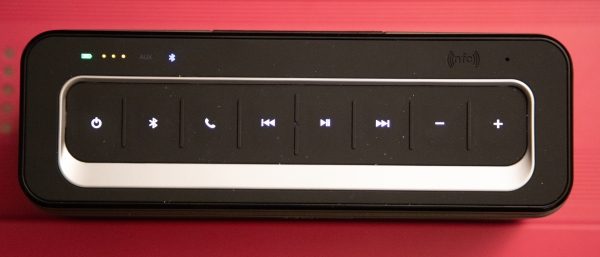
On the top of the speaker from left to right are the following buttons: power, Bluetooth, call answer/hangup, track backward, play and pause, track forward, volume decrease, volume increase.
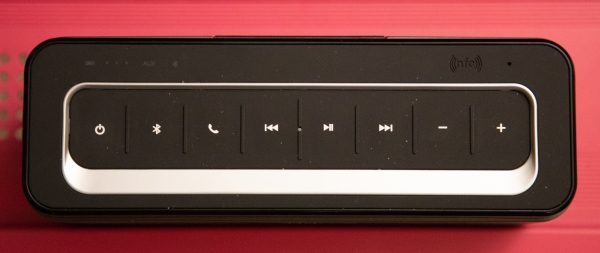
When the speaker is powered on there are indicator lights on the top left that show power, charge level,  and Bluetooth on/off. The Aux LED only lights when a device is plugged into the auxiliary port. In the top right corner, there is the NFC icon that indicates the NFC area to tap for connecting NFC enables phones/devices.


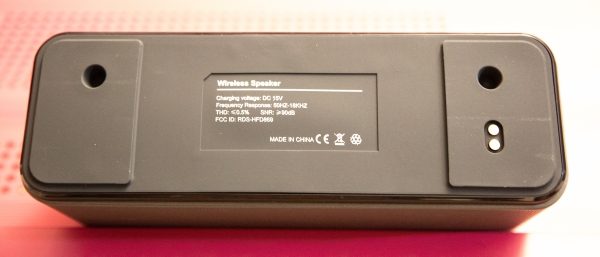
At the bottom of the speaker, there are 2 holes and 2 contacts that are used for mounting to the optional wireless charging base and connecting to it.

Performance

As soon as I took this Bluetooth speaker out of the box, I had a good feeling about it. It has a hefty and sturdy feel to it and overall it just feels like quality. I plugged it in to charge with the AC adapter, and when I returned in a couple of hours I pressed the power button and it turned on and all of the buttons lit up. The green power LED, and the 3 orange charge level indicated that it ready to go. I pressed the Bluetooth button and it lit up blue and when I checked my Bluetooth settings on my phone, the A5 was available and ready for pairing. It connected with ease, and the speaker confirmed the connection status with a voice command. I then navigated on my phone to the Pandora app and hit play. I am truly impressed with the sound of this speaker, and even more so at night when there is little or no ambient sound and I get to really appreciate the quality of the sound that this speaker provides. I also tested the phone function for answering, hanging up and conversing, and all worked well. I use the Douni A5 every night when I go to bed, and I just simply plug my iPhone USB charging cable into the USB jack on the speaker and when I get up in the morning, I have a fully charged phone. The Aux in feature works well for non-Bluetooth audio devices. I have not yet found any use for the Aux out feature.

What I like

  • The build quality
  • The auxiliary jack option
  • The USB charging option
  • The really nice sound
  • The built-in long-lasting battery

What can be improved

  • The wireless charging dock should be included
  • Built-in QI wireless charging would make this speaker perfect

Final thoughts

The Douni A5 Bluetooth speaker is one of the best of its kind that I have tested. It is really well built and has a feel of quality. The sound quality is great and it is loud enough for use indoors in any room. Being able to move around the room and have a clear phone conversation is a plus and the ability to have your phone being charged via the speaker while doing so, is very convenient. While I continue to stress that sound and convenience are all individually subjective dynamics, I do believe that most will like this speaker. I give it a big thumbs up!!

Price: $64.99
Where to buy: Amazon
Source: The sample for this review was supplied by Douni.

Filed in categories: Reviews

Tagged:

Douni A5 Bluetooth speaker review originally appeared on The Gadgeteer on September 12, 2018 at 9:00 am.

Note: If you are subscribed to this feed through FeedBurner, please switch to our native feed URL http://the-gadgeteer.com/feed/ in order to ensure continuous delivery.