Peak Design 45 Liter Travel Backpack Review

REVIEW – Finding the correct travel bag has always been difficult for me.  I have found out over time that a one size fits all type bag will usually not work.  They are either all way too big or too small for the trip and what I need to bring along.  Too many bags would have just a single large compartment and maybe a zipper or two for small things but no real easy way to organize my packing.  I also find that the larger the bag is, the heavier it will be.  When Peak Design offered up their new 45 liter travel backpack for review I jumped on it because it seemed to be an organized packer’s mecca.  Let’s see how it worked out for me.

What’s in the box?

I received the 45 liter Travel backpack along with some additional accessories.  You will see full detail pictures of everything below.  In addition to the backpack I received the following:

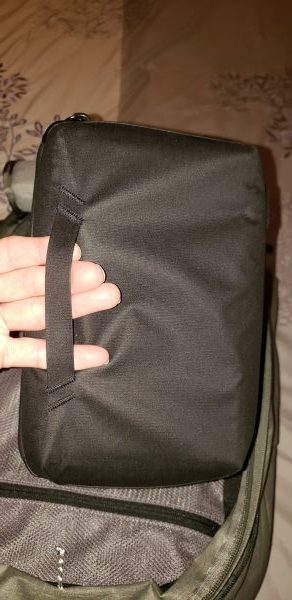
  • Wash pouch – complete with hook for hanging up in the bathroom!  It comes in sage or black and I received the sage.  Dimensions are 26 cm x 11 cm x 15 cm 2.5  liters
  • Tech pouch  – used to organize and store all your tech cables, batteries and charging adapters.  It comes in sage or black and I received the black.  Dimensions are 24 cm x 10 cm x 15 cm 2 liters
  • Medium packing cube – Dimensions 32 cm x 17 cm x 32 cm 18 liters
  • Small packing cube – Dimensions 32 cm x 8 cm x 17 cm 9 liters

Design and Features

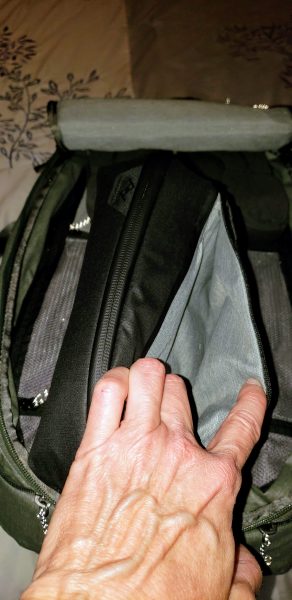
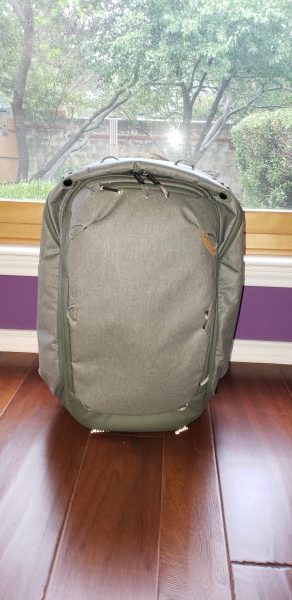
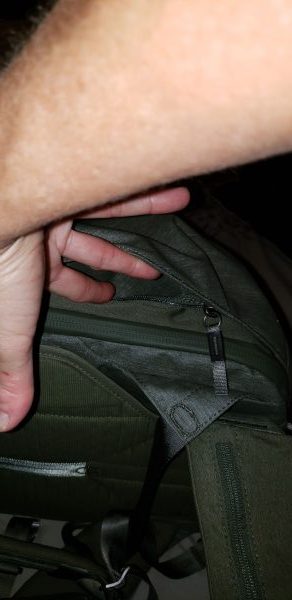
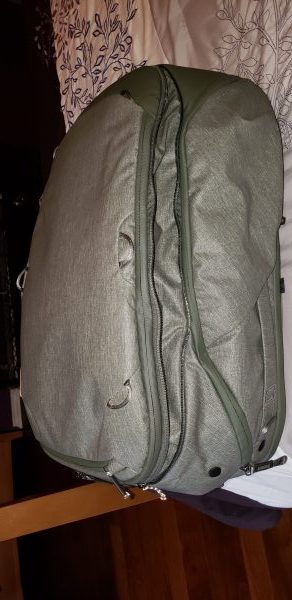
OK, be ready for a plethora of pictures.  This backpack has a ton of features allowing you to pack and organize your travel gear in many ways.  The first picture below shows the backpack that is fully compressed but does have inside all of the travel pouches and cubes.  The first thing I noticed and loved was how the backpack will stand on its own.  You can see that I received the sage color.  The backpack itself is able to compress itself to multiple sizes.  The ‘normal’ size is 35 liters which allows it to be a carry on bag for airlines.  You can compress it down to 30 liters by simply pressing down the top part of the bag where you see the zipper and it will fold into itself.   On the other end of the spectrum you can expand it to a full 45 liters with the side expansion zippers I will show later.  The bag has dimensions of 56 cm tall and 33 cm wide.  It can be expanded from 23 cm up to 29 cm in depth.  On the front of the bag there are 6 external carry strap attachment points with three on the left and 3 on the right side of the bag.  On top of the bag there are 4 external carry strap attachments and 2 more on the bottom.  You can literally have everything and the kitchen sink hanging off this bag if you wish.  The second picture shows you how deep the top pocket of the bag goes.  My hand is not very large, but it will easily fit my Samsung S9  and I believe it would also hold a phone as large as a Note or the large iPhone easily.  The pocket is heavily lined so that even if the bag where to fall on its face I do not think anything would be damaged inside.

The pack itself is made from 400 d for the shell and 900 d on the bottom both of which are made from recycled plastics.  It has a weatherproof construction and waterproof zippers.

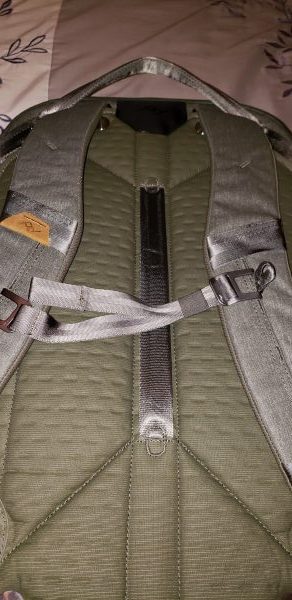
The next three pictures show the back of the bag.  At the top, you will see a handle.  It appears to be made of the same type of material as the seat belt in your car.  It is well stitched and made of several layers to give it a nice cushion.  The handle does not cut into my hand at all even when fully loaded.  There are two fully adjustable backpack straps that are well padded and sit comfortably on the back.  The straps both have two external seatbelt-like material where you can also attach hanging things.    The bag also comes with a very nice chest strap.  Both ends of the strap have metal hooks that are in the middle picture.  You simply hook the metal hook over the middle part of the back strap and it is held in place.  There are 4 points on the strap where you can hook the chest strap depending on how you like to carry the bag.  If you don’t want the chest strap at all, you simply can unhook both sides and store it away.  I really like how no plastic buckles are used.  Those always seem to be a point of failure.  You can also notice that the strap itself is made out of the same seatbelt-like material.  It is very soft and strong feeling.  I did note that on my trip I could also use that back handle as a pass through on my husband’s rollable luggage handle.
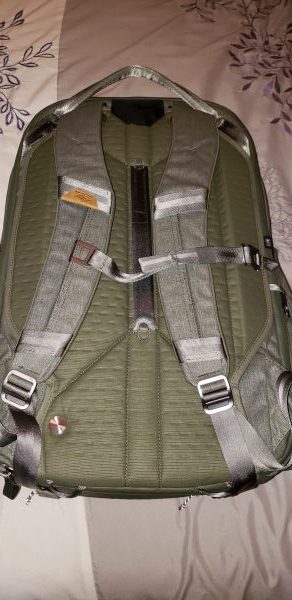
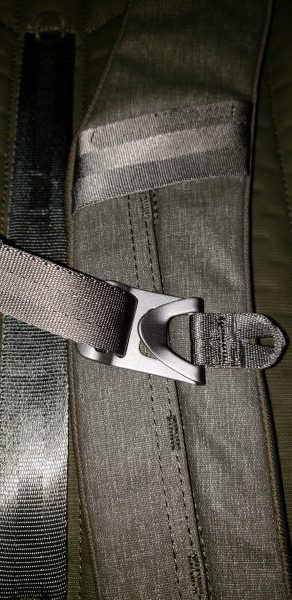
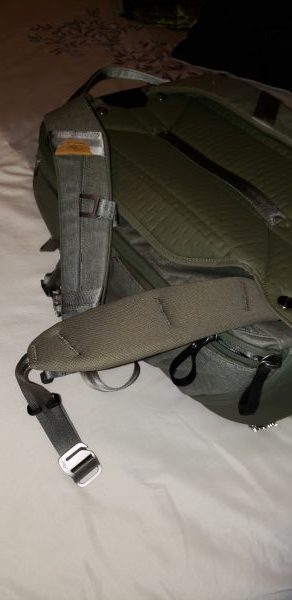
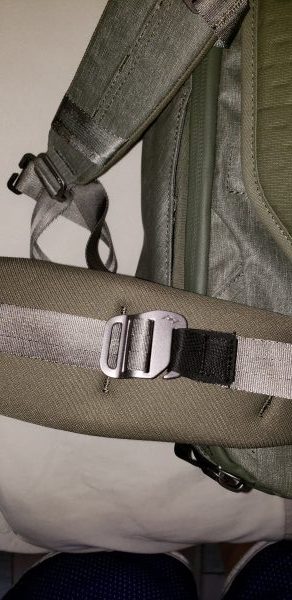
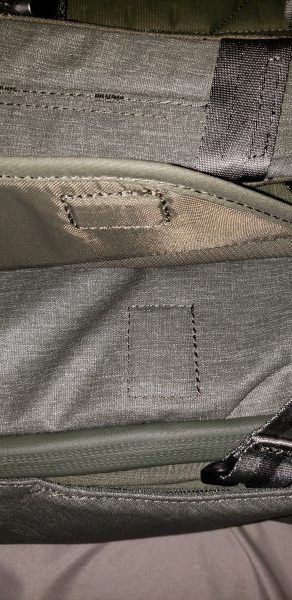
Also on the back of the bag, you will find another carrying handle strap that will allow you to carry the backpack from the back of the bag.  I personally found this very handy when pulling the back out of the trunk of a car.  Another really great feature for a backpack that can get heavy if fully loaded are the included waist straps.  They are cleverly tucked into side panels under the padding in the back of the pack.  The second picture shows how one side comes out of its handy slot.  The third picture is showing how the waist belt is connected to the front of your waste.  It has a metal hook that you simply slide into the opposite loop from the other belt.  Once again no plastic buckles that will easily break.  You can also see that the buckle is adjustable and made of that same seat belt material.  The fourth picture is a picture of a top and bottom magnet on the flaps hiding the waist belt.  Each side of the back of the bag has 4 magnets keeping the waist belt tucked away if you do not need it.  I would also like to mention there is a very small zippered pouch that is on the left waistband.  You could stick a small wallet in that pouch if need be.
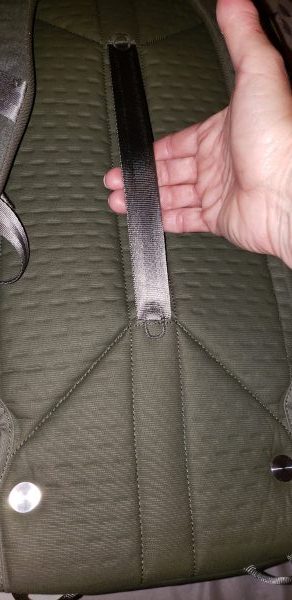
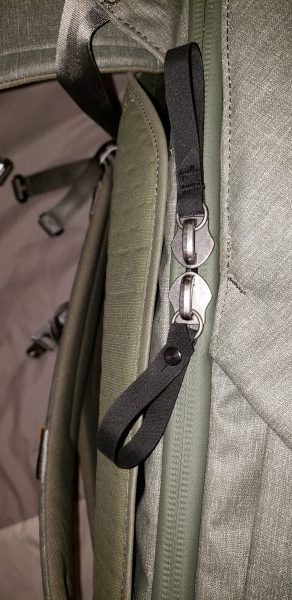
On both sides of the bag, you will find additional carry handles.  This makes for a grand total of five carry handles.  One on top, one on the bottom, one on the back and one on each side.  As mentioned earlier, the top and back carry handles are made of seatbelt-like material.  The side and bottom handles are made of the same type of material as the rest of the bag.  Both sides of the bag also have small zippered pockets.  It is an unusual shape for a pocket because the top has the angle you can see by the side carrying handle.  It will however also hold my Galaxy S9 phone.  You could easily store plane tickets or your passport in there.  The third picture shows the heavy duty waterproof zippers that give you access to the main compartment of the bag.
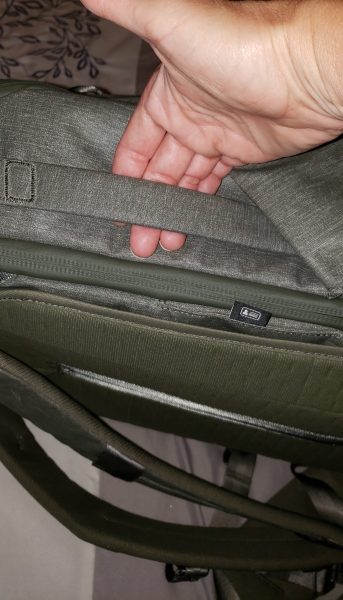
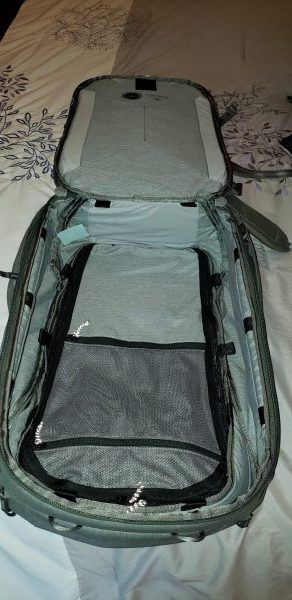
To access the main compartment of the bag, you unzip the two zippers from the third picture above.  This causes the back part of the pack with the chest straps to open.  The first picture shows you the main compartment.  The top flap is a laptop storage area that I will get into more detail later.  The main compartment is a huge open space.  There are 8 black seat belt material external tie downs inside this compartment.  Three on each side and two on top.  There are two storage compartments on the bottom.  One is mesh and the other is made of the same material as the bag.  I found those ideal for storing flat things like jewelry.  Keeping things like that there puts them essentially in the middle of the bag where they will not get lost.
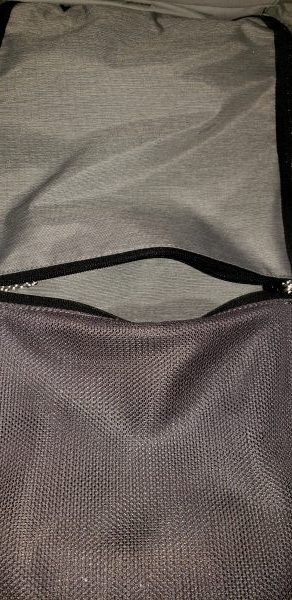
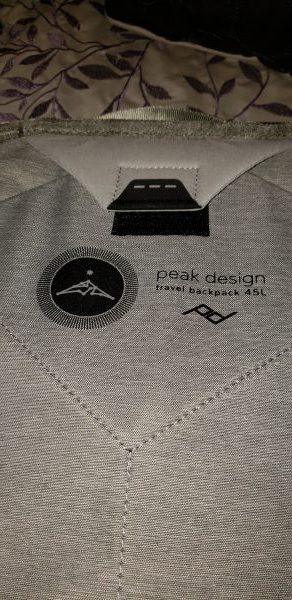
The next two pictures show the laptop carrying area in more detail.  This space carried my Dell 15 inch XPS with no problems at all.   It is well padded all the way around.  It has a separate storage slot that closes with Velcro where you could pack cables or the Microsoft mouse that stores flat fits perfectly here.  The main laptop area closes with Velcro as you can see in the second picture.
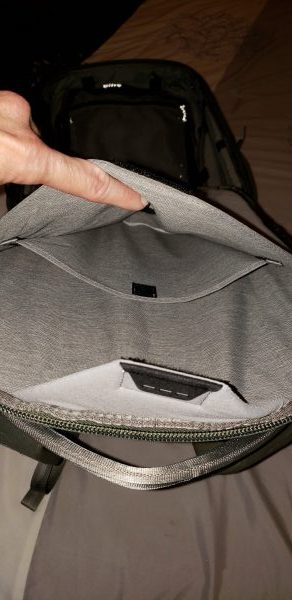
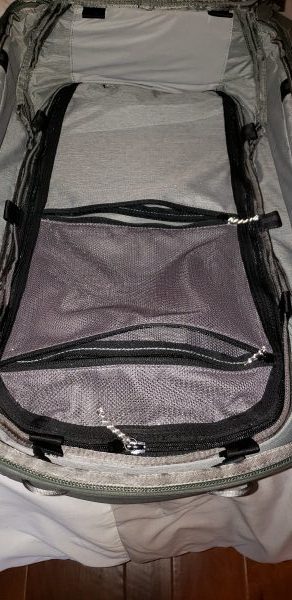
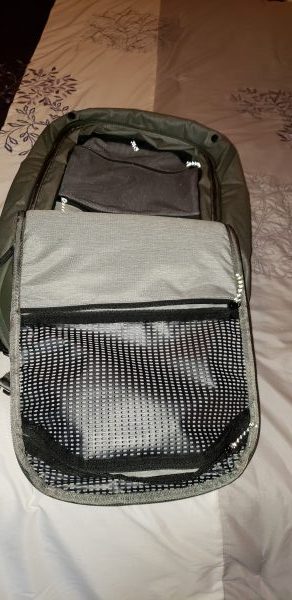
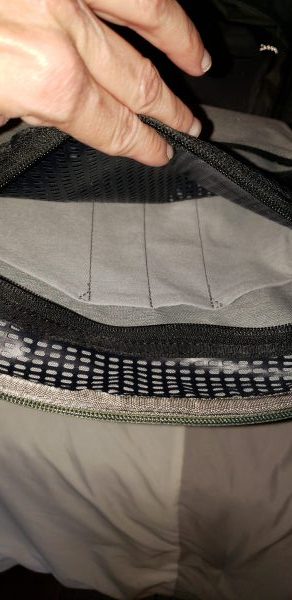
The next two pictures show the front part of the bag opened up.  The top flap has two storage compartment areas.  The top part is a plastic mesh type area and the bottom part has a flat storage area made of the same material as the bag.  The second picture shows you the separate storage slots that are built into that top flap area.  Since this is on the front of the bag, it would be very easy to just open that front zipper and get access to this pocket where you could store things like pens, keys or your wallet.  The first picture also shows the bottom part of the front of the bag.  It has one zippered mesh area like the bottom of the bag and also has a zipper in the middle that allows you access to the main compartment.   So you can lay the bag down on the chest straps, open the top of the bag and with one zipper pull get access to the main compartment at the back of the bag.
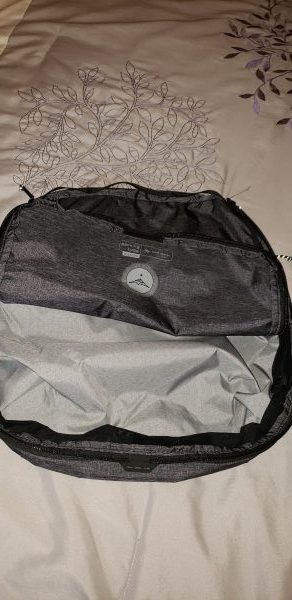
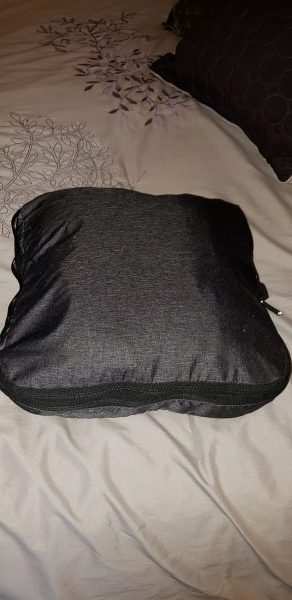
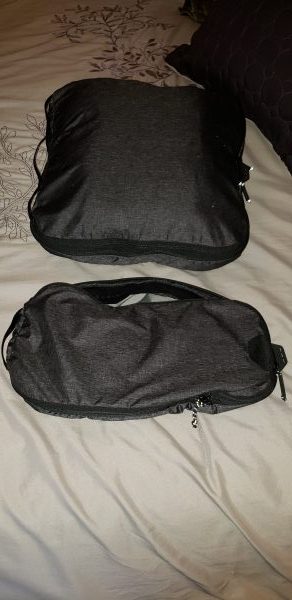
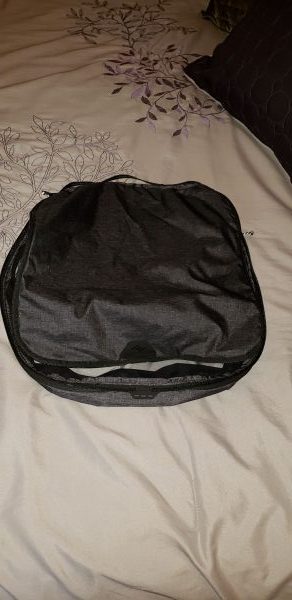
The next six pictures are showing the medium and small storage cubes.  Both cubes are made of an ultralight 40 D nylon shell that is made from 100% recycled plastic.  These bags weigh next to nothing but really do allow for some organized packing.  Both cubes have expansion zippers that will allow you to increase or decrease your storage capacity as needed.   They both also come with a handy carry handle made of seat belt material.  The first picture is the medium storage cube.  The second picture shows it halfway open.  It actually unzips almost completely around giving you full access to the top area of the bag.  The third picture shows a zippered compartment area at the back of the bag.  The first picture on the second row shows the medium bag (expansion zipper is closed so it is at its smallest size) loaded with 6 t-shirts, and 4 pairs of shorts.  The third picture is the fully loaded medium cube and the unpacked small cube.  Like the medium cube, this back also has a main compartment zipper that almost opens up the full back and a back compartment zipper.  The last picture shows both bags fully loaded but not expanded.
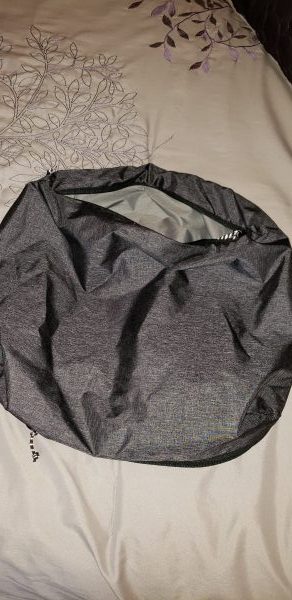
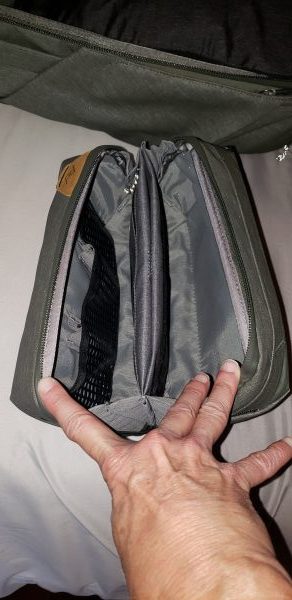
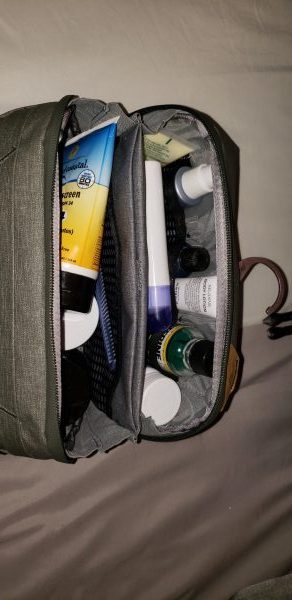
The next two pictures show the wash pouch.  This pouch is made of a weatherproof nylon canvas that is made from 100% recycled plastic.  It has silicone-coated mesh pockets, a stow-able metal hook for hanging, an external razor pocket that is sealed with a waterproof zipper along with the main zipper also being waterproof.  The bag will always sit upright which is really nice.  The first picture shows the interior.  The middle section that seems ‘fluffy’ is actually a magnetically closed holder for your toothbrush.  There are 7 total individual pouches for holding things.  You can see it fully loaded up with my stuff in the second picture.  You can also see the metal hook showing where I pulled it out of its storage pouch on the side of the bag.  It should be noted that the Kickstarter page mentions that the liner can be pulled out and is easy to rinse.  The bag I received did not have any kind of pull out liner in it.  The bag also has a nice carry handle on the top to make it easy to pull out of the backpack and carry to the bathroom.
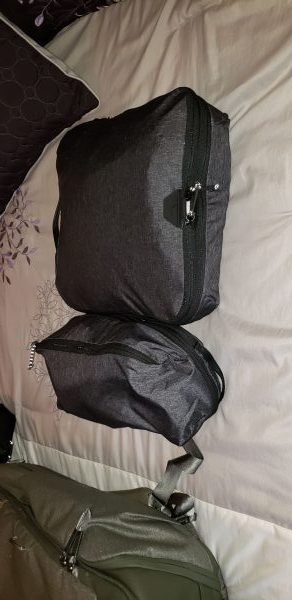
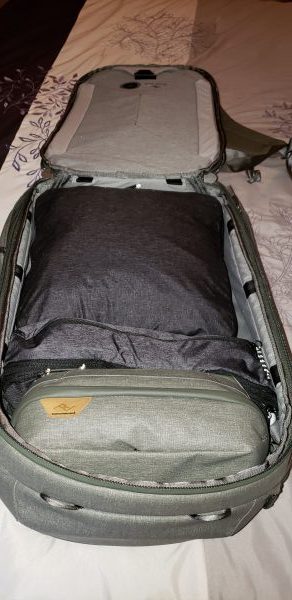
The next picture on the left shows the back part of the bag fully loaded with the medium and small packing cubes plus the wash pouch.  It all fit perfectly in the bag.  The second picture shows the side zippers unzipped and allowing the backpack to be fully expanded.
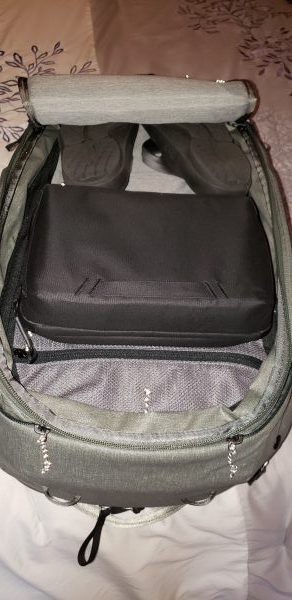
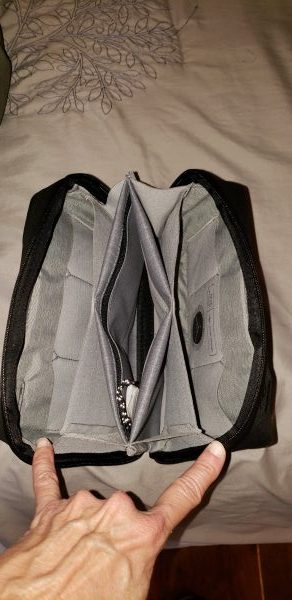
The next three pictures below show the tech pouch.  Like the wash pouch, it is made of weatherproof nylon canvas made from 100% recycled plastic.   It has dual grab handles made of the same material on either side of the bottom of the bag.  It has a beefy #8 waterproof zipper and will sit upright on its own.  It has a total of 21 individual storage pockets.  It has external loops that allow it to work with Peak Design carrying straps if you want to carry this over your shoulder separately.  This bag is an organized packer’s dream with a slot for virtually everything you can think of.  It even has a small pass-through slot for a charging cable so it can go from the external battery you have stored in the main pouch to the phone you may have stored in the outside zippered pocket on the back of the bag.  The final picture on the right shows the tech pouch along with a pair of flip-flops fitting nicely into the area on the front of the backpack that has its expansion zippers opened.
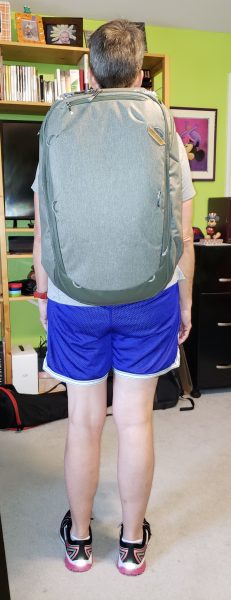
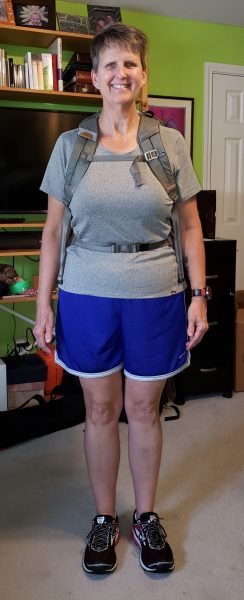
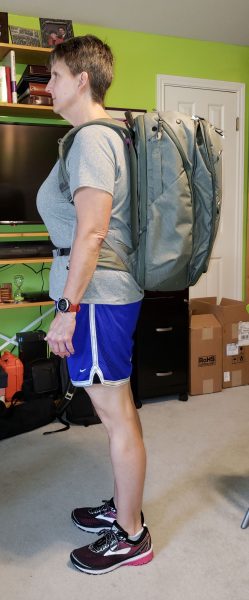
The final three pictures below show me wearing the backpack.  I am 5′ 7″ tall with a 32-inch inseam.  The pack is fully loaded but the expansion zippers are in compressed mode.  I have both the chest and waist straps on.  The pack is very comfortable and with the waist strap in place, I do not feel much weight at all in my shoulders.  My only complaint would be that this pack would get hot if I were hiking around in the heat.  It is not anything like an external frame backpack that allows air circulation between the pack and your back.
What I like

This is an extremely well-designed backpack.  There is literally a spot for everything and it provides a multiple of ways for you to carry it.  There are additional items you can buy separately that I did not get a chance to review.  They sell a separate shoe pouch along with three different sizes of camera cubes if you wanted to turn this into a camera backpack.  They also sell a rain cover for the bag that stores in its own pouch by tucking into itself.  It is lightweight for what you can carry.  The backpack, all the straps, the medium and small packing cubes, the wash pouch and the tech pouch all weighed right at 6.4 pounds according to my luggage scale.  I love how it is easy to get access to the front or back storage areas through either side of the bag.  The straps make carrying a heavy load easy to do allowing for weight distribution to your waist.

What can be improved

I honestly can’t think of anything that can be improved.  I am very happy with this bag.  Short of finding some really expensive lightweight materials to make it lighter there really is not anything you can do to this bag to improve it.  I would happily recommend this bag to anyone who does not feel they have to be able to roll a bag on wheels.  Adding wheels and handle to this bag would just add unnecessary weight in my opinion.  I would think this is the perfect bag for a person who wants to backpack through Europe.

Price: $235 for the backpack 45L, $399 for backpack 45L + small and medium packing cube, tech pouch, wash pouch, shoe pouch, and rain fly
Where to buy: Kickstarter – hurry the project ends on 9/20/18.
Source: The sample for this review was provided by Peak Design.

Filed in categories: Reviews

Tagged: ,

Peak Design 45 Liter Travel Backpack Review originally appeared on The Gadgeteer on September 16, 2018 at 9:00 am.

Note: If you are subscribed to this feed through FeedBurner, please switch to our native feed URL http://the-gadgeteer.com/feed/ in order to ensure continuous delivery.

Knockaround Hot Wheels 50th Anniversary “Rodger Dodger” Fort Knocks sunglasses review

REVIEW – Rule #1 is “Always look cool.”  And what better way to look cool when the temps outside are hot than a pair of cool shades?  Knockaround Sunglasses is keen to this; they’ve been doing cool shades since 2005, and for one of their cool brand collaborations check out these Hot Wheels 50th Anniversary “Rodger Dodger” shades.  Gadget on!

What is it?

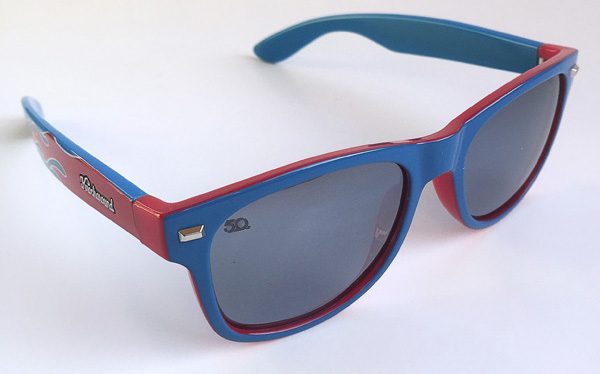
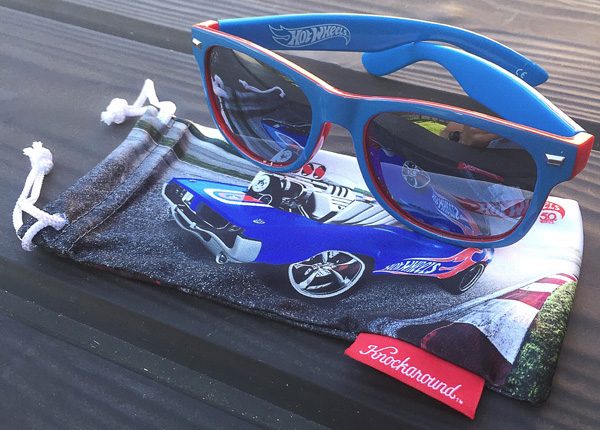
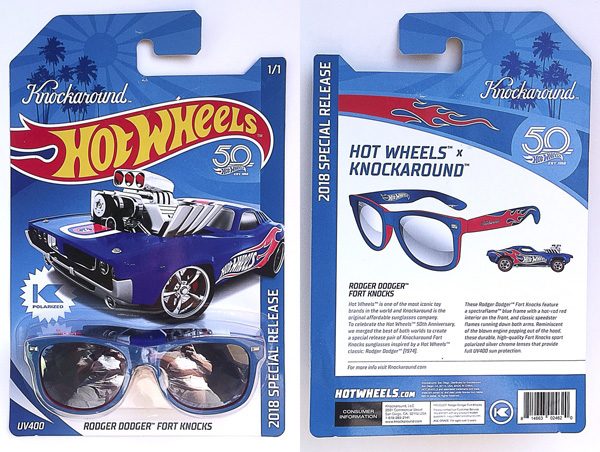
These shades are a brand collaboration between Knockaround, makers of cool, durable and affordably-priced sunglasses, and Hot Wheels, icon makers of beloved 1:64 scale toy cars for generations.  These Fort Knocks shades are styled to be reminiscent of the Hot Wheels “Rodger Dodger” toy car, with its distinctive blue and red flames chrome accents.

Hardware specs

  • Polarized silver chrome lenses with full UV400 sun protection
  • Microfiber cloth pouch

What’s in the box?

As a child of the 70s and 80s, I had an immediate feeling of nostalgia when I first saw the packaging of these shades.  The packaging itself is designed to very closely mimic that of the classic Hot Wheels toy car packaging.   I have to say that of all the products I have reviewed, the packaging of these shades is one of the most impressive and clever.

Inside the package:

  • Knockaround “Rodger Dodger” Fort Knocks sunglasses
  • Microfiber “Rodger Dodger”-styled drawstring storage/cleaning pouch

Design and features

As a bit of background, I first became aware of Knockaround when I stumbled upon their G. I. Joe Premium shades, which I wrote a short news article about here.  (Note to Knockaround: I’m a huge G. I. Joe fan and still hoping to be able to try them out!  Yo Joe!)

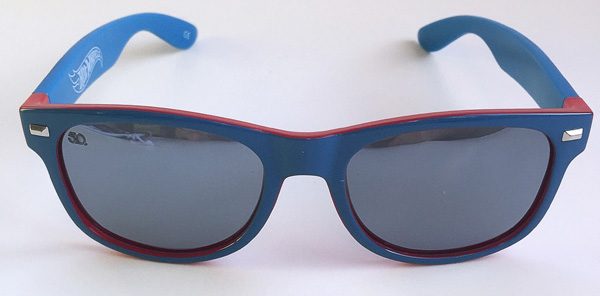
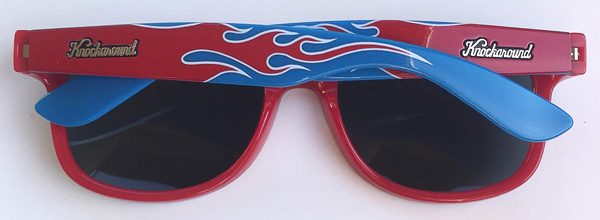
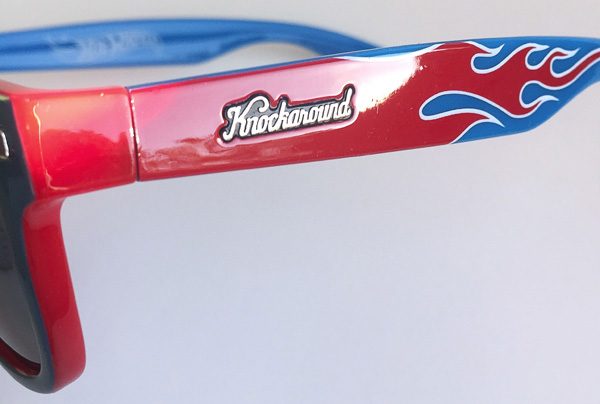
Let’s check out the shades themselves.  First off, Knockaround has done a great job with the styling on these, the blue and red paint color scheme is bold, bright and eye-catching, and it really does look like something that would have originated in the 80s.

These frames are Knockaround’s Fort Knocks style frames, which have a classic style but with a slightly wider fit than their other frames.  Plus, Knockaround claims they were so named because they are tough and can take a beating.

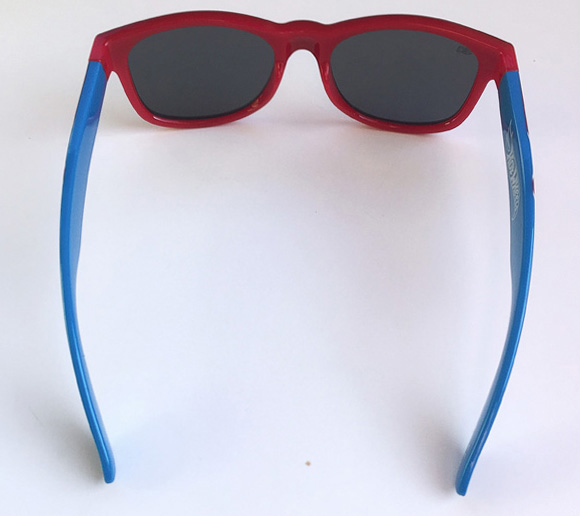
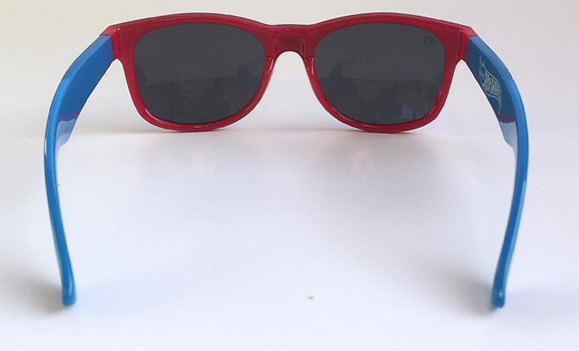
The inside of the front has a “hot rod red interior,” which is a neat contrast to the arms in blue.  When I first put them on, the red rims produced a cool effect when looking through them.

The Knockaround Fort Knocks sunglasses also include hidden spring hinges that help provide a more comfortable and conforming fit.

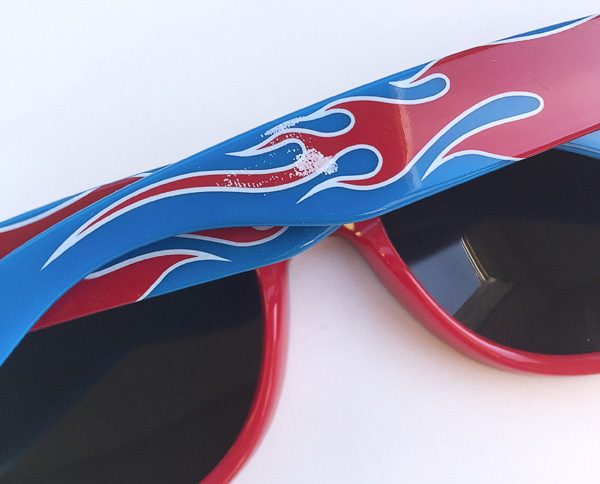
I noticed something on the right arm, as seen above, which appeared to be a bit of white residue.  In the process of scraping it off with my fingernail, I thought the flames would come off with it, but they did not.  

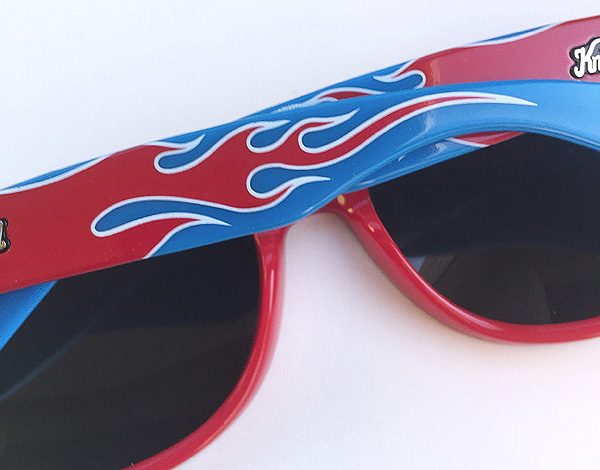
The other arm was fine, with no residue, as seen above.

Knockaround calls this styling “nitrous blue flame,” but to me, it looks like red flames with a blue background.  Either way, it looks cool.

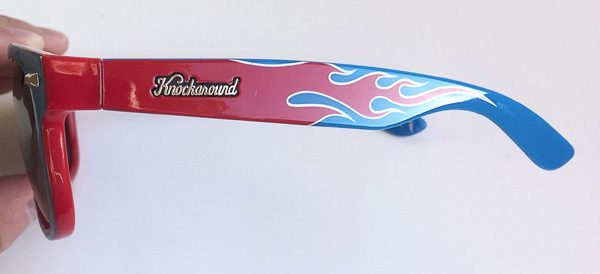
The blue and red color scheme is not the only thing that is reminiscent of the Hot Wheels “Rodger Dodger” racecar.  These sunglasses also have chrome accent, like the little silver squares on the front, and the recessed chrome “Knockaround” logo on both of the arms, as seen in the image above.

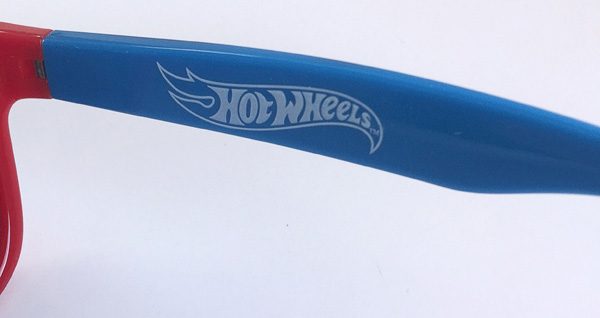
Knockaround also included a classic Hot Wheels logo in white on the inside of the right arm.

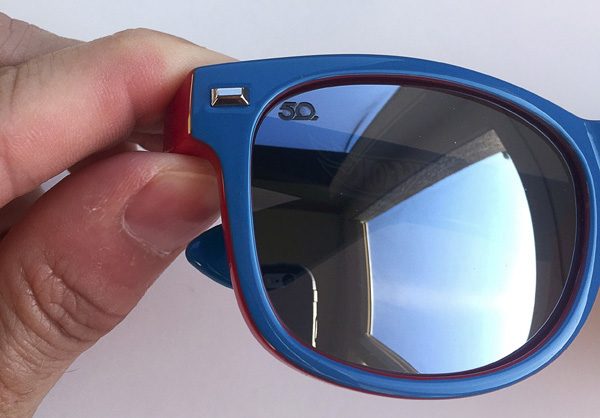
The upper right corner of the right lens of these shades has a tiny “50” molded in, a nod to these being Hot Wheels 50th anniversary edition.  You can also see one of the small chrome accents bars.  Note also that these Fort Knocks style sunglasses include Polarized silver chrome lenses (which gives them a very slight reflective look) with UV400 sun protection.

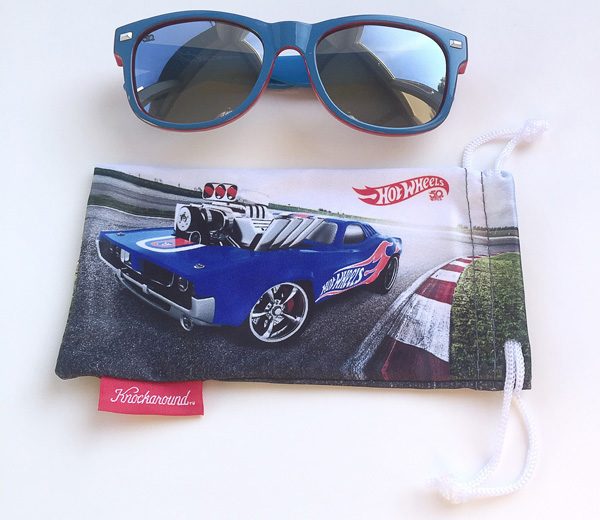
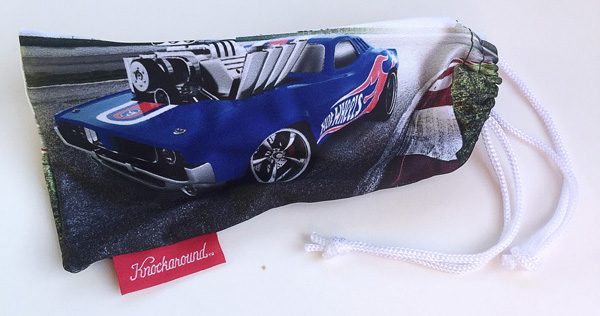
The microfiber drawstring storage/cleaning pouch is a really nice addition.  It features a lifelike image of the Hot Wheels “Rodger Dodger” race car sitting on a racetrack.

While I do like the nostalgic 1980s styling and linkage to such an icon and beloved toy company, I’m not sure these shades really fit my own personal style.  I’m more of a subdued, wraparound shades type of guy.  Still, these Rodger Dodgers are definitely fun and eye-catching.

It’s worth noting that last time these Knockaround “Rodger Dodger” Hot Wheels Fort Knocks sunglasses went on sale, they sold out very quickly.  As of this writing, they are currently sold out, but Knockaround reports that these will be re-issued starting in “mid-October.”

What I like

  • Retro 70s/80s throwback styling
  • Polarized lenses, UV protection and durable frames, but affordable pricing
  • Microfiber drawstring storage bag/cleaning cloth is included

What needs to be improved

  • Just that bit of white residue on the outside of the arm that I had to scrape off with my fingernail.

Final thoughts

Fun and nostalgic Hot Wheels styling with durable frames and polarized lenses, yet affordable pricing.  Knockaround has something good going with these brand collaboration shades.  These shades have a definite 80s throwback look and are definitely bold and eye-catching, so if these you think they are your styles, they are worth a look (pun intended).

Price: $35.00
Where to buy: Knockaround.com
Source: The product sample for this review was provided by Knockaround.com.

Filed in categories: Reviews

Tagged:

Knockaround Hot Wheels 50th Anniversary “Rodger Dodger” Fort Knocks sunglasses review originally appeared on The Gadgeteer on September 15, 2018 at 12:00 pm.

Note: If you are subscribed to this feed through FeedBurner, please switch to our native feed URL http://the-gadgeteer.com/feed/ in order to ensure continuous delivery.
Hudly Wireless heads-up display review

REVIEW – Pretty much every car made today is a rolling computer, with who knows how many processors controlling everything from the fuel system to your high-tech LCD display. But there are still many older cars on the road with nothing but an AM/FM radio to keep you entertained and informed. Many of these low-tech cars can be retrofit with an Apple CarPlay or Android Auto head unit. But if the dash of your car doesn’t allow or that sort of thing is too much hassle, the Hudly Wireless is engineered to bring the smarts of your phone to you while you’re driving in a non-distracting, hassle-free manner. Let’s see how well it does bringing some modern day features to our very low-tech Ford Thunderbird when paired with my iPhone X.

What is it?

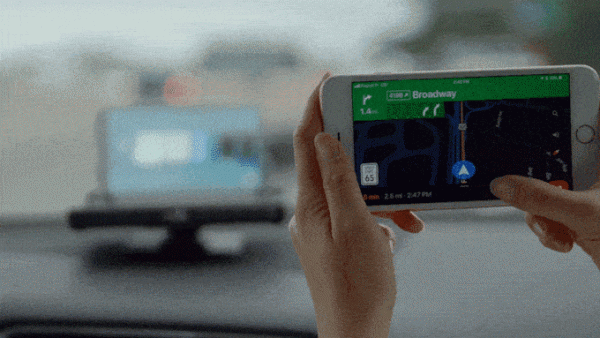
The Hudly Wireless is a portable head-up display (HUD) designed to project navigation directions, notifications, and other info from your smartphone to your field of view while driving. The latest Hudly product connects wirelessly to both iOS and Android devices and can be installed in virtually any car. Though be aware, for whatever reason Google Pixels and Nexus devices are not compatible.

Design and features

The Hudly Wireless portable head-up display began earlier this year as Kickstarter and Indiegogo campaigns receiving nearly $750k in combined funding with 1500+ backers.

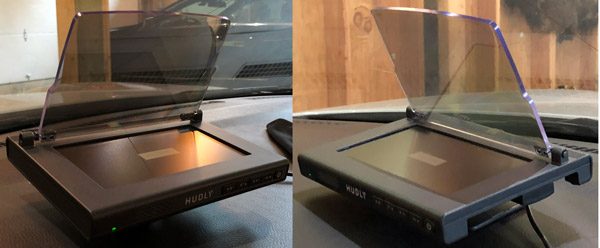
The Hudly Wireless measures 7.1 by 5.3 inches and stands about 2 inches high with base, less the transparent screen. Its casing is made of black plastic and adheres to your car’s dash via a removable 4.0-by-3.0-inch adhesive base.

The Hudly wireless has a 6.2” screen with a resolution of 800 x 480. The screen reflects onto an adjustable transparent display with a special coating that optimizes the reflection clarity and enhances the color and contrast of whatever you’re viewing. A sensor automatically adapts the brightness to ambient lighting conditions for optimal visibility. According to Hudly, the Wireless can get 5 times brighter than the typical smartphone screen.  Overall, I found the screen very bright, clear, and readable in all lighting conditions.

Hudly uses optical collimation to display directions in a similar focus plane as the road, elevating your reaction time and situational awareness since there is no longer a need to refocus your eyes for directions.

I have to disagree with this feature… I found that the screen was definitely on a closer plane of viewing than the road and objects ahead of me. That said, it is no more a distraction than a mounted smartphone or display in a typical modern car.

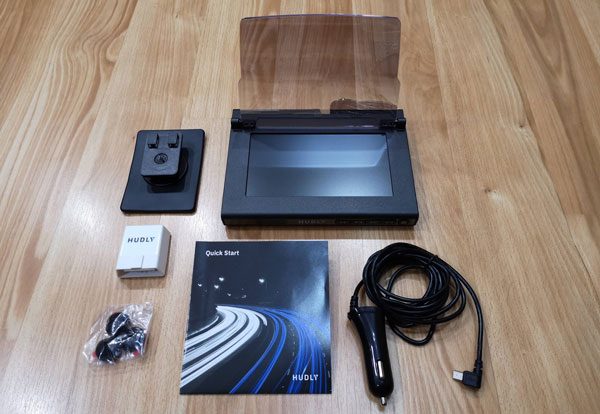
In the Box:

  • Hudly wireless heads-up display
  • Cigarette lighter power cable
  • Adjustable mount
  • Cable clips
  • Microfiber cloth
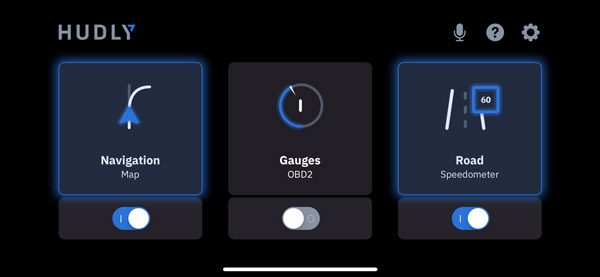
  • Optional OBD2 smart module

Installing the hardware and setting up the app is easy and takes just minutes to get things operational. Then each time you want to use the Hudly Wireless, your smartphone automatically reconnects to the device via WiFi.

But you do have to reestablish the mirroring from your phone to the Hudly. Occasionally the connection would flake and I had to power cycle the Hudly for it to work again but that was a rarity.

Like other vehicle tech-accessories, the Hudly Wireless is powered by a 12-volt power cord that plugs into the miniUSB charging port on the back of the device. The power cable is long enough to go around your dash and along your windshield enabling you to tuck it out of sight/the way. Though since I was using this in multiple vehicles, I never got around to making the wiring look presentable.

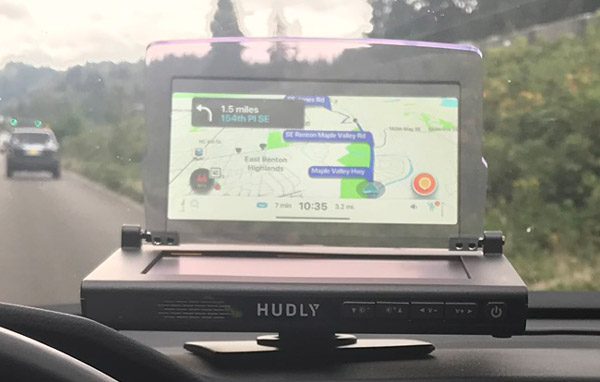
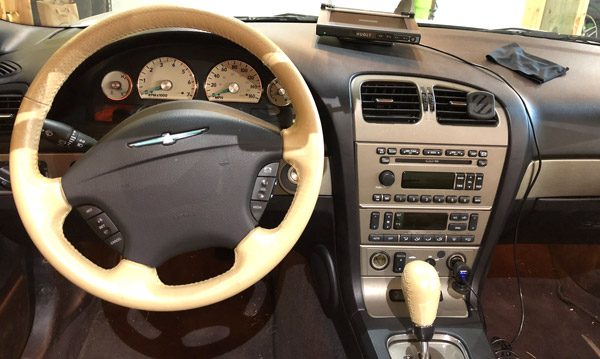
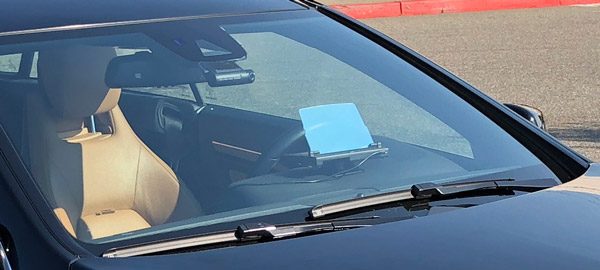
Here you see the Hudly Wireless installed in our very low-tech T-bird and it worked well even considering the steep angle of the windshield. Though I did prefer it off to the side and turned towards me, once again due to how the Hudly sat and the angle of the windshield.

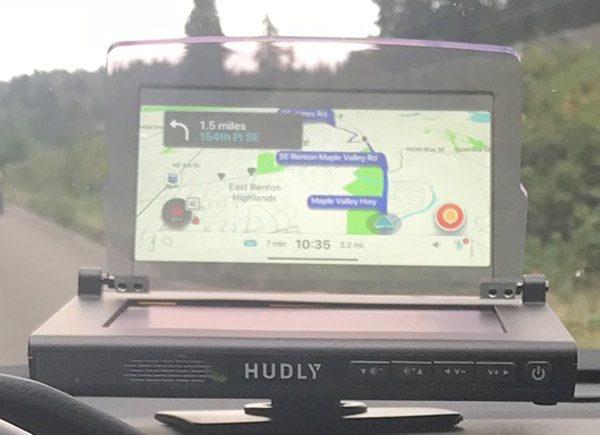
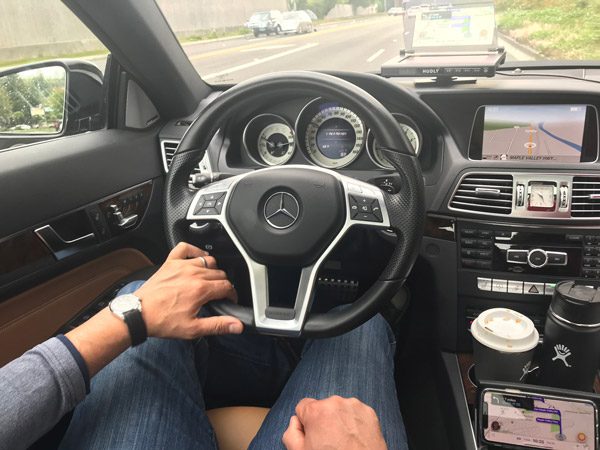
Here you see the Hudly installed in my three-year-old car and how it compares to the nav unit in my dash. Overall, the dash screen was brighter but the fact I could mirror Waze on the Hudly was much preferred to the stock nav software. You can also see how your smartphone has to be on and mirroring the screen for the Hudly to work. For extended use, you’d need to plug in your smartphone cause having your WiFi connected plus mirroring/casting with the screen on definitely chews thru your battery.

The front of the device has the power, volume, and brightness buttons for easy access/control. The speaker was loud enough to hear while driving.

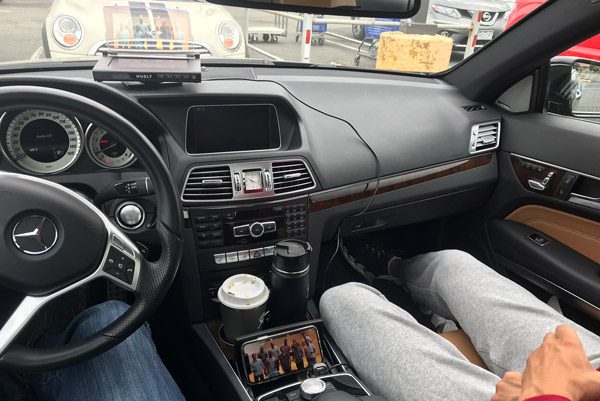
If you look real close, you can see Straight No Chaser on YouTube streaming from my iPhone to the Hudly Wireless. There is no safety feature to prohibit this sort of thing while driving. I was able to stream/view many video apps…anything Apple allows to be Screen Mirrored.

As it would happen, my wife was driving towards me while I was testing the Hudly Wireless and the first thing she said to me was how obnoxious the glare from the screen was. Obviously, the special reflective coating works both ways. I told her it was a safety feature like the flashing/oscillating motorcycle headlights.

What I like

  • Well build/engineered device
  • Bright, clear display
  • Mirrors your smartphone screen
  • Adds modern day functionality to old vehicles
  • Quick and easy to setup
  • Loud audio/speakers

What needs to be improved

  • Focal point more in the car than looking forward
  • Smartphone has to be on and mirroring/casting
  • Connection occasional had to be reset

For you motor-heads, the optional OBD2 smart module enables you to also stream your car’s performance data to the Hudly screen as well.

Final thoughts

Bottom line…the Hudly Wireless head-up display works as advertised. It enables you to mirror your smartphone’s screen in front of you while motoring down the road. The screen is bright, vibrant, and clear, easily seen in all lighting conditions. That said, in today’s high tech world, I see it as a relatively niche device. Most vehicles today coming with pretty good tech as a standard/included option, the ability to install Apple CarPlay/Android Auto head units into older cars, or just using a well-placed mount for your smartphone all of which gives you the same capability/features as the Hudly Wireless.

Price: $299
Where to buy: gethudly.com and Amazon
Source: The sample of this product was provided by Hudly.

Filed in categories: Reviews

Tagged:

Hudly Wireless heads-up display review originally appeared on The Gadgeteer on September 15, 2018 at 11:00 am.

Note: If you are subscribed to this feed through FeedBurner, please switch to our native feed URL http://the-gadgeteer.com/feed/ in order to ensure continuous delivery.

KYZA Travel Wallet review

REVIEW – I would say that I am an occasional traveler, getting on a plane maybe 4 to 6 times a year to go somewhere.  But even though I am not a heavy traveler, I am always on the lookout for travel gear that can make my life a little easier during the trip.  For some time I have wished that I could find an easier way to keep track of all the stuff you need while traveling… wallet, cash, cards, boarding passes, passports, notes, business cards, and more.  I hate having all those things spread out across my wallet, my suitcase, and my laptop bag.  So I decided to give the KYZA travel wallet a try.

What is it?

A leather travel wallet (2 actually) that keeps all your travel documents organized like your cash, credit cards, passport, boarding passes, receipts, notes, business cards, and more.

Product specs

Made of 100% genuine leather; brushed leather on the exterior and smooth leather on the inside. The wallet includes an inner wallet for your everyday travels and an outer wallet for your travel necessities.

Outer wallet:

  • Two slip pockets for boarding pass and passport
  • Note/cash compartment
  • Travel pen
  • Four credit card slots

Inner wallet:

  • Four credit card slots
  • Note/cash compartment
  • Rear slip pocket

Note: this travel wallet is designed for passports up to 125mm x 88mm (4.9 in x 3.5 in).

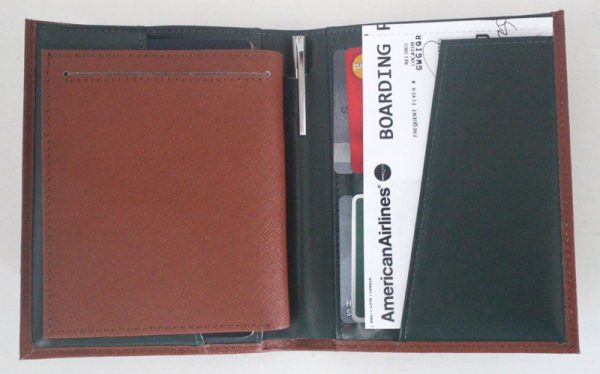
The larger outside wallet
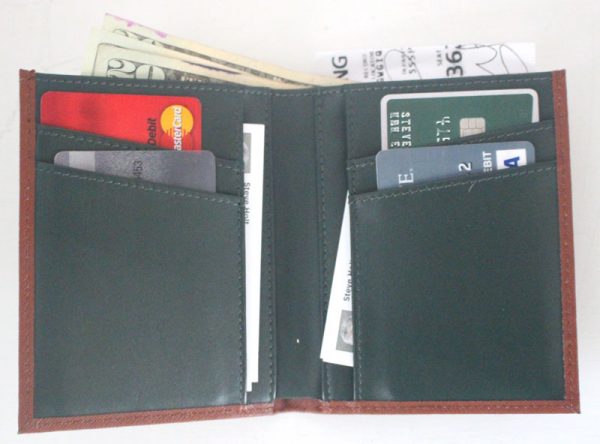
The smaller inside wallet
Here is the smaller wallet slipped into the larger wallet.
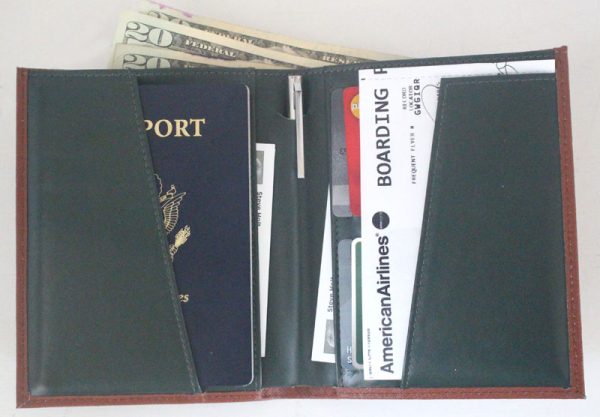
Here is the smaller outside wallet with numerous items inside.
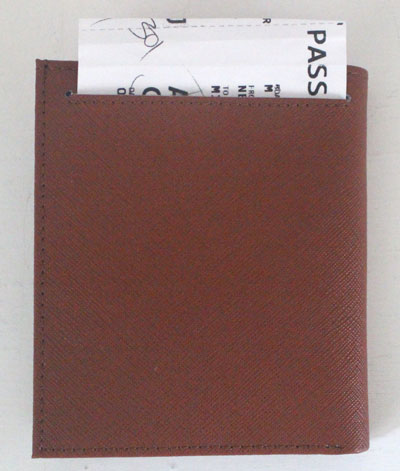
This is the back of the smaller wallet where the outside slit pocket is located.

What’s in the box?

A larger outer wallet, a smaller inner wallet, and a drawstring cloth bag to hold them when you aren’t traveling.

Design and function

When you look close at the KYZA you can tell that it is a quality product.  It doesn’t feel cheap and I imagine that it will last for several years of use.  The inner wallet is smaller and thus can be slipped into the outer wallet to keep everything together while you are traveling.  And the inner wallet is designed to slip out to use during your daily touring away from your hotel room.  As you can see from the pictures, the KYZA is quite thick when you get everything inside.  I did not feel comfortable having the KYZA (both the outside and inside the wallet together) in my suit coat inside pocket because it was so thick.  So I kept it in my laptop bag while en-route.  It was however wonderful having all my travel stuff together in one place instead of spread out in multiple places.

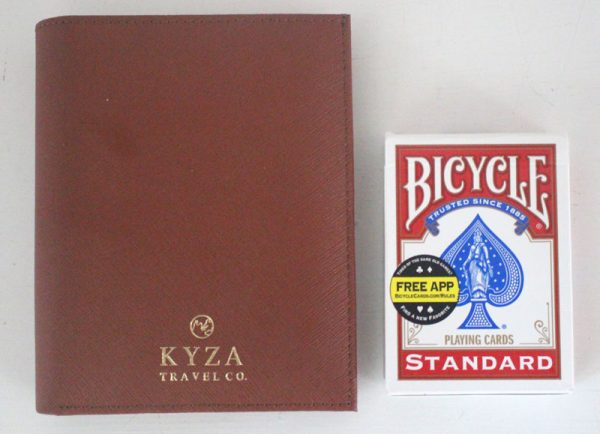
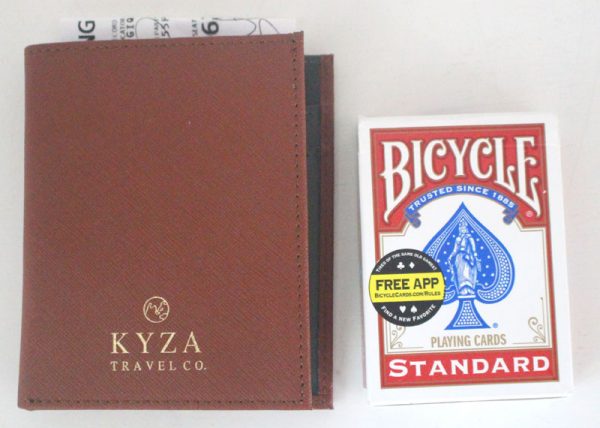
Here are some pictures of the how thick the wallets are when compared to a deck of cards and my existing wallet I use every day at home:

The larger outside wallet
The smaller inside wallet
Both of the wallets together
The smaller outside wallet compared to my everyday wallet at home

As you can see from the pictures, the number of slots and pockets in the KYZA is wonderful, and you can place all manner of things inside… cash, passport, boarding passes, receipts, business cards, credit cards, notes, and more.  There is even an ink pen nicely tucked inside the center spine of the outer wallet so that you never have to hunt for a pen when you have to fill out a form or sign a receipt.  Very nice.

I did have a couple of negatives that I want to mention.  The KYZA doesn’t come with RFID protection for your credit cards.  There are competing products that are also very nice out there that are cheaper and come with RFID protection, so KYZA needs to add that to be competitive.  Also, the KYZA logo on the outside is a bit too much for my taste.  It makes the wallet look like something I picked up a trade show, not a premium product that costs almost $130.  They could have easily done a small stamped logo in the leather on the front if they really wanted their logo on there, or better yet inside the wallet.

Final thoughts

I really like the KYZA despite the conspicuous logo emblazoned on the front and the lack of RFID protection.  I have some travel bags that have RFID protection and can utilize those to keep my KYZA safe when needed.  But it would be nice at this price point to have a feature that competing products already have.  I can’t give my highest recommendation to the KYZA, but it is a high-quality wallet that does the job and will last you a long time.

Price: $129.99
Where to buyKYZA website
Source: The sample of this product was provided by KYZA

Filed in categories: Reviews

Tagged: ,

KYZA Travel Wallet review originally appeared on The Gadgeteer on September 15, 2018 at 9:00 am.

Note: If you are subscribed to this feed through FeedBurner, please switch to our native feed URL http://the-gadgeteer.com/feed/ in order to ensure continuous delivery.

BoxLock smart padlock review

REVIEW – Road rage. PTSD. Spam. Phishing. You know something has become widespread when there’s a name for it that most folks recognize. Here’s a new one – Porch Pirate. Those are the folks who drive around behind delivery vehicles and grab packages from the stoops of the intended recipient. And, like any good contagion, there is a solution. BoxLock is a lock for a porch box that can be unlocked by your delivery person only with the bar code of the tracking number of expected packages. The Gadgeteer, of course, is on the case and have been testing one they sent us. Read on for the details.

Note: Photos may be tapped or clicked for a larger image.

What is it?

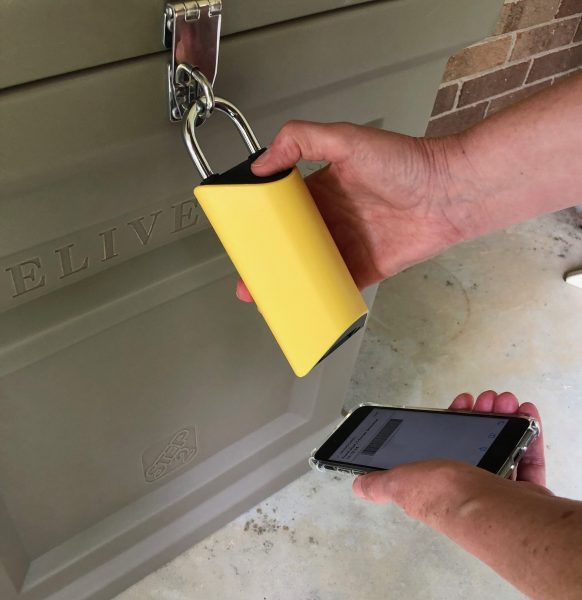
The BoxLock is a heavy-duty hasp-type lock with an integrated bar-code scanner. The software that you configure your lock with allows you to add package tracking numbers to the account. When the delivery person scans the tracking number from your package, the lock opens.

What’s in the box?

  • Lock
  • MicroUSB charging cable
  • USB 110V charger
  • Instruction sheet
  • Printed Master BarCode card

Design and features

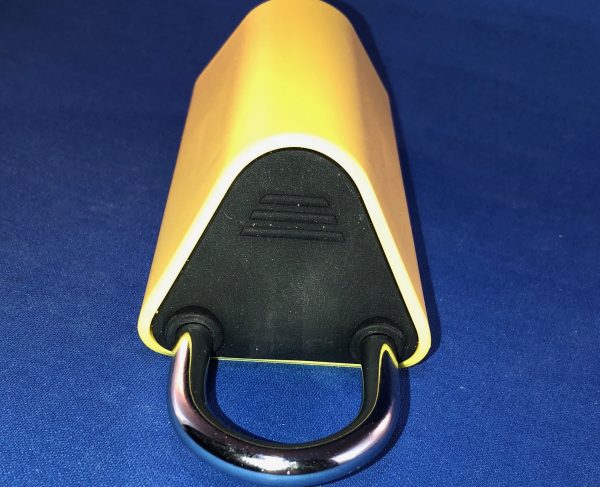
The BoxLock is a bright yellow 1.25” triangular lock 5” long on the rear, and 3.5” long on the angle that faces forward. The hasp is 1.25” in diameter inside, and extends about that amount from the top in the locked position. One flat side is against the back of the hasp, the opposite angle faces out. When naturally grasped, your thumb falls onto that angle at the top, where a button is placed that, when pressed, engages a light and a bar-code scanner beam. When a package whose tracking number is entered into the lock’s account, the lock will open, and the owner of the account can get an alert. If the lock is left open for a set amount of time, another alert will be sent, warning the owner that the lock was not properly re-engaged.


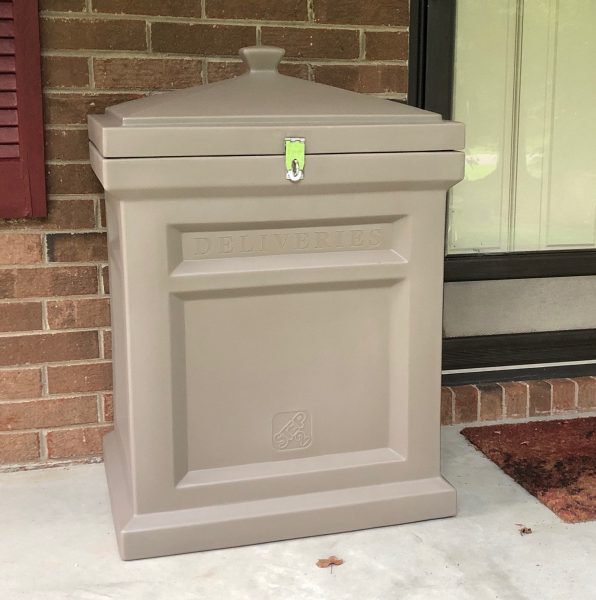
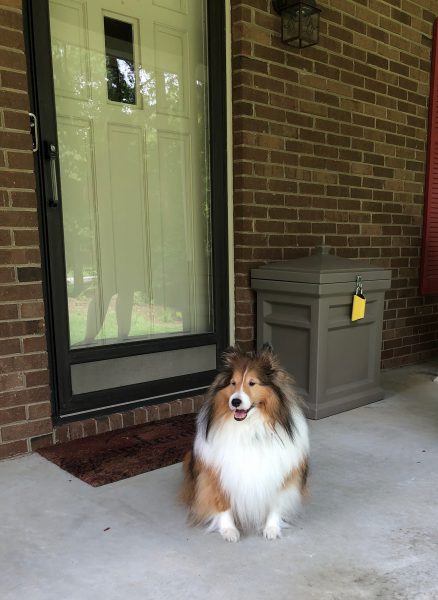
Since the hasp is a pretty standard padlock size, it will fit into most places that can be secured by a standard padlock. This means you could even have your shed or backyard be the place the delivery person opens to leave your package. I had planned to move my rear deck box (which normally houses electric hedge clippers, electric blower, and a 100 ft. heavy-duty extension cord and various other garden implements) to the front porch to test the lock. BoxLock was kind enough to include a Step2 box, one of the models which they also sell from their website. This vented box came preassembled and ready to place on my front stoop. The deck box had to be assembled, which was not an easy task. The metal hasp fits the BoxLock perfectly, with the bright yellow of the box lock drawing attention to the “Deliveries” label molded into the box. This made no difference to drivers whose habits have become ingrained. But, if we can ever get deliveries there, it can be easily weighted and it would make walking off with packages a bit more problematic.

Setup

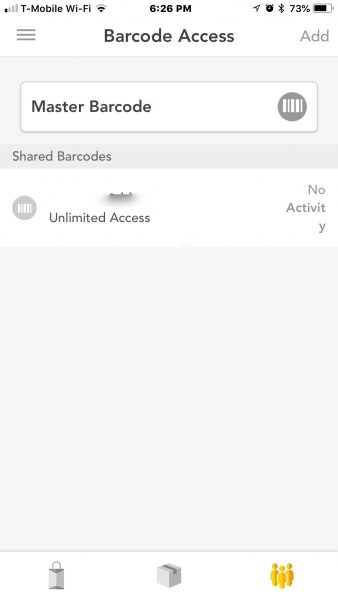
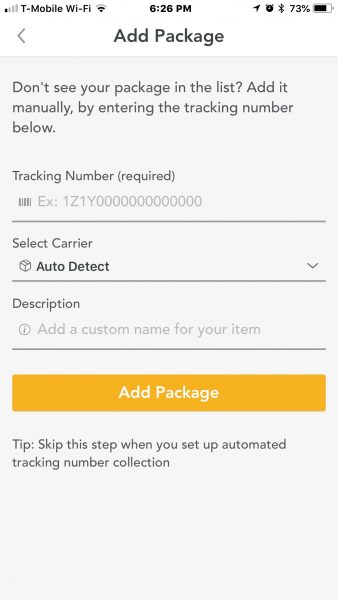
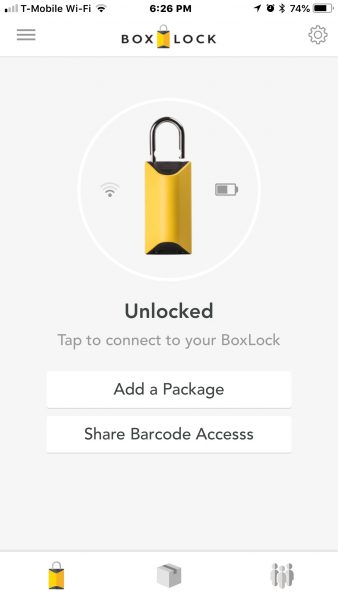
The lock will not work until it has been activated with an account, which is a good thing. You wouldn’t want a lock that you can’t control accidentally locked to something. Setup requires creating an account in the website or app and agreeing to the privacy policy of an unknown company (of course). Once you’ve fully activated your account, scanning or entering the serial number adds it to your account, and you’re in complete control. You can re-name the lock, or add anyone you’d like as a user by sending them a barcode that is their unique access code. You’ll get a notification (or at least a notice in your account) that they have accessed it.

Performance

Performance in unlocking with a package was perfect. Also, when I sent the signal from my account to open the lock, it immediately popped open every time. The one area that could use some work is when I sent the barcode to my Lovely Bride for her to be able to unlock the box using it on her phone. She was never able to get that to work. I could wiggle it around and play with the various distances and angles and finally get it to work with her phone barcode, but she hasn’t the patience for that. Printing out a card that I would expect her to have on her person every time she goes to fetch packages from the porch is a little beyond the pale. I’ve only just gotten her to see the need to carry her phone on such missions.

The lock, when used by the delivery companies, worked flawlessly. Through my video doorbell, I watched the first driver walk up on the porch, check the notes I had left on the delivery, and walk up to the lockbox. He swung the lock up and saw the scanner in the bottom, and then tested the button. He then grabbed the package he had set down, scanned it, and chuckled slightly when the lock popped open in his hand. He put the package in the box, locked it back, and gave the lock a tug to ensure it was secure. This was repeated with each driver who bothered to read the delivery instructions. Which brings up another issue. I’m lucky to get drivers to read that I want packages delivered to the front door, where they will be out of the sun and rain. (Our side door is south-facing and gets blisteringly hot.) It doesn’t matter how many times I call and ask, There is always some new driver who takes the route, and it’s not delivered to the correct place. The other issue is that the Post Office delivers many packages for other carriers. If it’s a package that meets the USPS parcel minimums, all of the shippers just have them fulfill the shipment. These are stuffed in the mailbox along with the rest of the mail. Even valuable packages like RAM or medicines are shoved in the mailbox with the mail and left to bake in the sun.

What I Like

  • Easy setup and entry of packages into account
  • Auto-recognizes the “Big Three” common carriers (UPSP, FedEX, UPS)
  • Allows adding other account users with their own custom barcode

What needs to be improved

  • Getting carriers to use it is going to take time
  • Using barcodes on phone screens in daylight is still problematic

Final thoughts

I love this product. It addresses a real problem that is growing, especially around gift-giving seasons. I think it would earn a permanent place on my front porch, except for two factors: having a strong-box on your porch is not very “welcoming”, and my Lovely Bride can’t get into it through her phone barcode. The other side of this is getting carriers to use it. Most of the prescription medicine deliveries are left in the mailbox, rather than delivered to the door.

Price: $129.00
Where to buy: Amazon.
Source: The sample of this product was provided by BoxLock.

Filed in categories: Reviews

Tagged:

BoxLock smart padlock review originally appeared on The Gadgeteer on September 14, 2018 at 11:30 am.

Note: If you are subscribed to this feed through FeedBurner, please switch to our native feed URL http://the-gadgeteer.com/feed/ in order to ensure continuous delivery.