Nanoleaf remote review

REVIEW – Not all 12 sided dice are for role-playing games. At least one of them can help automate your home.

What is it?

The Nanoleaf remote is pretty unique as remotes go. It doesn’t have any buttons, screens or even charging ports. Instead, it has 12 sides that encourage you to pick it up and play with it. How does it work? What can it control? Let’s find out.

Hardware specs

Dimensions: about the size of a tennis ball (but 12 sided)
Power: runs on 2 AA batteries
Battery Life: 3 years standby, 1 year of active use

What’s in the box?
  • 1 Nanoleaf remote
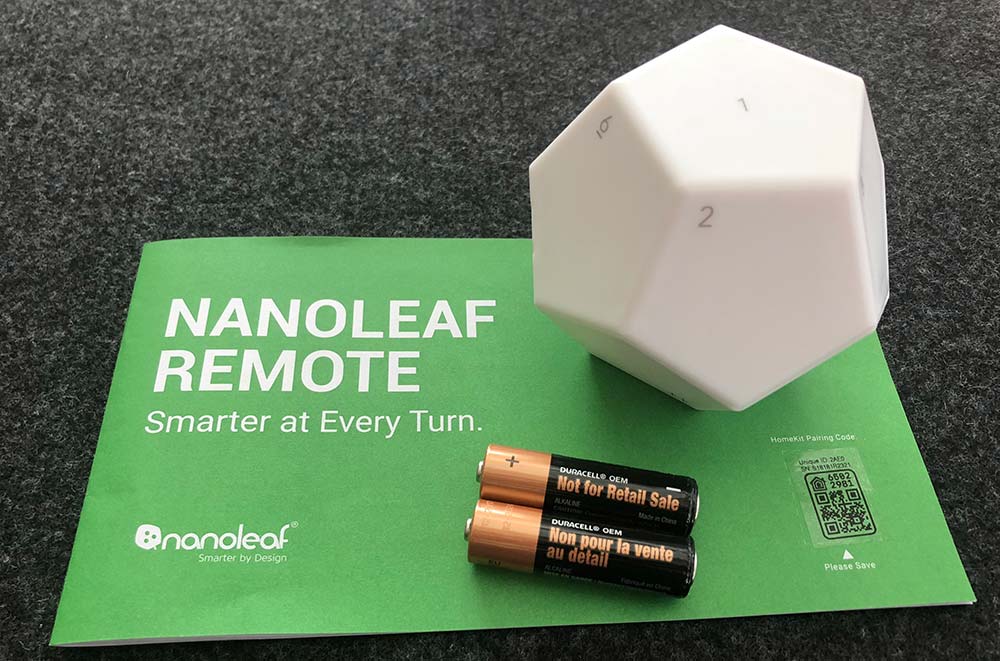
  • 1 Pair of AA batteries
  • 1 Instruction manual

Design and features

The Nanoleaf remote is a dodecahedron with softly rounded corners and edges. It feels good in the hand and it should as the whole premise is that this remote is meant to be touched, picked up and rotated. It’s also a very visual system which makes sense given that Nanoleaf’s core product is a modular lighting system. Each side is numbered 1 through 12 while producing its own color. Each can be individually programmed to act as a trigger for Homekit scenes or Nanoleaf panel color changes. There’s additional functionality if you’re using it with the Nanoleaf panels, as rotating the remote on a given side can adjust the brightness of your panel’s lights.

Setup

Physical setup is as simple as installing the batteries. The remote is already disassembled in the box.
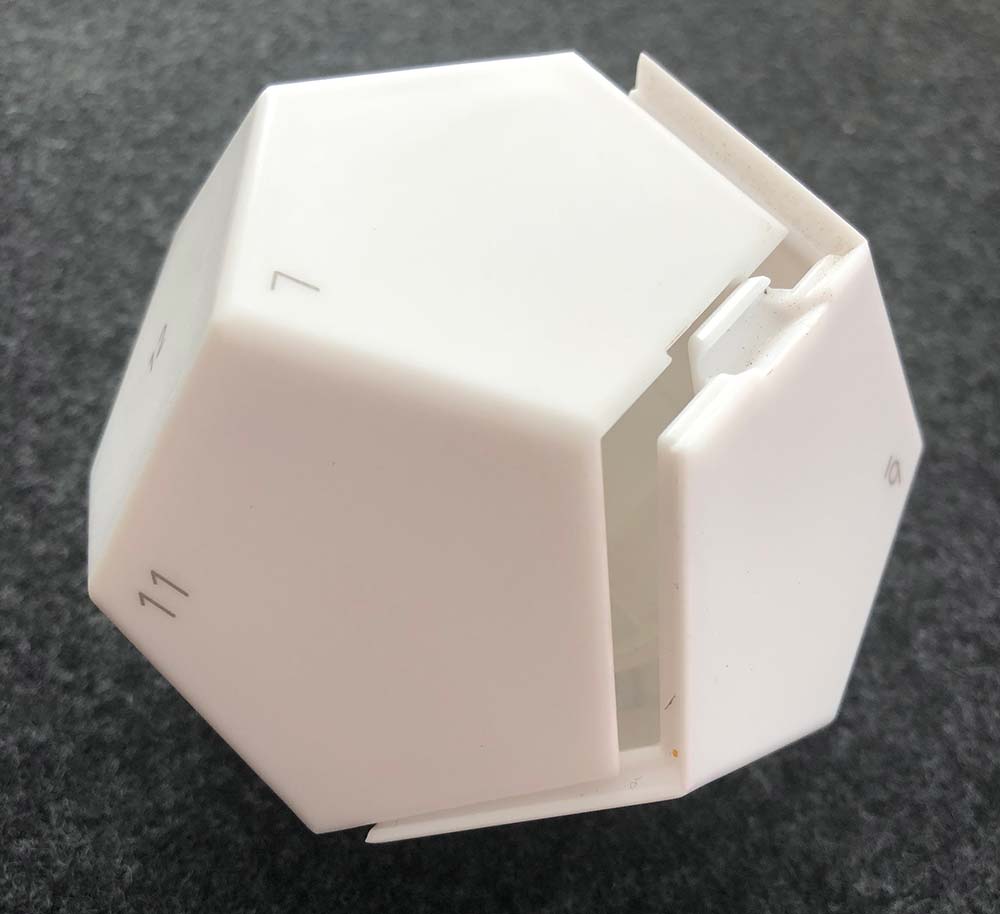
The only thing to note is that the left battery should be negative up and the right is positive up. There’s no physical markings inside on the battery compartment that I could see and the illustration is confusing.
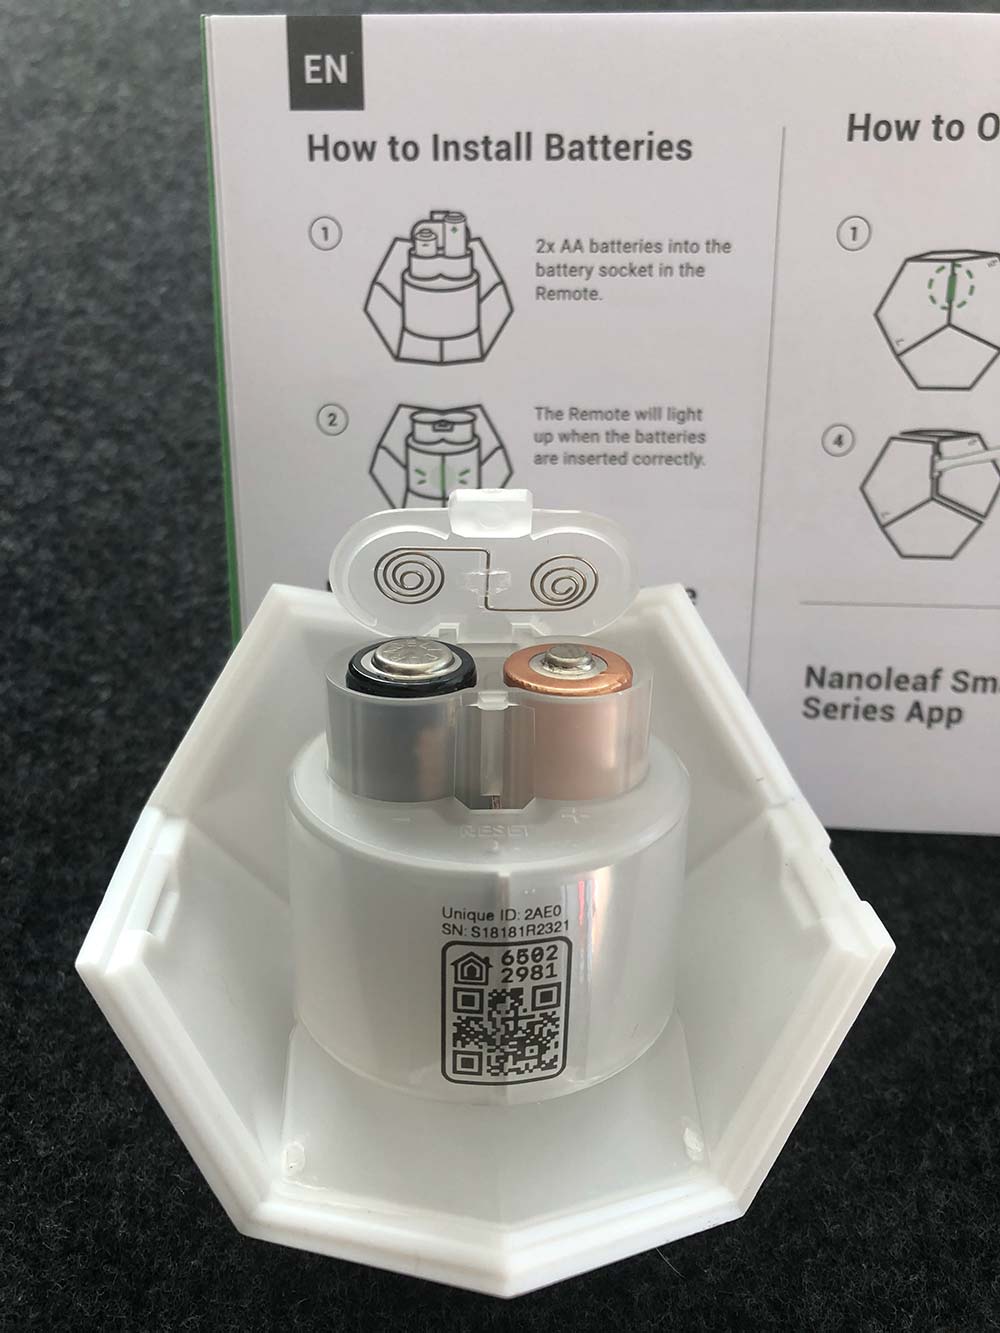
Pretty trivial though as the compartment is easy to open and close, and it lights up right away if you’ve got it right. Here’s a quick video of that startup sequence. (Please excuse the vertical video. I have no idea what I was thinking.)

Before you snap the two sides together, you’ll need to download the Nanoleaf app for Apple or Android and there are QR codes for both in the manual to get you to the right place quickly. Once you’re in the app, create an account and you’re now ready to pair with the remote.

Click the ‘Remote’ button in the bottom center and then the big ‘+’ at the top. Click on ‘Remote’ and then follow the instructions. I used the Homekit Setup Code which found the remote quickly and landed me on a page to customize the name and choose from the rooms I already have set up in Homekit.
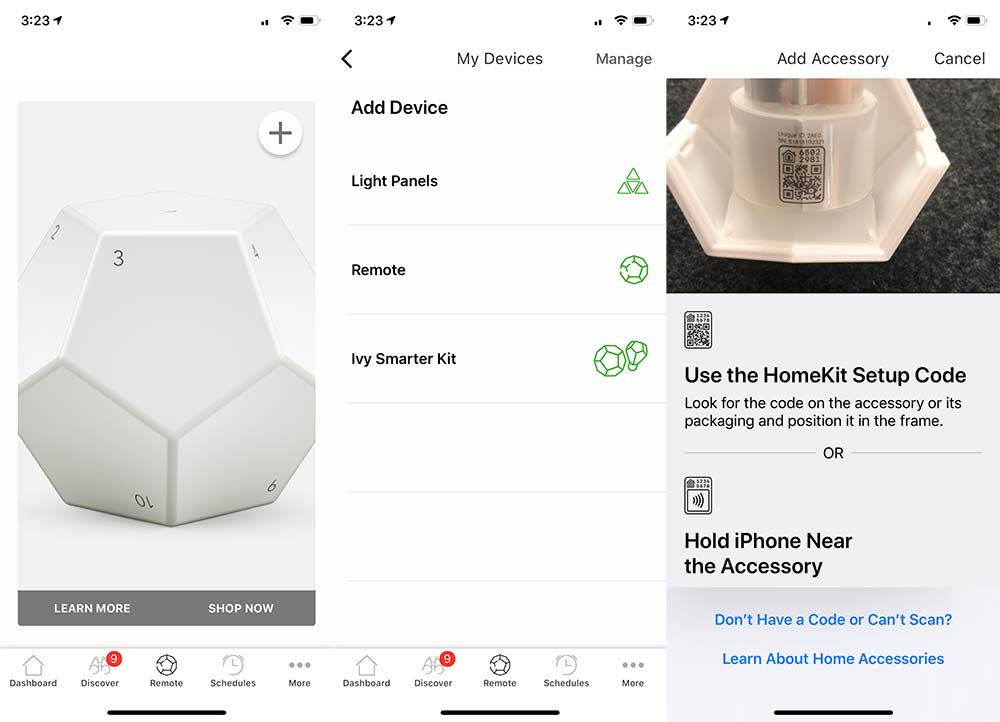
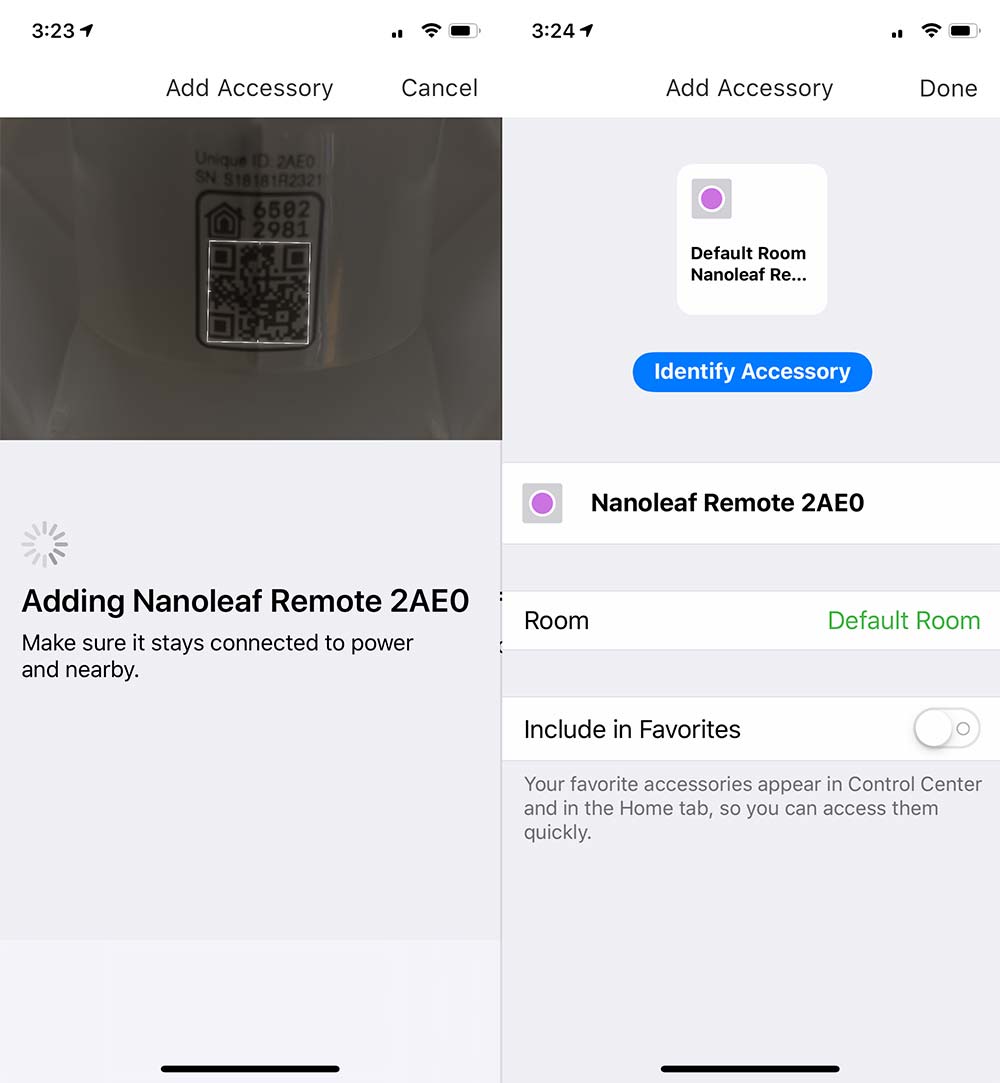
That same ‘Remote’ icon at the bottom now drops you to a screen where you’re presented with all 12 sides to customize. From having set this up originally I had ended up setting side 1 to an ‘All Off’ function, so I repeated that step in the Nanoleaf app for this walkthrough. As you can see in the pic, it has you finish the configuration in the Apple Home app.
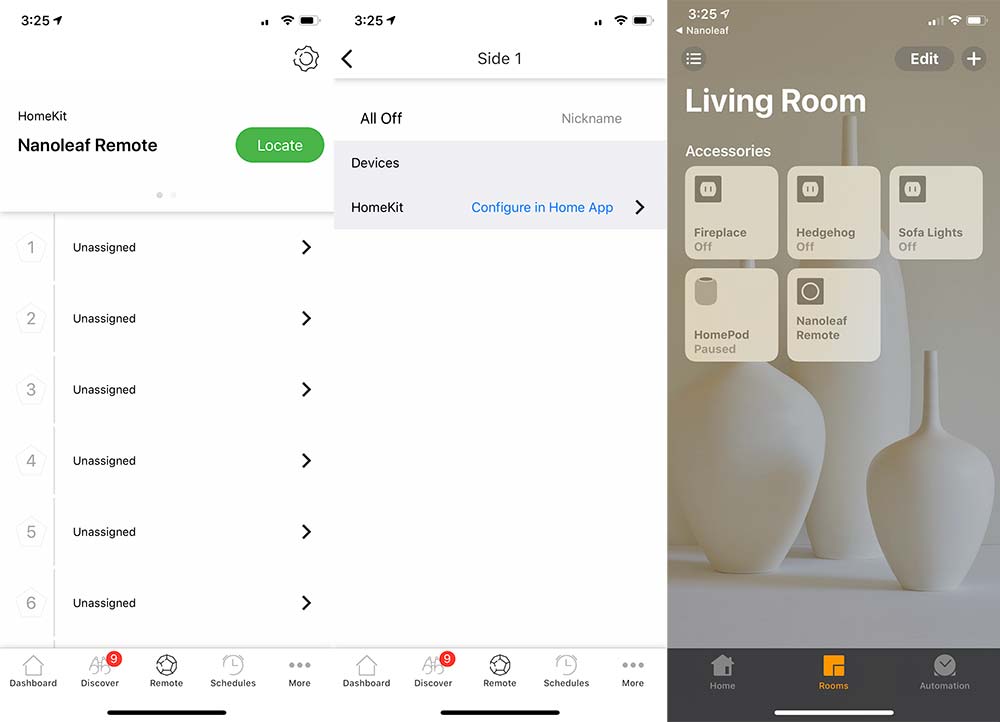
From the Home app, you need to press and hold ‘Nanoleaf Remote’ to see that I have 12 unconfigured buttons and see the ‘Settings’ button. Pressing ‘Settings’ lets you customize all 12 sides. For side 1, I’ve selected 5 lights that I want to turn off. All the others are already on schedules or infrequently used.
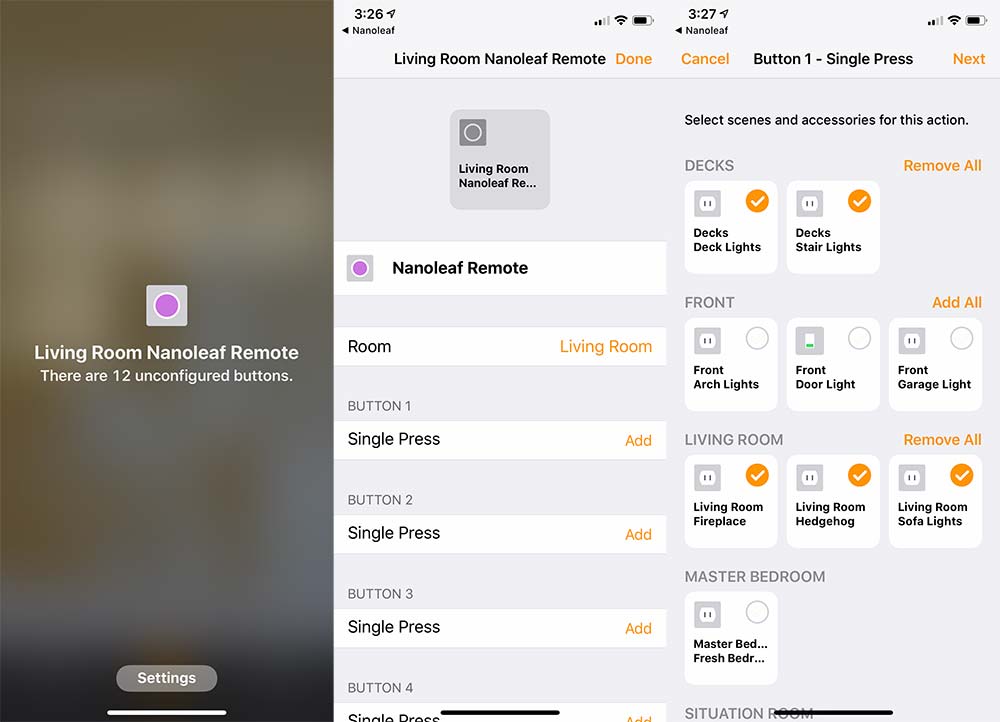
When you hit next, you need to define what action is being taken. In my case, they’re all set to ‘Turn Off’. Then you click done. Continue this for each side and set the action that you’re looking for. In my case, I set each even number to turn a specific Wemo on, and the next odd number to turn that same one off. I did not have actions for the final 3 sides.
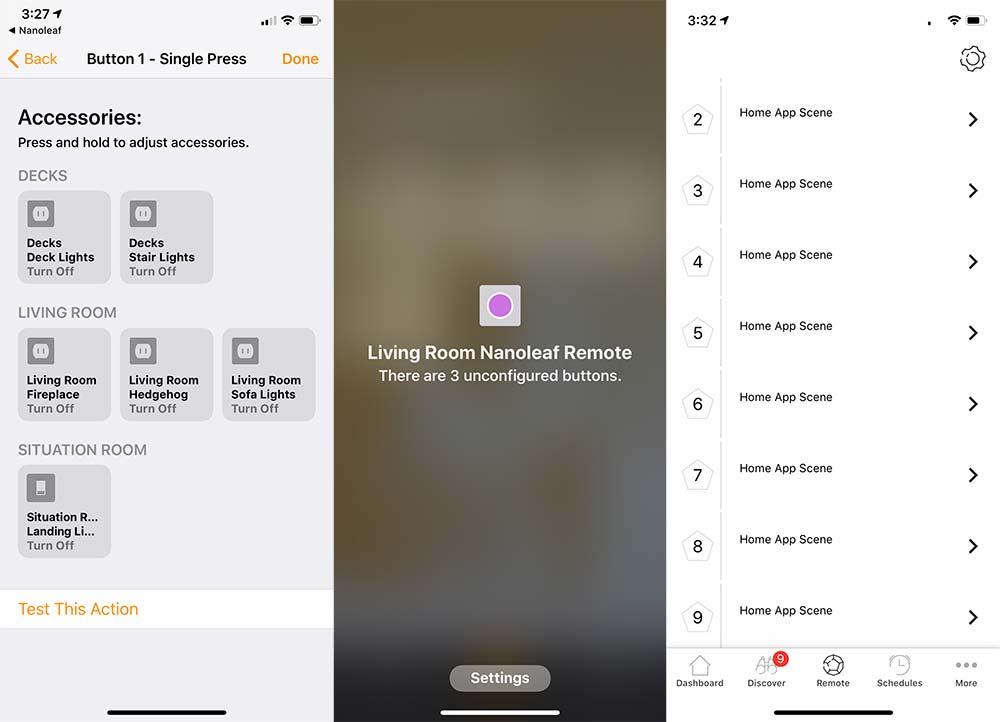
I’ll cover that last pic a bit more about the way I programmed the remote in the next section as I definitely feel like I’m using the remote for a very specific, narrow functionality and not taking advantage of its power.

Performance

In our house, we recently set up an Apple Homepod and added a Wemo Bridge to allow our multiple Wemo products to be Siri/Homepod compatible. We primarily have Wemo Outlets (both original and the newer minis) and then two Switches. As we continue please know that my review is based on controlling Wemo products and not any other Homekit accessories or Nanoleaf products.

We’ve been using Siri to turn on our various accessories, and used Alexa before getting a Homepod. The Nanoleaf remote added a very tactile (and quiet) action to accomplish the same thing. It’s actually quite refreshing instead of talking to a disembodied voice. In our case, picking up the remote and turning it from side 1 to side 2 activates the lights around our sofa.

I started realizing how narrow my use was when I originally set up the remote. I had 2-6 turning on different lights and realized that I needed the ability to turn off specific ones while leaving others on. That meant I needed to be able to remember which sides did what which led me to the even/odd setup which has been working pretty well.

Here’s a video of turning on and off our deck lights at night to give you an idea of the interaction of using it as an on/off trigger.

I can imagine that if you’re using the remote to control Nanoleaf’s own light panels or any other Homekit compatible color changing bulbs, part of the charm may be in the discovery of different color palettes as you rotate to find one that fits your mood. When using it as a binary on/off, you end up looking at each side more to find the number you want to turn to.

It helps that each side produces a different color as you can pick it up and rotate it in your hand until you see the color you want and then wait or set it down to trigger the action. It still means you need some recollection of what each color means. Here’s what that looks like.

There’s also haptic feedback as you rotate the remote in place looking for which number you want to turn to. I’m guessing this is to provide tactile feedback when controlling brightness levels on compatible hardware.

Within the Apple Home app, there’s no additional interaction unless you want to change settings. Back in the Nanoleaf app, however, I was surprised to see that each of the different sides all had the same name… ‘Home App Scene’ (the last photo in the setup section shows this). You could go into each one and retitle it, but it appears that there’s no back and forth communication between the Home and Nanoleaf apps as far as naming action goes, so it would really just be a housekeeping exercise. The Home app (settings) is going to be your source of truth for what the action is anyway.

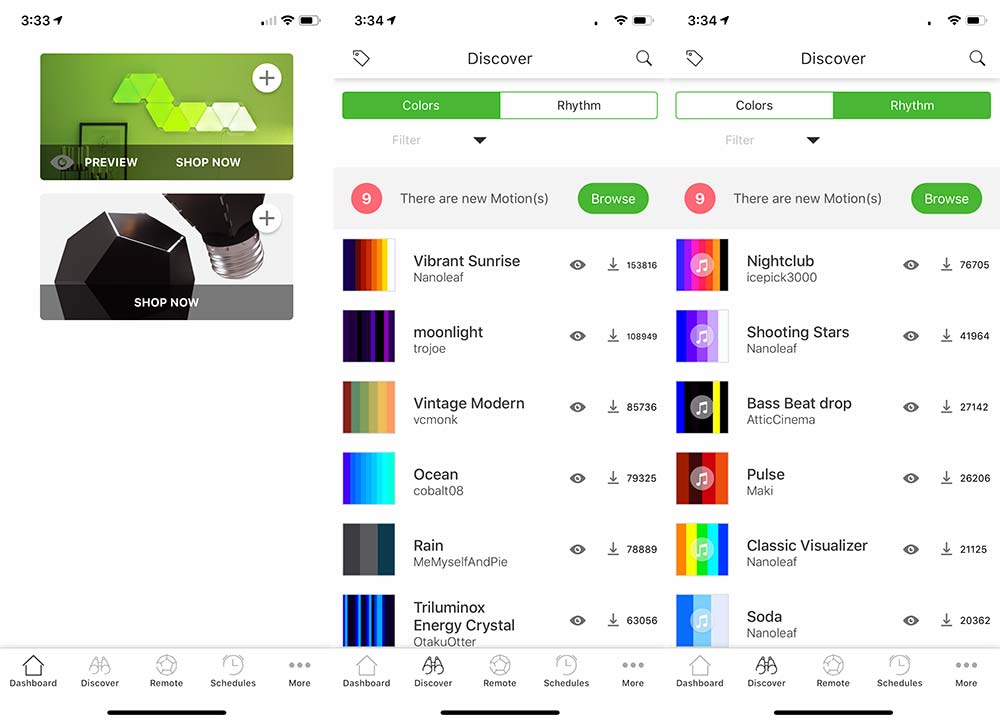
The Nanoleaf app does show a good bit more of what I’m missing by not having Nanoleaf light panels. There are schedule settings, a store and a ‘Discover’ section that has some amazing looking Colors and Rhythms which unfortunately look like they don’t work with the lights within the remote itself as I cannot select it as a device to download to.
As often as Alexa would respond with ‘you have multiple devices with that name’ (I guess many of them share the word ‘lights’); the Nanoleaf remote is not a surefire replacement either.  It’s pretty reliable, but sometimes you’ll turn to the side and nothing happens. I’m going to hedge my bets here and say that this is unlikely to be a sole Nanoleaf issue. Nanoleaf plus Homekit, plus Wemo Bridge, plus Wemo outlet… You get my point. Multiple opportunities for a handoff failure.

What I like

  • The size, shape, and illumination
  • The action of picking it up and rolling/rotating to trigger an action
  • The battery life (assuming it meets their claims)

What needs to be improved

  • Would like to see some of that color customization available for the remote
  • When it doesn’t trigger a light, it’s hard to understand what didn’t work

Final thoughts

I have to say that it’s incredibly fun to play with.  It’s also a great conversation starter. It looks cool, so guests pick it up and are intrigued by the light changing on the remote itself, and even more so when lights around them power up.  Somehow this just feels more magical than asking our non-human family member/assistants to do the same thing.

Price: $49.99
Where to buy: Nanoleaf
Source: The sample of this product was provided by Nanoleaf.

Filed in categories: Reviews

Tagged:

Nanoleaf remote review originally appeared on The Gadgeteer on September 17, 2018 at 4:00 pm.

Note: If you are subscribed to this feed through FeedBurner, please switch to our native feed URL http://the-gadgeteer.com/feed/ in order to ensure continuous delivery.

Logitech MX Vertical advanced ergonomic wireless mouse review

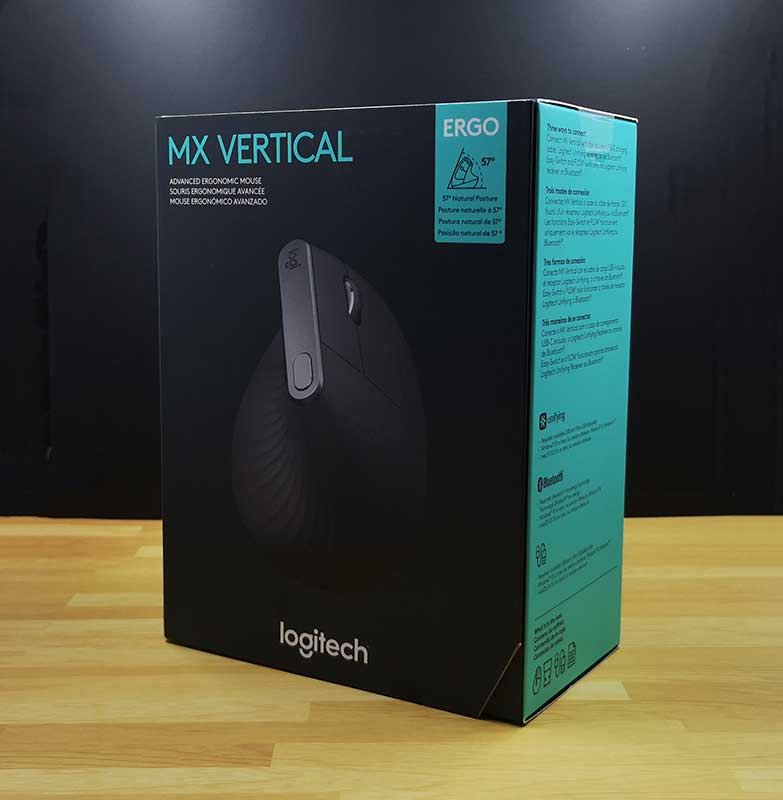
REVIEW – Do you have hand or wrist issues due to an RSI (repetitive stress injury) from using a mouse with your computer day in and day out? I’ve had some issues with my mousing hand for a year or so and have been trying a variety of ergonomic mice to see if one of them might help with those issues. The newest mouse that I’ll be testing is Logitech’s MX Vertical advanced ergonomic mouse.

What is it?

The MX Vertical is Logitech’s latest mouse which has been designed to provide a more neutral grip to prevent forearm twisting which can lead to RSI.

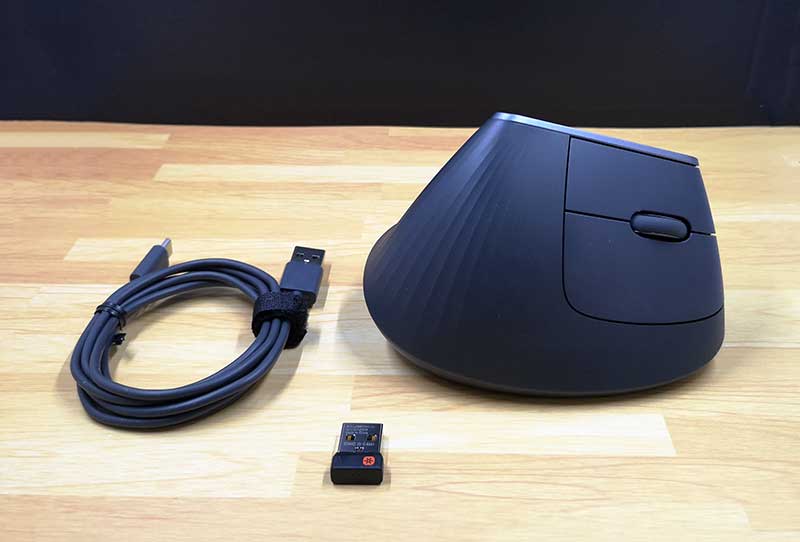
What’s in the box?

  • Logitech MX Vertical mouse
  • USB receiver
  • USB-C charging cable

Design and features

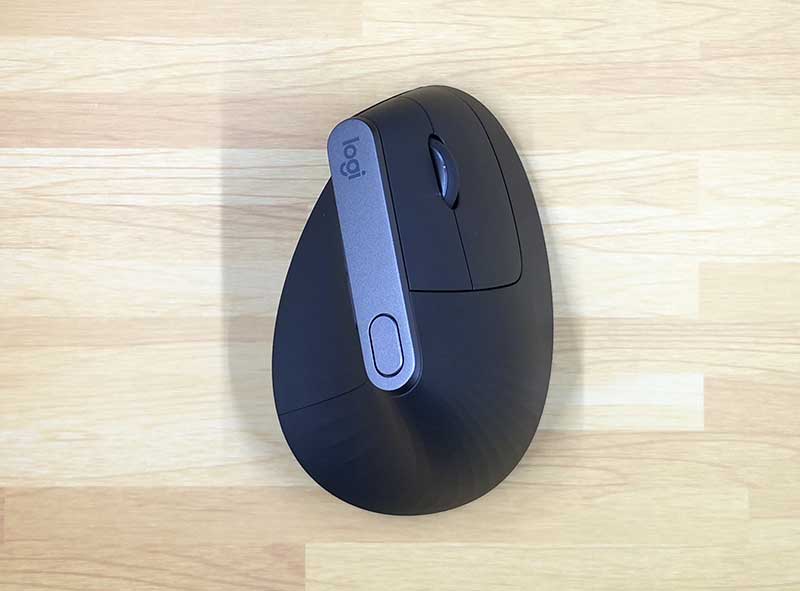
The MX Vertical mouse has a similar style to Logitech’s other mice including the MX Master 25 which I’ve been using for the past year or so. The MX Vertical has a dark gray / slate colored soft touch covering that provides grip and comfort.

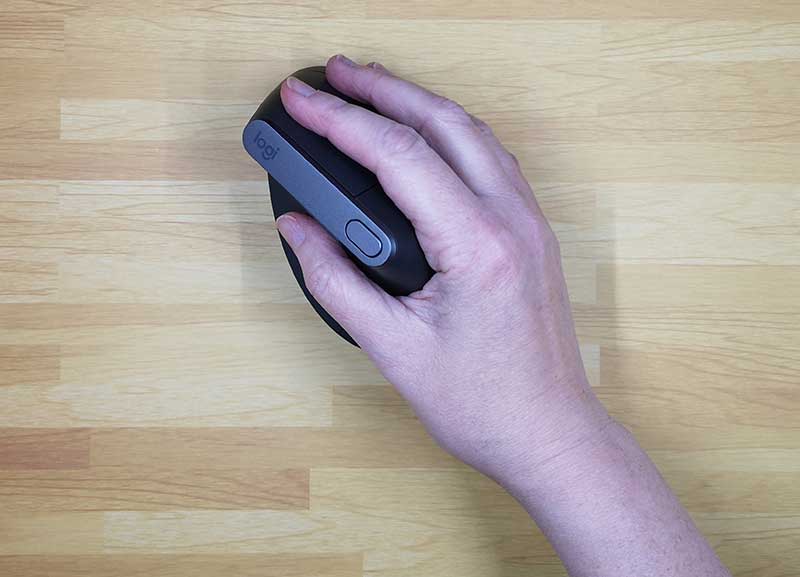
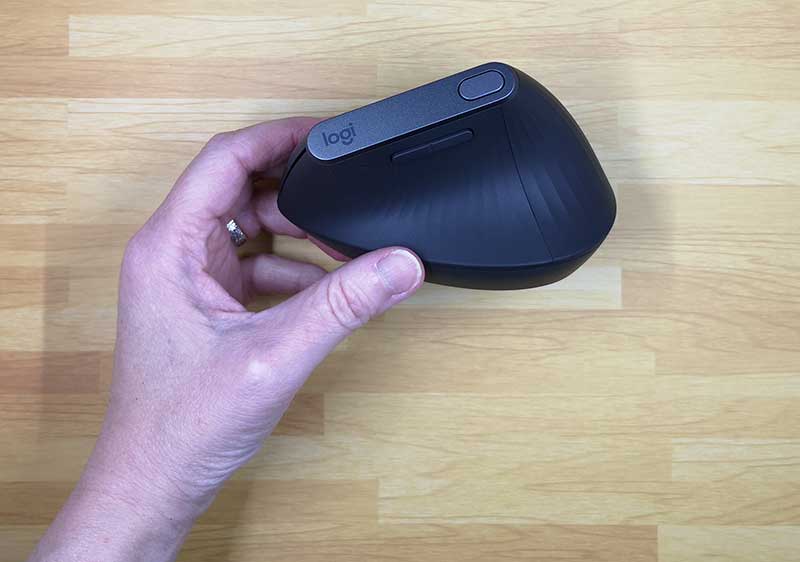
This is a 2 button mouse with a click scroll wheel, and 3 other programmable buttons. A large button on the top and rocker button above the thumb rest area.

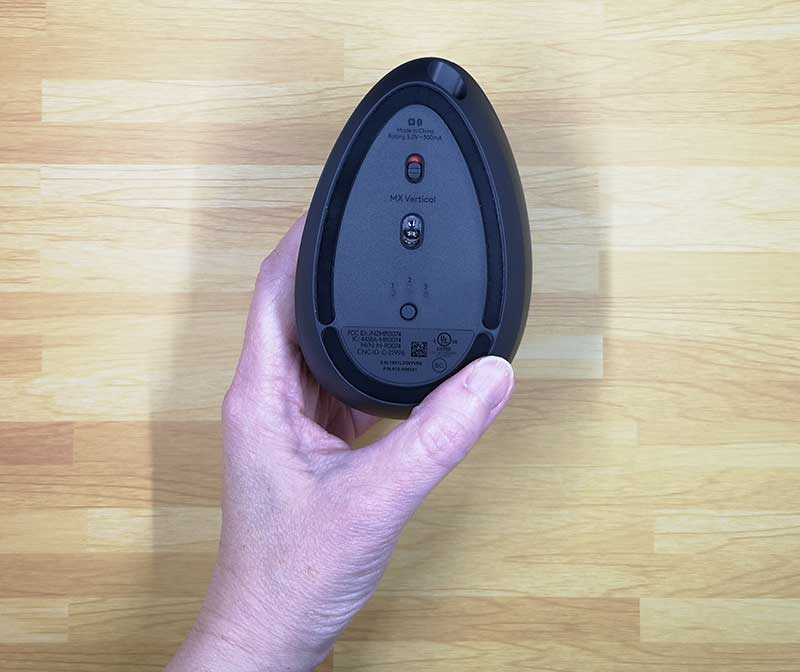
On the bottom of the mouse are the power switch and the channel switch that allows you to switch between up to 3 different devices that are paired with this mouse since the mouse can be connected to your computer, or tablet via Bluetooth or the included USB receiver. You can have the mouse connected to your laptop using the USB receiver and your phone or tablet using Bluetooth and easily switch between them with a press of the button on the bottom of the mouse.

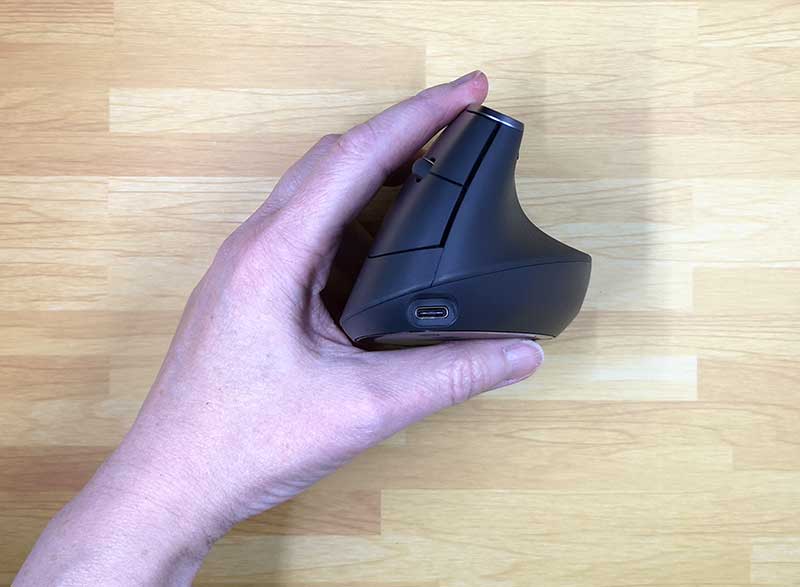
You can also connect the mouse to your computer using the included USB-C cable which plugs into the front of the mouse.

As mentioned, the MX Vertical is designed to provide a neutral grip so that you don’t have to rotate your forearm counterclockwise to use it. It provides a 57-degree angle that is supposed to deliver the optimal ergonomic posture for your hand. There’s a ledge for your thumb to rest and your index finger and middle fingers rest on the left and right buttons.

Let’s mouse around!

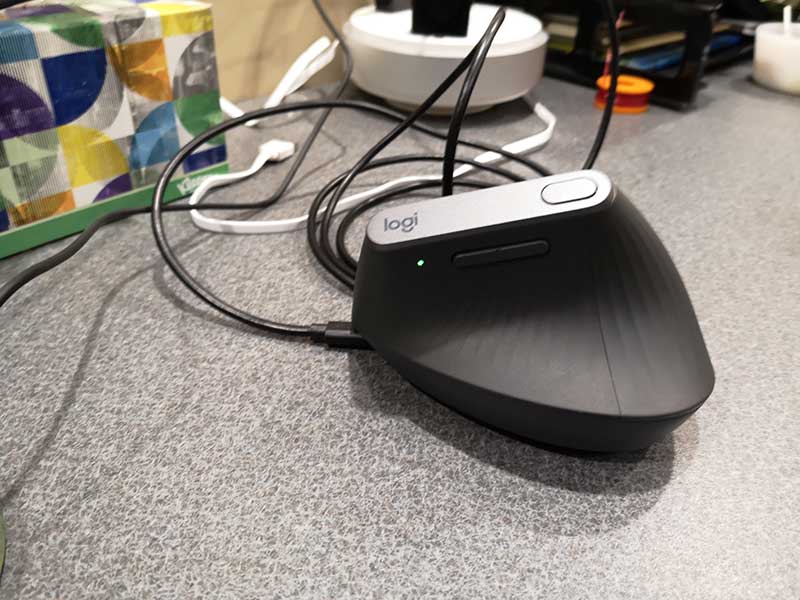
Like with any battery powered device, the first step before using it is to charge it up. To charge the Logitech MX Vertical mouse, you just connect the included (or any) USB-C cable to your computer or a USB power adapter. A small LED will light up to let you know that the mouse is charging. A full charge power the mouse for up to 4 months and if it does run out of juice, you can get 3hrs of use out of a quick 1-minute charge.

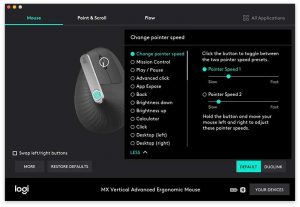
After charging is completed, you can start using the MX Vertical right away but connecting it to your computer using one of the three methods already described above. Out of the box, the left and right mouse buttons work as you would guess they would and the scroll wheel does what scroll wheels do… it scrolls. The scroll wheel can also be clicked to select things like most scroll wheels can do. By default, the top button can be used to switch between two pointer speeds and the rocker button scrolls left and right. However, if you don’t like those settings, you can customize them using the Logitech Options app for PC or macOS.

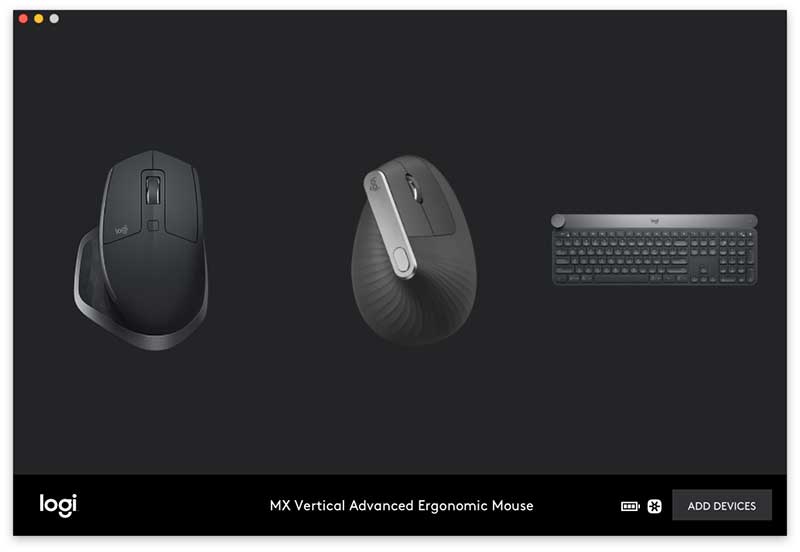
This app will detect all your Logitech connected devices and let you program and customize buttons and settings.


The options app will also let you setup Duolink which gives you the ability to control the computer using gestures with the mouse while holding a function key on the keyboard.

What I like

  • 4-month battery life on a full charge
  • Smooth movement on desktop
  • Multiple device switchable

What needs to be improved

  • Scroll wheel feel
  • Needs to be heavier

Final thoughts

I’m a big fan of Logitech products and have been using their mice and keyboard for years. I use their Craft keyboard daily and the MX Master 25 mouse daily. I was excited to try the MX Vertical because I do have inflammation in my mousing thumb and thought it might help. But, after using the MX Vertical for the last couple of weeks, I’ve switched back to the MX Master 25 which feels better to me for a couple of reasons.

First of all, I don’t like the feel of the MX Vertical’s scroll wheel. It has a ratchet click feel (and sound) when you scroll it vs. the completely smooth scroll setting on the MX Master 25 mouse which I prefer.

I also found that it was harder to do select text and do finer cursor movement in apps like Photoshop when I use the MX Vertical vs. the MX Master 25.

For me, I didn’t find that the ergonomics provided enough benefit to make me want to switch from my current favorite mouse. All that said, there’s nothing wrong with the Logitech MX Vertical. It’s a nicely made wireless mouse that works just fine for most people and for most tasks. It’s just not going to become my new favorite.

Price: $99.99
Where to buy: Amazon
Source: The sample for this review was provided by Logitech.

Filed in categories: Reviews

Tagged: ,

Logitech MX Vertical advanced ergonomic wireless mouse review originally appeared on The Gadgeteer on September 17, 2018 at 10:00 am.

Note: If you are subscribed to this feed through FeedBurner, please switch to our native feed URL http://the-gadgeteer.com/feed/ in order to ensure continuous delivery.
Kingston DataTraveler Bolt Duo review

REVIEW – Phones and even tablets often serve as the most-used, or even the only, camera that most people have these days.  The cameras on most of these devices take great pictures, so they are a good, convenient method of documenting your daily life.  The problem with relying on a mobile device as your camera is that there isn’t unlimited space to store your pictures plus the apps and other data you need.  There isn’t always an easy method of transferring your photos to another device so that you can delete some images to free up space again.  In the past, I have reviewed a flash drive that allowed you to transfer images from your mobile device to a computer, but that device had some problems.  (It worked great, but it turned out to rely on an app that wasn’t written for it nor supported for it.)  There are no such problems that I encountered when I was reviewing the Kingston DataTraveler Bolt Duo flash drive for Apple mobile devices.  Let’s give it a closer look.

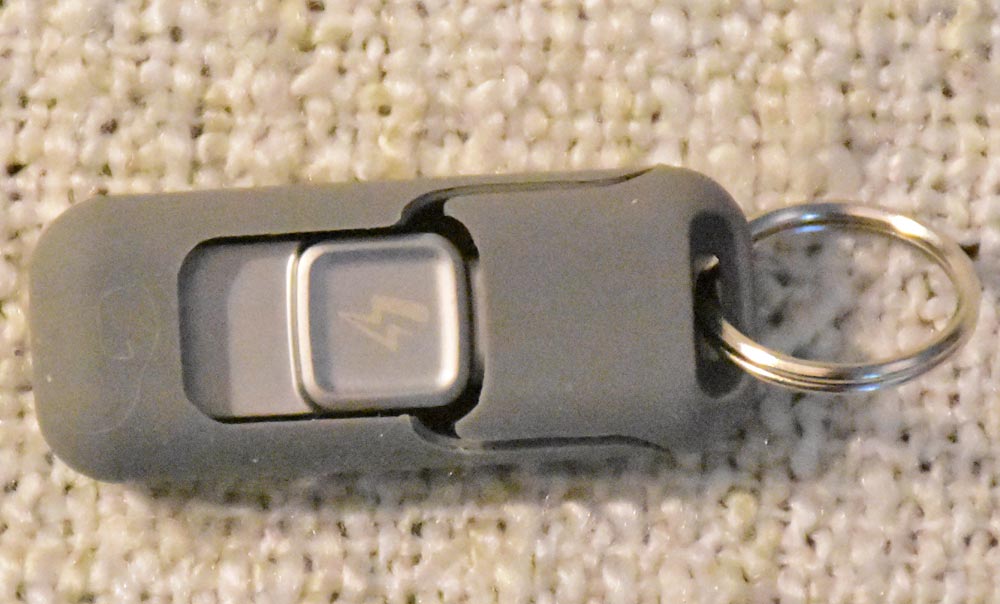
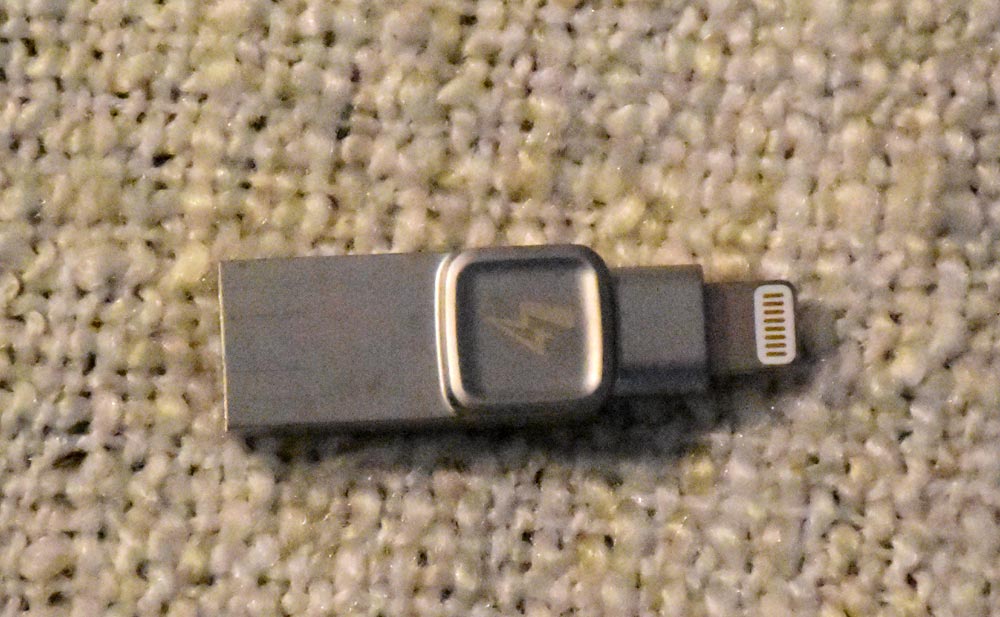
The Kingston DataTraveler Bolt Duo (seen at the top in an image from Kingston, but all others are my own images) is a flash drive with a Lightning connector on one end and a USB 3.1 plug on the other.  It’s Apple® certified, so it’s designed to work with most models of the iPhone and iPad.

Please forgive the dust and lint on the silicone sleeve.  It is a dust magnet!

Hardware specs

  • Connections: 1 Lightning, 1 USB 3.1 Gen 1
  • Dimensions: 1.6″ x 0.48″ x 0.26″ alone; 2.6″ x 0.79″ x 0.43″ in keychain accessory
  • Weight: 0.25 ounces alone; 0.51 ounces in keychain accessory
  • Compatible with:  iPhone 5, iPhone 5s, iPhone 6, iPhone 6+, iPhone, 6s, iPhone SE, iPhone 6s+, iPhone 7, iPhone 7+, iPhone 8, iPhone 8+, iPhone X, iPad (4th generation), iPad Air, iPad Air 2, iPad (2017), iPad Mini, iPad Mini 2, iPad Mini 3, iPad Mini 4, iPad Pro (1st generation), iPad Pro (2nd generation)
  • OS support:  iOS 9.0 and newer
  • Warranty:  2-year warranty with free technical support
  • Capacity:  32GB with storage for up to 8000 photos or two hours of video; 64GB with storage for 16,000 photos or 4 hours video; or 128GB with storage for 32,000 photos and 8 hours of video

Setup

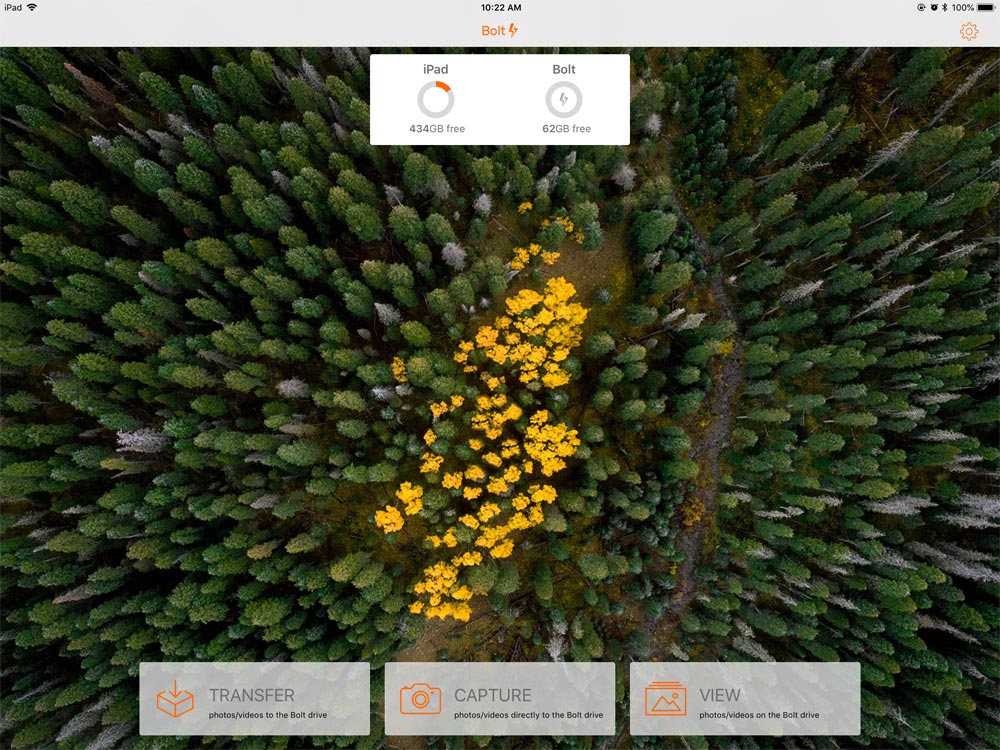
Setup couldn’t be simpler.  You plug the Bolt Duo into your iPhone or iPad and follow the prompt to install the app from Apple’s App Store.

Once it’s installed, you’ll see options and the capacity of your Bolt Duo.  You’ll see that I received the 64GB drive.

The app has three options:

  • Transfer photos or videos to the Bolt drive
  • Capture photos or videos using the Apple device’s camera and microphone directly to the Bolt drive
  • View the contents of the Bolt drive on the Apple device

Each time you plug the Bolt into the iPhone or iPad, you’ll be prompted to allow the app to access the Bolt device.  You’ll also be asked to allow the app to access the device’s camera and/or microphone when you want to capture images or videos directly to the Bolt.

Performance

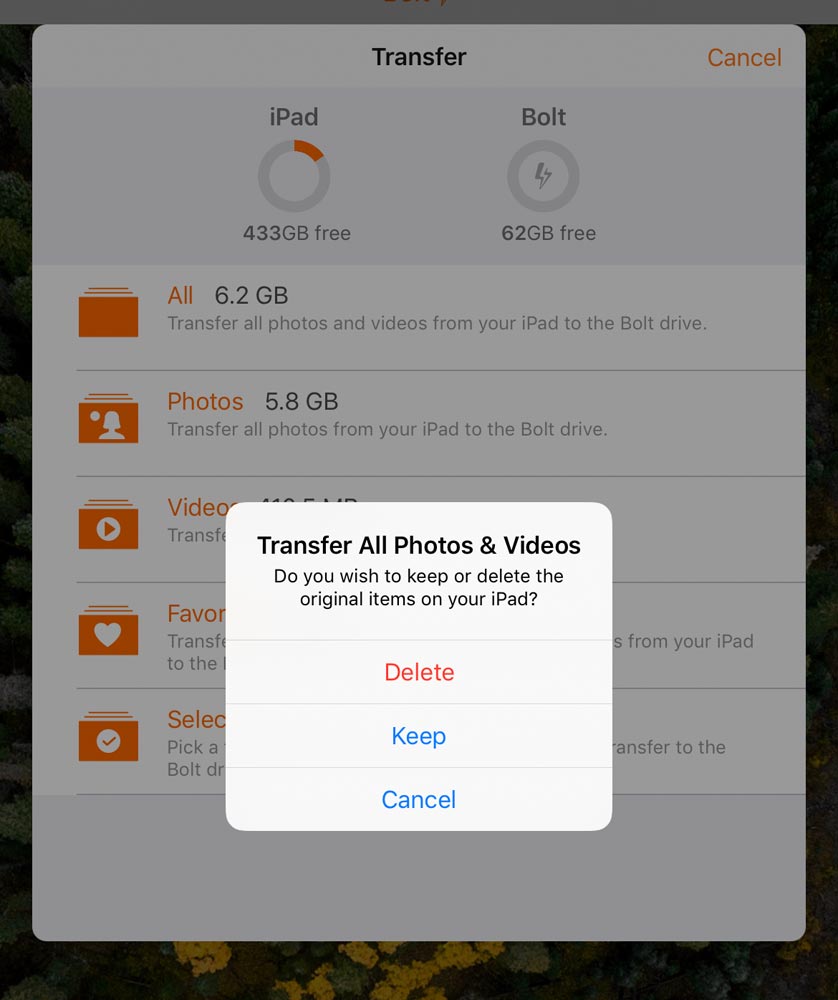
Of course, I started out by transferring images from my iPad to the Bolt Duo.  It took at least five minutes to transfer the 2000 images and videos I have on my iPad to the flash drive.

You can choose to copy over all photos and videos, only photos, only videos, only things in a Favorites album, or you can select only certain images/videos to transfer.  You can also keep everything on the iPad/iPhone or you can choose to delete them as they copy.  I retained all mine on the iPad.

After the transfer was complete, I used the app to View the contents of the flash drive.  Without looking at each and every one of the 2000 items on my iPad, it seemed that everything was copied to the Bolt.

I used the Capture option to store a photo directly on the Bolt.  After allowing the app to access the camera and mic, taking a picture with the app was as easy as taking a picture directly on the iPad.  There are only three camera modes in the app, though.  You can take a regular photo, a square photo, or a video.  Once the photo was snapped, it showed up on the Bolt in a new album, called Bolt Camera.  There was no appreciable delay in saving the image to the flash drive.

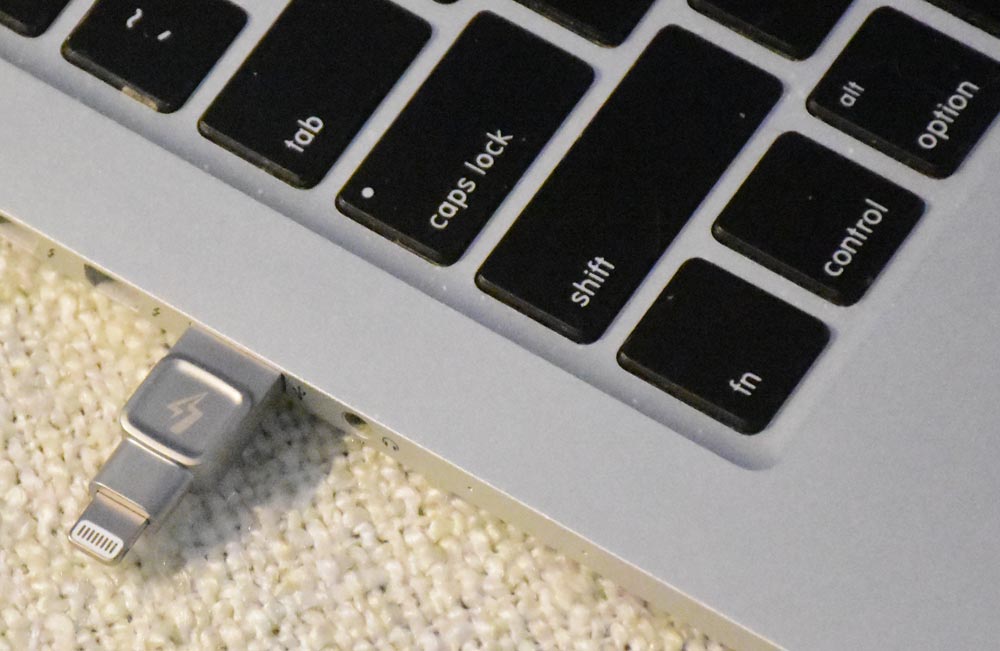
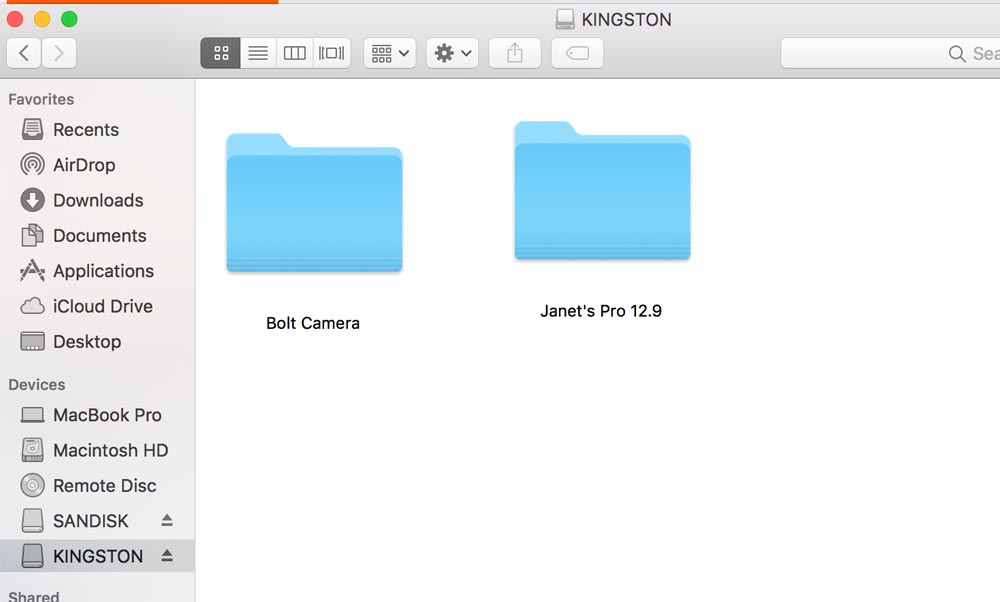
I next plugged the Bolt Duo into my MacBook Pro and checked out the contents of the Bolt using Finder.

You can can see the drive shows up in Finder as KINGSTON.  You’ll also notice there are two folders – one for the images captured directly onto the Bolt and one for my iPad’s images.  When I opened the iPad folder, placeholders were quickly populated for the images, but it was slow actually drawing the images.

I tried copying a picture from my computer to the Bolt, then transferring it to my iPad Pro.  It worked flawlessly.  You use the iPad’s “share” button to save the image to the tablet.

Since there was still a lot of free space on the Bolt drive, I downloaded the app to my iPhone and plugged the drive into my phone.  I was able to copy all my phone images to the Bolt Duo without having to first remove the images from the iPad.  There are now three albums on the Bolt, as you can see from the screen capture from my iPhone.

What I like

  • Small form-factor that can be easily carried with you
  • App is simple and easy to use
  • Quickly backs up images from the Apple device to the Bolt Duo
  • Can skip using the device’s storage and save images or videos directly to the flash drive
  • Didn’t require a driver to use the Bolt on my MacBook Pro

What needs to be improved

  • Nothing

Final thoughts

The Kingston DataTraveler Bolt Duo is a great way to transfer images from a mobile device to your computer so you can free up space on the Apple device – or just as a backup, even if you don’t need to save space on your mobile device.  You can also use the Bolt to transfer pictures back to the mobile device, if needed.  And you can store images and videos directly to the Bolt without using any space on your iPhone or iPad.  The app is simple and easy to use on both iPad and iPhone.  And you can backup both your iPhone and your iPad, or even your family’s devices, to the same Bolt Duo.  It may be perfect for its intended functions.

Price: $44.99 for the 64GB model reviewed here
Where to buy: Kingston or Amazon
Source: The sample of this product was provided by Kingston

Filed in categories: Reviews

Tagged: ,

Kingston DataTraveler Bolt Duo review originally appeared on The Gadgeteer on September 17, 2018 at 9:00 am.

Note: If you are subscribed to this feed through FeedBurner, please switch to our native feed URL http://the-gadgeteer.com/feed/ in order to ensure continuous delivery.
Black & Decker PowerCrush Digital Blender with Quiet Technology review


REVIEW – These days, there is a fast moving health and fitness movement that continues to gain momentum as many people look to better their health. A part of the healthier diet is a long list of healthy shakes and other healthy foods like vegetable liquid food replacements. This is no different in my household, and I welcomed the opportunity to test and review this personal blender. Here is my summary.

What is it?

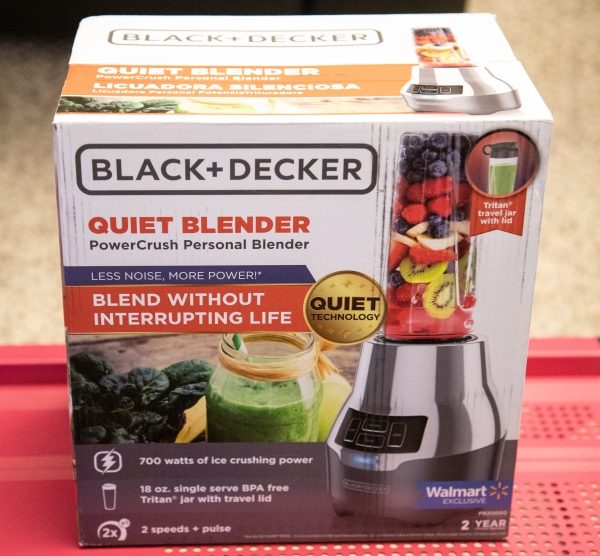
The BLACK and DECKER PowerCrush Digital Blender with Quiet Technology uses a specifically designed blade that creates a vortex when spinning in order to crush and blend various types of ingredients including ice, vegetables,  fruit, etc. It can be used to make vegetable drinks and smoothies all in the included 18oz personal size cup. All of the parts that attach to the cup including the snap-on lid, the cup itself, and the blade and housing are dishwasher safe. The blender has 700 watts of maximum power and digital touch controls as its interface.

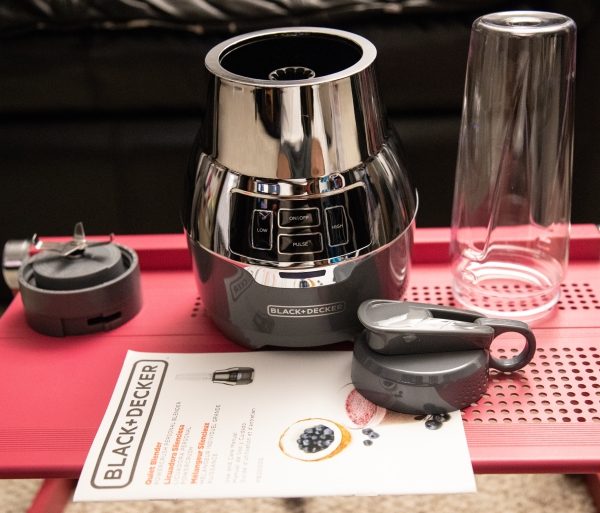
What’s in the box

1 x PowerCrush Digital Blender
1 x 4-tip stainless steel blending blade
1 x 18oz Personal Jar
1 x Snap-on travel lid
1 x Instruction/Recipe booklet

Design and features

Design Specs:

  • Quiet Technology: Blend without interrupting your life. This PowerCrush Blender is quieter* and maintains all the powerful blending performance you expect from BLACK+DECKER.
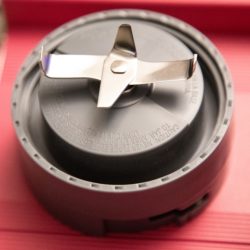
  • PowerCrush 4-Tip Blade Technology: The 4-tip stainless steel blending blade works with the shape of the jar to create a constant flow and vortex that leads ingredients directly to the blades for fast blending performance.
  • 700W Motor: The energetic motor delivers 700W at peak performance to easily crush and blend the toughest ingredients.
  • 2 Speeds + Pulse: From smooth blending to powerful ice crushing, two speeds and a pulse function handle any job with ease. Includes LED power indicator.
  • Personal Jar: Use the 18oz., BPA-free Tritan plastic jar for single-serving smoothies on the go. Snap-on travel lid included.

This personal blender is designed to crush ice and fruit and other similar types of ingredients to create personal drink mixes like shakes, blended drinks, etc. On the front, there are 4 buttons embedded into the stainless steel body. The buttons control the on/off function as well as the speed/rotation options that are low speed and high speed, and the pulse function.


The base of the blender has a receptacle that interfaces with the blade and housing as seen below. At the bottom of the blender, there are air vents and routing for the attached power cable.


The pictures below show the 4-tip blade and housing, the 18oz personal size cup, and the snap on lid.


Performance

Based on the understanding that noise levels or the perception of volume is individually subjective, I found this blender to be quite a bit quieter than I am used to and than I thought it would be. It was not as loud as another famous brand, and for my tests, it did a decent enough job of crushing/blending frozen fruit. I did find that the other famous brand blender was able to make an even smoother blend in the less time, but that blender is also more powerful. I also tried a variety of fruits like blueberries, blackberries, strawberries, bananas with ice and the resulting mixtures were great. Below are before and after pictures of one of the frozen fruit mixtures.


What do I like

  • I like the size and the functional design
  • The finished stainless steel look

What can be improved

  • Either the power of the blender or the blade design to be more effective at making an even smoother blend

Final thoughts

The PowerCrush Digital Blender with Quiet Technology is a nicely designed blender that has enough power and capability to blend most fruit and vegetable combinations to make a nice smoothie or vegetable drink. While it could use a bit more power or maybe some adjustment to the blade design to remove even the smallest of grains from things like small seeds, etc, it does make the blend smooth enough that in my opinion, is quite acceptable. Also, the ability to have a conversation while blending without having to scream at the other party is quite nice and non-disruptive. I personally like this blender, and for my needs and based on the price, I give it a thumbs up!!

Price: $32.88
Where to buy: Walmart
Source: The sample for this review was provided by Black & Decker.

Filed in categories: Reviews

Tagged: ,

Black & Decker PowerCrush Digital Blender with Quiet Technology review originally appeared on The Gadgeteer on September 16, 2018 at 3:08 pm.

Note: If you are subscribed to this feed through FeedBurner, please switch to our native feed URL http://the-gadgeteer.com/feed/ in order to ensure continuous delivery.
Renogy Outdoor Tactical Flashlight review

REVIEW – Open the case, my friend, and meet the tactical flashlight from Renogy. Not only does it look worthy of a spy movie, but it packs a lot of useful features in a budget-friendly package. Will it help you on your next mission? Let’s find out!

What is it?

It’s a portable tactical flashlight, with a beam that can be zoomed/focused. It comes with a rechargeable battery but can use regular batteries as well.

Hardware specs

  • CREE XML T6 LED emitting chip delivers maximum brightness of 600-1200 lumens.
  • Zoomable function, adjustable focus range up to 600 feet.
  • Aviation grade aluminum alloy, that’s water and shock resistant.
  • 5 light modes: high, medium, & low brightness, strobe and emergency SOS.
  • 5.4 inches long, 1.6 inches wide, about 9 ounces total weight (flashlight only).
  • Includes one 18650 lithium-ion rechargeable battery.
  • Also compatible with three AAA Batteries.

What’s in the box?

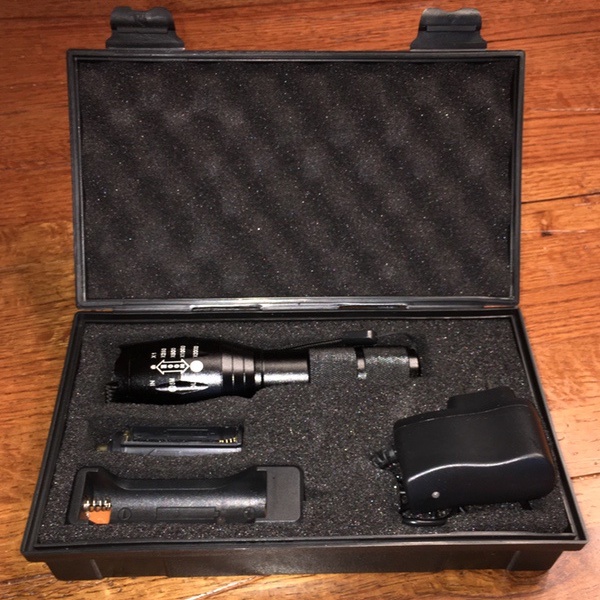
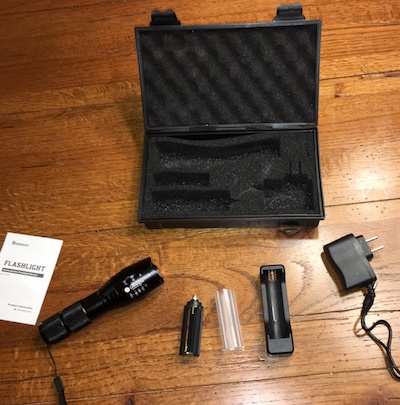
The Renogy Outdoor Tactical Flashlight comes in a foam-molded travel box. It includes the flashlight with a lanyard, a rechargeable lithium-ion battery, a charging cradle & power brick fir the battery, and an adaptor for three AAA batteries. An instruction manual is also included in the kit.

Design and features

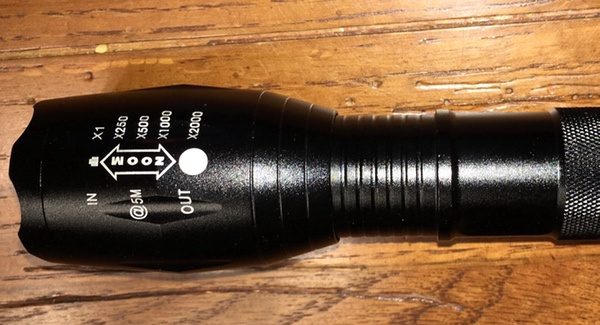
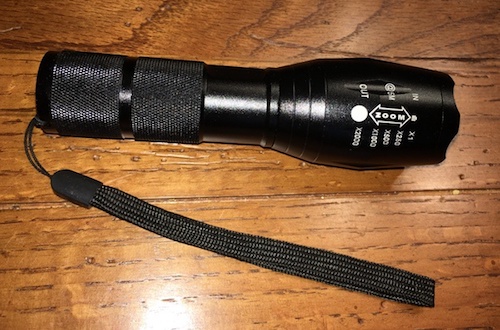
The Renogy Outdoor Tactical Flashlight is a tough little guy. It’s a small flashlight that’s easy to pack and carry, but it has a weighty, substantial feel in your hand. It’s built from aviation-grade aluminum alloy with a rock-solid build that’s meant to take drops and hard knocks. Given the size and durability, it’s ideal for outdoor use. It’s also got that all-black covert operations look if you’re into that sort of thing:

The plastic storage box uses molded foam inserts to keep all the bits and parts in one place. The box itself is 4-1/2″ by 8-1/4″ by 2″ deep, and will tuck nicely in a corner of your trunk or on your tool shelf. I hear the “Mission Impossible” theme in my head whenever I open it:

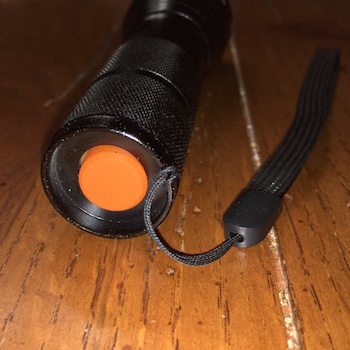
There’s a single rubberized on/off button on the butt-end of the flashlight for all operations. The business end uses a CREE XML T6 LED emitting chip delivers maximum brightness of 600-1200 lumens. I’ll be the first to admit that I don’t know all that much about flashlight bulb ratings, but I can tell you that it is surprisingly bright given it’s small size. 

You have 5 modes on this flashlight, activated by repeated pressing of the on/off button. The first three toggle through high/medium/low brightness with a steady beam. The fourth mode is strobe, with a continuing blinking beam. The is an “SOS” mode that blinks in a slow, repeating pattern that I assume indicates “SOS” (It’s been a while since my Cub Scout days). Cycling is engaged by repeatedly turning the flashlight on and off; it gets the jobs done, but it’s a tad inconvenient having to click away to get to the settings you want.

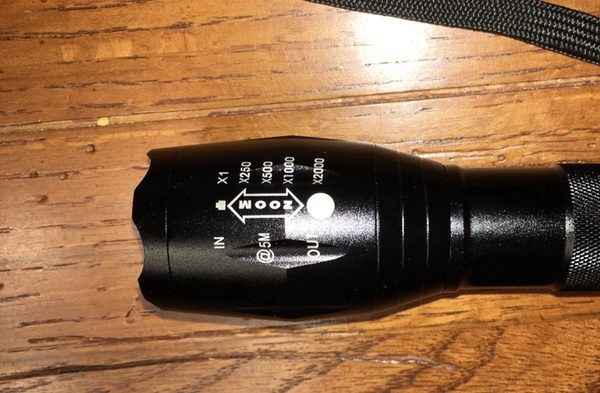
The flashlight also features a zoom/focus feature. The head of the flashlight slides like a telescope, as you can see in the pictures below. The total travel is about 1″ from fully compressed to fully extended:

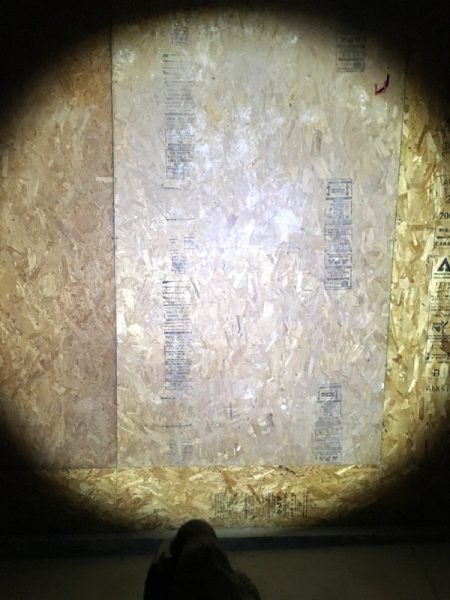
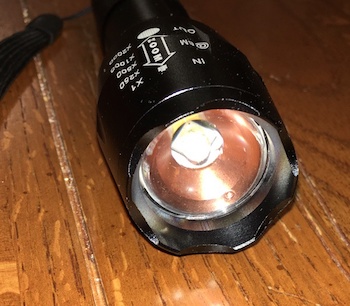
In “normal” unextended mode, the light beam is opened wide. Here’s a shot of the beam in my garage at a distance of about 10 feet. It’s bright and powerful!

As you slide the head to zoom, it will focus and intensify the beam. The shots below were taken from the same distance with the same level of light power, changing the zoom:

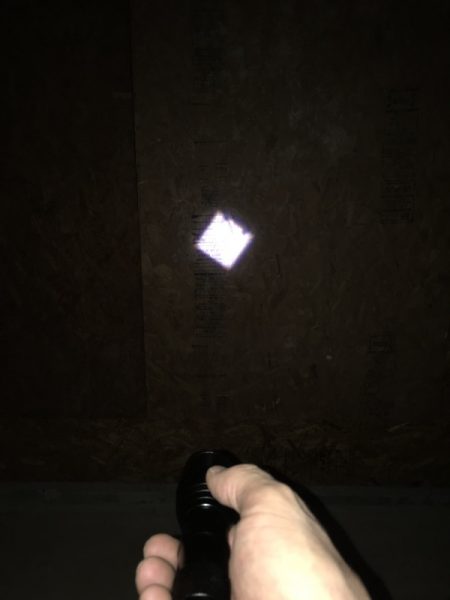
The next pic shows the light at max focus. See how the beam now takes the shape of the square LED light chip? According to Renogy, this zoom level gives the beam a 600-foot range.

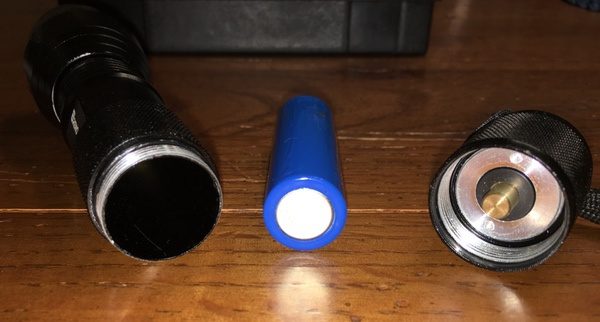
Not only is this flashlight powerful, but it is also rechargeable. The kit includes a 18650 lithium-ion rechargeable battery. The butt-end of the unit unscrews to insert the battery:
A charging dock and power brick are included in the package to recharge the unit. I’m doing some research into how long the battery will last under normal use, and I’m not having much luck. Given the LED chip light, however, I think it will go a long time between charges. I’ve had it for a month, and haven’t charged it once.

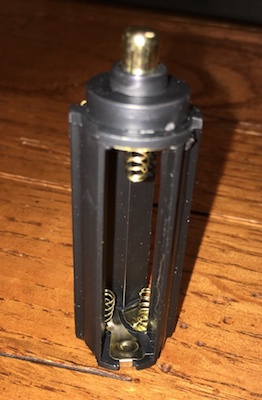
If you’re between rechargeable batteries at the moment, you also have a back-up system! The flashlight comes with an adaptor that will accept 3 AAA batteries, and can be loaded into the battery chamber in lieu of the lithium-ion option. That’s a nice feature in a pinch.

As far as general use goes, I took the Renogy Outdoor Tactical Flashlight on a camping trip back in August and it worked just fine. Plenty of powerful light in a small, compact package. The zoom feature was actually more useful than I thought, allowing us to focus the beam so that we didn’t irritate our neighbors on late-night trips to the camp washroom while enabling a wide beam mode when we needed it around our own site. The mode changing function is a but awkward, but a few quick clicks gets you to the setting you need.

If you choose to accept this mission, know that you’re getting a good price on the job! I am seeing this model going on Amazon Prime for under $20. That’s crazy good for a well-built flashlight that includes all of these components. It looks to me like a solid value.

What I like

  • Durable, solid build
  • Very powerful for a small flashlight
  • Includes all the accessories you might need
  • Convenient storage case for all the parts

What needs to be improved

  • Switching between lighting modes is a bit klunky, but manageable

Final thoughts

It’s hard to go wrong with a package like this. A well built LED flashlight that’s powerful, long-lasting and rechargeable is a good item. When it includes the lithium-ion battery and all the other accessories at a price point under $20, it’s a bargain. We’ll see how it does over long-term use, but I think it’s a good one.

Price: $19.49
Where to buy: Amazon.
Source: The sample of this product was provided by Renogy.
Filed in categories: Reviews

Tagged:

Renogy Outdoor Tactical Flashlight review originally appeared on The Gadgeteer on September 16, 2018 at 11:00 am.
Note: If you are subscribed to this feed through FeedBurner, please switch to our native feed URL http://the-gadgeteer.com/feed/ in order to ensure continuous delivery.