ABOX Raspberry Pi 3B+ Starter kit review

REVIEW – I love to tinker.  I love gadgets.  And I love when those two worlds collide, resulting in something I made and is useful.  The Raspberry Pi is one of those computing devices that – if you can define a use for it – is practical, easy to use, and brings satisfaction to even the most curmudgeonly tinkerer (aka me).  ABOX produces a few different Raspberry Pi kits and today we are going to look at the Starter version.  Does it have what you need to get started?  Read on to find out…

What is it?

The ABOX Raspberry Pi 3B+ Starter kit is a bundle of everything you will need to get started with the world of Raspberry Pi – except a keyboard, mouse, and monitor.

What’s in the box?
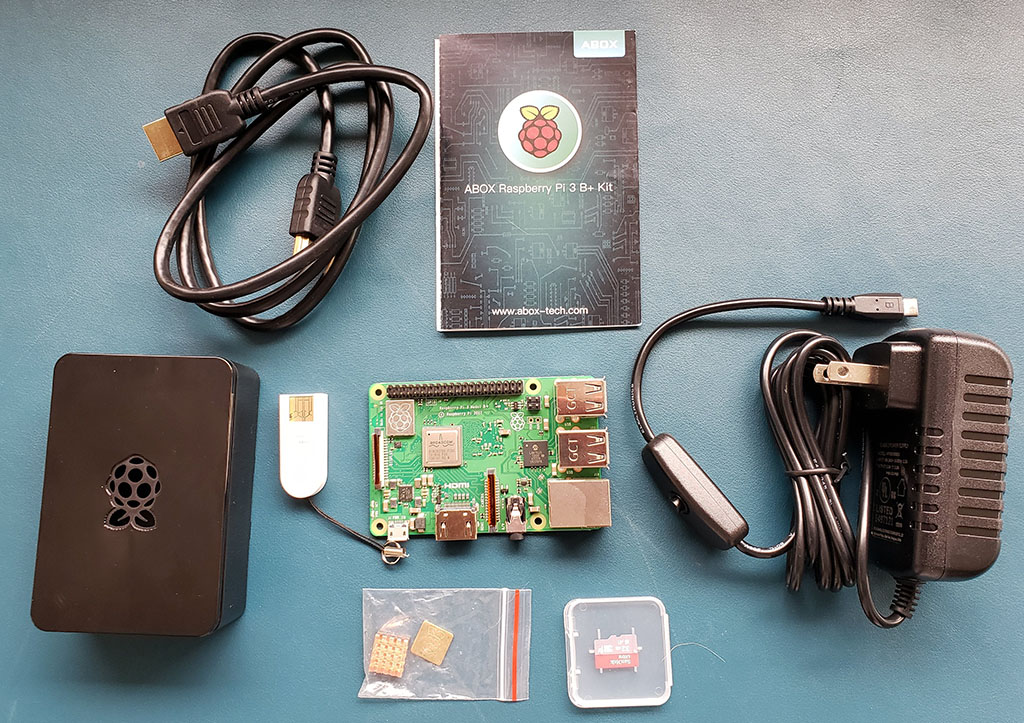
  • A Raspberry Pi 3B+ motherboard with 4 USB 2.0 ports, a gigabit Ethernet port, an HDMI port, audio out, power and micro-SD card reader.  This is the latest model of Raspberry Pi, with a processor that is 19% faster than the previous version, dual band 802.11ac wireless networking and Bluetooth 4.2.
  • A 32 gig micro-SD card pre-loaded with NOOBS, a great utility that will help first-time RPi’ers to load an operating system like the Linux distro Raspbian.
  • A USB 2.0 micro-SD card reader for your other computer that will allow you to load a different operating system like Retro-Pi for gaming.
  • Heatsinks for the motherboard – most Raspberry Pi cases do not have fans, so this helps dissipate heat.
  • A 5v power supply to provide electrons to your Raspberry Pi.
  • An HDMI cable to connect to a monitor.
  • A “Getting Started” booklet that will walk you through installing the Raspbian operating system.
  • A standard case to house the whole affair (minus the “Getting Started” booklet).

Setup

Setup doesn’t get much simpler.  Peel the tape off the back of the heat sinks and attach them to the two chips (in the picture, the upper left chip and the one immediately to the right and lower – it is pretty easy to figure out which goes where).  Open the case and put the board in place.  Close the case, and you are ready to get started.
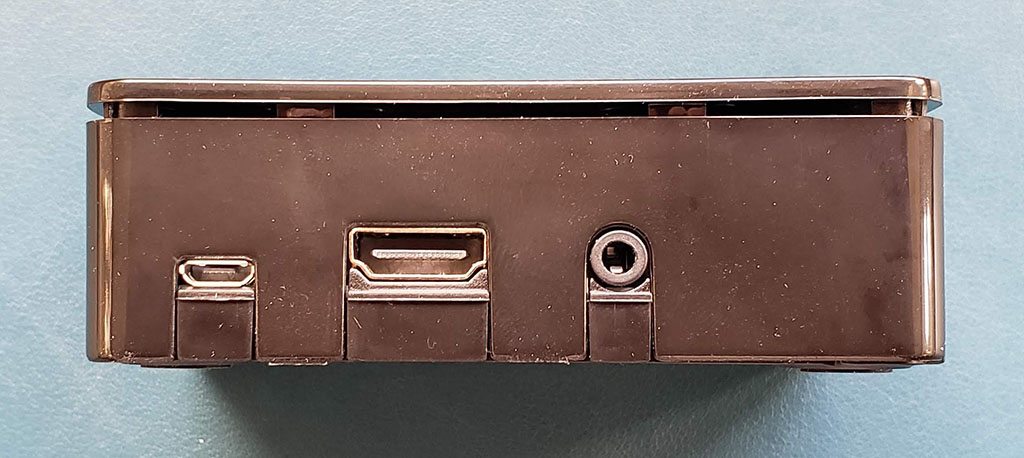
This is the power, HDMI and audio out ports in the case.
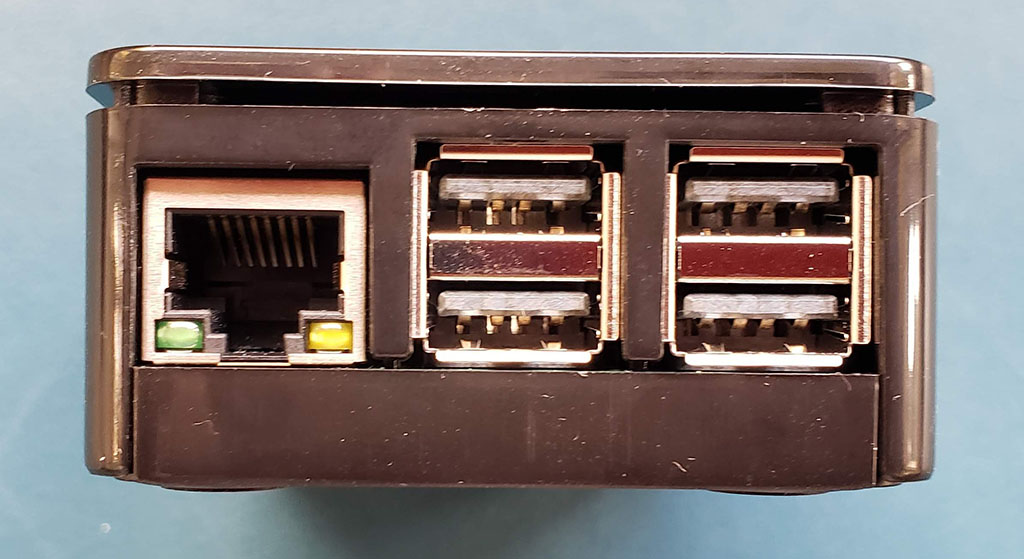
The Ethernet and USB 2.0 ports on one side…
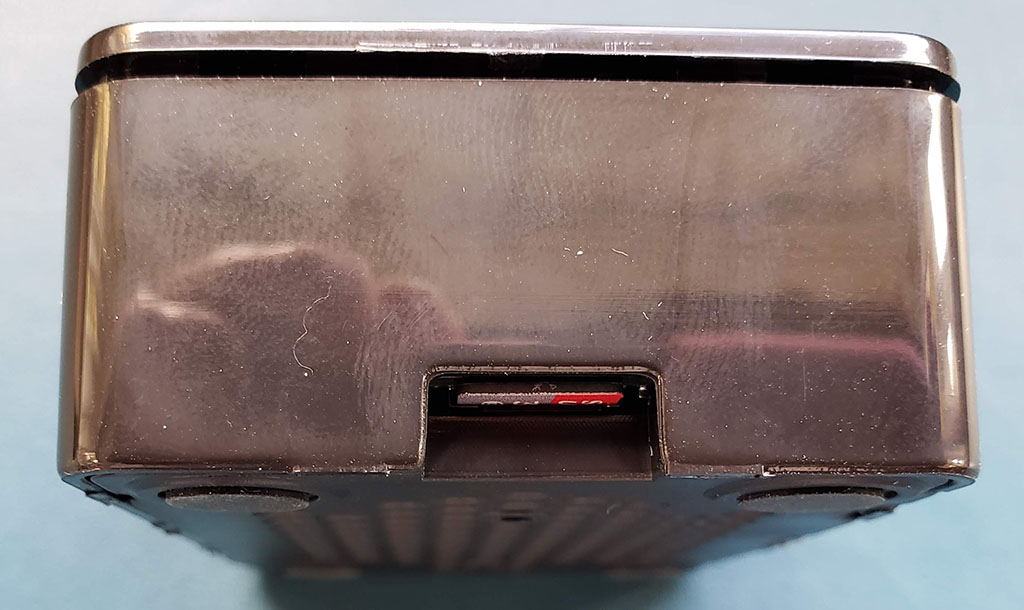
…and the micro-SD slot with the card installed on the other side.  Plug in your keyboard and mouse, connect a monitor and then plug in the power cable.
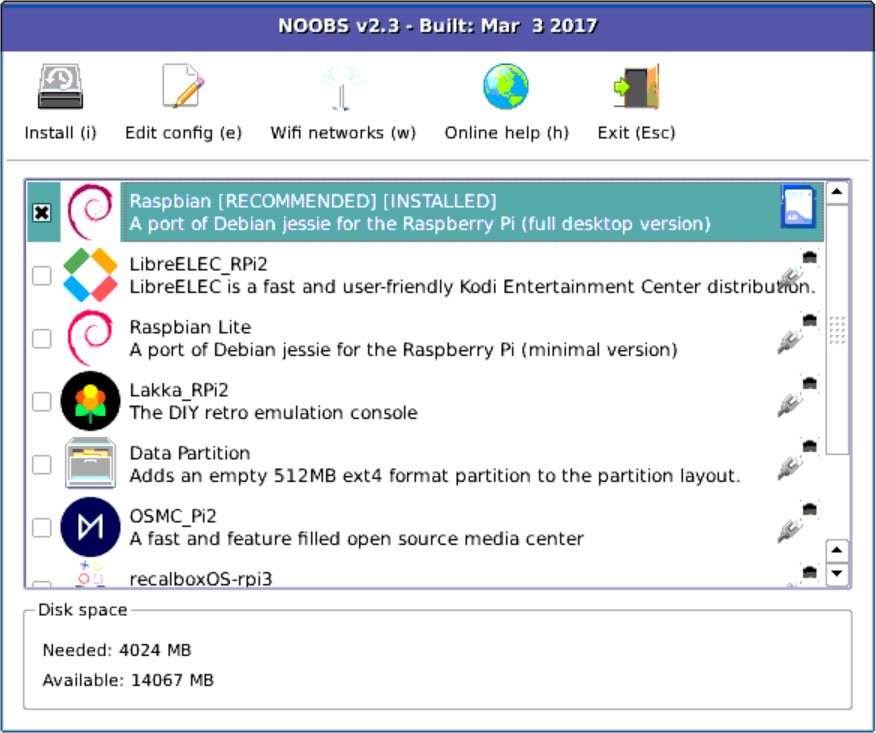
Load your operating system and you are ready to explore the world of Raspberry Pi.  It is that simple.

Is it worth it?

Depends.

These kits are a great, hands-on way to teach kids about STEM.  They are also great for home automation projects like creating your own Amazon Alexa device.  Into retro-gaming?  Again, another great use.  And this is the point – if you can find a use for this, a kit like the ABOX is the right way to get started.  If you are uncertain about what a Raspberry Pi is or what it can do, you might want to read more before spending the money.  So it really comes down to whether this particular kit is the right one.

And the short answer is yes, it is.  The motherboard and case are standard issue, so no difference between these and the components you will find in other kits.  The differentiation comes in the other components included in the Starter set.  The power cord is a solid, UL-listed version with a convenient on-off switch installed.  The HDMI cable is molded and shielded.  A name-brand micro-SD card that is fast enough to support the Pi.  And the instruction booklet will get you started – as far as getting an operating system loaded and functioning.  After that, you are free to explore as you like. ABOX has packaged great components that will help launch you into the Raspberry Pi world.

What I like

  • (Almost) everything you will need to get started (bring your own mouse, keyboard and monitor)
  • Good quality components that make it easier for the beginner to get started
  • An instruction book that gets you to the launch of the operating system

What should be improved

  • A fairly minor point, but a couple of pictures on how to assemble the case and motherboard would probably help the extreme beginner or kids getting started on their own

Final thoughts

Getting everything you need in one box is the difference between success and frustration when you are beginning.  There are plenty of tutorials on the Internet that will help you take an assembled unit and make it into something, but few will tell you what you actually need to get started.  ABOX is bridging that gap with kits like this.  From unboxing to install, the process took me a little over an hour – and a fair portion of that was spent finding a wired mouse that I could start with (once up and running I switched to a Bluetooth mouse – it’s just that brief getting started time where that – or a Logitech unifying device – is needed).

So what am I going to do with this?  I think I am going to make a retro gaming setup.  A couple of USB game controllers and installation of the Retro-Pie operating system, digging up some games on the Internet, and soon the sweet sounds of Donkey Kong will once again reverberate through my living room.  Or maybe I will buy a LCD screen component and some sensors to use as a weather station.  Or add the camera module and build a facial recognition device that will show either my wife or I a custom-built news and information feed.

Or maybe I will do all 3…where is my credit card again?

Price: $78.99 with the 32 gig memory card, $68.99 with the 16 gig version
Where to buy: Amazon
Source: The sample for this review was provided by ABOX.

Filed in categories: Reviews

Tagged:

ABOX Raspberry Pi 3B+ Starter kit review originally appeared on The Gadgeteer on October 5, 2018 at 12:00 pm.

Note: If you are subscribed to this feed through FeedBurner, please switch to our native feed URL http://the-gadgeteer.com/feed/ in order to ensure continuous delivery.

Suaoki 14W portable solar charge panel review

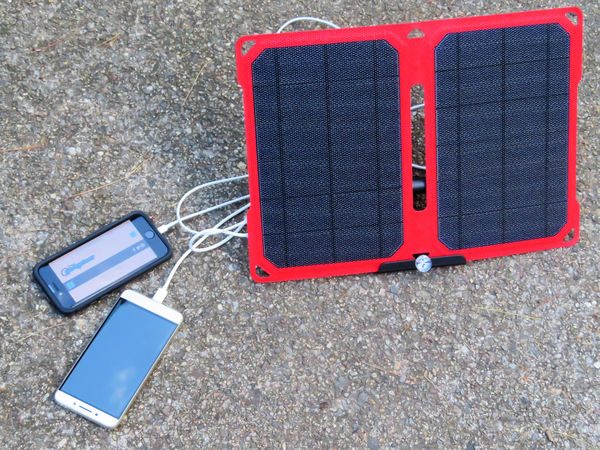
REVIEW – The Suaoki 14W portable solar charge panel can keep your rechargeable items fully powered even when you’re off the grid. The lightweight, thin, water-resistant design features two USB charging ports with optimized power output. Read on to see what I think!

What is it?

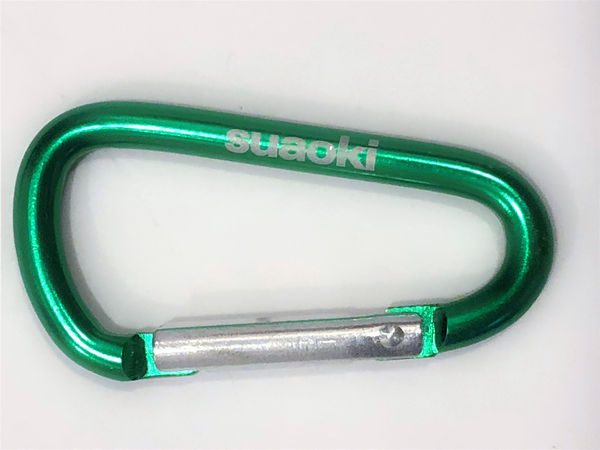
The Suaoki 14W portable solar charge panel is a gadget that you can use to charge rechargeable devices by converting solar energy into electricity. The solar panel generates power when it is exposed to direct sunlight. The circuitry in the panel ensures that the power delivered to each USB port is optimized to minimize the charging time required. The panel features an ETFE coating to protect the solar cells from the elements and rubber caps to protect the USP ports from water and debris. The panel comes with carabiners and nylon ties to support the panel from trees and equipment, as well as an easel with sun finder to point the panel directly at the sun.

What’s in the box?


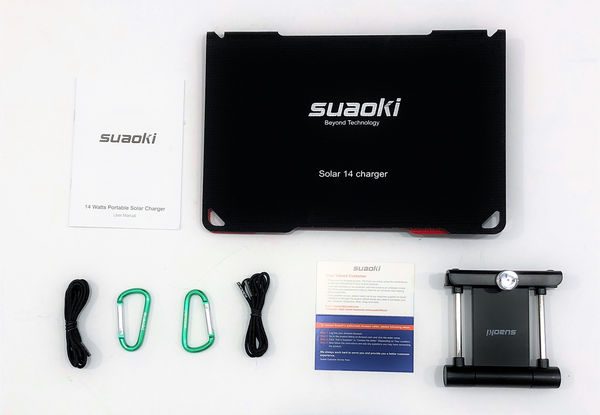
Suaoki 14W portable solar charge panel
User Manual
2 carabiners
2 1 meter long nylon ties
solar finder stand

Design and features

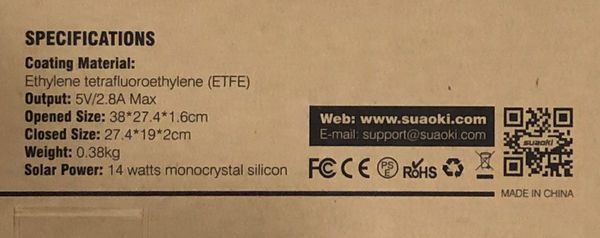
Specifications

solar cells – 14 watt monocrystalline silicone
cell coating – ethylene tetrafluoroethylene (ETFE)
output – 5V/2.8A (14W) max
open size – 38 x 27.4  x 1.6 cm
folded size – 29.4 x 19 x 2 cm
weight – 0.38 kg

Unboxing

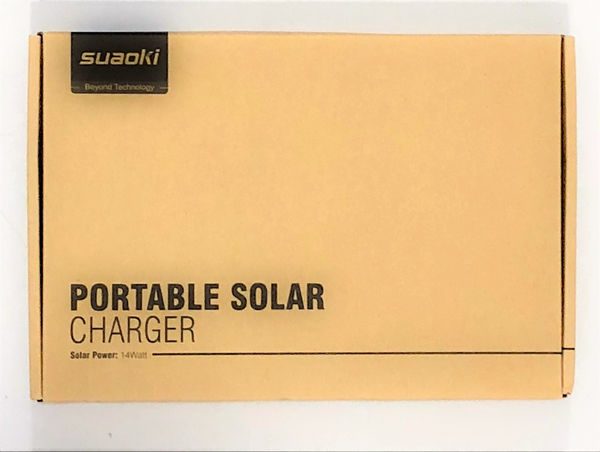
The Suaoki 14W portable solar charge panel comes in a no-frills cardboard box. The front, back and sides are printed with the product, specifications, suggested applications (tablet, mobile, 90’s iPod, a camera – with viewfinder, and a Sony PSP).

Design of the Suaoki 14W portable solar charge panel

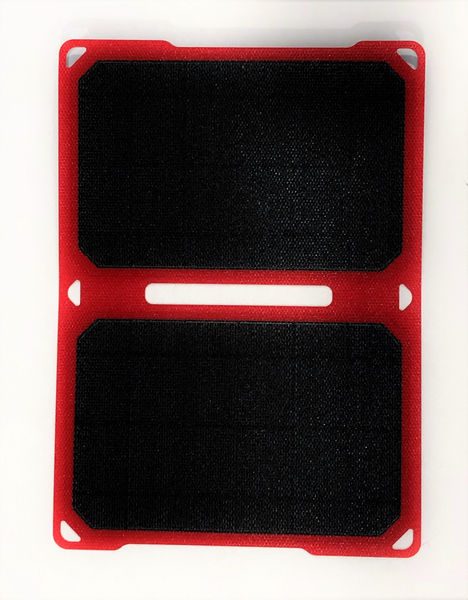
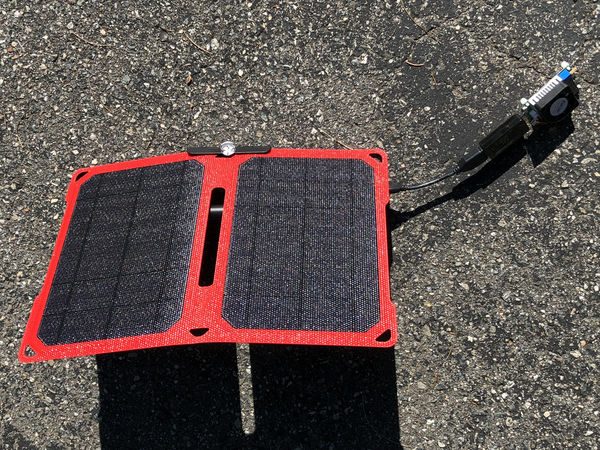
The Suaoki 14W portable solar charge panel is a folding solar panel design that resembles a restaurant menu: a roughly 7.5″ by 11″ folded design opens to a roughly 11″ by 15″ surface when being used.

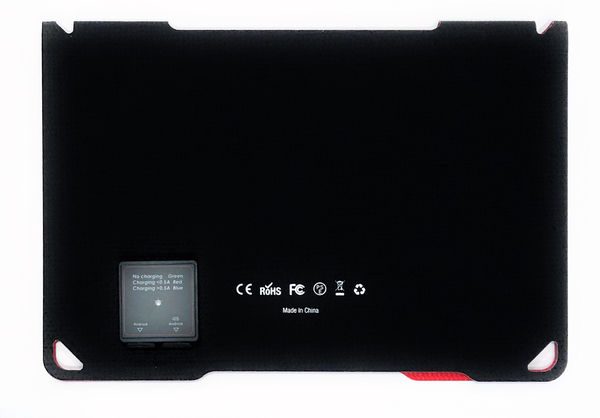
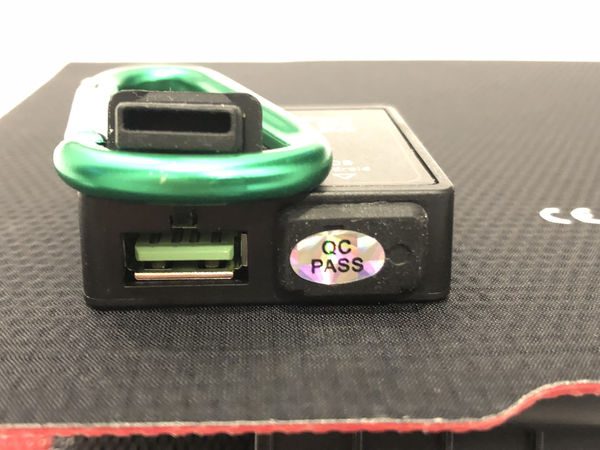
The outside back appears to be nylon coated. On one side of the panel’s rear is a small interface box with the USB ports on it and an LED indicator light. The area adjacent to the interface box is labeled with various compliance markings including the CE, RoHS FCC, WEEE, and recycling directives. Below the symbols, the device is marked that the country of origin is China.

On the front of the unit, the Suaoki brand label is centered above the product name: “Solar 14 charger”

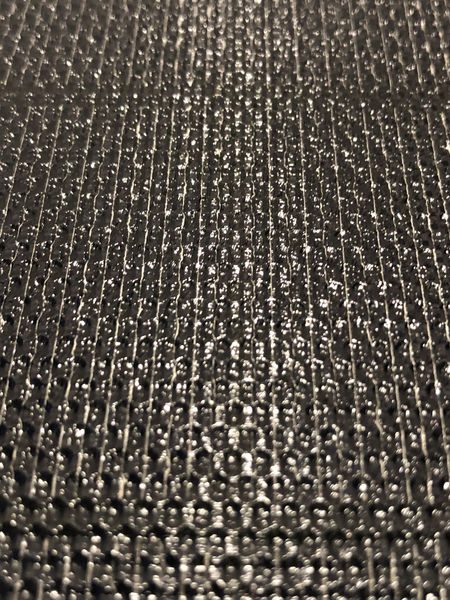
When the unit is opened, the inside appears to be coated with fiberglass; the surface has the texture of a cast woven mat.

However, the inside is coated with ETFE. This material has superior tolerance, compared with PET, to high temperatures that solar cells are exposed to and will outlast PET when exposed to salts, acids and bases. The cells are encapsulated within the coating. The corners of the cells have been mitered to provide more resistance to cracking. Even though the outer rim and hinge is flexible fabric, the cells are made of silicon crystal. This gadget is designed for outdoor use, but it is still fragile and must be treated with care. It would be beneficial to include a warning on the unit, such as: “caution, handle with care!”

The manufacturer states that the plastic coating and rubber boots for the ports give this gadget an IPx4 rating. Per the International Protection Marking this corresponds to protection against splashing and is tested to verify that water splashing against the enclosure from any direction shall have no harmful effect, utilizing either: a) an oscillating fixture for 10 minutes or b) A spray nozzle with no shield for 5 minutes.

There are six eyeholes around the perimeter of the unit: one in each corner and two along the center. These can be used along with the ropes and carabiners to mount the gadget just about anywhere the sun will hit it. The ropes are really shoelaces but will do the trick.

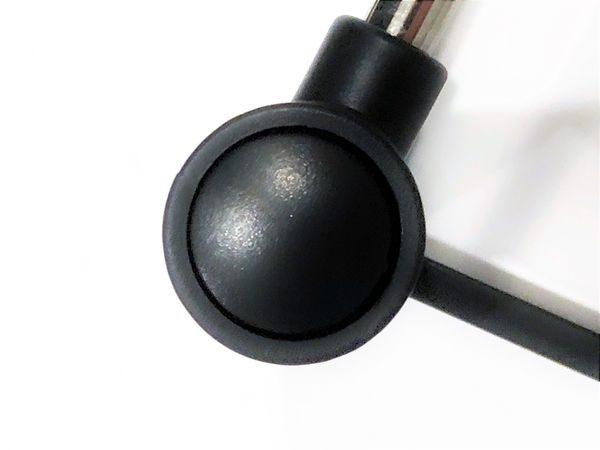
The supplied stand has a locking hinge that can be used to set the angle of the unit. The sun finder is located at the lower front of the easel. A clear plastic window with a small painted dot in its center sits about a quarter inch above a white target with black crosshairs. When the shadow of the painted dot is in the center of the crosshairs the solar panels are perpendicular to the sun. This is an important consideration since the power efficiency drops as the angle the panel makes with the sun changes from perpendicular to parallel.  the stand may be stored against the unhinged side of the panel when not in use. I did find that the label on the push button which releases the stand lock was easily removed.

The manufacturer states that the conversion rate for the panel is up to 20%, which is below the expected maximum conversion of 26.7%, but around the maximum conversion for compting technologies. This means that based on a cross-section of all technologies currently available, this panel is one of the most efficient.

Operation

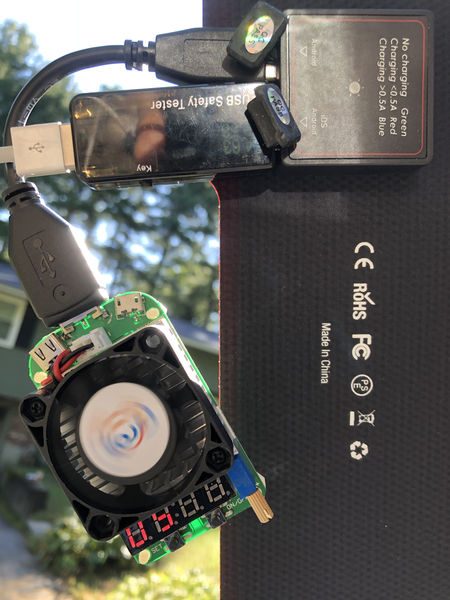
The Suaoki 14W portable solar charge panel has two USB ports. One is optimized for iPhone but may also charge Android devices and the other port is optimized for Android only. The directions give no indication of which port is best for charging a battery pack. The charging circuit starts as soon as the panels are exposed to sufficient light to power the unit.  The circuit will automatically regulate the current supplied based on the available sunlight. A LED mounted on the interface box will illuminate green if there is insufficient current available for charging, red if there is less than 0.5 A available and blue if there is more than 0.5 A available.

Performance

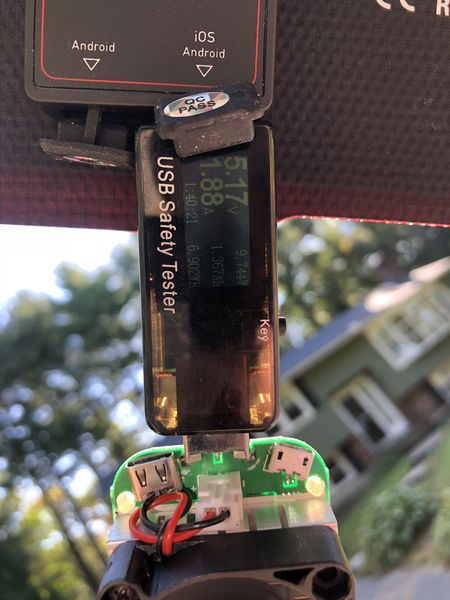
I used the Suaoki 14W portable solar charge panel with an iPhone, Android (LeEco Le Pro3), J7-t safety tester and a Drok USB intelligent electronic load.

I tried charging each device with the safety tester in line and I could not achieve a continuous power greater than 9.8 W indicated on either the Drok or the J7-t. When charging two devices the most I could get was 8.3 W combined.

These measurements were made on a bright, sunny, cloudless, haze-free day so conditions could not be more optimal. I used the stand with the solar panel so that the orientation was perfectly aligned.

It seems that getting 14 W in the field isn’t something I was able to do. Maybe I’ll try in the summer on the equator, but for now its more of a “Solar 10” than a “Solar 14”,

What I like

  • Easy to use
  • Many mounting options
  • Efficient
  • Built-in current indicator

What needs to be improved

  • power output
  • fragility warning

Final thoughts

The Suaoki 14W portable solar charge panel is a great option to keep your gear going in the outdoors. Using this along with a well-performing USB power pack will permit you to always make sure your power reserves are topped off.

Price: $59.99
Where to buySuaoki and Amazon
Source: The sample for this review was provided by Suaoki.

Filed in categories: Reviews

Tagged:

Suaoki 14W portable solar charge panel review originally appeared on The Gadgeteer on October 4, 2018 at 1:21 pm.

Note: If you are subscribed to this feed through FeedBurner, please switch to our native feed URL http://the-gadgeteer.com/feed/ in order to ensure continuous delivery.
Kong Jr. Gym Bag review

REVIEW – I have always been in search of the perfect bag.  That means I own many bags for the different types activities in which I participate.  The one activity that I have been unable to find the perfect bag for is for when I go to the gym.  I go to the gym after work so I need it to be able to hold my gym gear plus the occasional small item or lunch bag I may take to work that day.   Let’s see if the Kong Jr. gym bag by the King Kong company worked out for me.

What is it?

The Kong Jr. gym bag is a multi-compartment bag made specifically to carry your gym clothing and accessories to the gym.

What’s in the box?

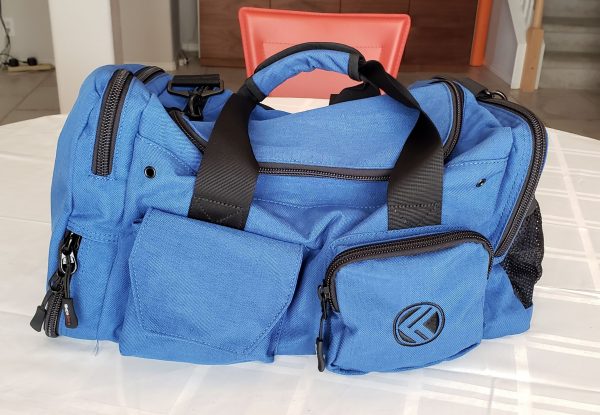
The only thing in the box was the bag itself as you can see in the picture above.  It came wrapped in a plastic sleeve in a standard cardboard shipping box.  The bag is advertised as being 30% smaller than their standard King Kong gym bag.  The dimensions of the bag are 11 inches tall, by 18 inches wide and 11 inches deep.  The original bag has an extra inch on the height and depth and is 20 inches long.

Design and Features

The bag has several pockets and features that allow you to really organize your gym paraphernalia.  The bag is made of  1000D nylon.  It seems very well constructed with #10 YKK zippers and heavy duty buckles.   Each zipper has a really nice pull tab on it in addition to the standard zipper pull.  That makes it really easy to pull the zippers.  They don’t use plastic on any buckle piece.

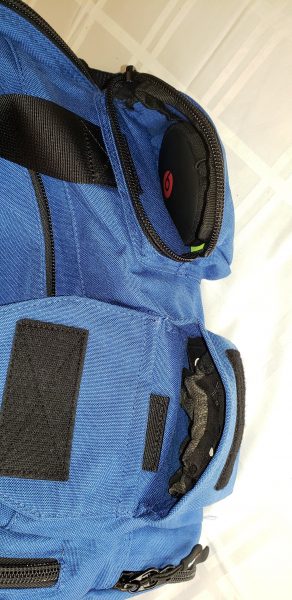
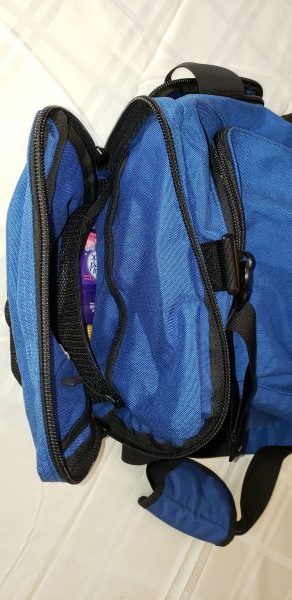
From the main picture at the top of this review, you can see that the bag comes with two pockets that run along the front side of the bag.   One is a zippered pocket and the other is a Velcro flap pocket.  The picture above shows both pockets open.  The small black strip you can see at the top of each pocket is where the bag handles are sewn into the main body of the bag.  In the Velcro pocket bag I have my weightlifting gloves and in the zippered pocket, I have some Beats headphones.  I like the separate pockets so I know which pocket has what I need depending on the type of workout I am doing that day.  I don’t wear headphones when strength training so when I do that, I know I just need to go to the Velcro pocket.  There is more room for other stuff in the zippered pocket, but I just did not have anything to put in them.

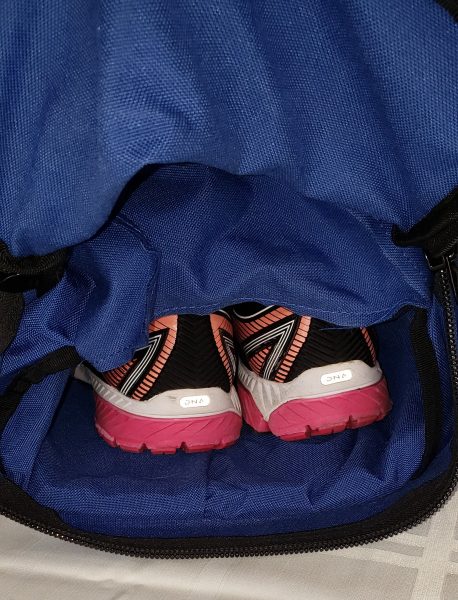
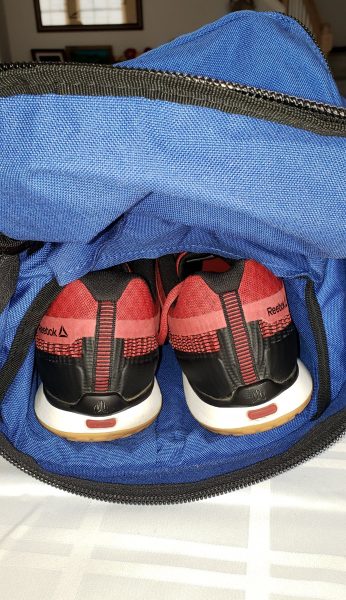
One one end of the bag is a shoe holder.  The first picture on the left shows my size 9 /12 women’s shoes in the pocket.  The next picture shows my husband’s size 11 shoes.  You can see there is still a bit more room for a larger shoe in the pocket.  The shoe pocket is made with water-resistant 1000D nylon.  King Kong advertises the pocket as a place to store wet clothing in there if you wished to keep your other gym items dry.   My only complaint with the shoe pocket is there are no ventilation holes of any kind in the area.  I have been using the bag now for several weeks and have not had any odor issues, but I see where this could possibly be an issue depending on what you put in there.

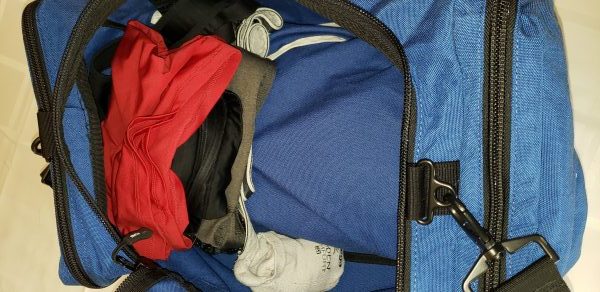
The next picture above shows inside the main compartment of the bag.  On the left side are my gym clothes for the day.  I have shorts, tights, shirt socks, and sports bra in there.  The blue bulk on the right-hand side is the shoe pocket with my shoes inside.  Obviously, the larger your shoes, the more internal room they will take in the bag.  I still had plenty of room in the bag to place in there my lunch bag holding a sandwich and chips.  I know on the larger bag folks talk about putting weight belts and other things inside the bag,  There would certainly be room for that if you wanted to use that extra room for more things like towels or the weight belts if you did not put a lunch in there as I did.

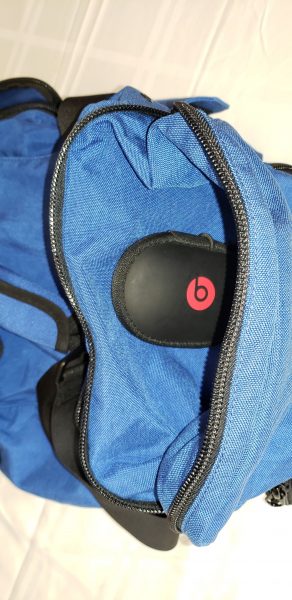
Above the shoe pocket, there is a smaller zippered pocket.  I put my Beats case in there so you could get an idea of the depth.  Basically, this pocket takes the top half of the side and the shoe pocket takes the bottom half.

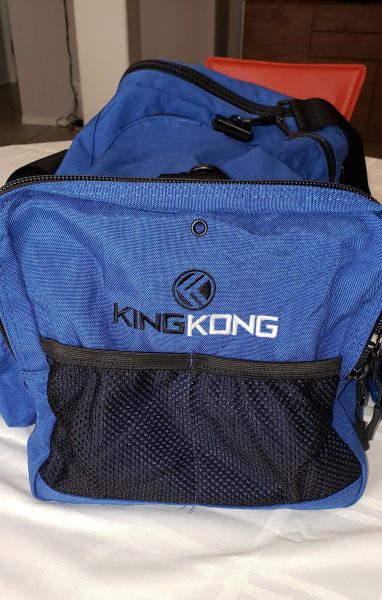
The opposite side of the bag has two nice external mesh pockets you could slip your keys or wallet to if you wished or anything else you might want.

Inside that side zipper is a full sized pocket that has a small zippered mesh pocket where I stored deodorant and comb.    There was more room in that pocket for other things.  This is a nicely sized pocket and could easily hold a gym towel or any other similar sized item.

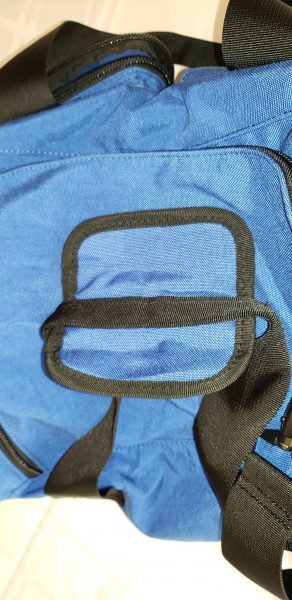
Finally one of my favorite things about this bag is the carry handle.  Every gym bag I have owned has always had a Velcro-based handle to hold the two carry straps together. I have had gym bag handles fail over time as the Velcro eventually wore out.  The King Kong bag uses a pair of magnets.  At first, I was skeptical thinking it would not really hold the handles together very well. Well, I am happy to report I was wrong and they do a great job.  I also love how quite they are.  I often open my bag at work to get things out of it and it is nice not to let the whole office know I am opening it due to no loud Velcro sound.

What I like

I love the size of this bag.  It has worked out perfectly for me in that aspect.  Only a couple of times I have wished I had a larger bag, but that was because I was bringing something extra into the office that I would normally not bring that was big and bulky.  This bag will hold just what I need and not feel like I am lugging a big piece of luggage to the gym.  I love the magnetic handle and the large shoulder strap with removable padding.   The shoulder strap is held on with heavy duty swivel buckles so I don’t spend a lot of time untwisting the shoulder handle as I do on bags with fixed shoulder straps.

What can be improved

The only suggestion I have is for King Kong to add a couple of ventilation holes on the zipper flap of the shoe compartment.  I feel that would really help keep the bag smelling fresher in the long run.

Price: $109.95
Where to buy: King Kong Apparel and Amazon
Source: The sample was provided by King Kong

Filed in categories: Reviews

Tagged: ,

Kong Jr. Gym Bag review originally appeared on The Gadgeteer on October 4, 2018 at 9:08 am.

Note: If you are subscribed to this feed through FeedBurner, please switch to our native feed URL http://the-gadgeteer.com/feed/ in order to ensure continuous delivery.
Mujjo iPhone Xs Max leather cases review

REVIEW – You just spent $1249 on an iPhone Xs Max and you want to protect your investment from everyday wear and tear without making it look like a plastic shrouded brick. When it comes to iPhone Xs Max cases, there are mediocre iPhone Xs Max cases and then there are Mujjo iPhone Xs Max cases.

What is it?

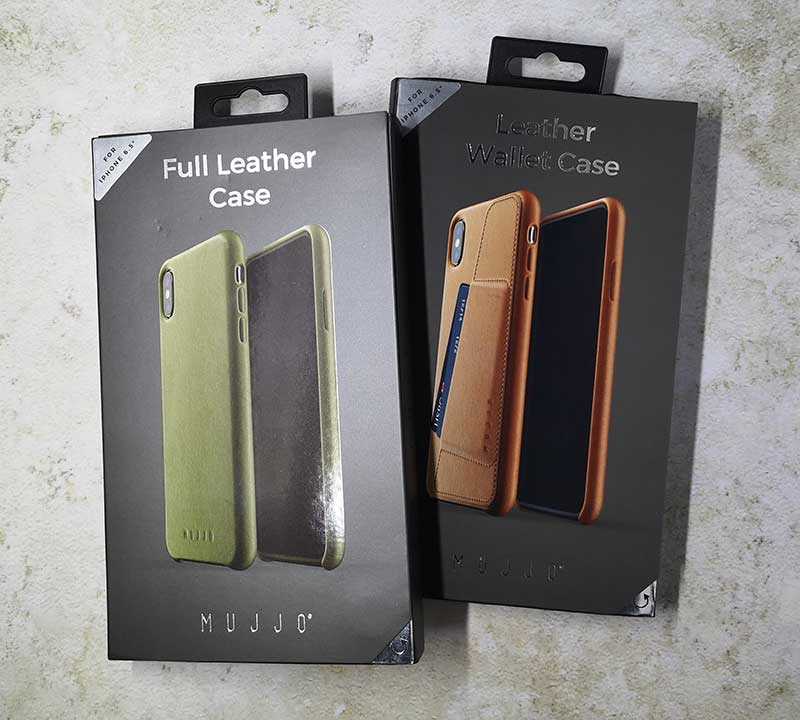
The Mujjo iPhone Xs Max Full Leather case and Full Leather Wallet cases are cases that have been designed exclusively for the iPhone Xs Max and are made of high quality materials.

Design and features

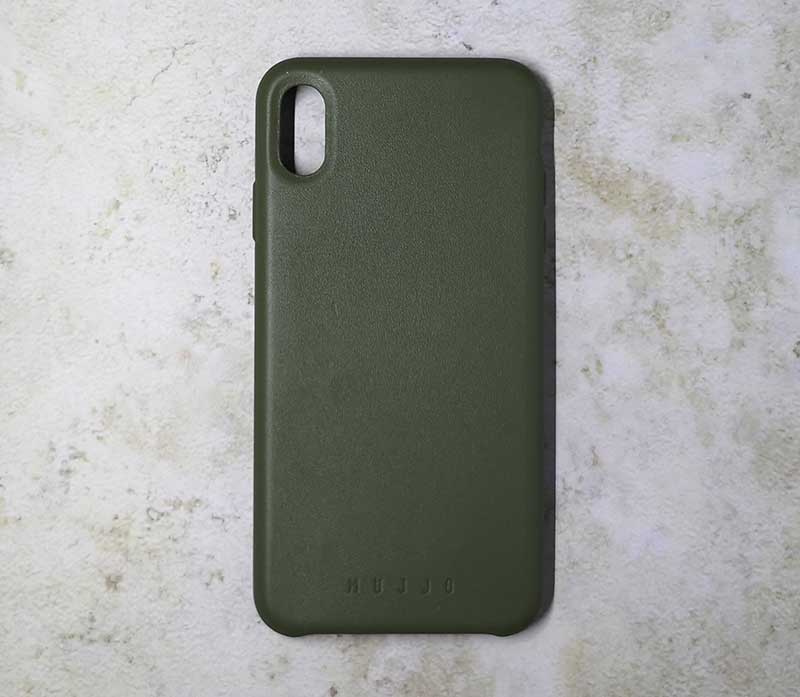
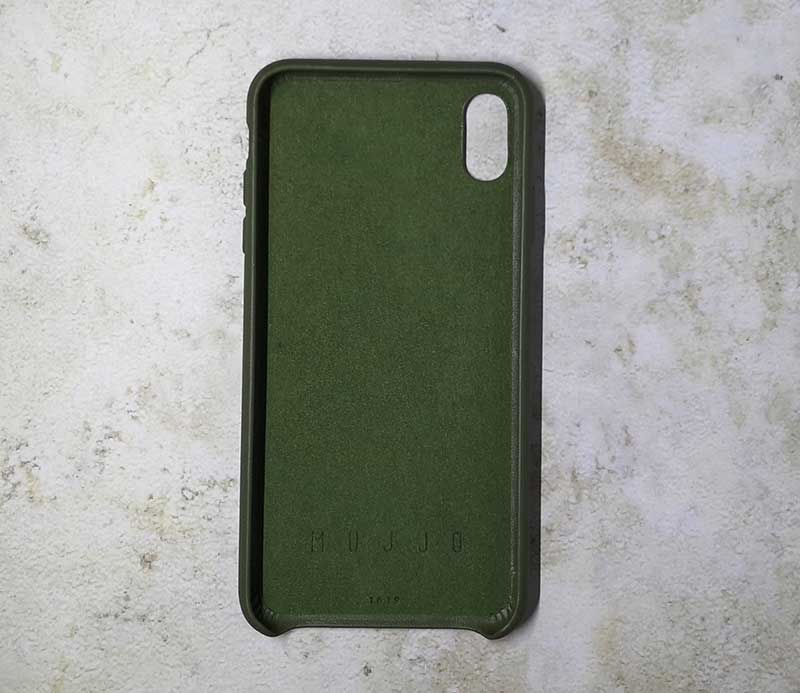
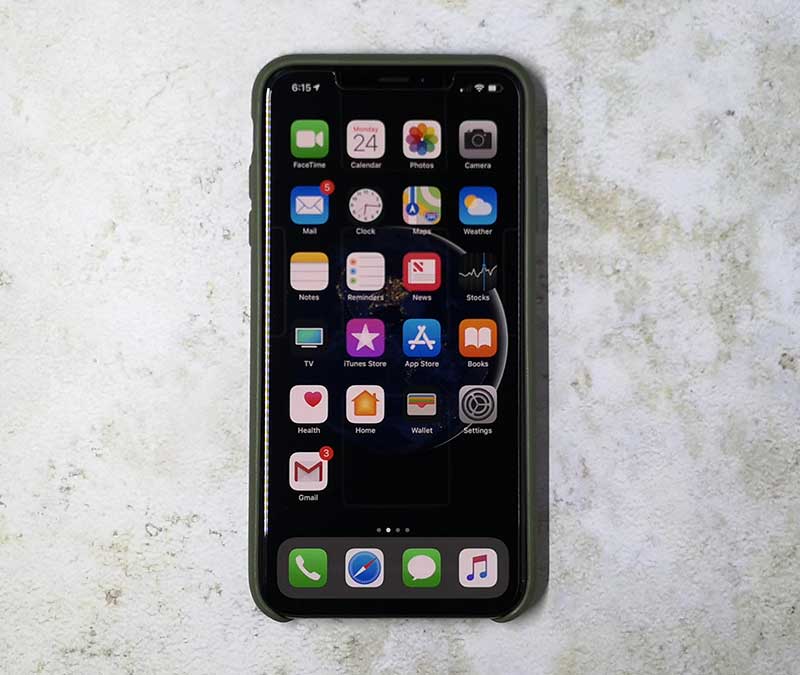
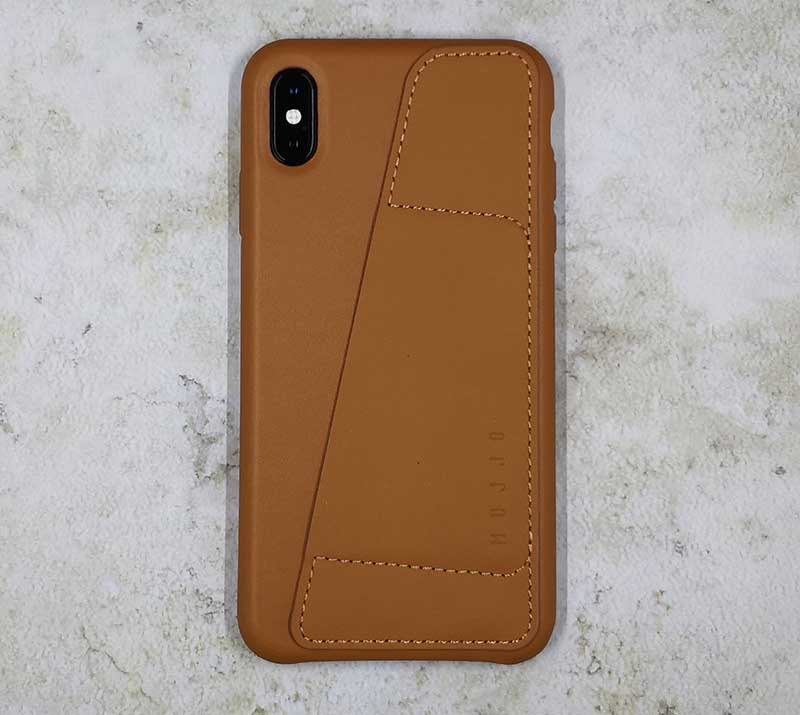
The Mujjo Full Leather case is a molded form-fitting vegetable tanned smooth leather case that is available in green, tan, gray, and black and it provides protection to the back and sides of the iPhone Xs Max without adding bulk or a dose of ugly.

The case is lined in a soft microfiber material that protects the back of the iPhone from scratches, fingerprints, and adds some thickness around the camera lens to protect it too.

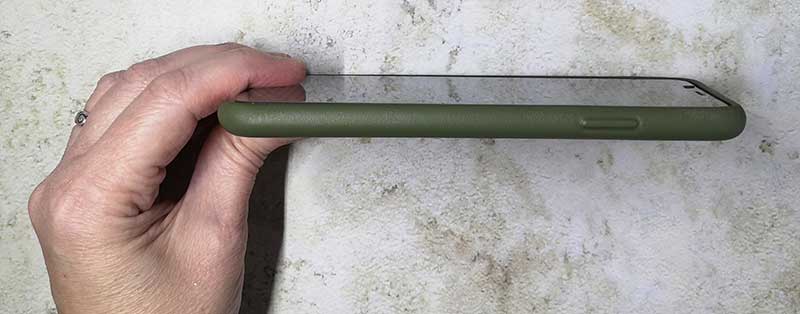
This case adds extra protection for the sides, back, and even the display with an extra 1mm tall bezel around the screen, all without adding a lot of additional bulk and weight.

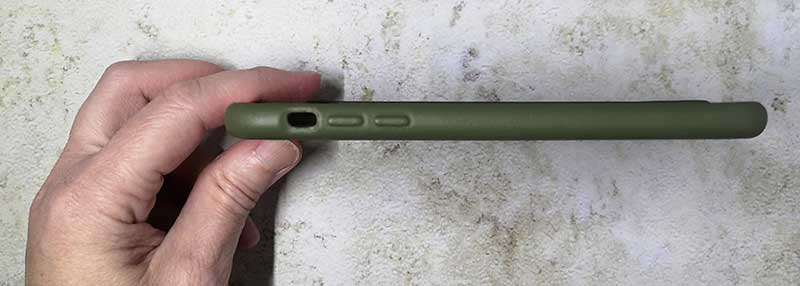
Instead of cutouts for the buttons on both sides of the phone, the buttons are molded into the case itself. The look is nice, but it does require a little extra effort to press each button.

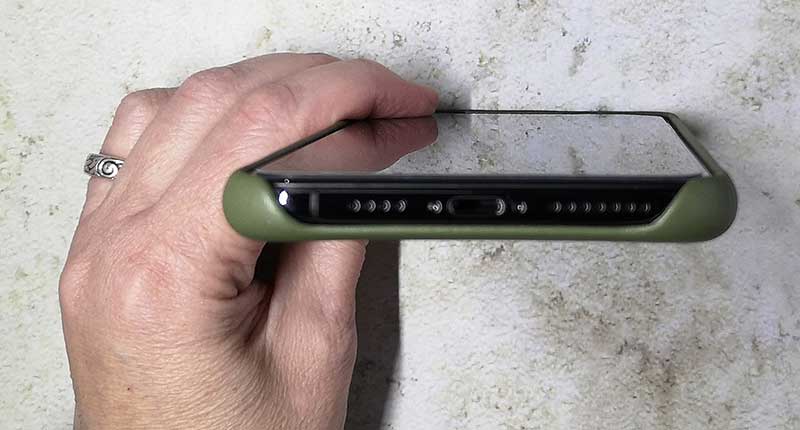
The top edge of the case is fully covered, but the bottom of the case has a large opening that leaves the speakers and lightning port uncovered.

The Mujjo Full Leather case is comfortable in hand and offers almost everything you need in a high-end leather iPhone case… well almost everything.

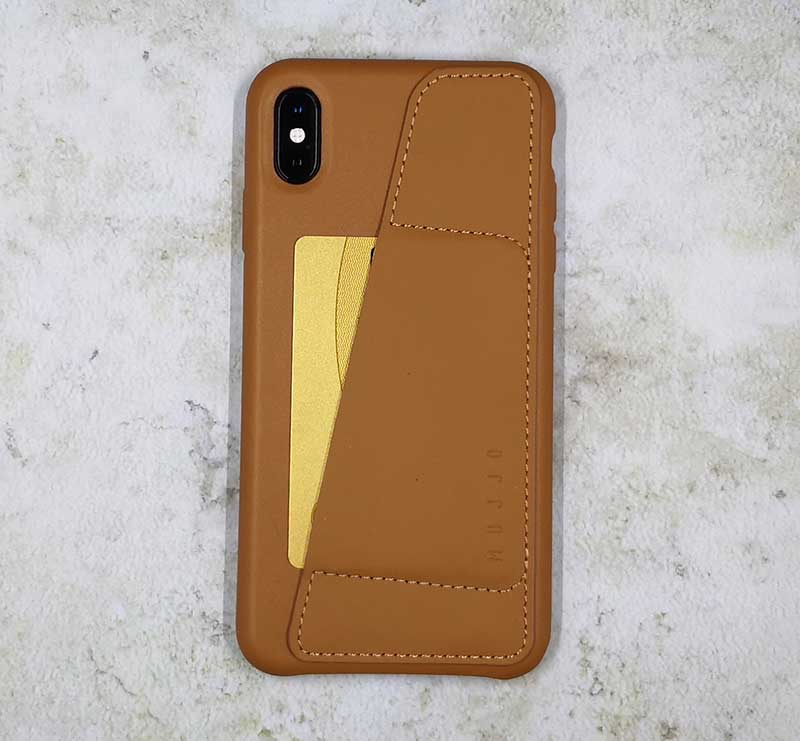
That’s where the Mujjo Full Leather Wallet case comes in. It’s the same case as the Full Leather case, except it’s a wallet too.

Sewn into the back of the case is a credit card-sized slot that holds 1 or 2 standard sized plastic credit cards.

The credit card holder does add some extra bulk, but it doesn’t interfere with charging the phone on a Qi wireless charger, even if you have a card in the slot.

What I like

  • Molded form-fitting design
  • Wallet case doesn’t interfere with wireless chargers
  • Easy to put on and remove

What needs to be improved

  • Buttons are harder to press when the phone is not in a case

Final thoughts

When you’ve spent more than a grand on a smartphone, protecting that phone from scratches, scuffs, fingerprints, and smudges is most likely a priority. One way to do that is to buy a case for the phone, but plastic cases are boring and ugly, so consider a nice looking and affordable leather case from Mujjo.

Price: $43.42 – $53.08
Where to buy: Mujjo and Amazon
Source: The sample for this review was provided by Mujjo.

Filed in categories: Reviews

Tagged: , ,

Mujjo iPhone Xs Max leather cases review originally appeared on The Gadgeteer on October 3, 2018 at 2:52 pm.

Note: If you are subscribed to this feed through FeedBurner, please switch to our native feed URL http://the-gadgeteer.com/feed/ in order to ensure continuous delivery.
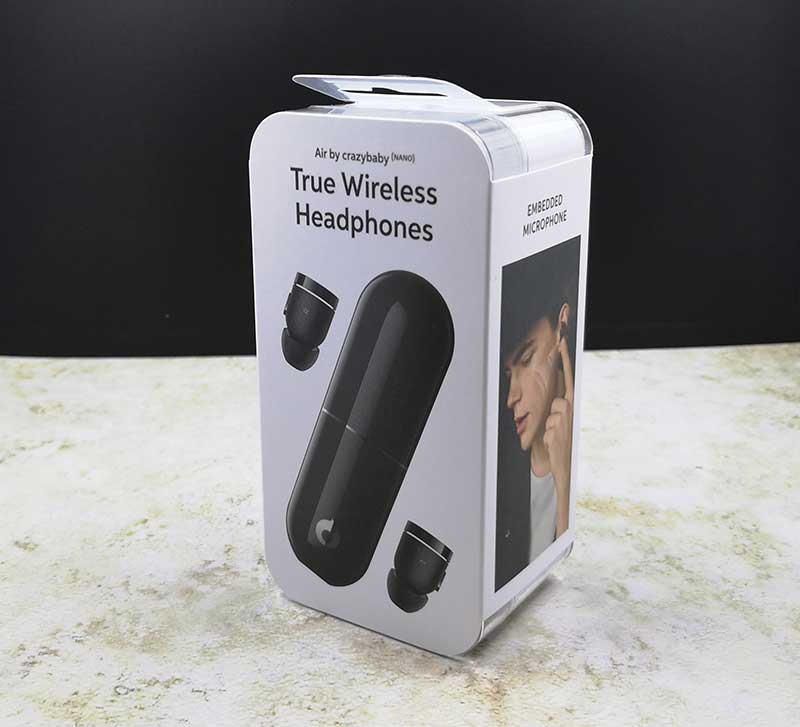
Crazybaby Air Nano and 1S True Wireless Headphones review


REVIEW – I’m on a gadget quest to find a comfortable pair of wireless earbuds that sound as good as they feel. So when I was offered not one but two pairs of wireless earbuds to review from Crazybaby, I had to say yes. Let’s take a look at the Crazybaby Air Nano and Crazybaby Air 1S True Wireless Headphones.

What is it?

The Crazybaby Air Nano and Crazybaby Air 1S are Bluetooth earbuds and are what Crazybaby calls true wireless headphones because they don’t have a cable that connects the left earbud to the right earbud.

Crazybaby Air Nano True Wireless Headphones

Since Crazybaby sent me two different styles of their wireless earbuds, I’m going to talk about each pair individually starting with the Air Nano earbuds.

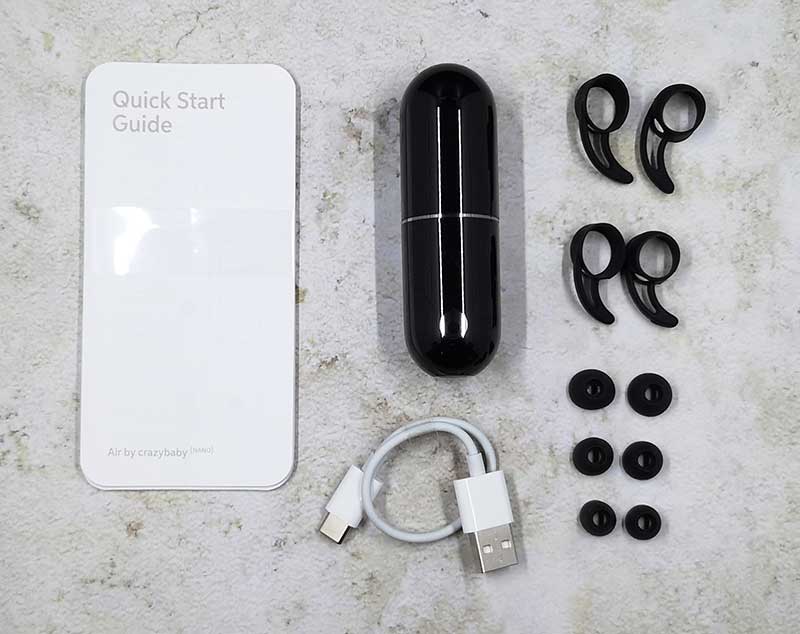
What’s in the box?

Crazybaby Air Nano earbuds
3 sets of ear tips
2 sets of ear wings
Charging case
USB-C charging cable
Quick start guide

Design and features

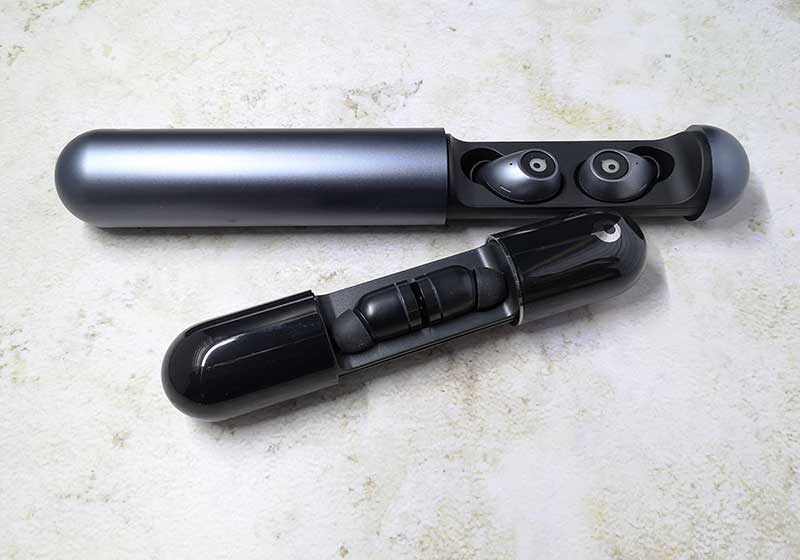
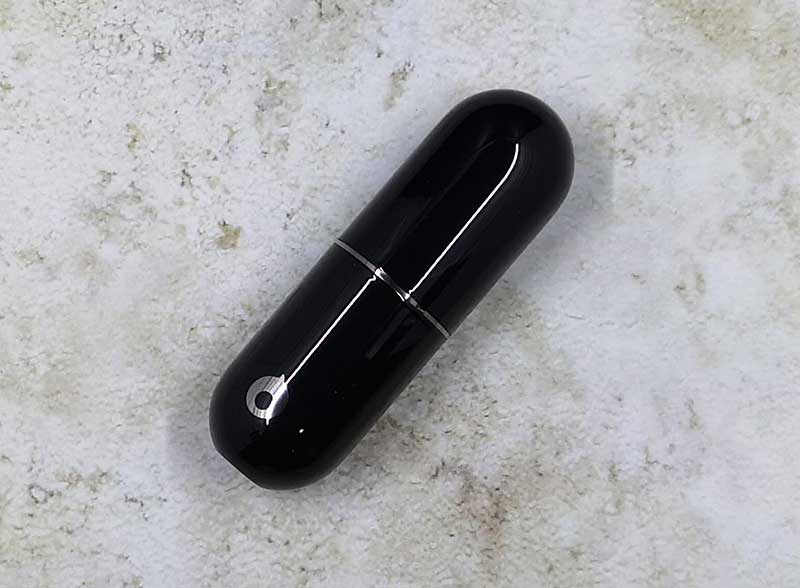
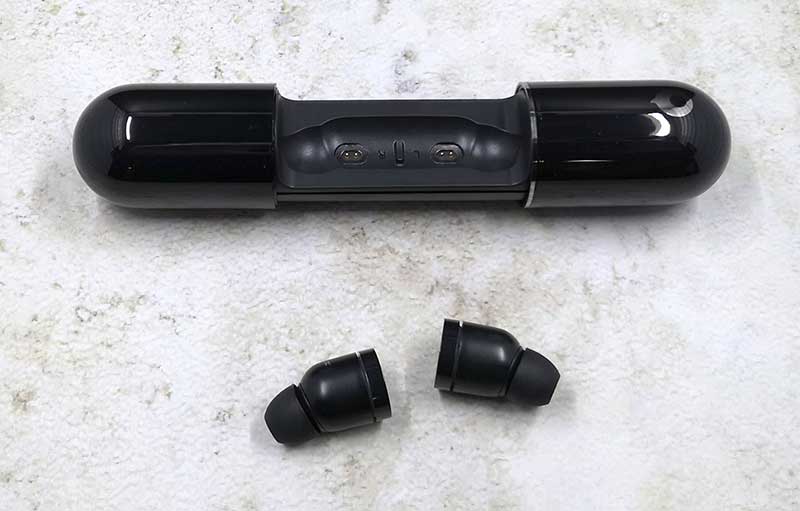
The Crazybaby Air Nano Bluetooth earbuds come in a shiny plastic case that reminds me of a giant pill. Available in 10 colors, I was sent black. Not exactly an exciting choice but it’s the sound quality and not the color of the earbuds that is important, right?

You might be wondering if the pill-shaped case will roll off a flat surface. Luckily, it won’t as long as you set it down on the surface instead of tossing it.

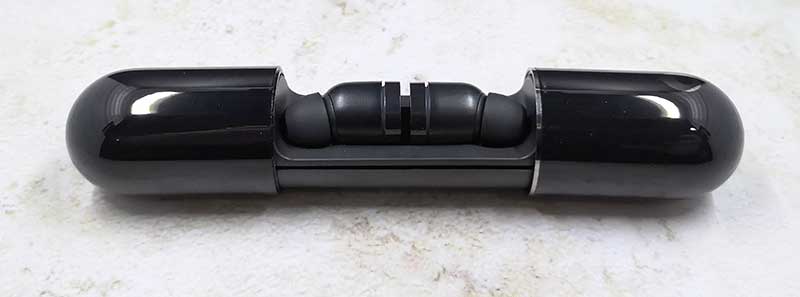
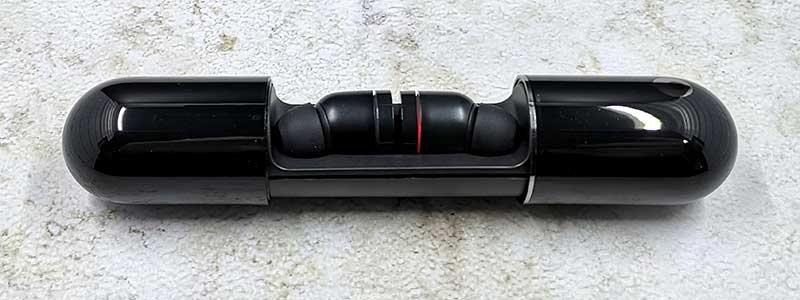
The capsule pulls open to reveal two earbuds nestled in their charging cavities.

The Air Nano earbuds are held in place with magnets as is the case itself which slides shut with a satisfying thunk sound.

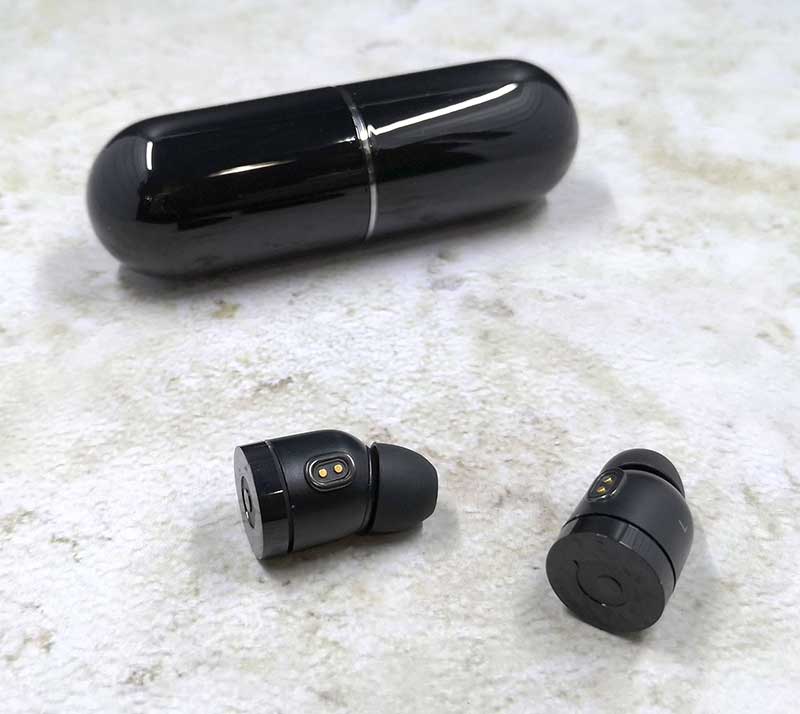
The earbuds themselves have a bullet shape but the ear tip part that goes into your ear canals is angled to provide a better fit than similar brands of wireless earbuds, or that’s the intent.

In the image above, you can see the two charging contacts on the side of each earbud. These contacts match up with the contacts in the charging case to make an electrical connection for charging.

Each earbud is clearly marked with an L or an R so you’ll know which ear they go in and the outer surface of each earbud is a multi-function button. Pressing and holding the buttons on each earbud will toggle power and illuminate the LED band in white.

The multi-function button on each earbud has its own set of functions:

Left earbud – One press will either answer a call or end a call, two presses will initiate Siri or Google voice assistants.

Right earbud – One press will toggle between play and pause for audio, two presses will go to the next track, and three presses will go back to the previous track.

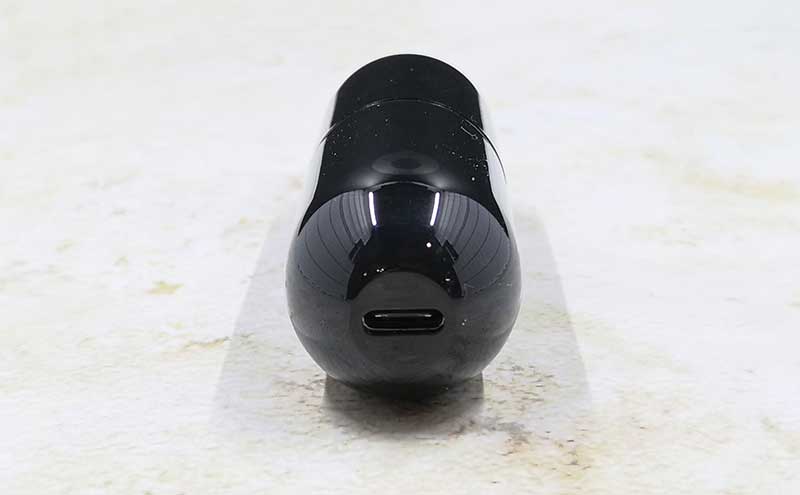
To charge the Crazybaby Air Nano earbuds, you connect the capsule to a USB port using the included USB-C cable.

While the earbuds are charging, the LED status band will glow red and will turn off when charging has completed. There’s also a tiny status LED on the end of the capsule that glows amber while charging and turns off when charging has finished.

Fit and comfort

As far as fit and comfort are concerned, it’s really going to depend on each person’s ear shape. For me, the right earbud fit fine and felt comfortable for an hour or so of constant wear. The left earbud, on the other hand (ear?), felt uncomfortable very quickly due to the multi-function button edge pressing against my ear. Everyone will have a different experience with the way these earbuds feel, so I can’t say they are horrible or wonderful. I’ll just say, that they weren’t the most comfortable in my ears.

It’s interesting to note that the headphones come with two sets of wingtips. The weird part is that you’ll have to take the wings off if you want to place the earbuds back into the charging capsule. That means you’re going to need a way to store the wings when you’re not using them. Hence – weird.

But how do they sound?

I wasn’t blown away but the sound quality, but I didn’t throw them across the room in disgust either. They have decent bass and treble, but overall music is a little muddy. But as long as you’re not a snobby audiophile, you’ll probably think they are just fine for listening to most types of music.

I tested the earbuds while paired with my Pixel 2 XL and listened to tunes using Spotify and videos using Netflix. I noticed no issues with video and audio syncing while using Netflix.

Battery life and connectivity

The Air Nanos will play for about 3 hours straight on a charge and can play another 90mins after just a 5-minute charge in the capsule charging case which will provide an additional 5-9hrs of playback time.

As far as connectivity, I didn’t have any problems pairing the Crazybaby Air Nano wireless earbuds with a Pixel 2 XL or with an iPhone Xs Max. Both phones also worked well with the buds for making and receiving calls. No one asked if I had fallen down a well while I was using them in a conversation.

What I like

  • Small size
  • USB-C charging case

What needs to be improved

  • Can be a little uncomfortable
  • 3hr battery life seems short
  • No place to store the wingtips when they aren’t being used

Final thoughts

I’ll say that the Crazybaby Air Nano earbuds sound better than the last pair of Rowkin earbuds that I reviewed, but they aren’t quite as comfortable to wear as the Rowkins.

Price: $99.00
Where to buy: Crazybaby and Amazon

Crazybaby Air 1S True Wireless Headphones

What is it?

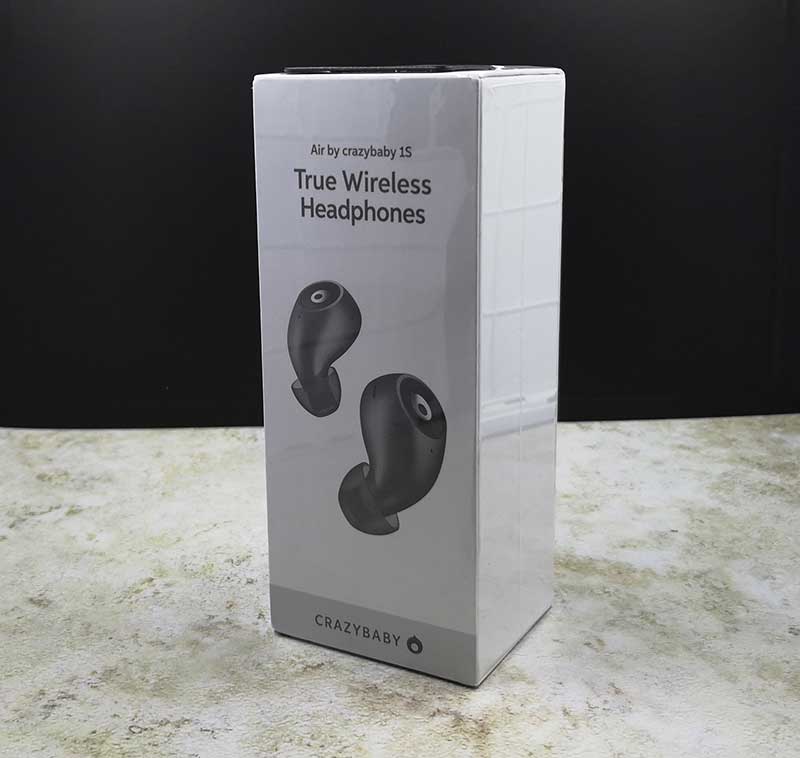
The Crazybaby Air 1S are Bluetooth earbuds designed for sports with an IPX 6 waterproof rating and are what Crazybaby calls true wireless headphones because they don’t have a cable that connects the left earbud to the right earbud.

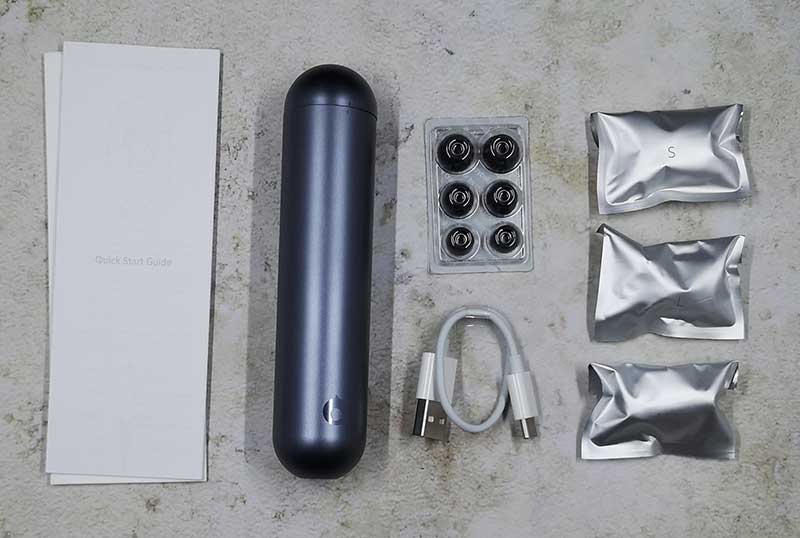
What’s in the box?

Crazybaby Air 1S earbuds
3 sets of ear tips
3 sets of earbud covers
Charging case
USB-C charging cable
Quick start guide

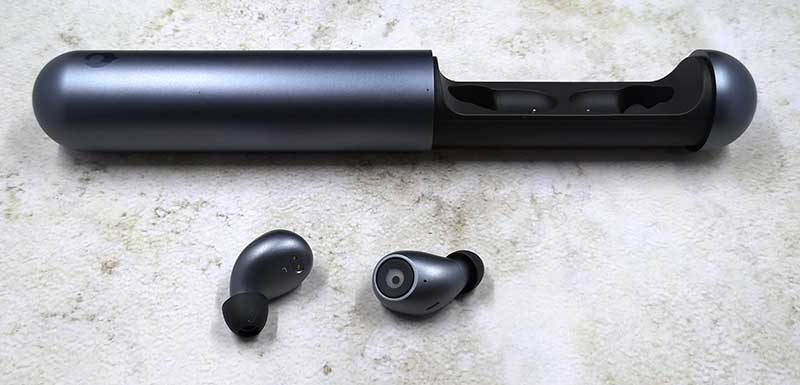
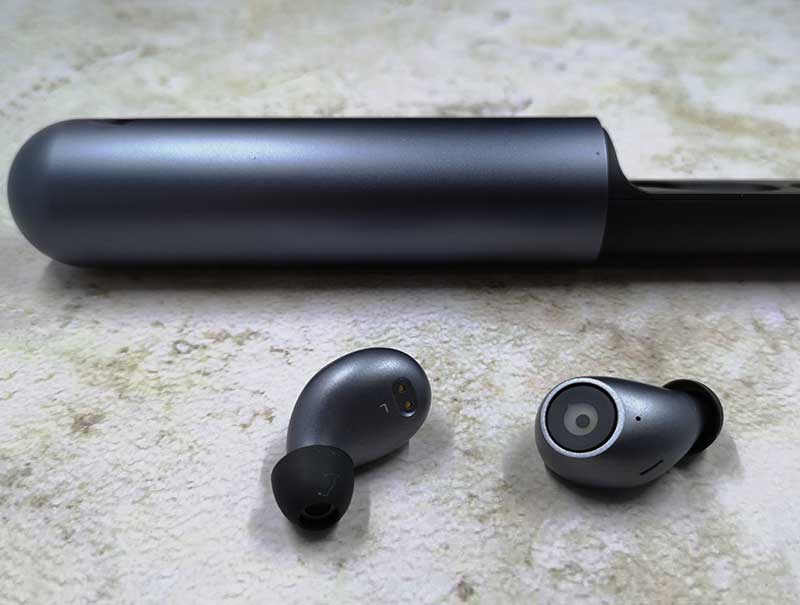
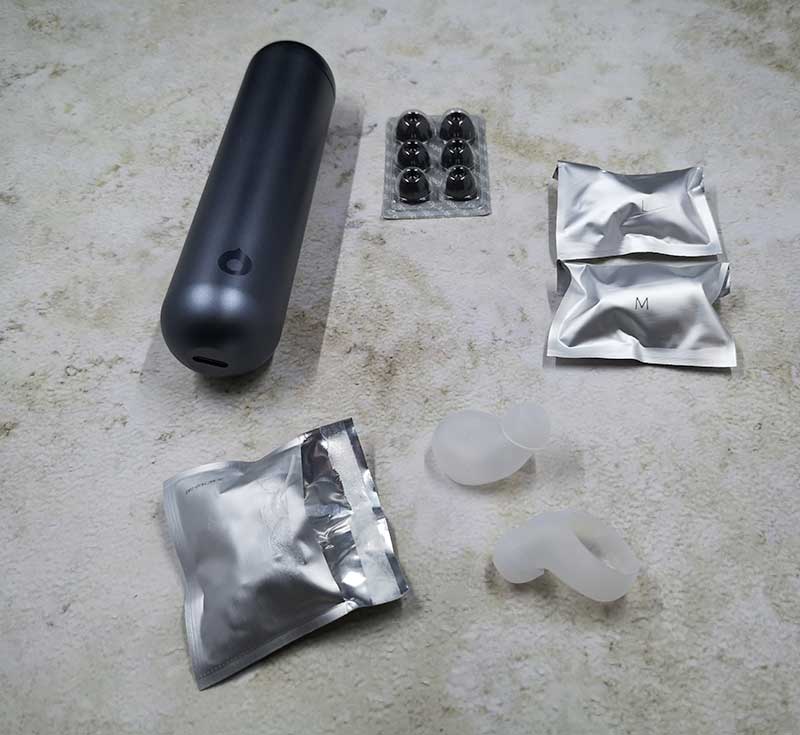
The Air 1S earbuds also store in a giant (even larger than the Air Nano) pill-shaped charging case. But unlike the Nano’s case, the 1S case has an aluminum shell that is available in either star grey or space silver. I guess I was sent star grey although it looks more like gunmetal blue to me.

The earbuds themselves are larger and have a teardrop shape and a color that matches the charging case.

Each earbud has two electrical contacts that match with the contacts in the charging capsule. The buds have a slightly indented multi-function button on the front that is easier to press than the buttons on the Air Nanos. You also hear an audible click when you press the buttons which have the same set of functions as the Air Nanos:

Left earbud – One press will either answer a call or end a call, two presses will initiate Siri or Google voice assistants.

Right earbud – One press will toggle between play and pause for audio, two presses will go to the next track, and three presses will go back to the previous track.

Fit and comfort

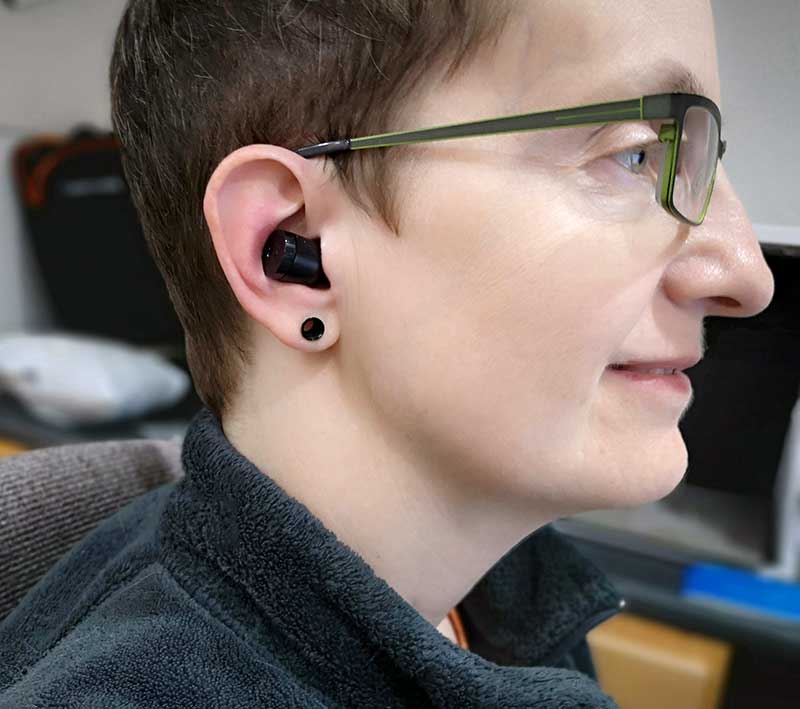
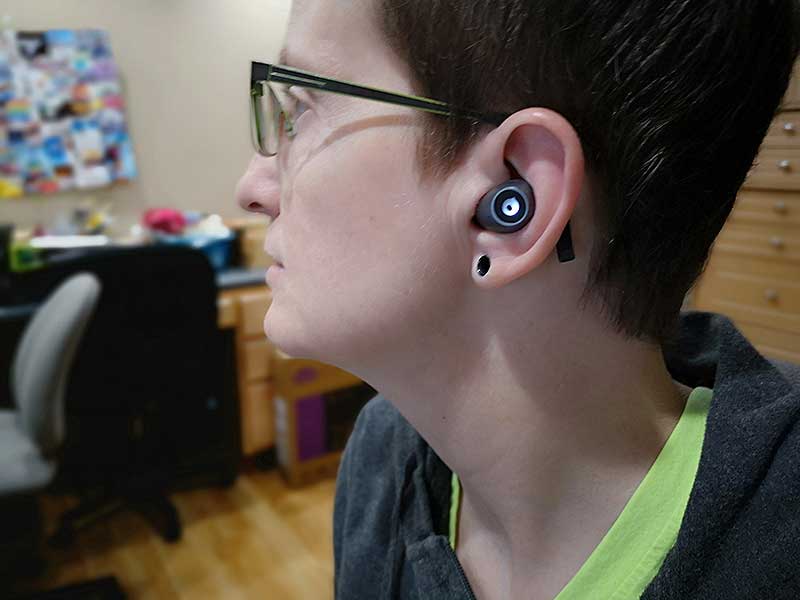
Again, my experience with the fit and comfort of these earbuds may or may not match your experience because everyone has differently shaped ears and ear canals. That said, these buds are even more uncomfortable for me than the Air Nanos which is really disappointing because I really like these earbuds. Just like with the Nanos, the left 1S earbud is more uncomfortable for me than the right earbud. But the right earbud is pretty uncomfortable too. I think my ears are a little too small for these earbuds which sucks because they look kind of cool when the status LED glows… kind of like the earbuds have eyeballs.

The Air Nanos came with wingtips which I thought was weird and the Air 1S earbuds come with what appear to be full body earbud covers with integrated eartips. I guess this is for people who want to use them while they are working out and don’t want to bathe the earbuds in ear sweat. Ick. But just like the Nanos, you’ll have to remove these covers when you want to charge the earbuds in the charging capsule.

But how do they sound?

I tested the earbuds while paired with my Pixel 2 XL and listened to tunes using Spotify and videos using Netflix. I noticed no issues with video and audio syncing while using Netflix. For music, they have really good bass and treble, with a nicely balanced tone. I was pleasantly surprised and enjoyed listening to music with them.

Battery life and connectivity

With a single charge, you can listen up to 3 hours and talk up to 4 hours. But you can use the charging capsule to recharge the earbuds for a total of 12 hours of music playback or talk time up to 14 hours.

As far as connectivity, I didn’t have any problems pairing the Crazybaby Air 1S wireless earbuds with a Pixel 2 XL or with an iPhone Xs Max. Both phones also worked well with the buds for making and receiving calls. No one asked if I had fallen down a well while I was using them in a conversation.

What I like

  • Good+ sound quality
  • I like the multi-function button design

What needs to be improved

  • Comfort for people with small ears
  • 3hr battery life seems short
  • No place to store the earbud covers

Final thoughts

I like the Crazybaby Air 1S True Wireless Earbuds quite a bit as far as how they look, sound, charge, etc. It’s just too bad that they hurt my ears to wear them for very long.

Price: $159.00
Where to buy: Crazybaby and Amazon
Source: The sample for this review was provided by Crazybaby.

Filed in categories: Reviews

Tagged:

Crazybaby Air Nano and 1S True Wireless Headphones review originally appeared on The Gadgeteer on October 3, 2018 at 9:00 am.

Note: If you are subscribed to this feed through FeedBurner, please switch to our native feed URL http://the-gadgeteer.com/feed/ in order to ensure continuous delivery.