Jackery Explorer 240 Portable Power Station review

REVIEW – Every gadget I have reviewed has one important thing in common: They all use power. It doesn’t matter if it’s a smartphone, Bluetooth speaker or wireless headphones—the batteries eventually need charging. To charge my various devices, I use outlets, hubs, my car and when I’m not around a power source—a battery backup. Let’s now take this a step further—the electricity is out and won’t return for a few days (when you live in Florida this isn’t far-fetched), your devices are dying and that trusty battery backup is drained also. Now what? Consider a large backup for your backups—a portable power station. One such mini-monster is the Jackery Explorer 240Wh Emergency Backup Lithium Battery.

What is it?

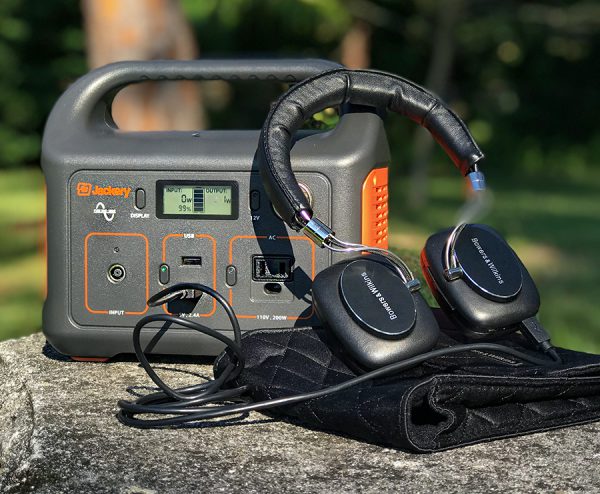
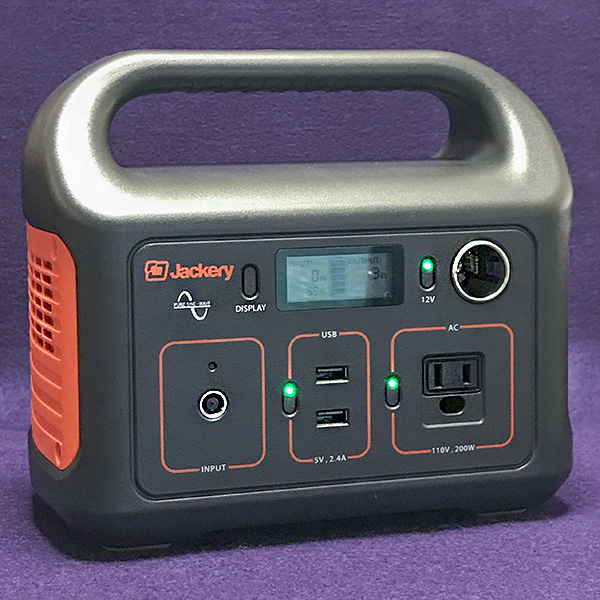
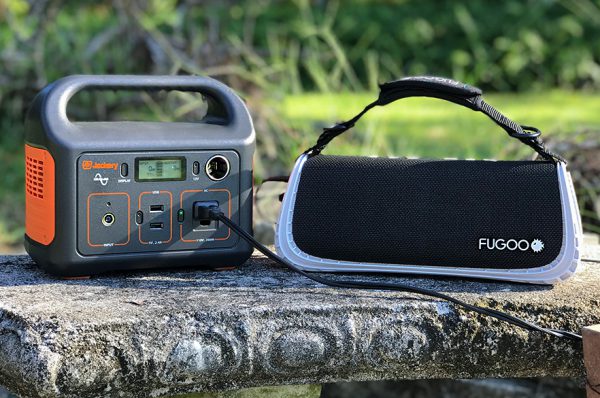
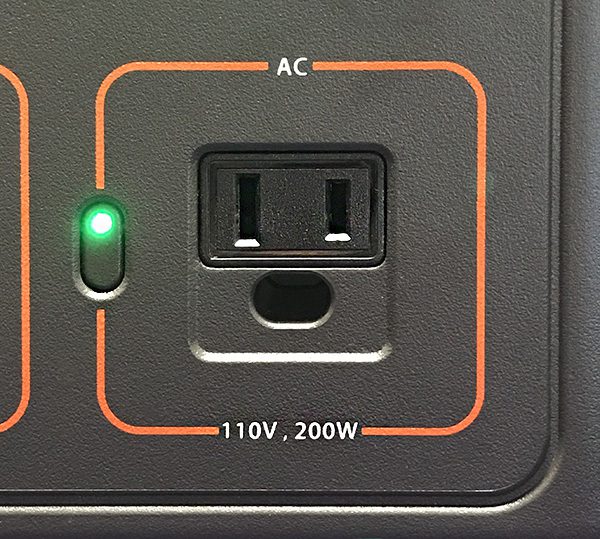
The Jackery Explorer 240 is a portable power station. Among its many ports are a 12V auto, two USB and one 110V AC. It’s made for outdoor and indoor use and is capable of charging multiple devices at the same time. It is a sine wave inverter. This means that the power output is clean power—like utility-supplied electricity. Inverter power is safer for delicate electronics.

Specs

  • Capacity: 240Wh
  • Battery Type: Lithium-ion
  • Weight: 6.6 lbs
  • Dimensions: 9.0’’ x 7.8” x 5.2”
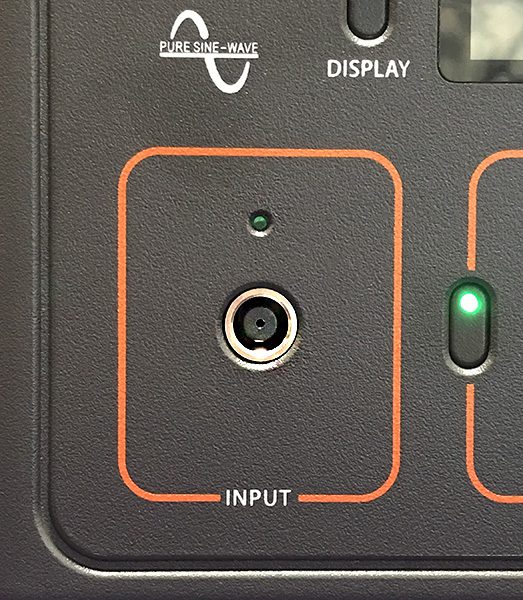
  • Input: 8mm DC, 12V~30V / 40W max.
  • AC Output: 110V, 200W (300W max.)
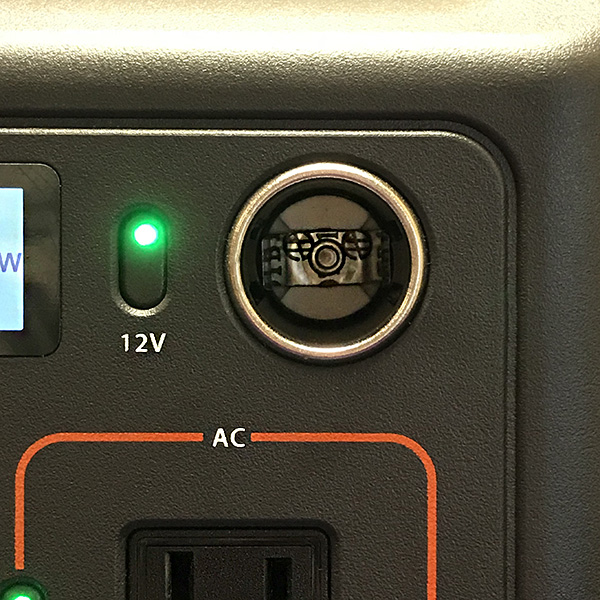
  • Car Port: DC 13.3V, 10A
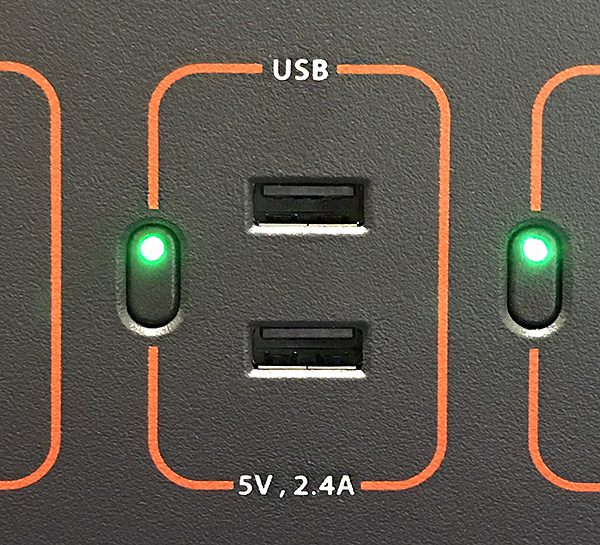
  • USB Outputs (2): 5V, 2.4A (each)

Design and features

The Jackery Explorer 240 is a power station that can power almost anything for a decent amount of time—depending on the device. For example, its 240Wh will recharge a tablet 7+ times, smartphone 20+ times, laptop 3+ times, a GoPro 40+ times or even power a car cooler for 6+ hours or a 32” TV for 3+ hours. If you’re camping, the Explorer 240 will power a 5W light for 40+ hours. In other words, it should easily power a weekend camping trip. 

If you’re a serious camper, optional solar panels will recharge the Explorer 240 in 10 hours (depending on sunlight). Jackery’s 50W solar panel will cost an extra $200. Otherwise, the Explorer 240 will recharge in 7 hours via house outlet or 12V car charger (both cables included). 

Note that you cannot take the Explorer 240 on an aircraft. It is not waterproof, so if used on camping trips, it should be kept out of the elements. All of the Explorer 240’s power comes from lithium ion batteries, so it’s completely silent with no vibration and zero emissions. 

Many safety features are built in using what Jackery calls its Battery Management System (BMS). BMS offers protection from short circuits, over current, over charging, over voltage and is temperature resistant. It comes with a 24 month warranty.

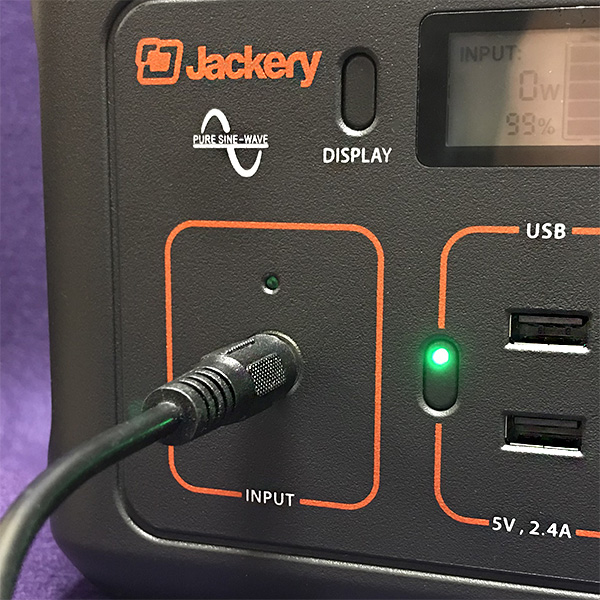
The Explorer 240 weighs less than 7 lbs. and is easy to carry with its conveniently oversized handle. It’s constructed of high impact plastic with all the ports placed on one side, so there’s no guessing when searching for the correct port. Each of the ports has its own power button that lights up when on. Note that plugging in a device does not automatically charge the device. The corresponding button for that port must be pressed.

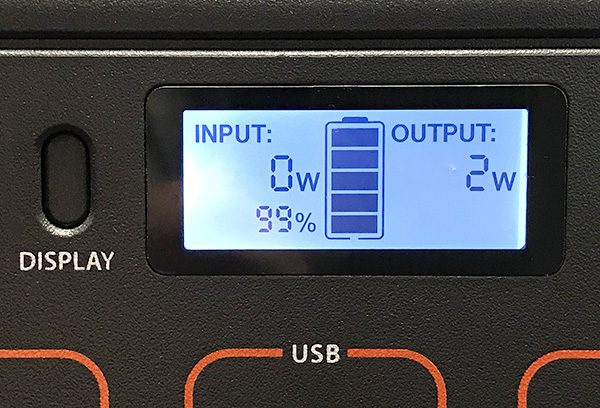
Also on the port side is a light-up LCD window that shows total power consumption in watts (if it goes over 200W, it will automatically shut off). For example, charging a smartphone takes a whopping 1-2W! The LCD also shows the percentage of how much battery life remains on the Explorer.

Using the Explorer 240 couldn’t be easier. Just carry and plug-in devices as needed. All ports are well made, so any connection feels solid and secure. The small size makes it easy to store without taking up much room in either a car or tent. Plus its rugged exterior feels like it will last for years while enduring rough handling.

What I like

  • Lightweight and easy to carry
  • Powerful
  • Totally quiet
  • No fumes
  • All ports on one side

What needs to be improved

  • Not water resistant
  • Expensive

Final Thoughts

You might say that the Jackery Explorer 240 is a one-trick pony and technically you would be correct. But what a pony it is! It’s comforting to know that you can have hours of quiet, safe and reliable power instantly available during extended blackouts, camping trips or even as part of a winter emergency kit for your car.

Note: If you are unfamiliar with the Jackery name, They’ve recently teamed with Honda, who will market identical power stations (with slightly different battery capacities)  under the “Honda by Jackery” label. If Honda is confident enough to put their name and reputation on Jackery’s power stations, then that should count for something.

Price: $299.99 US
Where to buy: Amazon
Source: The sample for this product was provided by Jackery.

Filed in categories: Reviews

Tagged:

Jackery Explorer 240 Portable Power Station review originally appeared on The Gadgeteer on October 19, 2018 at 9:00 am.

Note: If you are subscribed to this feed through FeedBurner, please switch to our native feed URL http://the-gadgeteer.com/feed/ in order to ensure continuous delivery.

ZAGG InvisibleShield Glass+ VisionGuard iPhone Xs Max screen protector review

REVIEW – The new iPhone Xs Max costs a trillion dollars so you better protect it, especially the display. One solution is a ZAGG InvisibleShield glass screen protector, but the one I’m going to tell you about isn’t just any ordinary screen protector. This one also blocks blue light. Let’s check it out.

What is it?

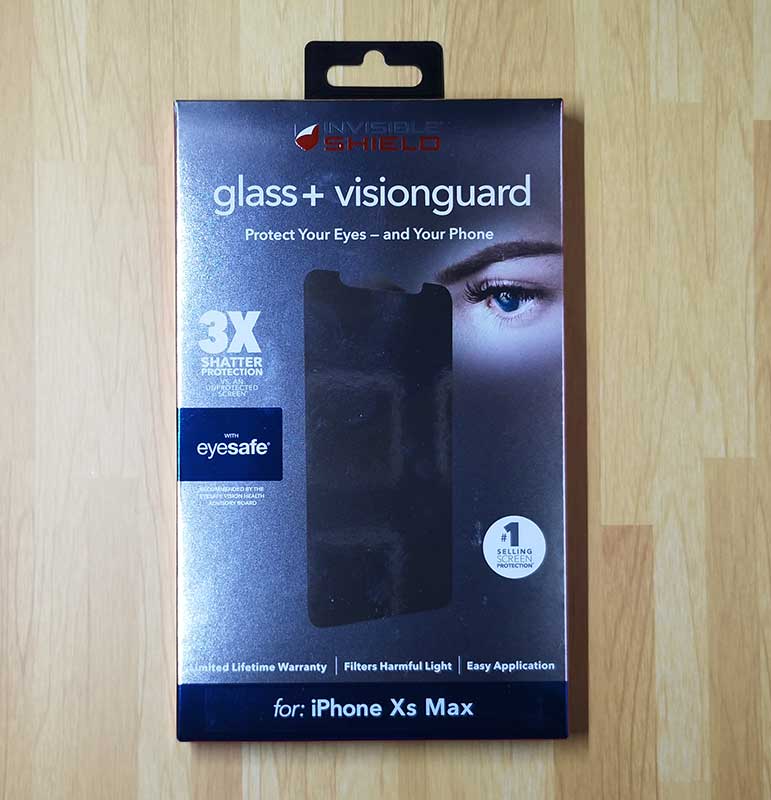
The ZAGG InvisibleShield Glass+ VisionGuard is a glass screen protector for the iPhone Xs Max and other phones.

What’s in the box?

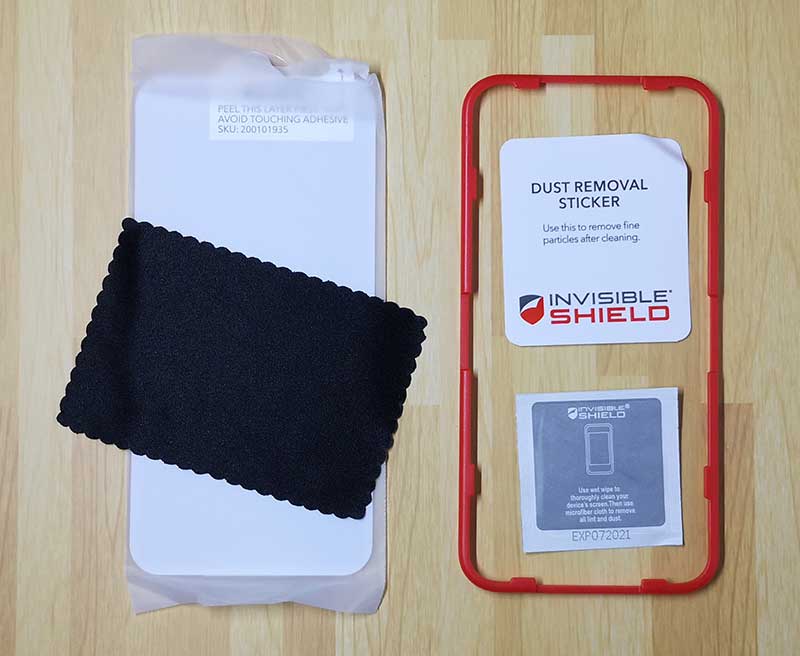
InvisibleShield Glass+ VisionGuard screen protector
Instructions
EZ Apply tray
Microfiber cloth
Cleaning wipe
Dust removal sticker

Installation

I went into this review expecting to be disappointed because every screen protector that I’ve either installed or had someone install for me has resulted in at least a few specs of dust or bubbles under the glass. But ZAGG sent me this protector without even asking if I was interested in reviewing it. And as fortune would have it, a few days later my iPhone Xs Max arrived just begging for protection. So I thought what do I have to lose?

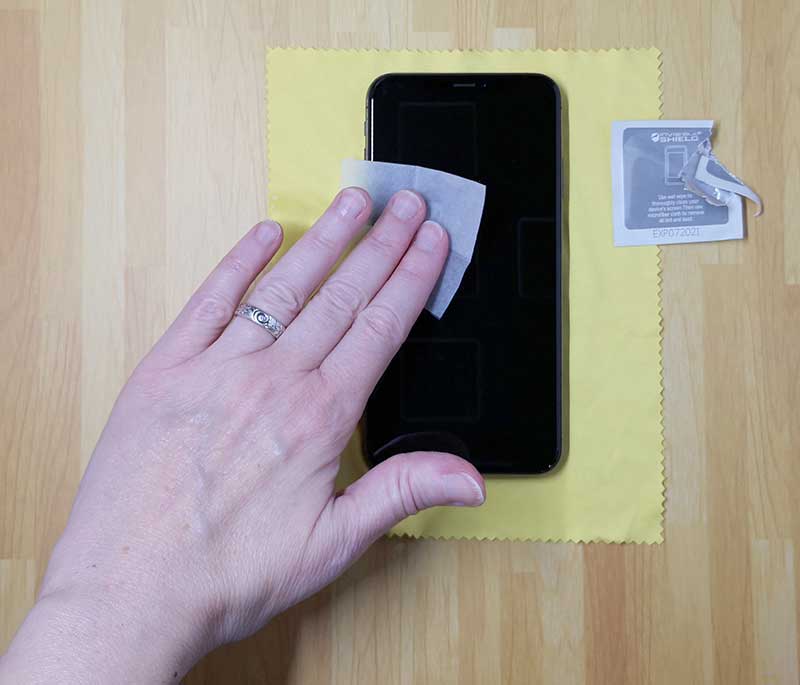
I followed the instructions which tell you to clean the screen with the included wipe. I then used the bright lights of my SHOTBOX to make sure the screen was completely free of dust specs.

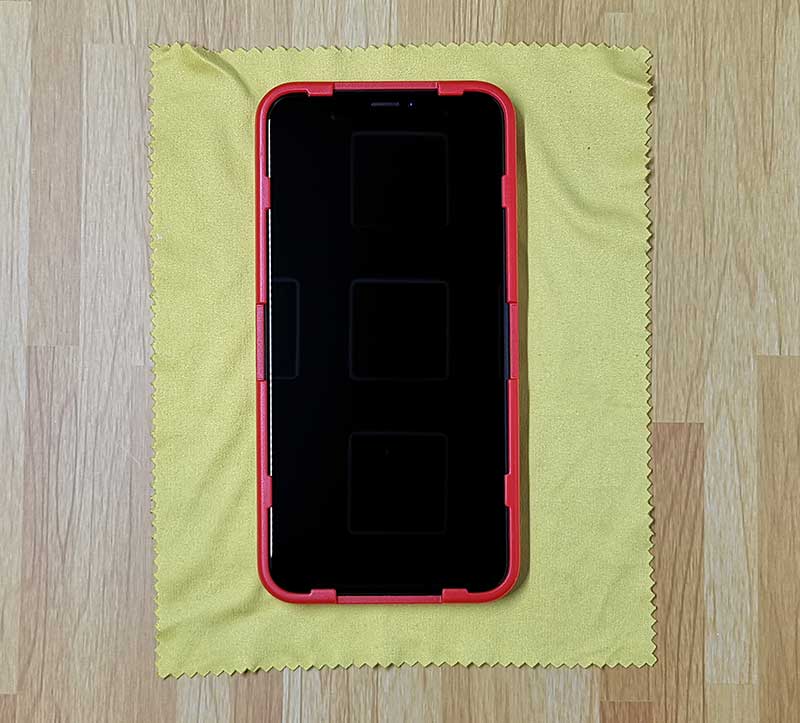
For the next step, I placed the EZ Apply Tray over the iPhone like you see above. That yellow cloth under the iPhone does not come with the screen protector, that’s just a glass cleaning cloth that I use to keep things clean.

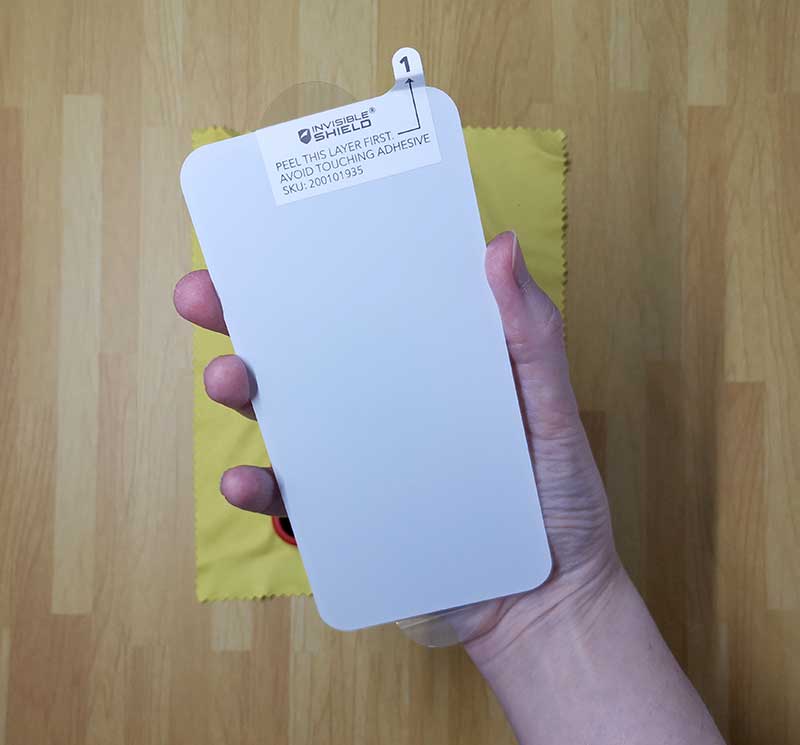
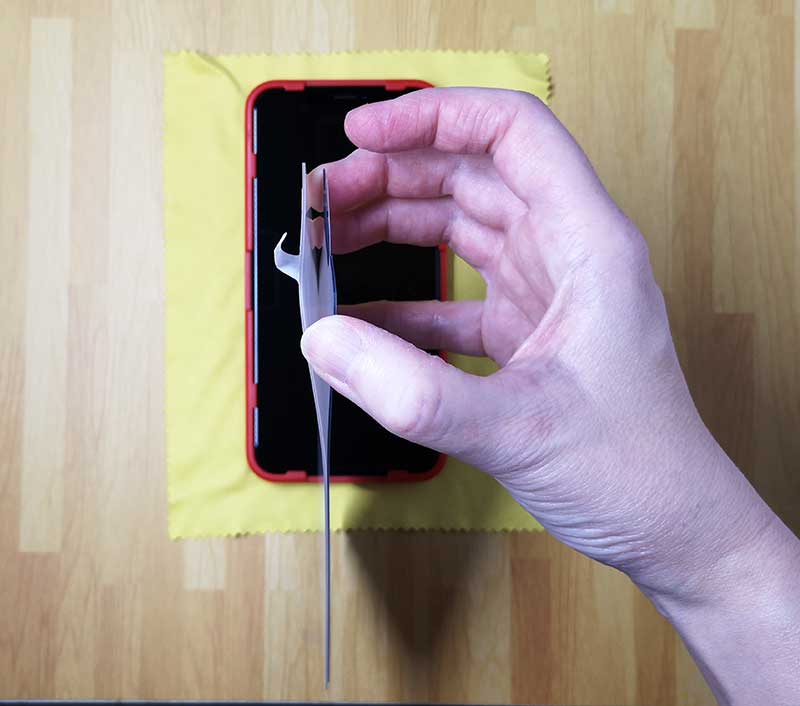
The next step instructions you to peel the #1 protective liner off the InvisibleShield.

This protective liner is as thick or thicker than the actual screen protector and I felt like I was going to snap the glass protector in half trying to remove the line because pulling the two pieces apart caused both pieces to flex. But the glass didn’t snap, so on to step four.

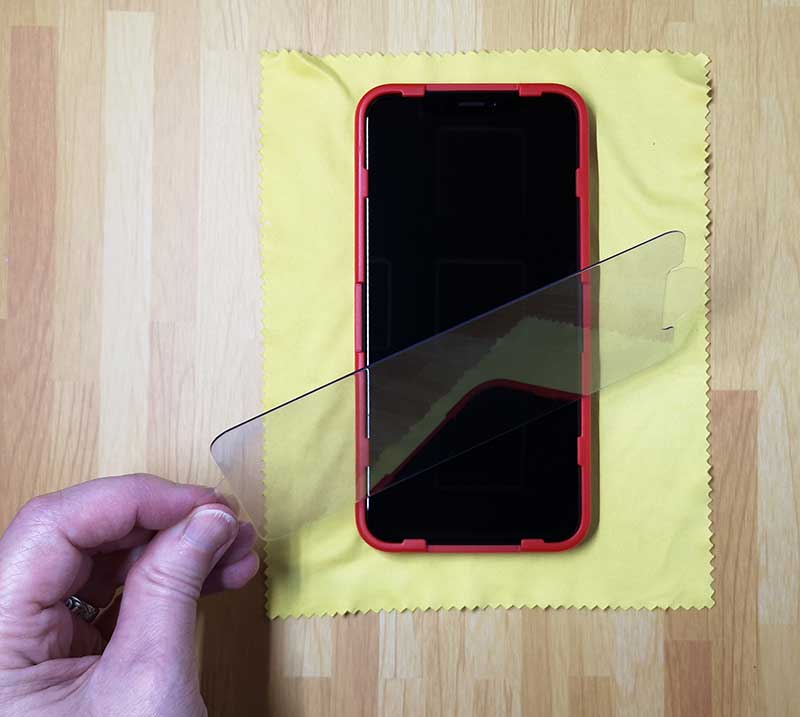
Here’s the InvisibleShield with the protective liner removed. The trick is to place it quickly before any dust can fall on it or the phone’s display.

Luckily the EZ Apply Tray makes positioning the screen protector pretty much fail proof. One the protector is placed, you just touch the center of the protector and it applies itself. Seriously. It was that easy.

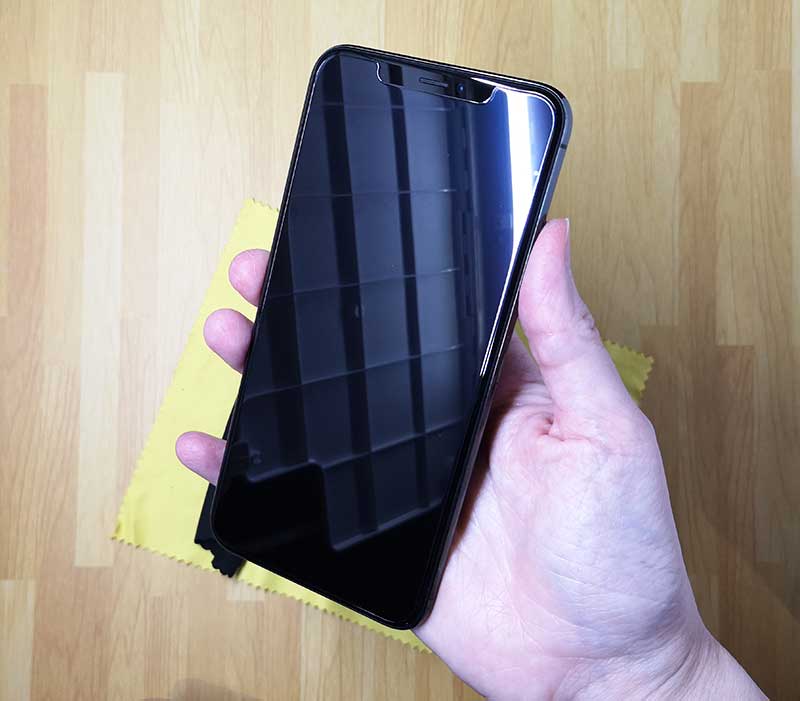
My first EVER perfectly applied screen protector. No dust, no bubbles, no ugly halo around the edges that won’t stick. It was perfect and has turned me into a screen protection advocate when I have been a dissenter in the past.

In addition to the easy application, the InvisibleShield screen protector offers a feature that I’ve not seen offered with other screen protectors. It has a special EyeSafe layer that filters out blue light which is known to cause eye irritation, sleep disruption, blurred vision, and more.

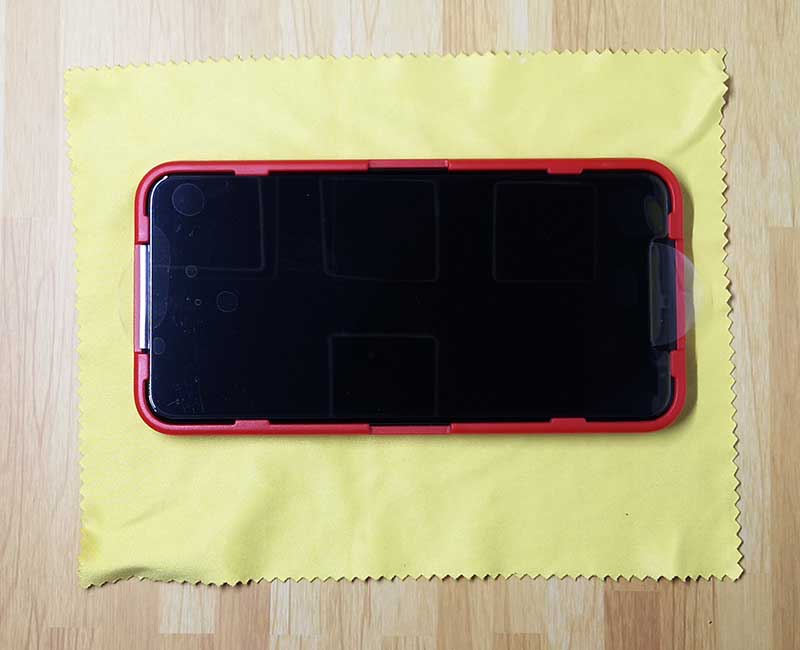
The image above shows the iPhone’s display before the screen protector was installed and the picture below is with the screen protector installed.

I thought it might make the screen look dimmer or even amber colored, but nope, the built-in blue light filter layer does the job without affecting the way the screen looks at all. True colors are preserved, even blues. Color me impressed.

To my eyes, the iPhone Xs Max display with or without the screen protector looks the same which is all I can ask of a screen protector. This protector doesn’t hinder touch sensitivity either. It provides 3x the shatter protection vs. an unprotected screen and it resists smudges too.

What I like

  • Simple to install
  • Filters blue light without affecting True Color
  • Lifetime warranty

What needs to be improved

  • Expensive

Final thoughts

I didn’t think I’d ever sing the praises of a screen protector but after my experience with the ZAGG InvisibleShield Glass+ VisionGuardscreen protector for the iPhone Xs Max, I think I’ve become a convert. Now if they can just get the price down a bit. $45 is a lot to pay, but if that’s the cost for peace of mind, I suppose it isn’t completely out of line.

I ended up returning the iPhone Xs Max to Apple, but I look forward to trying another ZAGG screen protector for my next phone so that I can provide a long-term review update.

Price: $44.99
Where to buy: Amazon
Source: The sample for this review was provided by ZAGG.

Filed in categories: Reviews

Tagged:

ZAGG InvisibleShield Glass+ VisionGuard iPhone Xs Max screen protector review originally appeared on The Gadgeteer on October 18, 2018 at 12:00 pm.

Note: If you are subscribed to this feed through FeedBurner, please switch to our native feed URL http://the-gadgeteer.com/feed/ in order to ensure continuous delivery.
MEATER+ wireless meat thermometer review

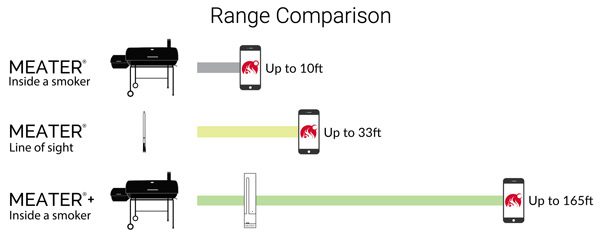
REVIEW – In January, I reviewed the MEATER wireless cooking thermometer that I continue to use regularly to this day. Over the passed year, it has helped barbecue/cook perfect slabs of meats for me and my guests. I liked it so much, I have given several as gifts to friends and family members. The MEATER’s only limitation or weakness was its wireless range; that did not allow me to travel far from the probe without losing connectivity. Well, the MEATER folks have addressed this issue and recently released an updated version of their wireless thermometer, the MEATER+ with nearly five (5) times the range…let’s see if it works as advertised.

Since the MEATER+ is nearly identical to the original, I will be plagiarizing from my original review (so you do not have to backtrack) and focusing on the PLUS’ longer range.

What is it?

Like the original MEATER, the MEATER+ is a truly wireless, dual sensor probe created with the sole job of helping you cook your food to perfection. Not only is the hardware very well done but so is the MEATER app and ecosystem, all working together to cook your meal with much less worry or guessing.

Design and features

As you can see, they are visibly (and come to find out internally) identical. So much so, I had to keep track of them during my testing so I did not get them confused. I learned during the course of this review, the MEATER probe has not changed/been modified.

The part of the equation that has changed/been improved is the bamboo charger also acts as a repeater to boost the signal from the probe and thus the overall range.

Probe Specs

  • Stainless steel, water resistant and easy to clean
  • Wireless up to 165 feet (50 meters)
  • Bluetooth 4.0 wireless connection
  • MEATER Sense™: 2 temperature sensors in 1 probe
  • Maximum internal temperature: 212°F (meat)
  • Maximum ambient temperature: 527°F (cooker)
  • Rechargeable: Over 24 hours of continuous cooking
  • Dimensions: 130mm length and 6mm diameter

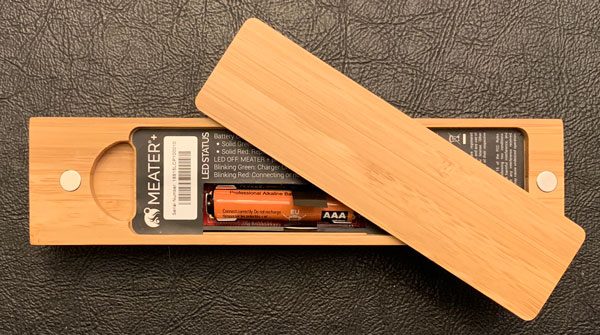
In addition to boosting its wireless range, the MEATER+’s bamboo holder securely keeps and recharges the wireless (easily misplaced) probe. There is a battery power level LED & button located on the front of the wooden holder.

Charger Specs

  • Store and charge your MEATER+ probe
  • Internal Bluetooth booster/repeater
  • Magnetic backing: Attach anywhere
  • Charges MEATER+ up to 100 times with one AAA battery
  • Real wood to match any kitchen or outdoor decor
  • LED indicator to show battery state
  • Dimensions: 157mm L x 37mm W x 28mm H

The MEATER+ is powered by a single AAA battery and can charge the probe up to 100 times before needing to be replaced. The back cover is also held in place by two small embedded magnets.

The MEATER+ probe has to be inserted into the meat beyond the line machined into the metal casing to protect the main sensor from damage due to high temperatures.

The ambient sensor is meant to monitor the cooking temperature of the oven or BBQ. It is located in the black plastic end of the probe.

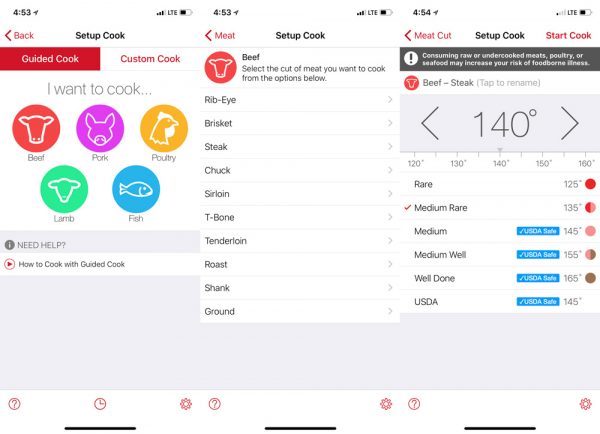
Along with creating a very easy to use, high quality device, the folks @MEATER have developed a very polished ecosystem/app to make cooking with either MEATER(+) probe nearly foolproof. The MEATER’s Smart Guided Cook system walks you through every step of the cooking processThe app guides you thru the type, cut, and doneness of the meat.

The MEATER+’s dual sensors continuously monitor internal and ambient temperatures concurrently. The app also gives you elapsed cooking time and estimated time remaining until your meal is ready to serve.

The app let’s you know when to pull the meat from the cooker, finish its internal cooking (aka letting it rest), and when its ready to eat. The estimated cook time has been spot on…within 5 minutes or so. Not bad considering the roast took nearly two plus hours to cook.

Overall, the whole system is brilliant and has only gotten better. I used the MEATER+ several times over the past few weeks. And for the most part, had zero functional or connectivity issues.

Here was my only issue with the original MEATER:

The only real limitation of the MEATER is it’s range and lost connectivity. I wouldn’t even consider it a true negative just a known issue that needs to be worked around. You’re sticking a small under powered Bluetooth device into a metal box, it’s range is going to be pretty limited. I found both in the BBQ and oven, the range of the MEATER was approximately 10 feet but would quickly reconnect once back in range.

Given the same BBQ, distances, wall thicknesses, etc…the MEATER+ worked as promised/designed. During my testing, I had both the original MEATER and MEATER+ working at the same time and the PLUS’ range was excellent. I was able to leave the BBQ, come inside and sit at our kitchen bar some 40 feet away from the probe with the signal penetrating not only the metal of the BBQ but several walls too. The original MEATER lost its Bluetooth connection (left screen capture) just like before, where the MEATER+ did not blink an eye (center screen capture).

The MEATER and now the MEATER+ have yet to let me down. Every piece of meat I have cooked using these wireless probes has been spot on.

What I like

  • Well made, thought out design
  • Truly wireless
  • Excellent range (improvement over the original)
  • Water resistant, dust-proof, easy to clean
  • Built-in dual sensors
  • Excellent app/ecosystem

What needs to be improved

  • None

Final thoughts

The new and improved MEATER+ is an excellent upgrade from the original. The added Bluetooth range definitely makes using the wireless probe and its ecosystem a seamless experience. During my testing, my smartphone and MEATER+ only had a few hiccups but that easily could have been my iPhone or the new iOS. If you’ve been considering the MEATER, I would pay the extra $30 and go for the MEATER+ ($99). If you have the MEATER and been having connectivity issues, upgrading is worth considering as well. Either way, the MEATER+ would make for an excellent stocking stuffer for the cook in your family even if it’s yourself 😉 .

Price: $99.99
Where to buy: The MEATER+ is available on their website.
Source: The sample of this product was provided by meater.com.

Filed in categories: Reviews

Tagged: , ,

MEATER+ wireless meat thermometer review originally appeared on The Gadgeteer on October 18, 2018 at 10:00 am.

Note: If you are subscribed to this feed through FeedBurner, please switch to our native feed URL http://the-gadgeteer.com/feed/ in order to ensure continuous delivery.

X3 Bar home gym review

REVIEW – How can you build muscle without spending hours in a gym each week and spending money on monthly membership dues? Sure, you can work out at home with your own fitness gear, but that can get expensive too and there’s the matter of all the time you have to devote several days a week to do the actual workouts. Then there’s the X3 Complete Home Gym that claims to build muscle by only spending 10 minutes 4 days a week. There has to be a catch right? Let’s find out.

What is it?

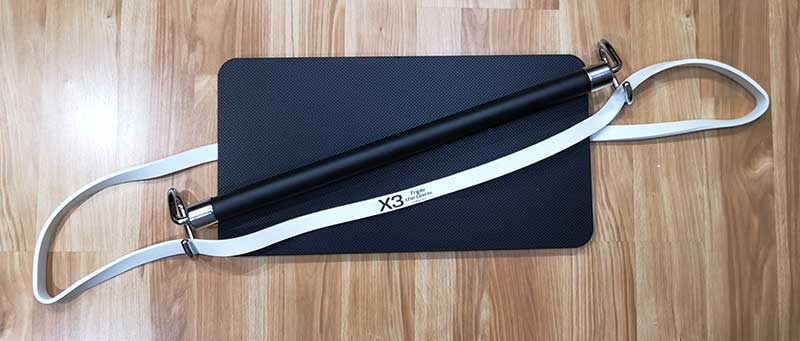
The X3 system is a home gym system invented by Dr. John Jaquish, a biomedical engineer. The portable workout system uses three parts. There’s the ground plate, the bar, and a set of heavy-duty latex bands.

What’s in the box?

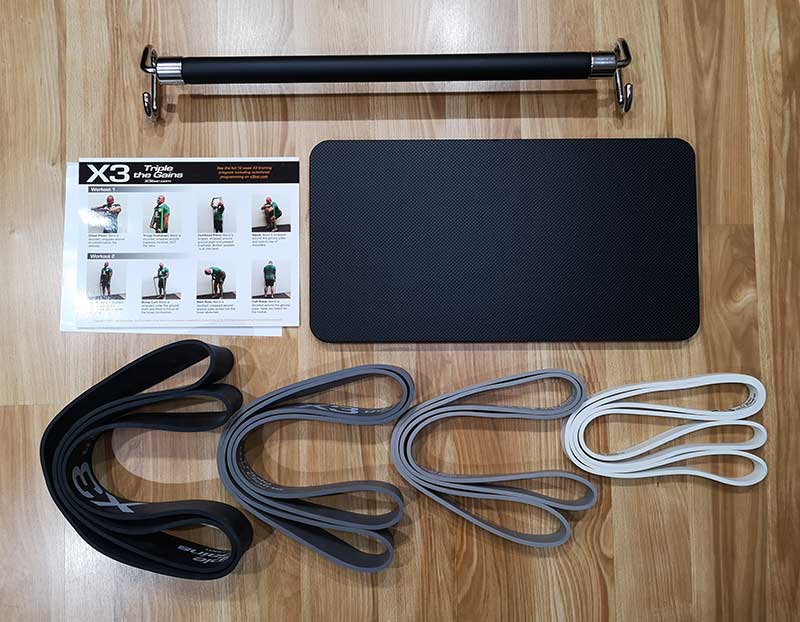
X3 bar
Ground plate
4 bands
Exercise charts

Design and features

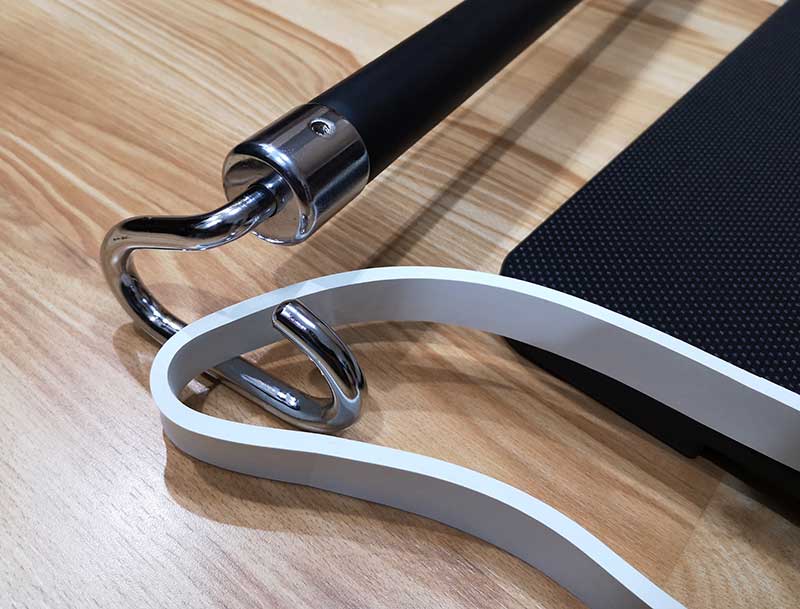
The main and most important component of the system is the X3 bar. The 23.5 inch bar is made of stainless steel with a special hook design to hold the exercise bands and ball bearings that allow the hooks to rotate freely for wrist comfort.

The bar has a well made substantial feel. There’s no way this thing is going to break or bend. I bet you could even run over it with a truck and it wouldn’t be any worse for the wear. I wouldn’t advise testing that theory though.

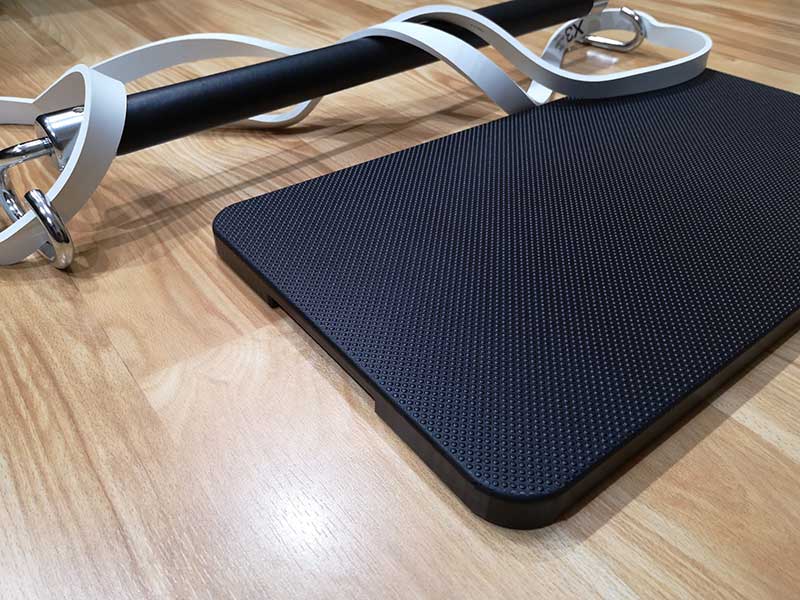
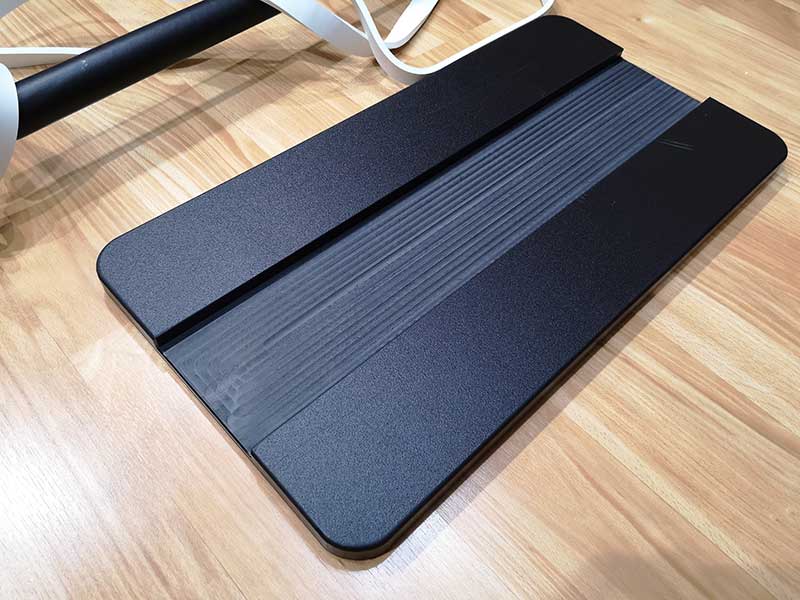
The biggest part of the X3 system is the ground plate which is a CNC milled high-density polyethylene 19 x 10-inch plate that has been designed to stand on for some of the exercises. The top of the board has raised dots that keep it from being slippery but you’ll want to use the board on a non-slippery surface and not a bare hardwood floor like I’m showing here.

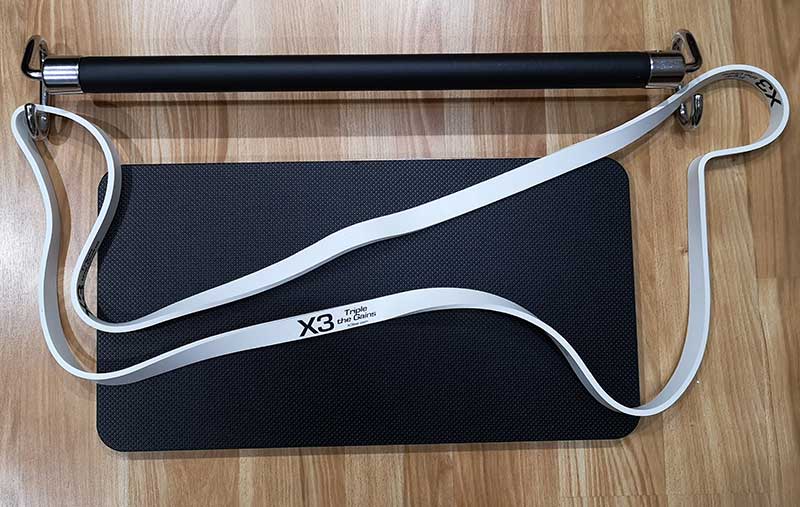
There’s a wide routed slot on the bottom of the ground plate which allows the exercise bands to fit under the plate while you’re standing on it.

X3 bar + bands + ground plate = let’s build some muscle!

Let me start out by saying that I’m not that strong. I’m a 5’6″ 129lb female that had a double mastectomy back in 2011 due to a fun-filled adventure with breast cancer which left me with some minor range of motion and upper body strength issues.

I work out 3 times a week on a lower tier priced Total Gym system, but I am a sucker for workout gear and thought the X3 looked interesting with the claims of building 3x the muscle working out only 10 minutes a day 4 times a week.

The X3 website outlines a 12-week workout program with videos that explain how to do the exercises which consist mainly of

  • Chest press
  • Tricep pushdown
  • Overhead press
  • Squat
  • Deadlift
  • Bicep curl
  • Bent row
  • Upward row
  • Calf raise

In the videos, Dr. Jaquish also talks about nutrition info and medical research info that backs up the system that he’s created. Actually, he talks a lot in his videos and I kept wishing for videos that were less talk and just demonstrations of the exercises that I could follow along with while doing my daily workouts.

The X3 bar ships with 4 latex bands that are different widths which translates into different strengths or weights.

The extra-lightweight band – 10 to 50 lbs, then doubled over 100 lbs
The light weight band – 25 to 80 lbs, then doubled over 160 lbs
The middle weight band – 50 to 120 lbs, then doubled over 240 lbs
The heavy weight band – 60 to 150 lbs, then doubled over 300 lbs

You have to choose the band that is right for you for each exercise so that you can do the exercise with the proper form for as many reps as it takes to get to total fatigue.

The X3 workout system has two different workouts for each week. One workout is done on Monday and Thursday and the other workout is done on Tuesday and Friday. Each workout only has 4 exercises and you only need to do 1 set of each exercise. That hardly sounds like a workout that will build muscle right? Well, trust me when I say that you will work up a sweat because you have to do each exercise to fatigue. That means you do reps until you can’t do another one. That’s all there is to it but it’s not quite as easy as it sounds, especially if you’re not all that strong like me. I had problems with a few of the exercises.

The exercises are done with the band hooked in the bar hooks or looped around the ground plate and the X3 bar. In the image above, I’m doing a chest press with a band doubled around my shoulders. This is one of my favorite X3 exercises because it’s easy to get into position, but sometimes the band separates around the back of your shoulders. It would be nice if there was a clip that could keep the band doubled and stacked correctly.

This is the triceps pushdown position and while I enjoy working triceps, this particular exercise can be uncomfortable because the band needs to rest across your trapezius muscle and not your neck. If you don’t have a big trapezius muscle (I don’t), it can feel awkward and painful especially if you try to use a band that is too strong for you. I have to use the 2nd weakest band for this exercise and sometimes I feel like it’s going to snap my collarbone. You can also do this exercise with the band around the back of your shoulders similar to the chest press exercise, but I find that to feel even more awkward for me.

And here I am demonstrating an upward row with the band under the ground plate and looped once through the X3 bar.

The main X3 exercise that I have trouble with is the squat. For that exercise, you’re supposed to put the band under the ground plate and through the bar as you see above, but then you are supposed to rest the bar across your arms in front of your shoulders/pectoral muscles. Well, I don’t have a chest at all now. I’m completely flat like a 12yr old boy, so I don’t have anything to balance the bar across and it’s a bit painful to have the bar across the tops of my arms when there’s not a lot of padding there. You can see what I mean by watching Dr. Jaquish demonstrate that exercise.

Why is this type of workout equipment effective?

The X3 exercises use variable resistance and stabilizing muscle firing which means that the tension on the muscle is not constant throughout the exercise and puts less stress on your joints where you’re weaker and more stress where you’re strongest. According to Dr. J, exercising this way will cause an increase in the release of human growth hormone which has a lot of health benefits for your whole body including helping your muscles grow.

What I like

  • Compact/portable system
  • 10 minute workouts 4 times a week

What needs to be improved

  • Expensive
  • Can be difficult for beginners to do all the exercises
  • Safety concerns  with some exercises like overhead press, tricep pushdowns, and squats

Final thoughts

In all honesty, I hated the X3 bar the first time I tried it because I found it awkward to use the bands because they would separate or twist across my back. I also had problems with some of the exercises due to my own strength and body shape. After the 3rd or 4th workout, I started becoming more accustomed to getting the bands in position and began liking the workouts a little more. I’ve now used the X3 bar about a dozen times and I definitely feel stronger. I can almost even do a real pushup now (sorta). Don’t laugh but it’s been a goal of mine to be able to do a real pushup for the past 2 years and only just in the last week have I been able to do one. I can only go down about 4-5 inches, but I couldn’t do that at all before and I think the X3 system has made the difference.

Does the X3 system help you build muscle? Yes, I truly believe that it does. But you can get the same results from other workouts and equipment. That means you have to decide if you’re willing to spend $500 on this system. I actually prefer my existing Total Gym to the X3 system because I can do a lot more exercises with it. But that equipment requires a lot more room than the X3 system and I’ve been using that equipment for years and am seeing more results now using the X3 for 10 minutes a day 4 times a week vs. the Total Gym for 30 minutes 3 times a week. I plan to continue using the X3 and the Total Gym so I can have a variety. I’ll update this review in a couple of months as I continue to use this system.

Price: $499.99
Where to buy: X3bar.com
Source: The sample for this review was provided by X3.

Filed in categories: Reviews

Tagged: ,

X3 Bar home gym review originally appeared on The Gadgeteer on October 17, 2018 at 1:43 pm.

Note: If you are subscribed to this feed through FeedBurner, please switch to our native feed URL http://the-gadgeteer.com/feed/ in order to ensure continuous delivery.
KIZIK handsfree shoes, Doorbird doorbell, Denon Heos speaker, and lots more – Review updates

REVIEW – You’re going to be here a while because we have 20 review updates for you today of reviews from as far back as 2014 and as recent as just this past summer. Check out the list of updated reviews below and you can find the actual updates at the bottom of each review.

Click & Grow Smart Garden 9 review by Julie Strietelmeier

SHOTBOX portable photography light box review by Julie Strietelmeier

Logitech Craft keyboard review by Julie Strietelmeier

Kizik Handsfree New York Shoe review by Howard Sneider

Pluto Pillow Review by Andy Chen

Master & Dynamic MW60 wireless and MW50 wireless headphones review By Bill Henderson

TaoTronics Elune Dimmable LED Desk Lamp review by Kathleen Chapman

Denon Heos 3 wireless speaker review by Kathleen Chapman

OxyLED T120 Dimmable Eye-care LED desk lamp review by Kathleen Chapman

Thermacell Mosquito Repellent review by Kathleen Chapman

DoorBird Video Doorbell review by Kathleen Chapman

MPOW Swift Bluetooth 4.0 Headphones review by Kathleen Chapman

Runtastic Libra Bluetooth Smart Scale and Body Analyzer review by Kathleen Chapman

Scosche EZTIP FlatOut LED Micro-USB Charge & Sync Cable review by Kathleen Chapman

Foobot air quality monitor review by Kathleen Chapman

Garzini Essenziale and Essenziale Finestra wallets review by Kathleen Chapman

WatchAir Smart (WiFi) Antenna review by Kathleen Chapman

Netatmo Presence Outdoor Security Camera review by Kathleen Chapman

Epson WorkForce ET-16500 Wide-format EcoTank all-in-one printer review by Kathleen Chapman

Jaybird X3 Wireless Bluetooth Headphones review by Kathleen Chapman

Filed in categories: Reviews

Tagged:

KIZIK handsfree shoes, Doorbird doorbell, Denon Heos speaker, and lots more – Review updates originally appeared on The Gadgeteer on October 17, 2018 at 11:00 am.

Note: If you are subscribed to this feed through FeedBurner, please switch to our native feed URL http://the-gadgeteer.com/feed/ in order to ensure continuous delivery.