Koogeek Smart Massager review

REVIEW – Sore muscles are not fun but how do you fix them? Most of the time I just wait it out until the pain goes away, but that can take a day or two. Another solution could be an electronic massager like the Koogeek massager. They sent me a sample of this highly portable device. Let’s check it out.

What is it?

The Koogeek massager is a small pocket-sized EMS electronic muscle massager device that can be controlled via your phone or other iOS/Android device.

What’s in the box?
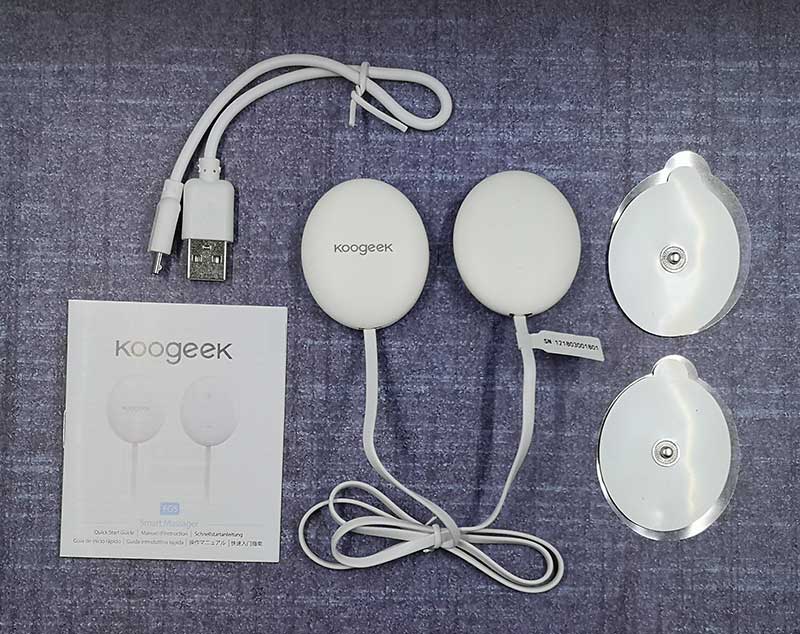
Koogeek massager
micro USB charging cable
2 gel pads
Instructions

Design and features
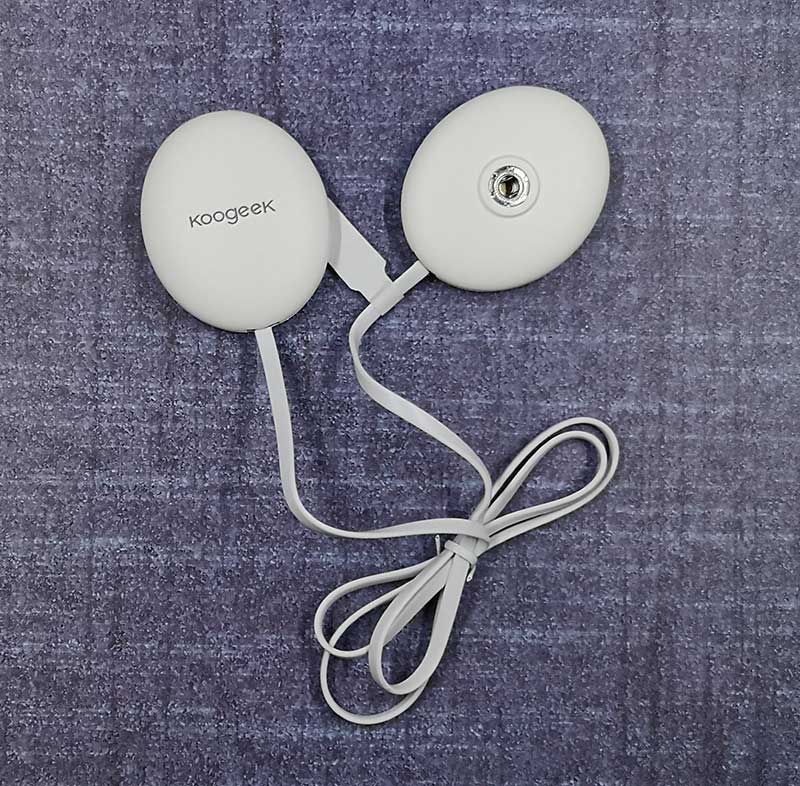
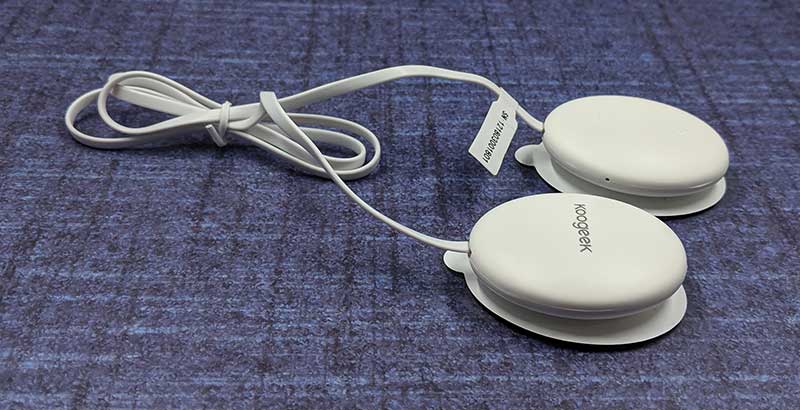
There isn’t a lot to say about this device other than it looks like two flattened eggs tethered together by a flat cable.
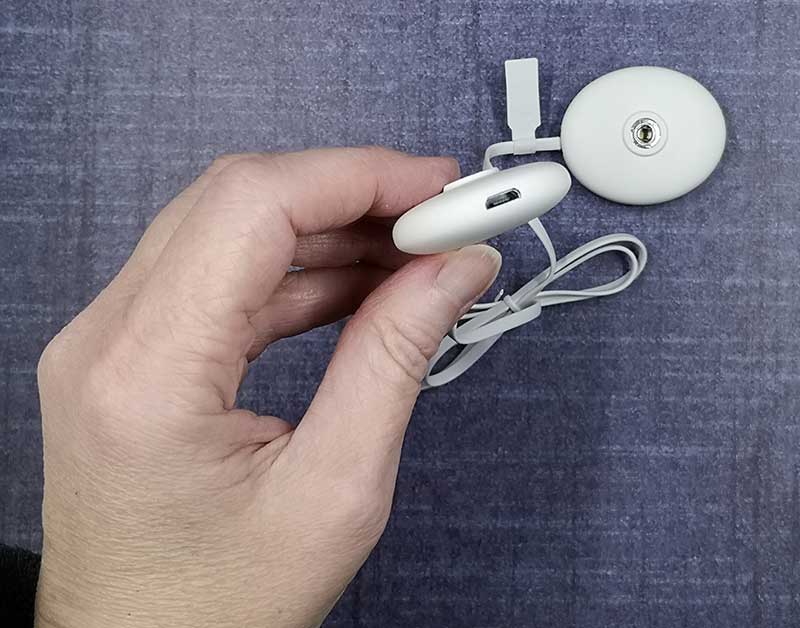
Each oval pad has a metal snap on the back for the gel patches and one of the pads has a micro USB connector to charge the internal batteries.
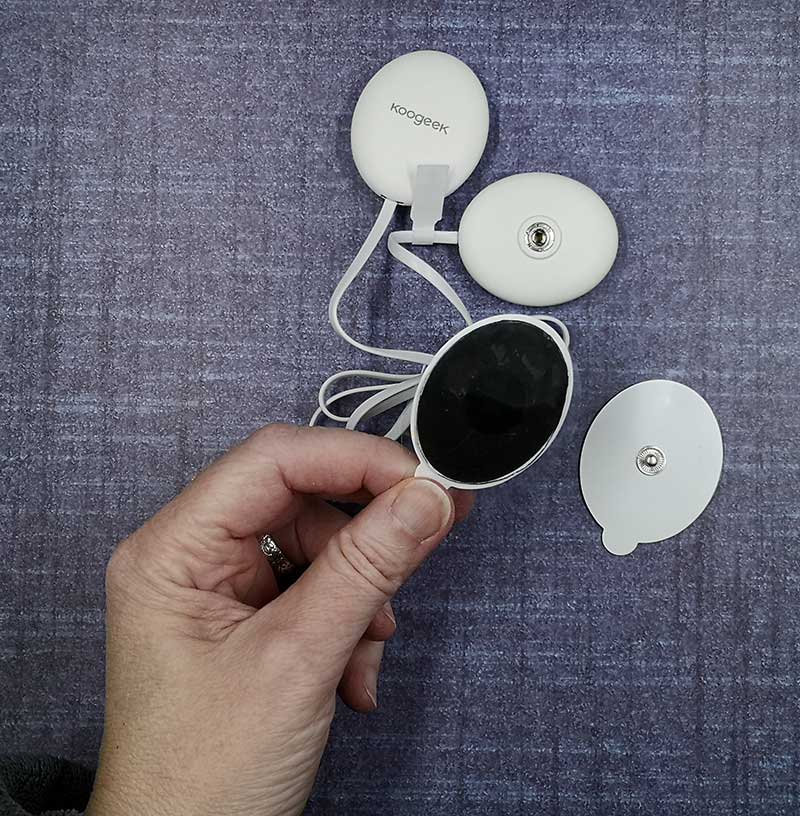
Included with the Koogeek EMS massager are two gel patches. These patches are super sticky so you have to be mindful where you lay them down if you don’t remember to put the layer of clear plastic back over them.
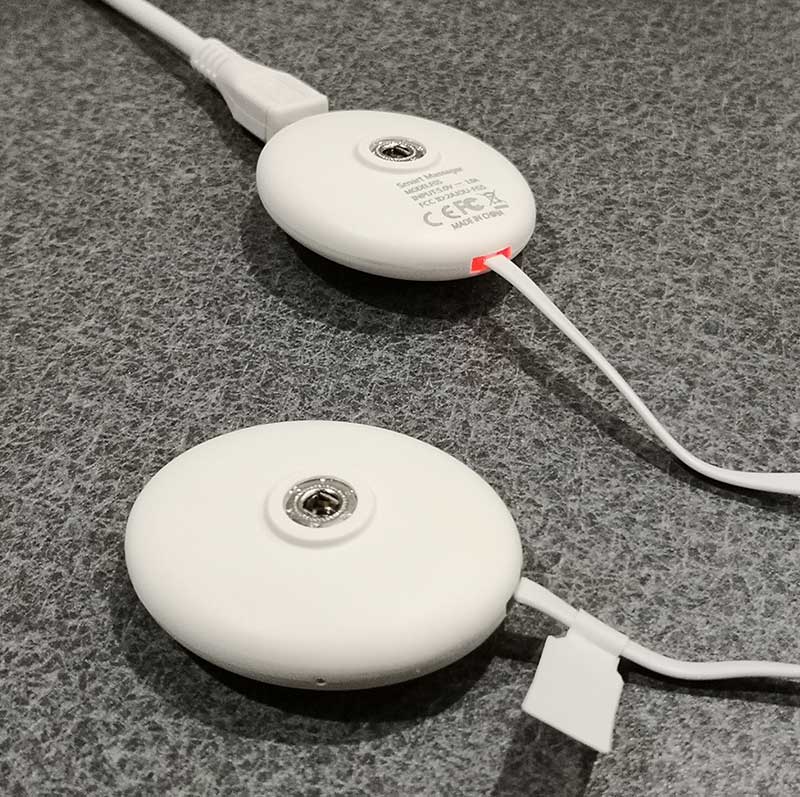
Before you can start using the massager, you’ll need to charge the batteries which is done by plugging it into a micro USB adapter. When you do that, an LED around the cable will glow red while charging and will turn off once charging is completed.

According to the instructions, the next step has you install the Koogeek health app which is used for a variety of their health products and even includes a step counter feature. But to use this app, you’ll have to create an account. If you’re like me, you’re thoroughly tired of creating an account for a new gadget. Why do you even need to have an account for an electronic muscle stimulator? Yes, I created one anyway, but not without some grumbling and even after I created it and tried to pair the massager with my phone (Pixel 2 XL), it never connected.

Luckily, you don’t even need to use the app to use this device. All you need to do is turn it on by holding the + button for about 3 seconds on one of the egg-shaped pads. Then you can stick the pads with the gel patches attached on your body in the area that needs the massage and you will feel the electrical pulses which change rhythm during the session. You can also press the + or – buttons on the pad to change the intensity level which goes from 1-10.

I didn’t think a massager this tiny would really do much, but I was surprised when I put one pad on my bicep and the other one on the opposite side of my arm and with each pulse, my arm would twitch and I could feel a very obvious electrical zap which may or may not feel good to you. According to the instructions, the working voltage is 30-60V. Some people might think this type of device feels too intense and even slightly painful at times. I think it just takes a little while to get used to it.

I was also surprised by the battery life on this small device. The battery will last up to 300 minutes of use with up to 23 minutes per session at which point it automatically turns off.

What I like

  • Small
  • Long battery life
  • Surprisingly powerful

What needs to be improved

  • Only comes with 2 gel patches so you have to buy more after they wear out
  • Couldn’t pair with my phone to use the app

Final thoughts

Other than the problem that I had with the Koogeek app, this portable EMS device worked great. I was really surprised. That said, I don’t know how well devices like these help with muscle pain. For me, the sensation of the electrical stimulation feels uncomfortable. But others might like it. If you’ve used larger EMS devices and wished you had an ultraportable EMS device, I think the Koogeek is probably as small as they come.

Price: $49.99
Where to buy: Amazon
Source: The sample for this review was provided by Koogeek.

Filed in categories: Reviews

Tagged:

Koogeek Smart Massager review originally appeared on The Gadgeteer on October 24, 2018 at 11:19 am.

Note: If you are subscribed to this feed through FeedBurner, please switch to our native feed URL http://the-gadgeteer.com/feed/ in order to ensure continuous delivery.

iStorage DiskAshur Pro2 portable encrypted hard drive review


REVIEW – Whenever I use any device that is connected to any computer or in any way to the internet, security is always on my mind. Whether I am trying to keep data confidential or to prevent the erroneous deletion or editing of records, I have always wanted a simple control methodology and device all incorporated into one portable component. Finally, I have my hands on the iStorage DiskAshur Pro2 which promises to make all of these dreams come true.

What is it?

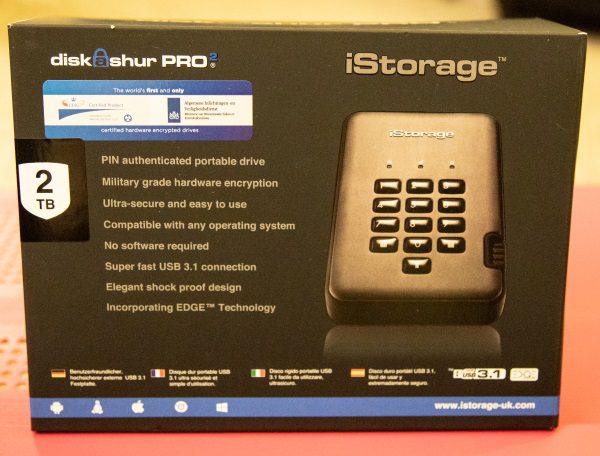
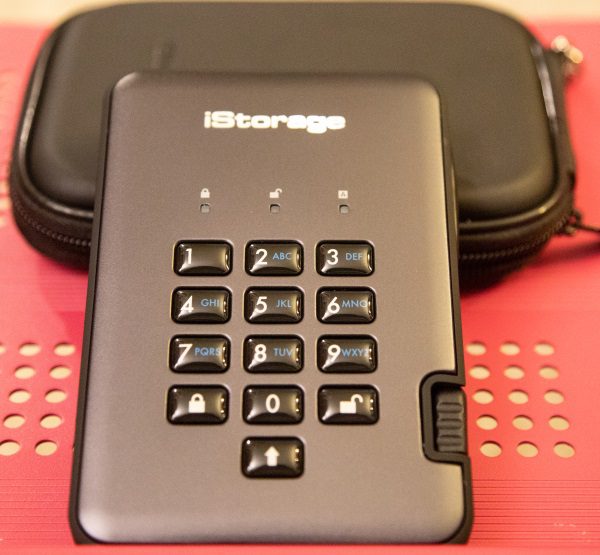
The iStorage DiskAshur Pro2 is a hardware encrypted drive, that utilizes secure pin authentication access via a keypad, works independently of any Operating System, and does not require any software installation.

What’s in the box


1 x iStorage DiskAshur Pro2
1 x Carry Case/Protection Case
1 x Quick Start Guide
1 x Information Sheet on available backup and security software

Design and features

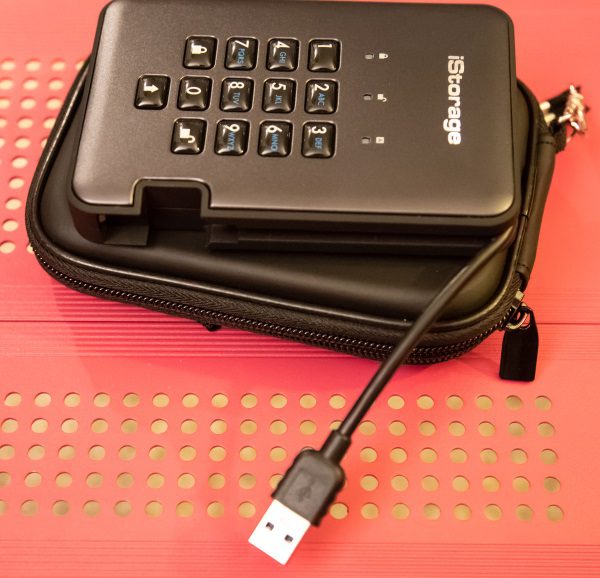
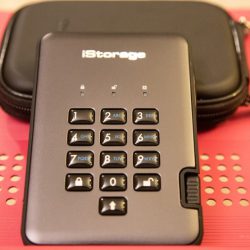
On the front of the drive, there is a keypad and three status lights that represent from left to right: Standby State/Locked (red), User Mode/Unlocked (Green), Admin Mode (Blue).  iStorage also provides a nice carry case/protection pouch that securely houses the drive, and as far as I can tell, will provide some limited protected from bumps and drops.

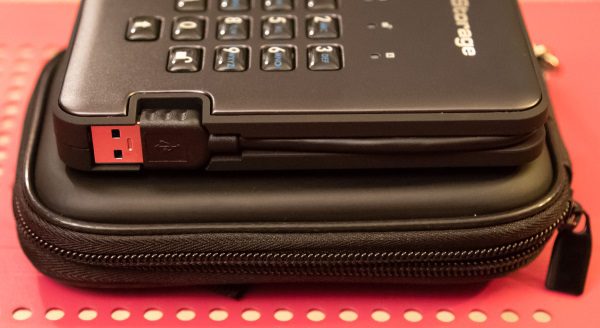
On the side of the drive, there is a built-in USB cable that tucks away neatly into the side of the device.


Performance


NCSC CPA (UK) – Certified: FIPS 140-2 Level 3 (US) – Certified
NLNCSA BSPA (NL) – Certified: NATO Restricted Level – Certified
GDPR Compliant: Common Criteria EAL4+ ready on-board secure microprocessor
Real-time military grade AES 256-bit XTS Full-Disk Hardware Encryption
No software or drivers required: 100% Hardware Encryption

This drive is ready to go right out of the case. The setup instructions are simple and the connection is easy using the built-in USB cable and the default pin. I did follow the instructions to immediately change the pin. The short video below show me utilizing the default pin to connect the drive to my laptop, and the lights that confirm connectivity and status. In the background, you can also hear when the drive connects to the computer.

The iStorage drive immediately connects each time you enter your unlock pin and immediately locks when you press the lock button on the keypad. Any time you walk away from your computer, you can simply press the lock button without removing the drive and the drive locks and disconnects from the computer. When you enter your unlock pin and press the unlock button, it immediately reconnects. This drives it great for data privacy and also for ensuring that if someone else uses your computer, that they do not delete or overwrite your files whether intentionally or not. If you lose the drive, no one can access your data.

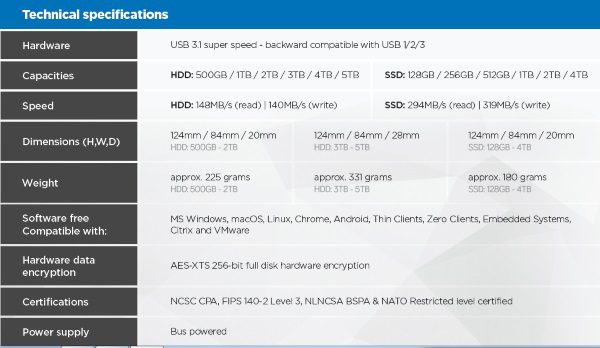
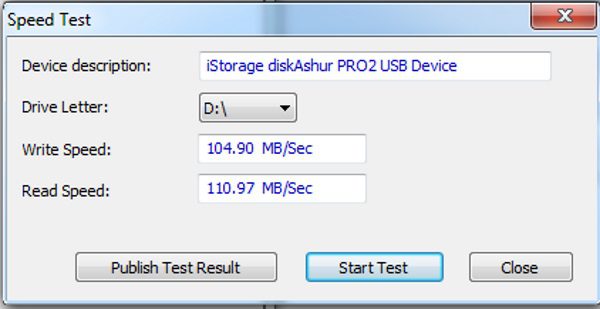
The read and write speeds are decent and more than adequate for my needs.

Since I am not an expert on technology that is employed with this device, I am including the following facts/features directly from the manufacturer’s website:

FIPS PUB 197 Validated Encryption Algorithm
Employing AES-XTS 256 bit hardware encryption, the iStorage diskAshur PRO2 seamlessly encrypts all data on the drive in real-time, keeping your data safe even if the hard drive is removed from its enclosure.

Brute Force Hack Defence Mechanism
The iStorage diskAshur PRO2 is intelligently programmed to protect against all forms of Brute Force attacks. After five consecutive incorrect PIN entries, the drive will freeze, requiring the drive to be disconnected and reconnected to the USB port to get a further five PIN entry attempts. If a further five (10 in total) consecutive incorrect PIN attempts are entered again, the diskAshur PRO2 will freeze again. To get a further and final five PIN attempts (15 in total), the “shift” button must be pressed whilst inserting the USB cable to the USB port and then an iStorage preset PIN will need to be entered. On the fifteenth consecutive incorrect PIN entry, the diskAshur PRO2 assumes it is being attacked and will delete the encryption key and lock itself, rendering all data previously stored on the drive as lost forever. At this point, the drive can be reset to factory default settings and redeployed.

Self Destruct Feature
You can pre-program the diskAshur PRO2 with your own unique Self Destruct PIN which, once implemented, instantly deletes the encryption key, all PINs, data and then creates a new encryption key.

Unattended Auto-Lock Feature
Set the unattended diskAshur PRO2 to automatically lock after a pre-determined amount of time where the drive has not been used.

Drive Reset Feature
The iStorage diskAshur PRO2 also employs a useful drive reset feature, which can be implemented with a unique command. This clears all PINs and data, and creates a new randomly generated encryption key, enabling the drive to be reset and redeployed as many times as needed.

Tamper Proof and Tamper Evident Design
In addition to incorporating a secure microprocessor, encrypting the data and the encryption key, the diskAshur PRO2 adds another barrier between your data and a hacker. All the components of the diskAshur PRO2 are completely covered by a layer of super tough epoxy resin, which is virtually impossible to remove without causing permanent damage to the components. This barrier prevents a potential hacker from accessing the critical components and launching a variety of futile attacks. Furthermore, the tamper evident design of the diskAshur PRO2 if breached, will provide visible evidence that tampering has occurred.

Data at rest protection
The iStorage diskAshur PRO2 also employs a useful drive reset feature, which can be implemented with a unique command. This clears all PINs and data, and creates a new randomly generated encryption key, enabling the drive to be reset and redeployed as many times as needed.

Wear Resistant Epoxy Coated Keypad
Designed with protection in mind, the diskAshur PRO2 wear resistant epoxy coated keypad hides key usage to avoid tipping off a potential hacker to commonly used keys.

iStorage also includes a lifetime license to Nero BackItUp software to securely backup the drive, and a free 1-year license to iStorage DriveSecurity Antivirus software.

What I like

  • The portability
  • The data encryption
  • The security provided by the keypad
  • The functionality

What can be improved

  • Maybe all of the drives should be SSD to further safeguard data by reducing the likelihood of the effect of minor bumps and drops that can easily damage the conventional hard drive

Final thoughts

This iStorage is a great asset for me. I am now able to save all of the files I need protected and walk away from my desk without worry about what will happen if someone else uses my PC. In addition, when I am in the field on a photo or video shoot, I can copy my footage or pictures to the iStorage drive and lock it, while leaving the PC on and available for use by others on my team. I never have to worry about any accidental deletion, or in some weird cases, any theft of my photos or footage. While I do understand that it is relatively expensive, it is obvious that a lot of thought has been put into the design and purpose. In today’s world when security breaches are of such concern and when data theft is prevalent, this drive protects your data and privacy in several ways. While some may debate function vs. cost, for me, the iStorage DiskAshur Pro2 gets two thumbs way up!!!

Price: 500GB version $250.40 with free shipping. 2TB version (Tested in this review) $450 + $6.99 shipping
Where to buy: Amazon
Source: The sample for this review was provided by iStorage.

Filed in categories: Reviews

Tagged: ,

iStorage DiskAshur Pro2 portable encrypted hard drive review originally appeared on The Gadgeteer on October 24, 2018 at 9:00 am.

Note: If you are subscribed to this feed through FeedBurner, please switch to our native feed URL http://the-gadgeteer.com/feed/ in order to ensure continuous delivery.
WellDesk XenStand laptop stand review

REVIEW – Your mother was always telling you to sit up straight, but how do you do that when you’re slumped over a laptop all day long? One way to improve the ergonomics is to raise the display to eye level with a laptop stand like the XenStand from WellDesk. Let’s take a look.

What is it?

The WellDesk XenStand is an adjustable laptop stand that is made in the USA of Baltic Birch Plywood and has the same DIY type of style as their dual monitor standing desk which reviewed a few months ago.

What’s in the box?

The XenStand has 2 support stands and 2 feet that are used to elevate the stand into higher positions.

Design and features

The WellDesk XenStand is made of nicely finished wood that has sanded, smooth edges with no splinters to worry about. It has a simple interlocking design where the two main pieces fit together to form an X. The stand is solid and stable while still being able to quickly disassemble it if needed.

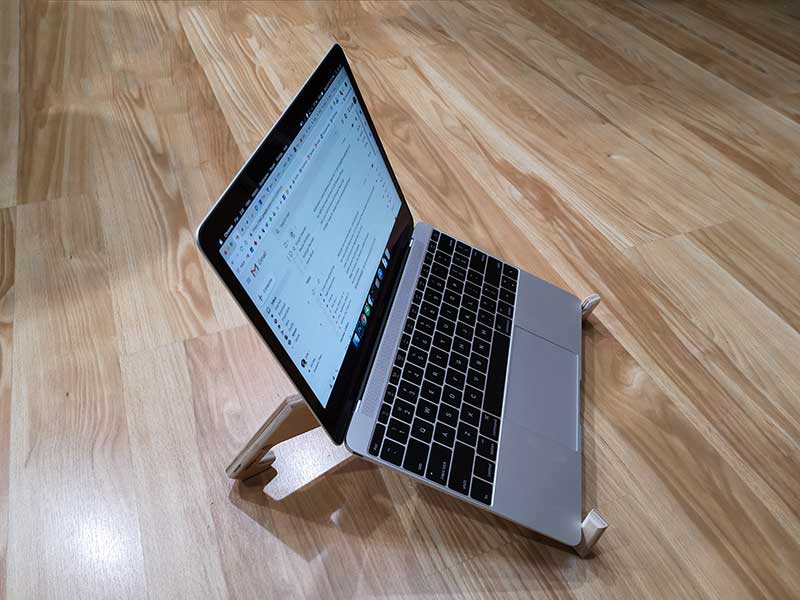
The back of the stand props up the display of the laptop while the hooks in the front of the stand prevent the laptop from sliding off the stand. I did all my testing of the WellDesk with my 12-inch MacBook, which is the smallest sized laptop that you would want to use with this stand. With the MacBook in place, the back of the laptop is raised approximately 4.25 inches.

In this position, the display is raised for more comfortable viewing. Of course, you will also need to use an external keyboard and mouse for correct ergonomics.


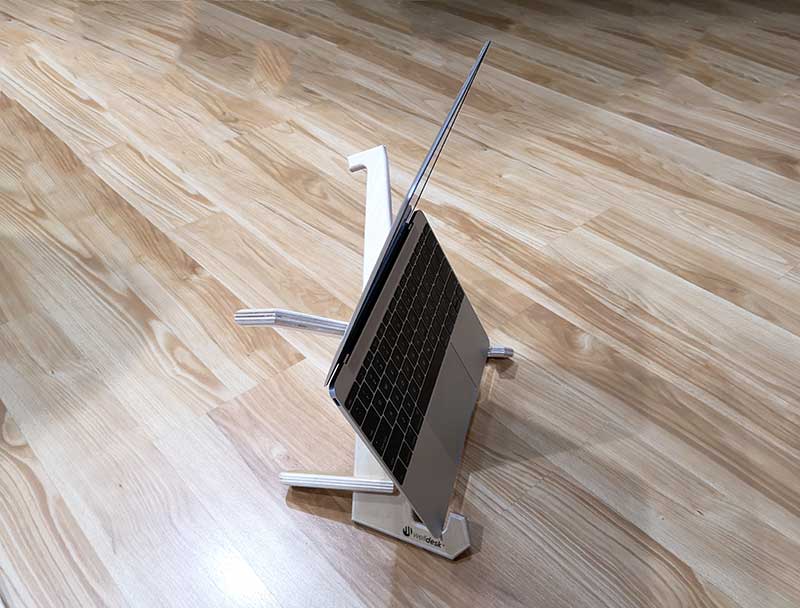
If the first configuration doesn’t raise the display high enough for you, there are two other configurations that you can try. By adding the included feet to the inner notches, the back of the display is raised even higher.


In this position, the back of the computer is raised 5.75 inches off the table.

Last but not least, you can add the feet to the rear notches and position the front edge of the laptop in the larger hooks. As you can see, this configuration will not work for my 12-inch MacBook because the display does not open far enough.

What I like

  • Made in the USA of sustainable products
  • Easy to assemble
  • Three configurations

What needs to be improved

  • Almost too wide for 12-inch laptops

Final thoughts

The WellDesk XenStand is a simple laptop stand lifts the display to eye level so that you can use a keyboard and mouse with your laptop to allow you to sit up straight to improve your posture and ergonomics. This stand is easy to assemble and disassemble and isn’t too bulky to take with you in the included drawstring canvas bag.

Price: $37.95 MSRP
Where to buy: Amazon
Source: The sample for this review was provided by Well Desk.

Filed in categories: Reviews

Tagged:

WellDesk XenStand laptop stand review originally appeared on The Gadgeteer on October 23, 2018 at 11:00 am.

Note: If you are subscribed to this feed through FeedBurner, please switch to our native feed URL http://the-gadgeteer.com/feed/ in order to ensure continuous delivery.
Tronsmart Trim 10,000 mAh power bank review

REVIEW – By now, everyone in the world who uses technology daily has at least one power bank. Those little portable chargers that can top up your phone or iPad while away from the grid have saved everyone’s bacon at some point, I’m sure. Now, the move to USB3 is taking hold, and phones, laptops, and all manner of devices are starting to be powered by this new spec. Tronsmart has answered the call with a 10,000 mAh slimline power bank they named the Trim, for obvious reasons) that not only includes the new port for both input and output, but also preserves the output for good ole USB-2. I was sent one to test and am ready, as ever, to report my findings.

Note: Photos may be tapped or clicked for a larger image.

What is it?

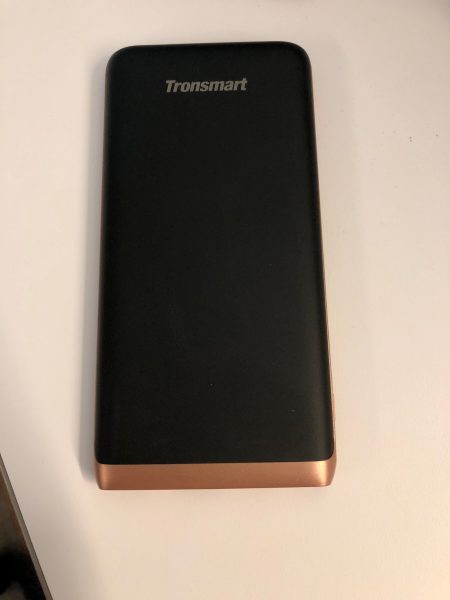
The Tronsmart Trim 10,000 mAh power bank is smaller than most modern smartphones. It is about the same weight, at 6.8 ounces, and can easily hide in a pocket, purse, or backpack and you’ll never know it’s there – until you need it.

Hardware specs

(from Tronsmart website)

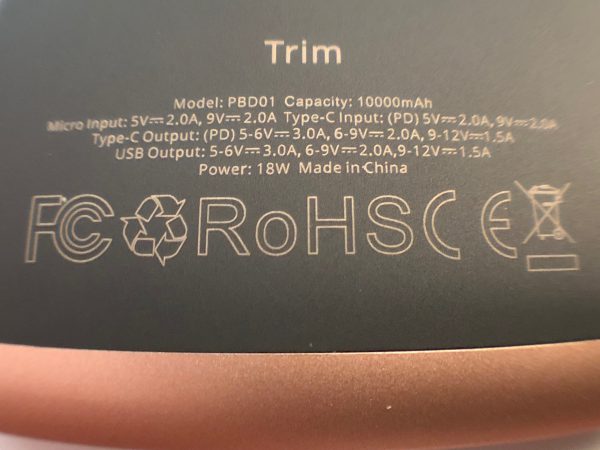
Model – Trim PBD01
Technology – PD (Power Delivery 3.0), VoltiQ, Quick Charge 3.0, compatible with Huawei FCP technology
Capacity – 10000mAh
Material – Anodized aluminum + plastic frame
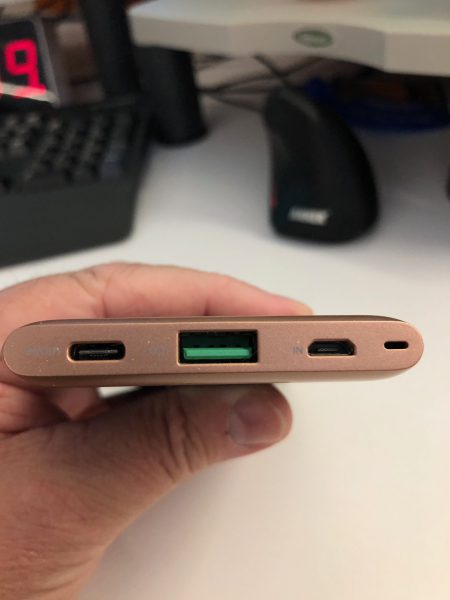
Ports – 3 Ports: USB Type-C, USB-A, MicroUSB
Power – 18W Total Output
Input – Micro USB: 5V/2A, 9V/2A; USB-C (PD): 5V/2A, 9V/2A
Output – (USB) USB-C (PD3.0): 5V/3A, 9V/2A, 12V/1.5A; USB-A: 5-6V/3.0A, 6-9V/2.0A, 9-12V/1.5A
Certifications – FCC, CE, RoHS
Dimension – 5.62 x 2.75 x 0.46 in (143 x 70 x 11.8 mm)
Net Weight – 194.3g / 6.85oz

What’s in the box?

  • Power Bank
  • 8” USB-A to microUSB cord/lanyard
  • Instruction sheet

Design and features

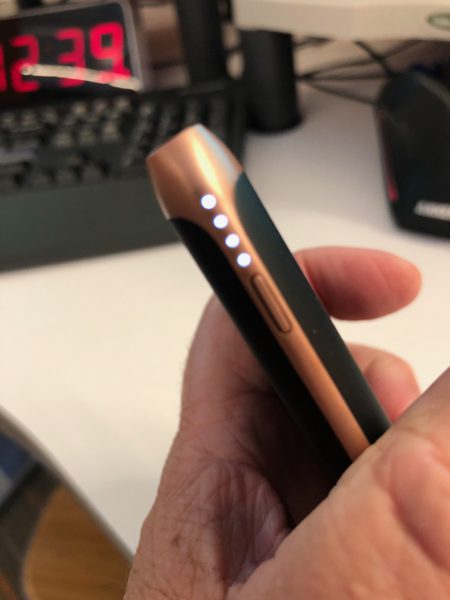
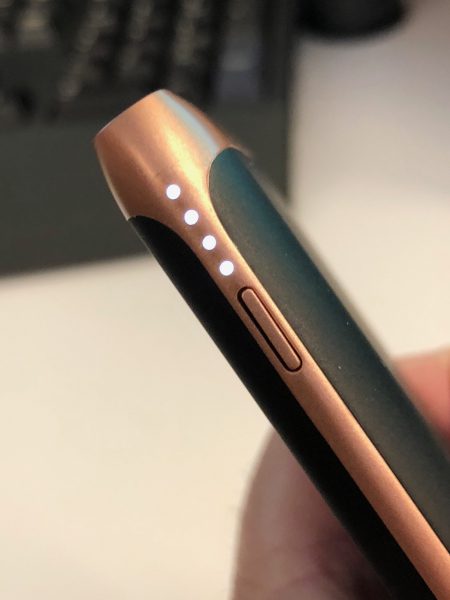
The thin, sleek Tronsmart Trim is a departure from most 10,000 mAh battery packs. Most are much thicker, heavier, and clunkier. This svelte unit rivals most phones or other handheld devices for style and build quality. The subtle 4-LED gas gauge tells you how much juice remains. There’s a place to add a tethered leash, if you like. (The included short USB-A to microUSB cable doubles as such a leash. I like these short minimal cables that have started appearing. If I’m not having to plug into a wall outlet 4 seats way at an airport gate, I really don’t want a 10 meter cable to deal with. I just need a few inches to connect to the phone or iPad I’m holding in my hand while it charges.)
In addition to the USB3 input and output, there is a microUSB input port and a USB2 output. The matte black rubberized case has a copper/rose gold band around all edges, as well as a full metal front where the ports are.
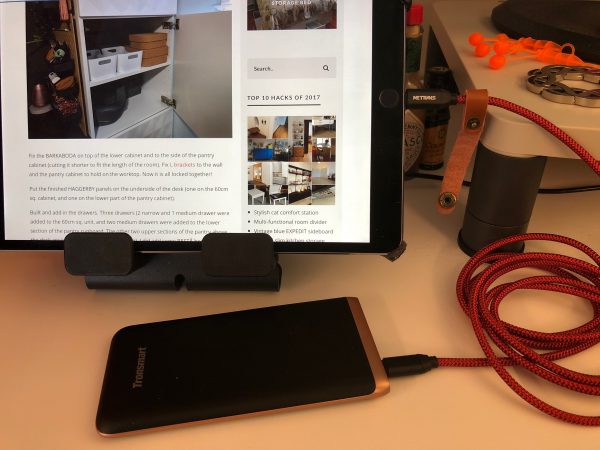
The Trim is very easy to take along, and simple to deploy. It charged both my iPads (12.9 and 10.5 pros) as well as my iPhone 8 Plus without issues. I didn’t run any long-term tests of trying to run anything down and seeing how quickly it came back using just this powerbank, but I did find that the power bank will hold a full charge for a good while (weeks) without losing any stored power, and this can bring up anything from your drone batteries, your watch, or your phone quickly. If you’re going to be away from grid power, or just moving around from place-to-place, you’re going to find it will serve you well, and with the USB3 I/O, will be useful for a good while to come.

What I Like

  • Small footprint
  • Multiple output options
  • Good capacity/size ratio

What needs to be improved

  • I can’t think of anything.

Final thoughts

Battery packs are a fact of life for Gadgeteers. We constantly have something that needs charging or at least topping off, since we use portable gadgets all the time. This slim, yet large capacity charger adds to the mix by having a USB-C option, both for charging and to connect to your devices. Adding in the slim form factor and modern styling, and it’s an easy must-have for anyone looking for a power bank for personal use or as a gift.

Price: $25.99
Where to buy: Amazon
Source: The sample of this product was provided by Tronsmart.

Filed in categories: Reviews

Tagged:

Tronsmart Trim 10,000 mAh power bank review originally appeared on The Gadgeteer on October 23, 2018 at 9:00 am.

Note: If you are subscribed to this feed through FeedBurner, please switch to our native feed URL http://the-gadgeteer.com/feed/ in order to ensure continuous delivery.
Deenkee I7 robotic vacuum cleaner review

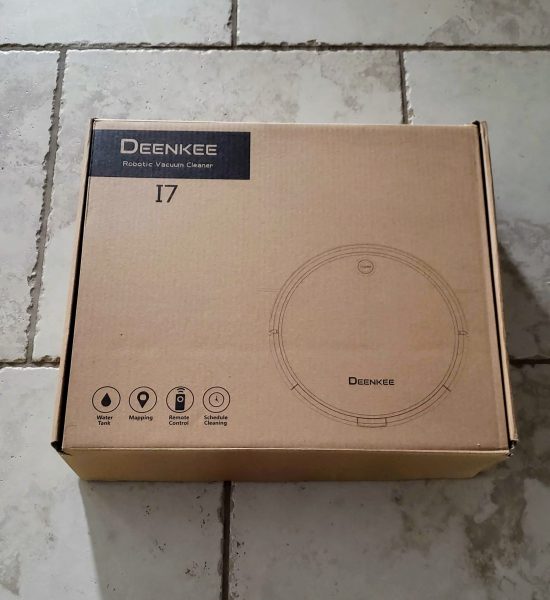
There are literally a plethora of robotic type vacuum cleaners out on the market.   The price ranges from a couple hundred to right at a thousand dollars for one.  We have all heard that quote ‘You get what you pay for’, and that has usually been my experience.  However, I was recently offered the opportunity to try out one of the lower priced vacuums by Deenkee.  I have never had a robotic vacuum and figured out I would give it a try.  Let’s see if the low price still gave good results.

What is it?

The Deenkee Intelligent Vacuum Cleaner is exactly what you think it is.  It is an automatic vacuum cleaner that roams around your house vacuuming carpets and hard floors.  This vacuum has the additional special feature of having a wet mop option along with the regular vacuum functionality.

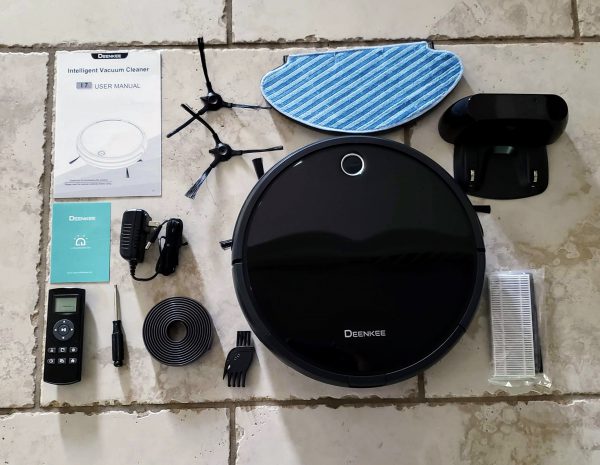
What’s in the box?

Deenkee included a lot of extra items in their budget-friendly vacuum.  Working our way around the picture from the top left to the right the following items were in the box.

  • User Manual
  • Two extra sweeper brushes to replace the 2 that are already mounted underneath the vacuum for when they wear out.
  • The wet mop pad and water holder underneath it.
  • Charging base station
  • Blue warranty card
  • Power adapter for the charging station
  • The vacuum itself with 2 brushes and filter system already installed.
  • An extra packet of HEPA filter and thinner foam filter
  • Remote control
  • Philips head screwdriver
  • A strip of heavy magnetized rubber
  • Small brush used to clean out the filters

Design and features

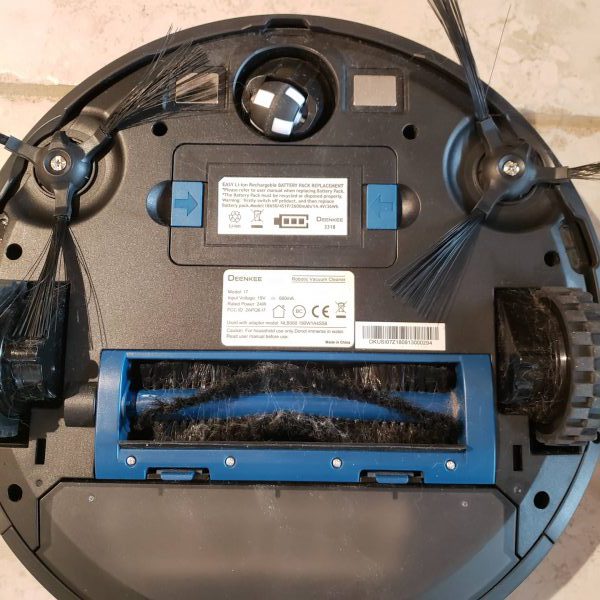
First off let me apologize.  The rest of the pictures in this review were taken after the vacuum had already gone around the first floor of my house a couple of times.  I was so excited to use the thing I totally forgot to take pictures until after it ran!  The picture above shows the bottom of the unit.  The first thing that caught my eye was the fact that the unit has two horizontal rotating brushes with one on either side of the front wheel.  This is one more than will see on other vacuum cleaners like the Roomba brand.  At the top of the picture, you can see the front wheel which is a freewheeling in any direction ball-type wheel.  Right below the front wheel is the battery compartment where the rechargeable battery sits.  This is replaceable so I assume in the future I can order another battery if and when the one I have now wears out.  Let me say that this battery is AWESOME.  The machine ran vacuuming the whole time for a solid 120 minutes.  The manual says it will run 90 – 120 minutes and I have had it run a full 120 minutes consistently.  It has then run an additional 30 minutes winding its way from one side of my house to the other finding its charging station.  That last 30 minutes the vacuum part was turned off and it just freewheeled around looking for the charging base.

Behind the battery, you will see the 2 rear wheels and the main middle brush.  Note the 4 tiny Philips screw heads below the brush.  You can use the included screwdriver to remove those screws and the brush will pop right out for easier cleaning.  We own a Shetland sheepdog and he sheds quite a bit of long hair.  I find I have to clean that brush about once a month to keep it effective.

Also, notice the two vertical oblong holes on either side of the middle brush?  That is where the water reservoir and mop pad would install.

The picture above shows how it mounts to the vacuum cleaner.  I personally never used the feature myself because I felt my downstairs area was just too large for the amount of water in the reservoir.  I am sure if you had just a small area to use this in it would work just fine.

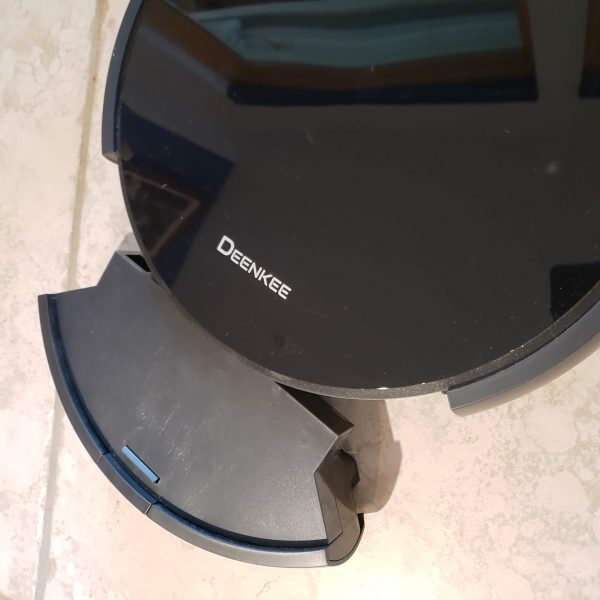
The next picture shows the top of the vacuum with the dirt canister pulled out.  There is a small button in the middle just to the left of the blue strip that is easy to press that releases the canister from the vacuum.

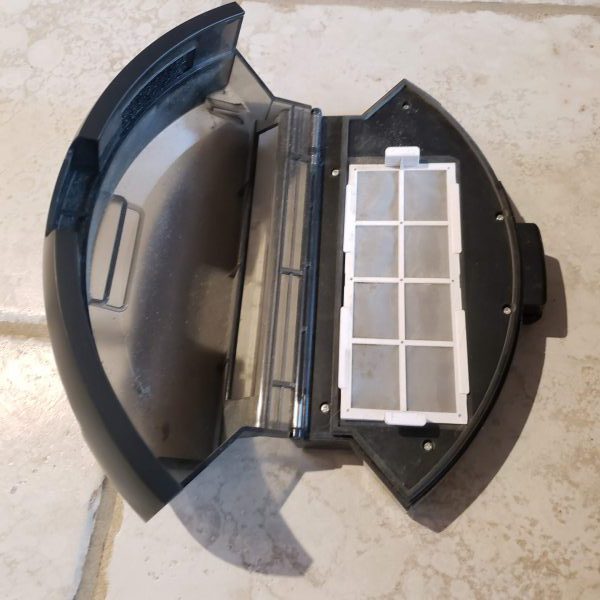
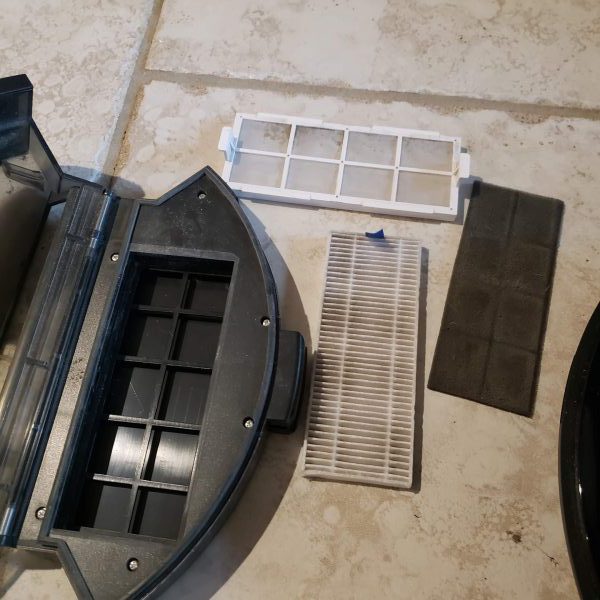
The next two pictures show the dirt canister opened and then with all of the filter material out.  This vacuum has quite an intensive filter system.  I never saw any dust coming out of the vacuum while it was working.  It even had the ultimate test at my house.  We had our stair railing replaced.  This meant that the entire first floor was coated in a fine layer of sawdust.  I ran my big Dyson vacuum over the entire floor and then manually dusted the house.  Then I kicked off the Deenkee to see if it would pick up any additional dirt.  That canister area was filled with very fine sawdust.  It did an awesome job of picking up additional sawdust.  The white screen filter in the left picture can be pried out using the two tabs on either side.  Below that was a black foam strip followed by a heaver HEPA media filter.  So you essentially get 3 layers of filter.  As noted earlier they give you an additional foam filter and HEPA filter in the box.

It should be noted that Deenkee sells a replacement packet including 2 filter sets, 2 mop pads, 4 horizontal brushes and 1 rotating middle brush for $25.99 at Amazon.

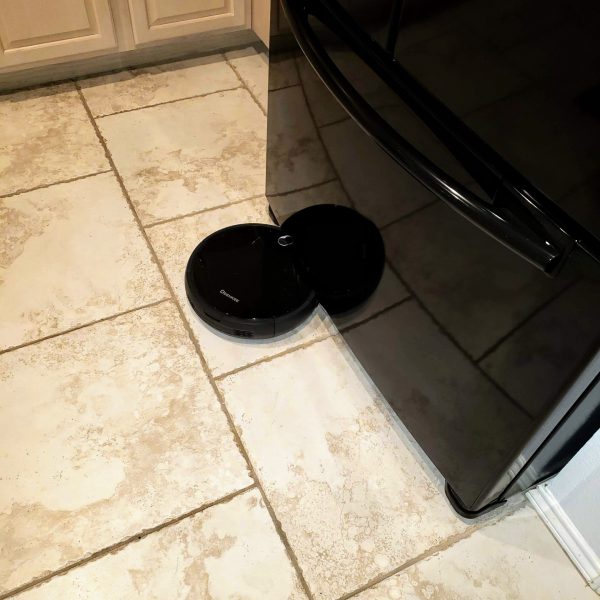
Overall, I was really happy with the Deenkee.  It did an excellent job of vacuuming.  I have a pretty large downstairs area that includes the kitchen, breakfast area, main living space, entryway and formal dining room.  There are tons of obstacles and of course, there was my dog.  I only encountered a few issues with the vacuum.  The picture above shows it stuck under my refrigerator.  That has only happened twice in about the 10 times it has run in my home.  I know more expensive robot vacuums have an actual camera on top to prevent this.  The other issue I had was it ignoring the magnetic strip I placed in front of my bedroom door.  I don’t like closing the door and wanted to try to keep it out of the room with the included magnetic strip.  I put it on top of the threshold, in front of the threshold and even a few feet in front of it and the vacuum still rolled right over it.  We have a bunch of power cables under our bed from the Sleep Number mattress and the vacuum would get stuck on those.   The nice thing, however, is when it did get stuck, it would stop vacuuming and start beeping loudly.  Eventually, it would just shut itself off if we were not home to get to it in time.

It’s not advanced as some others in that I don’t think it makes a map of your rooms.  It seemed to learn over time where some stuff was as it stopped bumping into some things and just turning around right before it would hit some things.  I often saw it sweeping over the same areas multiple times during the full 120 minutes.  Like I said our room is really complicated.

This last picture shows the ‘stuff’ it picked up on its first run around the floor.  Here I thought the floor was pretty clean.  YUCK!

What I like

This vacuum gives some really good bang for the buck.  Even in my complicated first-floor layout, the vacuum seemed to get every area clean.  It may not have been as efficient about it as some of the more expensive ones, but it did get the job done.  I love that it came with extra media filters, and as a bonus, I noticed they now seem to be shipping with 4 extra brushes and 2 extra media filters.  There is even a newer version of this vacuum out that costs an extra $20 that is supposed to be a bit quieter and have even more suction power.  It rolled over and vacuumed an extremely thick and fluffy doormat I have by my back door with no problems at all.

What can be improved

If some kind of mapping technology could be built in for just a bit more cost I think that would make the device a winner.  Then I would not have to remember to close doors to rooms I don’t want it to go to.  The magnetic strips just did not seem to work like they should.  Also making it quieter would be beneficial (which they did with a slightly more expensive version now available).  Putting some kind of sensor on the top of the front would also be great to keep it from getting stuck under objects.

Price: $209.99 – Get $70 off with code HRJD3G3F which expires on 10/30/18
Where to buy: Amazon
Source: The sample for this review was provided by Deeknee.

Filed in categories: Reviews

Tagged:

Deenkee I7 robotic vacuum cleaner review originally appeared on The Gadgeteer on October 22, 2018 at 11:00 am.

Note: If you are subscribed to this feed through FeedBurner, please switch to our native feed URL http://the-gadgeteer.com/feed/ in order to ensure continuous delivery.