Roccat Score gaming headset review


REVIEW – I picked up a Nintendo Switch over the summer because I loved the portability. One thing that is annoying about it is that Bluetooth headphones do not connect to it without an adapter. This meant most of my headphones didn’t work with it. I saw the Roccat Score and thought that maybe they would be a good fit to go along with the Switch, since they are small, portable, and meant for gaming.

What is it?

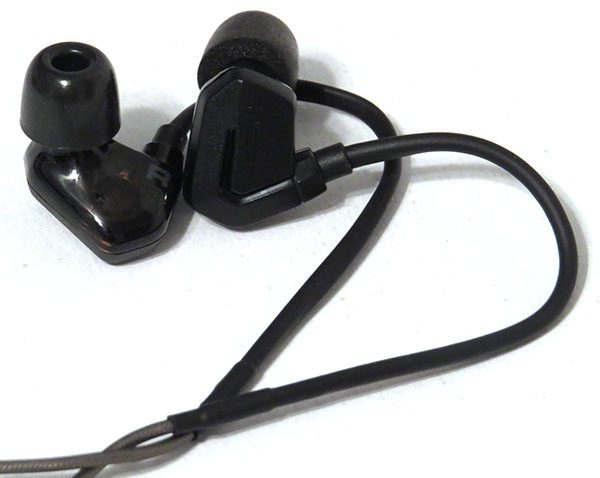
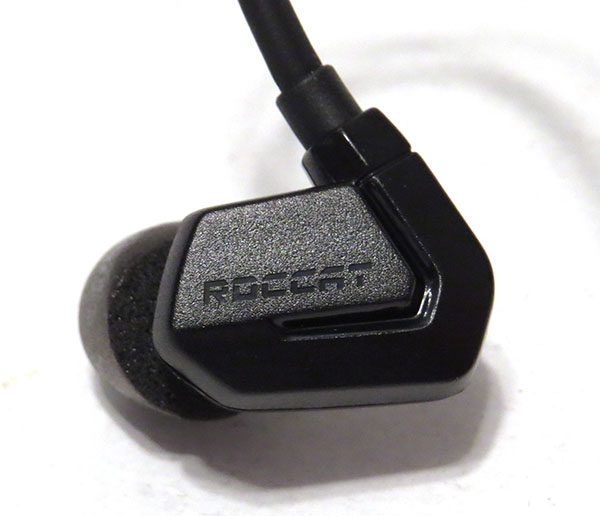
The Roccat Score gaming headphones are styled like earbuds but designed with gamers in mind.

Hardware specs

  • Headphones:
    Measured Frequency response: 20~20.000Hz
    Sensitivity at 1kHz: 108dB
    mid/high frequency driver diameter: 6.8mm (12 ohm impedence)
    low frequency driver diameter: 10mm (16 ohm impedence)
  • Microphone:
    Sensitivity at 1kHz: -42dB
    Impedance: 2.2kO
    Signal-to-noise ratio: >55dB
    Measured Frequency response: 50~12.000Hz

What’s in the box?

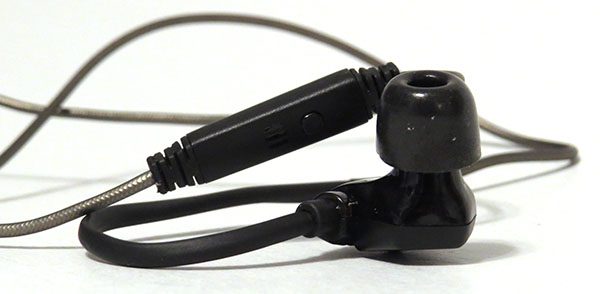
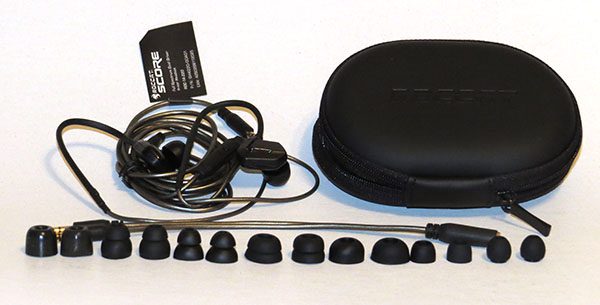
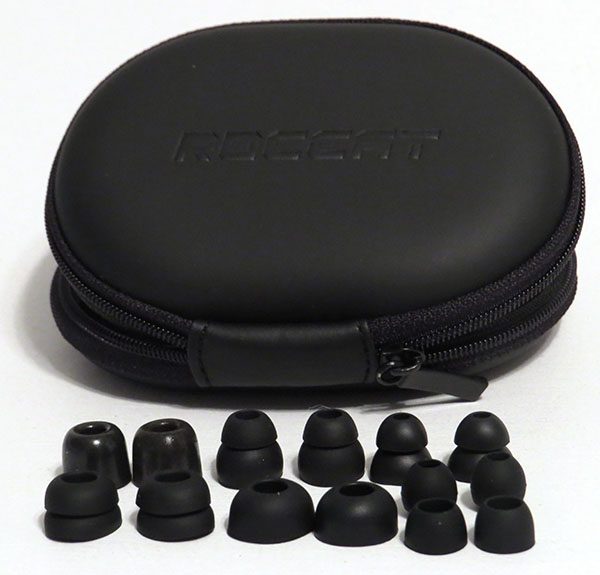
In the box, you’ll find the Roccat Score headphones, case, seven different styles of eartips, PC adapter (for microphone/headphone ports), and instruction manual. Six of the tips are standard, but the seventh is memory foam which was interesting.

Design and features

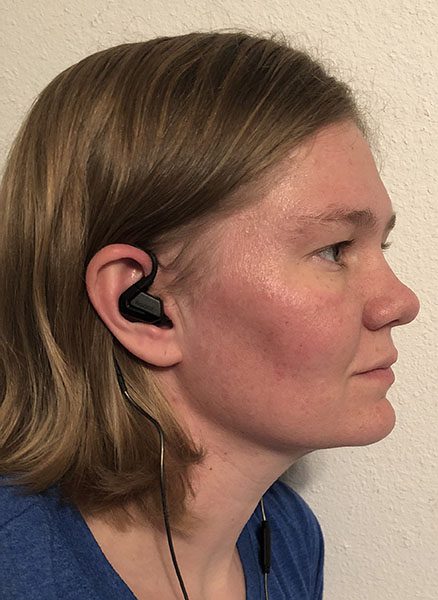
The thing that makes these headphones more unique compared to standard gaming headphones is that they are in-ear with no microphone that goes in front of your mouth. Like I mentioned above, this seemed like an ideal combination for the Nintendo Switch and mobile gaming in general.

Out of the wide variety of ear tips, my favorite ended up being the memory foam ones. It took a few tries to get the fit to be comfortable, but after I got the knack of it, they stayed in my ears and were comfortable for almost two hours straight.

After the headphones are inserted into the ear, the cord is looped up and over the ear with a nice and pliable cable that reminded me of soft (but not fuzzy) pipe cleaners. This kept the cord in place but also was comfortable on the top of my ear.

The microphone is located partially down the audio cable which was the one drawback these had. My friends noted that I sounded very ‘tinny’ because the microphone was picking up a lot of background noise and echoing due to being so far from my lips. They could understand me just fine but I sounded wrong to them.

Music sounded decent, with a nice mid-range and bass, and average quality highs. During games, you could hear footsteps and different sound effects pretty well, though you won’t get the huge booms when a bomb blows up near you since the bass is not extremely powerful. On the Switch, the music and sound effects from Breath of the Wild sounded great.

What I like

  • Variety of ear tips

What needs to be improved

  • The microphone sounds ‘tinny’

Final thoughts

Overall, I thought the Roccat Score headphones were a decent companion to the Nintendo Switch due to the portability, but I would not use them on my PC. The sound quality was decent but the microphone left a lot to be desired. If you can pick up a pair for around $50 or less, the Roccat Score headphones might be nice to toss in a backpack for travel, but I wouldn’t recommend them for much more than that.

Price: $59.99
Where to buy: Amazon
Source: The sample of this product was provided by Roccat.

Filed in categories: Reviews

Tagged: ,

Roccat Score gaming headset review originally appeared on The Gadgeteer on November 6, 2018 at 8:00 am.

Note: If you are subscribed to this feed through FeedBurner, please switch to our native feed URL http://the-gadgeteer.com/feed/ in order to ensure continuous delivery.

Lynktec Bolt wireless car charger review


REVIEW – As a self-proclaimed gadget nerd, I surround myself with every possible gadget and embrace every convenience that they offer. These days where the phone is an integral part of our lives, it is very apparent that driving while operating a phone is a very bad idea and against the law at least here in the USA. Phone mounts for cars have almost become a standard accessory in every car, with some offering more convenience than others.  The Lynktec Bolt wireless car charger is a new addition to an already very crowded field of car charger mounts. However, it offers features that I know that I would like. Here is my review.

What is it?

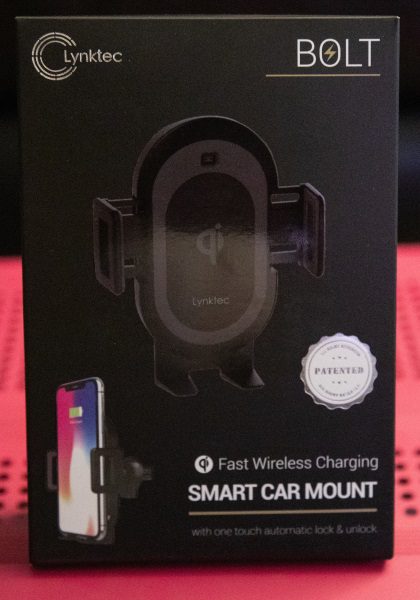
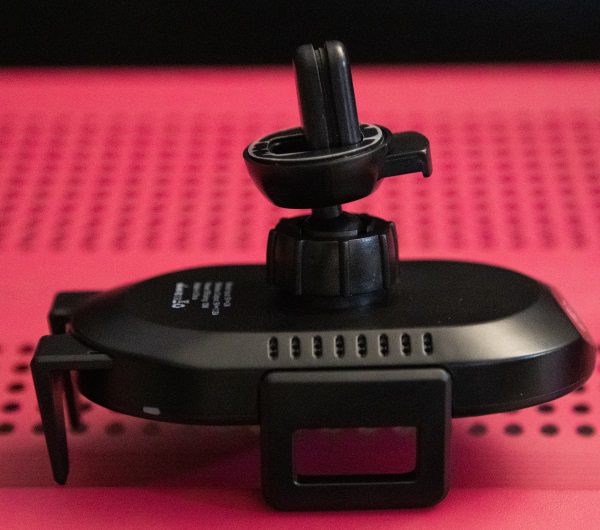
The Lynktec Bolt wireless car charger is a wireless phone charger that can be mounted to the vent louver, windshield or dashboard. It includes a built-in battery that provides operational power even when the car is turned off.

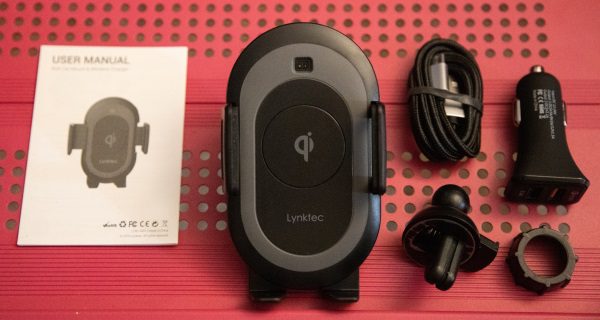
What’s in the box


1 x Bolt Car Mount
1 x Air Vent Holder
1 x USB-C to USB Cable
1 x Dual USB Car Charger (3.0/2.1A)
1 x Instruction Manual

Design and features

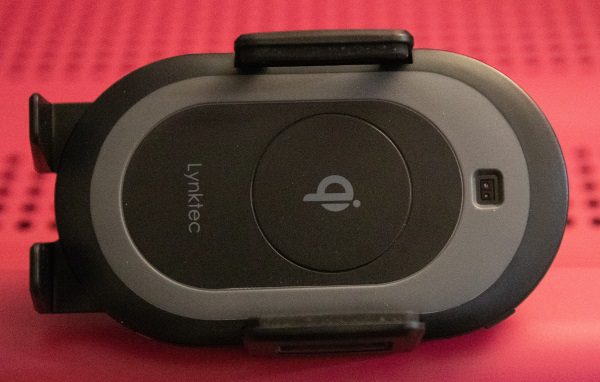
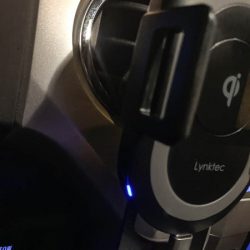
This mount has a bottom rest and two side arms that open and close electronically when the top touchpad is engaged. In the middle where the back of the phone rests is the Qi wireless charger, and above is the Infrared Lock Sensor that senses when a phone is placed into the mount and engages the securing arms to close.


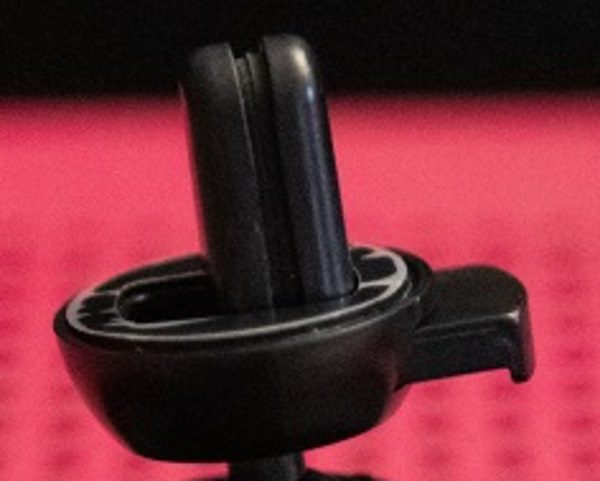
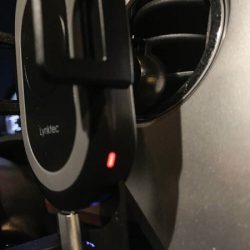
The vent visor clip is connected to the back of the mount via the supplied nut and you press the button above the clip to open the clip and slide it onto the vent louver.


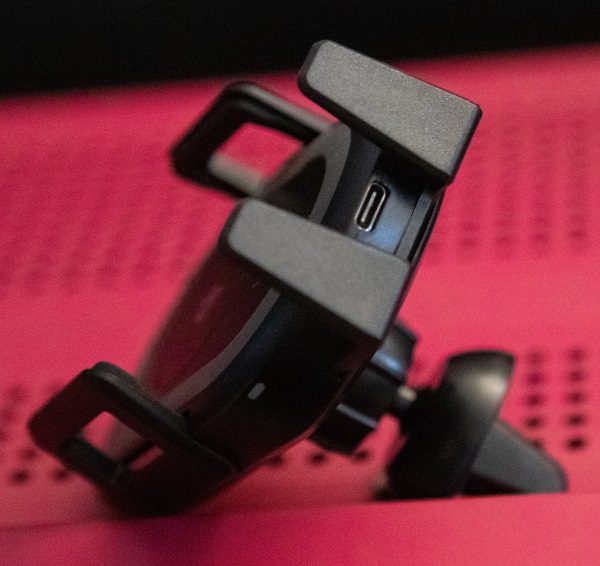
At the bottom of the mount, there is a USB-C power port.


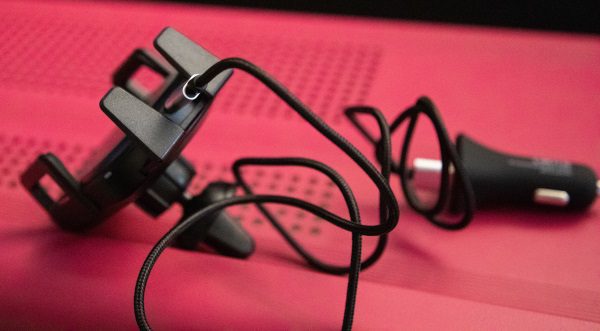
The USB-C to USB cable plugs into the power port on the mount and the other end into the 12V car adapter.

Performance:

Features:

  • Automatic lock & unlock with one touch release
  • Qi-certified fast wireless charger
  • Adjustable stand for 4″ to 6.7″ devices
  • Rotates from portrait to landscape mode
  • 250 mAh backup battery operates mount when disconnected from the power

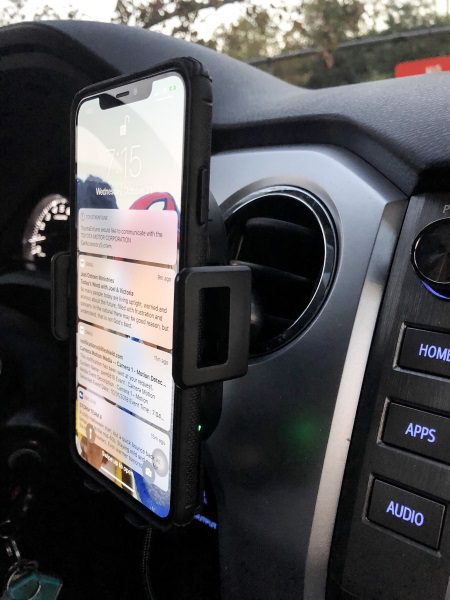
Below you can see how the mount connects to the vent louver.


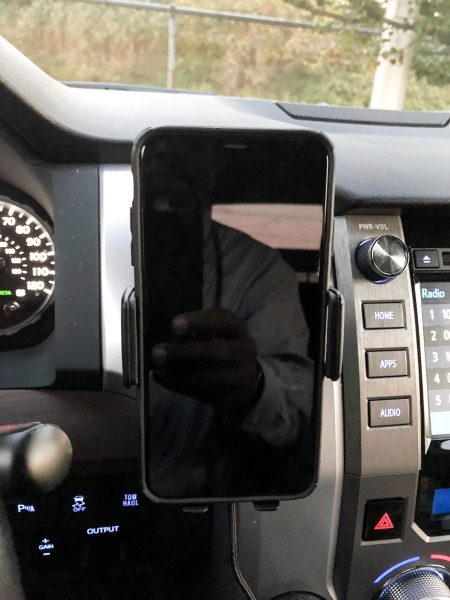
The picture below shows the mount connected to the vent with my iPhone 10XS Max in the mount.


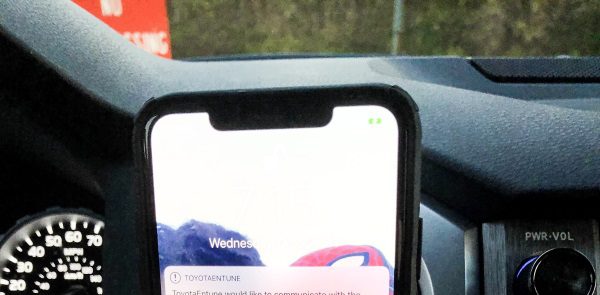
In the upper right-hand corner of the phone screen, you can see the icon that is green indicating that the phone is being charged.


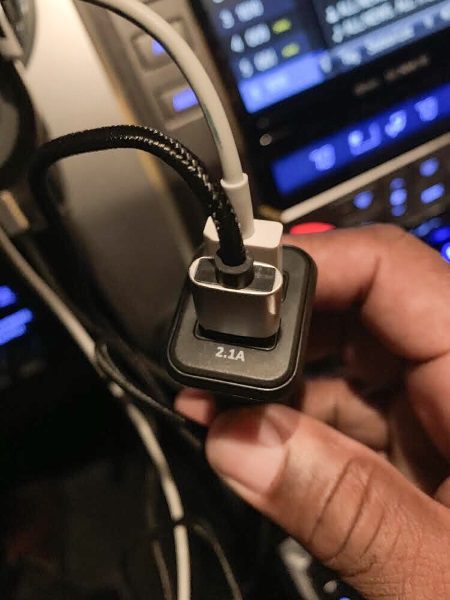
The car adapter power plug has the capacity to accommodate 2 USB cables. Only the one labeled 2.1A will work for the wireless charging feature.


The picture below on the left shows the red wireless charging indicator which is on the bottom right side of the mount. The picture on the right shows the blue power indicator that is on the opposite side.


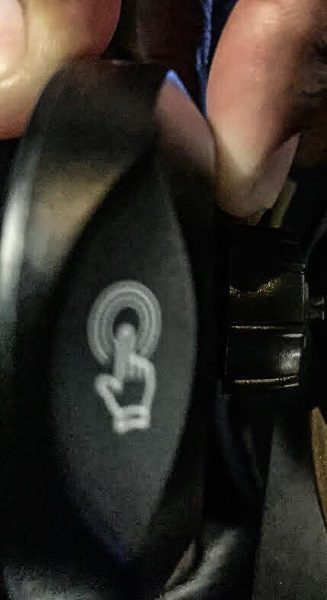
At the top of the mount, there is the touch control that opens and closes the securing arms by touch.

What I like

  • The Qi wireless charging capability
  • Can be used in both portrait and landscape mode
  • The build quality
  • The electronic arms that hold the phone
  • The touch operation

What can be improved

  • Based on the cost of this device, both the air vent mount and the dash/windshield mount should be included

Final thoughts

Not too long ag0, I reviewed a dash mounted phone holder that included arms that operated electronically but did not include Qi wireless charging. While it was a sturdy mount, I had to keep plugging in a separate cable into my iPhone for charging. I remember thinking how great it would be if wireless charging was included. This mount includes that great feature. Since the electronic arms on the mount that I previously reviewed mount began to fail after a few months, time will tell whether this device will do the same or stand up to the daily abuse. While I do think that for the price, the windshield/dash mount should be included, I will still give this Lynktec Bolt wireless car charger two thumbs up for now!!

Price: $49.99 (A telescopic Dash & Windshield suction are sold separately for $9.99)
Where to buy: Lynktec website and Amazon
Source: The sample for this review was provided by Lynktec.

Filed in categories: Reviews

Tagged: ,

Lynktec Bolt wireless car charger review originally appeared on The Gadgeteer on November 5, 2018 at 11:00 am.

Note: If you are subscribed to this feed through FeedBurner, please switch to our native feed URL http://the-gadgeteer.com/feed/ in order to ensure continuous delivery.

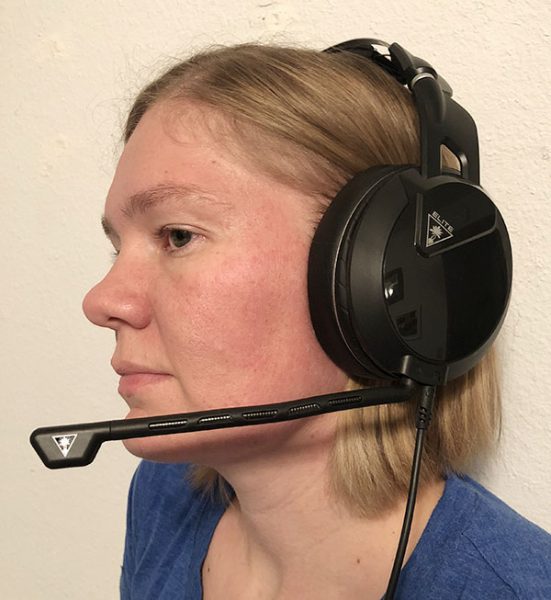
Turtle Beach Elite Pro 2 gaming headphones + SuperAmp review


REVIEW – I have enjoyed my Turtle Beach Elite Pro gaming headset since I got my hands on them and have felt little desire to try to upgrade to another higher end pair, that is until the Turtle Beach Elite Pro 2 came out. They are made for the two gaming devices I use most; the PS4 and PC, and it was a great opportunity to see how much they’ve improved from the first generation.

What is it?

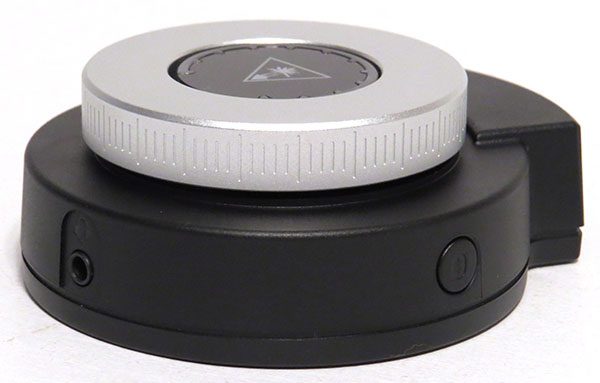
The Turtle Beach Elite Pro gaming headset is a pair of gaming headphones with a SuperAmp included to allow for an optimum gaming experience.

Hardware specs

  • Headphones
    Frequency: 12Hz – 20kHz
    50mm Nanoclear speakers
    Unidirectional microphone with TruSpeak technology
    Athletic fabric, leather, & cooling gel-infused memory foam build
  • SuperAmp
    Bluetooth compatible
    App-controlled
    Amplified DTS: Headphone X 7.1 surround sound support

What’s in the box?

In the box, you’ll find the Elite Pro 2 gaming headset, Elite SuperAmp, audio cable, optical cable, Mini USB power cable, quick start guide, and a Turtle Beach sticker.

Design and features

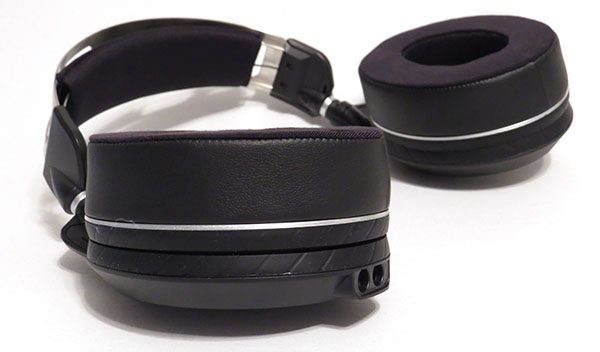
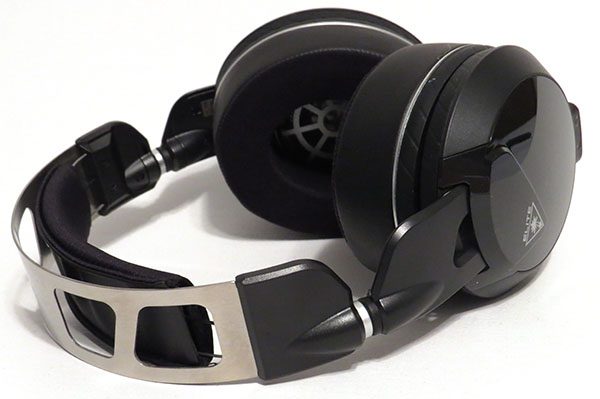
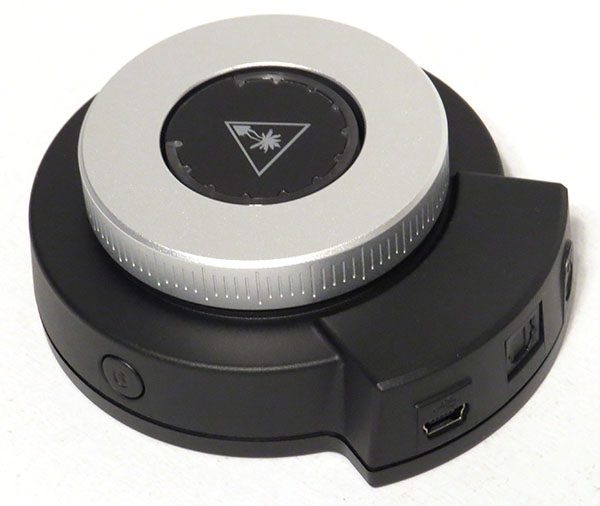
I have played too many hours to admit on the first pair of Turtle Beach Elite Pro headphones, and so I had high expectations for the newest version. I took out all of the components and quickly plugged in the SuperAmp using the same cord as the Turtle BeachElite Pro TAC, attached the microphone to the headphones, and plugged them in. They were ready to go very quickly. Next, I installed the Turtle Beach app and paired the SuperAmp to my iPhone via the Bluetooth button on the side of the SuperAmp. The app itself allows you to control the headphones just as if you had the Elite Pro TAC. I could change between several presets or customize it to my own liking. Lastly, I attached the Mini-USB and Optical cable to my PS4 for when I wanted to switch back and forth.

After countless hours, the padding on my old pair of headphones is still very good and quite comfortable. After using the new headphones, however, it would be very hard to return to the old ones. The gel memory foam cups are extremely comfortable and do not put much pressure at all on your head. They also claim to work well with glasses, though I do not wear glasses so I could not test that out.

They adjusted easily to my head to allow for maximum comfort. I could barely feel the band across the top of my head. They also were sturdy when pulled on and off and tossed onto the computer after each use. I loved that they stayed in place on my head and that I did not have to adjust the fit every time I used them. I noticed this happens often with my standard, cheaper headphones.

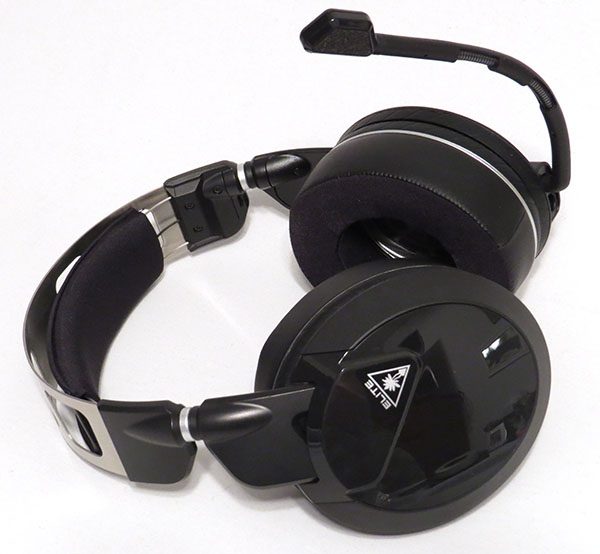
The microphone picked up the sound very well when talking. My friends had no problem hearing my voice and thought that the sound quality was better. When recording and playing back my voice, I had to agree; my voice came in clear and loud. One of the only flaws that I noticed in the design of the headphones came with the microphone. While I can remove the microphone entirely, it is not possible to move the microphone out of the way when not in use as the previous model.

Now let’s get to the sound quality. The first thing that I did was listen to music. I thought that the quality was very good overall. The highs were not as prominent as the mid and low ranges, but that’s fine with me. I could understand all the words clearly, hear the background beat to the music, and still get that nice bass sound. For playing music, they did well.

These are gaming headphones, so I was happy to try out different games to see how well they performed. My main game is Overwatch, and it is important to hear footsteps and gunfire around you when you are a healer. They were about on par with the previous model and definitely did an excellent job of letting me hear all there was around me. In Battlefield 1, I really loved hearing the boom of (my) grenades going off around me. The footsteps weren’t as prominent, though I could hear the gunfire very well and generally what direction the shots were coming from. These are the only two games that I play where having surround sound was very important. The sound quality on other games was just as good as listening to my music.

After using the headphones on my PC, I moved the SuperAmp over to the PS4 and tested out a few games there. The Mini-USB and Optical cables were both long enough to where I could sit comfortably on my bed and play. My PS4 recognized the headphones and switched over right away, and I was ready to go. The sound quality was similar to when using them on the PC. Since I always play with my TV speakers and not headphones, I could definitely hear the sound improvement. Now that I have used these headphones with my PS4, I will likely continue to plug them in whenever I play on the PlayStation and I seriously wonder why I went so long without using any headphones on my PS4.

What I liked

  • Extremely comfortable
  • Bluetooth capability
  • Versatile
  • Excellent microphone sound

What needs to be improved

  • The microphone doesn’t fold out of the way

Final thoughts

Overall, I absolutely loved the Turtle Beach Elite Pro 2 gaming headset and SuperAmp. The ear cushions are even more comfortable than the previous version and the sound quality is better as well. The only gripe I had about was the microphone sticking out all of the time, but not enough to switch back to the previous headset I was using. I would definitely recommend taking a look at the Turtle Beach Elite Pro 2 headset and SuperAmp if you are in the market for high quality gaming headphones.

Price: $249.95
Where to buy: Turtle Beach Website and Amazon
Source: The sample of this product was provided by Turtle Beach.

Filed in categories: Reviews

Tagged: ,

Turtle Beach Elite Pro 2 gaming headphones + SuperAmp review originally appeared on The Gadgeteer on November 5, 2018 at 9:00 am.

Note: If you are subscribed to this feed through FeedBurner, please switch to our native feed URL http://the-gadgeteer.com/feed/ in order to ensure continuous delivery.

AcuRite ATLAS Weather Station review

REVIEW – I have been considering getting a high-tech weather station for years now but never had the time/energy to do the product research and make it happen. As a bit of background, I have a degree in atmospheric science and am quite the data-nerd. So when Julie offered up the AcuRite ATLAS weather station, I quickly volunteered to check it out and see if it lives up to my hopes and dreams of collecting ultra-local meteorological data at our home.
What is it?

The ATLAS weather station is engineered to collect meteorological data in near real-time and wirelessly transmit it to you in a variety of ways. The ATLAS measures temperature, humidity, wind speed, wind direction, rainfall, UV index, and light intensity. The system transmits this data to either an optional HD touchscreen in your home or uploads it via the optional access point to the internet/cloud, making it viewable on your computer or smart device anywhere you happen to be.
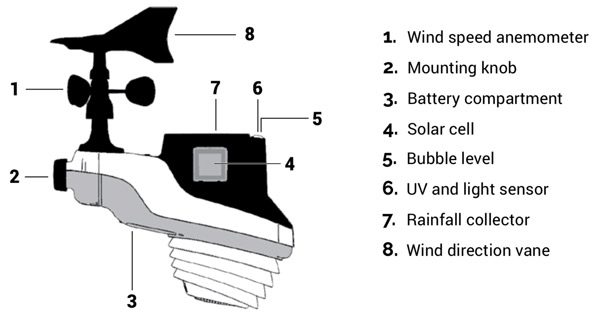
Design and features

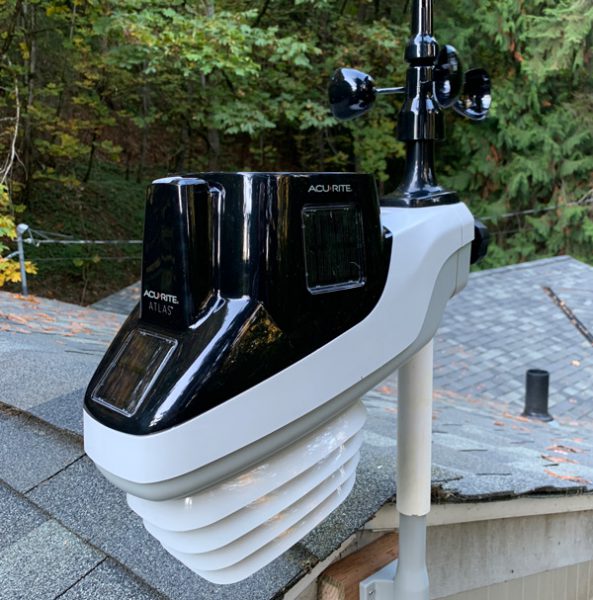
The AcuRite ATLAS is a compact, relatively well-made weather station that collects what I would consider pretty standard meteorological data. Its housing is made from a hard plastic designed to (obviously) withstand the outdoors.
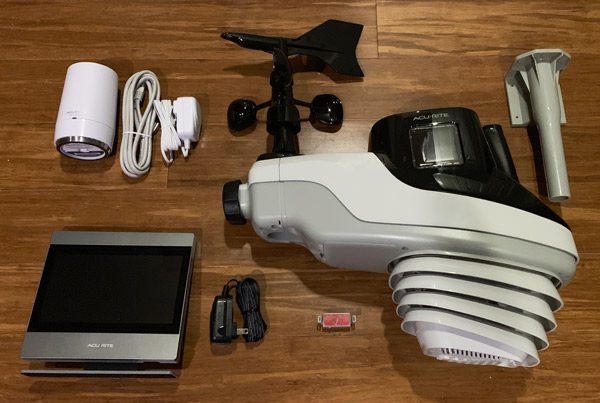
  • ATLAS Weather Station
  • Wall/post mounting bracket
  • High Definition Touchscreen Display (optional $99.99)
  • AcuRite Access Point (optional $99.99)
  • Lightning Detector (optional $39.99)

Specifications:

Temperature Range -40 to 158° F
-40 to 70° C
Temperature Accuracy +/- 1° F
Humidity Range 1% – 99% RH
Humidity Accuracy +/- 2% RH
Wind Speed 0 – 160 mph; 0 – 257 km/h
Wind Direction 360°
Wind Direction Accuracy +/- 3°
Rain .01″ intervals (0.25 mm)
Rain Accuracy +/- 5%
UV Index 0 – 15 index
UV Accuracy +/- 1
Light Intensity to 120,000 Lumens
Data Reporting Temperature: 30 seconds
Humidity: 30 seconds
Wind Speed: 10 seconds
Wind Direction: 30 seconds
Rainfall: 30 seconds
UV Index: 30 seconds
Light Intensity: 30 seconds
Wireless Range 330 feet (100 meters) depending on home construction materials
Wireless Signal 433 MHz
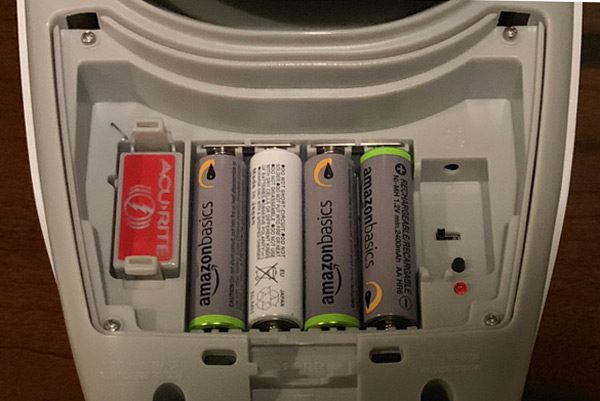
Power 4 AA alkaline or lithium batteries

The ATLAS weather station is powered by four (4) AA batteries (not included). I thought it was odd AcuRite recommends standard alkaline or lithium batteries versus rechargeable ones. We do our best to only use rechargeables and don’t have any disposable batteries in the house. So I threw caution to the wind and used what we had… Thus far the weather station is no worse for the wear. Hopefully, they recommend non-rechargeable batteries only due to poor performance/endurance in the extreme temperatures. That said, I’ll most likely swap them out when I get the chance.

The battery compartment also has a port for the optional Lightning Detector module, pictured here on the left.
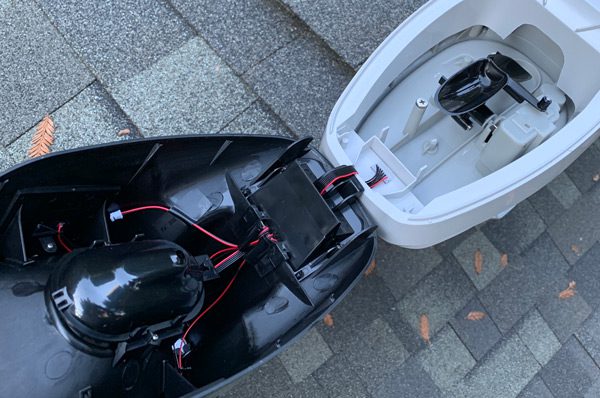
Before mounting the ATLAS weather station, foam surrounding the rain gauge must be removed allowing the plastic rocker to move freely. You definitely have to be careful to not damage or pinch the thin wires or small plastic connectors. The ATLAS is weather hardened but probably would not survive much, if any sort, of fall.
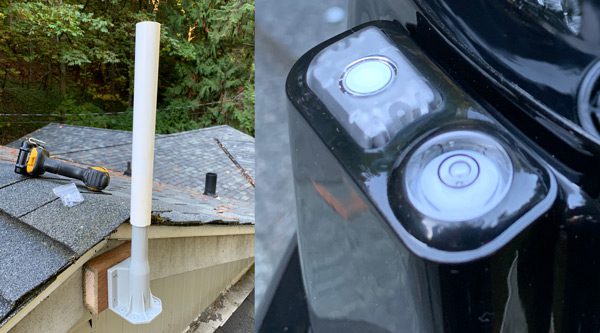
The plastic mount can be installed vertically or horizontally. An extension piece may be necessary to raise the ATLAS high enough away from whatever the mount is attached to. I used a 1 inch schedule 40 PVC pipe I had laying around the garage which worked surprisingly well. I may buy a longer piece to elevate the ALTAS even further above our roof but that may turn out to be unnecessary.

To accurately collect data, the ATLAS has to be level. Here you can see the integrated leveling bubble centered as prescribed (actually the easiest part of the install).

Once installed, you can barely tell the ATLAS is there collecting weather data unless you know where to look.
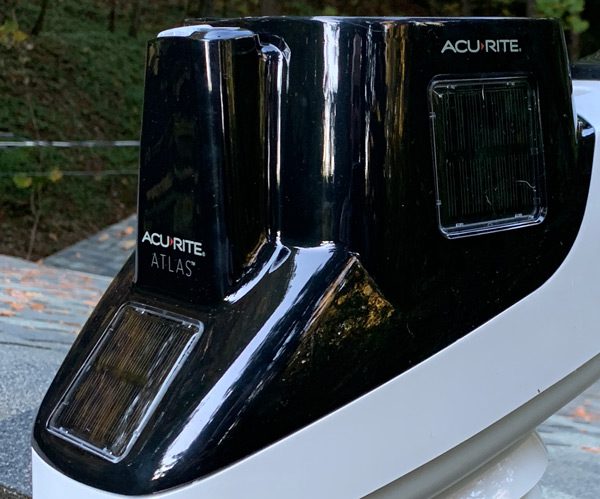
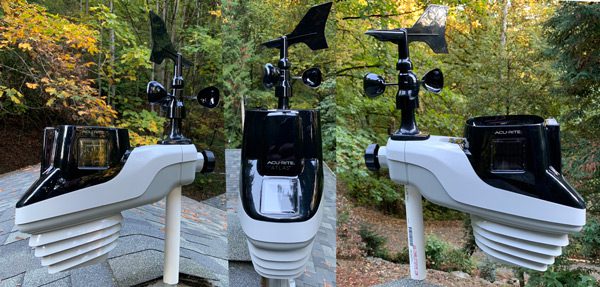
In addition to the AA batteries…when the sun is out, the ATLAS is also powered by three small solar panels built into the housing of the station. The solar cells measure about an inch and a half squared and there is one on the front and each side of the housing.
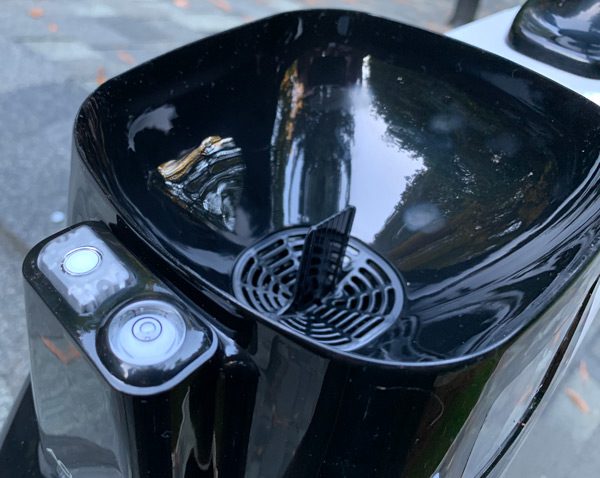
Here you can see the rain gauge intake and UV/light intensity sensor next to the leveling bubble.
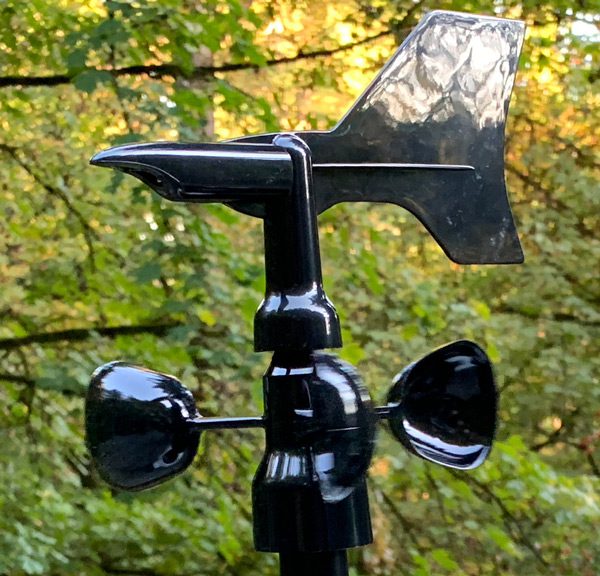
The wind direction and speed sensors are mounted top, rear of the ATLAS. Both sensors move freely in the wind. As long as you face the ALTAS due South, you do not have to tweak any of the settings to receive accurate wind direction.

Optional Accessories:

The biggest and really only issue I have with the AcuRite weather station is that you have to also purchase one of their optional accessories to view/access your data (though they do sell package deals on Amazon).

High Definition Touchscreen Display
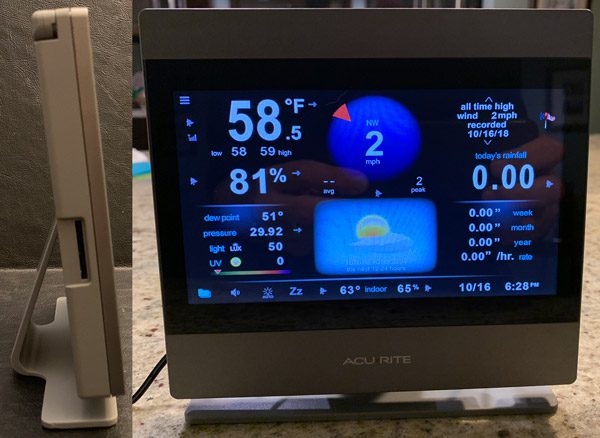
The high definition wireless touchscreen is clear and bright, though a bit top-heavy (I ultimately mounted it in my office). Displaying all the data in a well thought out layout. Like the smartphone app, the screen also enables you to dig deeper into the data for more thorough analysis. The system’s wireless range is approximately 300 feet depending on what the signal has to penetrate. The display has a built-in antenna that can be raised if need be. There is also a standard SD card slot if you want to capture the data for later review.

AcuRite Access Point
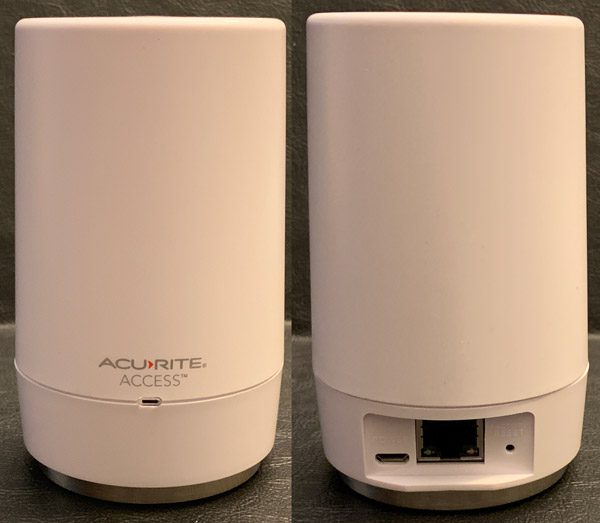
The AcuRite Access Point plugs into the ethernet port of your router and uploads the ATLAS met data to the myacurite.com website for viewing on your computer, tablet, and/or smartphone. The access point is dual powered via a microUSB plugged power source or three AA batteries as a temporary backup in case your power goes out. Though at that point, my guess is your internet modem and router would be without power limiting/killing your connectivity anyhow.
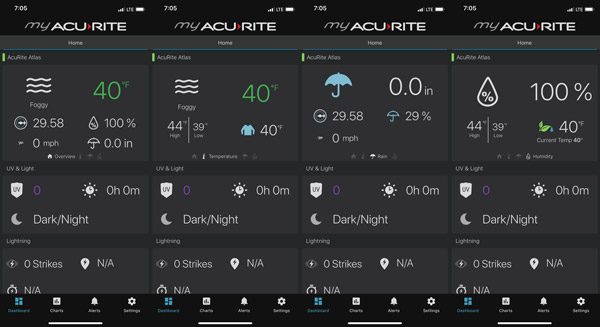
The AcuRite smartphone app does a pretty good job of displaying all the weather data collected by the ATLAS. You’re able to flip thru various data specific screens.
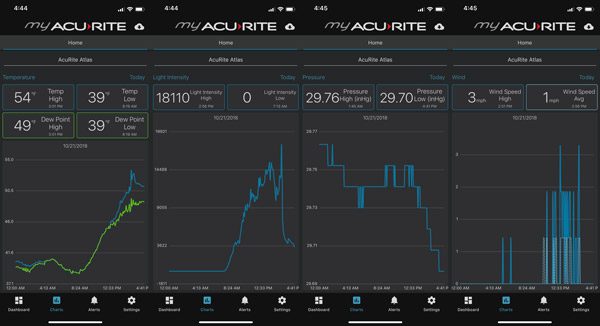
Or dive deeper into any one of the individual datasets to get a closer look as the weather changes over time. The app also enables you to download the data from the AcuRite server and set alerts for extreme conditions.

It is easy to tell at a glance the ambient conditions at your home or wherever you’ve installed the ALTAS. We live pretty far out in the sticks, so when I’m downtown or on travel, it’s great being able to check the app to see how (bad) the weather is at our place.

What I like

  • Provides real-time local weather data
  • Excellent list of sensors/data collected
  • Well made
  • Easy to setup
  • Solar and battery powered

What needs to be improved

  • Should include remote access in the box (vs as optional accessories)

Final thoughts

I really like the ATLAS weather station, it definitely meets my atmospheric scientist data-nerd needs.  AcuRite has done an excellent job creating a solid array of sensors in a compact, easy to install/setup design. The HD screen and smartphone app also do a solid job of displaying the meteorological data in an easy to read and understandable manner. That said, seeing the data on either, requires at least $100 more be invested to truly make the system usable. Though the ATLAS with all the accessories (screen, access point, and lightening module) shown here is currently available at Amazon for $261 as a package deal.

Price: ATLAS $149.99 / HD Touchscreen Display (optional $99.99) / Access Point (optional $99.99)
Where to buy: AcuRite.com or Amazon.com
Source: The sample of this product was provided by AcuRite.

Filed in categories: Reviews

Tagged:

AcuRite ATLAS Weather Station review originally appeared on The Gadgeteer on November 4, 2018 at 9:15 am.

Note: If you are subscribed to this feed through FeedBurner, please switch to our native feed URL http://the-gadgeteer.com/feed/ in order to ensure continuous delivery.
BlitzWolf BW-P3 power bank review

REVIEW – Until the day when quick-charging long-lasting battery technology is commercially available to power all of our consumer electronic gadgets, an external power bank is required necessity. Blitzwolf makes a version with Qualcomm Quick Charge 3.0. Read on to see what I think!                                               

What is it?

The BlitzWolf BW-P3 power bank is a gadget that you can use to charge rechargeable devices.  The power bank contains batteries and circuitry to regulate power output. The circuitry ensures that the power delivered to each USB port is optimized to minimize the charging time required. Special circuitry, licensed by Qualcomm, is available to charge compatible devices as quickly as possible. 

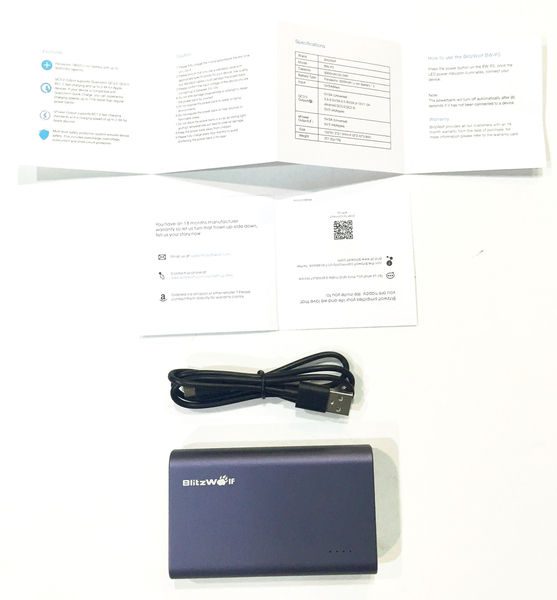
What’s in the box?


BlitzWolf® BW-P3 QC3.0 Power Bank
Micro USB Charging Cable
User Manual
Warranty Card

Design and features

Specifications

 Brand  BlitzWolf®
 Model  BW-P3
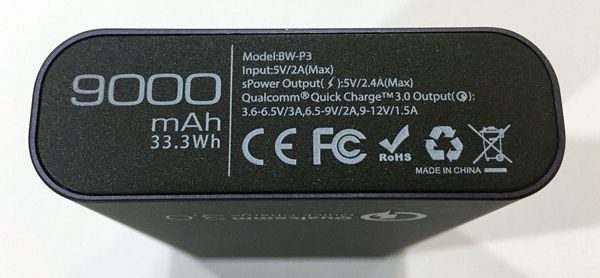
 Capacity  9000mAh/33.3Wh
 Power  18W(two USB ports total)
 Input  5V/2A (max)
 Output 1  5V/2.4A (max)
 Output 2  5V/2.4A (non-Quick Charge,universal)
3.6-6.5V/3A,6.5-9V/2A,9-12V/1.5A (QC3.0)
 Charging time  5 hours (with 5V/2A Charger)
10 hours (with 5V/1A Charger)
 Size  102*61.5*21.3mm
 Weight  225g±5g
 Certification  CE,FCC,Qualcomm QC3.0

Unboxing

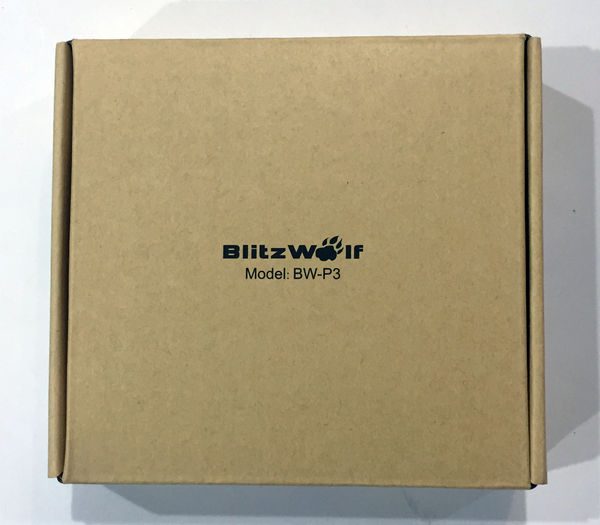
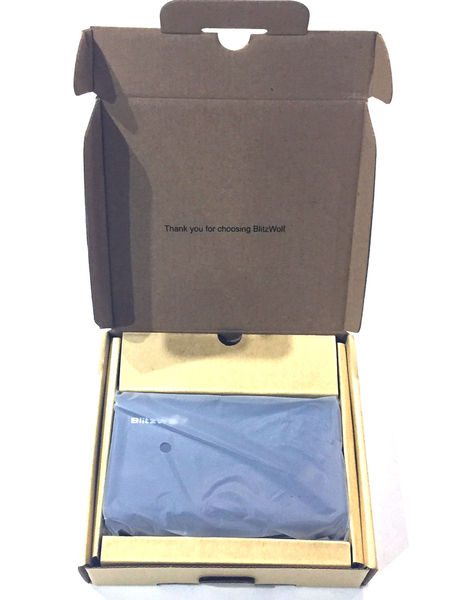
The power bank is made and ships from China. It took 18 days from the day I ordered it to arrive: 13 days from Shenzhen, China to Chicago, Illinois, USA, and another 4 days from Chicago to Massachusetts, USA.

The Package was well wrapped and the box inside didn’t show any signs of damage from the trip.


Design of the BlitzWolf® BW-P3 QC3.0 Power Bank

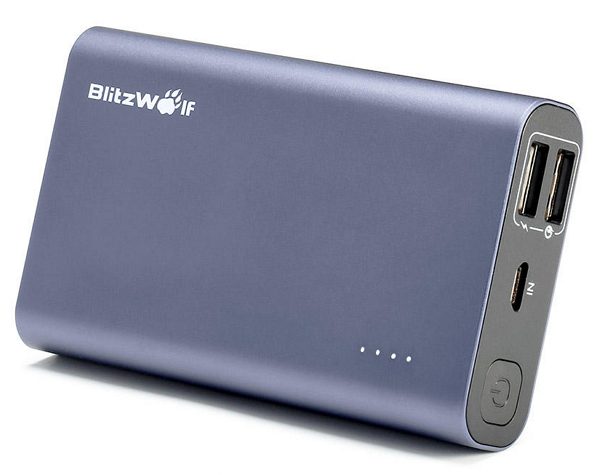
Weighing in at 221 grams and slightly larger than a deck of cards, the power pack has a substantial feel to it, indicative of a solid, well-crafted device. Its dimensions are perfect for large and small hands and make it easy to hold alongside a phone or tablet while charging. The dimensions are also perfect to hold 3 TR 18650 lithium batteries, which hold the charge for this unit. I purchased this six months ago, but the manufacturer is currently selling these units as a 10000 mAh capacity device. Since I charged the unit to 37 Wh I’m not sure if they changed the capacity inside or just changed the label on the case. TR 18650 batteries come in many capacities, so a change in the supplier may have allowed Blitzwolf to upgrade their product

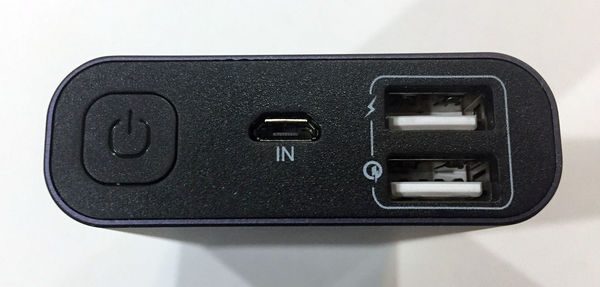
The Aluminum shell does not feel like it will dent or buckle if pressed. The front and back end, fabricated from black plastic are inset into the aluminum frame and gives the device a well crafted and defined appearance. The power button is large yet it doesn’t rock in the frame; it’s another design specification and manufacturing touch which confirms that this is a well designed and constructed device.

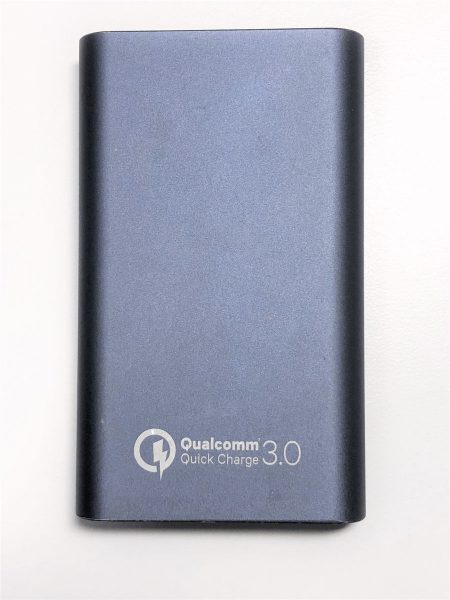
The bottom of the unit is emblazoned with the Qualcomm Quick Charge 3.0 symbol and text.

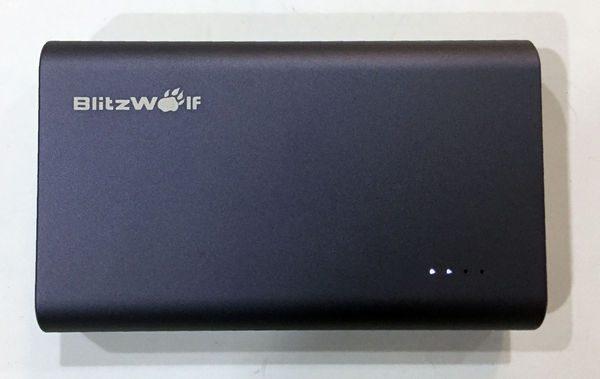
The top of the unit has the BlitzWolf logo and 4 white LEDs to indicate remaining capacity and charging status.

The LEDs are quite bright and easy to see even in full sun. 

Performance

I monitored the power bank charging with a J7-t safety tester and also monitored the temperature of the battery pack with an infrared thermometer.

Charging

The power bank draws up to 8 W (5.2 V, 1.52 amps) while charging. It took 3:42 to charge 24 Wh. While charging the case temperature rose from 73°F to 82°F. The next time it was empty I charged the pack using the supplied cable and it took 5:21 to charge 37 Wh. So it appears that the unit does have the stated capacity of 33.3 Wh.

Discharging

I used the power bank to charge a completely dead iPhone 6. It took 3:51 to charge the iPhone 9.9 Wh. I observed the phone charging at 7 W after an hour, so some trickle charging occurring for most of that elapsed time. The iPhone has a 6.9 Wh battery so 3 Wh was lost as heat in the charging process.

I also used the power bank to charge a dead LeTV Le Eco Le Pro 3 using the QC port. The charging occurred at up to 18.5 W (7.4 V, 2.5 amps) but changed according to the battery charging circuit requirements. The power bank charged 17 Wh into the phone by Quick Charge before being completely drained. The temperature of the case was measured as high as 104°F but dropped to 101°F as the charging continued.

What I like

  • Easy to use
  • Compact
  • High Capacity
  • QC 3.0

What needs to be improved

  • Nothing

Final thoughts

I recommend this product for those who would like to be able to charge their devices quickly and also have a good looking and dependable device. The design and performance are exactly as advertised

Price: $42.89 often less with sales, coupons and volume discounts
Where to buy: Banggood
Source: The Blitzwolf sample for this review was purchased with my own funds.

Filed in categories: Reviews

Tagged: ,

BlitzWolf BW-P3 power bank review originally appeared on The Gadgeteer on November 3, 2018 at 2:30 pm.

Note: If you are subscribed to this feed through FeedBurner, please switch to our native feed URL http://the-gadgeteer.com/feed/ in order to ensure continuous delivery.