I love my MPOW Swift Bluetooth 4.0 Headphones and because of them, Bluetooth earbuds are all I use. I no longer wish to deal with wired earphones. And I’ve found that I like having earbuds over other types of headphones (on-ear or over-the-ear) because they are small and portable, don’t leak sound so as to bother those around me, and also double as ear plugs when I need them. Recently, the Gadgeteer was given the opportunity to review the new Jaybird X3 Wireless Bluetooth Headphones and I was lucky enough to be the reviewer. What do I think? They are my new favorite earbuds because the Jaybird MySound app allows the user to create his or her own personal sound profiles within the app and save one of them directly to the earbuds (limited to one sound profile at a time which can be changed in the app), and you get about 8.5 hours worth of music playing time when the volume is set at a moderate level.
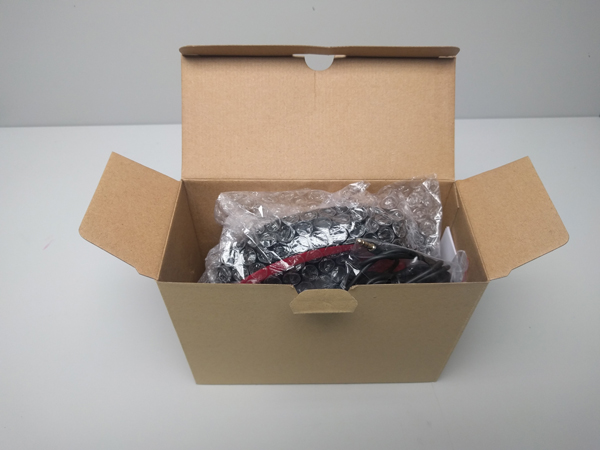
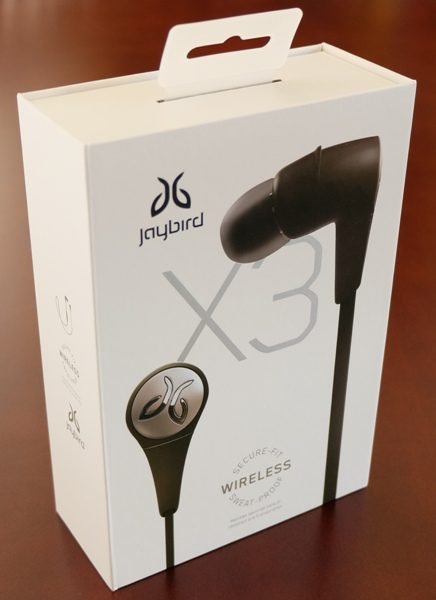
The Jaybird X3 box proved to be a little tricky to open. I initially thought that there was an inner box that would slide out from the bottom, but after looking all around the box, I found that it actually has a magnetic closure along the right side.
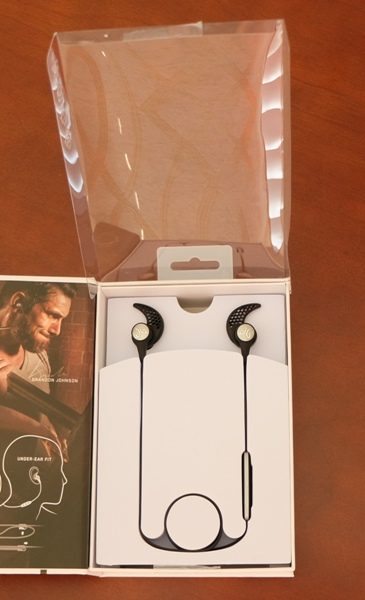
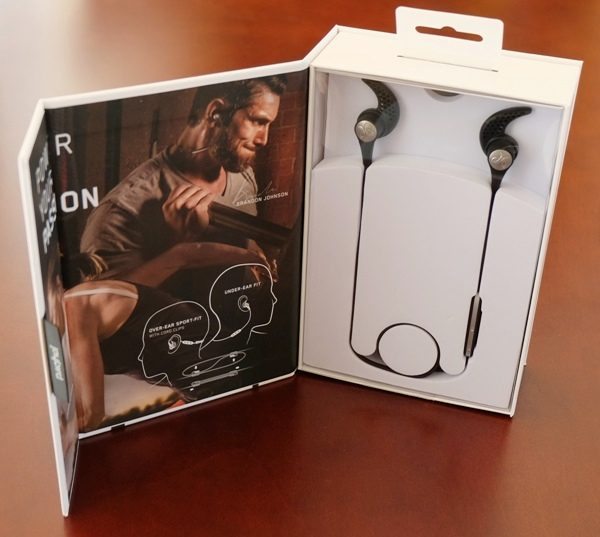
Then after figuring out how to open the box, I needed to figure out how to get the earbuds out. Again, I initially thought that there was an inner box that would slide out face first, but no, there is a clear plastic cover that needed to be lifted from the bottom upward (after cutting the tape on the bottom). Now I could finally access the earbuds. I just needed to be smarter than the box – so now we all know I have an I.Q. slightly greater than the Jaybird X3 box. Ha – win!!

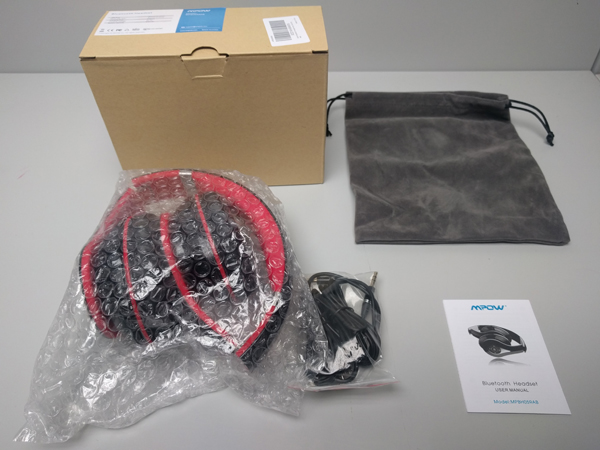
Package Contents
- Jaybird X3 Wireless Bluetooth Headphones (in-ear)
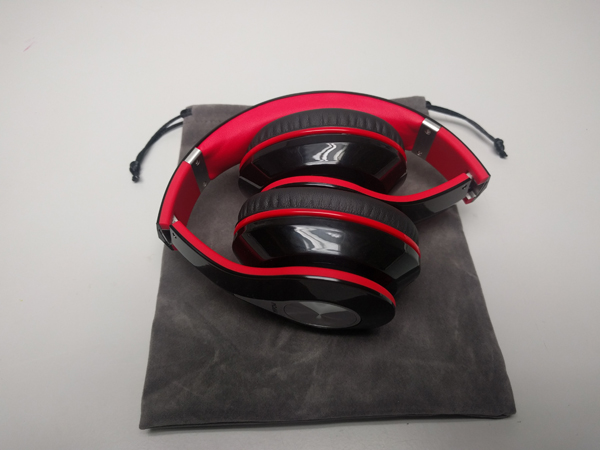
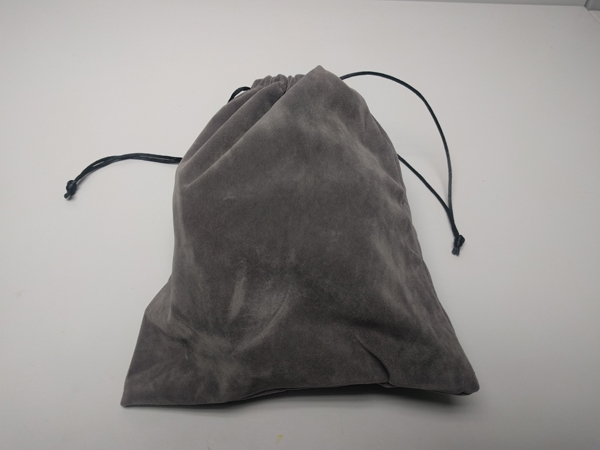
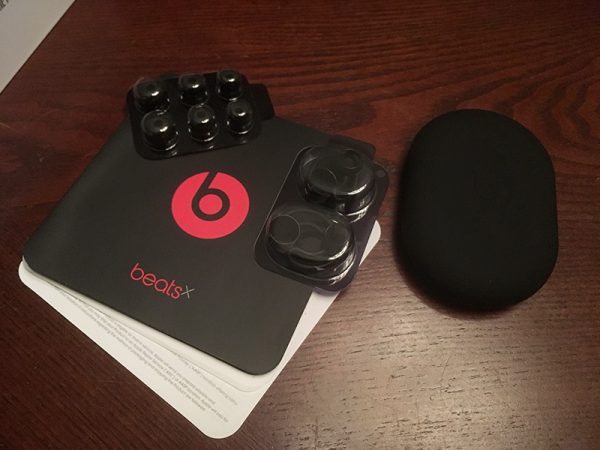
- Carrying Pouch
- Jaybird Sticker
- Quick Start Guide
- Jaybird Information/Warranty Sheet
- Comply Premium Isolation Foam Ear Tips (small, medium, large)
- Silicone Ear Tips (small, medium, large – on the earbuds)
- Silicone Secure Fit Ear Fins (small, medium, large – on the earbuds)
- Cord Shirt Clip
- Cord Management Clips
- USB 2.0 Charging Cable + Charging Clip (proprietary)
Specifications
- AUDIO
- Type: In-Ear Style
- Noise-isolation: Passive
- Impedance: 16 Ohm
- Speaker sensitivity: 96 +-3dB At 1KHz
- Output 5mW nominal, 10mW max
- Total Harmonic Distortion <3% (1KHz, 1mW)
- Audio Format: 16-bit Stereo
- Codec: AAC, SBC, Modified SBC
- Response Bandwidth 20Hz – 20kHz
- Driver Size: 6 mm
- BLUETOOTH
- Bluetooth Version: 4.1, Multi-point
- Range: 10 meters (30 feet)
- Frequency Band: 2.4 GHz
- Profiles: Handsfree, Headset, A2DP, AVCRP, SPP
- PAIRING
- Number of Paired Devices: 8
- Pairing passkey: 0000
- INTEGRATED MICROPHONE
- Type: MEMS, Omni-directional, ultra low power
- Sensitivity: -38dB +-3dB (Test conditions: 1KHz, 0dB = 1V/Pa)
- COMPATIBLE PRODUCTS
- Any A2DP Bluetooth stereo device
- iPhone
- Apple Watch
- iPod Touch
- iPad
- iPad mini
- Android
- Windows
- Blackberry
- Android Wear
- Smartwatches
- PC
- Mac
- Gaming devices
- MYSOUND APP COMPATIBILITY
- iOS 9+ (except iPad 2)
- Android 4.4+
- OPERATION
- Operating: 32F – 113F (0C – 45C )
- Storage: 14F – 122F (-10C – 50C)
- WEIGHT & DIMENSIONS
- Width: 1.1″ (28.02mm)
- Height: 1.09″ (27.69mm)
- Depth: 0.52″ (13.42mm)
- Weight: 0.63 oz (17.9g)
- Cord Length: 19.29″ (490 mm)
- BATTERY
- Play Time: 8 Hrs*
- Standby Time: 200 Hrs*
- Charging Time: 2.5 Hrs
- Quick Charge: 20 min = 1 hour Play Time
- Charging: USB with included charging clip
- AC power: DC 5V 500mA
- Type: Lithium Ion
- *May vary dependent on usage, device & aging
- Battery Voltage: 3.7V
- WARRANTY
Design & Build Quality
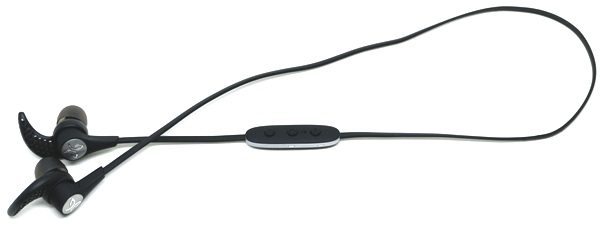
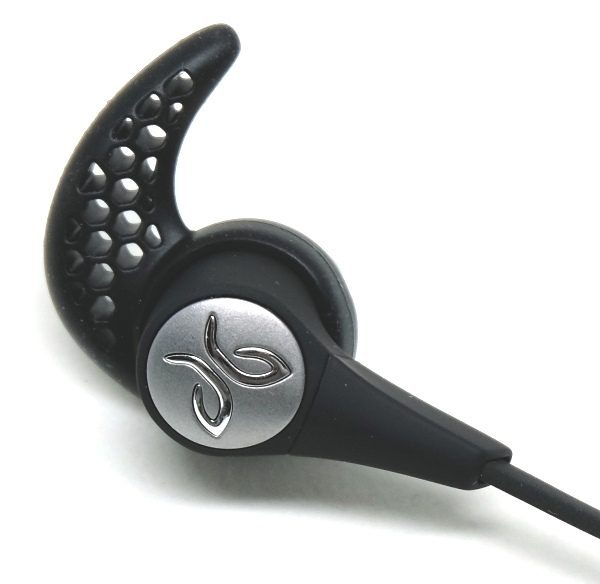
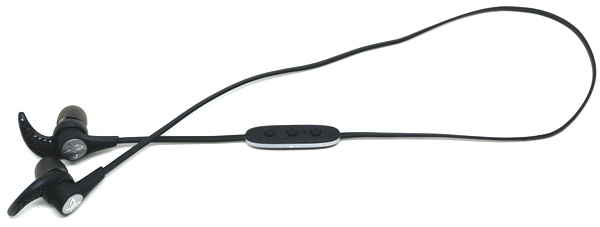
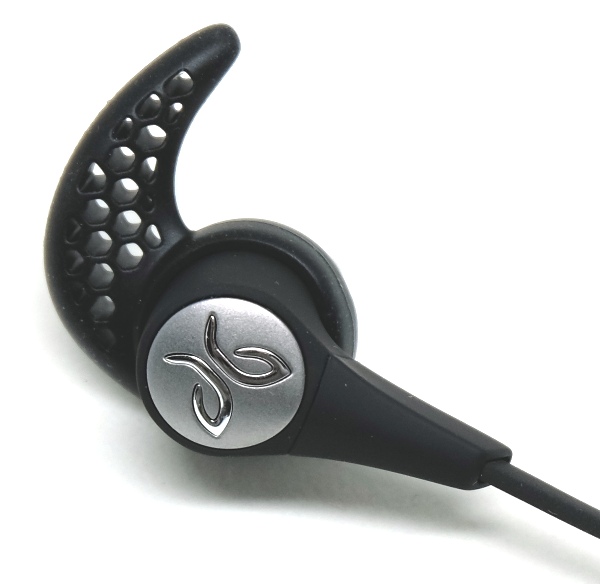
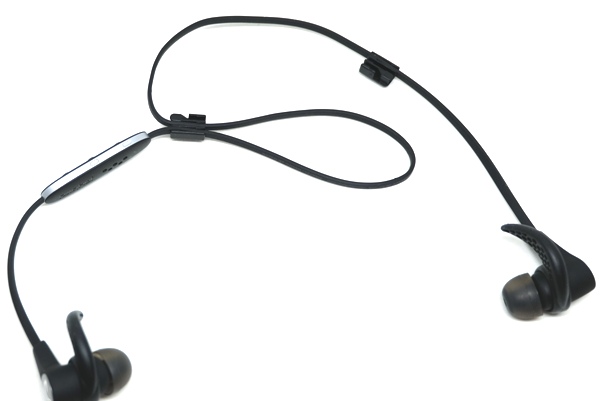
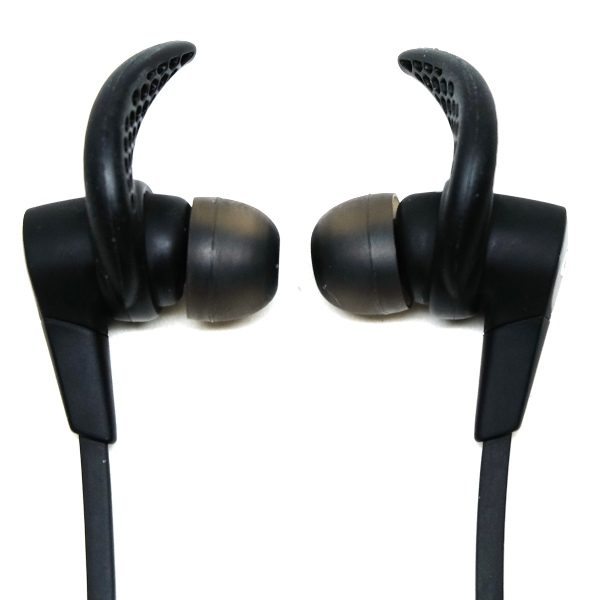
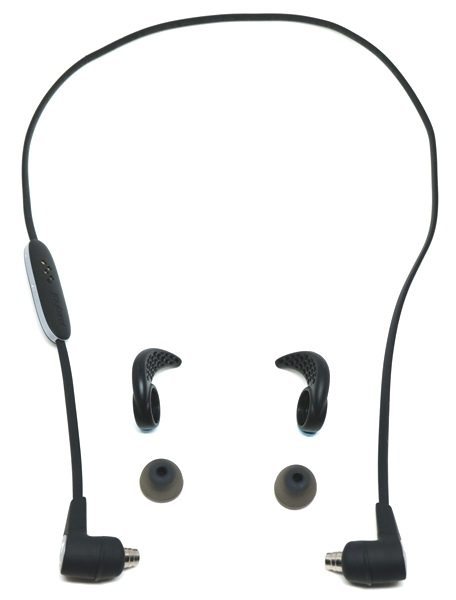
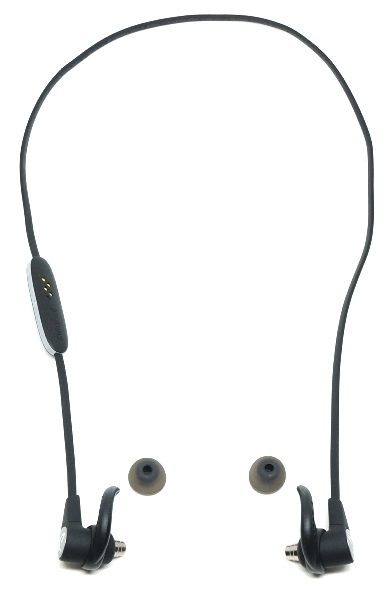
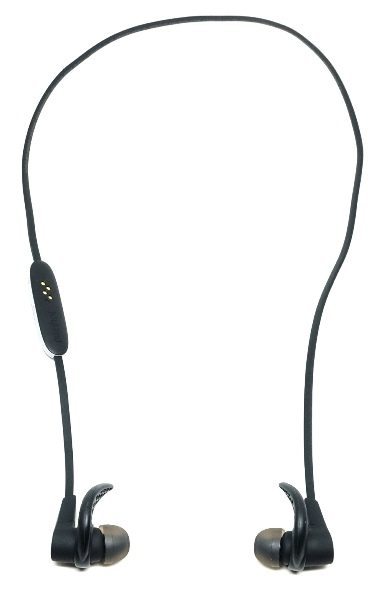
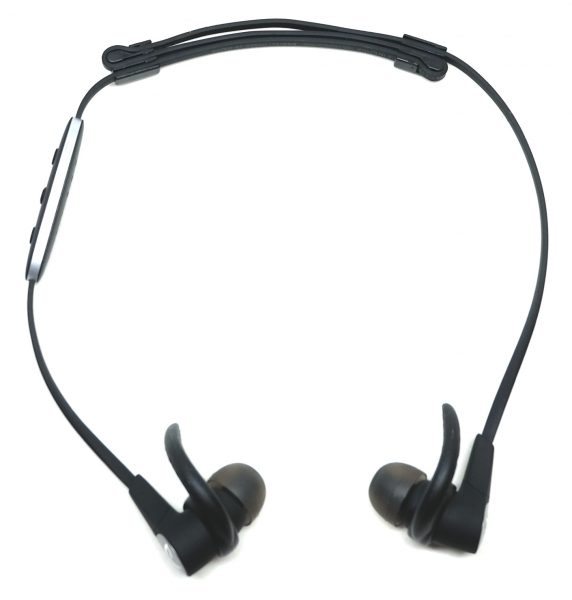
I found the design of the Jaybird X3 Wireless Bluetooth Headphones to be attractive. The Jaybird logo is tastefully displayed on the cap (metal or plastic – I’m not sure) on the end of each of the earbuds. The rest of each earphone is covered in a silicone type material as is the flat cord connecting the earphones. They are sweat-proof too. The Jaybird website states, “With double hydrophobic nano coating and redesigned super-tight seams we’ve got you covered in the rain, mud, sun, sweat and tears…” The inline remote is located under the right earbud.
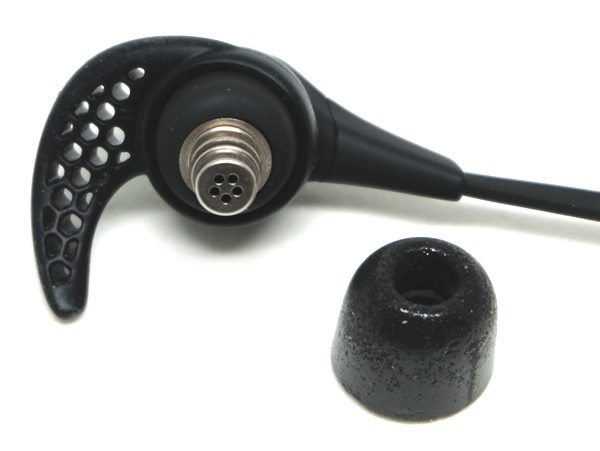
The Jaybird X3s came with three pairs of silicone tips (small, medium, and large) and three pairs of Comply Premium Isolation Foam ear tips (small, medium, and large). The ear tip laying next to the earphone in the photo above is one of the foam tips. It is squishy and has a slightly tacky feel to it. When the ear tips are removed you can see that the earphone is made of metal, unlike many inexpensive earbuds.
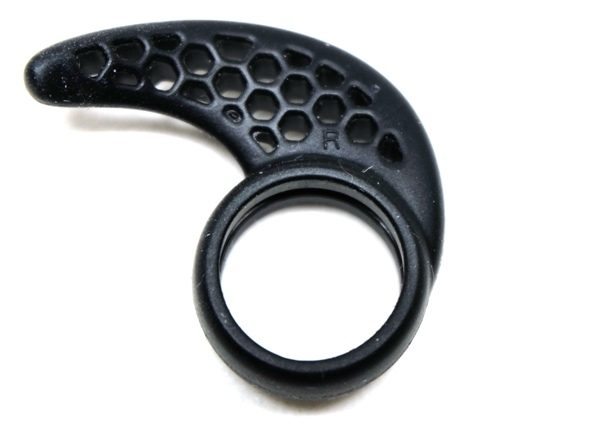
The X3s also came with three pairs of ear fins (curved silicone pieces) that help to stabilize the earphones while wearing them and keep them firmly in your ears. Each pair is labeled with an “L” or an “R” on the inside of the fin (as shown in the photo above). The “L” fin will always be the fin for your left ear and the “R” fin will always be the one for your right ear no matter whether you are using your X3s in the Over Ear or Under Ear configuration (more on that later).
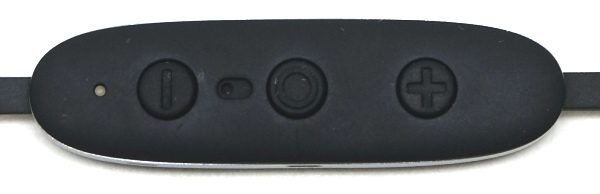
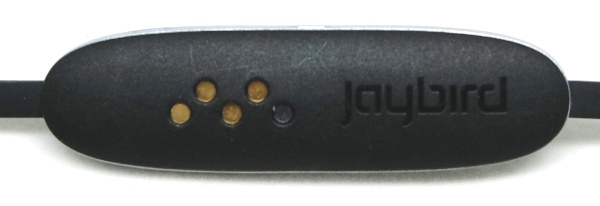
The inline remote is located just under the right earphone. It contains (from left to right) the LED status indicator, the Volume Down button, the microphone, the Power button, and the Volume Up button.
 The other side of the remote contains the contacts that connect to the charging clip to charge the earbuds.
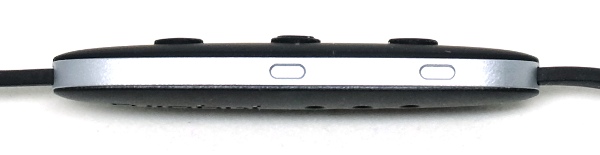
 And, along the side of the remote in the photo above, you’ll see two indentations that must be lined up with the edges of the charging clip.
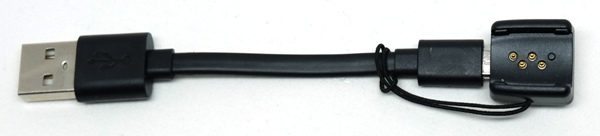
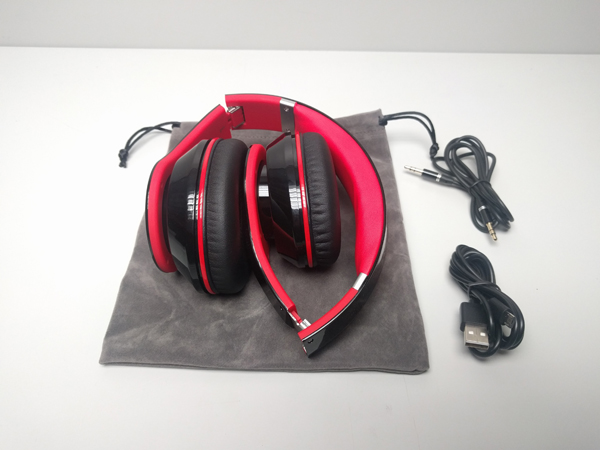
Above is the USB 2.0 cable with Charging Clip. The charging clip has the contacts that match those on the back of the earbud’s remote. The charging clip is also attached to the USB cable by a short black elastic tethering string to prevent you from losing it; however, the USB cable itself is very short (about 4 inches long) and thus, it would be very easy to lose both.
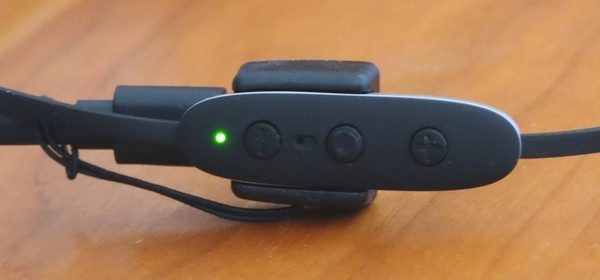
The inline remote must be oriented properly with the charging clip, then snapped into place in order to charge the X3’s. The LED light should be closest to the micro-USB end of the charging clip.
When aligned properly the LED will light up red while the earbuds are charging and will then shine green when completely charged.
Use
Pairing: I paired the X3s with my Nexus 6 phone and my iPod Touch 6G. First, I made sure that Bluetooth was turned on in my device. With the X3s completely off, I pressed the Power button (center button) for about 5 seconds until I heard a peppy female voice prompt say, “Power On” and then, “Searching for your music device” (NOTE: I had to continue to hold the Power button beyond the “Power On” voice prompt until I heard “Searching for your music device”). The LED shines green when the earbuds are powered on and then flashes alternately green and red when in pairing mode. Then while in my device’s Bluetooth settings, I tapped on the newly discovered Jaybird X3. The earphone’s peppy voice prompt then said, “Headphones connected” after which I almost expected her to say, “You go, girl!!” Anyway, I performed this pairing procedure for each device and there were no issues. You are able to pair the X3s with up to eight devices and can connect to two devices simultaneously (multipoint connection). You can also pair your X3s with your smartwatch to avoid having to use your phone at all.
If you have problems with device pairing or connections, you can reset your X3s. You’ll first want to remove the Jaybird X3s from your Bluetooth settings by tapping on “Forget this device”. Then you’ll power off the earphones and then put them back into pairing mode as described earlier. While in pairing mode, you’ll double press the Power button to reset them. The LED will flash orange and the earbuds will shut off. When they are powered back on, they will be immediately ready to pair.
ShareMe feature: I do not have access to another set of X3s so I did not test the ShareMe feature. You can find the directions on how to share the music you are listening to with another X3 user in the User Guide.
Bluetooth Connectivity: I tested the distance at which Bluetooth connectivity was maintained and found that it was 90 feet in line-of-sight of my iPod Touch 6G and 60 feet in line-of-sight of my Nexus 6.
I’ve been able to listen to my earbuds with two walls separating me from my connected device without drops. However, when exercising, I found that if my body got between the inline remote and my mobile device which was only about 3-4 feet away, Bluetooth connectivity was interrupted, but would quickly recover within a fraction of a second because I was constantly moving around.
Fit: The fit was a little tricky. I found that the design of the X3s didn’t quite go as far into my ear canals as my MPOW Swift earbuds, thus finding the correct ear tip that is both comfortable and creates a good seal around my ear canal took more time than with my MPOW Swift earbuds. If you don’t get the seal just right, this affects the quality of the sound. Finding the correct sized ear tip took a few minutes to figure out. Thankfully putting on and taking off the tips was easy. None of the Comply Premium Isolation Foam ear tips worked well for me. I found that the large sized silicone tips did the job.
In addition to finding the correct fitting ear tip, you need to make sure the earphones stay in your ears when moving around or exercising. Jaybird provides you with small, medium, and large ear fins to aid in that objective. Some of you will find that you don’t need to use them, but others, like me, will need them.
The ear fins are curved from side to side (not the obvious curve of the fin which ends in a point) and meant to always curve inward toward the sides of your head when wearing them such that when inserted into your outer ear, the fins are located above the earphones and the tip of the fins always points forward toward the front of your body. They are labeled with “L” for the left fin or “R” for the right fin but not very clearly because the letters are especially tiny and difficult to read. Finding the correct-sized fin (the large fins were what worked best for my ears) and ensuring that they were placed on the correct earphone in the correct orientation took a few minutes especially since each time you take off a fin, you must first remove the ear tip, put the fin on, replace the ear tip, try the fins out to determine proper fit and comfort, and repeat the process if necessary.
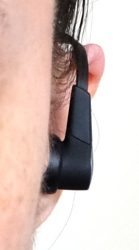
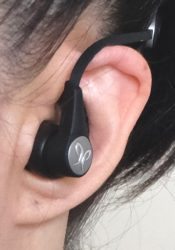
There are two ways you can wear the X3s. You can wear them such that the cord hangs under your ears (Under Ear Fit) or you can wear them such that the cord goes over your ears (Over Ear Fit).
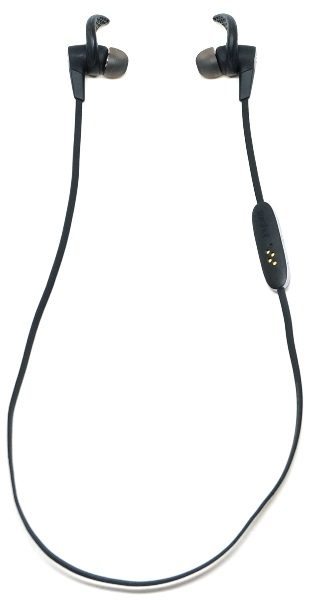
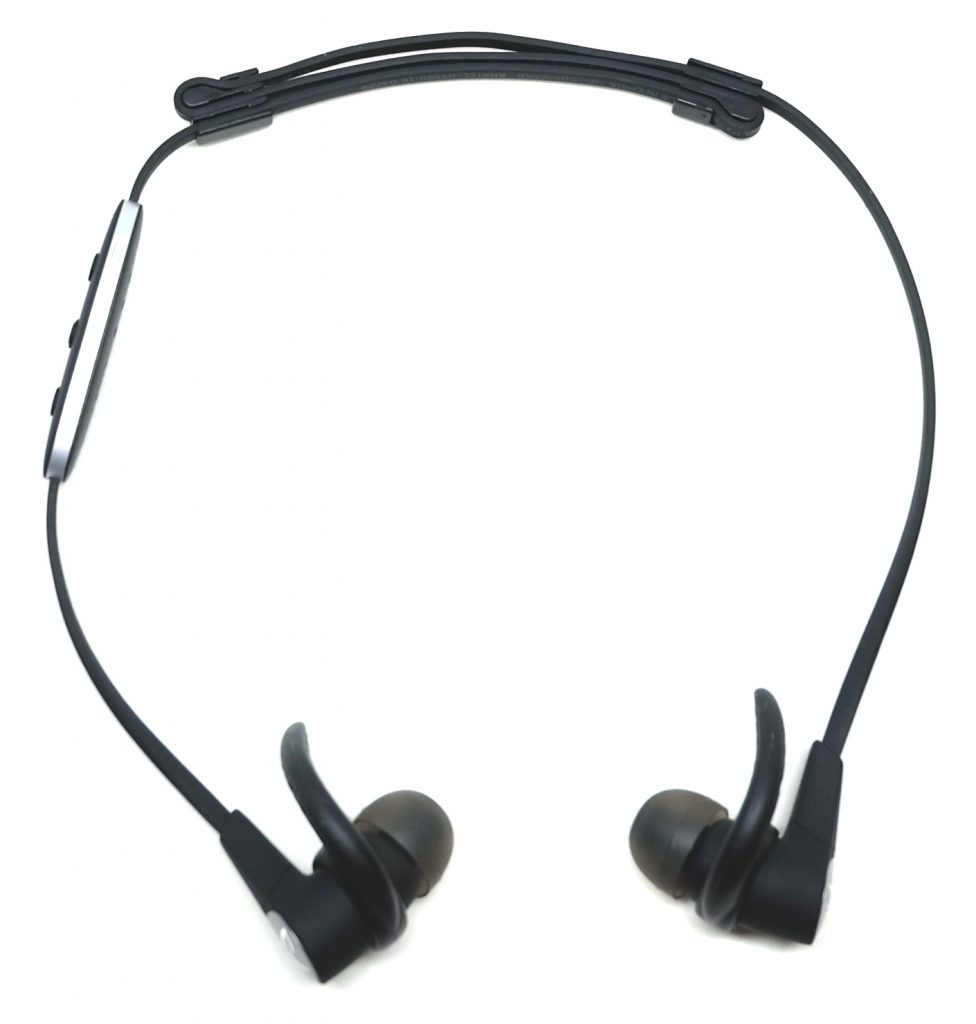
Under Ear Fit: The above photo shows the left earphone on the left side in the left photo and the right earphone on the right side of the same photo. The inline remote hangs below the right earphone with the fins in the correct orientation when wearing the X3’s with the cord hanging below your ears. Notice that the side to side curve of the fins would curve inward toward the sides of your head and the tips of the fins would point toward the front of your body.

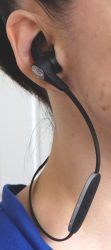
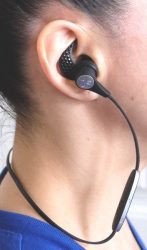
The above photos illustrate that fit. I preferred the Under Ear Fit. It was the most comfortable way to wear the X3s. I was able to do high impact exercises while wearing them in this orientation and only had to adjust them a couple of times. Once adjusted, they had no issues. I was able to wear them for up to a couple of hours before the tips of the fins started to make my ears a little sore.

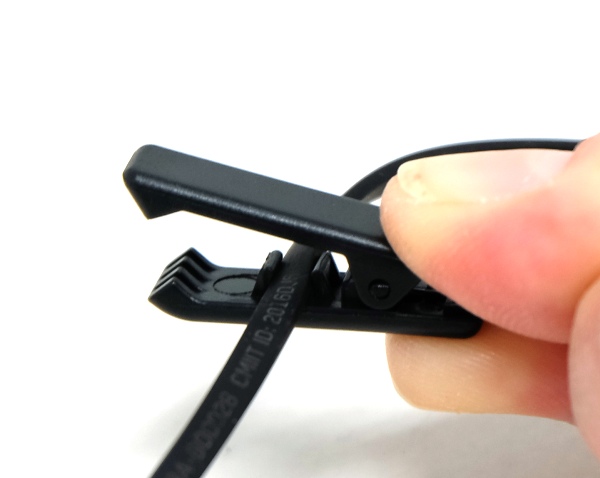
You may also use the shirt clip to attach the cord to the back of your shirt while wearing the earphones in the Under Ear configuration, but I chose not to.
Over-Ear Fit: I realize there are others who would like to wear the X3s in the over ear configuration. The orientation is quite different and somewhat complicated to arrange initially. The above photos show you how to put the fins on correctly for the “Over-Ear Fit”.
NOTE: The online or PDF User Guide illustrates how to do this differently than I do, so if you find that my way does not work for you, try the illustrations in the Guide. Please use the above online video guides and not the How to Guide in the MySound app. There are errors in the app guides.
When starting from the Under Ear position of the headphones, you’ll first want to start by rotating the headphones up so that the cord is oriented upward when on a flat surface and then flipping them over so that the earphone that now goes into your left ear has the remote on the left side (as shown in the first photo above). You’ll also have to remove the fins (that is, if you had them installed for the “Under Ear Fit”) so that the “L” fin is on the left and the “R” fin is on the right making sure to lay them out so that the side-to-side curve of the fins will still curve toward the sides of your head and the tip of the fins will point toward the front of your body (toward the flat surface). Your layout should look like the layout in the first photo above with the left fin, left ear tip, and left earphone on the left side and the right fin, right ear tip, and right earphone on the right side of your flat surface. Now all you have to do is just slip the fins on over their respective earphones. Then finally, install the ear tips. But wait, that’s not all…
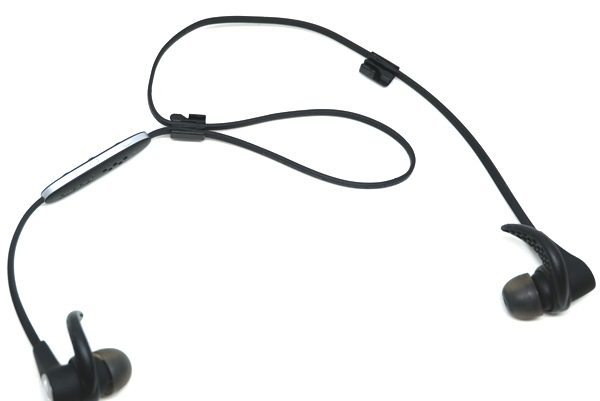
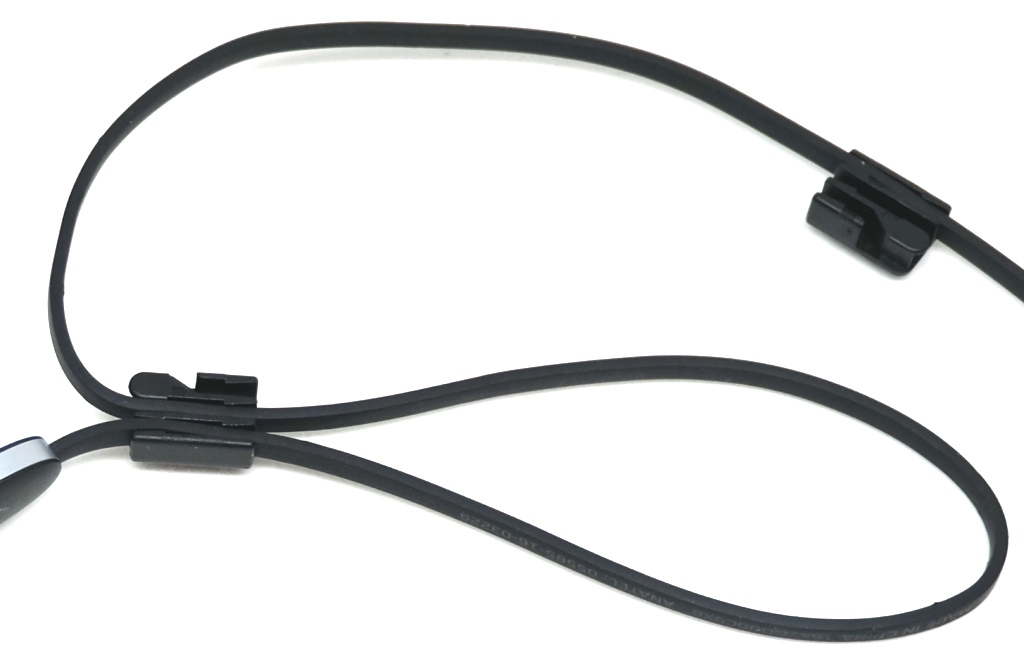
…now you need to install the cord clips. 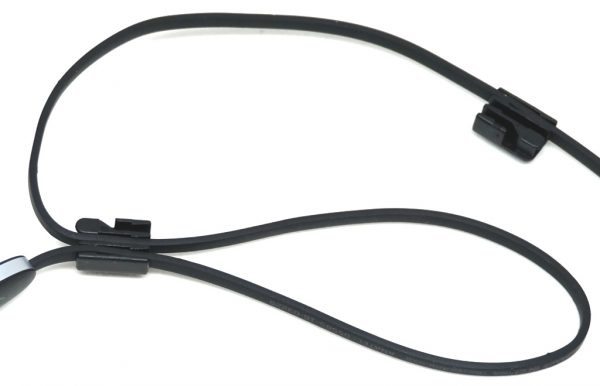
To install the clips, you’ll still want to keep the earphones such that the cord is oriented upwards on your flat surface. You’ll want to form and “S” loop configuration to take up the slack in the cord that will go around the back of your head when wearing the earphones in the Over Ear configuration. You’ll use the two hard plastic cord clips provided with your Jaybird X3s. Look carefully at the clips and their orientation in the photo above. There are three channels in each clip in which to insert the earphones cord. Two of the channels are straight and the third has a slope. Make sure that the clip that you have on the left side (as shown in the photo above) is oriented so that the curved channel is located in the upward position with the curve sloping downward and to the right and that the clip that you have on the right side (as shown in the photo above) has its curved channel oriented in a downward position with the curve sloping upward and to the left. Now you can start to insert the cord into the straight channels of the clips, adjust them to your desired length so that there is no excess slack in the back of your head, then insert the last loop into the sloping channels so that it looks like the photo above.
Your final Over Ear setup should look like the above photo. Just in case it’s not clear, the tips of the ear fins are touching the flat surface on which they were photographed. The earphone that goes into your left ear is shown on the left in the above photo and the one that goes into your right ear is shown on the right in the above photo. After completing this, you may want to go into the MySound app and switch the left and right channels (discussed later).
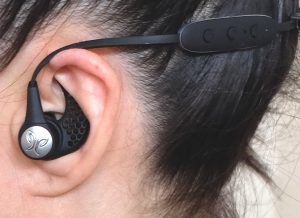
The above photos illustrate the look of the Over Ear fit.
I found that the notches in the clips that hold the cord inside the clips left slight gouges in the earphone cord’s silicone coating after removing them, which I found frustrating. I will not be using the clips – at all.
Jaybird MySound app: I downloaded the MySound app onto my Nexus 6 and iPod Touch 6G. This app is what clearly makes the X3 earbuds my new favorite earbuds because you can create your own equalizer presets. NOTE: This app only works with the Jaybird X3 and Freedom earphones. The Jaybird website states, “No more complaints of too much or not enough bass. Now you can customize the way your X3’s sound and save those custom sound profiles to your buds, no matter what music device they’re paired with or what music service you use.” Everyone has different sound preferences and this app makes it possible for everyone to create and save their own equalizer preference presets and save one directly to your X3 (or Freedom) earbuds to use when connected to any mobile device and listening to any music/movie apps or streaming services. Since the sound preset is saved directly to the earphones, your X3s will use that sound preference on any device and for all of your music and movie apps. If you want to change that particular sound profile, you just open the MySound app, make sure that the app connects to your X3s, and then select any of your other saved sound profiles. You must create an account in order to access your sound presets across devices.
Most of the screenshots come from my iPod Touch 6G unless otherwise stated. There are some slight differences between the iOS and Android apps which I will point out a little later.
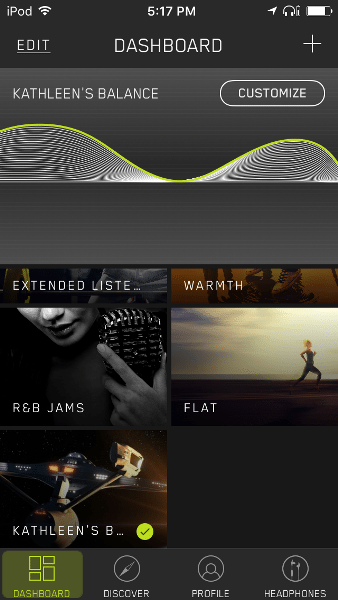
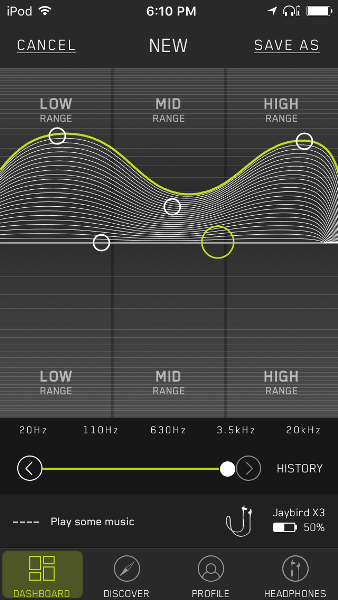
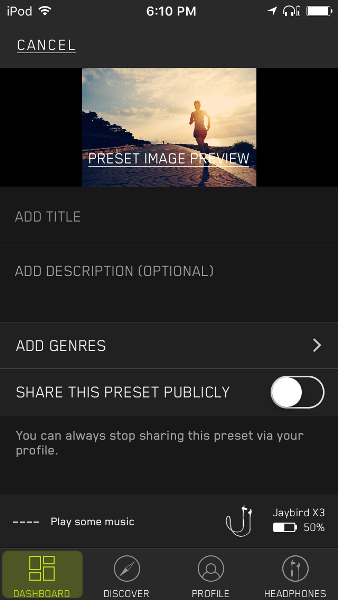
To create my own sound profile, I tapped on the “+” icon located at the top right of the MySound Dashboard. The next screen allowed me to adjust the frequencies to the levels that I prefer, after which I tapped on the Save As button located at the upper right of the screen. I then named my preset and could add a description and music genres, and I could select whether or not to share it with other X3 or Freedom headphone users.

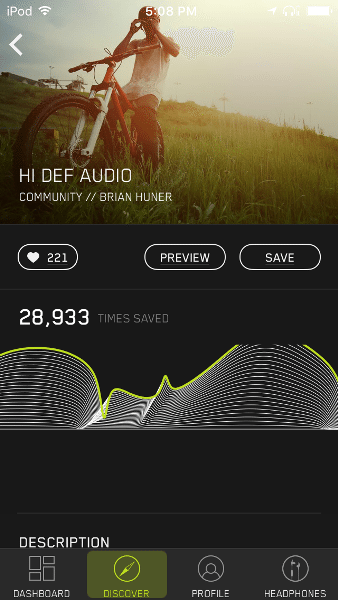
By tapping on the Discover button located along the bottom of the app screen (iOS app), I could look around and try out the sound profiles created and saved by other X3 and Freedom headphones users. I could preview the sound of another’s sound preferences by tapping on the Preview button (I needed to be playing music to preview) and if I liked it, I could save it to my dashboard.
The Profile button displays all of your personally created sound profiles and your name and email address (not shown). From the Profile settings, you can change your avatar, your name, your email address, and your password.
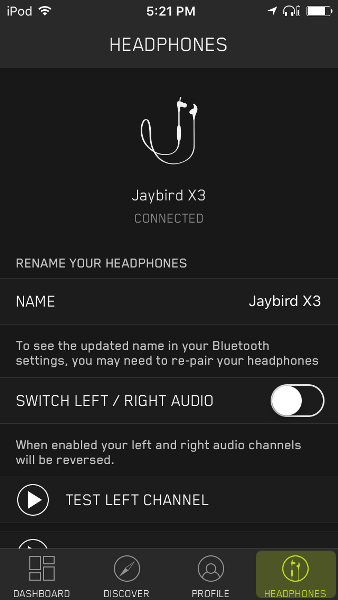
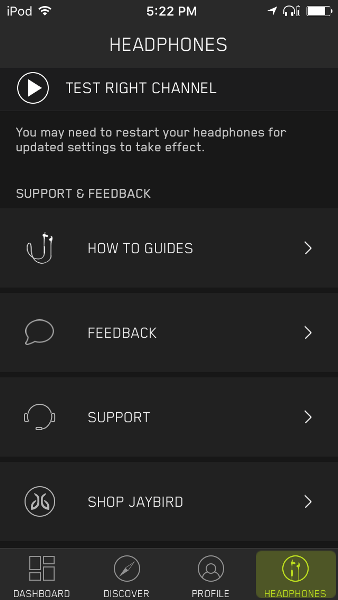
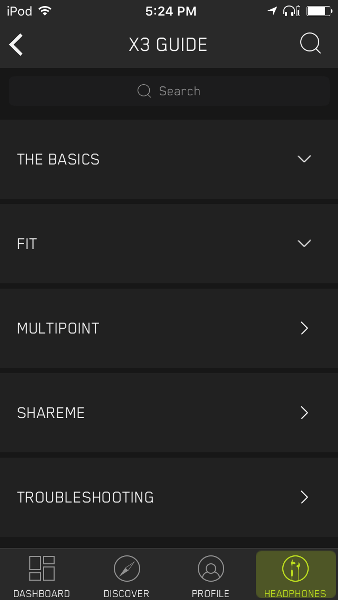
The Headphones button located along the bottom of the app screen allows you to change the name of your X3s, switch the left and right audio channels and test them (this is where you want to switch the channels if you wear your earbuds in the Over Ear position), peruse the How To Guides for the X3s and Freedom headphones, give feedback or seek support for your headphones, or shop Jaybird (shown in the center screenshot). The last screenshot shows all the information provided in the X3 How to Guide within the app.
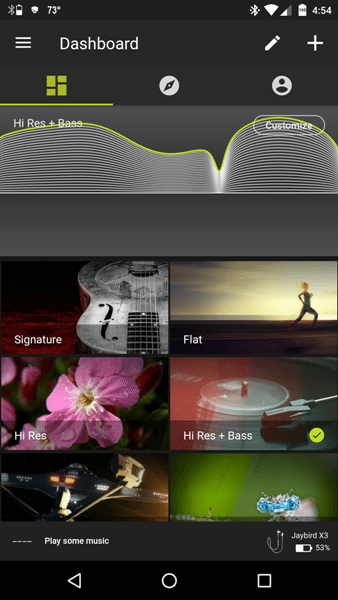
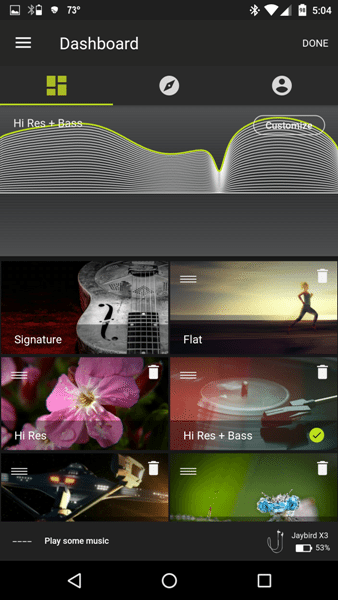
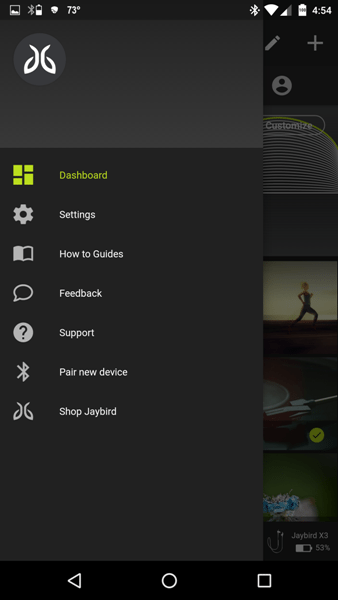
The above screenshots are taken from my Nexus 6 phone. The dashboard looks almost identical to the iOS app, however, to edit your dashboard, you must select the Pencil icon located in the upper right corner of the screen. It then brings up the option to arrange or delete your dashboard sound presets (notice the Reorder icon and the Delete icon that shows up in each profile). Also, notice Discover tab as identified by the Compass icon located under the word “Dashboard”. This is where you’ll go to discover other user’s sound profiles. To the right of the Discover tab, is the Profile tab. The menu icon located in the upper left corner of the Dashboard (the first screenshot above) allows you access to Settings, How to Guides, Support, etc. (shown in the last screenshot).
When using the MySound apps simultaneously on both my iPod and Nexus 6, I found that the apps seemed to interfere with each other. In general, the app needs to connect to the X3 earbuds in order to save a different sound profile to the earphones. I often found that I needed to open and close the app on my Nexus 6 in order for the iOS app to connect to the X3s or, on a rare occasion, I needed to disconnect the earphones from my Nexus 6 Bluetooth and open and close the app on my Nexus 6 in order for the iOS app to connect to the X3s. In only a couple of instances, I was able to connect the X3s within each of the apps simultaneously. By default, it appeared that the Android app would take precedence over the iOS app when connecting to the earphones.
Music Controls: To Power on the X3 headphones, I needed to long press the Power button for about two seconds until I heard a voice prompt say, “Power On”. To turn them off, I needed to long press the Power button for about four seconds until I heard the voice prompt say, “Power Off” (holding the Power button for only two seconds will activate the voice commands feature for which you will hear a beep). A short press of the Power button allowed me to pause/play music or movies when using Pandora, Netflix, Amazon Video, or when listening to music on local storage on both of my devices. This did not always work with video streaming apps. A short press of the Volume Up or Down buttons were all that was needed to increase or decrease the volume when listening to music or watching streamed movies. The volume buttons were also synchronized with each of my devices. If you short press the Volume Up or Down buttons when not listening to anything, a voice prompt will announce the battery level. While listening to music, a two-second long press of the Volume Up button skipped ahead a song and a two-second long press of the Volume Down button skipped back a song.
Playing Time: The playback time of the Jaybird X3s was awesome. I generally listen to all my media at a moderate (middle) volume level which allowed me to play about 8.5 hours of music or movies in my tests. Awwwwesoooome! (sing song voice). The LED will blink a single green flash when the battery is more than 10% and blink a single red flash when 10% or less according to the User Guide, but I did not notice this because I was wearing the headphones.
Charging: The User Guide on the Jaybird MySound app states that 2.5 hours of charging time will yield eight hours of playing time and that you should never use a charger that uses more than 5.5V which will damage the earbuds. I found that when connected to an Aukey multiport desktop charger (5V/2.4A max – variable power output according to the device’s needs), I was able to charge my X3s in a little over 1.5 hours (one hour 35 minutes – one hour 40 minutes). Perhaps the 2.5 hours is the charging time when connected to a computer – I didn’t test this.
Calling Features: A short press of the Power button answers/accepts a call while another short press of the Power button ends a call. A two-second long press of the Power button will reject a call and a double press of the Power button will redial the last call made (as long as you are not already on a call). If you are on a call, you can accept another call and switch between them by double pressing the Power button. A short press of the Volume Up or Down buttons increased or decreased the volume accordingly. A two-second long press of the Volume Down button until you hear “Mute On” will mute your voice. A similar long press of the Volume Down button until you hear “Mute Off”, turns it off. All of these were tested and worked well. The only thing I noticed is that when calls came in, I did not always hear the ring tone through the earphones. Sometimes, the only reason I knew I had an incoming call was because I could hear my phone ringing.
As I listened to the voice of the person calling me through the X3s, I would describe sound quality as very nice but dependent upon the caller’s phone – the higher end phones sounded better than the inexpensive phones. One of my callers informed me that I sounded a bit more tinny when using the X3s than when I am using my phone, but it is still very clear.
Frequency Response: When using my Audio Test Tone Generator app by Digital Antics, I could clearly detect 20 hertz when the earphones were set at a moderate volume level. I could only detect up to 15,000 hertz because of my limited hearing capacity for the upper frequencies but my kids could detect up to 18000 hertz, beyond that it sounded quiet and “fuzzy”.
Audio Quality: The factory setting of the Jaybird X3 headphones had good audio quality. Even though I am not an audiophile, I would describe the sound as balanced. The high and mid frequencies were crisp and clear though for me it was almost too sharp. The bass frequencies weren’t quite as strong as I prefer. However, after downloading and creating my own or altering the equalizer presets of other X3/Freedom users, I found that the sound was incredible. I tended to like one sound preset for most music and thus tapped on that one to select it which saved it to my earphones. If I wanted to switch to another preset, all I had to do was open the app, make sure the app connected to my X3s, then select another preset in the app. The last preset you select is the one that is saved to the earbuds and used for all of your music until you select another in the MySound app. I really liked this because Android 6.0.1 does not allow you to use third party equalizers and thus you are stuck with the default sound signature of your earphones (unless you mod your Android phone and install a custom ROM).
Once I found the sound preferences that I liked, I was able to thoroughly enjoy all genres of music. I tended to use and enjoy the “Hi Res” preset for most of my music (I added additional bass). This equalizer preset was created by another user and is characterized as having most of the frequencies boosted with a slight dampening of the 3.5 kHz range. I used this preset to listen to classic rock music like Bob Seger’s “Famous Final Scene”, bass heavy music like “High Roller” from The Crystal Method, orchestral music like the “Closing Credits” (from the soundtrack to Glory) by The Boys Choir of Harlem, and the theme of the AMC TV show “Halt and Catch Fire” which sounded fantastic. I selected another preset that dampened the middle frequencies more to take some of the harsh edge off of the tapping of the cymbal when listening to “No” by Megan Trainor. All was perfection with my favorite sound presets selected.
One thing that I noticed when using the X3s was that I experienced some lag when watching Netflix on my iPod Touch 6G. The X3s were initially off by a very noticeable amount of time. However, within a few minutes, things seem to correct themselves. I only experienced this a couple of times. All other times, the sound through the X3s were in sync with the video. This was never an issue when using the X3s with my Nexus 6 and watching video streaming apps.
Final Thoughts
The Jaybird X3 Wireless Bluetooth headphones are now my favorite Bluetooth earbuds. The MySound app is the reason I love them because I can create my own equalizer sound preference(s) and save it directly to the earbuds. If I want to change to another preset, I just tap on another within the app and I’m good to go. This makes any genre of music sound great. I also love that I can use these earbuds for about 8.5 hours when the headphones are set at a moderate volume level. The music controls and the calling features all work well, the Bluetooth range was excellent, and charging time was blazingly fast (1.5 hours to fully charge). The X3s were comfortable (once I found the correct fit) for up to two hours before starting to make my ears sore. They also stayed in my ears very well while doing high impact workouts.
What did I not like? Well, it takes just a few seconds longer to insert the earphones into my ears to get a good fit and a good seal around my ear canals when compared to using my MPOW Swift earphones which take literally a second to insert. The X3s also use a proprietary charging cable that can easily be lost. The Bluetooth connectivity of the X3s drops out a few times during each workout because my body (shoulder or arm) gets in the way of the inline remote and the device to which the earphones are connected. In addition, there were a couple of times that my sound and video were out of sync when using my X3s with my iPod Touch 6G but only a couple of times. I also found that the cord clips gouge slight nicks into the silicone covering of the earphones’ cord when removing them. And finally, the Jaybird X3s are about five times the cost of my MPOW Swift Bluetooth 4.0 headphones. Are they five times better? Maybe not. The MPOW Swift earbuds are a great value for the money but are missing the slightly more crisp clear mid and upper frequency sounds of the X3s. Even with these issues, I still love the Jaybird X3 Wireless Bluetooth headphones simply because I get to choose my sound preferences! If you have the money to purchase the X3s, I don’t think you will be disappointed.
Source: The sample used in this review was provided by Jaybird. Please visit their website for more information or Amazon to purchase them.
Product Information
| Price: |
$129.99 |
| Manufacturer: |
Jaybird |
| Retailer: |
Amazon |
| Requirements: |
- Any A2DP Bluetooth stereo device
- MySound app requires: iOS 9+ (except iPad 2), Android 4.4+
|
| Pros: |
- MySound app allows you to create and save your own sound preferences
- Crisp clear audio quality at all frequencies
- After finding the appropriate fit, the earbuds stay in well while exercising
- Playing time is 8.5 hours at moderate volume level
- Charging time was only 1.5 hours
|
| Cons: |
- Contains proprietary charging clip thus requiring you to take the clip with you – hopefully, you won't lose it
- Contains only passive noise isolation
- Fit was difficult to find
- Bluetooth was interrupted a few times during high impact workouts (my body got in the way)
- Sound was out of sync with my iPod Touch 6G only a couple of times when watching streamed videos
- The cord clips nicked my X3s cord
|
Filed in categories: Audio, Video, TV, Bluetooth Gear, Reviews
Tagged: Bluetooth headphones
Jaybird X3 Wireless Bluetooth Headphones review originally appeared on on March 16, 2017 at 4:31 pm.
Note: If you are subscribed to this feed through FeedBurner, please switch to our native feed URL http://the-gadgeteer.com/feed/ in order to ensure continuous delivery.