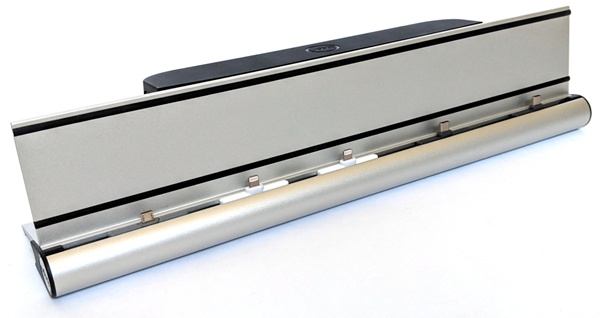
 REVIEW – We have so many mobile devices that it is a challenge to charge them in an organized fashion. I’m always on the lookout for interesting ways to accomplish this task. When the Udoq Docking System was offered to the Gadgeteer for review I was struck by its clean lines and simplicity and so I jumped at the chance to review it. I gave it a try and found that it is indeed beautiful, but it is expensive and my USB-C phones didn’t always charge.
What is it?
The Udoq Docking System is a charging docking station for mobile devices (including phones, tablets, and Apple watches) that will keep your devices and charging cables tidy. The height of the cables’ connectors is adjustable and thus will work with many cases on your devices.
What’s in the box?
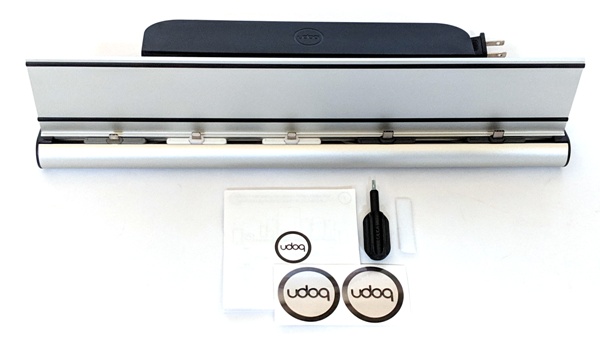 The Udoq Docking System shown above contains all of the following items which are sold separately:
- Udoc 400 rail (universal aluminum docking station for Apple and Android mobile devices) – $115
- User Manual
- Udoc tool
- White hook-and-loop cable ties
- Udoc stickers
- Cable Box S – $10.90
- 5-port Charger – $24.90
- C Cable (USB-C cable) – two for $31.80 ($15.90 each)
- L Cable (Lightning cable) – two for $35.80 ($17.90 each)
- M Cable (micro USB cable) – one for $10.90
Hardware Specs
- Udoc 400 rail (universal aluminum docking station for Apple and Android mobile devices)
- made of aluminum
- 400 mm long (15.75″)
- two black silicone strips that run the length of the back of the docking station to prevent devices from slipping or getting scratched
- Cable Box S
- offers space for cables and the 5-port charger (Does NOT fit the 6-port charger!)
- compatible with wall mount and Apple Watch Adapter
- is snapped into the cable opening at the backside of the Udoq rail
- a large lid gives easy access to cables and charger
- offers three large openings to route cables outside the back
- made from heat resistant ABS
- compatible with all Udoqs
- Inner dimensions: ca. 200 x 42 x 65 mm
- 5-port Charger
- Advanced Charging Technology: Overload protection, overcharging protection, overcurrent protection, over temperature protection, shortcut protection.
- Solid black plastic housing
- 5ft (150 cm) detachable power cord
- AC 100-240 V input for worldwide use
- 4 USB 2.0 ports with 5 V, 2.4 A per port, enabling fast and simultaneous multi-device charging
- 1 extra USB port with Qualcomm Quick Charge 3.0 Output: 3.6 V – 6.5 V/3 A, 6.5 V – 9 V/2 A, 9 V – 12 V/1.5 A
- Compact size: 2.4 x 3.5 x 1.2 in, (6 x 9 x 3 cm)
- C Cable (USB-C cable)
- USB Type-C 3.1 to USB-A (Standard USB Connector)
- Cable length: 150 cm (5 ft.)
- Color of cable: white
- Color of adapter: dark gray
- L Cable (Lightning cable)
- Certification Apple MFI
- Cable length: 150 cm (5 ft.)
- Color of cable: white
- Color of adapter: white
- M Cable (micro USB cable)
- Micro USB 2.0 to USB-A (Standard USB Connector)
- Cable length: 150 cm (5 ft.)
- Color of cable: white
- Color of adapter: middle gray
Design and features
 Udoq provided me with the above pre-assembled docking station to review. It includes the Udoq 400 rail, Cable Box S, 5-port charger, two USB-C cables, two Lightning cables, and a micro USB cable. Each of these items is sold separately. Cha-ching. Udoq also has accessories that allow for wireless charging and allow you to charge your Apple Watch (see Udoq accessories).
The Udoq 400 rail measures 400 mm (15.75″) and is made of a nice matte aluminum – not plastic. It has two black silicone strips that run the length of the back of the rail to prevent devices from slipping or getting scratched.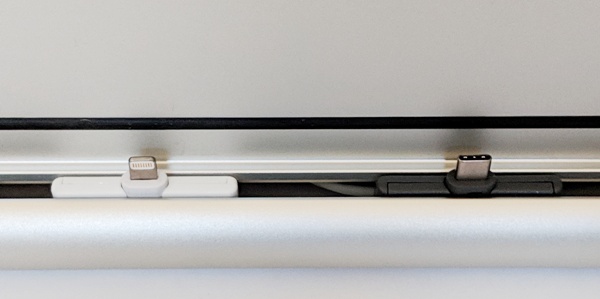
Each of the cables sits in a track and can slide along the length of the track to accommodate your devices.
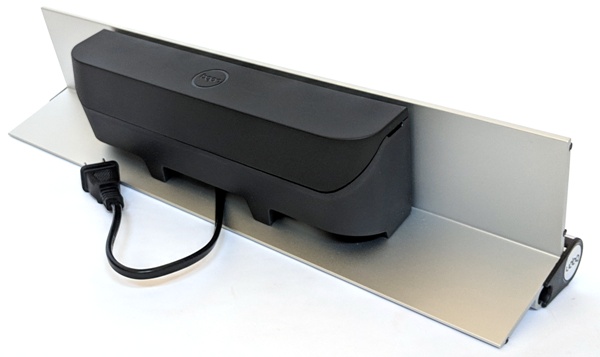 The Cable Box S is made of matte black plastic and is attached to the rear of the docking station. It sits just below the level of the Udoq rail.
Setup
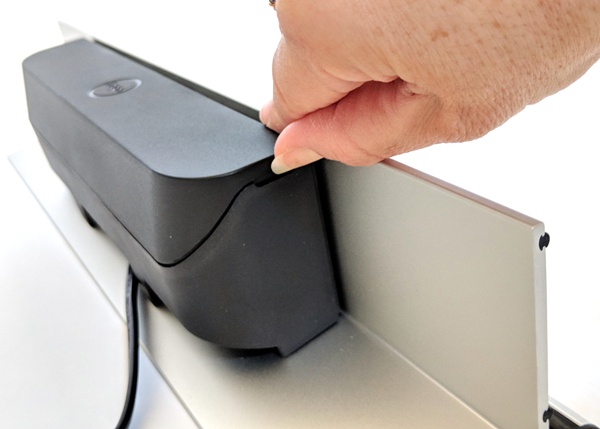 The lid of the cable box is easily removed by using the notches on the side of the box.
 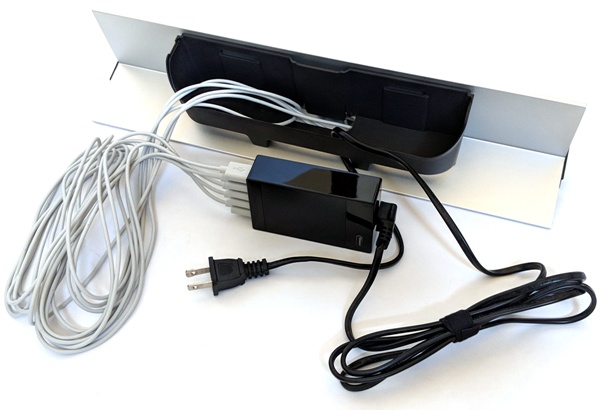 The box accommodates quite a lot. My box was full with the charger and all of the cables (shown above). The Udoq charging cables are all 5 ft. long (150 cm) as is the multiport charger’s power cord.
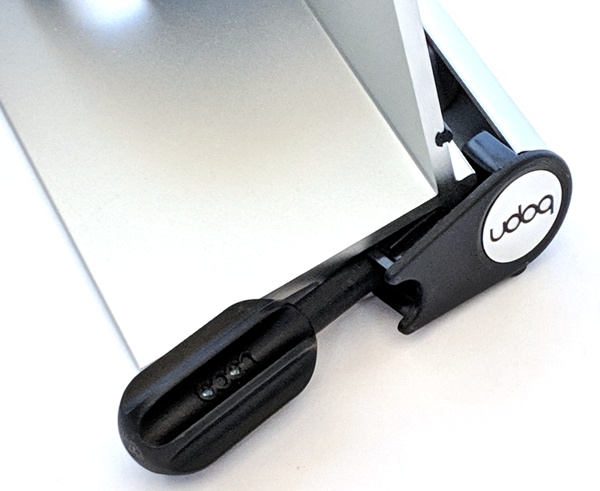 To gain a better understanding of how the Udoq charging station was put together, I pried the endcaps off the of the rail using the tool that Udoq provided.
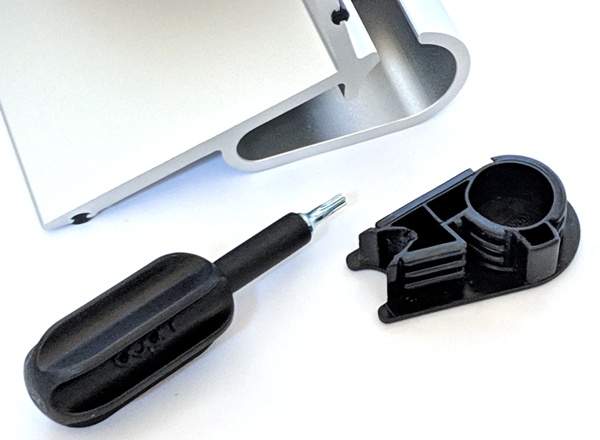 The end caps fit snugly but were easy enough to pry off with the tool.
 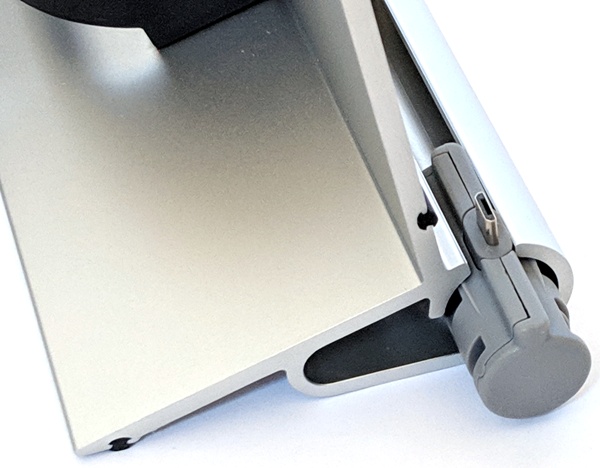 Each charging cable was mounted in a plastic adapter that allowed it to fit snugly and slide inside the track of Udoq rail.
 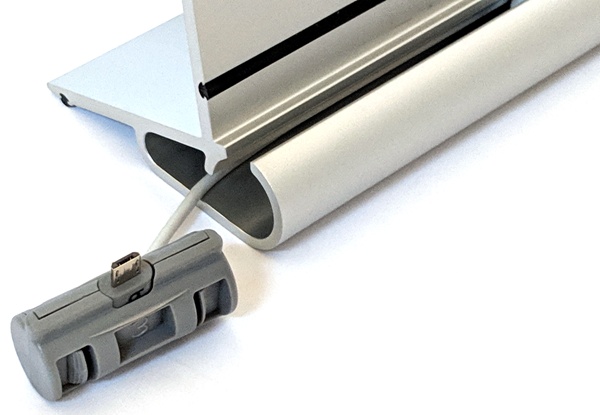 Each adapter can be taken out of the Udoq rail.
 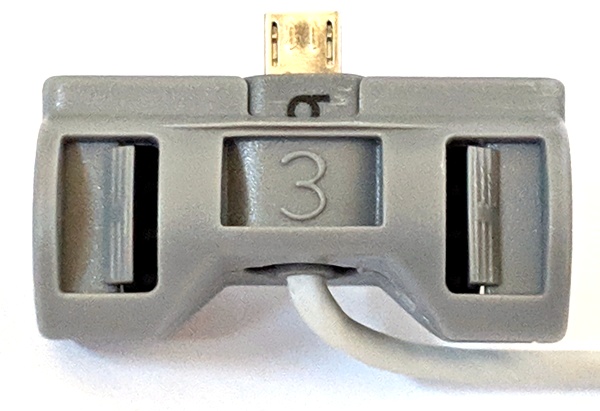 Each plastic adapter has two tabs on it.
 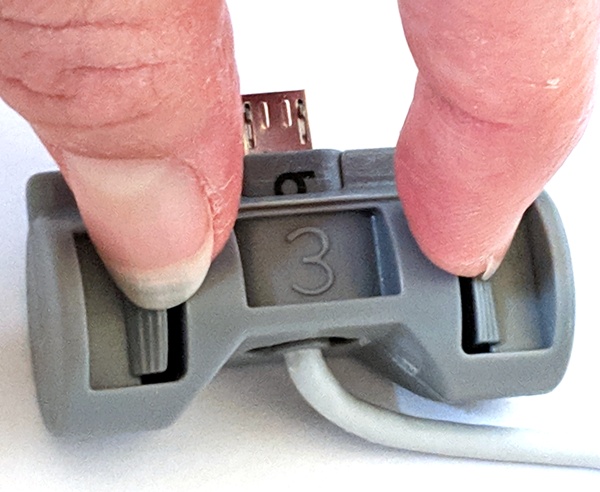 The adapter may be opened by squeezing the tabs together…
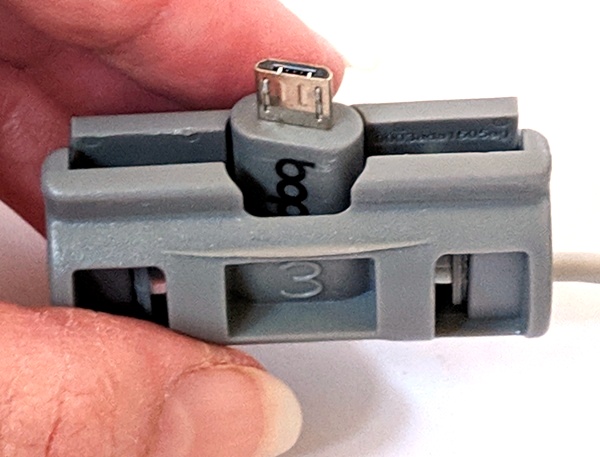 …then prying it apart.
 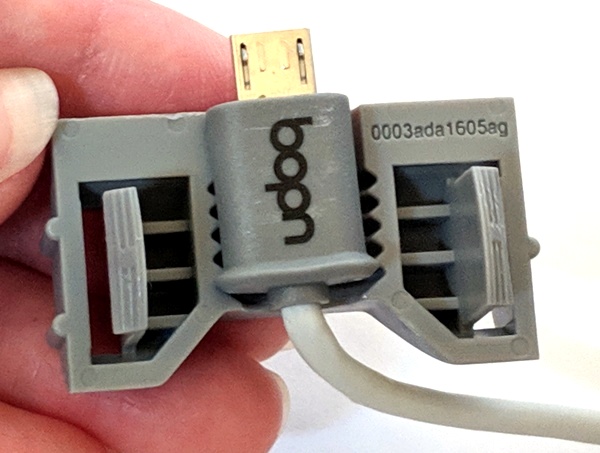 In the above photo, you can see that the charging cables’ connectors can be inserted into the adapter at different heights.
 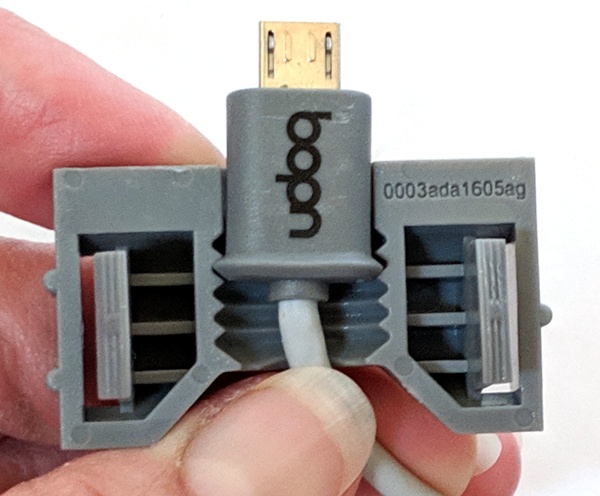 You can move the charging cable up in the adapter to get past a thick case on your device if needed.
 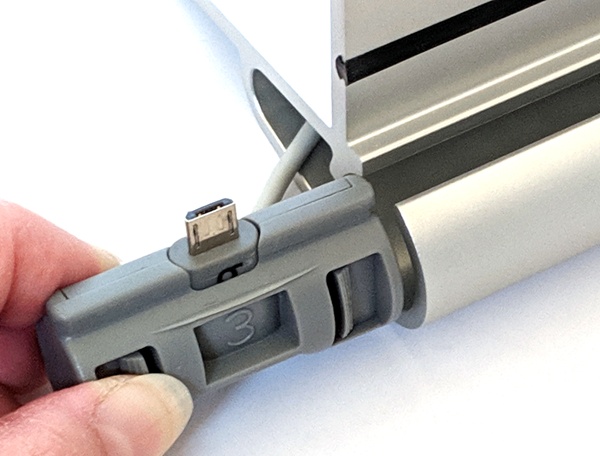 When you are finished with adjusting the height of the charging cable inside the adapter, you just replace the adapter’s cover and snap the pieces together.
 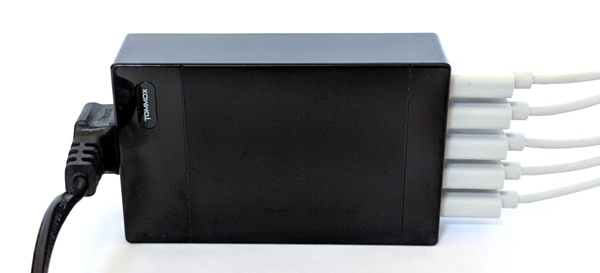 I received the 5-port charger from Udoq. It measures 3.75″ L x 2.32″ W x 1″ D (95 mm L x 59 mm W x 25 mm D). This ensured that the charger would fit inside the Udoq cable box (NOTE: the 6-port charger that Udoq sells does NOT fit inside the Udoq cable box).
 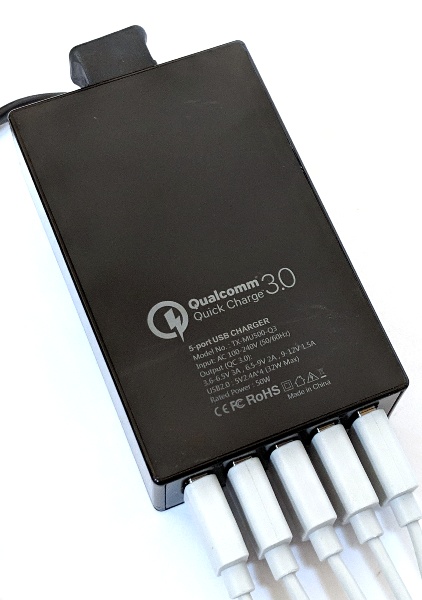 The 5-port charger has one port that provides Qualcomm Quick Charge 3.0 speeds: 3.6 V – 6.5 V/3 A, 6.5 V – 9 V/2 A, 9 V – 12 V/1.5 A. The other four ports provide 5 V 2.4 A.
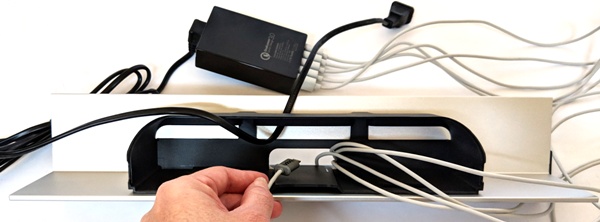
If you should need to assemble the Udoq Docking System on your own, you would simply insert all the USB-A ends of your Udoq charging cables into the 5-port charger and then feed the other ends of the cables in through the top of the cable box, then through the center opening located at the bottom of the cable box as shown above. 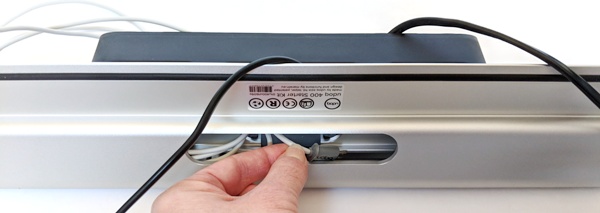 You would then grab each cable from the underside of the Udoq rail and feed it into the Udoq rail’s track as shown above.
 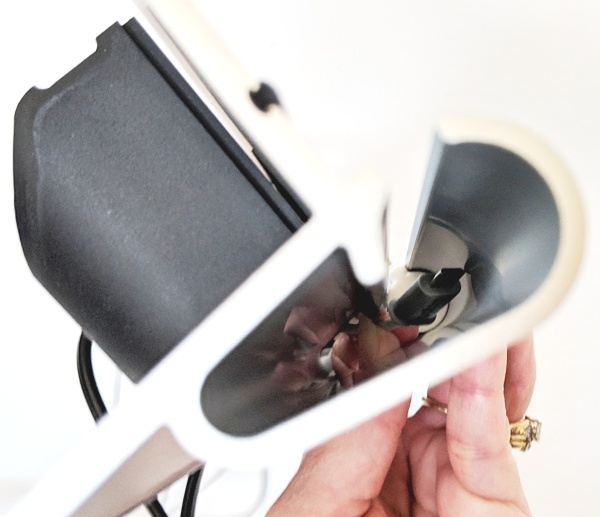 The above photo shows the cable in the Udoq track.
 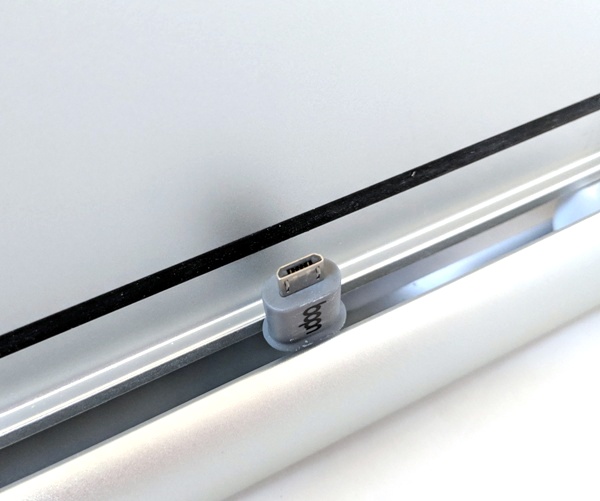 You would then need to pull the charging cable up and out of the rail’s track. And once it’s out of the track, you can insert the cable’s connector into its plastic adapter and slide it into the Udoq rail’s track.
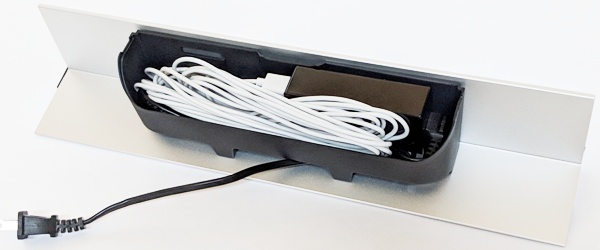
After all of the charging cables are inserted into the Udoq rail’s track, you can then reduce any of the charging cables’ slack in the track by pulling the excess cable length through the cable box. I then placed the 5-port charger into the cable box and coiled up all cables neatly to fit them into the box. This was a tight fit. Finally, I replaced the box’s lid.
Performance
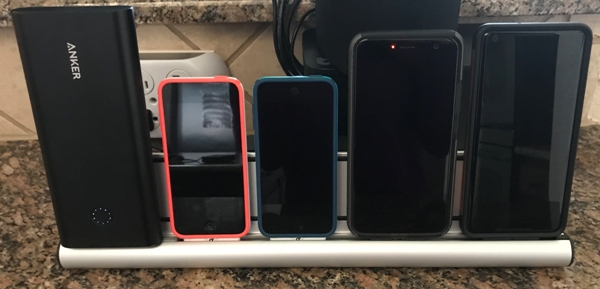 I really like how sleek and neat the Udoq Docking System is. However, I noticed that when I placed either of our USB-C phones into the charger using either USB-C cable, sometimes they would not charge even though the phones indicated that they were charging. I checked that the cables were inserted into the charger, that the charger was plugged in and receiving power (there is a small blue LED light on the 5-port charger indicating that it is powered on), and that the USB-C connector was seated high enough to be fully inserted into the USB-C port on my phone. Even after checking all of these things, I had to re-seat the phone on the USB-C connector before it would actually start to charge. When it did successfully charge, it did so more slowly than my phone’s OEM charger. All of the other devices charged just fine (iPod Touch 5G and 6G and an Anker portable battery).
There is one thing that I want to mention. I wanted to use the Udoq Docking System to charge my Anker portable battery and it just barely fit. There is only about 7 mm available between the charging cable connector and the back of the Udoq rail. In other words, if your device’s charging port is more than 7 mm from the edge of your device, it will not fit in this charging dock.
What I like
- The Udoq Docking System is sleek looking and keeps my devices and charging cables tidy while charging
- The Udoq rail is made of metal and not plastic
- It’s easy to use
- It accommodates devices with cases (the charging cable connector height is adjustable so that it can get past the thickness of the case)
What needs to be improved
- Charging of USB-C devices was inconsistent
- If your device’s charging port is more than 7 mm from the edge of your device, it will not fit in this charging dock
- Charging cables are proprietary – they must be purchased from Udoq
- Everything is sold separately, thus the Udoq Docking System is really expensive
Final thoughts
I really like the look of the Udoq Docking System. It keeps my devices and charging cables organized without taking up too much space. However, the Udoq rail, cable box, 5-port charger, and proprietary cables are all sold separately thus making this system very expensive. I also noticed that my USB-C devices sometimes did not charge. It was as though the device was not plugged in even though I checked my phone and it showed that it was connected and “charging”.
I really wanted this charging dock to work well because it looks so nice, but it wasn’t consistent in doing its job and it’s really expensive to boot. Thus my recommendation would be to pass on this charging docking station.
Price: $229.30 (includes: Udoq 400 rail, micro USB cable, two Lightning cables, two USB-C cables, cable box, and 5-port charger)
Where to buy: Udoq and Amazon
Source: The sample of this product was provided by Udoq
Filed in categories: Reviews
Tagged: Batteries and Chargers, charging dock
Udoq Docking System review originally appeared on The Gadgeteer on April 6, 2019 at 8:00 am.
Note: If you are subscribed to this feed through FeedBurner, please switch to our native feed URL http://the-gadgeteer.com/feed/ in order to ensure continuous delivery.


