In this tutorial, we’ll show how to access and browse the dark web. There is so much of the web hidden from the casual Internet user. Since many of these pages are inaccessible from Chrome, Firefox and other Internet browsers, you simply cannot hyperlink to them. If you visit a dark web link, you will only see a blank screen. Within the dark web, you will find exclusive content on cybersecurity, cryptocurrency, anonymous servers and legitimate websites banned by ISPs and governments. You can also send anonymous emails, access P2P links, engage in e-commerce and read scientific research papers, all the while preventing websites… Read more
Doogie S90 Modular Android smartphone review
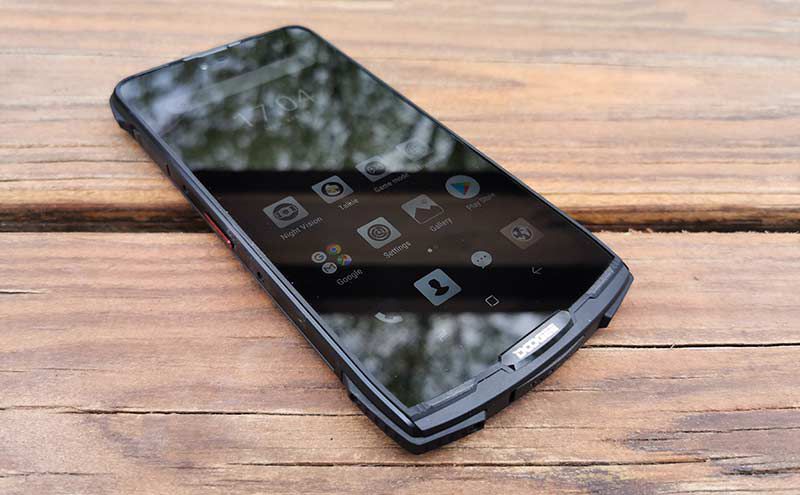
REVIEW – If you have a job that requires you to be outdoors in the elements, or in harsh environments, a ruggedized smartphone is a necessity. Trouble is that there just doesn’t seem to be many rugged smartphones on the market these days. I do have one to show you today though and it’s built like a tank on steroids. It’s the Doogee S90. Let’s check it out.
What is it?
The Doogee S90 is a ruggedized Android smartphone that isn’t just built to withstand tough environments, it’s also designed to be modular so that the functionality can be expanded.
Hardware specs
Processor: MediaTek Helio P60 octa-core 2Ghz
GPU: Mali G72 MP3 graphics processor running at up to 800MHz.
OS: Android 8.1 Oreo
Display: 6.18″ 1080 x 2246 pixels
Memory: 6GB RAM 128GB storage
Camera: 16 MP (rear) 8 MP (front)
Protection: IP68, IP69K, and MIL-STD-810G
Qi charging capability
Battery: 5050mAh
Height: 3.8 in Width 1.99 in
Weight: 10.8 oz. alone, 15.6 oz. with the extended battery module attached
What’s in the box?

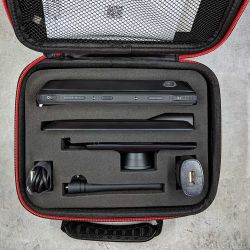
If you opt for the Super bundle, the S90 and modules come packaged in a zippered rigid suitcase which is a nice touch.
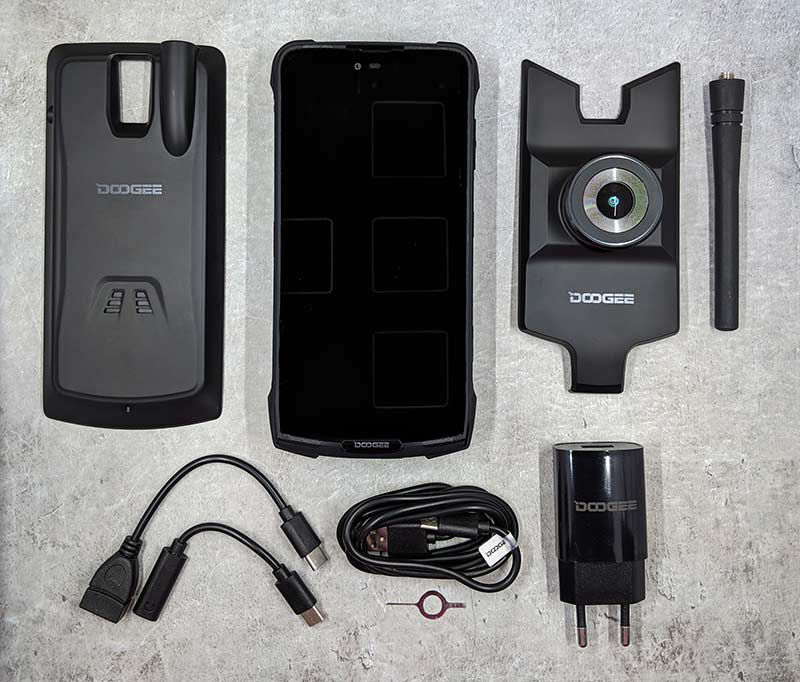
- Doogee S90 smartphone
- Extended 5000mAh battery module (installed on the camera in this photo)
- Night vision camera
- Walkie talkie module & antenna
- USB-C to OTG adapter
- USB-C to 3.5mm headphone jack adapter
- USB-C cable
- Power adapter (EU style)
- SIM card removal tool
Doogee is also going to offer a gamepad module but one wasn’t included with my review sample.
Design and features
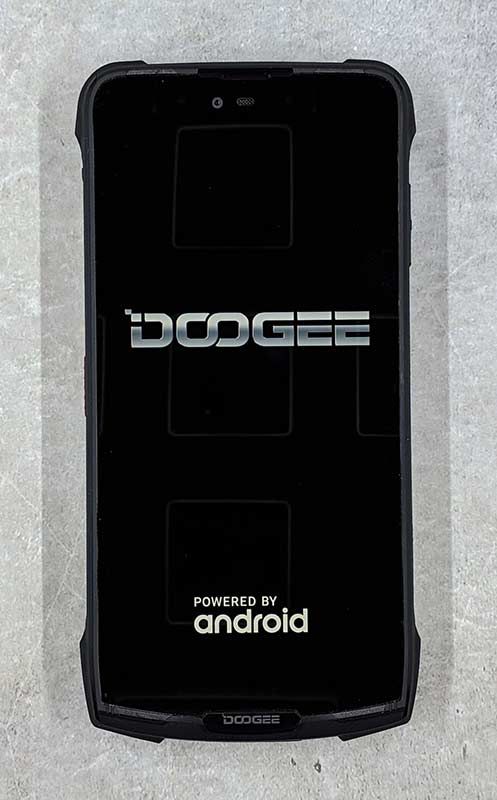
First of all, the Doogee S90 is probably not a phone that a typical person would want to buy because it’s quite heavy at about 11 ounces. The heft comes from the rugged housing. This phone is built like a tank. It has a raised metal frame around the display so that a fall on a flat surface won’t crack the screen.
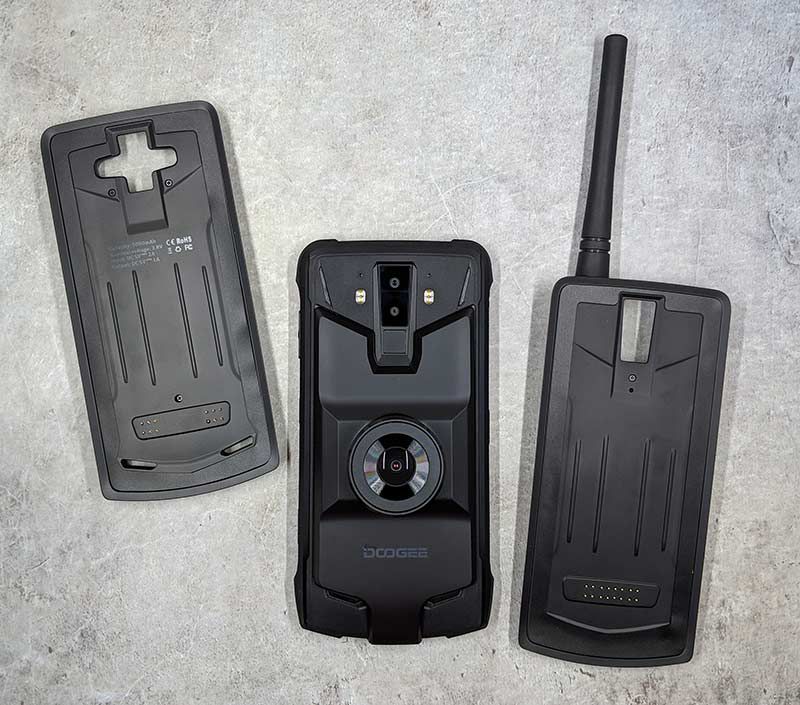
The back of the S90 is designed to allow for a variety of modules to attach to the back of the phone by using magnets to securely hold the module in place. This feature reminds me of Motorola moto mods for their moto Z series of Android smartphones.
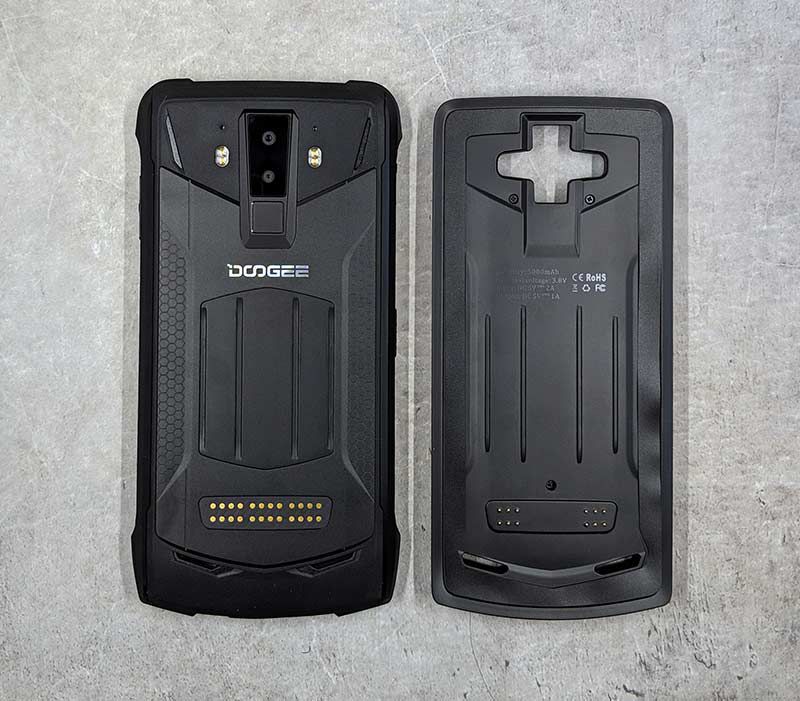
The back of the phone also has dual LEDs that turn the phone into a flashlight. Below the camera lenses is a fingerprint reader.
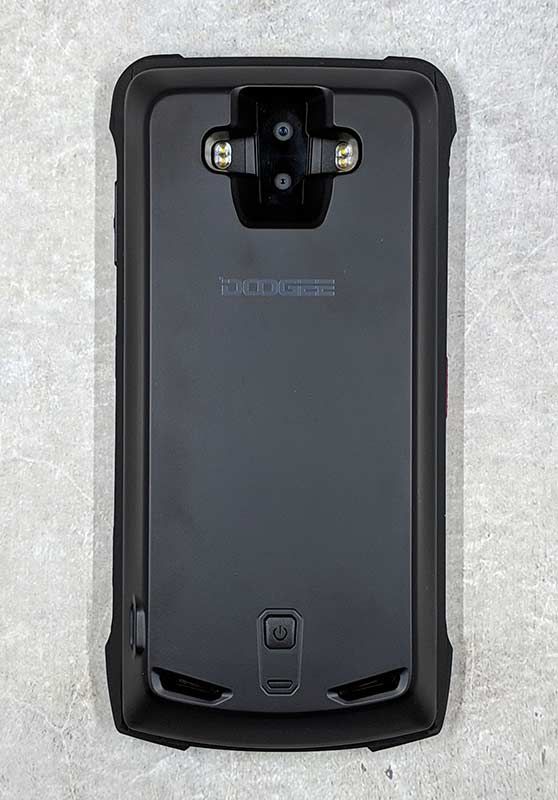
But the problem is that when you attach the extended battery module, the fingerprint reader is covered making it no longer accessible. This really didn’t bother me because, like many phones I’ve reviewed, the fingerprint reader didn’t work well for me.
By itself without any of the modules attached to the Doogee S90, the phone weighs 10.8 ounces, but add a module like the extended battery and oh boy, it becomes super heavy at 15.6 ounces which is practically a pound.
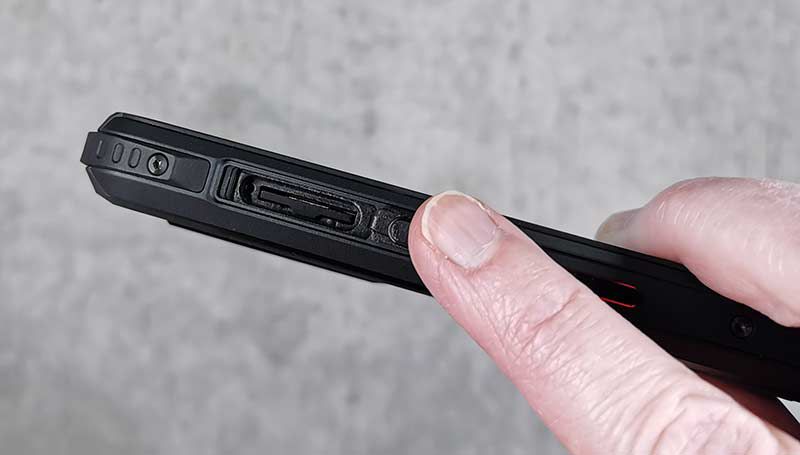
The left side of the phone has the SIM card and micro SD card tray. The tray is recessed which makes it harder to eject than traditional phones. Included with the phone is a special SIM ejection tool that has a little hook at the end that you can use to pull out the tray.
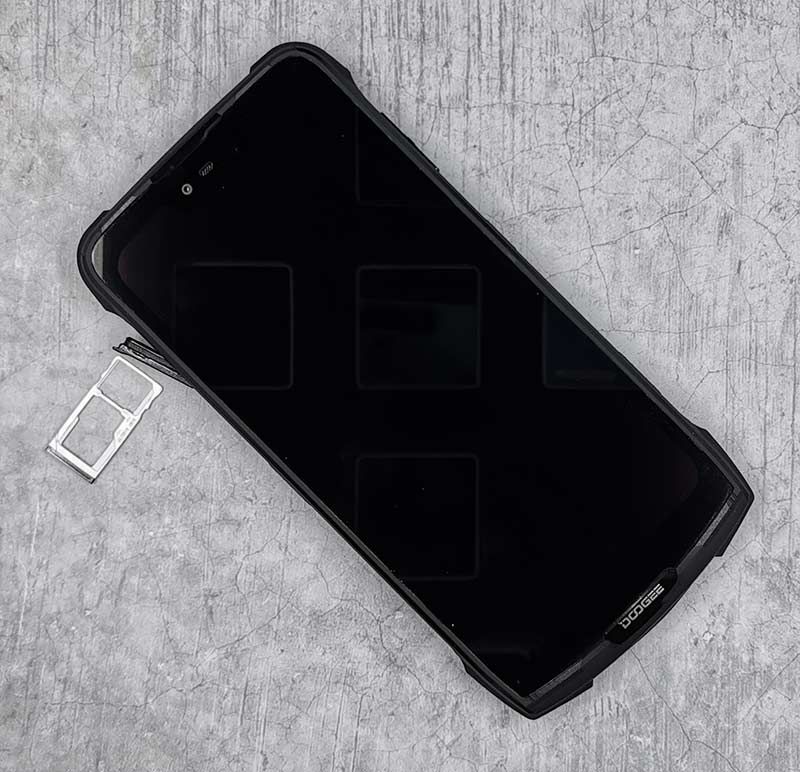
Be aware that the Doogee S90 is a GSM phone so it will only work with GSM carriers in the US like T-mobile and AT&T (sorry Verizon). I did all my testing with this phone on the T-mobile network.
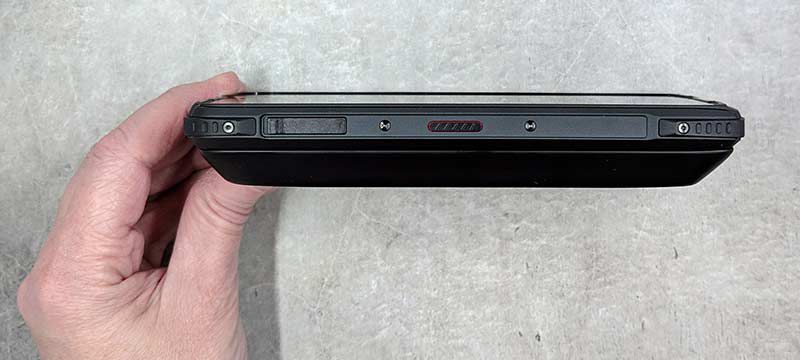
In addition to the SIM tray on the left side of the phone, there’s a custom key that you can program to perform shortcuts or launch apps. The key can be programmed to do different things based on one press, a double press, or a long press. It’s handy, for example, to program a double press to toggle the flashlight on and off.
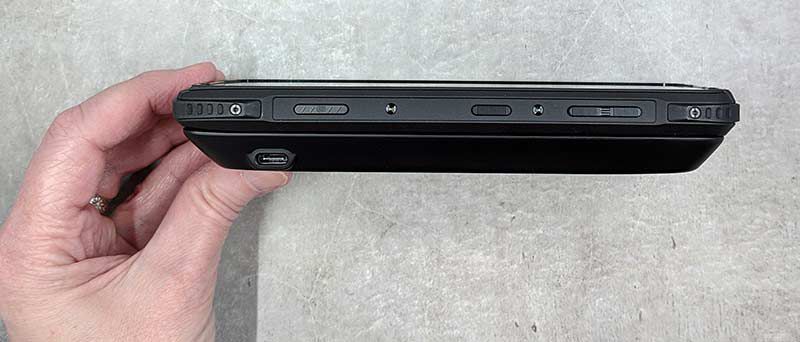
The opposite side of the phone has three buttons, the one on the left is a dedicated shutter button to snap a picture when the camera app is open. The middle button is the wake/power button, and the button on the right (which would be the top of the phone) is the up/down volume button.
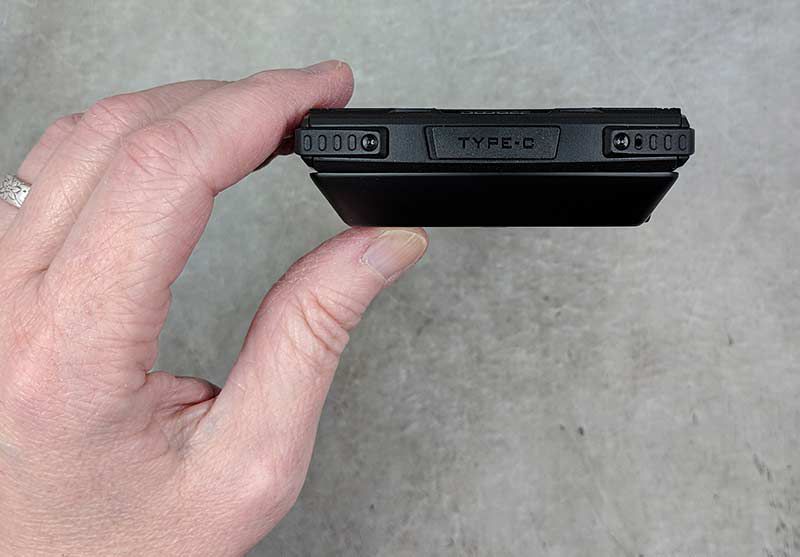
The ports on the S90 are protected from dirt and dust with covers, like the USB-C port on the bottom edge of the phone. Note in the image above, the extended battery module is attached to the phone.
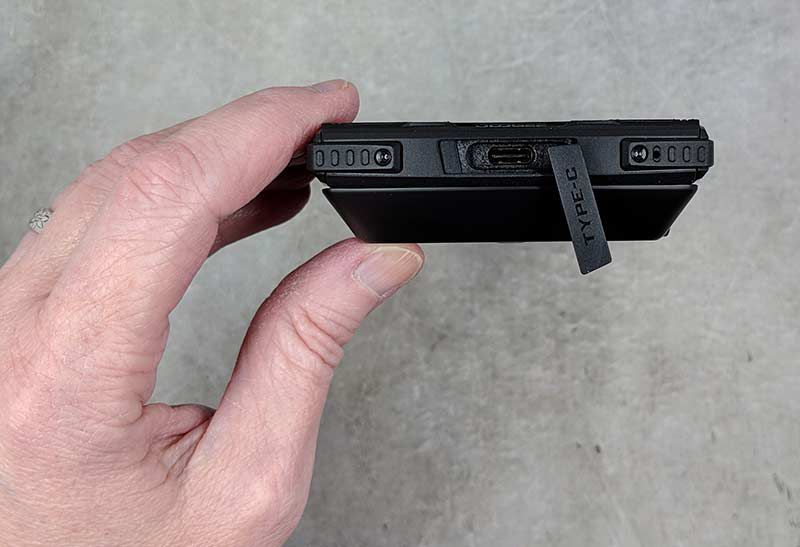
I find charging port covers to be annoying to use every time I want/need to charge the phone’s battery. Luckily, the S90 can also be charged wirelessly if you have a Qi wireless charger. Note, that you’ll need to remove the extended battery in order to charge the phone on a wireless charger.
Display
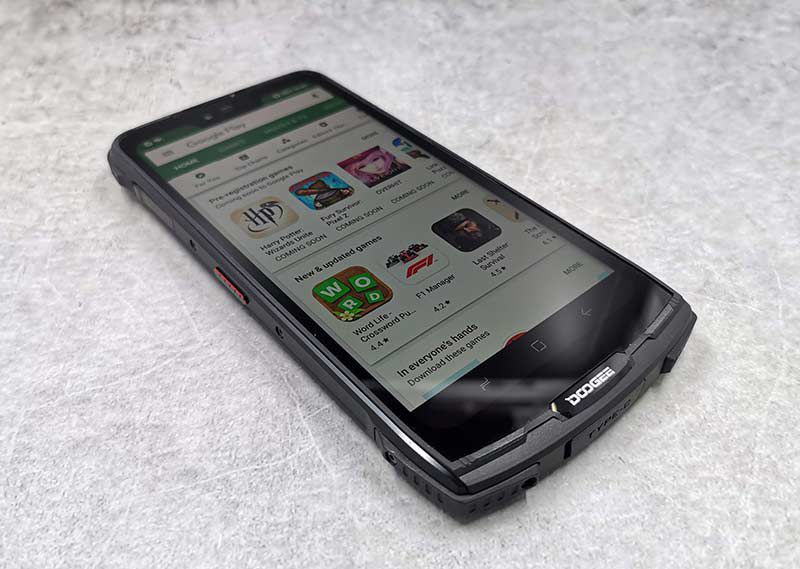
The S90’s display is bright, crisp, and has vivid colors. I had no issues with touchscreen sensitivity and I enjoyed watching video, reading text, etc while testing this phone. The display is very nice.
Audio quality
The S90’s speakers are located on the bottom part of the back of the phone. Even at full volume, audio sounds clear and crisp. I enjoyed listening to video using the built-in speakers. You might be wondering if the modules will block the speakers. I’m happy to report that the extended battery and the camera modules do not block the speakers. However, the walkie talkie module does cover them.
Camera
The Doogee’s camera does a respectable job and I was surprised by how nice the images turned out. I’m not going to trade the S90’s camera for the one in my Huawei P30 Pro, but the shots weren’t bad at all.
Modules
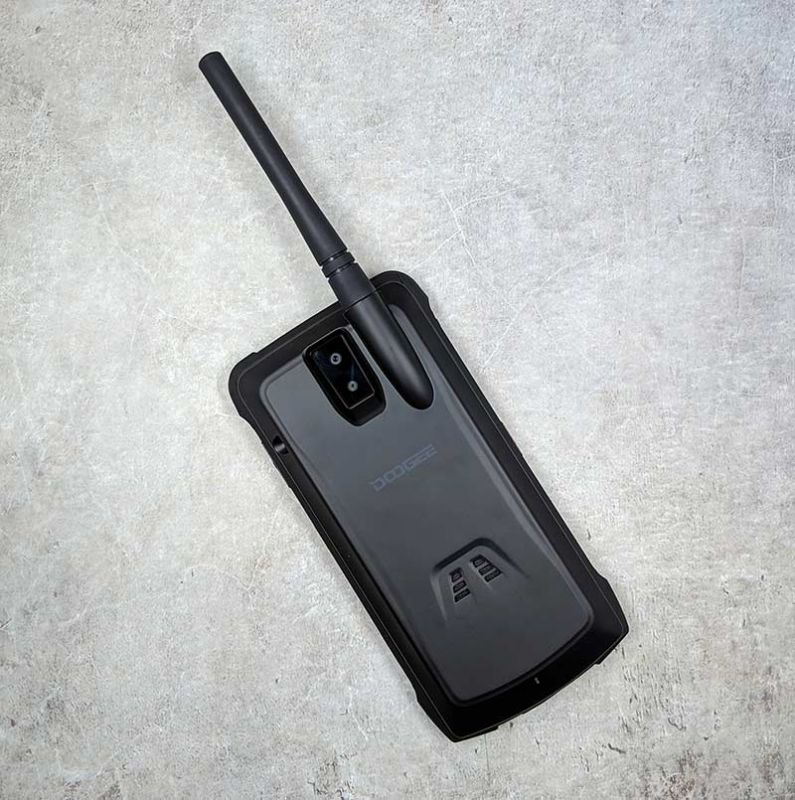
The walkie talkie module turns the phone into an app powered communicator that will let you listen and transmit on a frequency range from 409.75 mhz – 409.9875mhz.
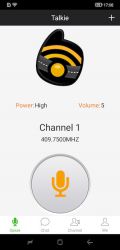
I played around with the module and the app but all the testing was one sided since I didn’t have anyone to talk to.
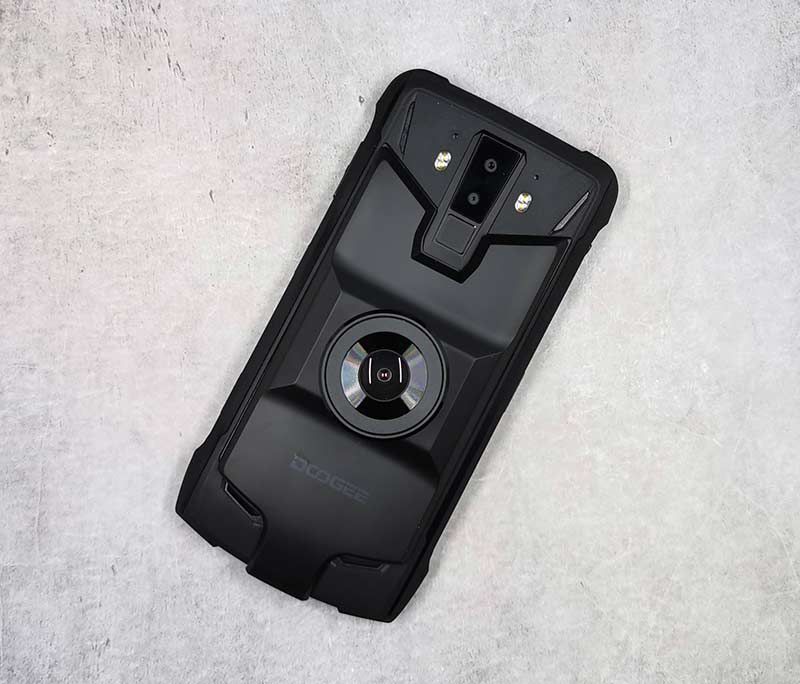
The night vision module is pretty cool. It’s able to take pictures in total darkness without using a flash. Here are some before and after samples.
The images are super grainy but still cool none the less.
Software and user interface
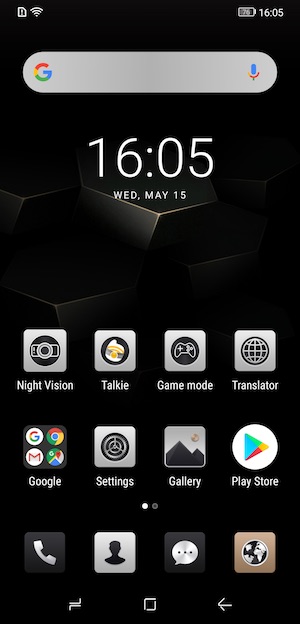
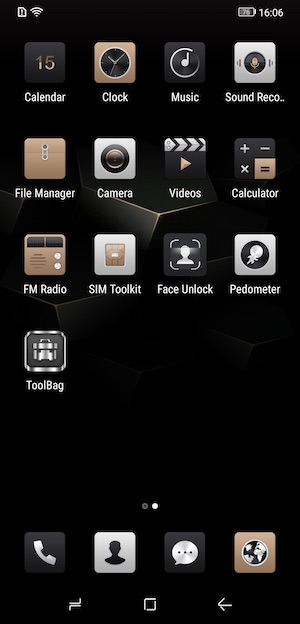
The S90 runs on Android v8.1.0 (Oreo) so it doesn’t have the latest version of the OS and it’s also not promised that it ever will receive any OS updates or even security updates. That said, the interface is relatively the same as regular Android if you don’t mind the silver, bronze, and black theme / icons.
Using the Doogee S90 for phone calls
I can’t comment on how well the S90 works on other networks like AT&T, but I didn’t have any major issues making and receiving calls on the T-mobile network with this phone except when I’m in my office (basement) of my house. For some reason, this phone seems to have issues holding on to the cell signal down there and on several occasions, people have tried to call me and have gotten my voice mail.
As far as call audio quality, the volume level and clarity on both sides of conversations have been just fine.
Overall performance and battery life using the Doogee S90 for day to day tasks
During a typical day, I don’t do anything too crazy with my phone. I use it to make and receive calls. Make and receive text messages, play a rousing game of Words With Friends, check my email, send emails, read books, surf, and occasionally watch a video on YouTube. For all those tasks, the S90 performed flawlessly. Apps open quickly, webpages load quickly, everything works at the speed I’ve come to expect from a smartphone.
When it comes to battery life, the Doogee S90 feels like it never runs out of juice. This is especially through if you use are using the phone with the extended battery module which adds an extra 5000 mAh to the phone’s built-in 5050 mAh battery. The phone will stay on standby for days and days between charges.
What I like
- Affordable
- Rugged
- Expandable with modules
What needs to be improved
- Heavy
- Allow the extended battery to charge wirelessly
Final thoughts
Should you buy the Doogee S90? That’s the $400 question. Why $400? That’s the price of this phone. Just going by price alone, the S90 is a decent deal. Especially when you consider how rugged the phone is and the great battery life when using the extended battery module. The issues with the phone come from not knowing if it will be supported with security and software updates. My guess is that it’s very doubtful it will ever get Android v9 (Pie). That means you’ll have to ask yourself if running the latest OS version is as important as an affordable rugged Android smartphone that comes with some interesting modules. I’ll be sticking with my Huawei P30 Pro and later in the year plan to get the latest Pixel. But that’s because I personally always want the latest and greatest. What about you? Would you consider a phone like the Doogee S90? Let us know in the comments below.
Price: $399.99
Where to buy: Doogee
Source: The sample for this review was provided by Doogee.
Filed in categories: Featured Items, Reviews
Tagged: Android, Smartphone
Doogie S90 Modular Android smartphone review originally appeared on The Gadgeteer on May 16, 2019 at 10:00 am.
Note: If you are subscribed to this feed through FeedBurner, please switch to our native feed URL http://the-gadgeteer.com/feed/ in order to ensure continuous delivery.
iMuto S5 Portable Solar Power Station review
REVIEW – Whenever I am out on a photo or video shoot, it is very important that I have a portable power source or power sources for my laptop, USB devices, and for charging and recharging numerous accessories. While there are many USB portable power packs available, many lack the versatility or the charge capacity to handle serving the power and charge needs for multiple devices and for extended periods of time. The iMuto S5 Portable Solar Power Station which just launched on Indiegogo looks like a possible solution and a game changer for me. Let’s see!!
What is it?
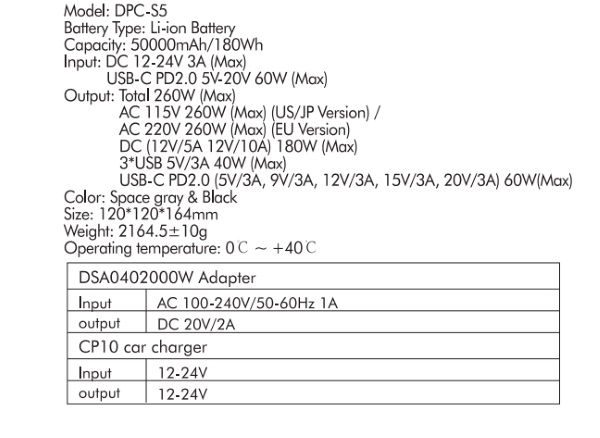
The iMuto S5 Portable Solar Power Station is a portable power solution that can power and recharge devices using common methods, such as an AC wall outlet, auto accessory power, or USB-C. It can also be charged and recharged via a solar panel using the power of the sun. It is lightweight and portable enough to be used for outdoor and indoor activities, and as standby emergency power in the case of a power outage or inaccessibility to a power source. Its features include 7 various power outlets for a total of 260W of power, all powered from its 50,000mAh built-in battery. It also has a built-in air cooling system that allows for safe charging, an intelligent Battery Management System to self-monitor, and built-in protection from overheating, overvoltage, and short circuits
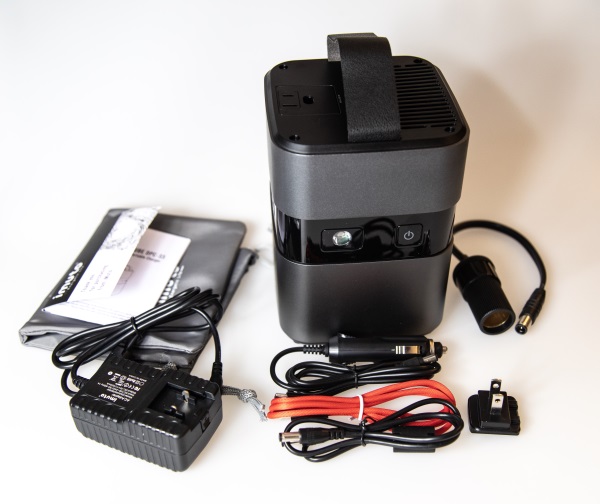
What’s in the box
1 x iMuto S5 Portable Solar Power Station
1 x AC Power Supply
1 x USB-C Cable
1 x 12V DC Outlet
1 x 12 Volt Auto Cable
1 x Accessory Cable
1 x User Guide
Design and features
Specifications
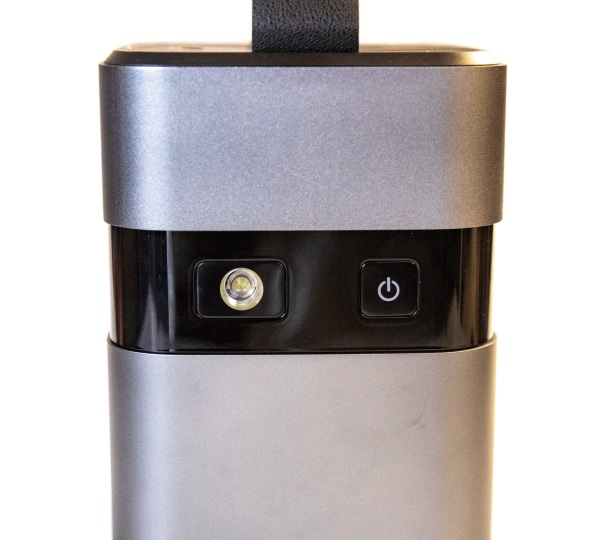
On the front of the iMuto, there is the power button that turns on the LED display and all of the ports except for the AC port that has a dedicated switch.
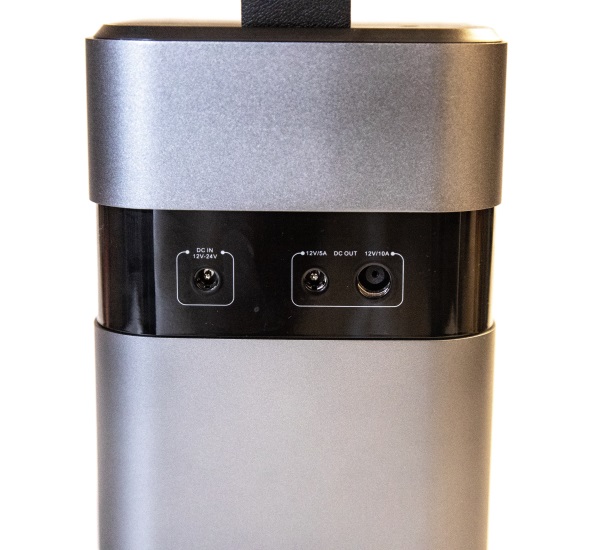
On one side there are 3 ports. From left to right as shown below there is the DC in charging port, and 2 DC out ports.
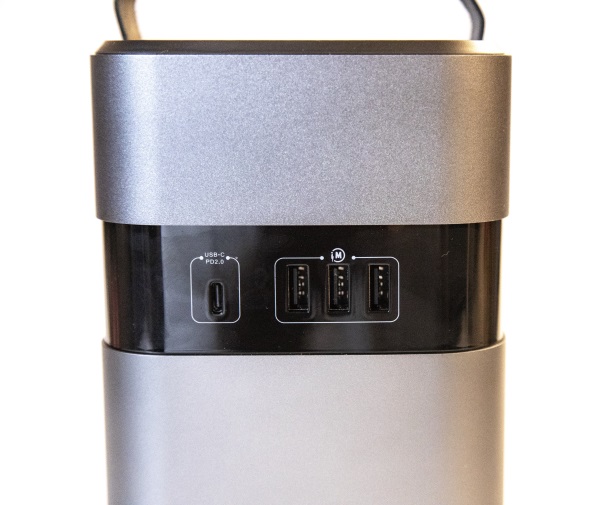
On the 3rd side of the device, there is a USB-C input/output port and 3 USB output ports.
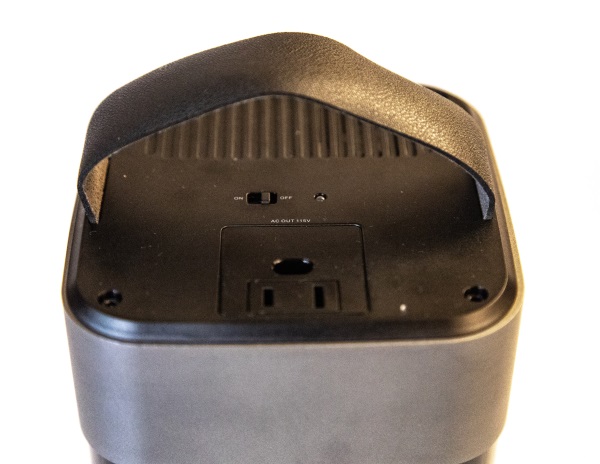
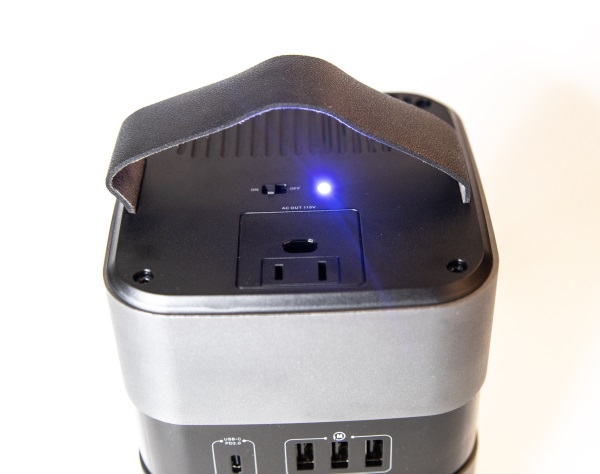
On the top of the iMuto, there is the AC port, with a switch and blue LED power indicator above it. There is also the carrying handle.
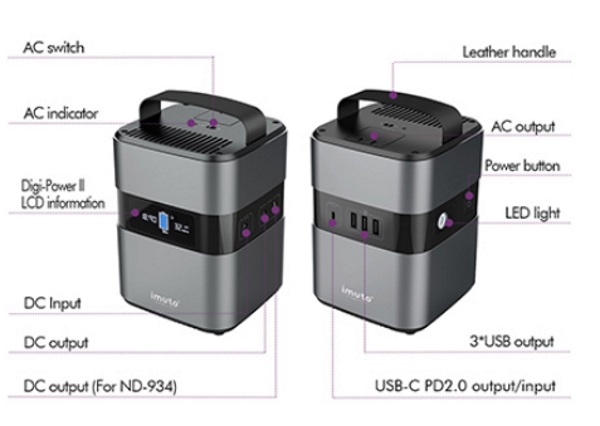
Below is a detailed picture of the device and its functional parts.
Performance
The first thing that I did when I took the iMuto out of the box was to plug it in to fully charge. While it did arrive with some amount of charge, I wanted it fully charged before I started my testing. Once it was fully charged, for my first test I decided to use it to power my Nebra AnyBeam portable projector which is another device that I am testing, along with a 4K Roku Stick with its power adapter plugged into the AC port. I also plugged in my smartphone to charge while binge-watching NCIS: Los Angeles via the projector. After about 6 hours of the three devices being connected to the iMuto, it seemed to have barely moved off of 100% charge. While it is easily noted that these devices do not require much power, it is exactly these types of devices that I would use this power supply for. I do not own a portable fridge nor would I likely use it for such a device. Rather, my use involves keeping 3 to 4 tablets charged, along with a couple of smartphones, a couple of camera batteries via their respective battery chargers, while powering things like my projector and Roku/Amazon sticks, etc. Occasionally, I would also need to plug in a laptop for extended use for editing or as a slideshow video source either directly connected to a TV or a projector. It may take me some time to really add a formidable stress load to “push” the capabilities of this power supply, but from initial impressions, this device is great.
The iMuto S5 is also very solidly built and is likely to withstand life inside of one of my gear bags. For my use, it is not the device that I would carry in my backpack unless I really had to. It does have some weight to it and would add too much more weight to my already heavy backpack. For this reason, a home in my gear bag will work better for me.
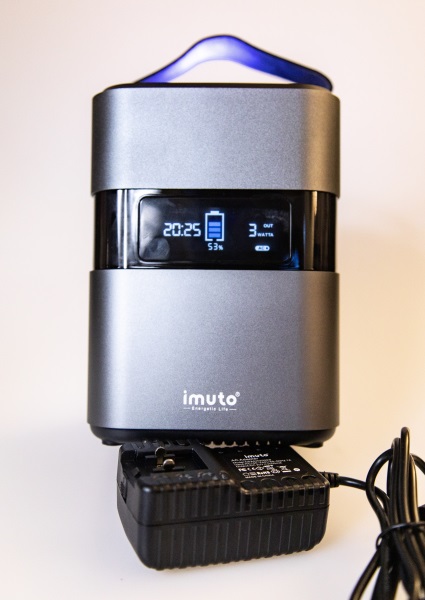
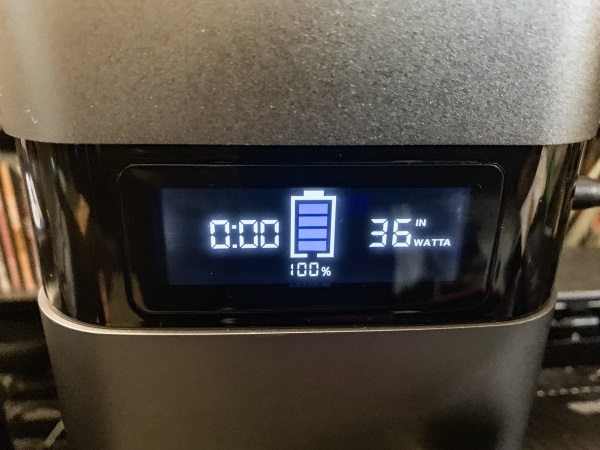
The picture below shows the LED display when the iMuto is fully charged and without any load plugged in. The second picture below shows all of the information that would be displayed depending on what is plugged into the iMuto.
On top of the power station, there is the AC plug and the switch that allows you to control power to it independently. There is also a Blue LED that lights when the switch is turned on.
The chart below provides some information on the approximated/expected charging/powering capabilities of this iMuto Power Station.
At the time when I received this device for testing, iMuto was not yet able to provide the complimentary solar panel for review and testing.
What I like
- The build quality
- The built-in battery capacity
- The Solar Panel charging option
- The types and number of outlets
- The size
What can be improved
- The solar panel should be included
Final thoughts
I have been lucky enough to test a few portable battery packs/devices like this one, and so far, this one is my favorite. The capacity of the built-in battery along with the types of power ports make it a really useful addition to my gear bag. I also love that I am able to plug in my small portable projector and my Roku or Amazon Stick and head outdoors or anywhere else without worrying about power or more importantly the longevity of my power source. The overall build quality is very solid and unlike others that I own that feel like plastic toys. I am giving this one two thumbs up!!
Price: Pledges start at $229 with rewards estimated to ship in August.
Where to buy: Indiegogo
Source: The sample for this review was provided by iMuto
Filed in categories: Reviews
Tagged: Crowdfunded, External power supply
iMuto S5 Portable Solar Power Station review originally appeared on The Gadgeteer on May 16, 2019 at 9:00 am.
Note: If you are subscribed to this feed through FeedBurner, please switch to our native feed URL http://the-gadgeteer.com/feed/ in order to ensure continuous delivery.
GL.iNet GL-AR750S-EXT (Slate) and using a WISP repeater review
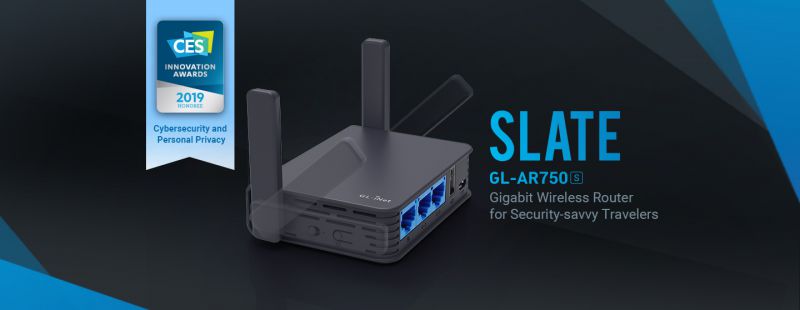
REVIEW – For some reason, in a very short time I’ve gone from zero travel routers to three travel routers. If you follow through my reviews, I initially purchased the TP-Link TL-WR802n, then to add further functionality I discovered the GL-iNet GL-300N-V2 and after reading my review, GL.iNet was kind enough to send me their latest model travel router, the GL-AR750S (Slate). It’s worth noting that the Slate was awarded a CES 2019 Innovation Award HONOREE in the Cybersecurity and Personal Privacy product category. As such I’m going to do a review of the AR750S, compare it to their MT300N and then demonstrate some of the advantages of using a travel router. Is this my last attempt to find the “ultimate” travel router? Read on…….
Once again I’m not going to go into all the technical details as you can get these at the GL-iNet GL-AR750S website.
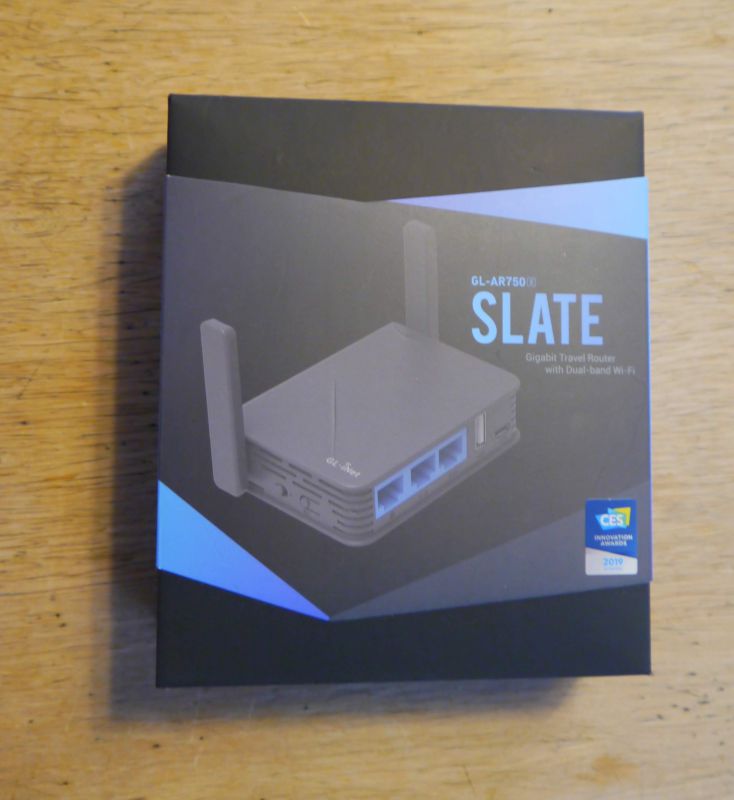
The slate is nicely packaged in a plain black box with a slip off sleeve.
What’s in the box?
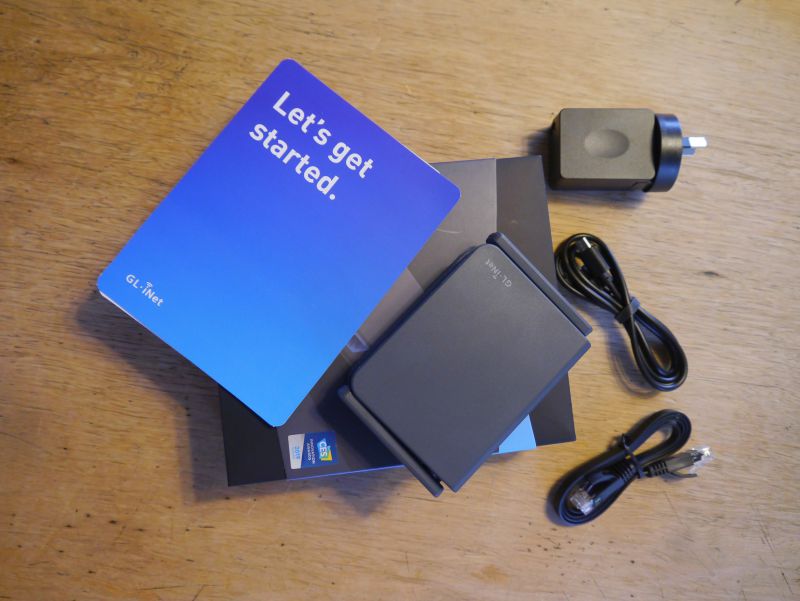
They include the router (funnily enough), a power 5V/2a power supply with appropriate country plug, a micro-USB cable and an ethernet cable, and some quick start guides. Personally while I love the packaging it’s just gonna go in a drawer.
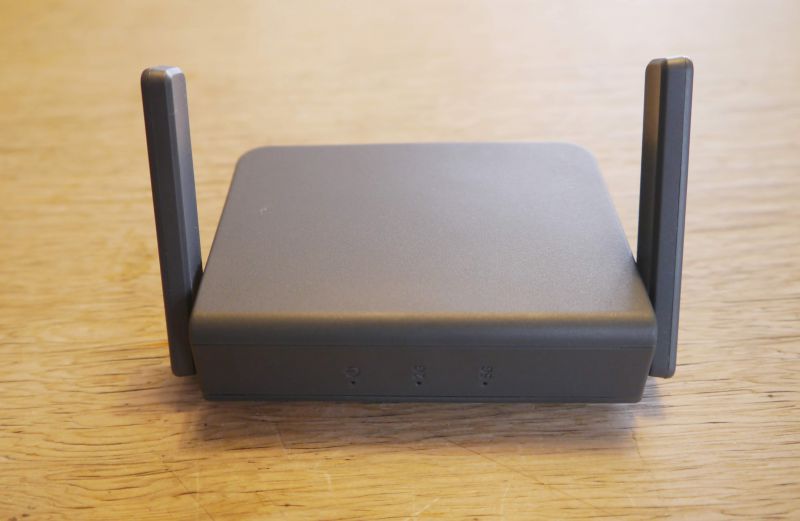
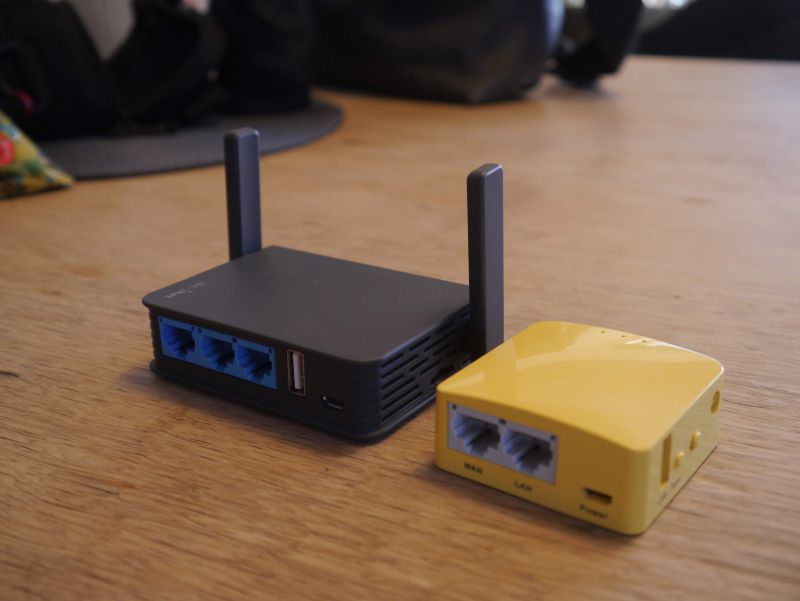
On the front, there are three discrete LEDs; power, 2.4Ghz activity, and 5Ghz activity. They’re very discrete and you can only really see them when you’re looking straight on to them, not like some disco light LEDs on “full size” routers. The unit has 2 x 2 dBi non-detachable (though you can if you disassemble the unit) but fold up/down antennae for better performance.
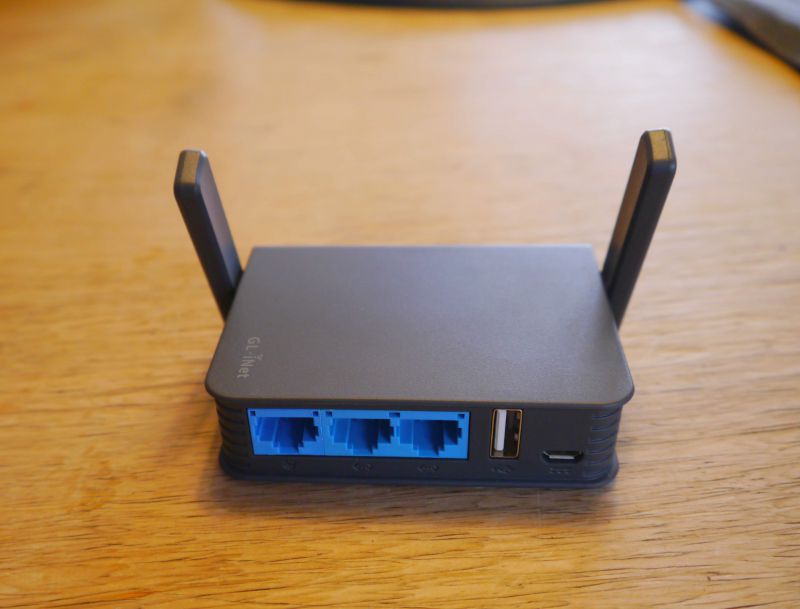
On the back, there are 3 GB ports that are as standard configured as 1 WAN and 2 LAN but you can make it 3 LAN ports. This is currently the only travel size router that has GB ports, most of the rest only have 10/100. Gigabit ports might be overkill in a hotel/free WiFi situation however if you need to plug in wired devices and shift large files like at a trade show or something, they will be a bonus. There’s a USB 2 port for USB stick or USB 4G MiFi device, and finally a micro-USB port for power. Unlike the small Mango, the Slate takes 5V/2A compared with 5V/1A.
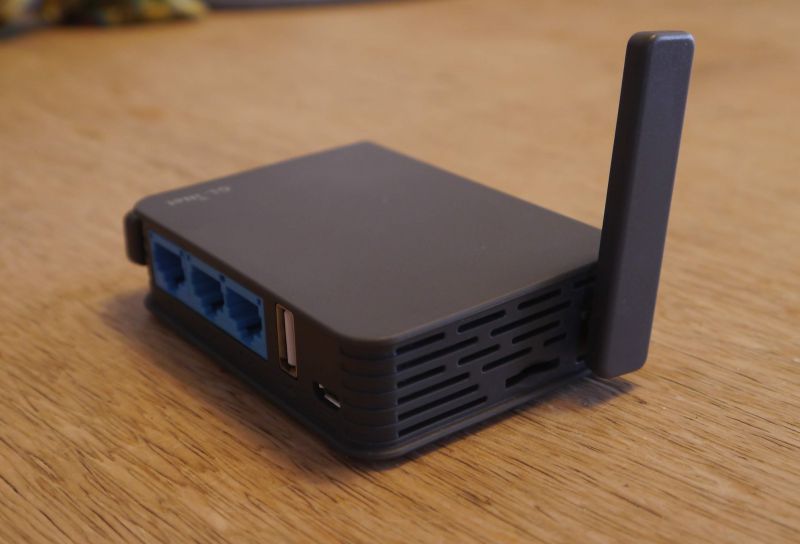
On the left-hand side is a micro-SD/Transflash slot which supports up to a 128GB card. Note you actually put the card in, what I consider, “upside down” (contacts on the top) and there’ s no indication on the unit as to which way to put it. The slot isn’t hot plug either, so if you insert a card you do have to reboot your router. Again note the folding antennas.
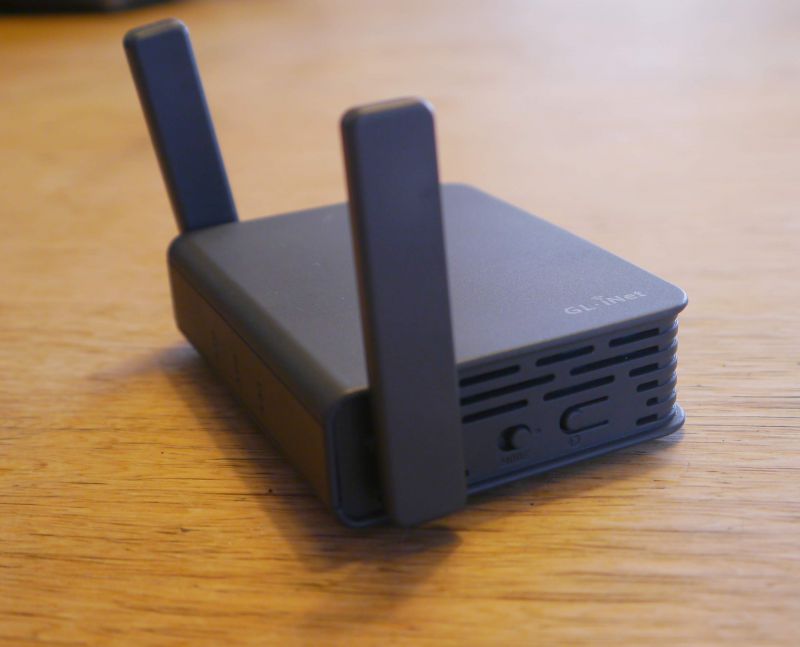
On the right-hand side, there’s a switch which can be programmed (normally for VPN on/off) and a reset switch. A short press will attempt to “repair” your network and a long press will reset the router to factory default.
Slate versus Mango:
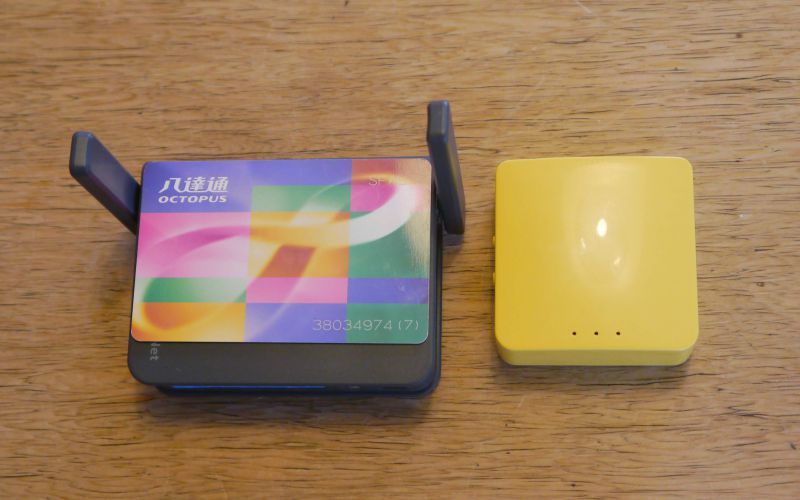
The Slate is 100mm X 68mm X 24mm and weighs in at 86g compared with the 39g of the Mango. While it’s bigger than the Mango it’s still small enough to throw into your gadget bag or even your pocket. The Slate has the following major differences over the Mango:
- Better processor (useful especially when using OpenVPN)
- Micro SD slot
- 2.4Ghz and 5Ghz band
- External Antennas
- Gigabit ports
Setting up a WISP repeater session:
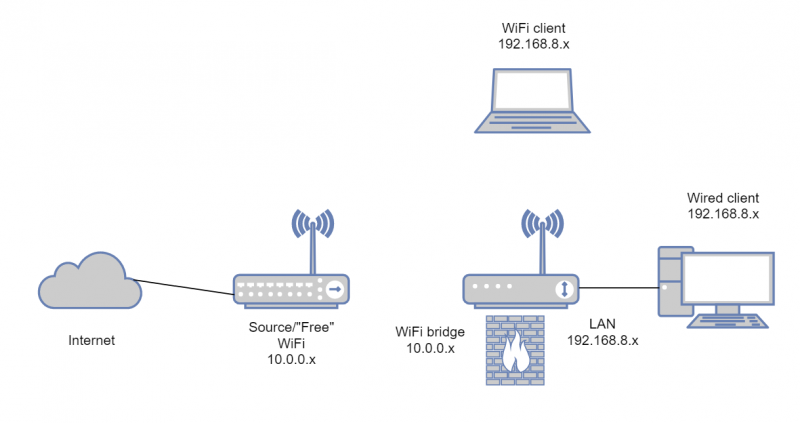
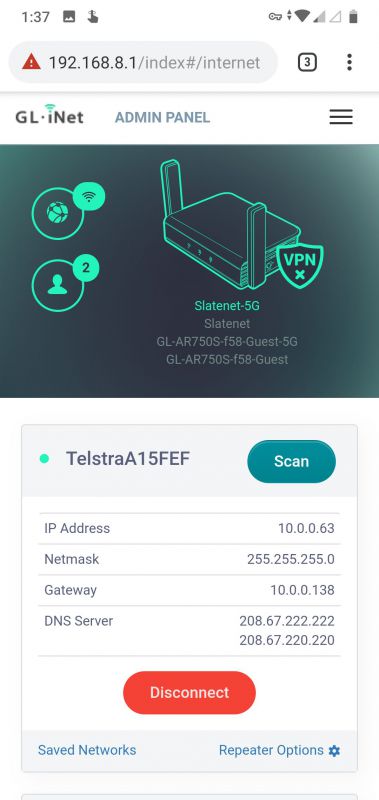
So here’s a (very non-technical) diagram of what WISP mode does. You connect to a WiFi network via WiFi on your mobile router and it creates a LAN on the other side with a firewall in between and clients on a different subnet. Your client devices are now on their own LAN segment and on a completely different subnet ( 192.168.8.x) from the source WiFi network (10.0.0.x). Only traffic destined for my own LAN will traverse the firewall on the AR750s. You can load things onto the travel router like perhaps an OpenVPN or Wireguard VPN service so all devices go through it, a global ad blocker, share a USB stick of music, movies or photos. Only people attached to the WiFi LAN will have access, especially important if you’re on “free” hotel wifi or similar.
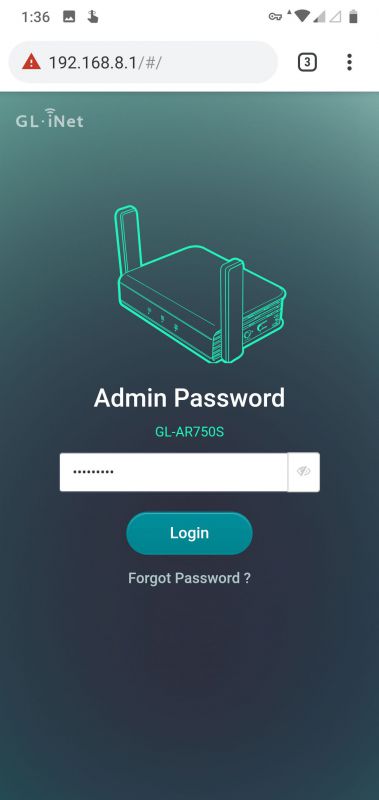
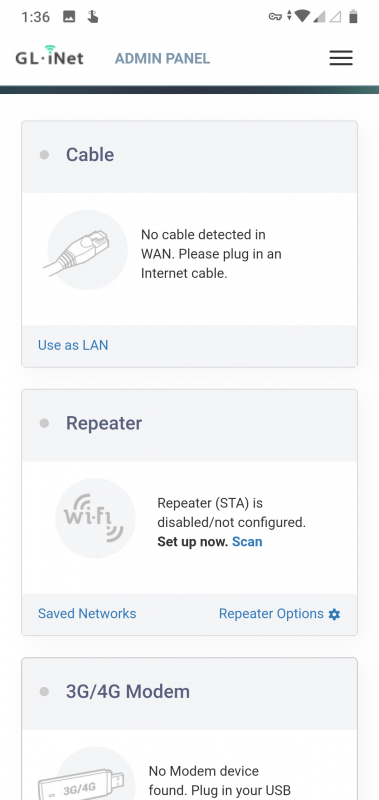
Setting up in WISP mode is easy as…
- Login
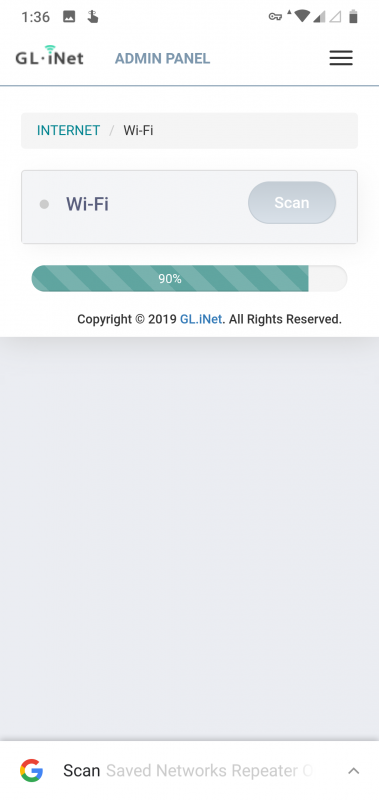
- Go to “Repeater” and hit “Scan”
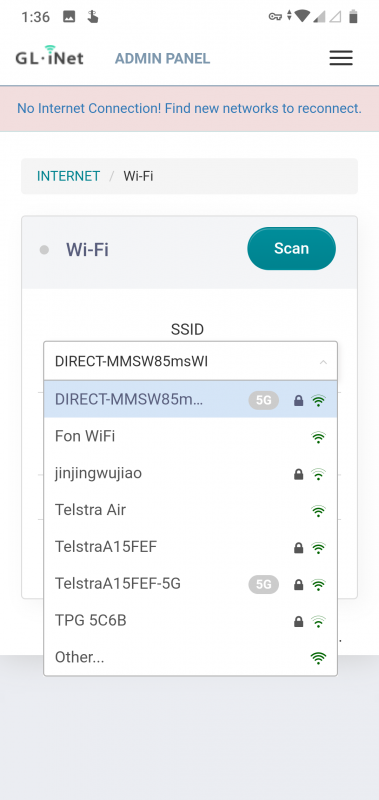
- The router will go off and scan for any available WiFi networks
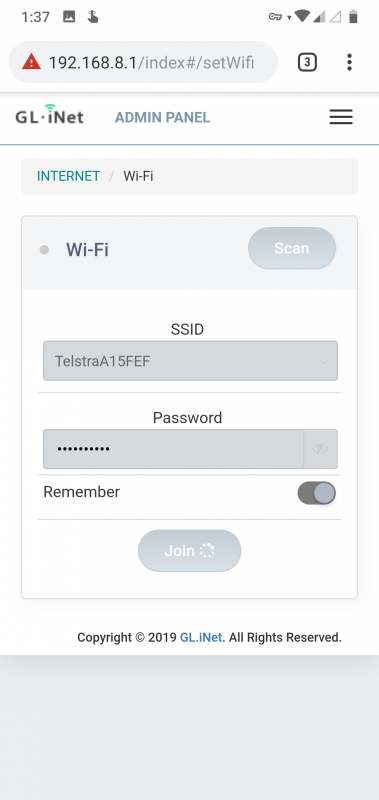
- You can then choose whichever network you need to connect to (note there’s a 5G network as well)
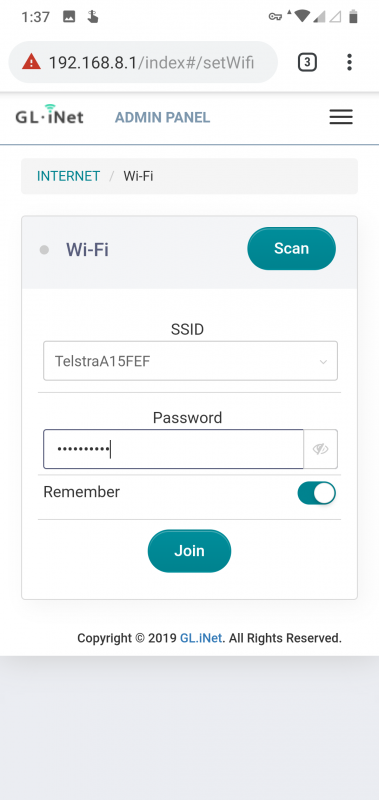
- Put in the password to the network you want to connect to
- Click “Join”
And away you go.
If there’s a login screen to validate your usage like many hotels or coffee shops have you should only have to do this once with your first attached device. After that, all your attached devices should just attach no problem (including things like Chromecasts, Fire Sticks etc).
Once again, it’s the same overlay over OpenWRT as the Mango, so if you’ve got one GL-Inet device you can easily work out others.
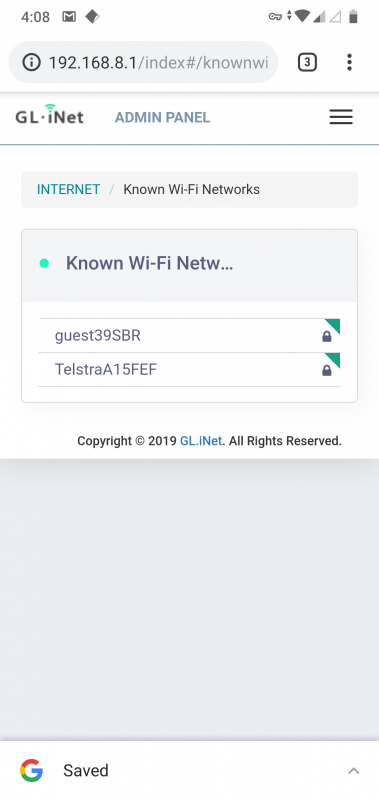
The other nice thing is there’s an option which I didn’t refer to in my last GL-iNet review, to remember your WISP networks, so if you bounce between regularly used ones you shouldn’t have to set up again. Personally, I would only be saving those that you do use frequently and that are a bit more “trustworthy” like at work or home. No need to rescan and set up all the time.
WISP Mode speed:
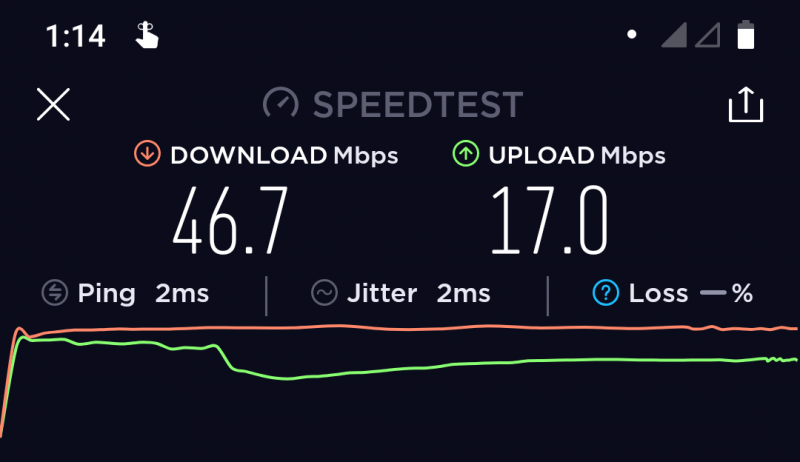
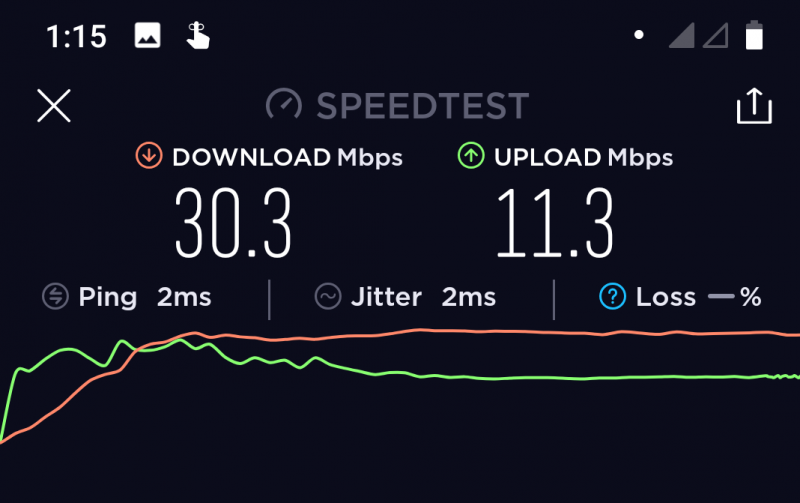
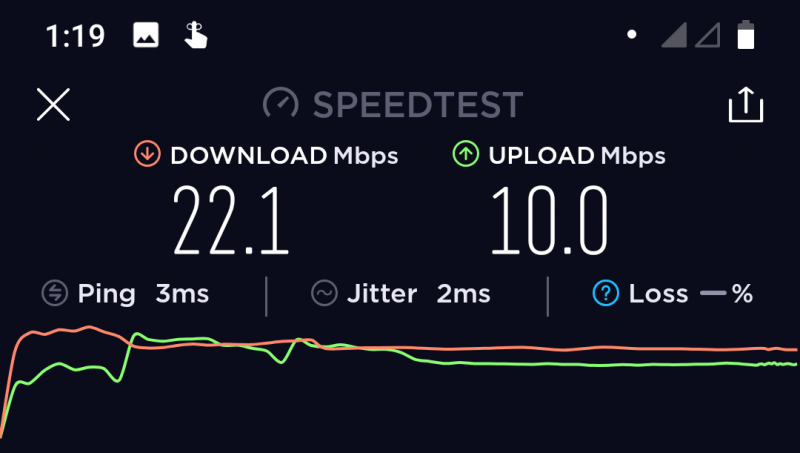
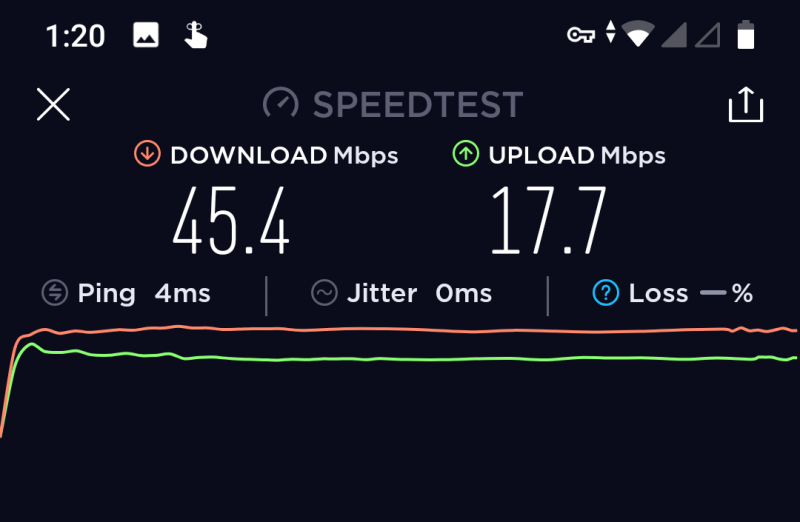
So what’s the advantage of a dual-band router when traveling and using in WISP repeater mode? In a single band router, you attach to your WISP source and your bandwidth is shared between repeating the source signal and transmitting your LAN. People indicate that you’ll probably lose half your bandwidth to the repeater however, in reality, I’ve seen about 1/3 bandwidth loss. Below are some Speedtest figures that show the advantage of using a dual-band router where you repeat on one band and transmit your LAN on the other.
So here’s my speed connected with my phone directly to the source WiFi router and standing right next to it on the 2.4Ghz band.
Here’s my speed in a remote area of the house connected to directly to the source router on 2.4Ghz. There’s a few walls and doors between the device and the base router and you can see the effect it’s having on my speed.
In the remote area I’ve used a WISP repeater connection to router on the 2.4Ghz band and then connected to the 2.4Ghz LAN network. You’ll see there’s a drop in speed compared with connecting directly to the base router. Remember the 2.4Ghz on the AR750s is now not only servicing my WiFi LAN connection but also “bridging” between the two routers. I normally see about a 1/3 drop in speed approximately. This is around the same speeds I’d expect from the Mango as this only supports the 2.4Ghz band. So the speed might not be there, in fact we’ve taken a drop, but the security as described above is.
So what if you want speed AND security? I’m in the same remote area of the house above however here I’ve got the WISP repeater attached on the 2.4Ghz band and I am attached to my LAN on the 5Ghz bandwidth. The 2.4Ghz WiFi LAN network is turned off. Here the 2.4Ghz band isn’t doing anything except bridging between the two routers. This is the big advantage of a dual-band router when using WISP repeater mode; one band for bridging, the other band for LAN.
Summary:
I’m really impressed by the GL-AR750S. It’s a faster processor, external antennae, micro-SD slot, and dual-band makes this not only useful for traveling but also at home. In fact currently, I’m house sitting and been moving houses quite a bit. The GL-AR750s has been great for this as rather than having to connect all my devices to the house network each time we move I just connect my devices to the GL-AR750s and then WISP to the house network. That way I don’t have to change anything except linking the Slate once to the house network. Between my wife and I that’s probably 8-10 different devices including things like a Chromecast and an Android TV media box. When we move, we just connect the GL-AR750s once to the new house network and away we go. Additionally, I’m using the micro-SD to operate as an SMB media server and ad-blocking all connections on the router itself.
And my Mango? Still a great functional little travel router. It will remain my EDC travel router that’s left in my gadget bag when I’m out and about. It’s smaller size and lower power consumption means it’s easier to carry and will last longer on my powerbank or when attached to the USB port of my Surface Pro. If I’m going on holidays though I’ll be taking the AR750s even though it’s bigger for its added micro-SD slot and better performance.
In my opinion, the Slate (GL-AR750s) is highly recommended especially as a travel router but is also useful for home use either as an access point or repeater or bridge or VPN Server or media server or even as the main router. It’s definitely very flexible and packs functions and features that punch well above its size.
I don’t think I’ll be looking for any more travel routers in the near future, think I might already have my “Goldilocks” pair
Price: $69.99
Where to buy: The GL-AR750S is available direct from GL-iNet and Amazon
Source: The sample of this product was provided by GL-iNet
Filed in categories: Reviews
Tagged: Routers
GL.iNet GL-AR750S-EXT (Slate) and using a WISP repeater review originally appeared on The Gadgeteer on May 16, 2019 at 8:00 am.
Note: If you are subscribed to this feed through FeedBurner, please switch to our native feed URL http://the-gadgeteer.com/feed/ in order to ensure continuous delivery.
Smartphone App to Diagnose Ear Infections Developed by Scientists
If there’s one illness that every child seems predisposed to, it’s ear infections. The problem comes in when they have several ear infections. This requires lots of doctor visits, meaning money and time spent. You may hate to keep going to the doctor because after a few times, you know the symptoms. But the doctor won’t prescribe antibiotics unless your child has been diagnosed. There may be another solution very soon. Scientists have developed a smartphone app to diagnose ear infections. It works by listening for fluid in the ears with the addition of a folded piece of paper. Diagnose Ear Infections with Smartphone App… Read more