Uten Barbecue Charcoal Grill review

REVIEW – Take your charcoal grill on the road! This week we’re checking out the Uten Barbecue Charcoal Grill, It’s a lightweight & portable design made for transporting to the campsite, the beach, or the park. How does it hold up to the testing? To the review!

What is it?

It’s an open-styule portable charcoal grill.

What’s in the box?

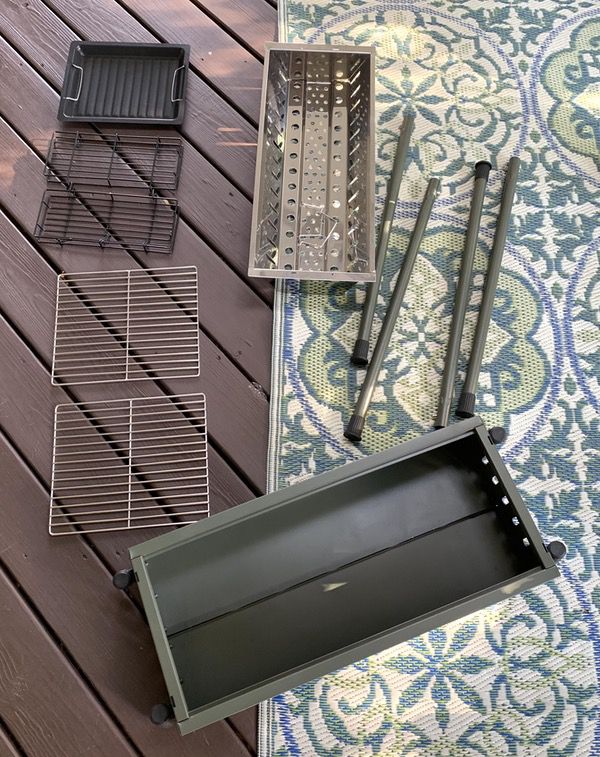
You’ll get the grill with a full-length charcoal basket, 2 grill grates, 1 griddle plate, 2 removable side baskets, and 4 detachable legs.
Hardware specs

  • Dual vent design
  • 14.65 pounds
  • 31.6” by 12.6” by 27” tall fully assembled

Design and features

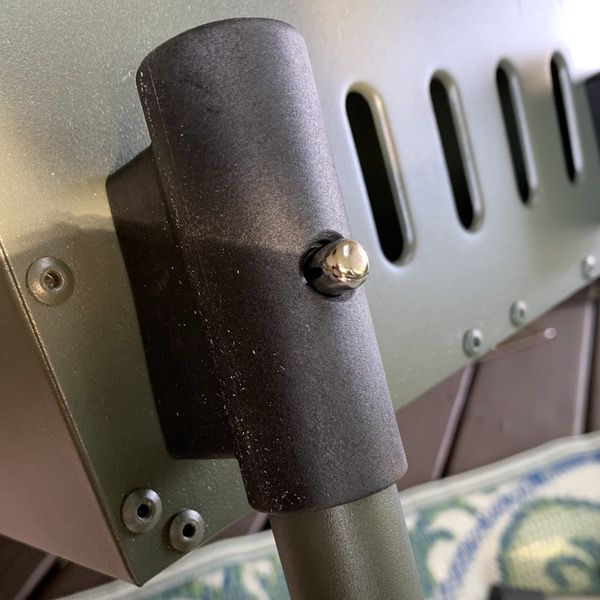
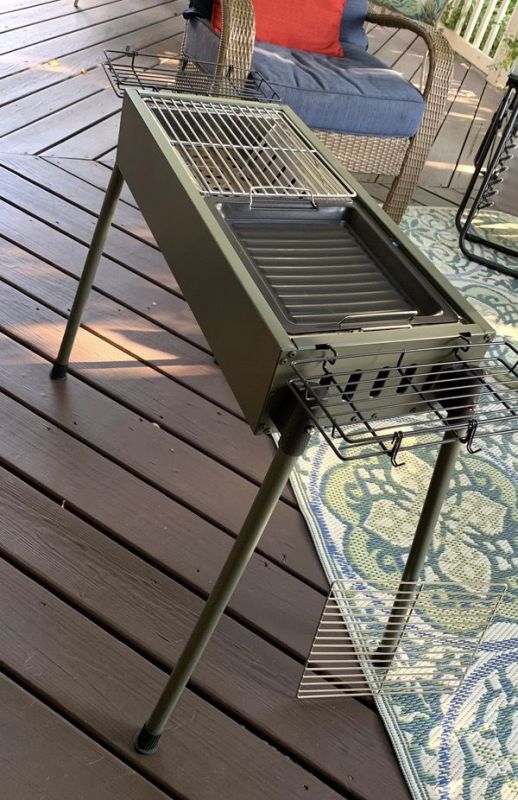
The Uten Barbecue Charcoal Grill is a lightweight portable cooker. Weighing in at just under 15 pounds with detachable legs, the 31.6″ by 12.6″ by 6″ footprint (with the legs removed) is very packing friendly. You con’t find any assembly instructions, but you won’t need them. There are 10 total parts to the unit. You have 4 legs that use spring-tabs to pop into the leg brackets on each corner of the fire box:
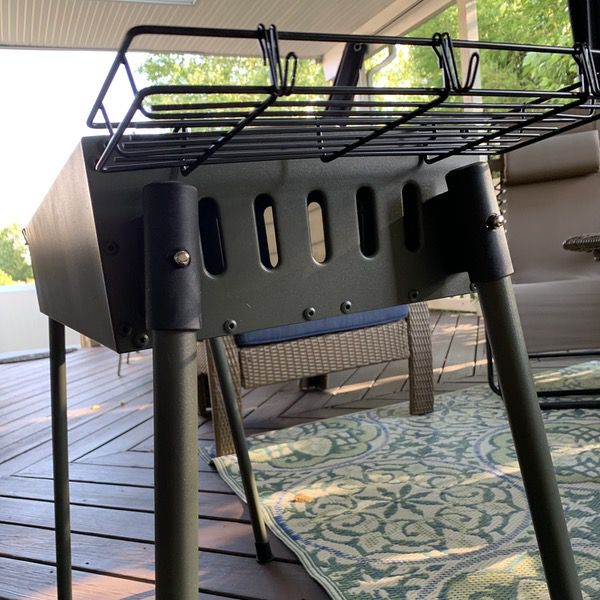
A pair of wire side baskets hook into each side of the grill: 
Drop the aluminum charcoal tray into the fire box, and add your grill grates and/or griddle tray, and you’re in business. With about 2 minutes of work you’ll have almost 400 square inches of cooking area to work with. I’m estimating that to handle 8-10 burger patties, 8 decent sized boneless chicken breasts, or a whole heap of hot dogs.
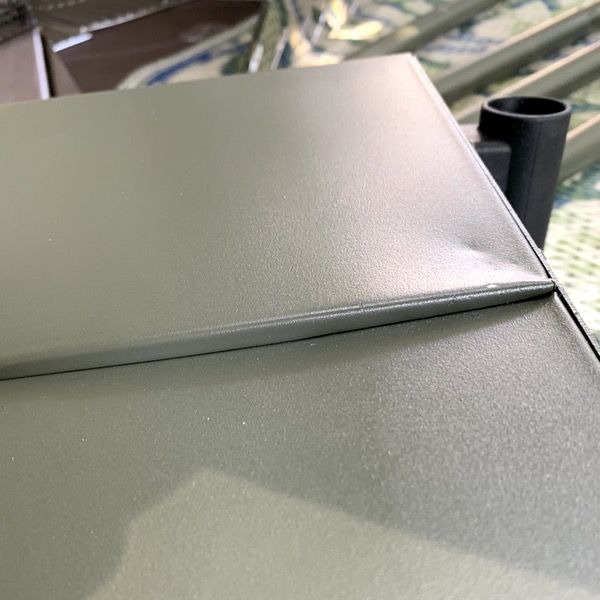
There are some quality issues that come with grills on the cheaper end of the scale, and you’ll find them here. The shot below is from the underside of the firebox, which has a two-part floor. See how the two floor components don’t line up? It doesn’t impact performance, but it’s a bad bit of quality control.
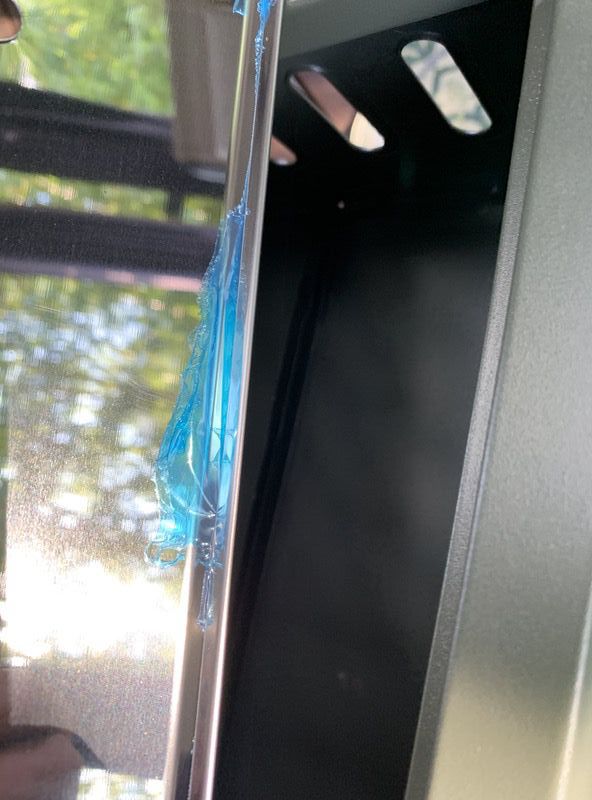
Here’s another weird bit. The charcoal tray was covered with a blue film to protect it during shipping. It looks like that film was put on before finishing the seams of the tray, so you can’t completely peel it off. I got most of it with a knife, but had to burn the rest off before the first cook.
Despite those issues, it looks like a fairly solid camp grill. Let’s fire it up and see what happens!

Performance

So we moved the grill down to the patio to get cooking. Even though it’s a lightweight build, it’s surprisingly stable when set up. Those legs brackets with the spring post locking mechanisms are tight, and the legs are splayed slightly to add a bit of extra stability. Rubber feet on the bottom of the legs provide a bit of extra grip, too. I wouldn’t want the kiddos or pets running around it, but it’s stable enough for safe use on unstable surfaces like grass, sand & dirt.

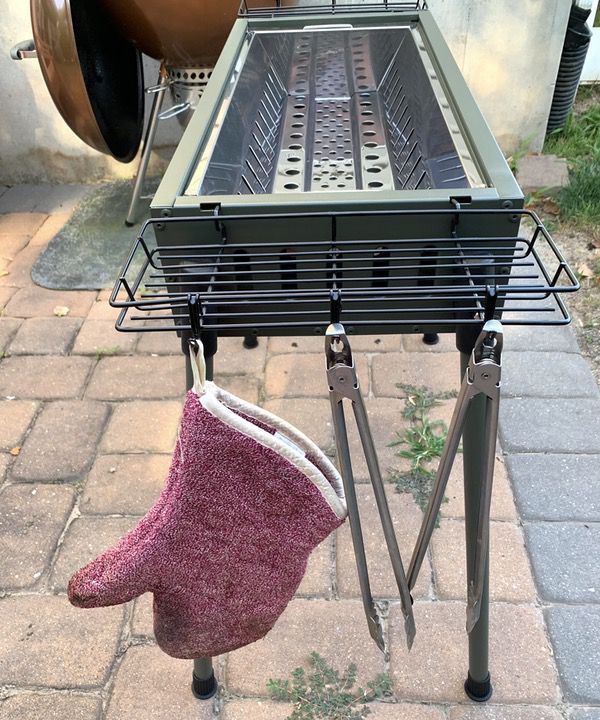
The side baskets are useful for holding your assorted accessories, and the inclusion of two baskets is a nice touch. I really like that there are 6 hooks (3 on each side) for hanging tools and gloves.
We fired up a chimney of lump charcoal for purposes of our test. For those that don’t know, lump charcoal burns hotter and faster than composite briquettes. Our chimney gave us a thin layer of charcoal across the length of the fire basket.
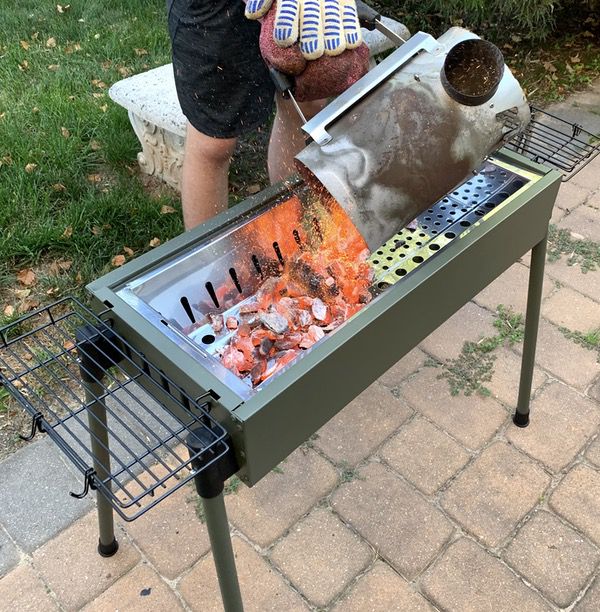
For this cook we’re using the griddle to saute up some green beans & peppers marinated in olive oil, melted butter, and garlic. The griddle is firmly nestled in the firebox, so it’s not prone to slipping around during use. It’s also got a nice thickness to it, so it distributes the heat evenly. Note that the griddle does have ridges, so it’s not ideal for frying eggs or pancakes.

We grilled some chicken breasts dry-rubbed with a blackening spice on direct heat using the grill grates. The grill grates are aluminum, and typical of what you see in lower cost grills with respect to thickness. I think they’ll hold up just fine with proper care. They don’t lock in tightly like the griddle does, however, so you’ll want to be careful moving your food around, or the grill grate could slide on you a bit. I’d probably want to figure out a modification to fix this for long-term safety.

We finished things off with some toasted garlic bread over the coals, switching out the griddle for the other grill grate.

Here’s the finished product. While I only used one chimney of charcoal, the grill has nice venting on the sides to help maintain heat. The griddle side was plenty hot enough to provide a steady saute for 15-20 minutes to let the beans cook through without burning. We got good grill marks on the chicken on a relatively slow cook as well.

Once cooking was done, we took a look at how the grill held up. Cleaning is a problem because that two-piece bottom creates a big seam down the middle. I was able to get to a lot of it with my brush, but there’s no port to catch ashes. You’ll need to turn it over to get all the corners cleaned. The lack of a trap for collected grease (like what you’ll find when you do burgers) is also an issue. If the coals don’t catch it, it will be difficult to clean.
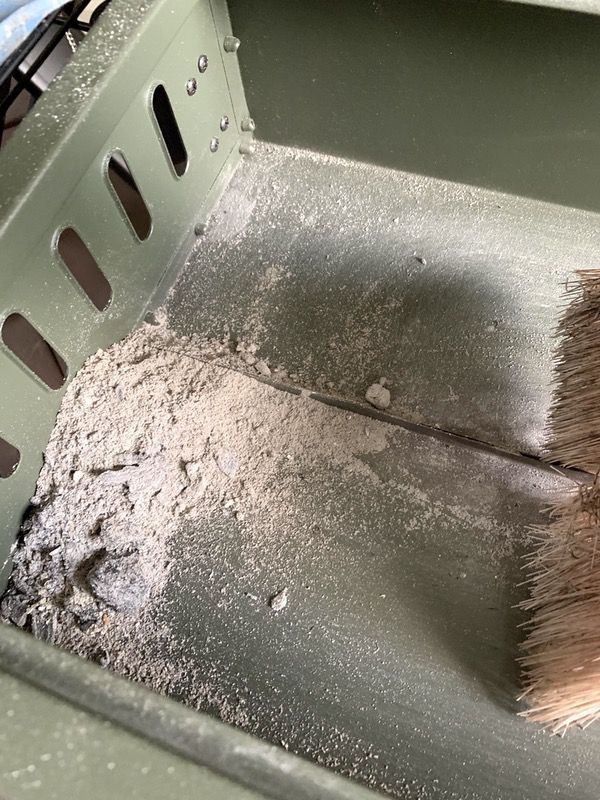
The charcoal insert is showing some discoloration after one grill session, but held up pretty good to one chimney of coals.
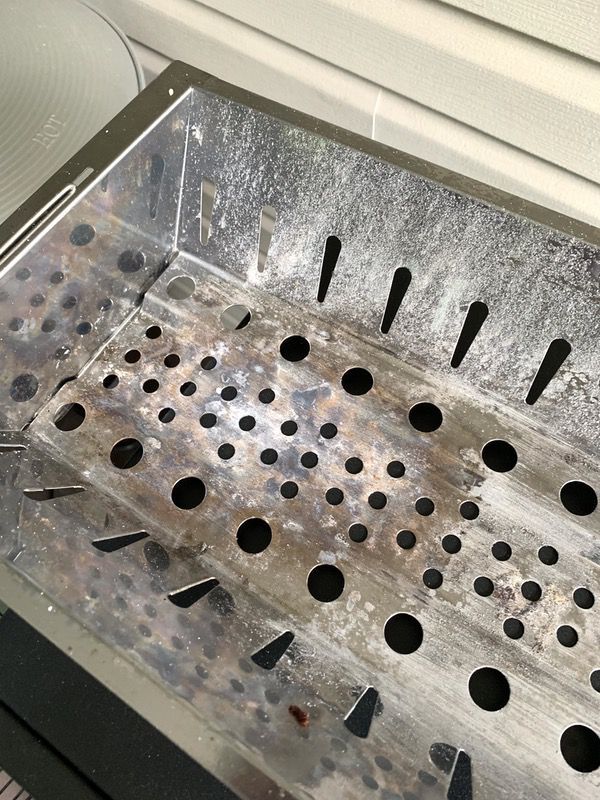
And the griddle held up surprisingly well. Not a burn mark or discoloration to be found.
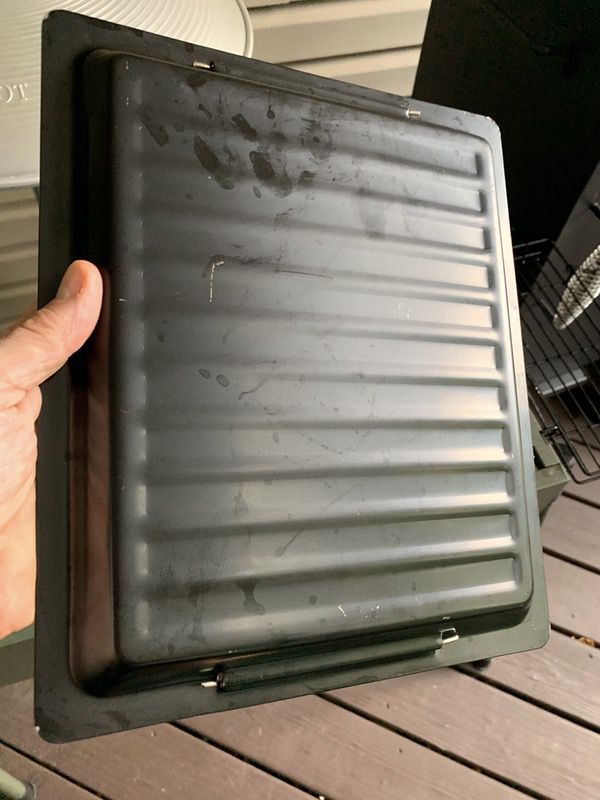
Overall I am pretty happy with the Uten Barbecue Charcoal Grill as a light duty, occasional use grill. If you’re looking for something you can toss in the car for a weekend adventure I think you’ll find this be a great solution. But we do need to talk about the fact that it’s not designed for heavy use.

All of the materials in the build are relatively thin, and there’s no buffer between the charcoal chamber and the sidewalls. I’ve seen some reviews pointing to the paint on the firebox flaking off, as well as corrosion and warping. One particular review reported an incident where the leg brackets actually melted. Given their positioning next to the side vents, I could absolutely see this happening if you completely loaded the firebox end-to-end with charcoal. That would also make the side baskets unusable as well due to the intense heat.

It’s a light-duty cooker, and won’t take the intense heat. If you fill the thing with coals soaked with lighter fluid, you’ll kill it pretty quickly (you’re not using lighter fluid to light your grill anyway, right?). But if you’re putting a chimney or two in there and loading your coals with space for the vents, I think it will last a couple of seasons with care.

What I like

  • Easy to assemble
  • Stable
  • Nice baskets & hooks for accessories
  • Good for light duty use

What I’d change

  • Construction quality has some flaws
  • Grill grates can slide around a bit
  • Difficult to clean ashes & grease out of the firebox without a trap
  • Lightweight design will not hold up to heavy heat or extended use

Final thoughts

For an occasional use outdoor grill, the Uten Barbecue Charcoal Grill is a fine solution. It’s got decent cooking area, and some nice features with side baskets and hooks that benefit you when you’re at a location where table space is at a premium. The legs are well planted and stable for use on rough surfaces, too. Just keep in mind that the construction is lightweight and not designed for high heat or regular use like a backyard grill.

Price: $65.99
Where to buy: But it on Amazon.
Source: The sample of this product was provided by Uten.

Filed in categories: Reviews

Tagged: , ,

Uten Barbecue Charcoal Grill review originally appeared on The Gadgeteer on July 11, 2019 at 1:28 pm.

Note: If you are subscribed to this feed through FeedBurner, please switch to our native feed URL http://the-gadgeteer.com/feed/ in order to ensure continuous delivery.

Back Up Your Data Safely and Easily with MiniTool Shadowmaker Pro

This is a sponsored article and was made possible by MiniTool. The actual contents and opinions are the sole views of the author who maintains editorial independence, even when a post is sponsored. Backing up your data is important. While hard drives and SSDs aren’t as error prone as floppy disks, they can still break down without warning. If a drive goes bad while holding your only copy of a file, it’s gone forever. Even with expensive data forensics tools, there could be nothing you could do to get it back. Rather than wait for something to go… Read more

We Are Hiring Linux and Tech Writers

We are expanding and are looking for talented writers and technology enthusiasts to join us. Make Tech Easier is a popular technology blog that provides free computer tutorials, tips, tricks and software reviews. We cover topics relating to Linux, Windows, Mac, Android, iOS and all Web stuff. If you are seriously obsessed with your computer and have tons of computer tips and tricks up your sleeve or are always surfing the Web to look for cool, useful software and eagerly share with your friends when you find something interesting, then you are the one we are looking for…. Read more

E-Blox building brick sets review

REVIEW – E-Blox are great for anyone who loves Lego but wants to try something different, perhaps a little more advanced, with cool light-up blocks.

What is it?

Building-block toys with LEDs, some sets come with related stories, some are kits with free-play options, others involve constructing circuits.  

What’s in the box?

We tested two boxes. 

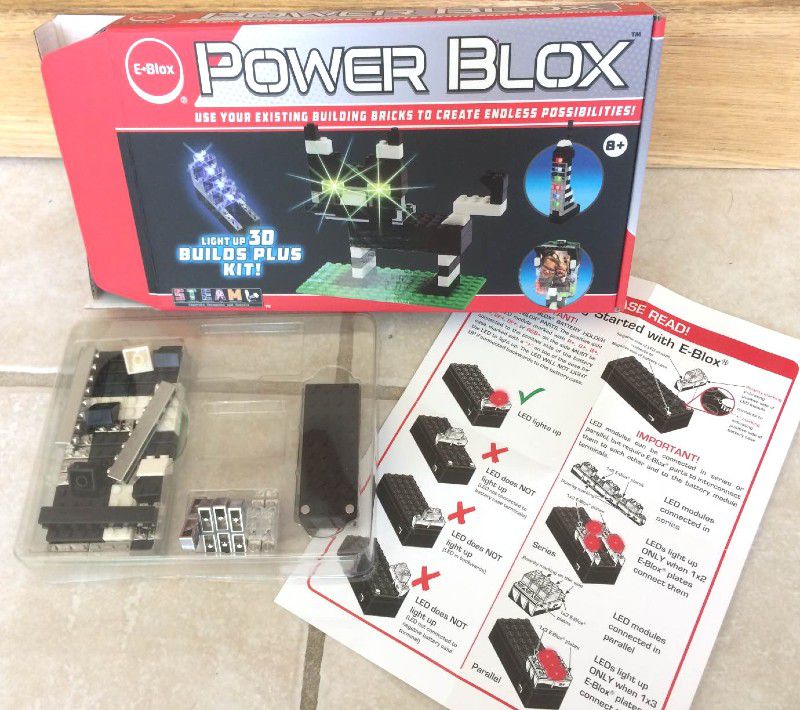
Our Power Blox Builds Plus set came with:

  • 73 pieces (3 models shown)
  • Safety instructions for 9-volt battery handling

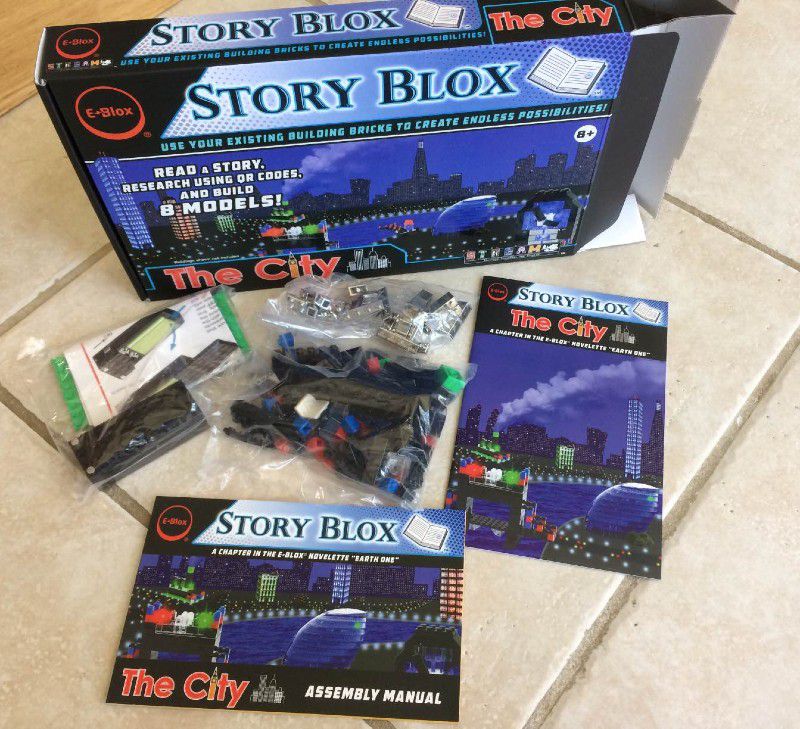
Our Story Blox The City set came with:

  • 138 pieces (8 models)
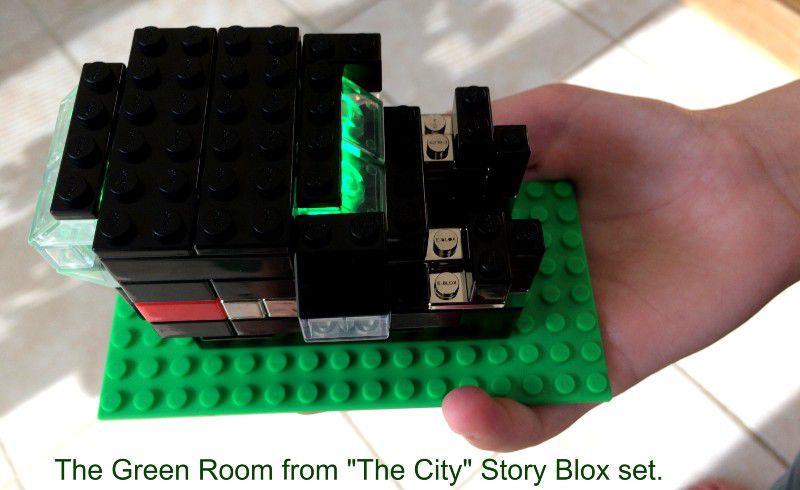
  • “The City,” a chapter in the E-blox novelette “Earth One”
  • An assembly manual
  • Safety instructions for 9-volt battery handling

Specs

A 9-volt battery is required for the power box/battery case, which powers the LED pieces. Each box includes a safety sheet about the hazards, storage and removal of the battery in order to avoid a short circuit or leakage. In fact, there’s even an alarm incorporated into the battery box, which sounds when there’s a short.

On the opposite side of the safety sheet are instructions for getting started with E-blox. Unlike other building block toys, there are several specific rules with E-blox in order to get the light-up blocks to work properly:

  • The LED must be connected to the battery case terminals.
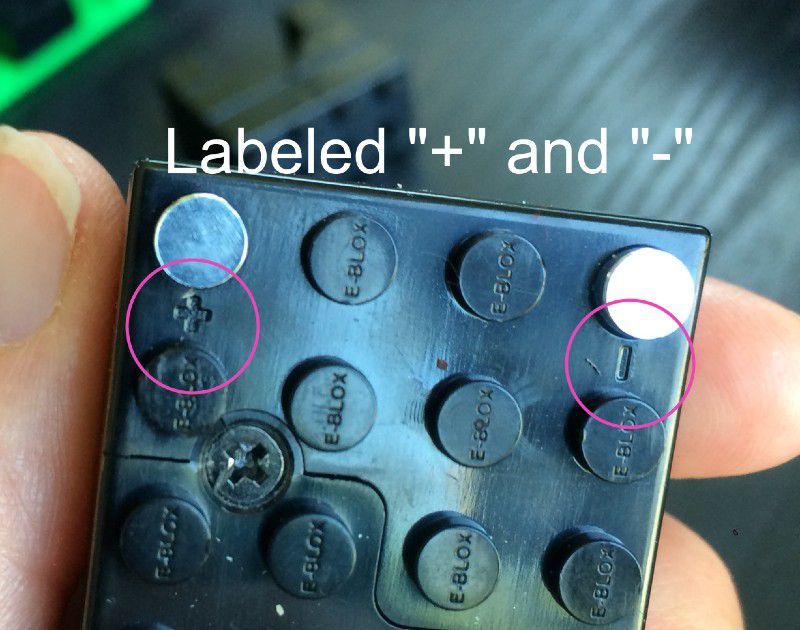
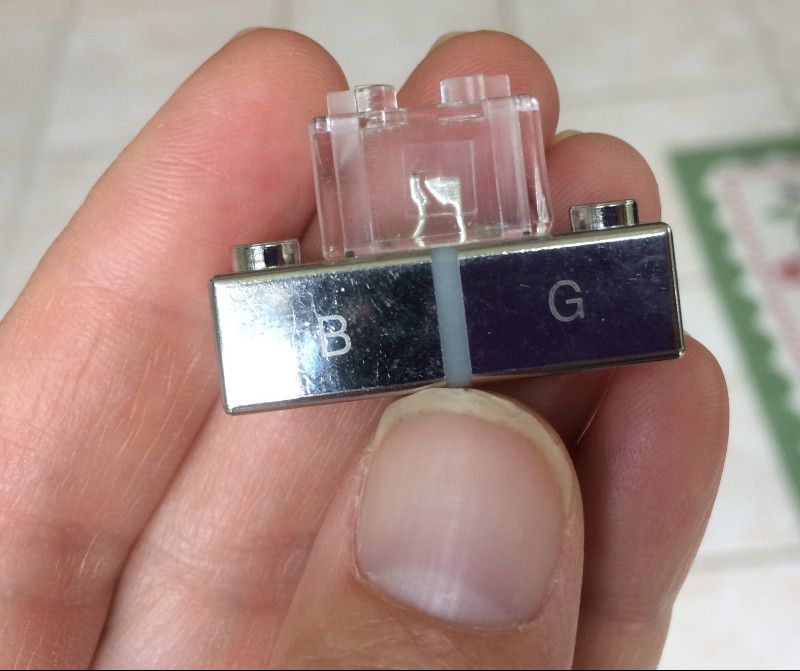
  • Each piece must be placed correctly, with the positive “+” side of the LED module connected to the positive side of the battery case. (Both are labeled.) Backward LEDs won’t glow.
  • It must also be connected to the negative battery case terminal, too.
  • If you want your project to include more than one light by connecting the modules in a series, the silver conductive pieces must interconnect the LEDs to each other and to the battery module terminals.

Design and features

There are four different types of E-Blox:

  • Circuit Blox, where you use a circuit board to build toys, with 13 different sets including a flying saucer or FM radio.
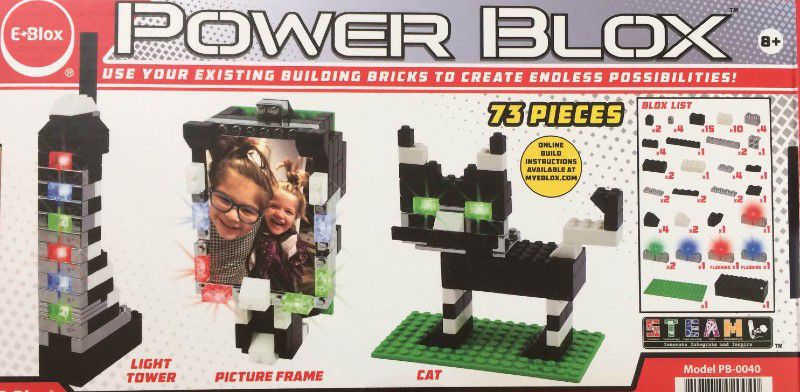
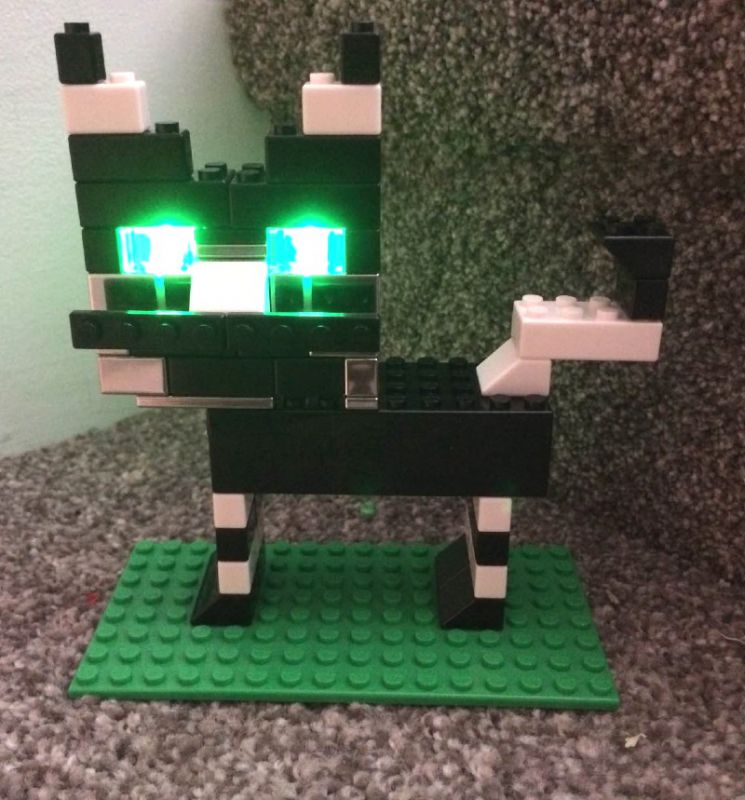
  • Power Blox, with 11 sets, where you build structures that incorporate glowing pieces, with multiple designs per box (ours was a kitten, tower or picture frame; another option was an airplane, space invader or ghostship).
  • Story Blox, three sets that incorporate a story and 8 corresponding models to build.
  • Single Pieces, buy exactly the blox you need, priced from 10 cents for a 1-block spacer to $10 for a battery block.

We tested a Power Blox and Story Blox set. My son, 11, was excited to make the kitten in his Power Blox set. Based on previous Lego experience, he expected he could improvise— and he constructed it just fine to the naked eye, but the cool green eyes wouldn’t glow, because we hadn’t sufficiently studied all the rules for getting the LEDs to work.  

As you can see from the LED requirements in the Specs section above, there is a lot to pay attention to. For us, this meant a little learning curve before building, at least if you want the lights to work on your creation. 

After 30 minutes of frustration, we looked up the instructions on YouTube, since his Power Blox set didn’t come with an assembly manual. With the instructions and a more attentive eye to positive and negative terminals, his dad helped work it out. 

I should note that after my son built a handful of smaller models with the instructions (in the Story Blox set), he went back to his Power Blox and was able to build an impressive tower on his own. So these can be used for creative play and freestyling, but you need to study up and get a feel for them first.

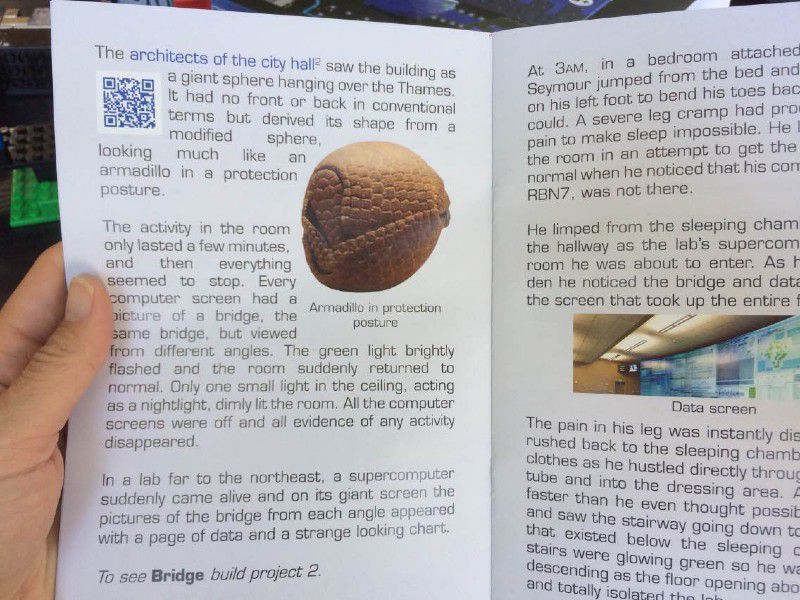
Story Blox are a neat concept, especially if you’re trying to help a hands-on learner get in more reading and even a little research. For every page of text, there was a related build, as well as a QR code to research topics related to the story. Don’t expect a lot of reading, there are only about 8 sentences to read before each build. But it’s certainly a clever way to get kids engaged.

  A few watch-outs:

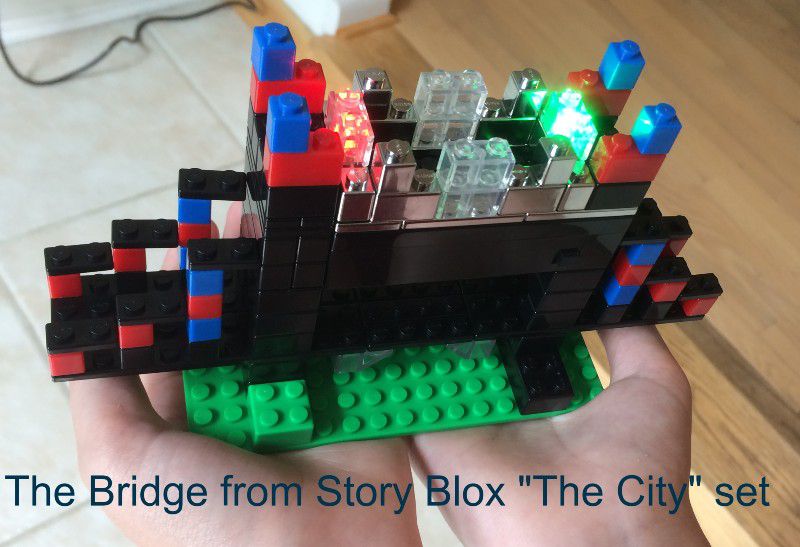
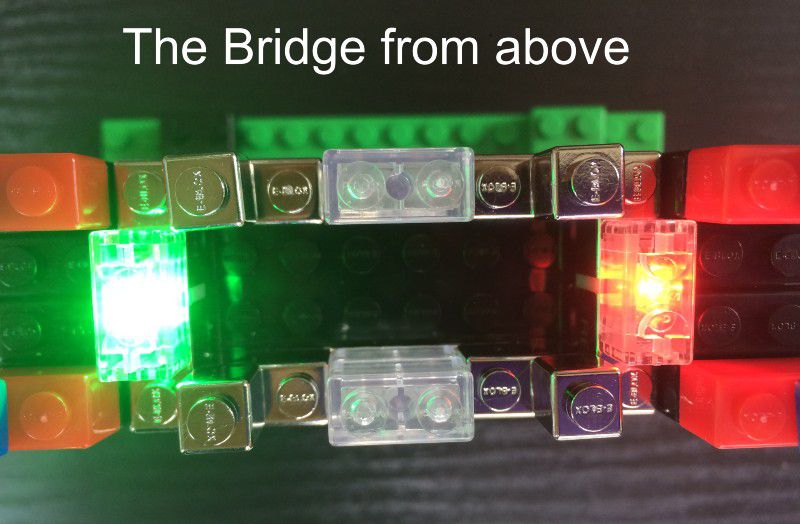
  • These creations are very delicate. While the conductive pieces are very tight and hard to get apart because of their plating, the regular pieces are very loose. I carefully picked up the kitty after taking its picture, and it crumbled in my hands. I also accidentally broke the bridge from The City. If my child were younger or more sensitive, that could have led to tears.
  • The light-up pieces look like three separate pieces, but they are actually one. If you’ve spent any time playing with Legos, you’d be conditioned to see 3 one-by-twos. And like both me and my son, you’ll try to rip them apart. Don’t! You’ll break them.
  • The pictures on the box aren’t necessarily the models you’re going to build. Our Story Blox box showed cool light-up office buildings, which were not included. Be sure to check the back of the box to see the exact models it comes with.
  • You need to take apart each project to build the next, which may be hard for those who get easily attached to their work. We’ve been displaying my son’s creation-of-the-day as our dinner table centerpiece each night before he takes it apart to build something new. But five years ago, we wouldn’t have gotten past the first build, because he could never bear to destroy it.

What I like

  • Creative toy, with several ways to engage young learners
  • The different colored lights are very cool and unique
  • It’s educational, a great way to learn about 3D electronic circuits
  • Attention to safety, especially the alarm for short circuits

What I’d change

  • Include written assembly manual for all sets
  • Tighter fitting “regular” pieces for more stability
  • Add a tool for unlocking the tight-fitting conductive pieces

Final thoughts

A fun, unique toy with a bit of a learning curve at first, but lots of cool designs and creative possibilities once you understand how they work.

Price: Power Blox sets from $21.99 to $175.99. Circuit Blox sets from $10.99 to $82.49. Story Blox sets are $54.99. We tested Story Blox The City, $54.99, and the Power Blox Builds Plus set, $43.99.
Where to buy: E-Blox and Amazon
Source: The sample of this product was provided by E-Blox.

Filed in categories: Reviews

Tagged: ,

E-Blox building brick sets review originally appeared on The Gadgeteer on July 11, 2019 at 11:00 am.

Note: If you are subscribed to this feed through FeedBurner, please switch to our native feed URL http://the-gadgeteer.com/feed/ in order to ensure continuous delivery.

Nomad offers a free Lightning cable if you plant trees in the Amazon


NEWS – No one ever has enough Lighting cables, and no one who isn’t a land developer hates trees. What if you could plant trees and be given a free cable for your trouble? Nomad is offering exactly that in their Free Cable for the Planet program. Donate at least $5 to plant 5 trees in the Amazon, and they will send ya 1.5 meter Lightning cable, with or without end-caps. You do have to pay for shipping, but when’s the last time you bought a quality third-partly Lightning cable for under $10?

Hat tip to imore.com for their reporting of this news.

Filed in categories: News

Tagged:

Nomad offers a free Lightning cable if you plant trees in the Amazon originally appeared on The Gadgeteer on July 11, 2019 at 10:00 am.

Note: If you are subscribed to this feed through FeedBurner, please switch to our native feed URL http://the-gadgeteer.com/feed/ in order to ensure continuous delivery.
Posted by / July 11, 2019 / Tagged with / Posted in News