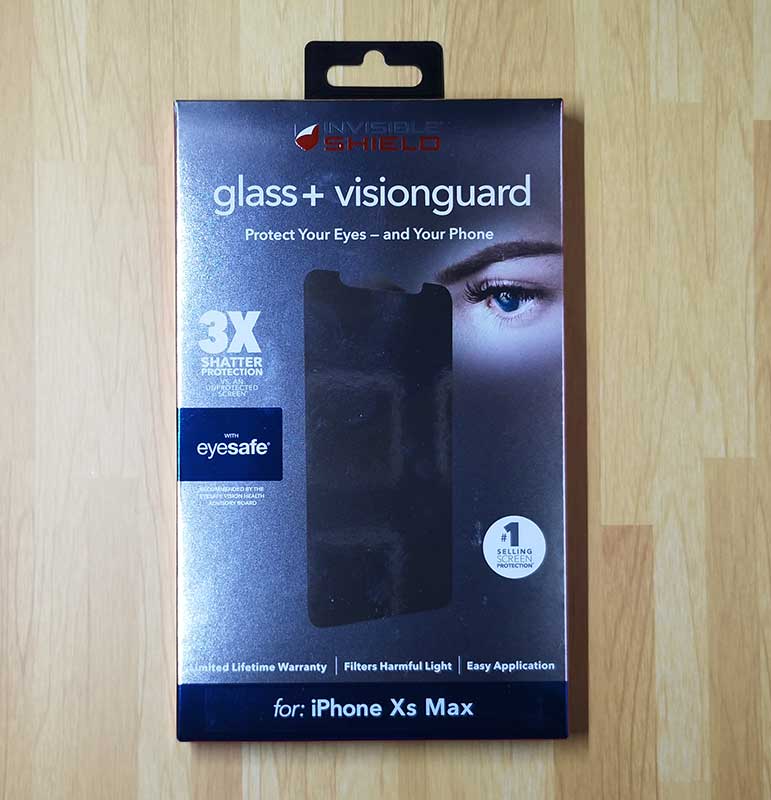
ZAGG InvisibleShield Glass+ VisionGuard iPhone Xs Max screen protector review

REVIEW – The new iPhone Xs Max costs a trillion dollars so you better protect it, especially the display. One solution is a ZAGG InvisibleShield glass screen protector, but the one I’m going to tell you about isn’t just any ordinary screen protector. This one also blocks blue light. Let’s check it out.

What is it?

The ZAGG InvisibleShield Glass+ VisionGuard is a glass screen protector for the iPhone Xs Max and other phones.

What’s in the box?
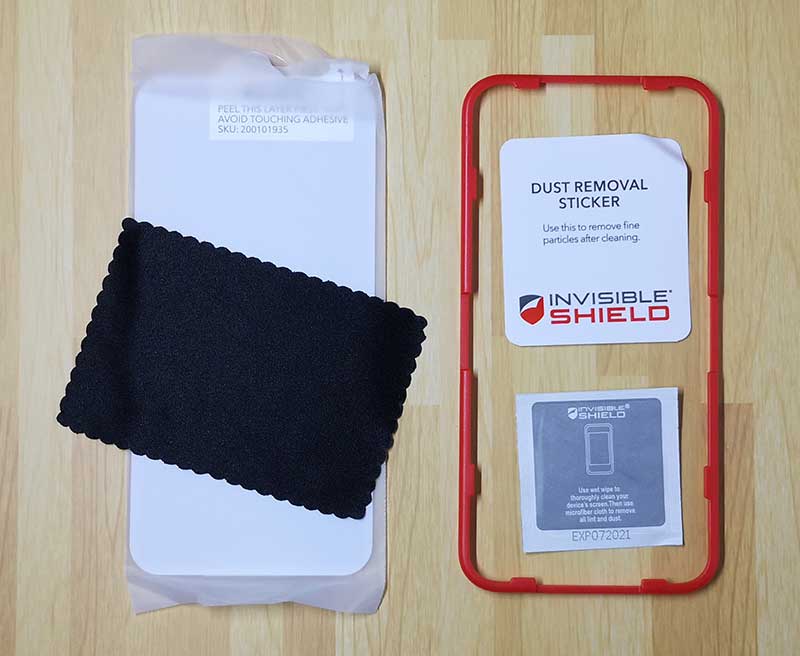
InvisibleShield Glass+ VisionGuard screen protector
Instructions
EZ Apply tray
Microfiber cloth
Cleaning wipe
Dust removal sticker

Installation
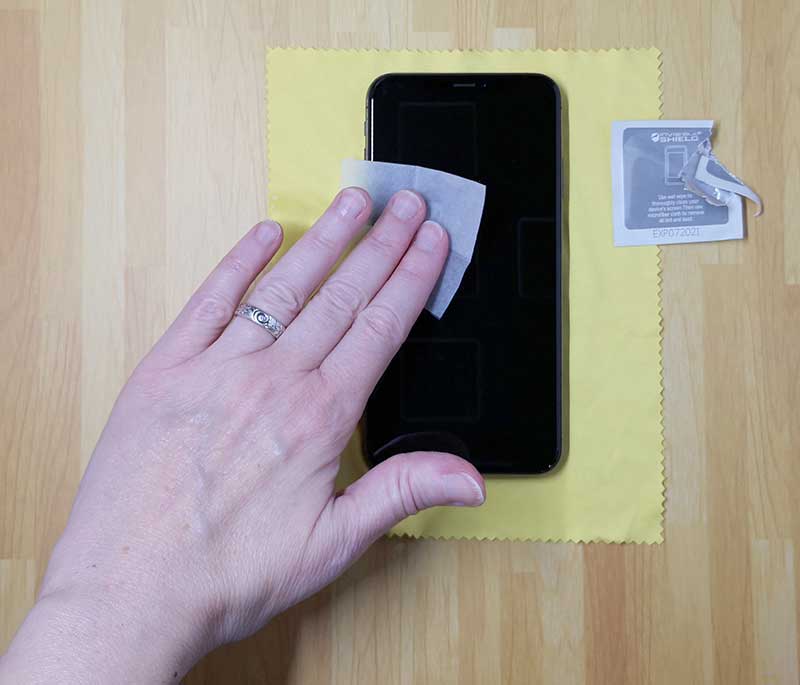
I went into this review expecting to be disappointed because every screen protector that I’ve either installed or had someone install for me has resulted in at least a few specs of dust or bubbles under the glass. But ZAGG sent me this protector without even asking if I was interested in reviewing it. And as fortune would have it, a few days later my iPhone Xs Max arrived just begging for protection. So I thought what do I have to lose?

I followed the instructions which tell you to clean the screen with the included wipe. I then used the bright lights of my SHOTBOX to make sure the screen was completely free of dust specs.
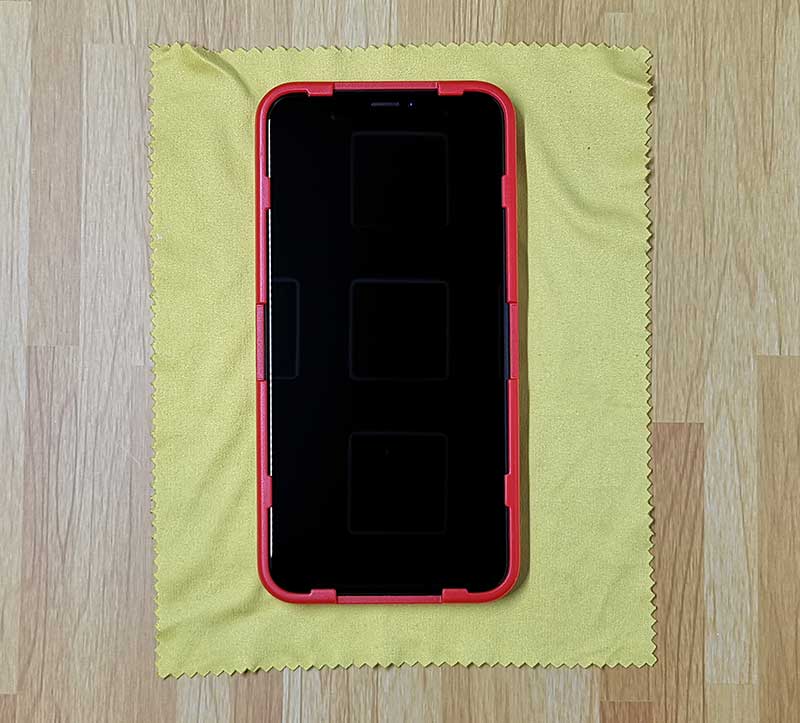
For the next step, I placed the EZ Apply Tray over the iPhone like you see above. That yellow cloth under the iPhone does not come with the screen protector, that’s just a glass cleaning cloth that I use to keep things clean.
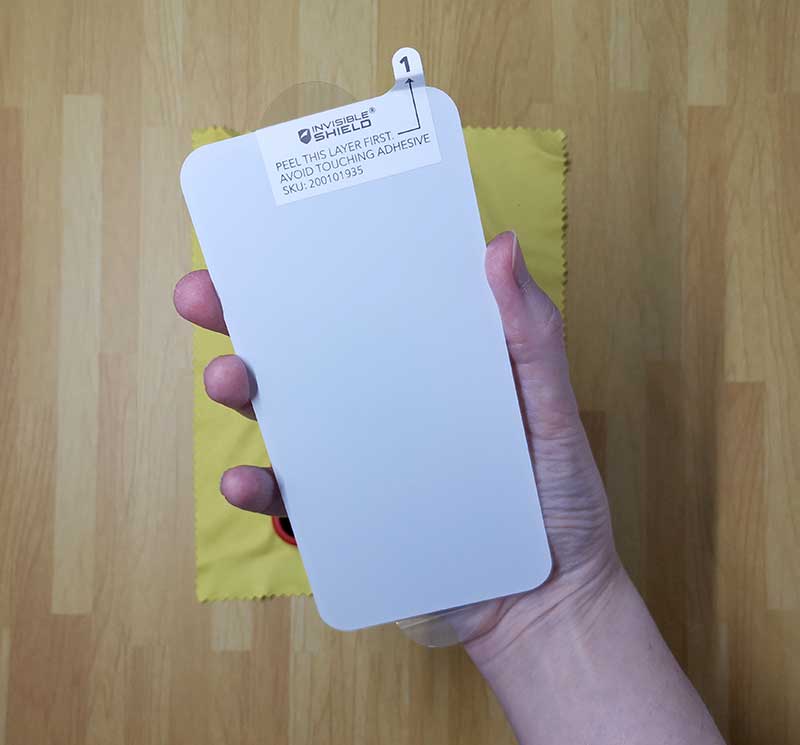
The next step instructions you to peel the #1 protective liner off the InvisibleShield.
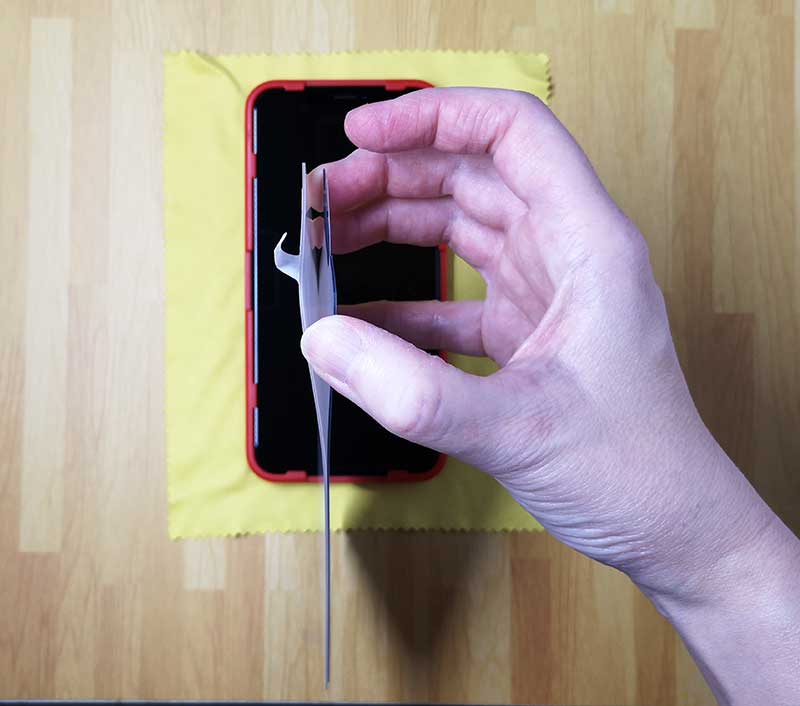
This protective liner is as thick or thicker than the actual screen protector and I felt like I was going to snap the glass protector in half trying to remove the line because pulling the two pieces apart caused both pieces to flex. But the glass didn’t snap, so on to step four.
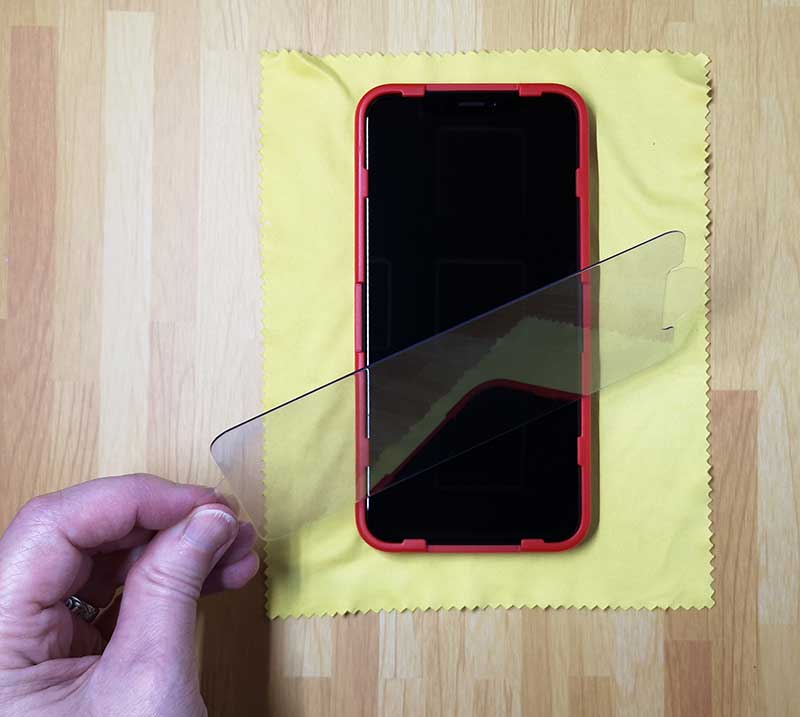
Here’s the InvisibleShield with the protective liner removed. The trick is to place it quickly before any dust can fall on it or the phone’s display.
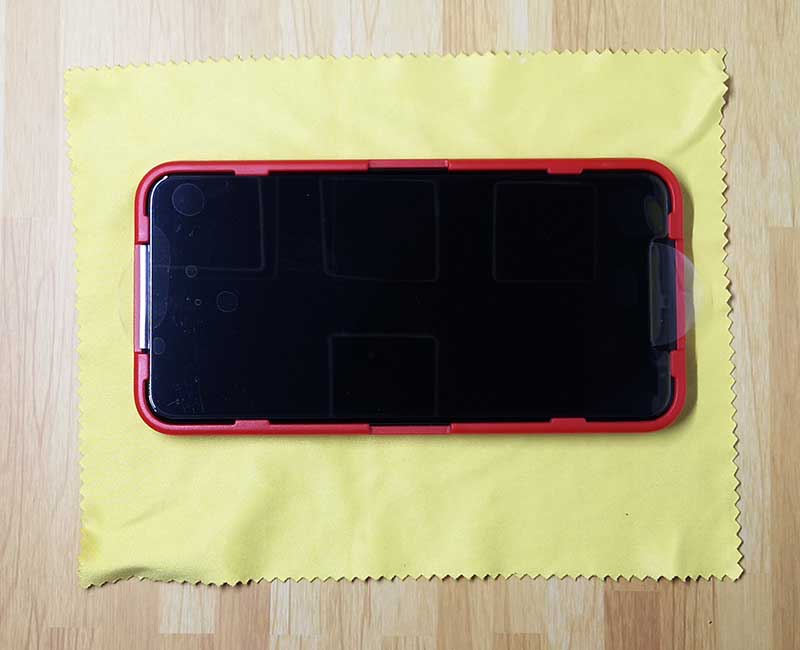
Luckily the EZ Apply Tray makes positioning the screen protector pretty much fail proof. One the protector is placed, you just touch the center of the protector and it applies itself. Seriously. It was that easy.
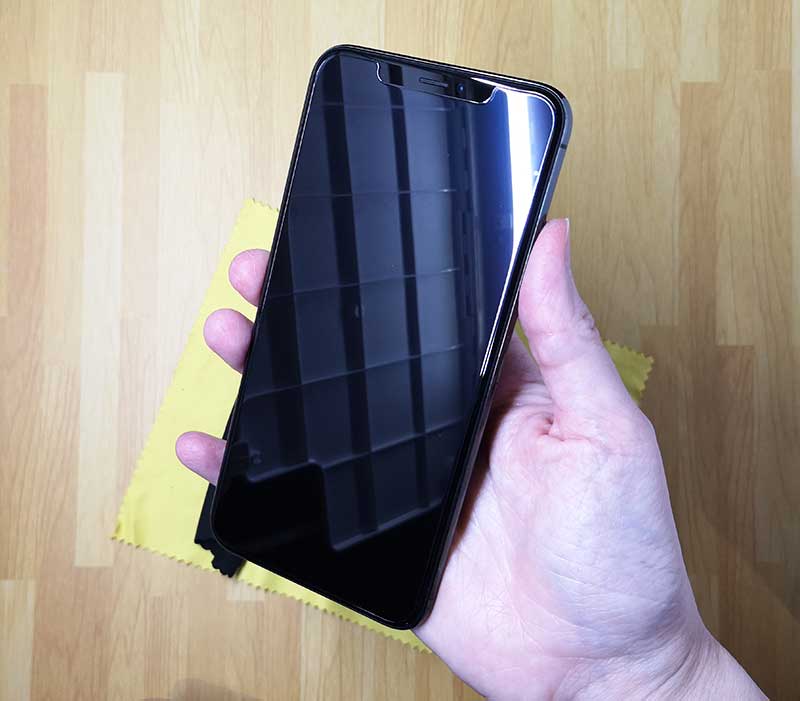
My first EVER perfectly applied screen protector. No dust, no bubbles, no ugly halo around the edges that won’t stick. It was perfect and has turned me into a screen protection advocate when I have been a dissenter in the past.

In addition to the easy application, the InvisibleShield screen protector offers a feature that I’ve not seen offered with other screen protectors. It has a special EyeSafe layer that filters out blue light which is known to cause eye irritation, sleep disruption, blurred vision, and more.

The image above shows the iPhone’s display before the screen protector was installed and the picture below is with the screen protector installed.
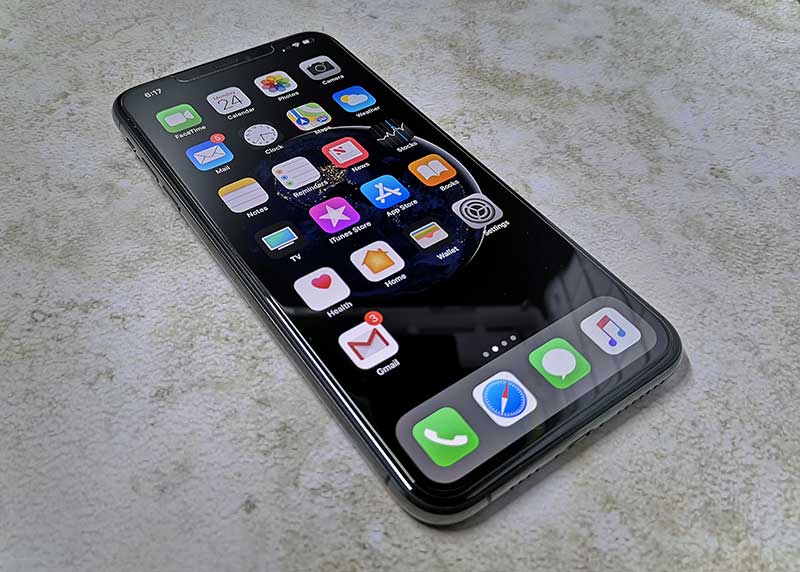
I thought it might make the screen look dimmer or even amber colored, but nope, the built-in blue light filter layer does the job without affecting the way the screen looks at all. True colors are preserved, even blues. Color me impressed.
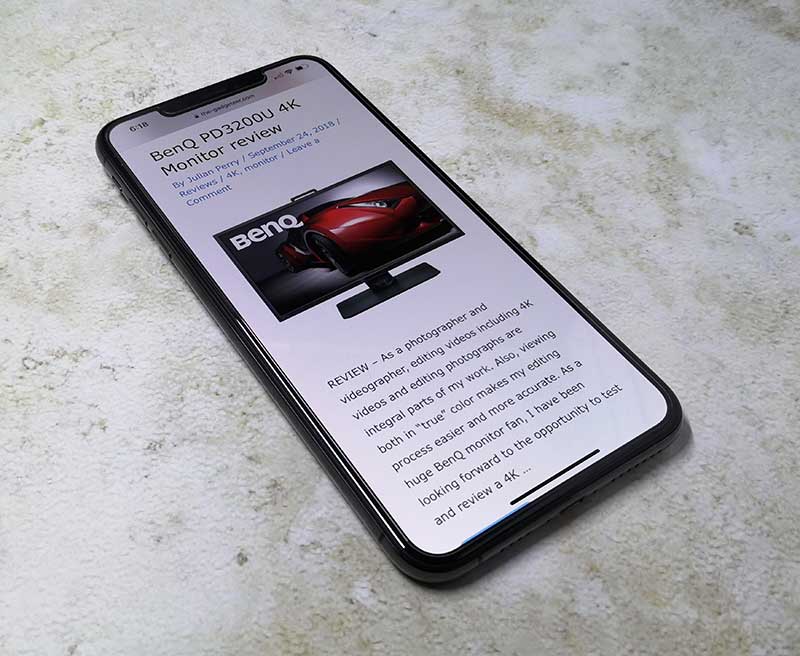
To my eyes, the iPhone Xs Max display with or without the screen protector looks the same which is all I can ask of a screen protector. This protector doesn’t hinder touch sensitivity either. It provides 3x the shatter protection vs. an unprotected screen and it resists smudges too.

What I like

  • Simple to install
  • Filters blue light without affecting True Color
  • Lifetime warranty

What needs to be improved

  • Expensive

Final thoughts

I didn’t think I’d ever sing the praises of a screen protector but after my experience with the ZAGG InvisibleShield Glass+ VisionGuardscreen protector for the iPhone Xs Max, I think I’ve become a convert. Now if they can just get the price down a bit. $45 is a lot to pay, but if that’s the cost for peace of mind, I suppose it isn’t completely out of line.

I ended up returning the iPhone Xs Max to Apple, but I look forward to trying another ZAGG screen protector for my next phone so that I can provide a long-term review update.

Price: $44.99
Where to buy: Amazon
Source: The sample for this review was provided by ZAGG.

Filed in categories: Reviews

Tagged:

ZAGG InvisibleShield Glass+ VisionGuard iPhone Xs Max screen protector review originally appeared on The Gadgeteer on October 18, 2018 at 12:00 pm.

Note: If you are subscribed to this feed through FeedBurner, please switch to our native feed URL http://the-gadgeteer.com/feed/ in order to ensure continuous delivery.

Travel light and handsfree with the Outpac Daysafe Crossbody

NEWS – If you carry a laptop bag to work, you probably don’t want to carry that huge thing when you go out for lunch or to run some quick errands.  You could use the Outpac Daysafe Tech Crossbody as your wallet and carry it inside your bigger EDC bag.  When you only need a phone, keys, and wallet, just take out the Daysafe and throw it across your body.  Everything you need for a quick trip is at hand, but not in your hand!

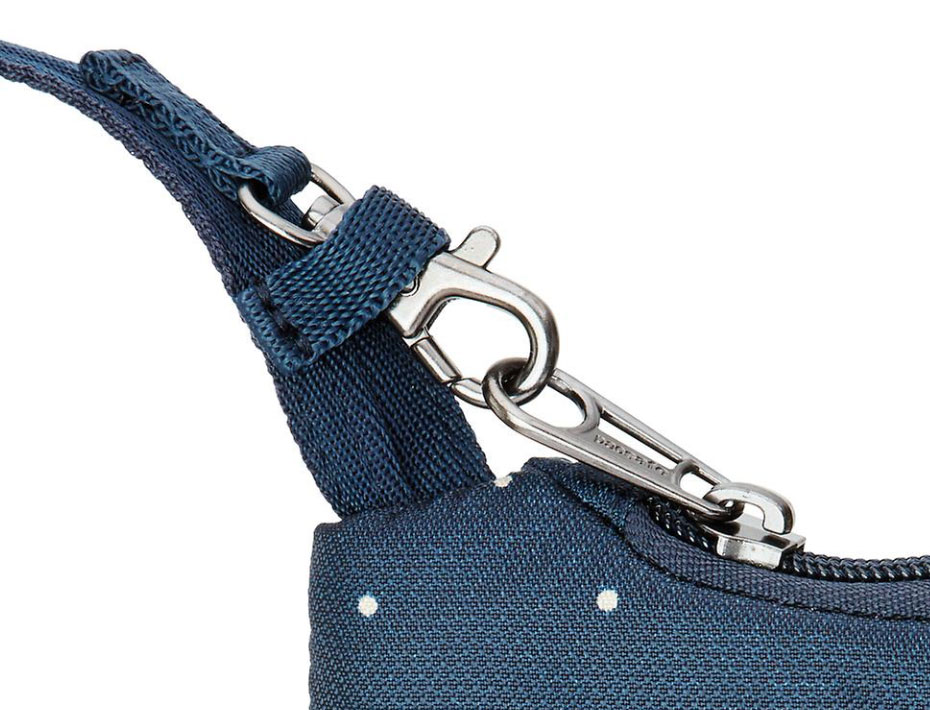
It’s called the Daysafe for two reasons.  1) The exterior is made of lightweight polyester with slash-proof construction, slash-proof strap, and lockable zippers to deter pickpockets.

2) Inside, you’ll find six card slots with RFID blocking to prevent RFID skimmers from collecting your personal information.  There are other interior pockets to hold and organize papers and other cards or even a US passport.  The bag also has a pen loop and a phone pocket that can accommodate a phone as large as an iPhone 8 Plus.

The Daysafe fits close, so you can wear it under a jacket.  The bag itself measures 5.12″ x 1″ x 8.5″ and weighs only 0.37 pound.

The Outpac Daysafe Tech Crossbody is available in black, red, or Navy dots for $39.95 each at The Container Store.

Filed in categories: News

Tagged:

Travel light and handsfree with the Outpac Daysafe Crossbody originally appeared on The Gadgeteer on October 18, 2018 at 11:00 am.

Note: If you are subscribed to this feed through FeedBurner, please switch to our native feed URL http://the-gadgeteer.com/feed/ in order to ensure continuous delivery.
MEATER+ wireless meat thermometer review

REVIEW – In January, I reviewed the MEATER wireless cooking thermometer that I continue to use regularly to this day. Over the passed year, it has helped barbecue/cook perfect slabs of meats for me and my guests. I liked it so much, I have given several as gifts to friends and family members. The MEATER’s only limitation or weakness was its wireless range; that did not allow me to travel far from the probe without losing connectivity. Well, the MEATER folks have addressed this issue and recently released an updated version of their wireless thermometer, the MEATER+ with nearly five (5) times the range…let’s see if it works as advertised.

Since the MEATER+ is nearly identical to the original, I will be plagiarizing from my original review (so you do not have to backtrack) and focusing on the PLUS’ longer range.

What is it?

Like the original MEATER, the MEATER+ is a truly wireless, dual sensor probe created with the sole job of helping you cook your food to perfection. Not only is the hardware very well done but so is the MEATER app and ecosystem, all working together to cook your meal with much less worry or guessing.

Design and features

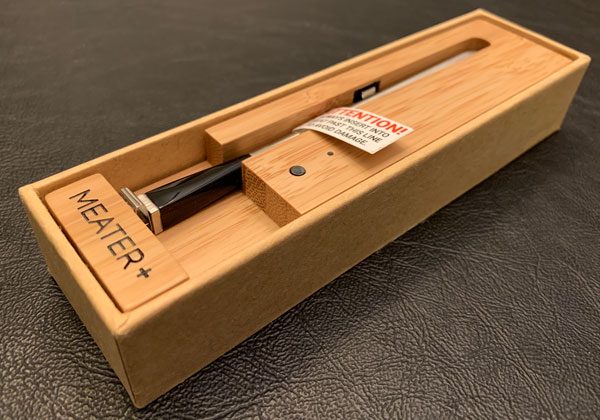
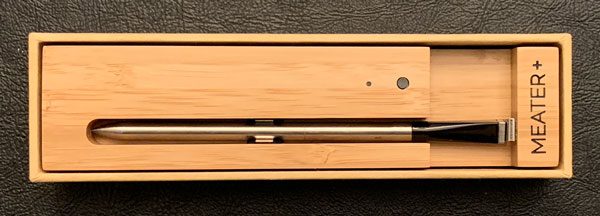
As you can see, they are visibly (and come to find out internally) identical. So much so, I had to keep track of them during my testing so I did not get them confused. I learned during the course of this review, the MEATER probe has not changed/been modified.

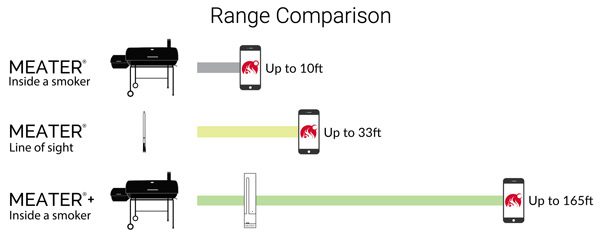
The part of the equation that has changed/been improved is the bamboo charger also acts as a repeater to boost the signal from the probe and thus the overall range.

Probe Specs

  • Stainless steel, water resistant and easy to clean
  • Wireless up to 165 feet (50 meters)
  • Bluetooth 4.0 wireless connection
  • MEATER Sense™: 2 temperature sensors in 1 probe
  • Maximum internal temperature: 212°F (meat)
  • Maximum ambient temperature: 527°F (cooker)
  • Rechargeable: Over 24 hours of continuous cooking
  • Dimensions: 130mm length and 6mm diameter

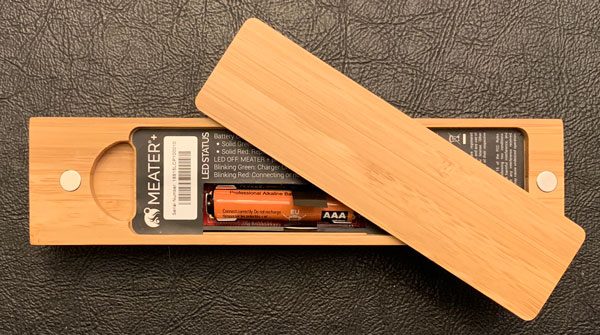
In addition to boosting its wireless range, the MEATER+’s bamboo holder securely keeps and recharges the wireless (easily misplaced) probe. There is a battery power level LED & button located on the front of the wooden holder.

Charger Specs

  • Store and charge your MEATER+ probe
  • Internal Bluetooth booster/repeater
  • Magnetic backing: Attach anywhere
  • Charges MEATER+ up to 100 times with one AAA battery
  • Real wood to match any kitchen or outdoor decor
  • LED indicator to show battery state
  • Dimensions: 157mm L x 37mm W x 28mm H

The MEATER+ is powered by a single AAA battery and can charge the probe up to 100 times before needing to be replaced. The back cover is also held in place by two small embedded magnets.

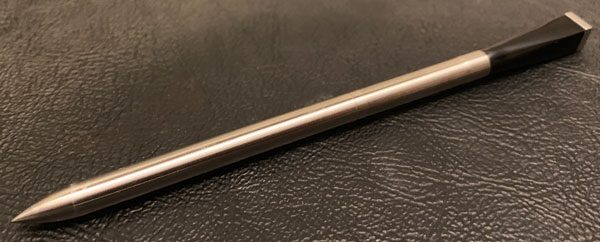
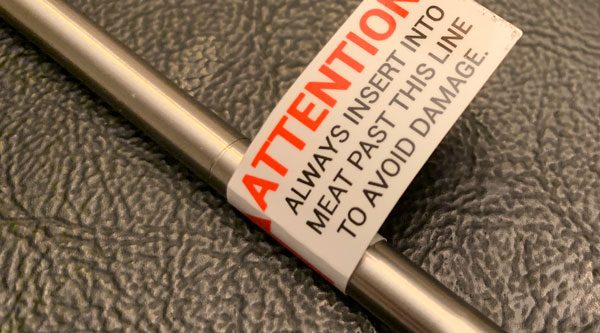
The MEATER+ probe has to be inserted into the meat beyond the line machined into the metal casing to protect the main sensor from damage due to high temperatures.

The ambient sensor is meant to monitor the cooking temperature of the oven or BBQ. It is located in the black plastic end of the probe.

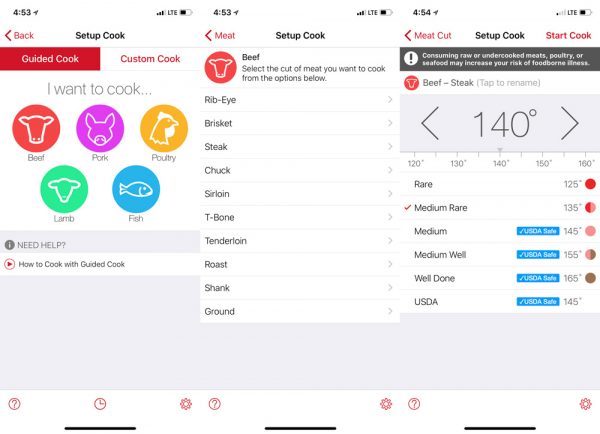
Along with creating a very easy to use, high quality device, the folks @MEATER have developed a very polished ecosystem/app to make cooking with either MEATER(+) probe nearly foolproof. The MEATER’s Smart Guided Cook system walks you through every step of the cooking processThe app guides you thru the type, cut, and doneness of the meat.

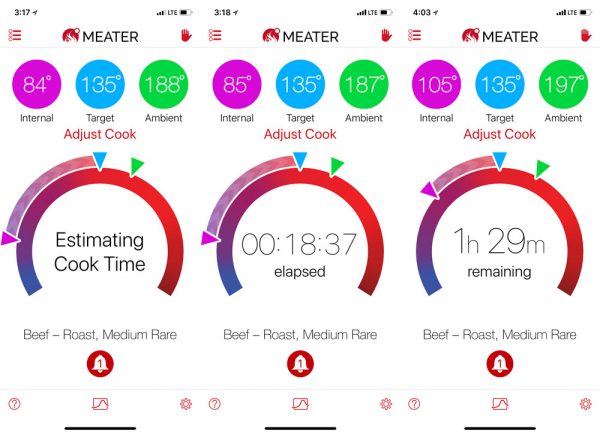
The MEATER+’s dual sensors continuously monitor internal and ambient temperatures concurrently. The app also gives you elapsed cooking time and estimated time remaining until your meal is ready to serve.

The app let’s you know when to pull the meat from the cooker, finish its internal cooking (aka letting it rest), and when its ready to eat. The estimated cook time has been spot on…within 5 minutes or so. Not bad considering the roast took nearly two plus hours to cook.

Overall, the whole system is brilliant and has only gotten better. I used the MEATER+ several times over the past few weeks. And for the most part, had zero functional or connectivity issues.

Here was my only issue with the original MEATER:

The only real limitation of the MEATER is it’s range and lost connectivity. I wouldn’t even consider it a true negative just a known issue that needs to be worked around. You’re sticking a small under powered Bluetooth device into a metal box, it’s range is going to be pretty limited. I found both in the BBQ and oven, the range of the MEATER was approximately 10 feet but would quickly reconnect once back in range.

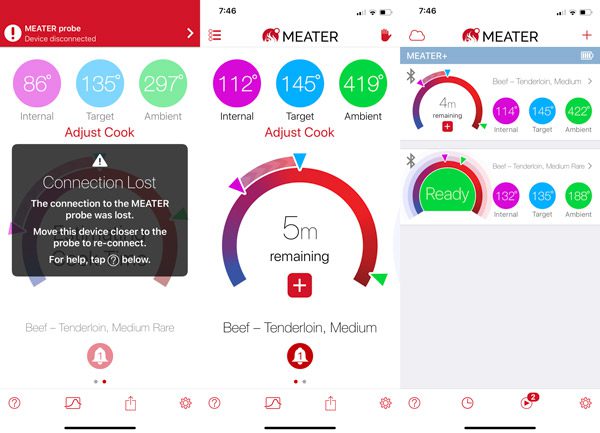
Given the same BBQ, distances, wall thicknesses, etc…the MEATER+ worked as promised/designed. During my testing, I had both the original MEATER and MEATER+ working at the same time and the PLUS’ range was excellent. I was able to leave the BBQ, come inside and sit at our kitchen bar some 40 feet away from the probe with the signal penetrating not only the metal of the BBQ but several walls too. The original MEATER lost its Bluetooth connection (left screen capture) just like before, where the MEATER+ did not blink an eye (center screen capture).

The MEATER and now the MEATER+ have yet to let me down. Every piece of meat I have cooked using these wireless probes has been spot on.

What I like

  • Well made, thought out design
  • Truly wireless
  • Excellent range (improvement over the original)
  • Water resistant, dust-proof, easy to clean
  • Built-in dual sensors
  • Excellent app/ecosystem

What needs to be improved

  • None

Final thoughts

The new and improved MEATER+ is an excellent upgrade from the original. The added Bluetooth range definitely makes using the wireless probe and its ecosystem a seamless experience. During my testing, my smartphone and MEATER+ only had a few hiccups but that easily could have been my iPhone or the new iOS. If you’ve been considering the MEATER, I would pay the extra $30 and go for the MEATER+ ($99). If you have the MEATER and been having connectivity issues, upgrading is worth considering as well. Either way, the MEATER+ would make for an excellent stocking stuffer for the cook in your family even if it’s yourself 😉 .

Price: $99.99
Where to buy: The MEATER+ is available on their website.
Source: The sample of this product was provided by meater.com.

Filed in categories: Reviews

Tagged: , ,

MEATER+ wireless meat thermometer review originally appeared on The Gadgeteer on October 18, 2018 at 10:00 am.

Note: If you are subscribed to this feed through FeedBurner, please switch to our native feed URL http://the-gadgeteer.com/feed/ in order to ensure continuous delivery.

Gadgeteer Team EDC 2018 updates – Joe Porletto

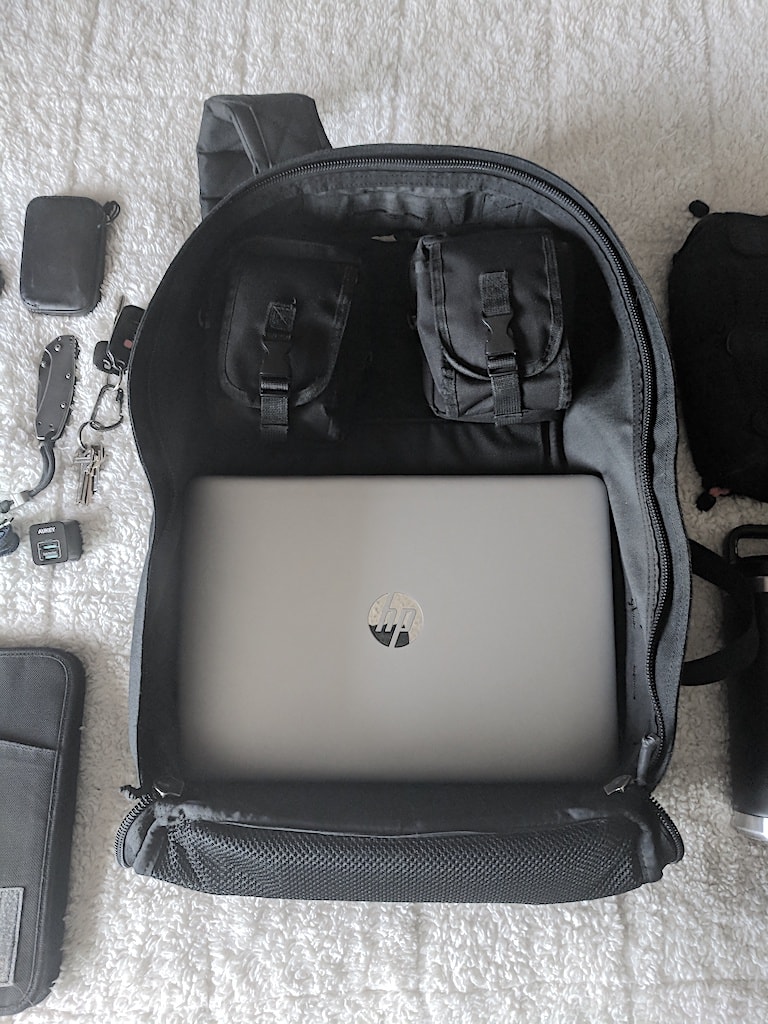
ARTICLE – As you may be able to tell from my gear pics, I take my EDC kit very seriously (and I prefer the color black). Navigating the streets and subways of NYC for the last twenty or so years has helped me hone my kit down to the absolute bare necessities for daily urban survival. Now that I live in the Pacific Northwest though, I’ve started to modify my EDC a bit, but overall it’s stayed pretty consistent. Here’s my EDC update for 2018.

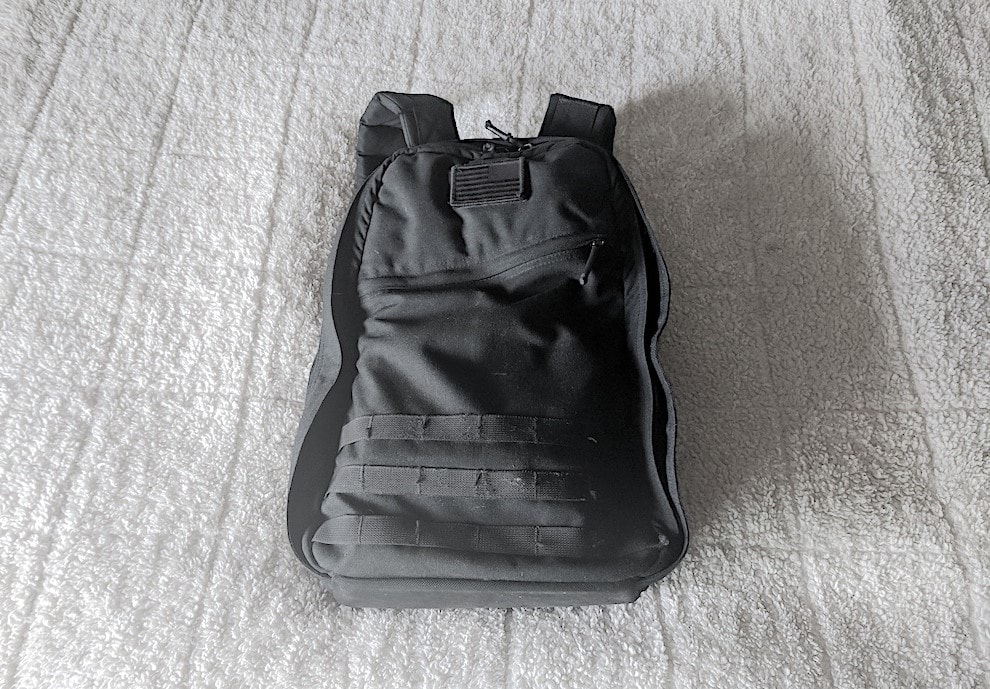
The success of an EDC kit is completely dependent on the bag that holds it all, and there is no bag tougher than the GORUCK GR1. Before I owned my GORUCK, I’d buy a new backpack or messenger bag at least once a year. I was always on the lookout for the perfect bag. Since acquiring my beloved GR1 though, I haven’t given another bag a second look. The fit, construction, material, and aesthetic are all the absolute best I’ve ever encountered. The GORUCK costs more compared to other backpacks, but it’s 100% worth it.

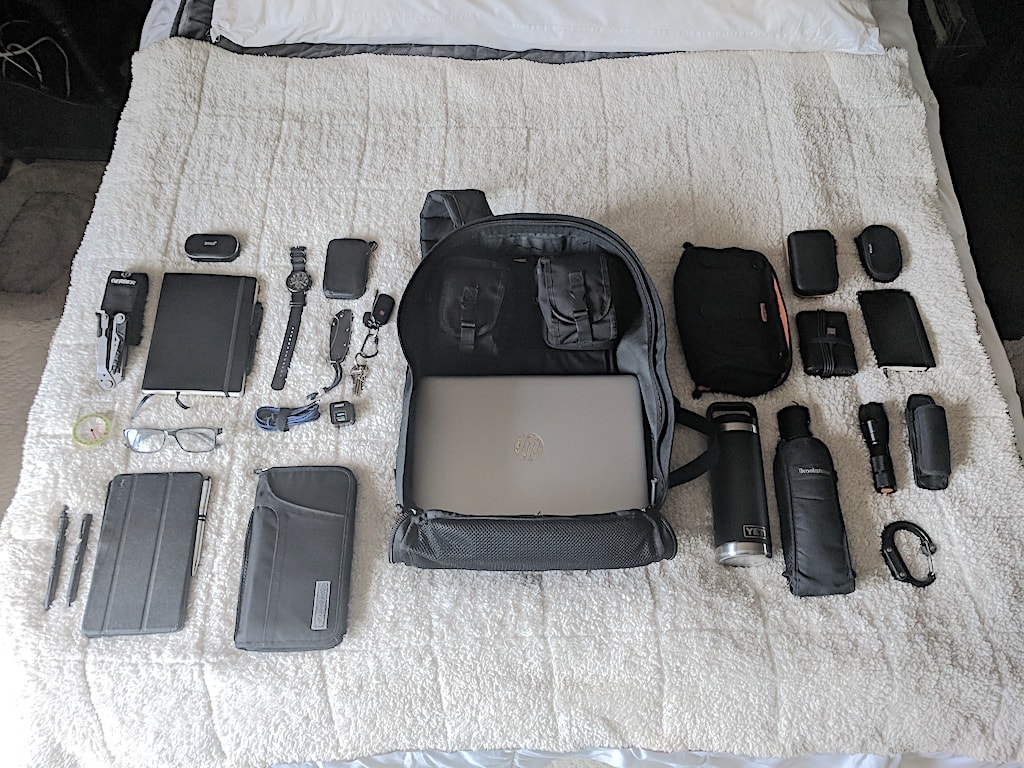
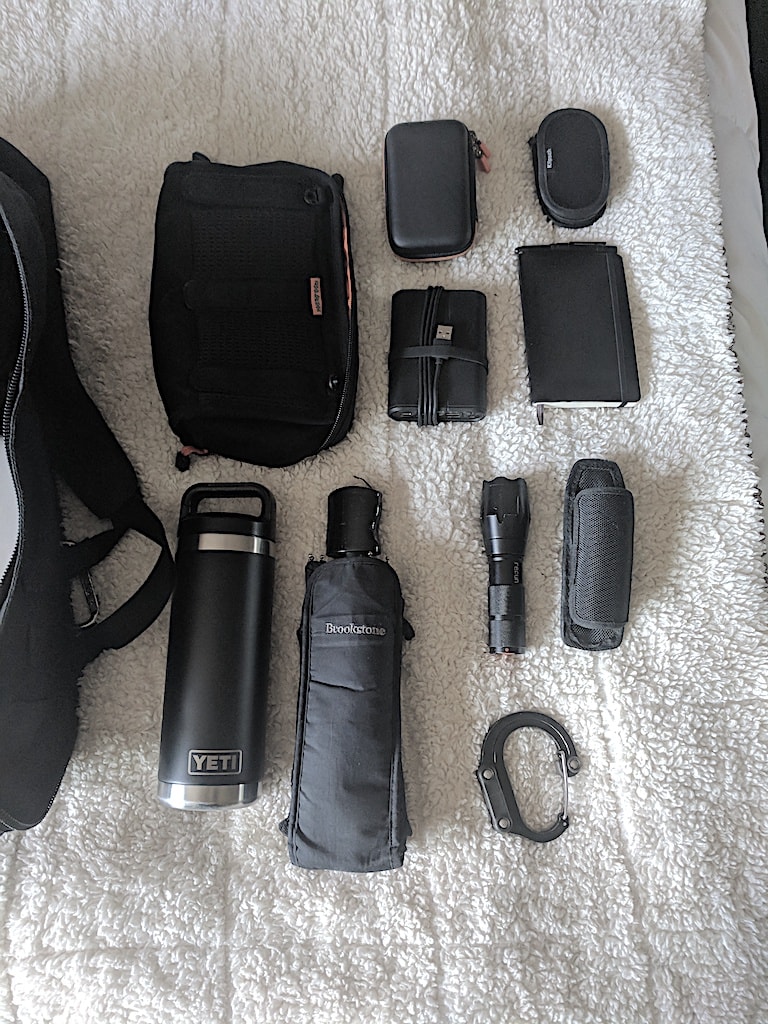
Now, let’s break down everything that fits inside my GR1 on a daily basis.

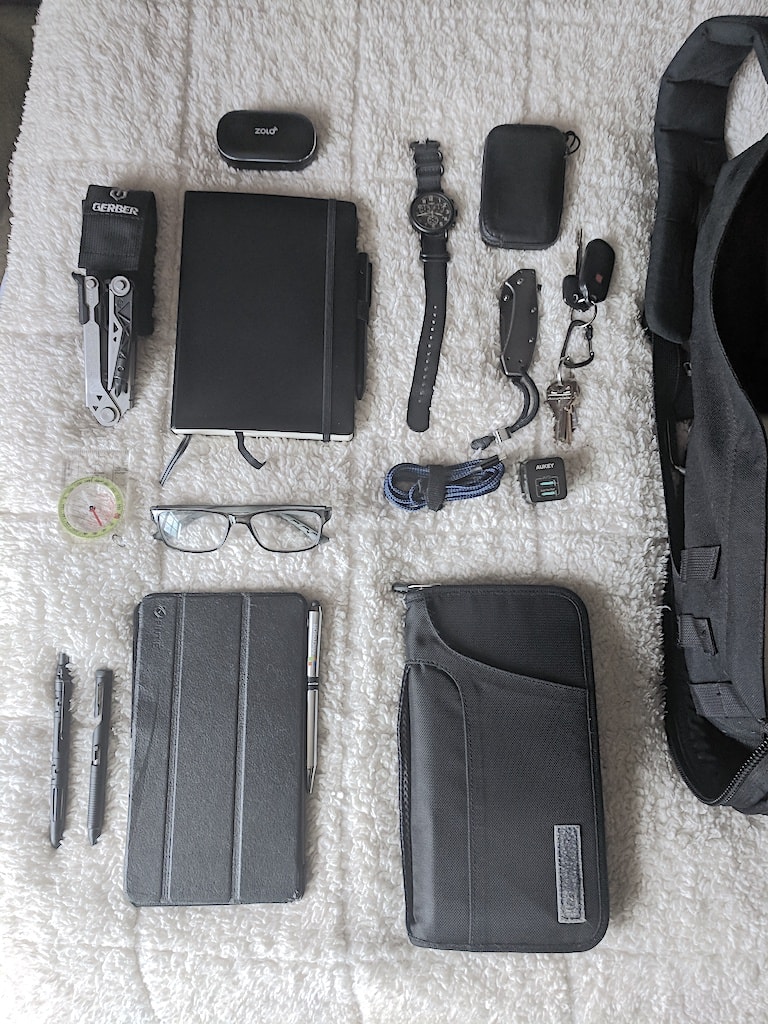
Items (Clockwise L to R):


Bag:

Internal items:

Items (Clockwise L to R):

Not pictured:

Filed in categories: Articles

Tagged: ,

Gadgeteer Team EDC 2018 updates – Joe Porletto originally appeared on The Gadgeteer on October 18, 2018 at 9:00 am.

Note: If you are subscribed to this feed through FeedBurner, please switch to our native feed URL http://the-gadgeteer.com/feed/ in order to ensure continuous delivery.

Control your Philips Hue lights by simply entering a room

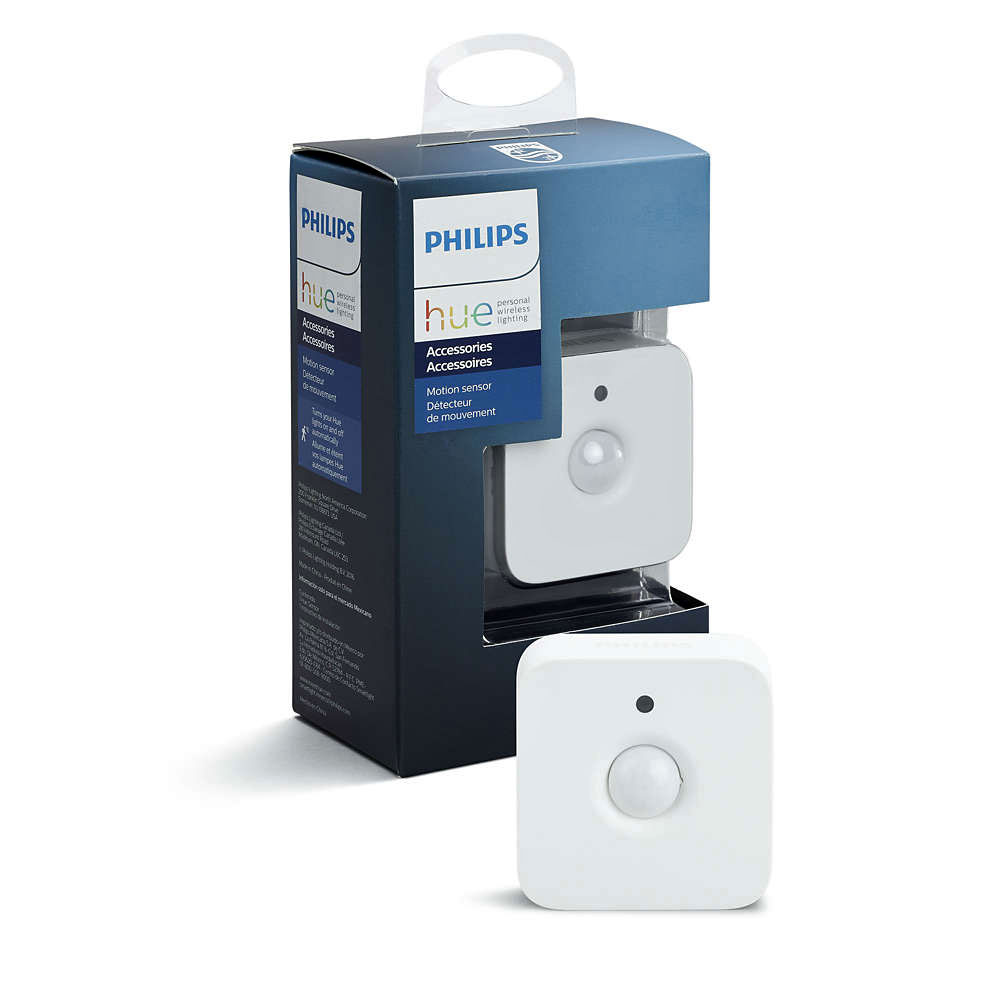
NEWS – Most of the bulbs in my house are Philips Hue bulbs or light strips.  I have a lot of Hue Tap switches scattered around to operate my lights, and they work well, but a couple of them require you to walk down a dark hallway to reach the switch.  I need to add a Hue Motion sensor at each end of the hall to automatically trigger the lights so I’m not wandering around in the dark.

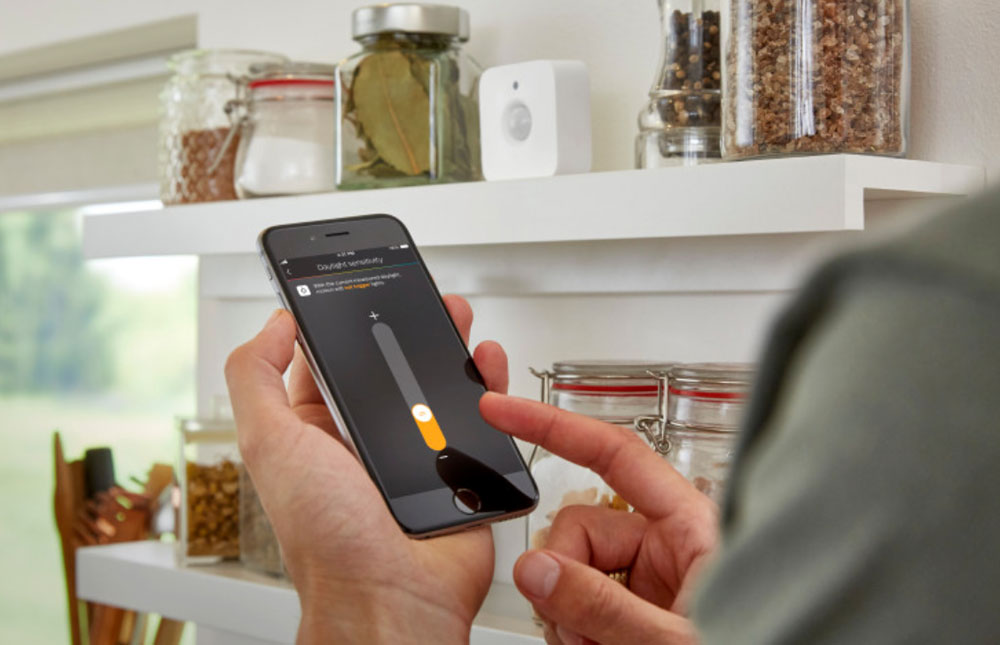
The Motion sensor is battery-powered, so it can be installed anywhere.  You can set it on a table or shelf, mount it to the wall or ceiling with a screw, or attach it to an appliance or other metal surface with the included magnet.  Once mounted, you can adjust its viewing angle.  When it detects motion, the sensor can trigger your selected Hue scene or light setting to turn the lights on.  Lights will go off after it no longer senses motion.  The sensor also has a daylight detector, so it can adjust the light for a dim nightlight when the room is dark or for bright white light during the daytime.  Of course, the Hue Motion sensor requires a connection to the Hue bridge to operate your Hue lights.

The Hue Motion sensor is $39.99 at the Philips Hue website.

Filed in categories: News

Tagged: ,

Control your Philips Hue lights by simply entering a room originally appeared on The Gadgeteer on October 18, 2018 at 8:00 am.

Note: If you are subscribed to this feed through FeedBurner, please switch to our native feed URL http://the-gadgeteer.com/feed/ in order to ensure continuous delivery.