Use your laptop anywhere with the Foldable Laptop Stand by Levit8

NEWS – How many times have you found yourself in a place where you need to or want to use your laptop, but there is either no place to sit and use it at a comfortable height or no place clean and comfortable to use it while standing? I have faced this scenario more than once, and I have frequently looked for a portable stand that has the height and weight requirements that will also allow me to carry it without an issue.

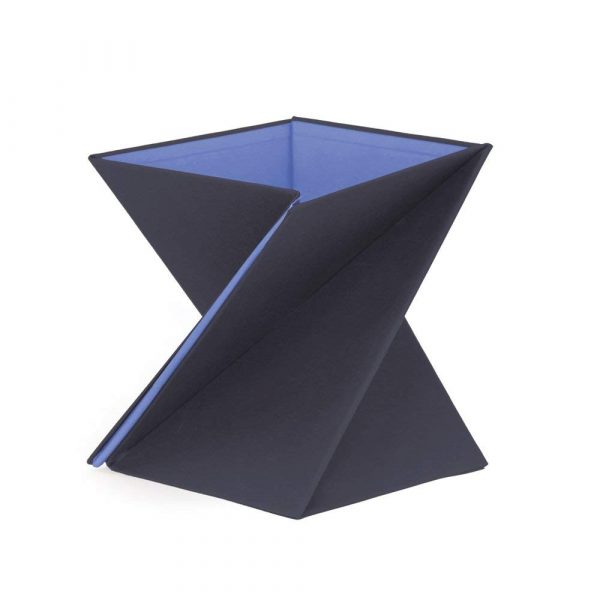
I recently came across the Foldable Laptop Stand by Levit8. This foldable laptop stand seems like it would work in a variety of scenarios. It is an origami style design that is lightweight and claims to be able to support 20 times its weight. It is constructed from polyester, PU fabric, and high-density cardboard, and is stain and water-resistant. It comes in the following 4 sizes: Small: 9″ x 9″ x 9″ (1.3lbs); Medium 9″ x 9″ x 11.9″ (1.65lbs); Large: 9″ x 9″ x 14″ (1.85lbs); X-Large: 9″ x 9″ x 16.2″ (2lbs). Since the largest size weighs only 2lbs, it would likely be an easy addition to my EDC backpack.

If you are interested in purchasing the Foldable Laptop Stand by Levit8, you can head over to Amazon and pick one up. They range in price from $23.95 to $34.95 depending on the size you choose.

Filed in categories: News

Tagged:

Use your laptop anywhere with the Foldable Laptop Stand by Levit8 originally appeared on The Gadgeteer on July 25, 2018 at 10:00 am.

Note: If you are subscribed to this feed through FeedBurner, please switch to our native feed URL http://the-gadgeteer.com/feed/ in order to ensure continuous delivery.

TRENDnet Powerline 200 AV PoE+ Adapter review

REVIEW – The TRENDnet Powerline 200 AV PoE+ Adapter extends a computer network almost to 1000 ft by transmitting an encrypted signal over existing electrical wiring. The adapter can also power PoE+ devices. Best of all it is ready to use out of the box. Read on to see what I think!

What is it?

The TRENDnet Powerline 200 AV PoE+ Adapter creates a high-speed computer network on top of  your home’s existing electrical wiring. It does this by creating an encrypted radio signal within home wiring for transmitting and receiving network traffic. This is useful for using network components that require wired network connections in rooms where no such connection is available. The TRENDnet Powerline 200 AV PoE+ Adapter also has PoE+ capability, which means that it can supply up to 30W of power over the ethernet connection for powering devices. Some devices which may benefit from this include IP cameras, wireless access points and VoIP handsets. 

What’s in the box?
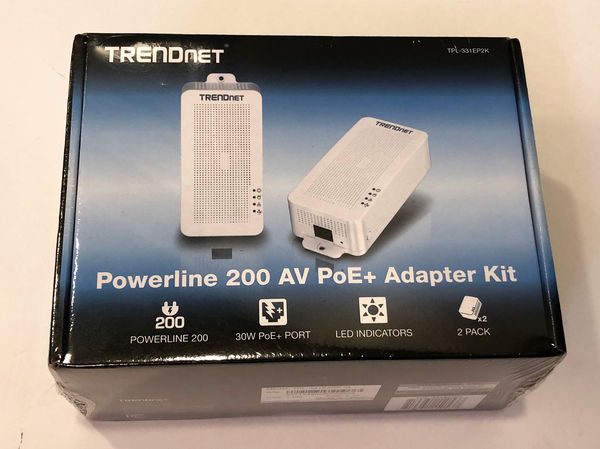
The product review is for the TPL-331EP2K which contains two units for starting a network.

  • 2 x TPL-331EP
  • Quick Installation Guide
  • Safety note (about the dangers of using damaged electrical equipment and exposing the unit to extreme heat)
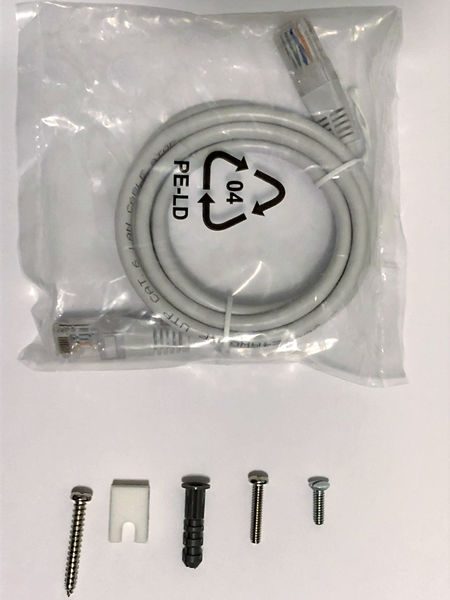
  • 2 x Network cable (1.2m/4 ft.)
  • 2 x mounting hardware

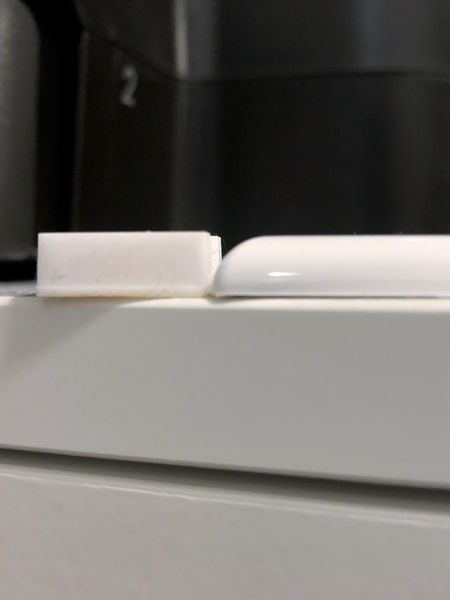
Mounting hardware includes a plastic drywall anchor, screw and foam spacer so that the base of the unit can be fastened to the drywall below the wall receptacle. You can see from the picture below that the spacer, on the left, is about the same thickness as the wall plate (on the right).
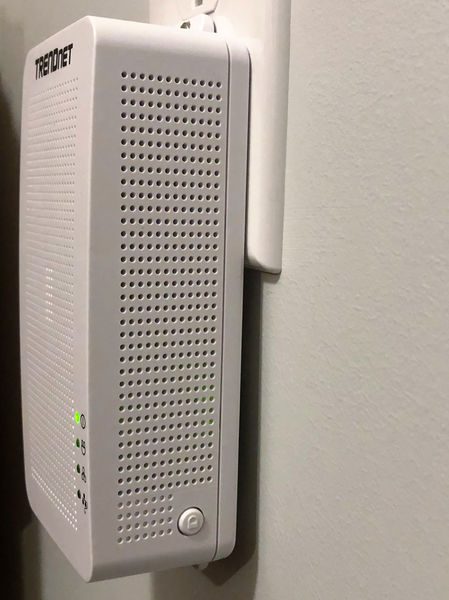
The mounting hardware also comes with an extended wall plate screw that can support the weight of the adapter in a standard duplex receptacle design. The unit weighs 7 1/4 ounces so it will generally stay installed without the screw – the hardware provides assurance that it will not be removed accidently. The picture below shows the unit fastened by the wall plate screw only. 
Design and features

Specifications
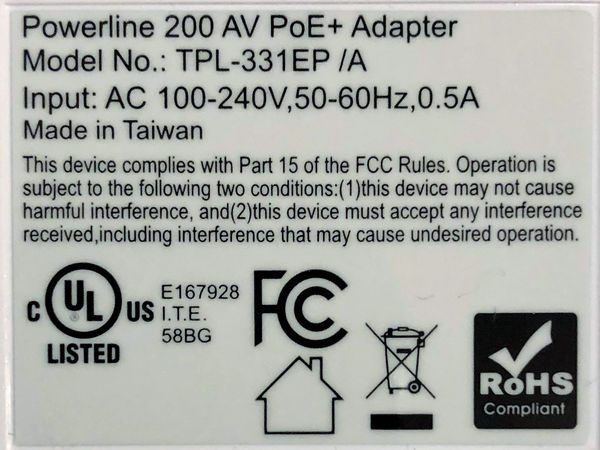
Standards  • IEEE 802.3, IEEE 802.3u,  IEEE 802.3x,  IEEE 802.3af,  IEEE 802.3at,  IEEE 1901
Frequency Band • 2 – 28MHz
Modulation/Protocol • OFDM, 1024/256/64/16/8-QAM, QPSK, BPSK, ROBO; CSMA/CA, CSMA
Data PHY Rate • Up to 200Mbps
Networking Distance • Powerline: Up to 300m (980ft.) linear distance over electrical power lines***
Encryption • 128-Bit AES (Advanced Encryption Standard)
Powerline Nodes • Up to 8 (max.)
Overlapping Powerline Networks • Up to 4 (per electrical system)
Special Features • Auto-connects to other TRENDnet Powerline adapters;  IPv6 support;  IGMP / MLDv2 Streams
Power • Input: 100 – 240V AC, 50-60Hz; Consumption: Active mode: 2.3W (max.); Standby mode: 1.7W (max.); PoE Budget: 30 Watts (max.)
PoE Delivery • Pin 1, 2 for power+ and pin 3, 6 for power- (mode A)
Operating Temperature • 0 – 55°C (32 – 131°F)
Operating Humidity • Max. 93 % non-condensing
Certifications • FCC;  IC
Dimensions • 156 x 67 x 43 mm (6.14 x 2.6 x 1.7 in.)
Weight • 205g (7.2 oz.)
Warranty: • 3 year

TRENDnet Powerline 200 AV PoE+ Adapter Design

The power adapter will look at home in any fairly technical setting, such as an AV area or near a computer workstation area. However, it’s technical design and lines will be somewhat of an eyesore anywhere else. For instance, if you are using this to discreetly power an IP camera then the large TRENDnet box will certainly provide a hint that there may be surveillance in the area.  The front of the unit is well ventilated but it seems excessive for a device that only consumes 2.3 W.
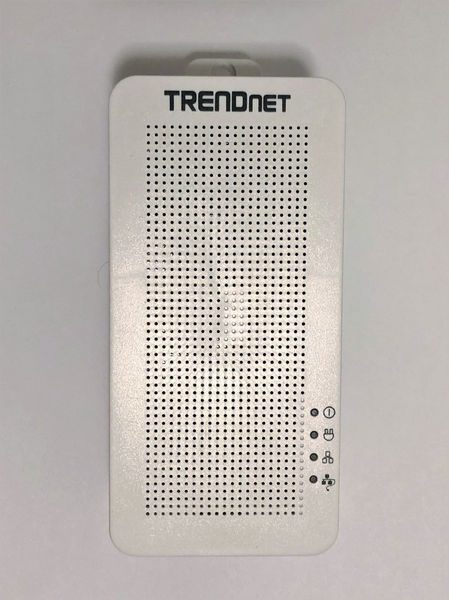
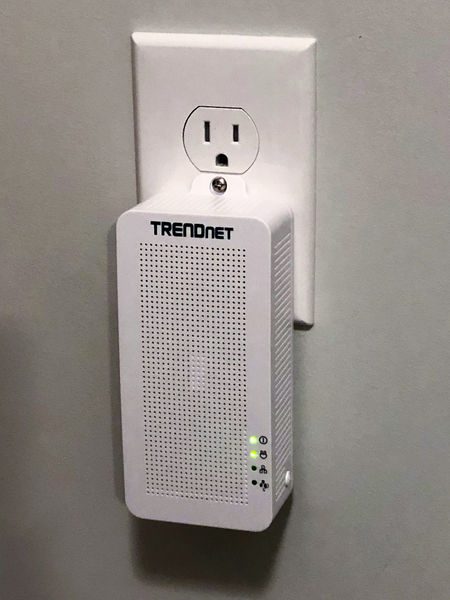
The four LEDs on the front indicate the operating state of the unit. The top LED is always lit whenever the device is powered. The second from top LED is lit when the powerline network is connected and blinks when data is transmitted over the powerline network. The second from bottom is lit when the Ethernet port is connected and blinks when data is transmitting over Ethernet. Therefore, the middle two LEDs always blink together, but the second from the top may blink on its own (indicating the powerline network overhead). The bottom LED is lit when a PoE/PoE+ device is connected.

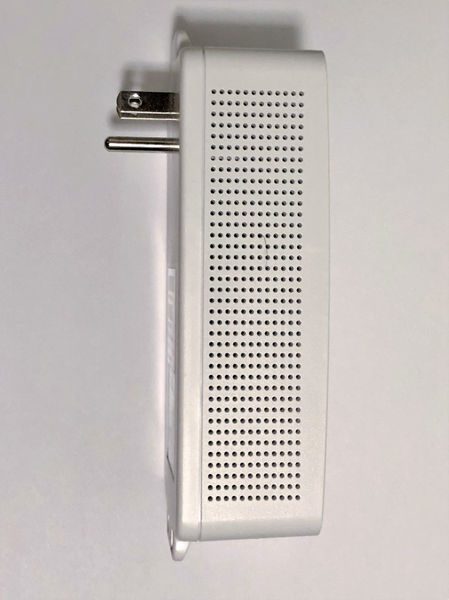
The left side of the unit has more ubiquitous venting but no other interface or indicators.
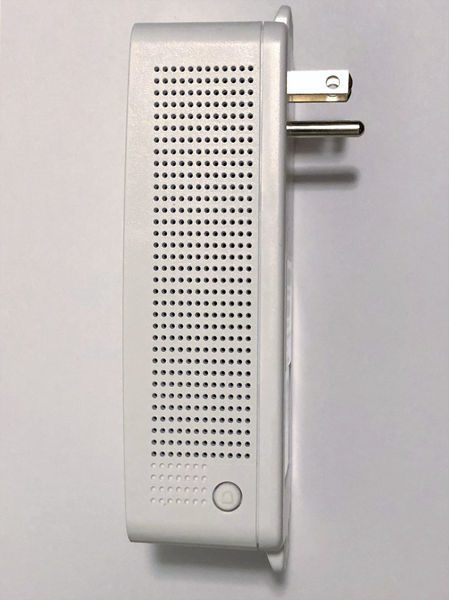
The right side of the unit looks similar to the left side but there is a sync button at the base. Pressing the sync button for 3 seconds initiates a synchronization session. The powerLED will begin to blink for 2 minutes. Pressing the Sync button on additional adapters within the time frame will synchronize encryption keys between these adapters and create a private network. Without performing this step any additional TRENDnet adapters introduced into the electrical circuit will also be allowed to join the network. Performing this step on a subset of adapters (if four or more adapters are connected) will create an isolated network of adapters.
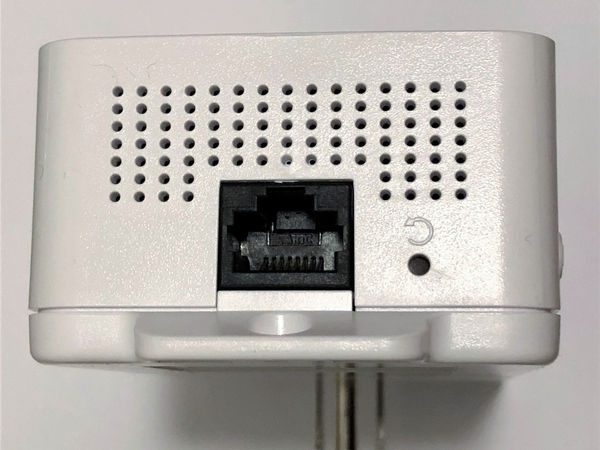
The bottom of the device is shown in the picture below. The Ethernet port is a standard design. The reset button to the right restores factory defaults settings if it is pressed for more than 10 seconds. When resetting  all LEDs will turn off and on again. After reset the powerline network name will return to the default “HomePlug AV”.
Operation

Operation is the definition of simplicity. The adapters automatically establish a network out of the box. The adapters are also cross-compatible with Powerline 1200, 600, and 500 adapters.

The powerline communication works on a single electrical system. (Usually controlled by a single distribution panel). Power strip, GFCI outlets, and AFCI circuit breakers may degrade Powerline network signals. My first choice for outlets in my home was on two different end-runs powered by different breakers. One breaker is the standard design from 1973. The other breaker is a GFCI type installed last year. The Powerline signal did not transmit across the GFCI. However, it was easy to debug this situation by observing the LEDs on the front.

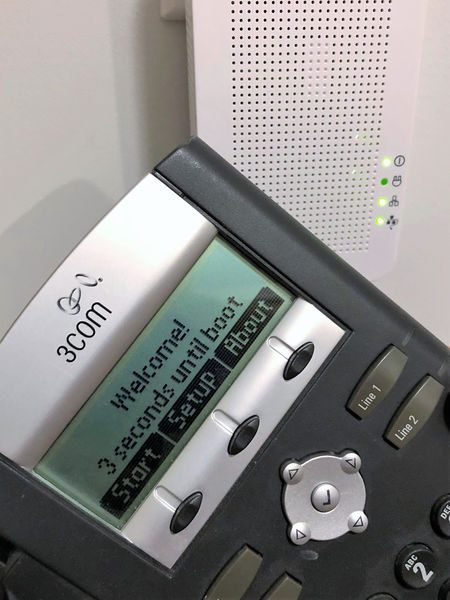
I tested the operation of the PoE with a VOIP phone from work and it successfully powered up. You can see the PoE LED illuminated in the picture below, and the Powerline LED in the middle of a blink. I didn’t have any PoE+ devices at my disposal.
Performance

Aside from the PoE capability, the most important aspect of the system is how quickly it can provide communications over the electrical system and how reliable it is. Every electrical system is a little different so these tests only indicate one set of results and can’t guarantee the maximum or minimum performance achievable in another application.

One thing I did notice is that I cannot use touch-sensitive lamps on the same line as the adapters. The adapters must introduce signal noise that triggers the circuitry to turn the touch light on and off.

To test performance, first I plugged my laptop directly into my router and then the router to the TRENDnet and the TRENDnet to another computer. I tested the speed between the systems using LAN SpeedTest Portable Ver. 4.1.0 Lite by Totusoft. The OS parameters the computer used for the test:

Operating System: Windows 10 Build 14393
Window ScaleFactor: 1
Network Cards: 1
HP Timers: 0 = 0.01 1 = 0.09 10 = 9.38 100 = 99.02
Packet Size: 1 MB to 1 MB
Packet Size Avg: 1,000,000 Bytes
Packets: 1
Write Cache: Enabled
Read Cache: Disabled

The results vary considerably from test to test. However, in general, the results using the Wi-Fi in my house (with the Ethernet ports disconnected):

Write Speed: 149.08 Mbps
Read Speed: 199.52 Mbps

The typical results using the TRENDnet without Wi-Fi:

Write Speed: 16.51 Mbps
Read Speed: 24.60 Mbps

And for comparison, the results at work (using a different source and destination):

Write Speed: 231.96 Mbps
Read Speed: 273.98 Mbps

The results above indicate that the Powerline is not operating at 200 Mbps. Unless the Powerline network is very clean there may not be sufficient bandwidth for 4k video, for instance. However, 25 Mbps is adequate for  general web surfing, email, social media, Online gaming, Video conferencing, and HD video streaming. It would be great if the TRENDnet could provide an indication of  signal quality. Maybe an LED that indicated the electrical system signal-to-noise ratio could be included in future designs.

The TRENDnet has been connected to my SmartThings hub for the past month. I have not had any reports from my hub that the internet signal has dropped. Therefore I can say that the connectivity remains very high.

What I like

  • Easy Set-up
  • PoE/PoE+ for devices that can use it

What needs to be improved

  • electrical system quality check

Final thoughts

The TRENDnet Powerline 200 AV PoE+ Adapter provides network access through electrical wires when network cabling or Wi-Fi isn’t available. Setup is easy since the adapters auto-connect to an encrypted network out of the box. Even if the signal isn’t the fastest, it seems to be very reliable.

Price: $59.99
Where to buyAmazon
Source: The sample for this review was provided by TRENDnet.

Filed in categories: Reviews

Tagged:

TRENDnet Powerline 200 AV PoE+ Adapter review originally appeared on The Gadgeteer on July 25, 2018 at 9:00 am.

Note: If you are subscribed to this feed through FeedBurner, please switch to our native feed URL http://the-gadgeteer.com/feed/ in order to ensure continuous delivery.
Blackwing Pencils – the Cadillac of writing implements?

NEWS – If you still like taking notes and writing journal entries the old way with paper and a pencil or pen, you need to check out Blackwing Pencils.  These pencils were first introduced by the Eberhard Faber Pencil Company in the 1930s.  They immediately found a loyal following, including novelist John Steinbeck and Chuck Jones, who used Blackwings to create Bugs Bunny and other Looney Tunes characters.  Eventually, Blackwings were discontinued in the 1990s, but a devoted cult following would pay as much as $40 per pencil to buy up leftover stock.  In 2010, the Blackwing company started production again.

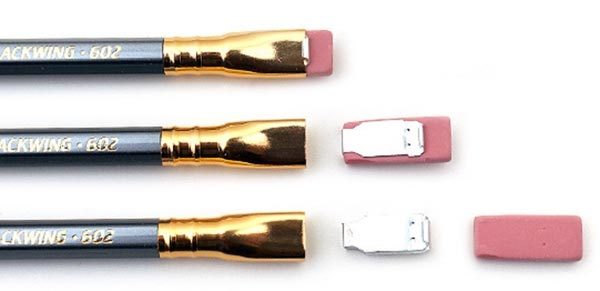
Blackwing says their pencils combine the best wood and best graphite.  The body is made of incense-cedar wood from California and Oregon that sharpens evenly and easily.  They are filled with premium Japanese graphite that’s crafted with clay for strength and wax for smoothness.  All of them have an eraser that’s unlike any I’ve seen on another pencil; they remove from the holder so you can use every bit of the eraser, and you can purchase replacements for $2.95 for a pack of 10.

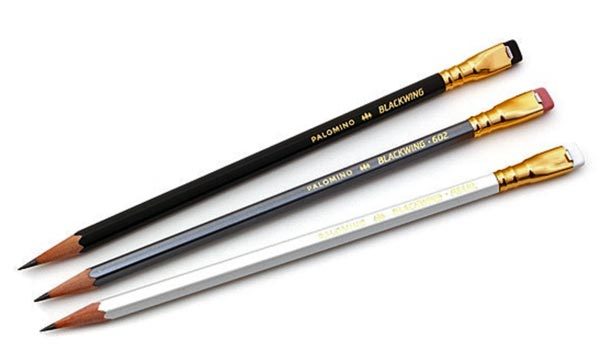
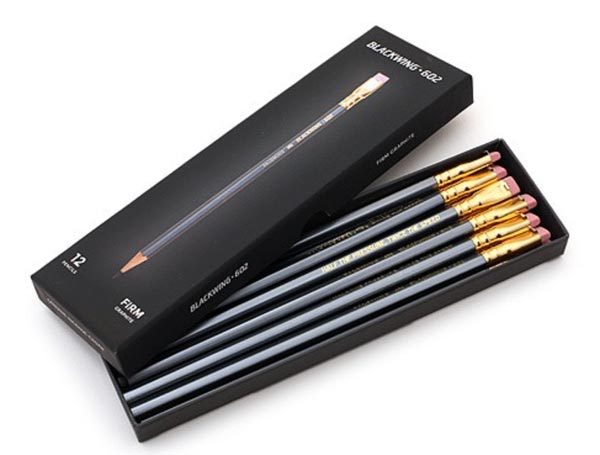
There are three models of these pencils.  The Blackwing has a matte black finish and a black eraser.  It has soft graphite that’s perfect for scoring or illustrating.  The Blackwing Pearl has a pearl white finish and a white eraser.  It has a balanced graphite for lettering and line work.  The Blackwing 602 has a gunmetal gray finish and pink eraser.  Its firm graphite is great for writing and everyday use.  Each type is $21.95 for a set of 12 pencils.  They can be purchased at Blackwing.

Filed in categories: News

Tagged:

Blackwing Pencils – the Cadillac of writing implements? originally appeared on The Gadgeteer on July 25, 2018 at 8:00 am.

Note: If you are subscribed to this feed through FeedBurner, please switch to our native feed URL http://the-gadgeteer.com/feed/ in order to ensure continuous delivery.

Adonit’s Snap 2 stylus sticks to the back of your phone and has a camera shutter button

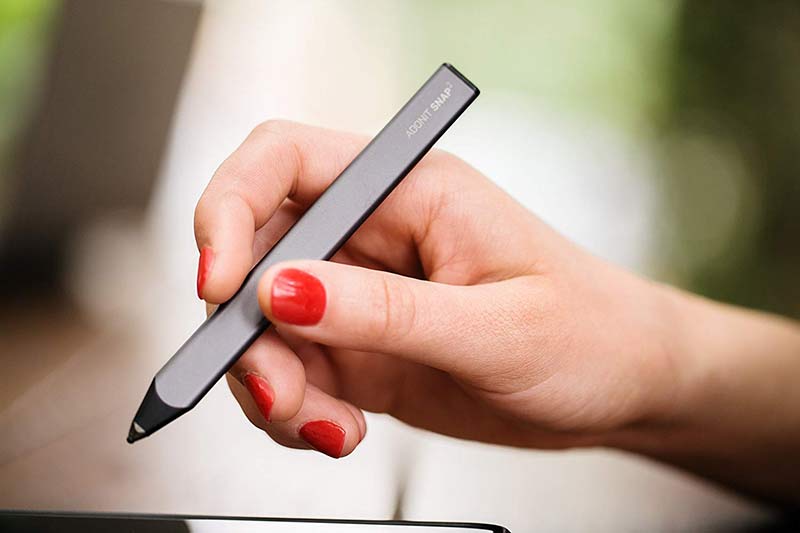
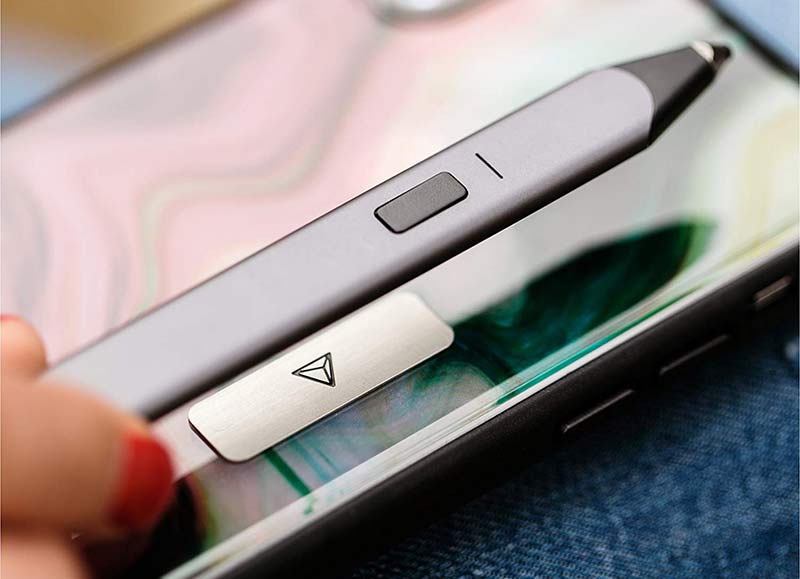
NEWS – Adonit’s Snap 2 stylus takes a fun shaped Bluetooth stylus and adds a magnet so you can attach it to the back of your iPhone or iPad so you’ll always have a stylus when you need it. But that’s not the only cool feature that this Adonit stylus has to offer. It also includes a built-in shutter capture button so you can use the stylus as a wireless image capturing gadget for your iPhone 6 and newer devices. Sorry Android fans.

The carpenter pencil shaped Snap 2 stylus has a 1.9mm PixelPoint tip and it comes with a stick-on metal plate. You can read more about the Snap 2 Bluetooth stylus and other styluses at Adonit.net and you can buy the Snap 2 for $34.99 on Amazon.

Filed in categories: News

Tagged:

Adonit’s Snap 2 stylus sticks to the back of your phone and has a camera shutter button originally appeared on The Gadgeteer on July 24, 2018 at 2:00 pm.

Note: If you are subscribed to this feed through FeedBurner, please switch to our native feed URL http://the-gadgeteer.com/feed/ in order to ensure continuous delivery.

MIOPS Smart controllable camera and flash trigger review

REVIEW – Each photographer has his or her own type of photography that is special to them. I like to photograph subjects in nature, and I also like to use existing objects to create my scenes. Water drop photography is a favorite of mine, and this device promises to greatly help me to expand my creativity.

What is it?

The MIOPS Smart is a device that responds to Lightning, Sound, Laser, Timelapse, HDR and more to trigger the shutter of a camera to take a picture.

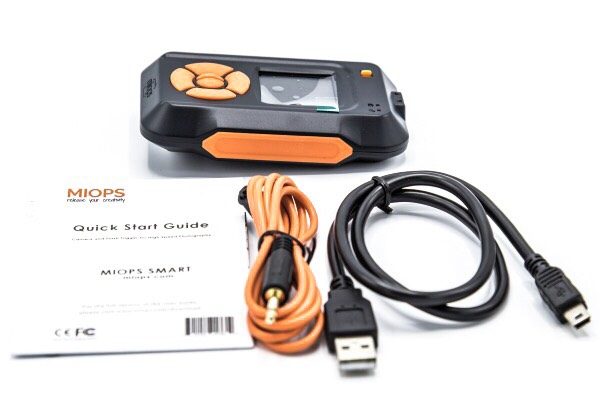
What’s in the box


1 x MIOPS Smart
1 x Mini USB Cable
1 x Camera Trigger cable
1 x Quick Start Guide

Design and features

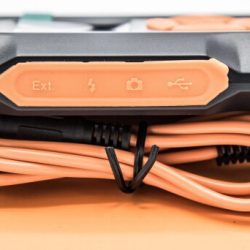
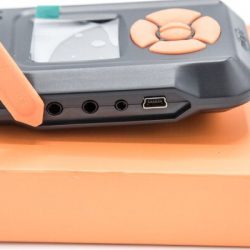
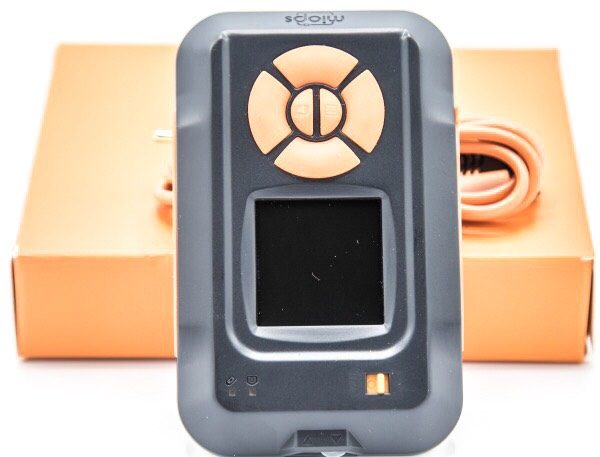
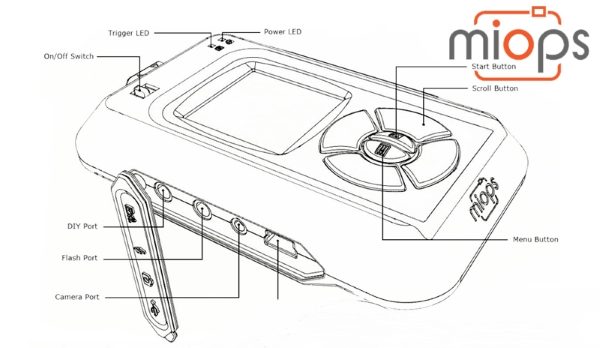
The MIOPS Smart is a small and nicely built camera shutter trigger that can be activated in several modes. On the front there is a display screen and buttons to navigate the screens should you choose to do so from the device. On the side under a removable cover, there is a port for extension DIY projects, a flash trigger port, a camera trigger port, and a mini USB port for charging the battery.


On the top, in addition to the control buttons and the display screen, there is the trigger LED, the power LED and the on/off power button.


On the front (side), there are an infrared sensor and a motion sensor lens.

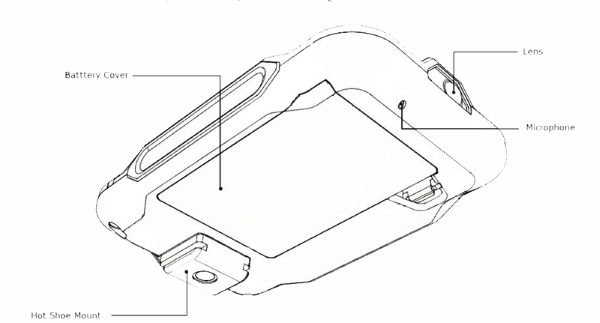
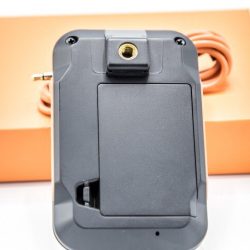
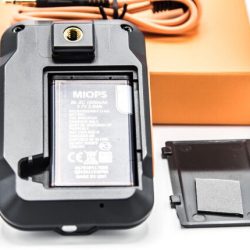
On the back of the MIOPS Smart, there is a 1/4-20mm female mount that sits on a Hot Shoe mount, the microphone and a battery door that covers the slot that holds the rechargeable battery.


Performance

While you can control the MIOPS Smart via the buttons on the device, the optimal way to use it is via the app. It has several operational modes and setup screens that are available via the app.

App

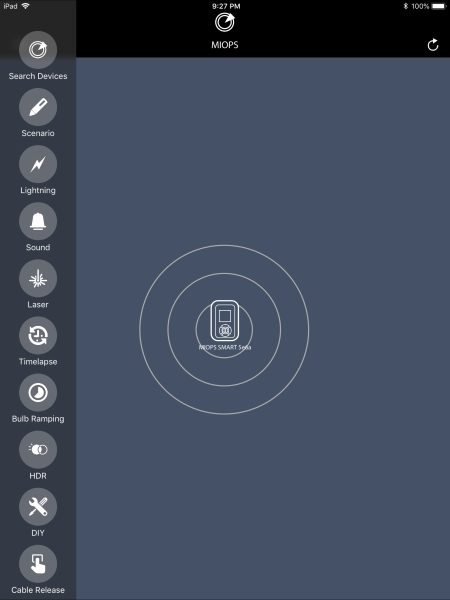
Once you install the app and launch it, and turn on the MIOPS Smart, it appears on the app. If you have more than one MIOPS device turned on, they will all show up as available for selection.


Once you select the MIOPS Smart by touching the icon on the screen, it connects to the app and is ready to be controlled via the app. At this stage, all of the available modes and options are available on the left of the screen. (I used the app on my Pad for this demonstration)


Scenario option:

For example, you can create custom scenarios by combining all available modes with up to five different steps. You can do so by using any combination of the sensors or by using different sensors for various steps of your scenario. For instance, you may want the MIOPS to trigger the camera shutter to take a picture after an object breaks the laser beam and then makes a sound either from hitting a surface or by some other action.


Lightning option:

This option has one screen which gives you the ability to set the sensitivity level to trigger the device.


Sound option:

Settings for Sensitivity, Delay, and Lock.


Laser option:

Threshold, Delay and Frame settings screens.


Time Lapse option:

Settings for Interval, Exposure, and Limit


Bulb Ramping option:

There are 4 settings screens for this option: Interval; First Exposure; Last Exposure; Frame.


HDR option:
Settings screens are for: Center; EV (+-); Frame.


DIY option:
Settings screens: Threshold; Delay; Mode.


Cable Release option:

For my testing of the MIOPS Smart, I chose the sound option. I set up for water drop photography using the MIOPS Splash Water Drop Kit and the MIOPS Smart, within a photography lightbox enclosure. (Additional items like a catch basin for the water, etc are necessary)


The enclosure that I used does not have any built-in lighting. To light the effect, I used a flash strobe with a colored gel insert. To take the pictures, I used a Canon EOS 7D Mark II with a 70mm Sigma Art Macro Lens. The MIOPS Smart was connected to the 3-pin trigger port on the Canon and mounted close to the MIOPS Splash. A flash trigger transmitter was attached to the shoe on top of the camera, and a receiver was connected to the strobe. I used 2 iPhones to simultaneously control the MIOPS Splash app and the MIOPS Smart app. When I trigger the MIOPS Splash device to drop water, the mechanism makes a sound that in turn triggers the MIOPS Splash to trigger the camera shutter. This setup takes time and a whole lot of patience to get the size and timing of the waterdrops as desired, as well as to get the sensitivity and timing correct for the MIOPS Splash to receive the sound and trigger the camera to take the picture at the right time. This setup is actually one of my less complicated setups and describing the details of it is challenging.

The MIOPS Smart is a great device, and I do plan to try it with a laser beam for the laser option, as well as with lightning when a safe and convenient opportunity presents itself. The following are 2 pictures of water drops that were taken as a part of the testing:


What I like

I like the build quality and the functionality of this device. So far it has worked flawlessly and has allowed me to increase my photography creativity.

What can be improved

1: Longer camera trigger cables must be made available
2: Include a tested laser that works with the device. (They are quite inexpensive but all may not work with this device)

Final thoughts

The MIOPS Smart is a great camera trigger device that is nicely built, and that offers endless opportunities for creative photography. I am thoroughly enjoying using it, and every day I am designing more elaborate photo opportunities. As long as it continues to function well, it is well worth it.

Price: $219
Where to buy: MIOPS Website or Amazon
Source: The sample for this review was provided by MIOPS.

Filed in categories: Reviews

Tagged: ,

MIOPS Smart controllable camera and flash trigger review originally appeared on The Gadgeteer on July 24, 2018 at 1:00 pm.

Note: If you are subscribed to this feed through FeedBurner, please switch to our native feed URL http://the-gadgeteer.com/feed/ in order to ensure continuous delivery.