My first experiences with the Nest Temperature Sensor

My condo is a rectangle, with the HVAC unit and thermostat at one end and the bedrooms at the opposite end of the condo on the long axis.  The air flows out and has a straight path to the living and dining room areas, but it has a 90° turn to the hallway towards the bedrooms and another 90° turn back to the office.  This means the living/dining areas are freezing in the summer / hot in the winter and the bedrooms and office are uncomfortably warm in summer /cold in winter.  We replaced our ancient HVAC unit last summer, which did greatly improve the amount of air flowing to the bedrooms, but they are still too warm this summer.  When the HVAC unit was replaced, we had a Nest Learning Thermostat installed.  This made it easier to adjust the thermostat settings without having to get up in the middle of the night, but the Nest alone couldn’t make our bedrooms more comfortable.  That’s why I was so interested to learn about Nest’s Temperature Sensor.

The Sensor works with the Nest thermostat to send information about the “local” temperature to the Nest.  The Nest app can then prioritize that sensor temperature to control the behavior of the HVAC unit if desired.  I purchased a Sensor from my local Lowes and installed it in the master bedroom.  Adding the Sensor to the Nest system was easily accomplished by simply following the instructions included with the Sensor.

The Temperature Sensor is powered by a CR2 3V lithium battery (included); Nest says you’ll get up to two years from the battery.  It connects to your Nest thermostat (either the 3rd-gen Learning or the Thermostat E model) via Bluetooth Low Energy and can be placed up to 50 feet away from the thermostat.  This distance may vary depending on the construction of your home and sources of interference.  My Sensor connected to my 3rd-gen Learning thermostat with no problems.  I placed it on a wall close to the bed and out of the direct flow of air from the vent in the master bedroom.

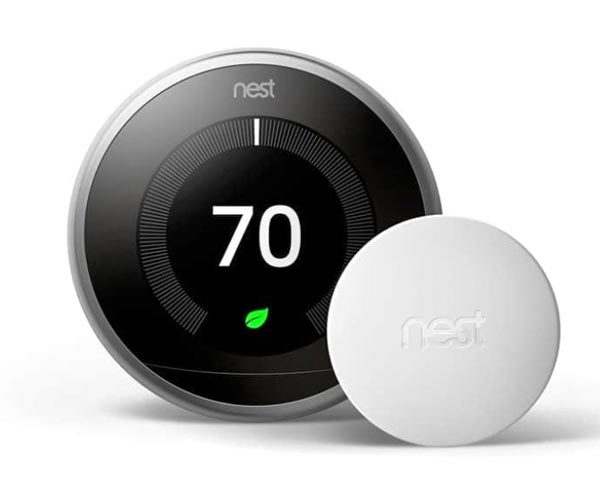
You can see the Sensor in the above image.  It’s a white plastic puck with a 1.9″ diameter and a 0.8″ thickness.  It comes with a special hanging screw to allow you to take it down to change the battery when needed.

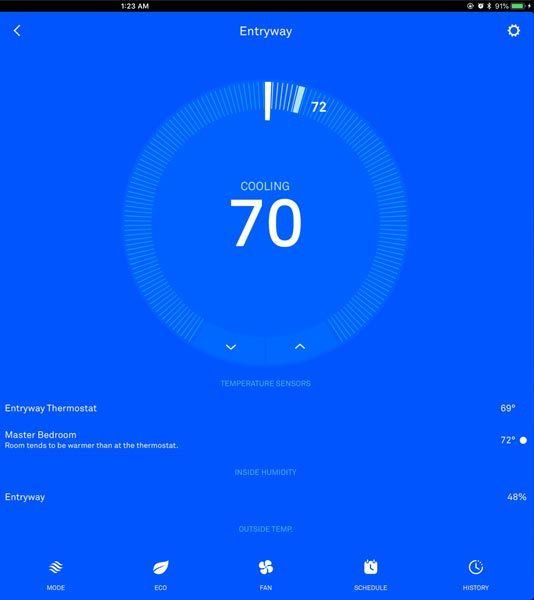
The Sensor shows up in the Nest app under the thermostat information.  If you aren’t familiar with the app, the circle shows the set point (longer white marker) and the current temperature (shorter blue line with the current temp shown beside it).  Under that, you’ll see the temperature measured by the thermostat and by the sensor.  The white dot beside the master bedroom temperature shows that I have manually selected that sensor to be prioritized by the thermostat.  You can see that the bedroom is still three degrees warmer than the dining room area with the thermostat.

However, I was able to increase my set point after I installed the Sensor.  I used to have the set point at 67° to try to get the bedrooms cooled down a bit.  The living and dining rooms would be uncomfortable to stay in without a blanket or sweater, and the bedrooms would still be uncomfortable for sleeping.  The bedroom used to be about 76° at the coolest.  Now that I have the Sensor controlling the HVAC unit, the bedroom is much more comfortable and the living and dining rooms are, too.

You can have 6 Nest Temperature Sensors supported per connected thermostat and up to 18 Nest Temperature Sensors supported per home.  With multiple sensors in your house, you can use the Nest app to schedule which Sensor will be prioritized during various hours during the day.  I don’t need a schedule, because I need the bedrooms always prioritized.  Since adding the sensor, I haven’t had to use a fan to make the room more livable.  This makes me very happy because I can’t stand the sound of the fan.  Having a cool bedroom to sleep in was well worth the cost of the sensor for me.

The Nest Temperature Sensor is $39.00, or you can purchase a three-pack for $99.00 from Nest and other retailers like Target.

Filed in categories: Articles

Tagged:

My first experiences with the Nest Temperature Sensor originally appeared on The Gadgeteer on June 15, 2018 at 11:00 am.

Note: If you are subscribed to this feed through FeedBurner, please switch to our native feed URL http://the-gadgeteer.com/feed/ in order to ensure continuous delivery.

The Nomad 2-in-1 battery cable will keep your phone up and running!


For those of us who walk around with our cell phones everyday and everywhere we go, if you are like me, you are always looking for the most convenient way to keep it charged, and still carry as least extra “stuff” as possible. Companies vying for our business have designed and produced many variations of such products to meet our demands.

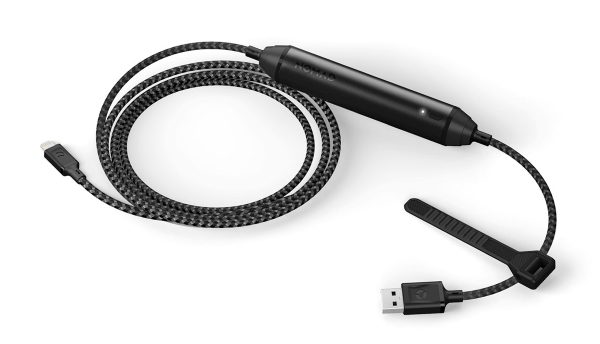
One such company is Nomad. They have just recently released a new and improved version of their 2-in-1 battery cable. The cable is made of 20 AWG (American Wire Gauge) which they state will aid with fast charging, and it has 2X RF Shield for fast sync. It is nylon wrapped, with a MFI Certified Lightning Cable with a built-in high capacity 2800mAh portable battery, which will allow you to charge with just the cable while on the go, and it should withstand the usual daily abuse and more. The outermost shielding of the cable includes a 2X thick moisture barrier and braided ballistic nylon. They have also built in a liquid silicone rubber cable tie so that the cable can always be wrapped for storage in an organized way.

If you would like to purchase the Nomad 2-in-1 lightning battery cable, it is available in a 1.5-meter length on the Nomad website for $49.95.

Filed in categories: News

Tagged: ,

The Nomad 2-in-1 battery cable will keep your phone up and running! originally appeared on The Gadgeteer on June 15, 2018 at 10:00 am.

Note: If you are subscribed to this feed through FeedBurner, please switch to our native feed URL http://the-gadgeteer.com/feed/ in order to ensure continuous delivery.

Speck Presidio magnetic mount case and Scosche MagicMount Pro Charge review

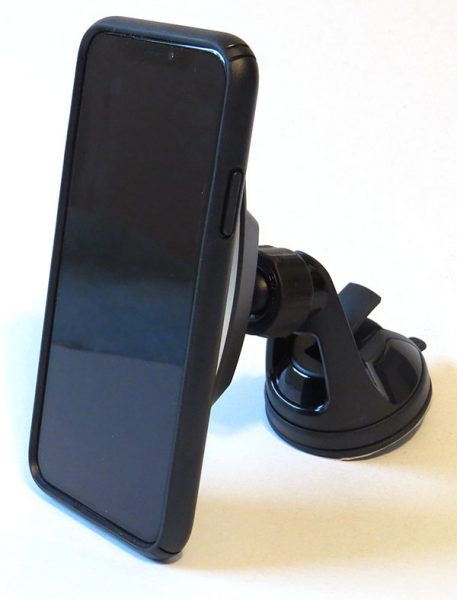
Wireless charging is one of the reasons I upgraded to the iPhone X, but I could not sacrifice my magnetic car mount just to charge my phone. Speck must have known of my dilemma because their new Presidio mount case for the iPhone X is made for magnetic mounts like the Scosche MagicMount Pro Charge, which I was also able to try out.

What is it?

The Speck Presidio is a protective case for the iPhone X that allows for use with magnetic mounts and wireless charging. The Scosche MagicMount Pro Charge is a magnetic car mount that allows for wireless charging.

What’s in the box?

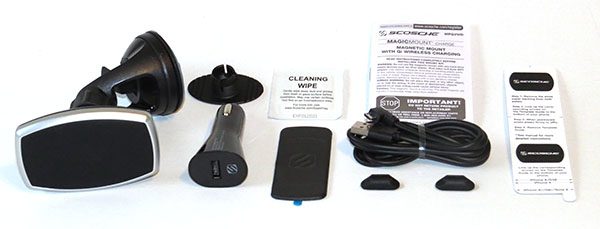
Inside of the Scosche box, you’ll find:

  • The MagicMount Charge mount
  • Optional low-profile adhesive dash mount
  • Large single plate with template guide for mounting to device
  • Two small metal plates with template guide for mounting to case
  • 12v car power adapter
  • Micro-USB charging cable
  • Two wire clips
  • Cleaning wipe
  • Instruction manual

Design and features

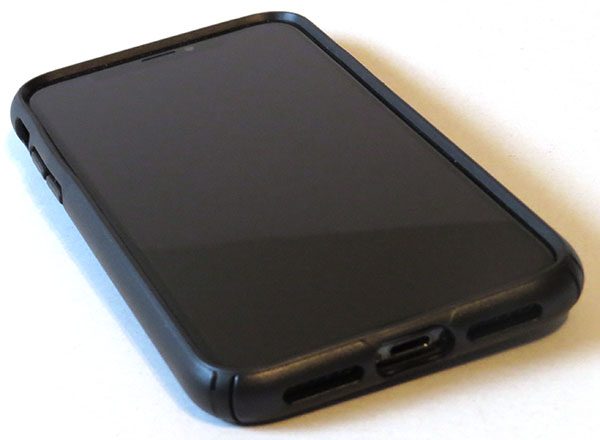
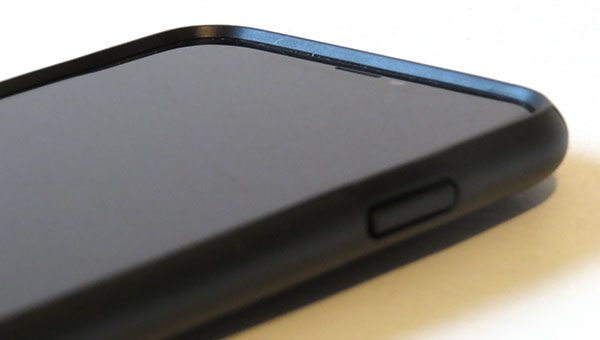
Like most Speck cases, the Presidio is built to be protective by using two layers of protection to cushion the impact of a drop. There is also a nice lip on the front to keep the screen protected. This lip worked well, since I proceeded to pull my phone out of my pocket and practically toss it face down, where it skidded five feet in front of me. My glass screen protector was safe! The case has a few scratches but it fared very well overall. Another time, I dropped it straight on the corner and it bounced slightly and the phone was just fine. For protection, it is great.

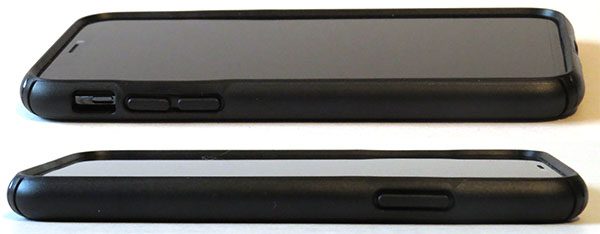
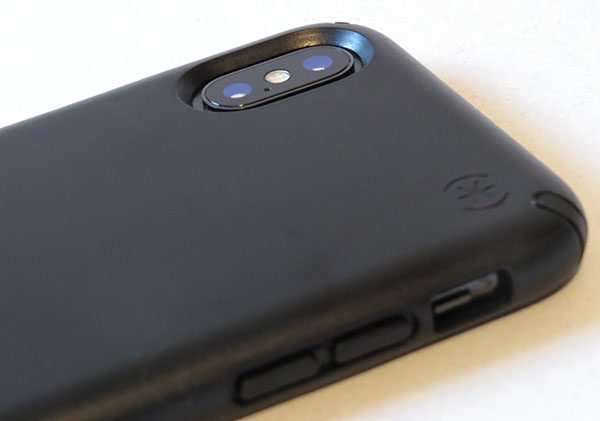
Each button is covered but easy to use, while the bottom of the case has a cutout wide enough for all of my charging cables. The vibrate switch was easy to access, and the overall design and quality is what you’d expect from a Speck case.

While the case is smooth, I never felt as though I was going to drop it. The times that I did drop it was due to user error, not due to the case. It did not add much bulk at all to the phone.

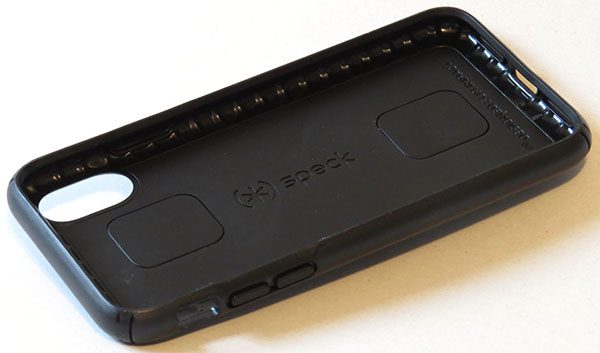
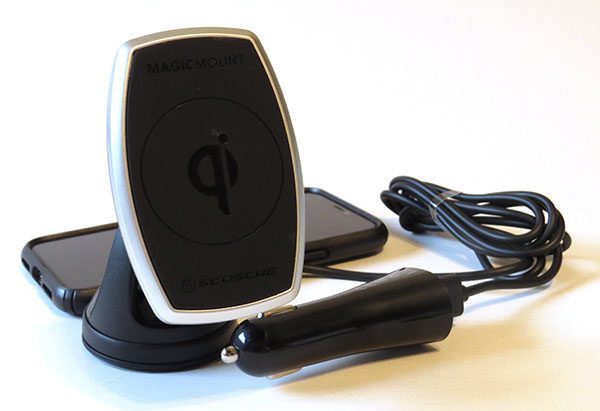
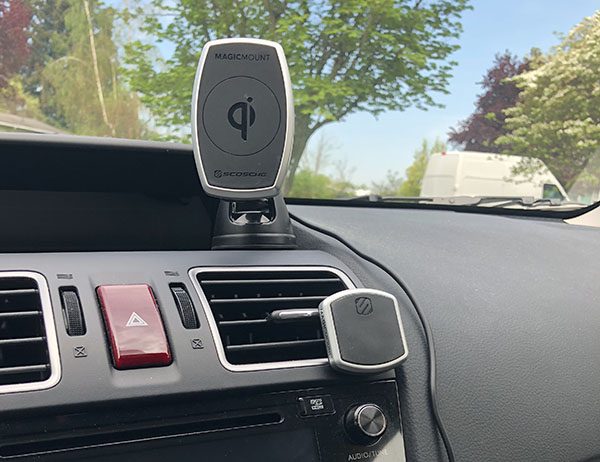
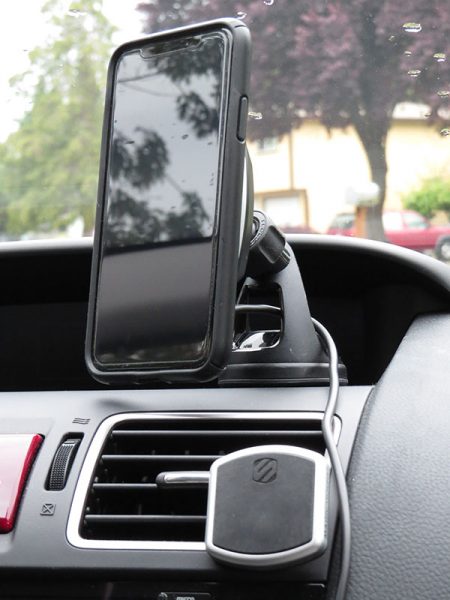
The biggest difference between a regular case and this one is the ability to use a magnetic mount and wirelessly charge. I already had a Scosche MagicMount vent mount that I used daily, and it worked fine with the case. Since the case has two smaller metal plates versus one big one, you cannot reliably mount the phone in landscape mode on the square vent mount. It worked fine in landscape and portrait mode with the MagicMount Charge since that one is rectangular and both metal plates in the case can attach firmly to it.

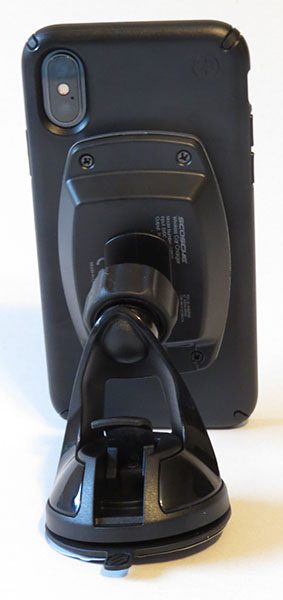
The Scosche MagicMount Charge mounts to either a window or dash and can be positioned to whatever angle you desire. I chose to mount mine to the dash and it was very easy to do. First I cleaned the dash with a wipe of my sleeve and placed the sticky side of the mount down. It stayed firmly in place the entire time, and I changed the positioning three times over the few weeks I have used it.

One thing I noticed was that over time, the joint that holds the head of the MagicMount Charge would come loose enough that it would start to turn downwards. It was easy to re-adjust it, but it was something noticeable.

I chose not to use the wire clips since my vent mount kept the cord perfectly off to the side. The power adapter worked well and is of a good enough quality to allow for quick charging of the iPhone. Over the span of 45 minutes, while using the GPS, I went from 47-73% charge using the mount and Speck case. I also like that the charge mount will not continue to charge after the phone is full, and instead go into standby.

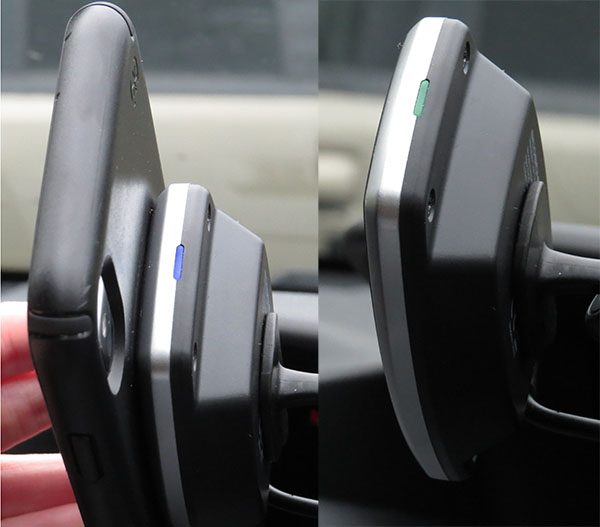
There is a light on the top that signals when the phone is being charged or if the device is on standby, but I could not see it since my phone was always in the way.

What I like:

  • Case: Easy to just throw on the mount and drive off.
  • Case: Very good protection.
  • Case: Can wirelessly charge and use a magnetic mount.
  • Mount: Stays firmly in place.
  • Mount: Adjustable to the perfect angle.
  • Mount: Easy to use once installed.

What needs to be improved:

  • Case: Some bright color options would be nice!
  • Case: Cannot attach to some mounts in landscape mode.
  • Mount: Head joint comes loose every week or so.

Final thoughts:

I absolutely loved the combination of the Speck Presidio case and the Scosche MagicMount Charge dash/window mount. Since using these, my phone has yet to die at the end of the day, since I am charging it each time I drive the car, which is multiple times a day. The protection of the case is great, and the ease of use of the mount is awesome. Overall, I would highly recommend the Speck Presidio case if you want to use a magnetic mount yet also want to wirelessly charge your phone, and the Scosche MagicMount Charge is an excellent companion to the case.

Price: Case – $44.95, Mount – $59.99
Where to buy: Speck Presidio, Scosche MagicMount Pro Charge, and Amazon.
Source: The sample for this review was provided by Speck and Scosche.

Filed in categories: Reviews

Tagged: ,

Speck Presidio magnetic mount case and Scosche MagicMount Pro Charge review originally appeared on The Gadgeteer on June 15, 2018 at 9:00 am.

Note: If you are subscribed to this feed through FeedBurner, please switch to our native feed URL http://the-gadgeteer.com/feed/ in order to ensure continuous delivery.
Forget taking 12+ hours to cold brew coffee with Cuisinart

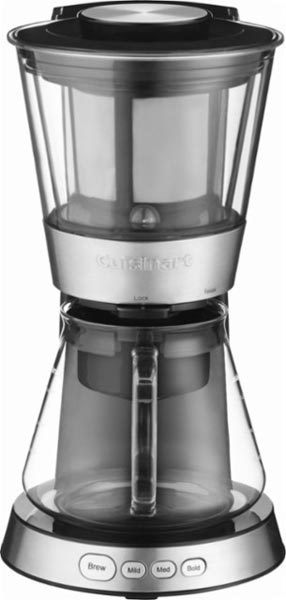
Most of the cold brewers for coffee that I’ve seen lately take 12-24 hours to brew a pot.  With the Cuisinart DCB-10 cold coffee brewer, you can brew a pot in as little as 25 minutes.  Like other cold brewers where the coffee sits in the water and slowly extracts, the Cuisinart machine starts with cold or room temperature water.  But Cuisinart’s “unique spin technology circulates coffee through water for total flavor extraction in a fraction of the time manual brewers require.”

The coffee grounds are never exposed to the high temperatures that extract the oils that cause bitterness, so your brew is smoother.  There are three flavor strength settings, so you can brew the coffee the way you like it.  The three brewing cycles are mild (25 min), medium (35 min) and bold (45 min).   The coffee can be stored in the refrigerator for up to 2 weeks.

The DCB-10 comes with a 7-cup carafe and a steel filter.  All removable parts are dishwasher-safe for easy cleanup.  The Cuisinart DCB-10 is available for $81.84 at Amazon.  Other retailers offer it for $99.99; check the Cuisinart site to locate a brick-and-mortar store.

Filed in categories: News

Tagged:

Forget taking 12+ hours to cold brew coffee with Cuisinart originally appeared on The Gadgeteer on June 15, 2018 at 8:00 am.

Note: If you are subscribed to this feed through FeedBurner, please switch to our native feed URL http://the-gadgeteer.com/feed/ in order to ensure continuous delivery.
totallee thin Pixel 2 XL case review

When it comes to using a case on my smartphone, I normally only use them for one reason and that’s to add some extra grip to an otherwise slippery phone. I don’t use a case to protect it from scratches because I really don’t care THAT much if my phone shows a bit of wear and tear. That said, I don’t want to drop it on a hard surface and bust the display. So I usually seek out a thin case that doesn’t add bulk but does add grip. My current everyday phone is the Pixel 2 XL and the latest case that I’m testing on it is the totallee thin Pixel 2 XL clear case. Let’s take a look.

What is it?

The totallee thin clear case for the Pixel 2 XL is a soft clear case that’s only 0.02-inches thick and only ads 0.1 oz to the overall weight of the phone. Not bad!

Design and features

The case is made of a glossy clear soft flexible material that feels like silicone but isn’t sticky like some silicone cases and doesn’t attract lint.

It has cutouts for the camera and flash as well as the fingerprint reader on the back of the phone.

There’s a circular cutout on the top for the microphone.

And on the bottom, you’ll find a cutout for the USB-C port.

There aren’t cutouts for the power button and volume button though. The buttons are molded into the case. I’m not a fan of this as I feel like it ruins that tactility of the buttons. I’m not saying that it makes the buttons impossible to press, but it does take slightly more effort. In the end, I wish there were cutouts…

Because the case is soft and flexible, you don’t have to worry about breaking a fingernail or your phone when you try to put the case on or remove it. One word about that: Yay!

Once it’s on, you really don’t really notice it because it doesn’t add much bulk. But it does add a nice level of grip that is missing with a naked Pixel 2 XL.

Note that this case is not going to protect your phone from drops to a hard surface. It’s only going to help protect it from everyday wear and tear and scratches.

What I like

  • Easy to put on and remove
  • Adds grip without unnecessary bulk

What needs to be improved

  • Molded buttons for power and volume make interacting with the phone slightly more difficult
  • Expensive

Final thoughts

There really isn’t a lot more to say about the totallee thin Pixel 2 XL case. It does what it’s been designed to do which is to add a minimum level of protection and grip without adding bulk. The only complaint that I have is that it’s kind of expensive at $25 although you can get it for a few cents short of $20 on Amazon. Even at that price, it feels too pricey when you can find other thin cases for the Pixel 2 XL for significantly less. I don’t hate the totallee, but I’m sticking with my current favorite (check my favorite gear page to see what that is)… unfortunately, it’s even more expensive than the totallee, but I like the look and feel better so…

Price: $25
Where to buy: totallee and Amazon
Source: The sample for this review was provided by totallee.

Filed in categories: Reviews

Tagged: ,

totallee thin Pixel 2 XL case review originally appeared on The Gadgeteer on June 14, 2018 at 1:00 pm.

Note: If you are subscribed to this feed through FeedBurner, please switch to our native feed URL http://the-gadgeteer.com/feed/ in order to ensure continuous delivery.