Camera gear, wireless doorbells, retro keyboards, GoCube, and more – Notable crowdfunding campaigns

This week we are bringing you seven crowdfunding campaigns that are currently running on Kickstarter and Indiegogo. This week’s campaigns are for people who like camera and video gear, EDC tools, puzzles, and more. Check out our picks for this week’s notable crowdfunding campaigns.

MUWI: The Ultra Compact Dolly for Smartphones & Cameras

What is it?
MUWI is a small pocketed sized dolly for your smartphone and small cameras to let you take smooth motion shots.

Why do I like it?
Motion adds emotion to a video and the MUWI looks like a cool way to add curved or linear motion when you use your smartphone to capture video for all sorts of shots.

Where can I find more info?
The MUWI campaign ends on 7/3/18 and they have already passed their funding goal of $35,000. You can pre-order a MUWI starting at $39. After the MUWI campaign ends, rewards are estimated to start shipping in September 2018. Visit their Kickstarter page for all the details.

GoCube | The Classic Puzzle Reinvented

What is it?
GoCube is like a Rubik’s cube on steroids. It connects to an app to help you learn to become a cuber.

Why do I like it?
I have always sucked at figuring out the Rubik’s cube but not for lack of trying. The GoCube knows the current state of the cube and helps you learn how to solve it and you can compete with others. What’s not to love? Oh, one small thing… it’s not going to ship until March of next year. Ouch! But, if you can wait that long it does look pretty fun.

Where can I find more info?
The GoCube campaign ends on 8/9/18 and they have already passed their funding goal of $25,000. You can pre-order a GoCube starting at $69. After the GoCube campaign ends, rewards are estimated to start shipping in March 2019. Visit their Kickstarter page for all the details.

Capsule360: Versatile Motion Control Box with 3-Axis Motion

blurb by Julian Perry

What is it?

The Capsule360 is a motion box that takes 360-degree video or photos. It also has the ability to Pan, Tilt, and Slide.

Why do I like it?

I like the Capsule360 because it has many versatile features that include the ability to perform Smart-Object Tracking, 360-degree Product Photography, Star Tracking for Astrophotography, Panorama shots and more. It also has a Face Recognition feature that will follow you as you record, so that you are always in focus and in the frame. This is a great feature for Vloggers and anyone self-recording. You can use up to three Capsules360 boxes at once, and there is an app for both Android and IOS to control it all.

Where can I find more info?

The Capsule360 campaign ends on 7/10/18, and they have already met and passed their funding goal of $75,000. You can back this project with a support pledge starting at just $1, or a pledge for one or more Capsule360 boxes, starting at $179. After the campaign ends, rewards are estimated to start shipping in December 2018. Visit their Kickstarter page for all the details.

The Arbor Instant Video Doorbell

What is it?

Arbor is a wireless doorbell with a built-in motion activated security camera.

Why do I like it?

I like the Arbor doorbell because you don’t have to pay monthly fees, it comes with a WiFi booster chime, the battery powers the unit for up to a year on a charge, it has a built-in alarm, and the shipping is free.

Where can I find more info?

The Arbor doorbell campaign ends on 7/17/18, and they have already met and passed their funding goal of $50,000. You can pre-order an Arbor starting at $159. After the Arbor campaign ends, rewards are estimated to start shipping in August 2018. Visit their Indiegogo page for all the details.

EverRatchet: World’s First Ratchet Keychain Tool

What is it?

EverRatchet is an EDC multitool that fits on your keychain and has a 1/4″ ratchet, fire flint, scraper, 7 wrenches, bottle & box opener and more

Why do I like it?

I like the EverRatchet because it’s the first tiny pocket tool like this that I’ve seen with a ratchet mechanism. And it’s ultra-affordable and it is available in stainless steel and titanium. Really, what’s there not to like about it?

Where can I find more info?

The EverRatchet doorbell campaign ends on 7/5/18, and they have already met and passed their funding goal of $3,200. You can pre-order an EverRatchet starting at $16. After the EverRatchet campaign ends, rewards are estimated to start shipping in September 2018. Visit their Indiegogo page for all the details.

Masta Box: The World’s First Fidget Controller Gadget

What is it?
Masta Box is a fidget toy that is actually a tool that can do something other than just entertaining someone who likes to fidget.

Why do I like it?
The Masta Box fidget “toy” that doubles as a multi-functional controller that can be used as a joystick, laser pointer, trackball, air mouse, music player control, and more.

Where can I find more info?
The Masta Box campaign ends on 7/12/18 and they are still working towards their funding goal of $24,232. You can pre-order a Masta Box starting at $28. After the Masta Box campaign ends, rewards are estimated to start shipping in November 2018. Visit their Kickstarter page for all the details.

Rymek Retro Bluetooth Mechanical Keyboard

What is it?

The Rymek Retro Bluetooth Mechanical Keyboard is a Bluetooth keyboard that is reminiscent of mechanical typewriters from decades past.

Why do I like it?

I like the Rymek Retro Bluetooth Mechanical Keyboard because it reminds me of my mother’s Underwood typewriter that I used as a kid to write my own newsletters and stories. I loved the way it felt to press the keys and see the metal arm pop up and strike the page. This keyboard from Rymek brings back a little bit of that same feel but in a high tech package with backlit keys and a multifunction knob that provides multimedia control.

Where can I find more info?

The Rymek campaign ends on 7/17/18, and they have already met and passed their funding goal of $20,000. You can pre-order a Rymek starting at $99. After the Rymek campaign ends, rewards are estimated to start shipping in August 2018. Visit their Indiegogo page for all the details.

Filed in categories: News

Tagged:

Camera gear, wireless doorbells, retro keyboards, GoCube, and more – Notable crowdfunding campaigns originally appeared on The Gadgeteer on June 17, 2018 at 5:13 pm.

Note: If you are subscribed to this feed through FeedBurner, please switch to our native feed URL http://the-gadgeteer.com/feed/ in order to ensure continuous delivery.

Minger LED Smart TV Backlight kit with Camera review

It’s hard to get the same movie-watching experience at home as you have at the theater.  Some things are better at home (cheaper popcorn, more comfortable seats, no talking strangers), but other aspects, like ambient lighting, are more difficult to control.  Room lights can wash out the TV screen, but watching in a dark room can cause eyestrain and means bathroom trips without those neat little pathway lights theaters have.

Dr. Andrew Weil describes an experiment that determined people experience less eyestrain when they watched a movie against a lighted wall.   I don’t know about your setup, but there’s no room behind my TV for a lamp to light the wall.  A lot of ingenious companies have come up with LED light strips that attach to the back of the TV to wash the wall with light.  Some of these are static lights of a single color, but some companies have come up with systems to wash the wall in moving colors that match what’s on the TV screen.  The Gadgeteer was recently offered the chance to review the Minger LED Smart TV Backlight kit with Camera which promises to wash the walls with moving colors.  Since I was already looking for a backlight for my TV, I asked to be given the chance to review the Minger kit.  Let’ see how it works.

What’s in the box?

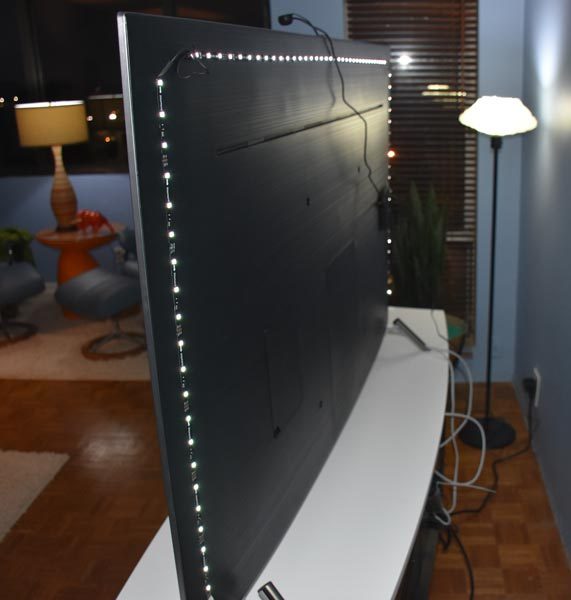
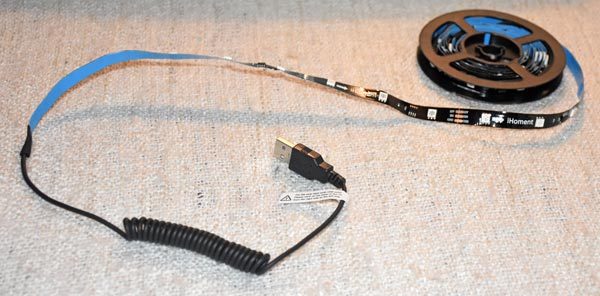
The first component is the 8.5 feet of LED strip lights.  This kit is sized to fit a TV with a 55″ – 65″ screen.  They also offer a kit for a 46″ – 55″ screen.   I received the larger kit for my 65″ Samsung TV.  The strip was nicely coiled around this film reel, so there were no kinks.  The back of the strip has a press-to-stick adhesive to make applying it to the TV simple.  It’s actually three strips of lights, with permanent connectors already joining the strips.  This makes fitting it around the corners at the sides of the TV a snap.

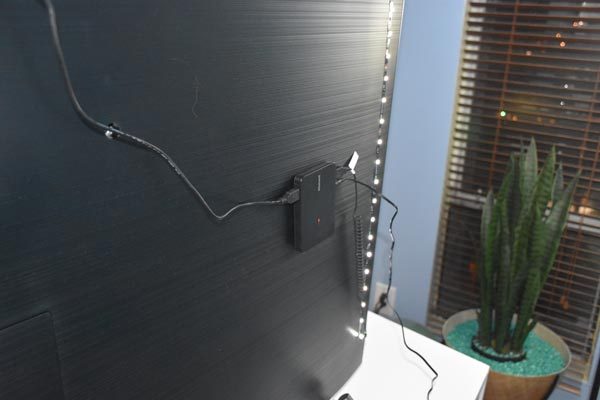
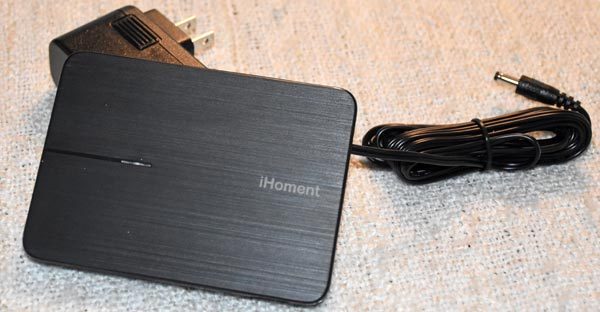
The controller box also has adhesive on the back to attach it to your TV.  There are three connectors on the box.  Two USB connectors attach it to the camera (on top of box) and to the light strip (bottom of box).  You also attach the included AC power supply to the bottom of the box.

Please note that the seller calls this the Minger system, but some of the components are marked iHoment, and the controller app is called iHomentLight.

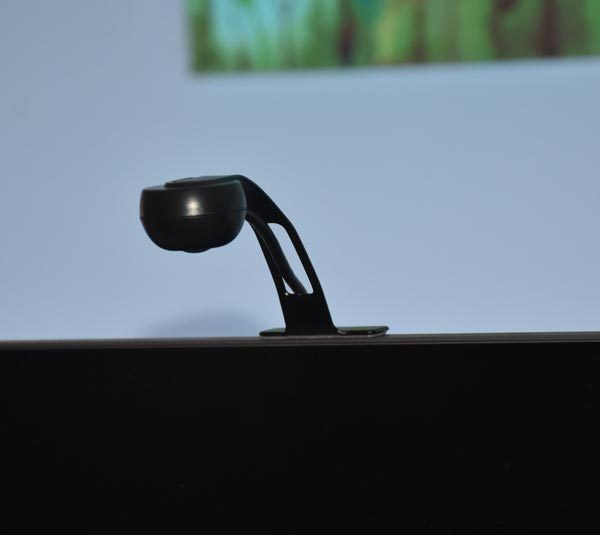
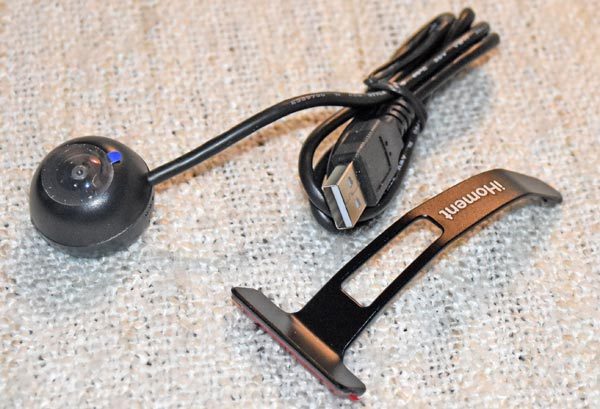
Instead of reading signals through the TV’s HDMI cable, and thus limiting the equipment it can work with, the Minger system attaches a camera to the top of the TV to “see” what’s on the screen.  The stand attaches to the TV with an adhesive base.  The camera plugs into the iHoment controller attached to the back of the TV.

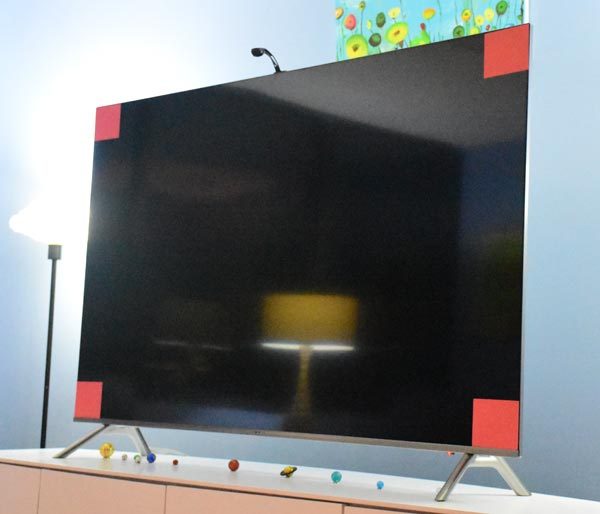
These four red cards are used for calibrating the Minger system.  They have adhesive strips on the back so you can attach them to the four corners of the TV’s screen.  They remove without leaving behind a residue.

Lastly, you’ll get a detailed set of installation instructions.  The included paper tape measure is needed for installation.  You’ll use it to find the middle of the top of the TV so you can apply the strip lights evenly on the top and sides of the back of the TV.

Setup

The installation guide has illustrations and instructions in three languages for each step.  You first find the midpoint of the top of the TV, and center the long strip to the top using the adhesive back.  The short strips attach to the sides, with the end with the USB plug on the right side (as you face the back of the TV) and the end with no connector on the left side.

The adhesive on the strips attaches easily with light finger pressure.  The back of my TV isn’t smooth plastic; it has thin, raised lines on the surface.  I’ll need to periodically check it for a while to be sure it’s sticking well to the textured surface over time.

I couldn’t move the TV far enough from the wall to get a great picture, but you can see the installed light strips from this angle.

The pictures on the manufacturer’s website show the controller box beautifully centered on the TV, but I can’t do that with my TV for two reasons.  First is there’s a bunch of connectors and plugs in the center of my TV, and they are hidden behind a removable door.  Secondly, my TV has a cable guide system to hide all the cables so nothing is visible below the TV.  I need to guide the power cable over to one of the TV’s legs so I can conceal it with the rest of the cables.  I’ll probably end up just using some 3M Command cable guides to run it down the back of the leg and behind my media cabinet.

This is the camera adhered to the top center of the TV.  I was really unhappy at first about having something sticking up off the TV in front of my picture my daughter painted for me, but the camera is pretty discreet.

Here’s the TV with everything installed and ready for calibration.  I turned off the TV and left on the room lights so the camera could “see” the color of the calibration patches, as instructed.  I pushed the TV and media cabinet back into place so the TV would be lighted as it normally is in my living room.

I downloaded the iHomentLight app from the Apple App Store to my iPhone 7 Plus.  (The app is designed to fit the iPhone screen, but it will run on the iPad, if needed.  There’s also an app for Android.)  After connecting to the iHoment controller via Bluetooth, I was able to select the calibration setup from the app.  The app walks you through every step of calibration.

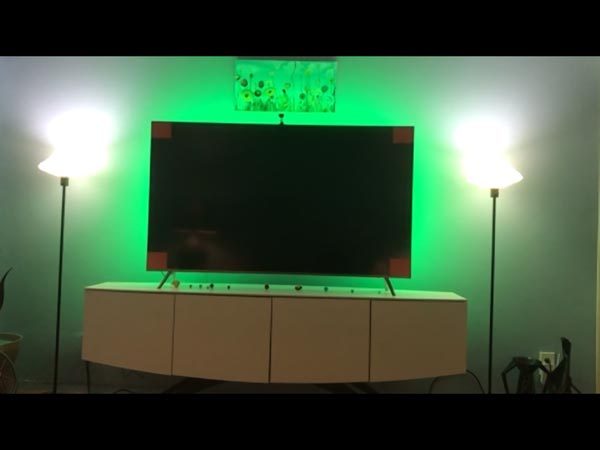
During calibration, the lights blink and change.  When calibration is complete, the backlights turn to steady green.

I’m ready to start watching TV!

Performance

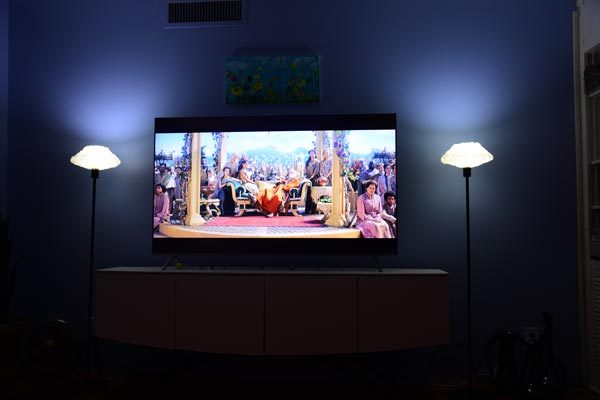
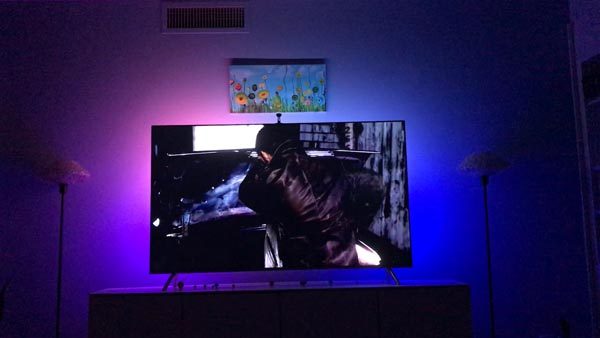
This is how my living room normally looks while I watch TV.  I turn off all the other lamps in there because they cause screen glares and reflections.  I leave on the lights flanking the TV so we can see if we need to leave the room.  It’s okay this way, but the two lamps can be a bit harsh, even when I dim them.  The lede photo (at the top of this review) shows my TV with the Minger lights in use.

By the way, the images you’ll see in photos and in the short videos are from Thor: Ragnarok, Annihilation, and episodes of the Supernatural TV show.

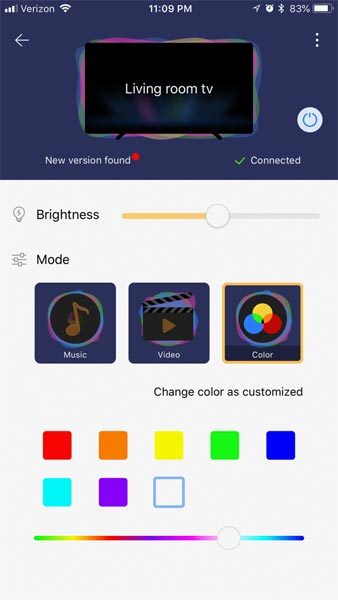
There are three modes for the light strips.  First up is the Color mode.  This allows you to choose a color by selecting one of the pre-selected colors or by scrubbing the slider bar to choose a custom color from the gamut.

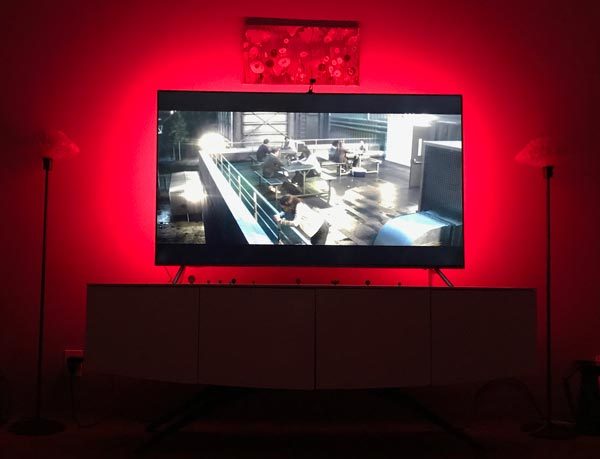
For this picture, I choose the static red color, with the brightness setting maximized.  I wouldn’t use red, but the static color is a nice way to add some light to the room without using those lamps to the side of the TV.  If I were going to use static, I’d select a blue and dim it down a bit.

By the way, my living room is painted a medium blue.  This color will impact the appearance of the colors the Minger system is shining onto the wall behind the TV.  They will differ from the actual color and brightness you’d see against a white wall.

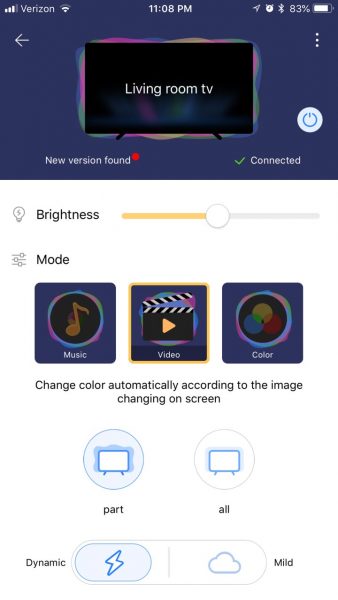
The next mode is Video.  This mode uses the camera to monitor either Part of the screen (the edges) or All of the screen to select the colors for the strips.  With All selected, the camera seems to select the color in the center (from left-to-right) of the screen, about a third of the way down from the top to use for all of the lights on all three strips.  With Part selected, the camera monitors the edges of the screen and selects different colors for the various positions of the light strips, so it seems the color is bleeding off the TV screen onto the wall.  Part monitoring is shown in the above video.  All other clips for the Video mode show All monitoring.

You can also choose Dynamic or Mild for the speed of the color changes.  The Dynamic changes are quick and abrupt – suitable for action movies, especially.  The Mild changes are slower and less abrupt.  Again, I’ll try to show this in videos.

Something I noticed that didn’t depend on the settings in Movie mode was that the color changes seen on the wall lagged a bit behind the color changes on the screen.  (I’m sure this was an artifact of the time needed for the camera to read the color, send it to the controller box, where it was evaluated, and instructions then sent to the light strips.) This was especially true when the action on the screen was changing rapidly.  While I was carefully watching the performance of the Minger system for this review, I was aware of the lag.  When I was just watching a show, I wasn’t really aware of the color lag.  It didn’t bother me that the color on the wall didn’t match what was showing in that portion of the screen when using Part mode any more than having the entire wall washed with a single, but changing color when using All mode.

I did enjoy the changing color display on the wall behind the TV regardless of what mode I was using.  I didn’t prefer the Part or All option over the other.  I just liked the movement of the colors that mimicked the action on the screen.

I didn’t dislike having a single, unchanging color on the wall with the Color mode.  That was actually a nice ambient light that was easy on the eyes, but I did prefer the motion of the Video mode.

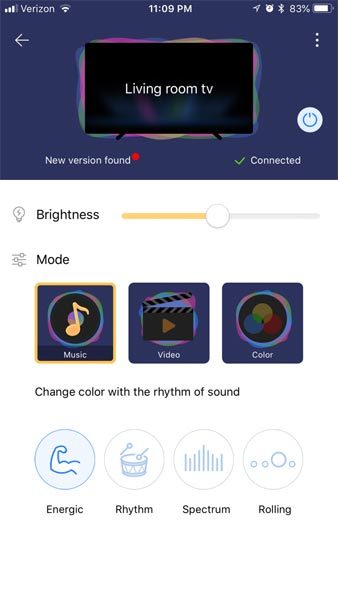
You’ll notice a power button at the top of the app screen.  Because the light strips aren’t plugged into the TV itself, you’ll need to open the app and turn on the lights manually each time.  This also means that you can use the light strips even with the TV off.  The system uses a microphone to “listen” to ambient sounds and creates a light show based on what it hears.

My video shows the color display while listening to Gary Numan’s I Am Ruin from his Savage (Songs from a Broken World) album.  The lights were also just as happy to dance to the sounds of a conversation I was having with my husband.  I can’t imagine what it would do at a party with music playing and a lot of people all talking at once! 😉

I’m sure that there are many other light kits on the market that do what the Minger system does, but most of the other kits I’ve seen cost much more than the $60 this system costs.  I haven’t tried any of the other systems, but I think they’d have a hard time performing so well that I’d be willing to pay a premium for them when the Minger kit does such a great job.

What I like

  • Easy installation
  • Neat installation with only one wire coming off the TV
  • Lots of color modes so I can customize how I like it best
  • Nice ambient lighting for the room without reflections or glare on the TV screen or bright lights shining in your face
  • Can create a light show for music without having the TV on
  • Could even use the kit as an accent light for the room without watching TV or listening to music
  • Using a camera means you don’t have to insert it into the cabling path of your home theater setup
  • Camera also means you can use it with older TVs without HDMI

What needs to be improved

  • Some people may be bothered by the slight lag in the color change, especially action movie fans

Final thoughts

The Minger kit is still installed on my TV, and it will stay there.  My husband, daughter, and I all agree that the Minger LED Smart TV Backlight kit with Camera makes watching TV and movies at home more like going to the theater.  It’s a keeper!

Price: $59.99
Where to buy: Amazon 20% Off Code on Amazon: WFW5U34K (Expired 07/15).
Source: The sample of this product was provided by Govee for Home

Filed in categories: Reviews

Tagged:

Minger LED Smart TV Backlight kit with Camera review originally appeared on The Gadgeteer on June 17, 2018 at 10:51 am.

Note: If you are subscribed to this feed through FeedBurner, please switch to our native feed URL http://the-gadgeteer.com/feed/ in order to ensure continuous delivery.
Kitbeez True Wireless Earbuds with Power Bank review

As the “perfect earbud” search goes on, I got another opportunity to test and review a contender. Here we go:

What is it

The Kitbeez True Wireless Earbuds with Power Bank, are a pair of very small earbuds with a charging case and a built-in battery, and a removable power bank that can charge devices with micro USB, micro USB-C or Lightning jacks.

What’s in the box


1 x Pair of Kitbeez True Wireless Earbuds with Power Bank and charging case
3 x Pair for EarGels
1 x Micro USB Cable
1 x Micro USB-C Male Adapter
1 x Lightning Male Adapter
1 x Instruction Booklet

Design and features

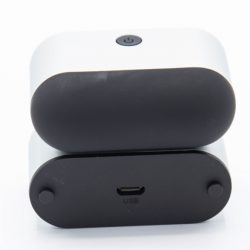
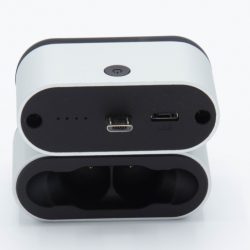
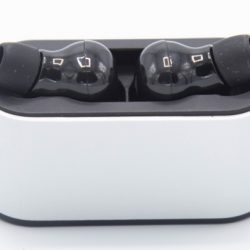
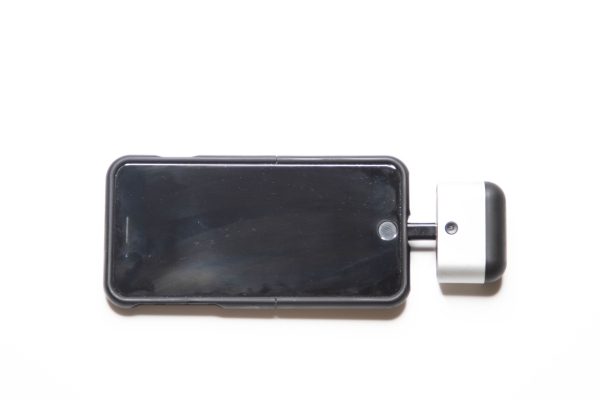
The Kitbeez True Wireless Earbuds with Power Bank consists of a base unit that is a USB power pack, and it plugs into a charging base for the wireless earbuds. When the 2 halves are connected, the entire case measures approximately, 3 inches x 2 inches x 3/4 inch. These measurements include the top cap that covers the earbuds when they are placed in their charging case.


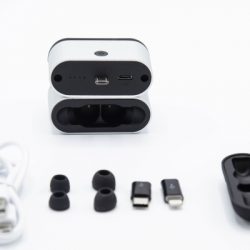
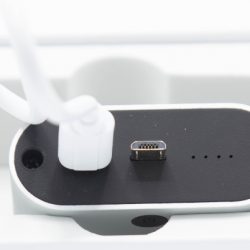
The base unit which is the USB power pack/charger has a micro USB connector that plugs into the charging case. This is illustrated by the pictures both above and below. The earbuds then sit in the charging case to be stored and recharged. In addition to the micro USB connector on the base unit, there is also an LED indicator that shows the charge level of the power pack, and female micro USB jack that is used to charge the base/power pack.


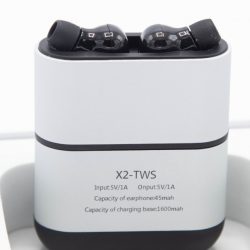
As illustrated below, on the front of the case on the base unit, there is a button that when depressed shows the charge level as indicated above by the blue LEDs. The back of the unit has the following imprinted information:

Model: X2-TWS
Input: 5V/1A
Output: 5V/1A
Capacity of earphone: 45mah
Capacity of charging base: 1600mah


Two additional adapters are also included with these earbuds. They plug into the male micro USB connector of the base power pack and allow you to plug in and charge any device with a micro USB-C port or a lightning port.

The picture below on the left shows a micro USB cable plugged into the base power pack to charge it.


Performance

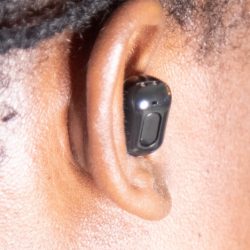
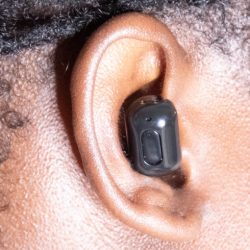
The Kitbeez True Wireless Earbuds perform well in a few categories. The sound is decent with a good balance of lows, mids, and highs. No one frequency range overshadows the other, which is nice for earbuds that are on the relatively lower side of the price scale. The lows are acceptable but do become somewhat distorted at higher volumes. Any distortion can be easily remedied by lowering the volume a notch or two. The earbuds are very small and light and stay in your ears quite well, although I am still not convinced that they will always stay in place while sprinting across a hard surface.


The Bluetooth connection is very stable, and I only experienced disconnections when I was in an area with known interference. Charging time is great, and the earbuds’ power lasts quite long on a full charge even when played at high volume levels. The active noise canceling works, but since it is always active, I was not able to turn it on and off for a comparison. While I was able to use these earbuds for phone calls, there were times when I had to repeat myself several times because the person on the other side of the call could not hear me clearly.

In terms of music, I tested them with my usual genres of Contemporary Jazz, R&B, Reggae, Easy Listening, Gospel and “borderline” Classical, and the sound reproduction was always relatively acceptable. They are not audiophile grade by any means, but they work well for daily use while going about my business.

What I like

I like that the sound of the earbuds is decent and loud enough and that they are quite small. I also like the charging options that the base unit provides and that they seem to last a very long time on one charge of the base unit. Once properly charged, I used them for at least 2 weeks at about 1 1/2 hours each day from Monday to Friday without ever having to recharge the base unit. After the 2 weeks, I decided to charge the base unit albeit that the LEDs still showed 2 of 4 lights indicating that it was still at about 50% charged.

What can be improved

1: The earbuds have no visible markings that I can see to tell me which one is left or right, and I only know after I place them in my ears and the voice command lets me know. About 80% of the time, I had to switch them around. I did not really hear any difference in performance when they were in the wrong ear but just knowing that they were in the wrong ear compelled me to switch them around.

2: When connected the base unit to the charging case, you have to pay extra attention to the connection and fiddle with the two halves while looking at the earbuds seated in the case to ensure that they are charging. For the first few days of testing these earbuds, I just “dropped” them into their charging case and assumed that they were charging. When I went to use them, one side was “dead”. The next day, I tried leaving them to charge overnight and got the same result. After some further investigation, I found out that I had to plug the base unit in and out of the charging case a few times until it seated properly.

3: This is my biggest issue with these earbuds: With a few exceptions, almost all of the wireless earbuds that I have tested disconnect when put in their charging case. This is not the case with these earbuds. Initially, After I placed the earbuds in their charging case and tried to answer a few phone calls, I could not hear anyone on the other side of the calls. I checked to see what was wrong, and I found out that the earbuds were still connected to the Bluetooth on my phone. I tested this several times with the same result. After that, I knew that I had to physically power down the earbuds before placing them in their case to release the Bluetooth connection, or I would have to go into the settings on my phone and disconnect. Since this discovery, I have been powering them down after each use.

Final thoughts

Honestly speaking, I did not expect a whole lot from these earbuds, considering the price and some of my previous experiences. However, they work quite well for daily “runabout” use, and having the USB power pack is a great convenience since it can be used universally to charge other devices. Recommending earbuds based on sound is very risky since this dynamic is based on individual perspective and very subjective. For the cost, and the features offered, I would say that these are definitely worth a try, and are a good value.

Price: $54.99
Where to buy: Amazon
Source: The sample for this review was provided by Kitbeez.

Filed in categories: Reviews

Tagged:

Kitbeez True Wireless Earbuds with Power Bank review originally appeared on The Gadgeteer on June 17, 2018 at 10:00 am.

Note: If you are subscribed to this feed through FeedBurner, please switch to our native feed URL http://the-gadgeteer.com/feed/ in order to ensure continuous delivery.
Nite Ize packs a lot of functions into a mini flashlight

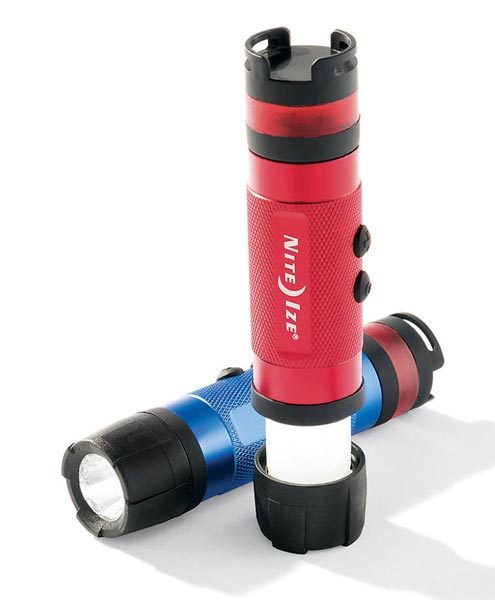
These mini LED flashlights from Nite Ize are only 1.25″ in diameter x 4.5″ long, but they pack in six functions.  They work as a high/low flashlight or lantern and as a red safety light with glow, flash, and SOS modes.  They are a handheld flashlight or they can stand for use as a lantern or for flashing modes.

In flashlight and lantern mode, the LEDs produces 80 lumens for up to two hours of light.  The low setting produces nine hours of softer light.  It uses 1 AA battery (included).

The machined aluminum body is water- and shock-resistant.  The lanyard loop can be used with a lanyard around your neck or with a carabiner to clip it to a belt loop or your gear bag.  The Nite Ize 3-in-1 LED Mini Flashlight is available in blue or red for $11.99 at The Container Store.

Filed in categories: News

Tagged: ,

Nite Ize packs a lot of functions into a mini flashlight originally appeared on The Gadgeteer on June 17, 2018 at 9:00 am.

Note: If you are subscribed to this feed through FeedBurner, please switch to our native feed URL http://the-gadgeteer.com/feed/ in order to ensure continuous delivery.
Presidio Grip World Edition iPhone X cases may offer the best protection yet


With the cost of cell phones these days, investing in a good cell phone case is just plain common sense and mandatory to protect against the accidental drop or bump or bruise. Manufacturers have flooded the market with every type of cell phone case imaginable, and they have made the process of choosing that much more difficult. Despite all of the choices, not all cases are equal. Some of them protect our phones much better than others.

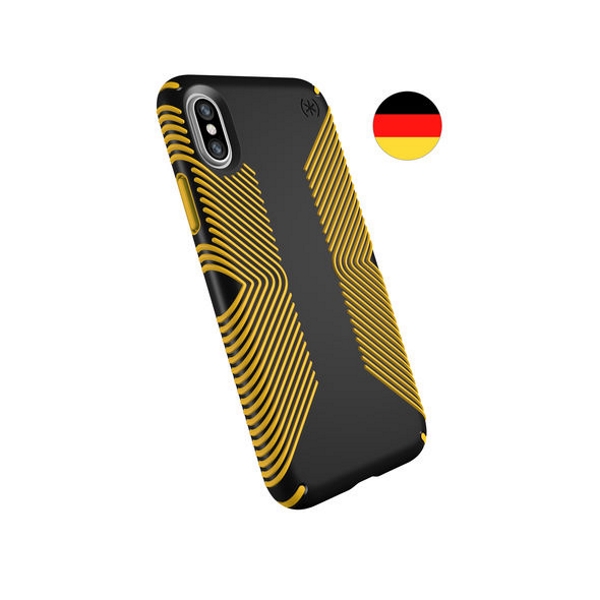
The iPhone X is Apple’s most expensive cell phone. The Presidio Grip World Edition iPhone X Cases are made for the iPhone X, and made to impress, with two layers of protection that can withstand up to a 10-foot drop. It has a protective no-slip grip and a raised bezel for screen protection all in a slim design. It is scratch resistant and comes with a lifetime warranty.

The Presidio Grip World Edition iPhone X cases are available for purchase on the Speck Products website for $39.95.

Filed in categories: News

Tagged:

Presidio Grip World Edition iPhone X cases may offer the best protection yet originally appeared on The Gadgeteer on June 17, 2018 at 8:00 am.

Note: If you are subscribed to this feed through FeedBurner, please switch to our native feed URL http://the-gadgeteer.com/feed/ in order to ensure continuous delivery.