TaoTronics 4K action camera review

GoPro has forever changed the approach to action video with their line of HERO cameras.  While the price range of $150-$400 for their latest models is a lot less than comparable professional video equipment, it can still be more than some would like to spend on this type of gadget. Other manufacturers have broken into this market to lure consumers with lower prices and various other features and functions. One such company is TaoTronics. This camera is made in China and has up to 4K30FPS recording. Keep reading to see what I think!

The TaoTronics 4K Action Camera is a GoPro “Clone” that specification-wise sits somewhere between the GoPro HERO Session and HERO4 Black. The comparative Features are summarized in the table below:

HERO4 Silver TaoTronics HERO4 Black
Video Modes*
    4K 15 30 30
    2.7K 30 30 60
    1440 0 0 80
    1080 60 60 120
    720 120 90 240
    480 240 0 240
photo resolution 12 16 12
photo shots/sec 10 10 30
connectivity WiFi, Bluetooth WiFi WiFi, Bluetooth
Water depth 40 30 40
Size (mm) 30 30 30
59 59 59
41 41 41

* Video Mode is the maximum framerate supported in each resolution

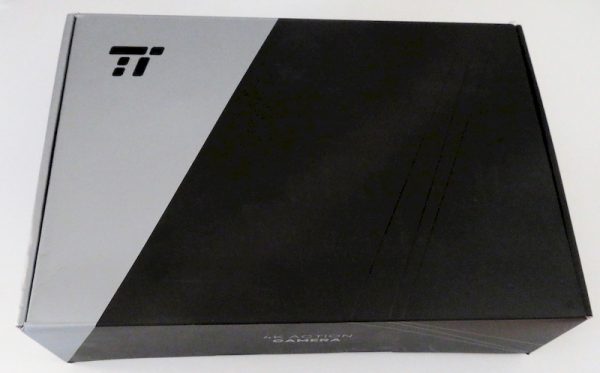
The camera comes in a rather ordinary cardboard box.
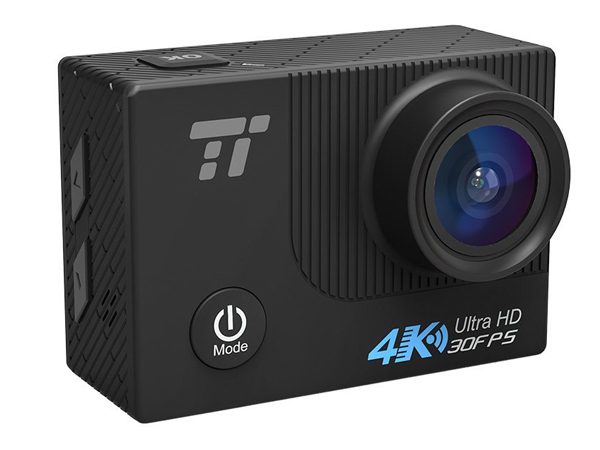
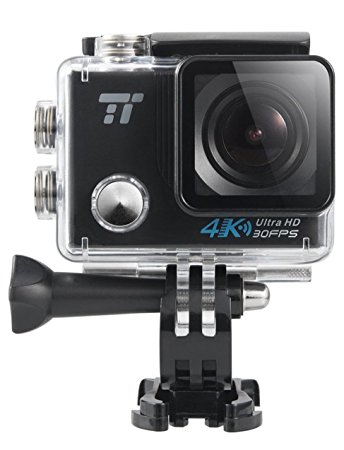
The camera is about the same size and shape as the HERO4 and comes with a waterproof housing that has a similar hinged attachment point as the GoPro line of cameras. It is therefore compatible with a whole ecosystem of GoPro style attachments.
The camera also comes with a protective mount backing (that fits onto the hinge of the waterproof front and has slots for a nylon belt), a tubeframe mount, several adhesive and hinged mounts for surface mounting.
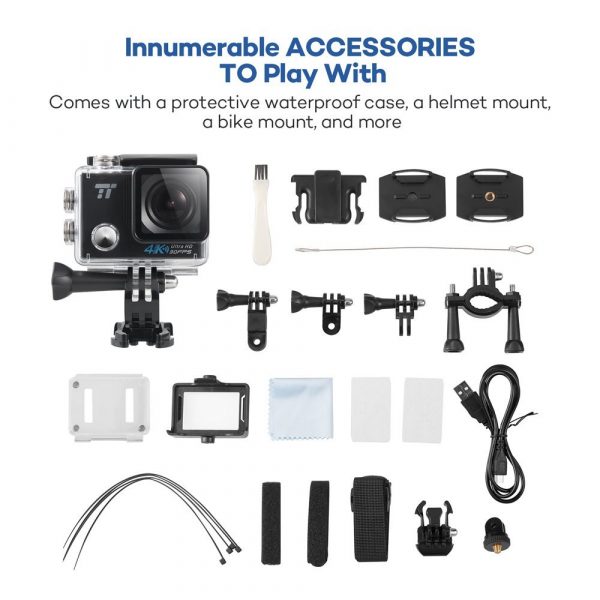
The system also comes with a snap on case with 1/4-20 mounts on the top and bottom and a spring clip mount for attaching to a belt or similar. Hinged mounts that are orthogonal allow the camera to be tilted in 2 dimensions and a male 1/4-20 mount (which allows any camera with a tripod mount to interface with GoPro fittings) and a female 1/4-20 mount are also included to permit the camera to be swiveled in each direction. Specific mounts, for mounting to the chest or helmet, pontoon and selfie sticks, and suction mounts are not included.

Inside the packaging provides some illustrations of how the included accessories can be used to mount the camera to a helmet or bicycle handlebar.
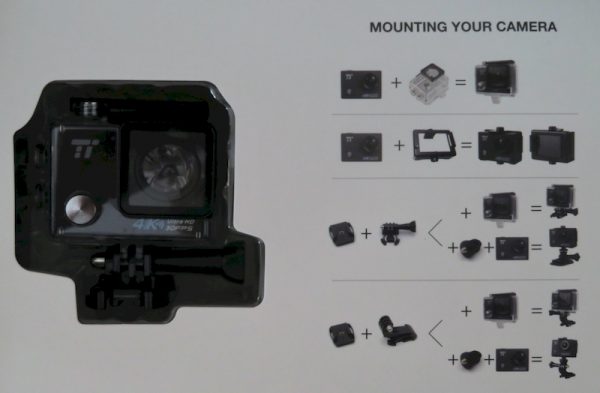
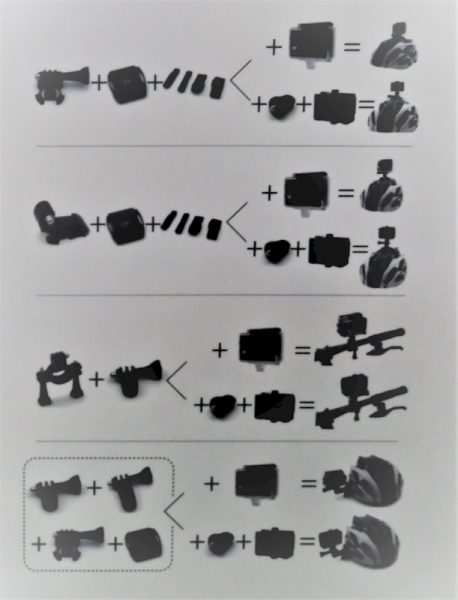
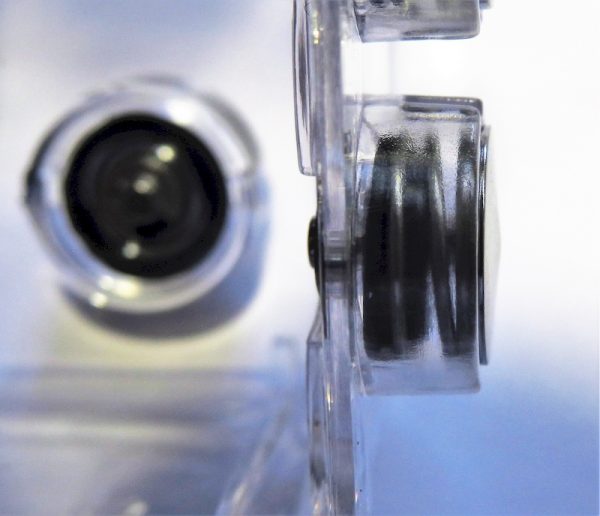
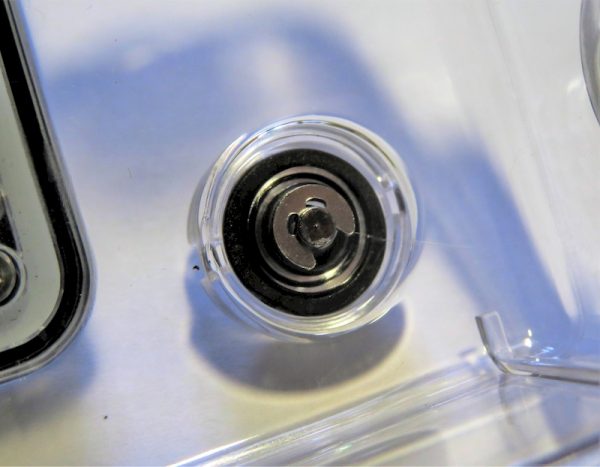
The buttons on the waterproof case are spring loaded pins that penetrate a gasket. There isn’t an impermeable diaphragm on the inside of the case so water penetration is a definite possibility.
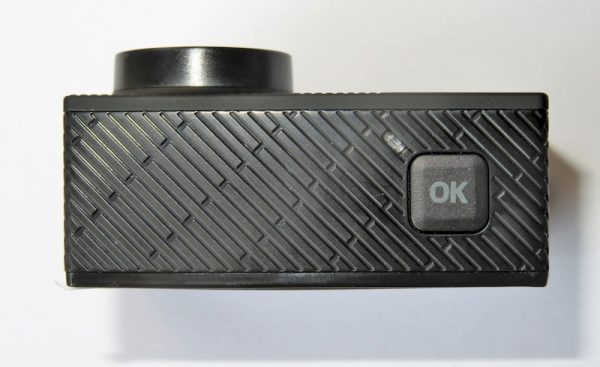
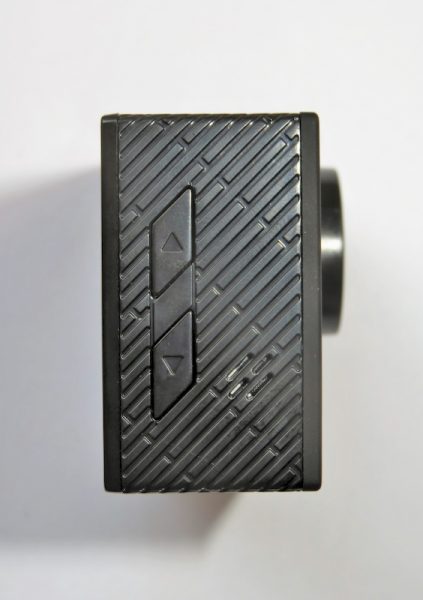
The camera layout is similar to the HERO4 as well, with a power/mode button on the front, an OK/Start/Stop button on the top, an up/down button on the side and a screen on the back.
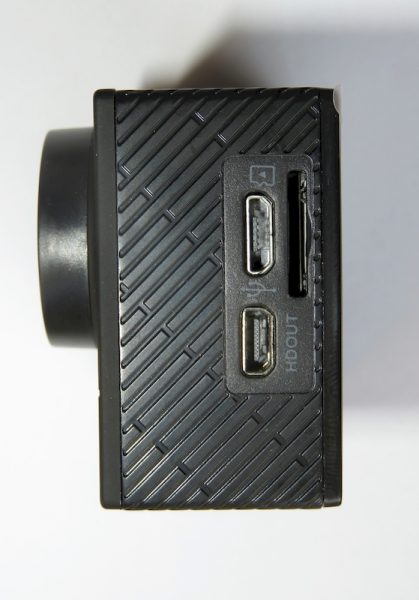
One noticeable difference is that this camera doesn’t have a LCD status window or LED indicators on the front of the camera. Actually, it is difficult to determine that the camera is recording from the front, so in a situation where you’re recording a selfie, you will have to look at the back or a smartphone with XDV running to make sure the recording has started or is in progress. Another difference is that this camera doesn’t have any feature similar to a highlight button, which is located on the side of the HERO4 and can be used to bookmark significant sections of the video. The screen is not touch sensitive like it is on the HERO4 but since the screen is most often in the housing, and since this doesn’t have the video editing features of the HERO4, a touchscreen isn’t really needed. The screen comes with a matte screen protection on top of a clear glossy screen protector on top of the plastic glossy screen cover that is part of the case. I prefer to leave the matte cover on to reduce glare from the sun. The camera also has a blue LED on the back that is lit while powered and blinking while recording and a red LED that is lit while externally powered and blinking while charging. The LEDs can be disabled if the camera is used as a dashcam.

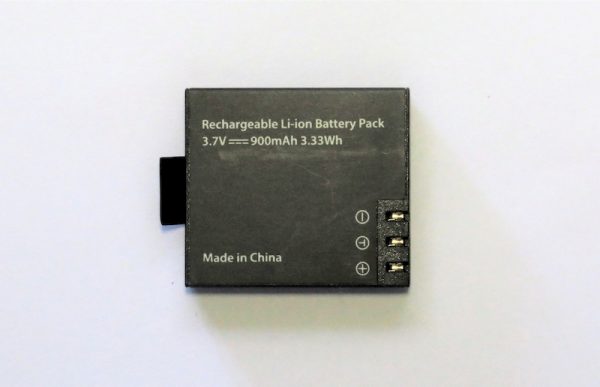
The camera is powered by the battery below. It appears to be a typical HERO type battery.
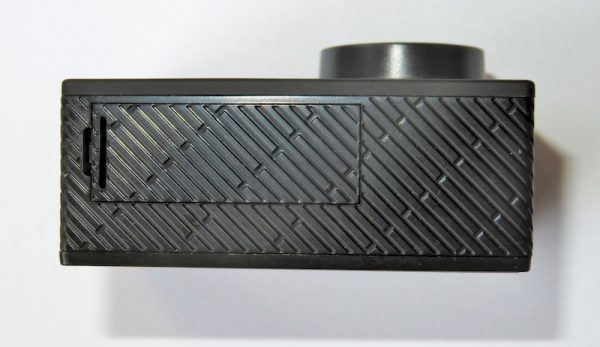
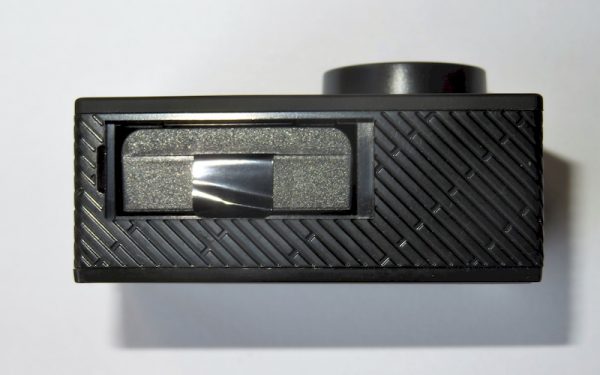
The battery door is held in place by a springy piece of plastic and is completely removable. A plastic tab on the battery help to pull it out.
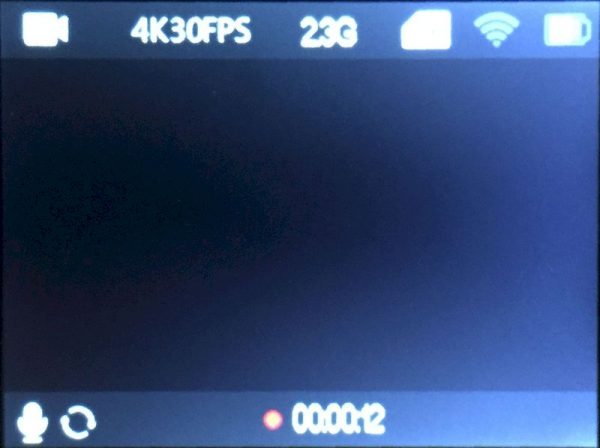
The standard operation is menu driven and circulates through video recording, camera recording, slow-mo recording, playback and settings screen. To change the mode press the mode button and to start or stop operation in the desired mode press the OK button.

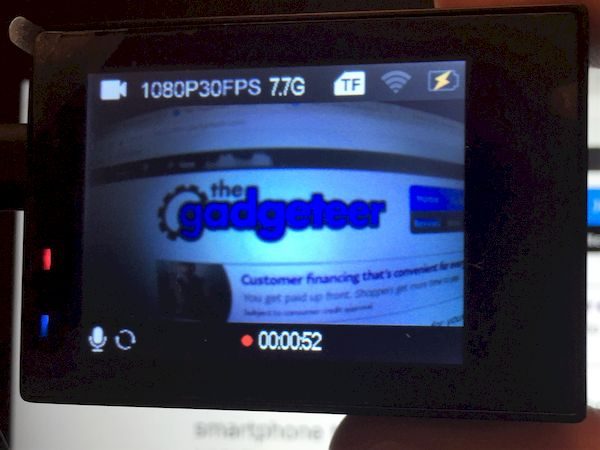
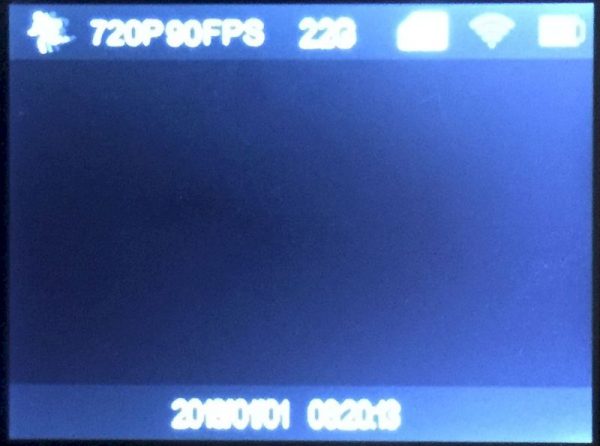
The video recording screen shows set resolution, memory remaining, WiFi signal, and battery strength. The bottom of the screen shows if the sound is recorded, if the image is rotated, loop recorded, time lapse recorded, and the elapsed time of the recording.
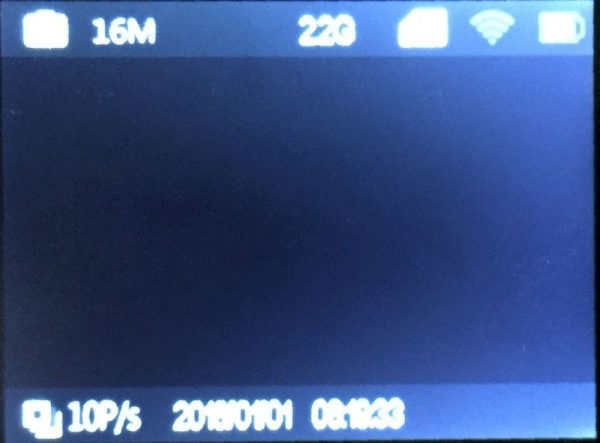
The still shot screen shows set resolution, memory remaining, WiFi signal, and battery strength. The bottom of the screen shows if dramashot is enabled, what the delay timer or the auto timer is set to, and the current time.
The slow-mo mode is very similar to the video mode
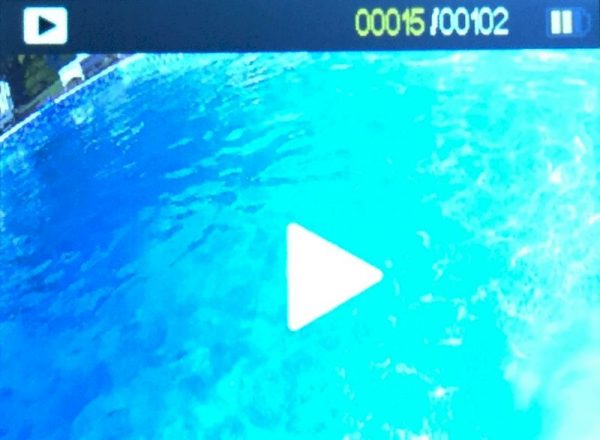
The playback mode displays a preview of the recorded image and what order it is in the camera. The date and time the recording was made, while useful, is not displayed. Once the playback is started the up and down buttons on the side can be used to adjust the speed of the playback from 2x, 4x or 8x speed in either forward or reverse. A long press on OK will bring up a erase menu for the item on the screen.
There are a number of settings on the camera to tailor it to your shooting environment and preferences.
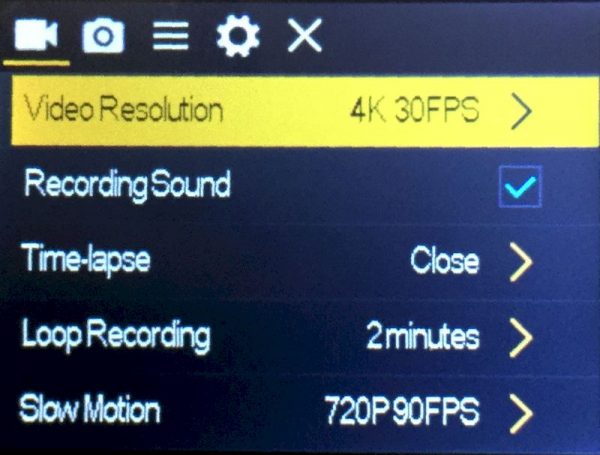
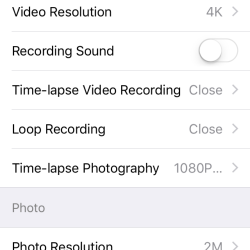
The video resolution setting allows the user to select any of the supported resolutions (even the high frame rate options). Recording sound allows you to select recording a video with or without sound.  The TaoTronics has a time lapse mode and can be set up for 0.5, 1, 2, 5, 10, 30, and 60 seconds intervals for video. Loop intervals are limited to 2, 3, and 5 minute segments. These segments seem short compared to the 5, 20, 60 and 120 minute intervals of the HERO4, however, if this is being used as a dashcam, 5 minutes is usually sufficient to capture the good (awesome car on the road), the bad (awesome car hits car in front of you) and the ugly (you hit car in front of you). The drivemode on the TaoTronics is similar to the QuikCapture mode on the HERO4. Not only will the TaoTroincs begin recording as soon as the camera is powered from the MicroUSB port, the camera will begin recording as soon as the power button is pressed. note that loop recording isn’t available if time lapse recording and vice versa.

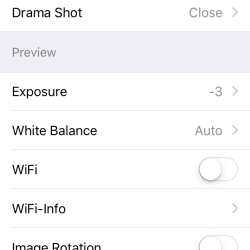
The TaoTronics time lapse mode can only be set to 3, 10, 15, 20 and 30 second intervals for photo. The TaoTronics will capture a burst of photos by setting up the feature called DramaShot; the camera can be programmed to capture either 3, 5 or 10 photos each time the OK button is pressed. However, there is no way to record continuous burst photos and there is no way to capture a photo while recording a video. The camera has a 3, 5, 10 or 20 second timer. A timer cannot be set to start a time lapse or DramaShot.

The photos and videos share common exposure settings for white balance (auto, sunny, cloudy, incandescent, and fluorescent) and exposure (-3 to 3 by integer steps) There is no shutter setting for the camera. The camera also has a setting to limit interference by fluorescent light by indicating if the electrical frequency is 50 or 60 Hz.

When mounting the camera upside down there is a setting to rotate the image, but there is no accelerometer in the camera, meaning that the camera is unable to determine the correct orientation automatically.

The settings are available in Chinese, English, Japanese, Korean, Russian, German, French, Italian, Spanish, Polish, Portuguese, Dutch, Hindi, and Turkish.

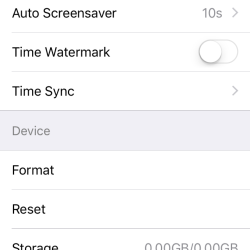
This review is with the firmware version 20170605V23. The camera is compatible with micro SD cards up to 64 gb. I put a 128 gb card in it and the camera ruined it; I needed to reformat the card afterwards. I made the performance tests with a 16gb Class 2 card, which seemed to work OK even though the data rate on some videos is 5.5 MB/s – about 2.5x the minimum guaranteed capability of the card.

I wanted to demonstrate the camera recording features on their own, but also demonstrate some reference of what is being recorded. using the 1/4-20 mounts from the TaoTronics package and a clamp mount from a GoPro-compatible package I rigged a Canon SX720 HS, LeEco Le Pro3 Smartphone, and the TaoTronics together.
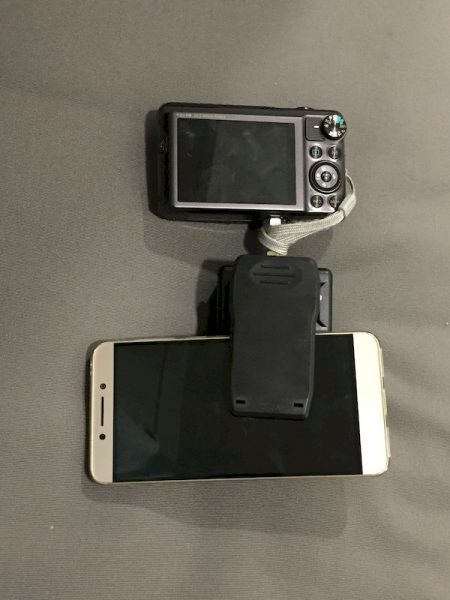
I shot the same scene on all three devices so an unbiased comparison of the recordings can be made. Note that the Canon top resolution is full HD 1920×1080, not 4K. The recording  of me walking is at 4K resolution on the LeEco and TaoTronics. The recording of the 9/11 memorial is in FHD on all three devices. I’m making the videos available on a mega.nz site so that you can see them without re-encoding but downloading from here is slow, so please be patient.


4KTaoTronicWalk


4KLeEcoWalk


FHDCanonWalk


FHDTaoTronic

FHDLeEco


FHDCanon

Note that I trimmed the length of the video with software that doesn’t re-encode the video so no modification of the recorded image occurs during the process. The wide field of view of the TaoTronics means that each item recorded has less resolution. I’m not sure if this is the reason why the shots from the Canon and LeEco look clearer. Also the lens flare and glare off of the TaoTronics lens is significantly more noticeable than on the other two shots. Unless you’re JJ Abrams this isn’t a good thing.

I made some recordings of the camera near a pool. The reflection of the sun off the water is a good test to see if the camera can effectively record very bright scenes. At the same time the shadow of the shrubs is recorded.

4KPoolAbove

The camera does a good job at recording the pale blue of the water under the surface; the block artifacts of the compression process are visible, but small. Key-frames of the shadow of the waves are visible on the pool bottom but I’m not sure the other cameras would not have captured similar artifacts.

4KPoolBelow

distortion became much more obvious at slo-mo speeds

HDSlowMoPool

I literally threw the camera up into the air and had it land in the water. I didn’t notice any water intruding into the case after this test.

To test the action recording I took the camera out for brief run, just holding on to the case so that the picture shook about a lot. I wanted to see how well the camera can record a rapidly changing scene. The results show that the camera recorded the scene without generation of large blocks or skips in the recording. I did have the camera drop audio a couple of times in this situation. I’m not sure why this happened – it may be the sub-optimal MicroSD card I was using. Also, its pretty evident that there is no image stabilization.

4KTaoTronicRun

The camera did a nice job at recording the same scene in slo-mo

HDSlowMoRun

I shot a scene at dusk and the shot looked very similar to what was actually there. I noticed there was a lot of noise in the dimly lit night sky, but some elevated noise at this low lighting is to be expected. I didn’t change the exposure setting but this would have improved the captured image even more.

FHDNight


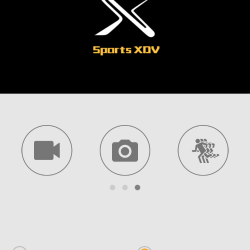
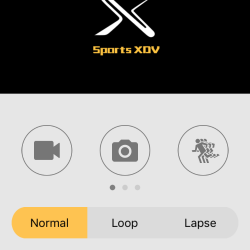
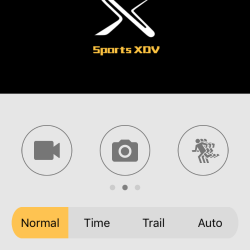
The companion app for this camera is called XDV and is available from Shenzhen Sunchip Technology on the iPhone and XDV by wisdomplus of the Android play store. The app allows you to set the recording mode of the camera, to view a live stream of the recording, to review recorded images on the camera and to access other settings on the camera. The connection to a camera can only be made by using the WiFi of the camera generated access point, so you’re limited to the range of the camera. It would be great if the camera and smartphone could connect as clients to the same WiFi system, then the range could be arbitrarily large through bridging of multiple antennas.

In the end I think that the recorded video was slightly better on the other two cameras and footage from YouTube (even though this may post processed) looked a bit more polished that what I recorded. If you want to get that last bit of video quality out of your shots or more special features you will probably need to spend a bit more. However, the TaoTronics camera is a very close second. I see myself taking a lot more action shots with this in the future and I think its a good gadget for anyone to have in their arsenal.

Source: The sample for this review was provided by TaoTronics. Please visit their site for more information and Amazon to check prices / order.


Product Information

Price: $79.99
Manufacturer: TaoTronics
Retailer: Amazon
Requirements:
  • Class 10 MicroSD card up to 64GB
  • Smartphone for using paired app is optional
Pros:
  • Good Picture
  • Fits GoPro form factor
Cons:
  • No indicator light in front
  • some lens flare/glare in brightly lit scenes
  • only WiFi connection as an access point

Filed in categories: Reviews

Tagged:

TaoTronics 4K action camera review originally appeared on The Gadgeteer on October 5, 2017 at 10:34 am.

Note: If you are subscribed to this feed through FeedBurner, please switch to our native feed URL http://the-gadgeteer.com/feed/ in order to ensure continuous delivery.

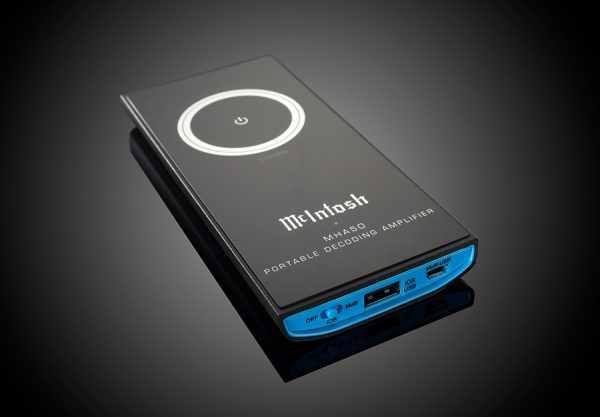
McIntosh Audio goes small with the MHA50 Portable Decoding Amplifier

Anyone who knows audio is aware of McIntosh—no, not Apple’s Macintosh! McIntosh is one of the most respected brands of audiophile gear with a history of great sound, long life and understated design with their signature blue lighting. Many years ago, I bought a Marantz receiver solely because it looked like a McIntosh (couldn’t afford the real thing). Only later did I realize that those copy-cat Marantz products were incredible in their own right. Lucky me! But I digress. McIntosh has continued to refine their core products (amplifiers, preamps, receivers, speakers) while also innovating in a digital world. Now they are venturing into the portable market with the McIntosh MHA50 Portable Decoding Amplifier.

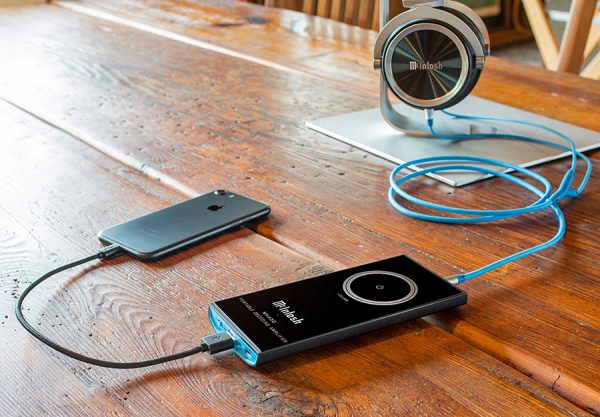
Nearly everyone walks around with most if not all of their music library in their pocket or bag where it’s readily accessible via a pair of headphones. While convenient, it likely doesn’t sound as good as it could. The handheld MHA50 Portable Decoding Amplifier can make your music sound its best—and likely better than you’ve ever heard it before—through your headphones.

The MHA50 includes wired inputs for Apple iOS and Android devices plus Mac and Windows computers. It can also wirelessly connect to these devices via Bluetooth 4.1 with aptX technology ensuring high wireless sound quality. It has a high-performance 32-bit digital-to-analog converter (DAC) and outputs audio that is superior to what your device alone can produce. It supports 32-bit/192kHz hi-res audio, DSD, and USB audio. Its 3,000 mAh rechargeable battery provides up to 6 hours of playback on a single charge when wireless and last even longer when wired.

About the size of a smartphone, the MHA50 is lightweight for portability with a beveled case that fits inside a pocket. Its features a glass front panel with a touch-sensitive volume control knob inspired by the classic knobs found on McIntosh products.

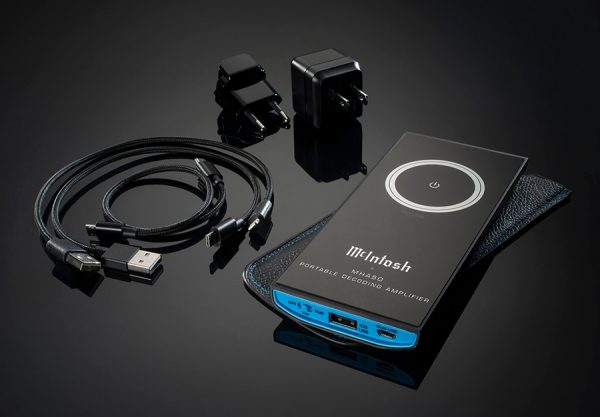
The MHA50 to work with all types of small earphones to large over-ear headphones. It comes complete with a luxurious leather carrying case, a Lightning to USB-A cable for Apple devices, a USB micro-B to USB micro-B cable for Android devices and a USB micro-B to USB-A cable for Mac and Windows PCs. A wall mount charger is also included.

The MHA50 sells for $700 US and is available from McIntosh dealers. Visit www.mcintoshlabs.com for more info.

Filed in categories: News

Tagged: ,

McIntosh Audio goes small with the MHA50 Portable Decoding Amplifier originally appeared on The Gadgeteer on October 5, 2017 at 9:00 am.

Note: If you are subscribed to this feed through FeedBurner, please switch to our native feed URL http://the-gadgeteer.com/feed/ in order to ensure continuous delivery.

Julie’s gadget diary – It’s official, I’m switching back to Android

When I was watching Google’s live event yesterday and heard that the new Pixel 2’s would be going on sale that day, I immediately opened a new tab on my browser and went to check the Google Play store. Sure enough, they were available to order, so I did just that.

I ordered the Google Pixel 2 XL 128GB version in black. The black and white version looks very snazzy and I am a little bummed that I didn’t pick it so I’d have the red power button. But I was worried that the white would look dirty after use. I also know that I’ll end up covering it up with a thin case to add some grip to what I’m guessing will be a slippery phone.

A few days ago I posted that I was going to be switching from iOS to Android after a 3-month Android hiatus in iPhone land. I mentioned that my device choice was narrowed down between an LG V30 and the new yet unofficial Pixel 2 XL. I ultimately decided to go with the Pixel 2 XL even though it doesn’t have a microSD card or wireless charging. Why did I order it then? Because it has crazy fast charging, will have security and OS updates for the next 3 years and free full-resolution back up to Google Drive of images and video.

I planned to give my iPhone 7 Plus to Jeanne to replace her really old Samsung Galaxy Note 2. Switching to Android concerned me a little because I had planned for Jeanne and I to both be on an iOS phone when I bought an iPhone X. We’ve been on different Android phones with different versions of the OS for years, which always makes it tough to troubleshoot problems when she calls me on the phone at work to complain about something not working right. I thought being on the same version of the OS would greatly help my stress level during those calls 😉 But I wrecked that idea when I decided I’d go back to Android. However, Jeanne didn’t really care about that and was just looking forward to getting a new phone no matter what it was. But it still bugged me.

Lady luck was shining on me though because yesterday Dave Rees offered to trade me a new still in the box Pixel XL (last year’s model) for my iPhone 7 Plus which he plans to give his son. I jumped on that offer because Jeanne and I could both be on the same OS like I wanted. At least through next year’s Android P update which is the last update the first Pixel phones will receive.

I also sold my iPad Pro 10.5 with Pencil yesterday to a friend at work because I have barely used it since buying it 3 months ago. So all in all, I feel like I got 2 brand new phones for only about $300. Yay!

Now I just have to wait 2 weeks until the Pixel XL 2 arrives. Waiting.is.so.hard. 😉

Filed in categories: Articles

Tagged: , ,

Julie’s gadget diary – It’s official, I’m switching back to Android originally appeared on The Gadgeteer on October 5, 2017 at 8:00 am.

Note: If you are subscribed to this feed through FeedBurner, please switch to our native feed URL http://the-gadgeteer.com/feed/ in order to ensure continuous delivery.
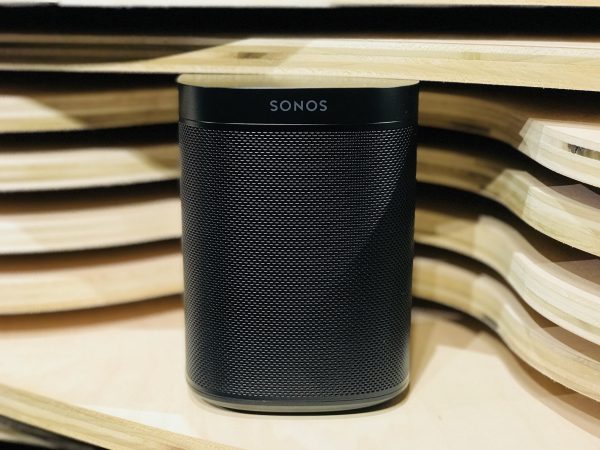
Sonos One is their first smart speaker with Alexa (Hands-on)

“Play mom’s playlist.” We suspected it was coming, and today Sonos confirmed that they are bringing Alexa into their eco-system. A software update is now available that allows Sonos owners to use Alexa to control their Sonos. The update is a beta that will be available for users in select countries, including the U.S. 

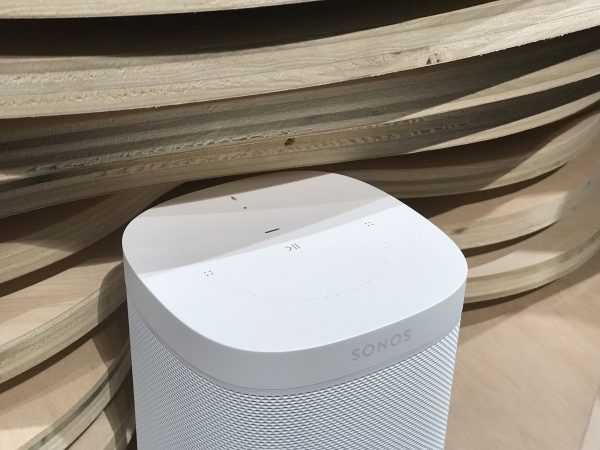
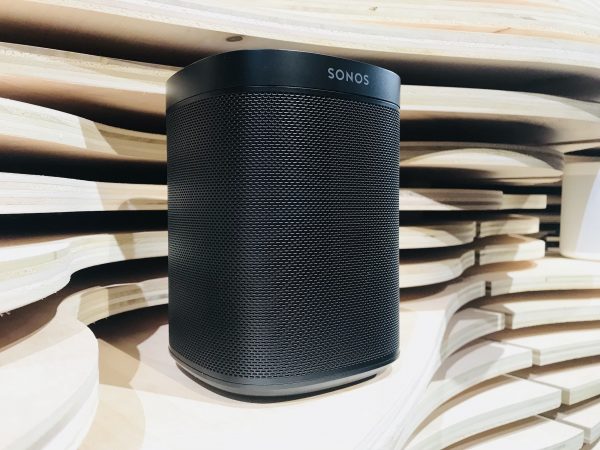
The company also unveiled their new Sonos One speaker which comes with Alexa support out of the box. But don’t let its familiar looks fool you, the Sonos One might look similar to their Play One speaker on the outside – but on the inside, it has been completely re-engineered. To that effect, it comes with a six-mic array and an adaptive noise suppression algorithm that has been optimized for Alexa. Worried that Alexa won’t hear you over the music? That’s where the echo cancellation technology inside of the mics come into play. Overall, the Sonos One is really positioned as a building block, since it allows you to use Alexa to control the rest of the Sonos family.

We briefly got to listen to the Sonos One, and it sounded fantastic for its size – even when playing all on its lonesome. Of course, like with other Sonos speakers, you will be able to pair the Sonos One with other Sonos Ones in stereo mode. Unfortunately, you won’t be able to pair the Sonos One with an older Play One speaker that you may have laying around. That’s a bummer, but Sonos did tell us that they may possibly add that feature later on in an update. And considering how great Sonos is with software updates, our hopes are high.  The Sonos One will retail for $199. Pre-orders for the Sonos One start on October 4th at www.sonos.com and it will be available globally on the 24th.

And not to make Google feel left out – especially on “Google Day”, Sonos announced that support for Google Assistant will arrive in 2018. In addition, Sonos unveiled plans to bring Apple Airplay 2 to their speakers in 2018, as well as the ability to directly control Sonos from within the Pandora and Tidal apps via an update within the next few months. Direct control from within Audible, iHeartRadio, and Kuke Music are also set to land in 2018. Last but not least, Sonos showed off a revamped Sonos app, which is more user friendly and modern, offering quicker access to your music.

Filed in categories: News

Tagged: , ,

Sonos One is their first smart speaker with Alexa (Hands-on) originally appeared on The Gadgeteer on October 4, 2017 at 8:15 pm.

Note: If you are subscribed to this feed through FeedBurner, please switch to our native feed URL http://the-gadgeteer.com/feed/ in order to ensure continuous delivery.
OLALA 7800mAh Power Bank review

I really like portable chargers that have built-in cables so that I can eliminate having to carry additional charging cables with me when I’m away from home. I have Android devices (that use only micro-USB charging cables) and iOS devices that may need a charge when traveling, so the OLALA 7800mAh Power Bank with its built-in micro-USB cable and built-in Lightning cable attracted my attention when it was offered to the Gadgeteer for review. I found this charger to be a wonderful compact size (it fits well in my hand) and that it worked well charging my devices.

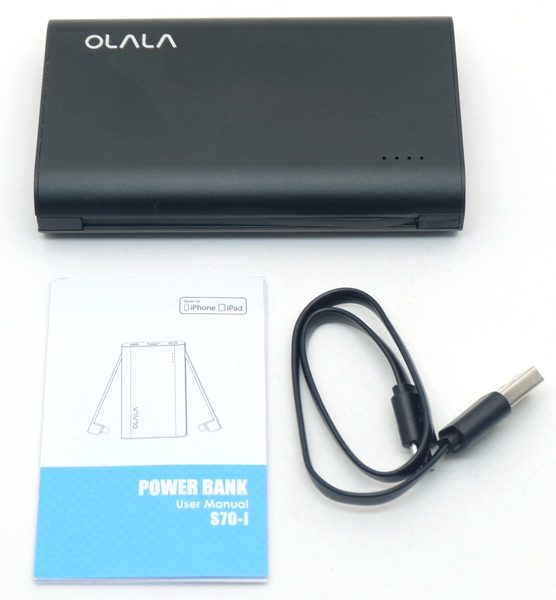
Package Contents

  • OLALA 7800 mAh Power Bank
  • Micro-USB charging cable
  • User Manual

Technical Specifications

Basic  Spec Capacity 7800mAh
Dimension 110.5 x 66 x 22 mm/4.35 x 2.60 x 0.87 inches
Weight 223 g/7.87 ounces
Battery Type Lithium-ion battery
Performance Input 5V / 2.0A
USB Port Output 5V / 2.4A max
Built-in Lightning Connector Output 5V / 2.4A max
Built-in Micro USB Connector Output 5V / 2.4A max
Fully Charged by 2A Adapter 5hrs
Cycle Life >500 times
Conversion Efficiency 85%
LED Battery Indicator 1LED 0~25%
2LED 25%~50%
3LED 50%~75%
4LED 75%~100%
LED Charging Indicator Blue Light Flashing Charging
4 Blue Lights On Charged
Environment Condition Operation Environment -10 to 55℃
Operation Humidity 10%~85% RH
Storage Environment -20 to 70℃
Storage Humidity 5%~90% RH
Package List Power Bank 1pcs
Micro USB (for charge) 1pcs
User Manual 1pcs
Warranty 1 year

Design & Build Quality

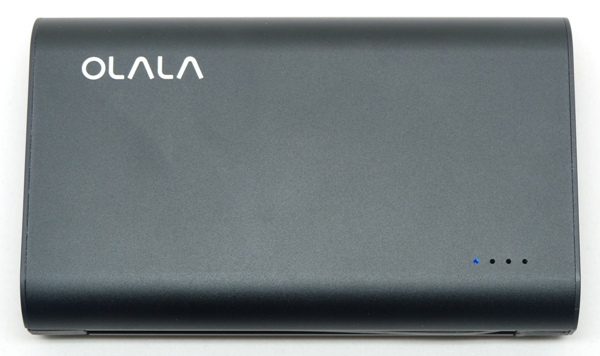
The OLALA 7800mAh Power Bank is enclosed in a matte black metal case and measures 4.35″ x 2.6″ x 0.87″ and weighs 7.87 oz. The metal casing makes the battery feel well made and it is small enough to fit in my purse. The rounded sides also make it comfortable while carrying it around. However, it does NOT come with a carrying case.

There are four LEDs that illuminate to indicate the amount of charge left in the battery:

  • 0-25% – 1 blue LED
  • 25-50% – 2 blue LEDs
  • 50-75% – 3 blue LEDs
  • 75-100% – 4 blue LEDs

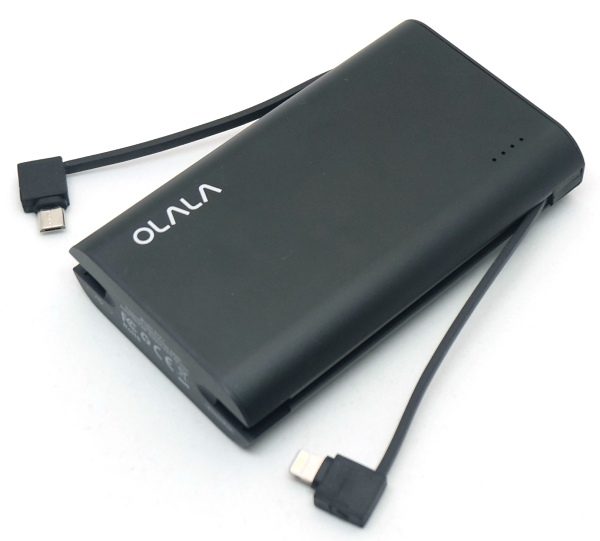
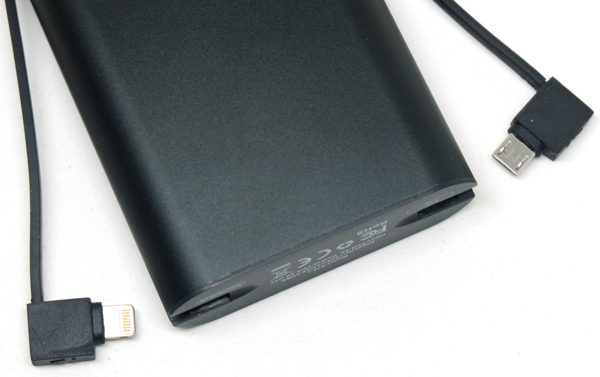
This charger comes with built-in micro-USB and Apple MFi certified Lightning cables, thus allowing you to eliminate having to carry around additional charging cables (unless you want to charge a third device or charge the battery itself while traveling).

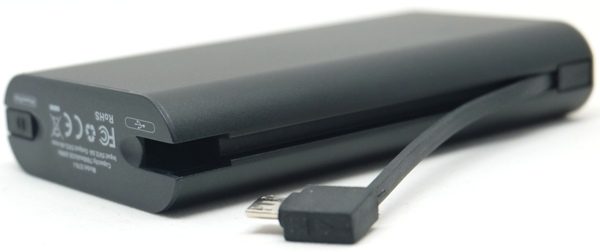
The lengths of the built-in cables (which are about 3.75″ long) tuck neatly into the side of the charger.

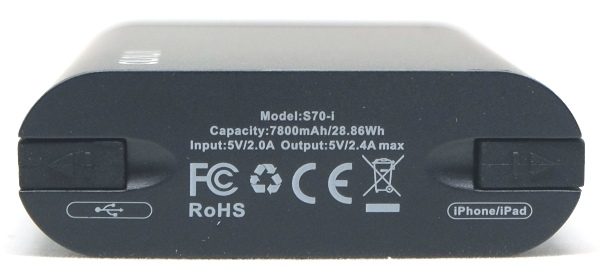
On one end of the charger, you can see that the micro-USB and Lightning cable connectors fit flush with the charger when inserted into the battery. You can also see the technical details of the battery in the above photo. 

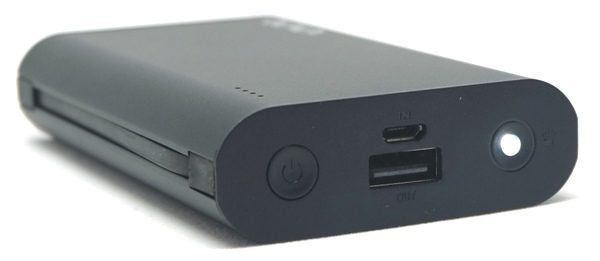
The other end of the charger contains the power button (which MUST be pressed to start charging), the micro-USB port to charge the battery, a USB port to charge a third device and an LED flashlight.

Use

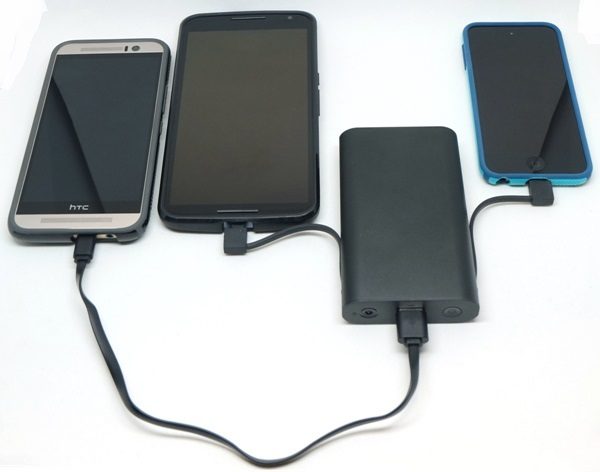
In order to start charging any device using this battery, it is necessary to press the power button. I found that this battery successfully charged my Nexus 6 phone (3220mAh battery) 2.5 times on one charge of the OLALA battery and about 2.75 times in another test (each time my phone was below 10% when the battery was used to charge it). It was able to charge my iPod Touch 6G (1043mAh battery) 5.75 times in another test (each time my iPod was at or below 16% charge when the battery was used to charge it). And, it was able to charge an HTC One M9 (2840mAh battery), a Nexus 6, and an iPod Touch 6G completely before needing to be charged. Since the battery has an output of 5V/2.4A max per each of the three outputs (which makes this portable charger better than my RAVPower Savior external battery with built-in micro-USB cable), it charged each device as quickly as their OEM chargers did (e.g. Nexus 6 was fully charged in one hour and 43 minutes or less).

Another attractive feature of this battery is that it only took about four to 4.5 hours to charge it after being completely depleted in my tests. When the battery is depleted, the first of the four LED lights flashes blue when the power button is pressed. When the battery is charging, the first LED light flashes blue until the battery reaches 25% charge and then remains lit, after which the second LED light flashes blue until it reaches about 50% charge and then remains lit, etc. When all four LEDs remain lit, the battery is fully charged.

This battery also has an LED flashlight as an added feature. In order to turn it on, you need to long press the power button for about three seconds and repeat the process to turn it off. My phone’s flashlight is about twice as bright as the flashlight on the OLALA battery, so I’m not so sure how useful this feature is.

Final Thoughts

I am impressed with the OLALA 7800mAh Power Bank – it is a well-made, compact portable battery. Its primary benefit is that it has a built-in micro-USB and Apple MFi certified Lightning cable so that you don’t have to carry around additional charging cables when traveling. It charged my Nexus 6 phone about 2.5 times on one charge of the OLALA battery and my iPod Touch 6G 5.75 times. It only took about four to 4.5 hours to charge the battery itself. The only drawbacks are that you have to press the power button to start charging a device and I would love to have the ability to directly plug the charger into an outlet so that I don’t have to carry ANY additional cables around to use it. Also, as time goes by and you upgrade your Android devices to USB-C devices, the micro-USB built-in charging cable will become obsolete. But until then, this charger works like a charm and you’ll be able to eliminate having to carry additional charging cables.

Source: The sample used in this review was provided by OLALA. Please visit their website for more information or Amazon to purchase one.


Product Information

Price: $29.99
Manufacturer: OLALA
Retailer: Amazon
Pros:
  • -The charger has a built-in micro-USB and Lightning cables to eliminate having to carry extra cables
  • -The charger charges three devices at a time; each output is 5V/2.4A max thus it charged my devices as quickly as their OEM chargers
  • -The charger charges my phone about 2.5 times on one charge of the OLALA battery
  • -The battery itself charges in about 4-4.5 hours
Cons:
  • -The power button must be pressed first to start charging

Filed in categories: Reviews

Tagged:

OLALA 7800mAh Power Bank review originally appeared on The Gadgeteer on October 4, 2017 at 11:00 am.

Note: If you are subscribed to this feed through FeedBurner, please switch to our native feed URL http://the-gadgeteer.com/feed/ in order to ensure continuous delivery.