Samsung Wisenet SmartCam A1 home security system review

There are several considerations to keep in mind when shopping for a home security camera. Do you want a cloud-based camera or a camera that saves footage locally? Do you want to be able to live stream via a mobile device? Do you need an expandable system? Do you need a camera that can pan and tilt? Is pricing a major factor in your choice? These are all factors that I keep in mind when shopping and reviewing security cameras like the latest camera that I’ve been testing – the Samsung Wisenet SmartCam A1.

What is it?

The Wisenet SmartCam A1 from Samsung is a low to mid-range priced home security camera that has basic and advanced features.

What’s in the box?
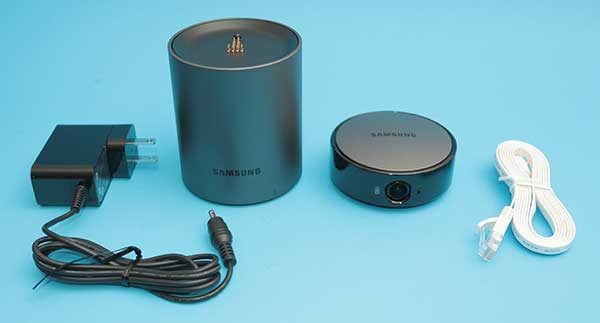
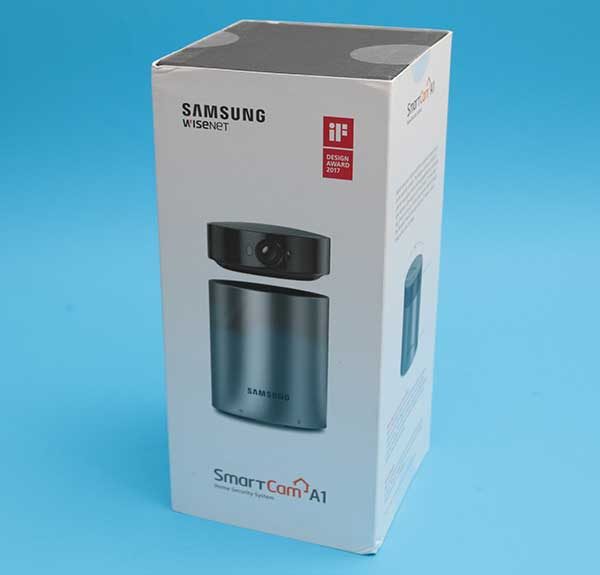
Station Hub
SmartCam A1 camera
Power adapter
Ethernet cable
Quick start guide

Design and features
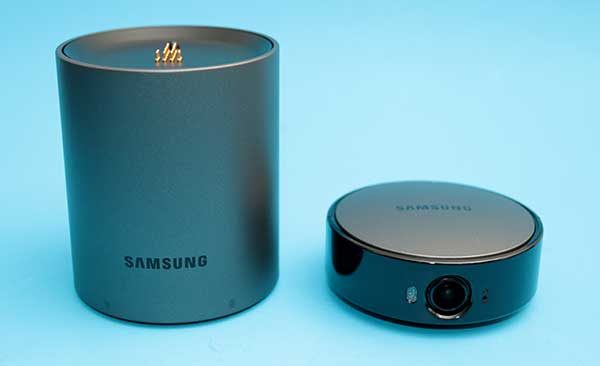
The SmartCam A1 has a unique design that includes the Station Hub unit with a removable 350° panning wireless camera that contains its own rechargeable battery.
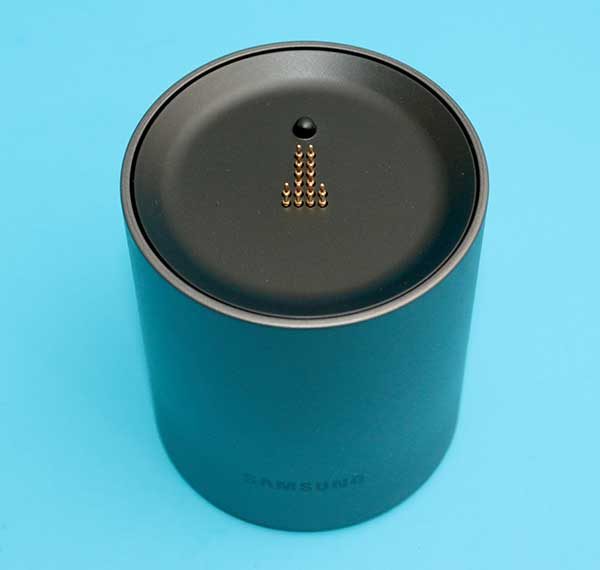
A set of spring loaded pins on the top of the hub provide power and connectivity to the camera when it is docked on top of the hub.
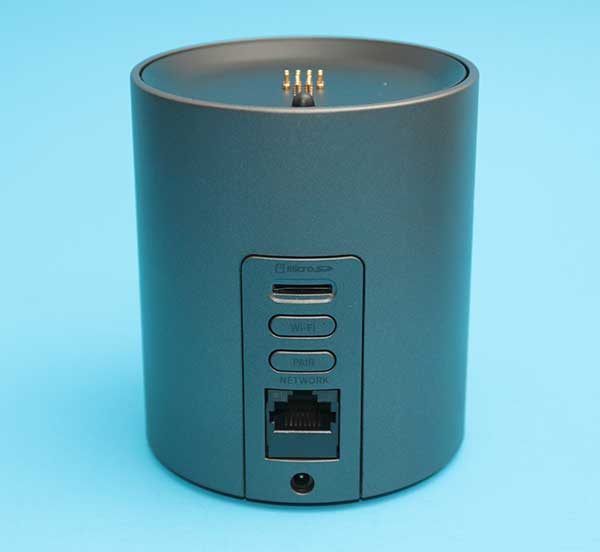
On the back of the Station Hub, you’ll find a microSD card slot which is used to save continuous camera footage. Below the card slot is a WiFi direct button, a pairing button, an Ethernet port and a power port.
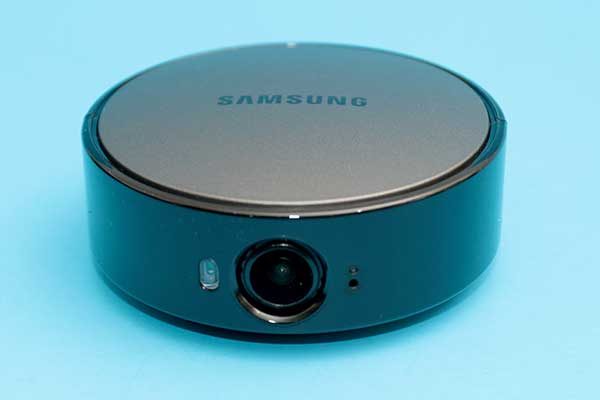
The camera is shaped like a hockey puck. It has a 130° Ultra-Wide Angle lens with a status LED and microphone on the right side and a motion sensor on the left side. 
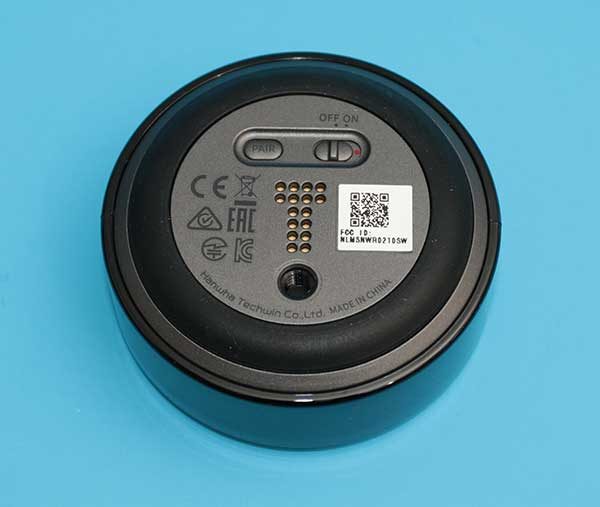
On the bottom of the camera is a pairing button, on / off switch, a set of electrical contacts for the Station Hub, and a threaded tripod socket.
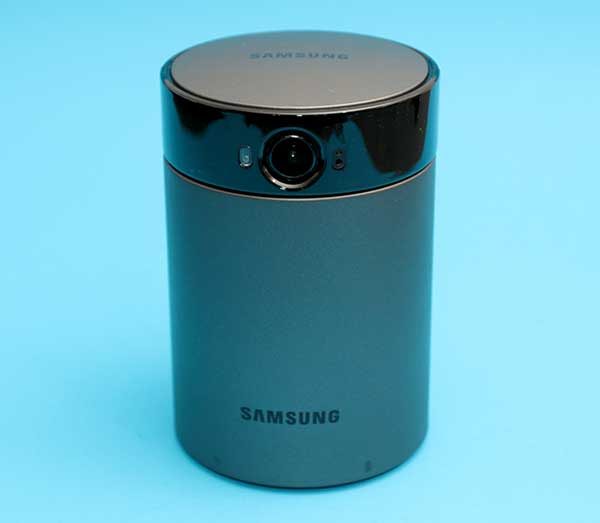
The bottom front edge of the Station Hub has two status LEDs. The LED on the left provides booting status and the LED on the right provides WiFi connectivity status.

The camera attaches to the top of the Station Hub with magnets but can be removed and placed anywhere inside your home for up to 3 hours of wireless surveillance.
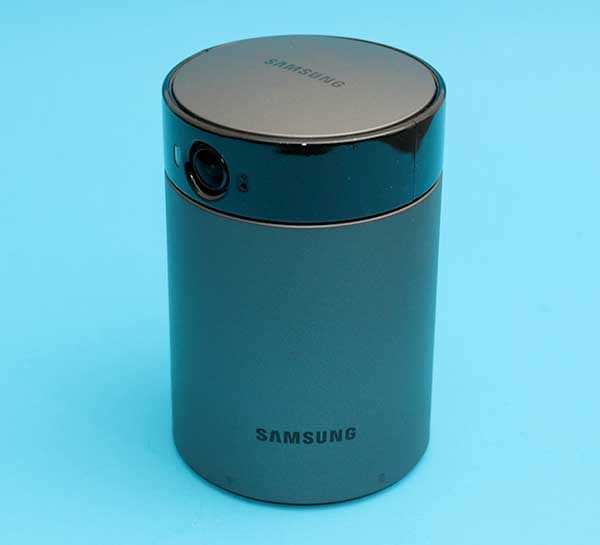
The top of the hub can rotate which gives the SmartCam A1 the ability to pan 350 degrees. You can do this manually, or the app can automatically track subjects when it detects motion.

Setup

Setting up and configuring the SmartCam A1 using the iOS and Android SmartCam app is an easy step-by-step process.

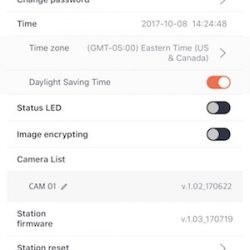
After installing the app and creating an account, you have to power on the Station Hub and the connected camera by making sure the power switch on the bottom of the camera is in the on position. You can then connect the Station Hub to your wireless router using the included Ethernet cable, or you can finish the setup using WiFi.


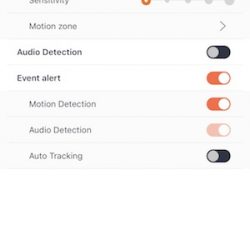
After the camera is working, you can customise the settings for motion, audio detection, and auto tracking. You can create a schedule for the times and days when you want the camera to automatically monitor for motion.
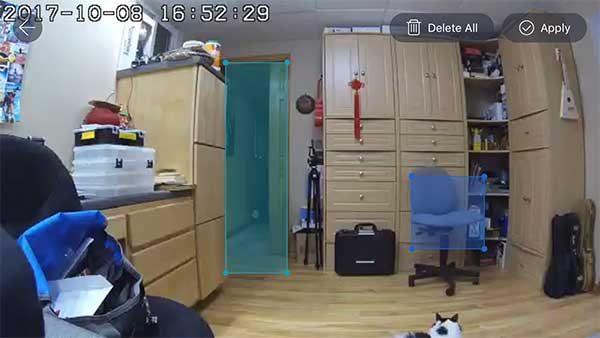
You can also set specific trigger areas to monitor for motion only in those areas. For example, in the image above, you can see that I have set trigger zones for the doorway and the chair.


Buttons in the app will allow you to arm and disarm all or individual cameras.

Other features include two-way audio and playing alarm sounds through the camera. You can also use the app to view past events and any past point in time that has been recorded on a microSD card (not included).
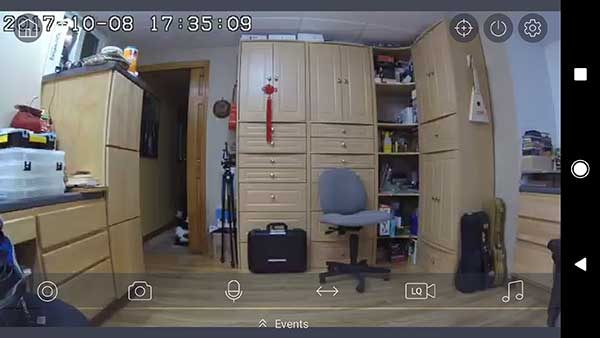
The picture quality of this home security camera is clear and sharp, but there is some fisheye warp on the edges as you can see from the image above.

The SmartCam A1 also has decent night vision.

When the SmartCam A1 detects motion or audio, it will send a notification to your mobile device or an email if you have configured that option. Be aware that the SmartCam A1 is almost too sensitive when it comes to detecting motion. Even when set to the lowest sensitivity setting, it will detect the smallest movement which caused my phone to constantly ping with a new notification. It got so annoying that I disarmed the camera.
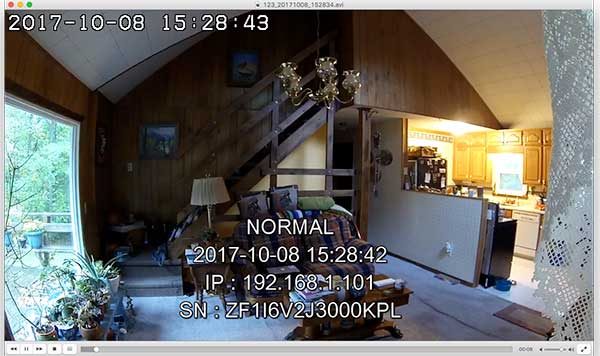
As mentioned above, the SmartCam A1 records continuous video footage to a microSD card. You can view that footage through the SmartCam app or you can remove the microSD card and view the footage on your Mac or PC.

I did run into a problem trying to view the footage on my MacBook. The video files are saved as .AVI files on the microSD card. These files should be viewable using QuickTime, but I received an error each time I tried to view them so I tried VLC media player. The videos play using that app, but they have informational text that is overlayed over the video for the entire clip. Note that you don’t see this textual overlay when you view the same footage through the SmartCam mobile app.

I think the best feature of the SmartCam is the auto tracking feature which will follow the subject in the viewable area when motion is detected. See an example below.

It is a little creepy when you notice that the camera is following you around the room, but it’s a pretty handy feature.

Final thoughts

I’ve been using the Samsung Wisenet SmartCam A1 Home Security camera system for several weeks. I really like the auto tracking feature and the ability to pan the camera manually. I also like that there are no cloud storage fees involved because the footage is stored locally. If (hopefully when) Samsung can fix the motion detection sensitivity issue, the SmartCam A1 security camera system could easily become my new favorite.

Source: The sample for this review was provided by Samsung. Please visit their site for more info and Amazon to order.


Product Information

Price: $179.00
Manufacturer: Samsung
Retailer: Amazon
Pros:
  • Local storage of video footage
  • 350° auto tracking and panning
  • Expandable with more cameras
  • Wireless camera
  • No monthly or yearly cloud storage fees
Cons:
  • Motion detection is too sensitive even at the lowest sensitivity level

Filed in categories: Reviews

Tagged:

Samsung Wisenet SmartCam A1 home security system review originally appeared on The Gadgeteer on October 9, 2017 at 10:00 am.

Note: If you are subscribed to this feed through FeedBurner, please switch to our native feed URL http://the-gadgeteer.com/feed/ in order to ensure continuous delivery.

The Gadgeteer team’s favorite gear bags (part 3)

Welcome to part three of an on-going series where we tell you about the gear that we use on a daily basis. Today we have the favorite gear bags for five of our writers here on the Gadgeteer team. Enjoy!

Also read:
The Gadgeteer team’s favorite gear bags (part 1)
The Gadgeteer team’s favorite gear bags (part 2)

Andy Jacobs

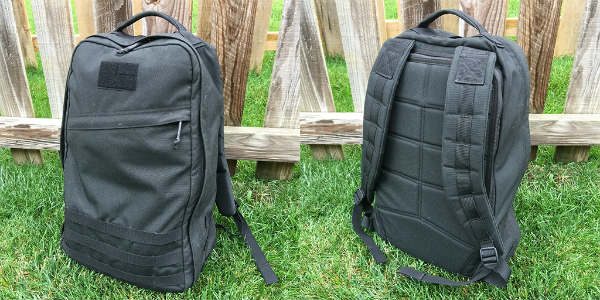
The GORUCK GR1 rucksack.  GORUCK’s original piece of gear, with its roots in US Special Forces these rucks are built proudly in the USA and proven by special operators in war zones across the world and by GORUCK Challenge participants across these great United States. Made from water-resistant and uber-durable 1000D Cordura nylon, there’s a reason why GORUCK refers to their rucks as “bomb-proof.”  The GR1 is available in two sizes, both of which I own: the 21 Liter which I use for both ruck training and GORUCK Challenges, and the 26 Liter (shown here) which I use for EDC and short travel.  Because GORUCK believes design should be simple and versatile so you can use your ruck in the way that works best for you, their rucks include high-strength nylon MOLLE webbing inside and out to attach items (such as GORUCK’s Field Pouches) and several organizational pockets inside, plus a padded laptop/hydration compartment.  Admittedly, GORUCK’s products are not cheap—in quality or price (GR1 is $295)—but they are easily the best-built, most durable products I’ve ever used, and if you do manage to damage one of their rucks, their SCARS lifetime warranty will fix you up.  I know, because they’ve done it for me (more than once).  For me, GR1 is the ultimate rucksack (AKA backpack).  Full review in the works.

You can read more about this bag at goruck.com.

Jacob Haas

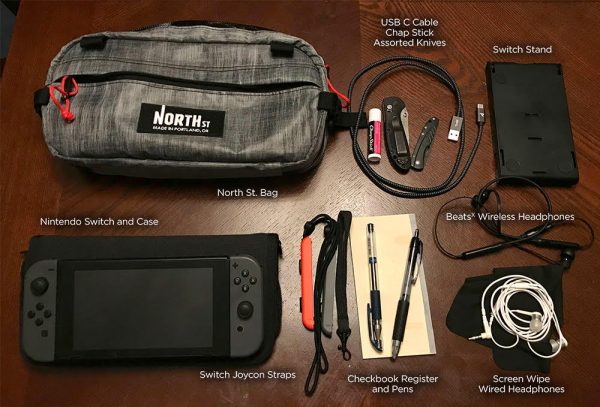
My go-to bag at the moment is the Pioneer 12 Hip Pack from North St. Bags. When I reviewed this back a couple months ago. I liked it for its many interior pockets and expandable width, allowing me to fit a lot more inside than I originally thought I could. I’ve been using it almost daily to carry things that I can’t or wouldn’t want to shove into my pockets, like headphones, cables, and my Nintendo Switch that I like to play over lunch breaks. The bag itself still looks brand new after several weeks of steady use. I added a shoulder strap that I cannibalized from a small messenger bag and turned it into more of a tech-purse, which suits me just fine.

You can read more about this bag at northstbags.com.

Dave Rees

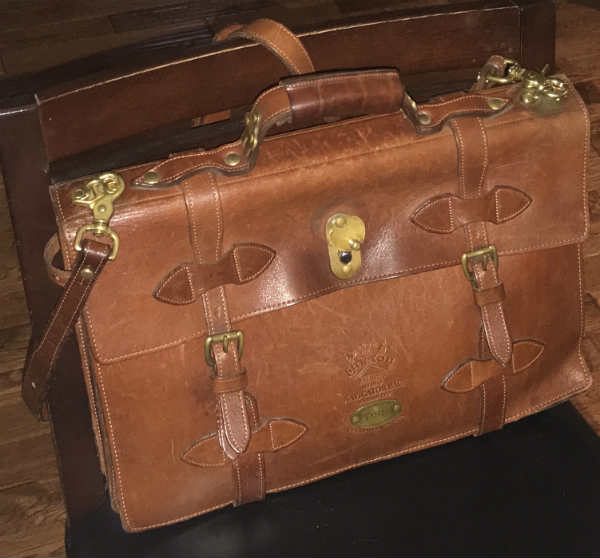
My favorite bag is near a half dozen years old, weighs more than five pounds, and is as non-tech & old school as you can get. Add in the fact that I have reviewed many high-quality bags over the past five years, is a testament to how much I love and enjoy carrying my Colonel Littleton 1943 Navigator bag. It’s a perfect size, able to securely transport my laptop, iPad Pro, and all my EDC gear with me. Its meticulous craftsmanship and classic WWII aviator styling are so me… As you can see, it is aging gracefully and continues to get praise from strangers to this day. I carry it to work every day, on work travel and vacation as well. Even though I have a closet full of very nice bags, I would buy another if it ever became damaged, lost, or stolen.

You can read more about this bag at northstbags.com.

Kathleen Chapman

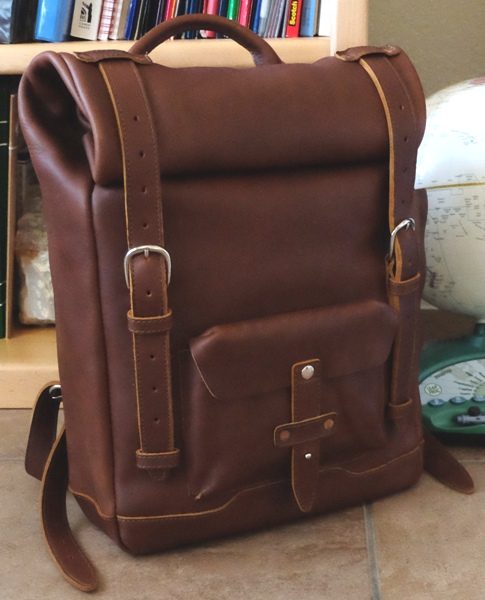
My preferred type of gear bag is a backpack. For many years I’ve used a Jansport backpack to carry my teaching materials, but I’ve had a desire to upgrade to something attractive as well as rugged and since then I’ve discovered my inner leather enthusiast. Thus, my favorite gear bag is a backpack that I recently reviewed – the Pad & Quill Roll Top Leather Backpack (review has not yet been published to provide the link). I love the fact that it is a beautiful, well-made, high-quality leather backpack that is large enough to carry all of my necessary items and yet is still compact enough for me. It even has an internal pocket (unpadded) for a tablet/laptop which I use to store my portable keyboard. It does take time to access my materials since it is a roll-top backpack that has a two buckle closure, however, it has a quick side access zipper slot (8.75″ long) that allows you to extract small items quickly.

You can read more about and/or purchase the Pad & Quill Roll Top Leather Backpack on the Pad & Quill website.

Howard Sneider

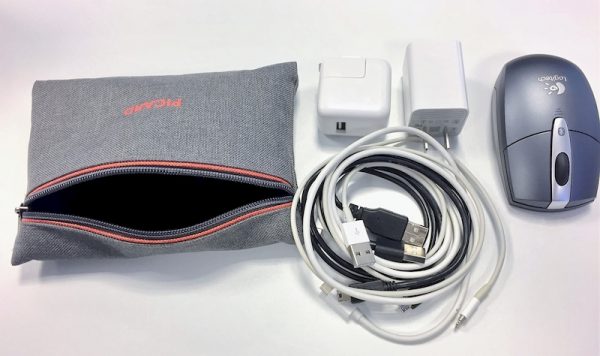
My take on “favorite gear bag” may be a little different than other Gadgeteers. My current favorite bag is a freebie Lufthansa Premium Economy Class amenity kit by Picard I obtained on a recent European flight. This isn’t available in stores; It is only available with a seat from Lufthansa. It originally contained foam earplugs, sleep-mask, toothbrush, toothpaste, and over-socks (if you want to take your shoes off but still walk around the cabin). So why is this so great? It is impeccably made; it uses good quality materials, double stitching on the zipper and all the seems are lined.

The best part is that the bag is the perfect size to hold all of my cables, chargers, and a Bluetooth mouse. It has changed my backpack from a mess of cables to a neatly packed and organized kit. At meetings if I need any of these things I don’t have to go fumbling through my bag – I can just pull this bag out and not be distracted, or cause a distraction, during the meeting.

The other benefit of using this bag is that at airports, these items are all collected so that if the carry-on inspector has any questions about the contents everything is organized and in one place. This item is frequently on eBay for relatively little cost. I suggest you get something like this to make your electronics more organized.

You can read more about the Lufthansa Premium Economy Class amenity kit at www.picard-lederwaren.de.

Also read:
The Gadgeteer team’s favorite gear bags (part 1)
The Gadgeteer team’s favorite gear bags (part 2)

Filed in categories: Articles

Tagged: ,

The Gadgeteer team’s favorite gear bags (part 3) originally appeared on The Gadgeteer on October 9, 2017 at 9:00 am.

Note: If you are subscribed to this feed through FeedBurner, please switch to our native feed URL http://the-gadgeteer.com/feed/ in order to ensure continuous delivery.
Focal Clears things up with a new high-end headphone

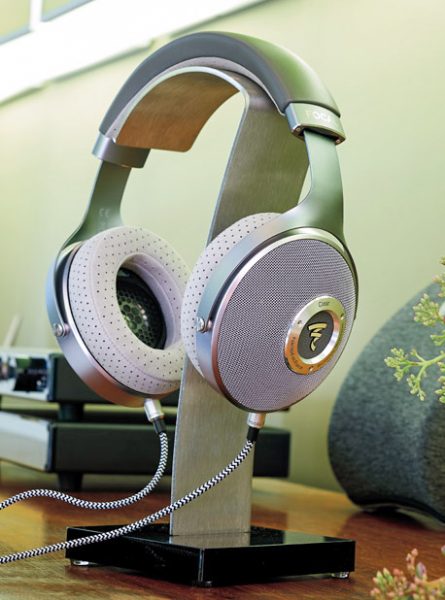
A year ago, I said the “The Focal Elear headphone may be the best headphone available for the money today.” However, it was (and still is) 1000 bucks—no small amount for headphones regardless of budget. But that—as they say—was then. Today, Focal has swapped the E in Elear for a C and has released the Clear headphone. Price-wise, Clear sits between the slightly less expensive Elear and the uber expensive Utopia model.

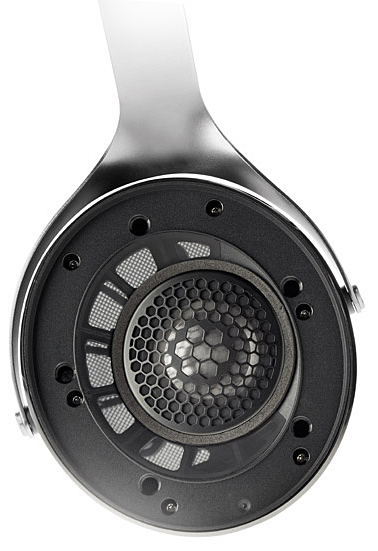
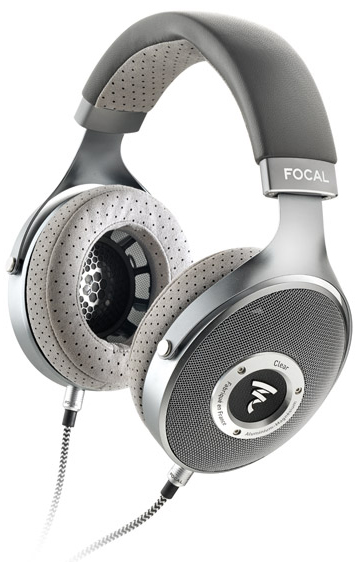
Like its siblings, the Focal Clear is an audiophile circum-aural open-back headphone, meaning it has a more open sound but leaks sound so anyone next to you can hear what you hear. According to Focal, this open back speaker design provides unparalleled dynamics.

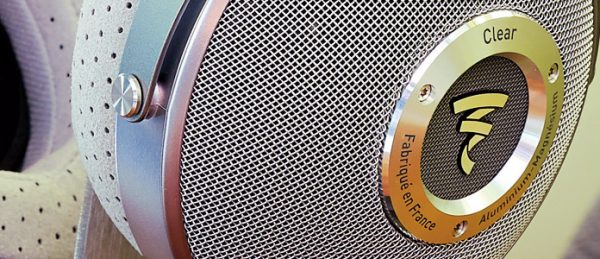
The Clear headphone speaker’s aluminum/magnesium alloy features a new copper voice coil and offers a combination of low weight with high rigidity. This provides wide dynamics over the entire audio spectrum and is capable of revealing the tiniest details of a recording. Bass is controlled—even at high volumes.A new generation of perforated micro-fiber ear cushions helps give an impression of a very open space. The sensation of listening in the room—and not through headphones—is intensified. Listeners may think they are listening to the best loudspeakers on the market.


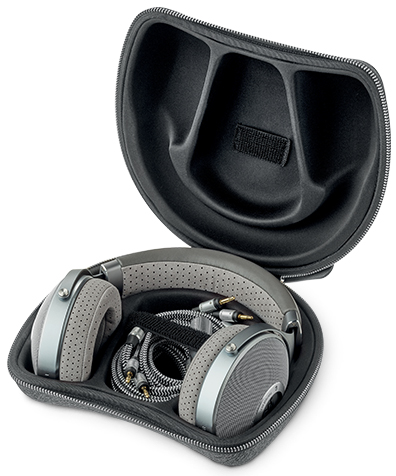
The Focal Clear comes with a hard carrying case and 3 different cable connections. An optional stand is available. The Clear headphone is available now and sells for $1,500 US. Visit www.focal.com/headphones for more information.

Filed in categories: News

Tagged:

Focal Clears things up with a new high-end headphone originally appeared on The Gadgeteer on October 9, 2017 at 8:00 am.

Note: If you are subscribed to this feed through FeedBurner, please switch to our native feed URL http://the-gadgeteer.com/feed/ in order to ensure continuous delivery.
Keep your BBQ tools all in one place with the BBQ 5-in-1 Multi-tool

Simplify camping, tailgating, and other outdoor cooking activities with the BBQ 5-in-1 Multi-tool which keeps all the essential cooking implements together in one handy package.

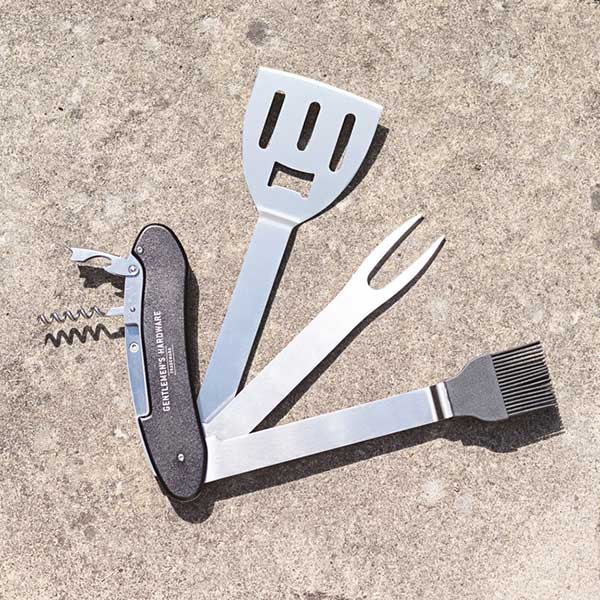
The BBQ 5-in-1 Multi-tool is constructed of stainless steel and silicone and includes a spatula, fork, basting brush, bottle-opener and a corkscrew.

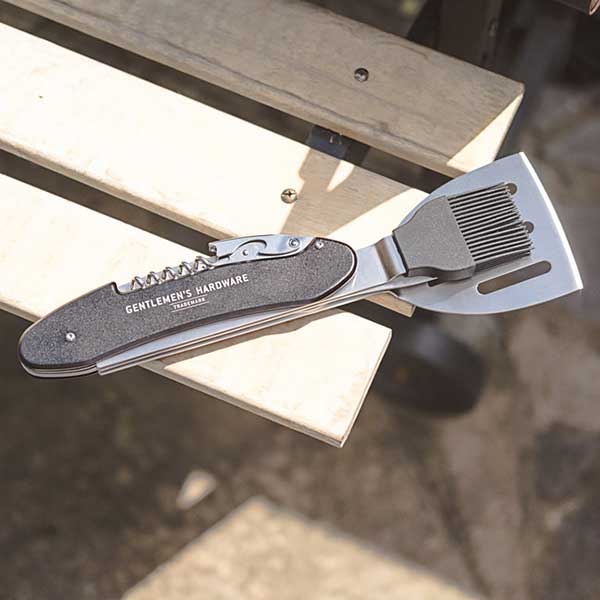
The tools can be separated for easy use and can then fold up for travel. The BBQ 5-in-1 Multi-tool is easy to clean and is dishwasher safe. It’s a Swiss Army Knife for grill masters.

The BBQ Multi-Tool is priced at $19.99 at Amazon.

Filed in categories: News

Tagged: , ,

Keep your BBQ tools all in one place with the BBQ 5-in-1 Multi-tool originally appeared on The Gadgeteer on October 8, 2017 at 10:16 am.

Note: If you are subscribed to this feed through FeedBurner, please switch to our native feed URL http://the-gadgeteer.com/feed/ in order to ensure continuous delivery.

Logitech Slim Combo 10.5 inch iPad Pro keyboard case review

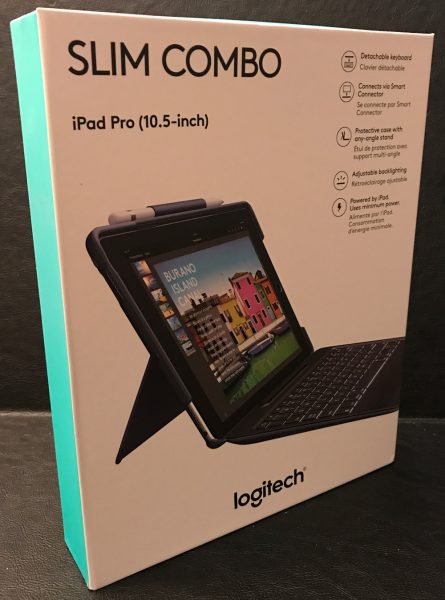
Both Julie and I have longed for Apple to produce a Surface Pro like product, a hybrid tablet running macOS. Apple argues that the iPad Pro fills that niche and is more than powerful and capable enough to get the job done. And I might agree that the iPad Pro has the horsepower but so far iOS has fallen a bit short for me. With iOS 11 and a portable keyboard, I have renewed hope that I can make the iPad Pro my main productivity travel companion. The Logitech Slim Combo is one of the most feature-rich smart connector enabled keyboards available. For this review, Logitech sent me their 10.5″ version in classical blue to check out.

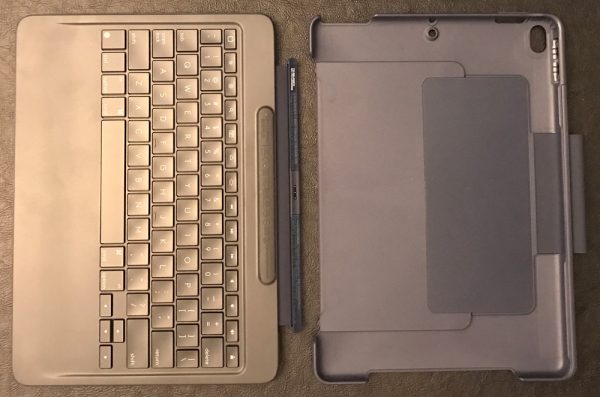
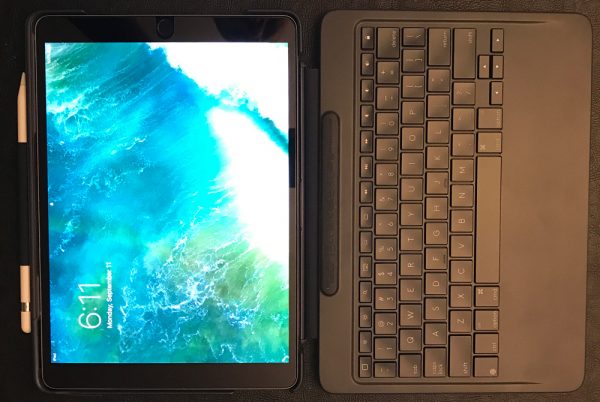
The Logitech Slim Combo is a well made, plastic two-piece solution for adding productivity and protection to the iPad Pro. The back panel encases your iPad Pro and securely holds it in place with a snap. The front cover or base of the Combo is a nicely engineered keyboard that magnetically attaches to the iPad Pro’s smart connector.

The casing is made from rigid plastic and high-performance technical fabric with PU coating for spill-resistance. The case has cutouts and push-thru buttons taking nothing away from the functionality and features of the iPad Pro.

The back panel is very form fitted and takes a bit of force to get the iPad perfectly seated…but once inside there is little chance of it accidentally falling out.

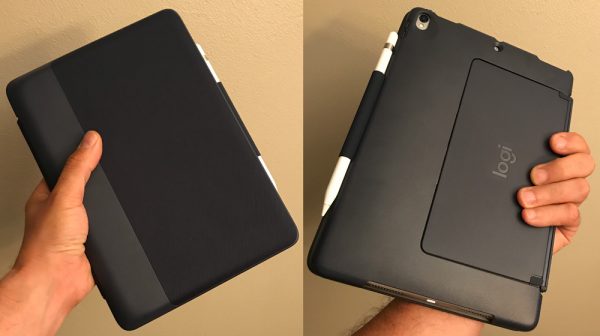
The Slim Combo has an integrated loop built into the keyboard portion the case to transport the Apple Pen.

The top of the back hard case has a push-thru for the power button and cutouts for both speakers, mic, and audio plug.

The Slim Combo’s keyboard attaches on the left side of the case magnetically to the iPad’s Apple Smart Connector. The magnetic hold is adequate but the keyboard did fall off every now and then.

The base of the case has a large cutout allowing access to the iPad’s lighting port and speakers.

The backlit keyboard has no battery and is powered by your iPad via its smart connector. Connectivity is thru the connector as well, (versus Bluetooth) meaning little to no lag while typing.  According to Logitech, the keyboard uses between 0.4 to 2.3 percent of iPad battery for an hour of typing depending on backlighting brightness. There are three levels of backlighting that automatically turns off 8 seconds after the last keystroke. Interestingly the keyboard’s firmware is automatically updated when connected to the iPad Pro via Smart Connector.

The keyboard has 19 mm key pitch and 1.5 mm key travel. The palm rest is comfortable and enables good hand/finger positioning for typing. The keyboard feels a bit cramped compared to my 12″ MacBook but is more than functional and way better than typing on the iPad’s virtual keyboard. That said, I keep reaching for an imaginary trackpad that would make the setup perfect/ideal.

The bottom of the keyboard is textured as you can see below so that it does not slide around and is easy to hold onto when on the go.

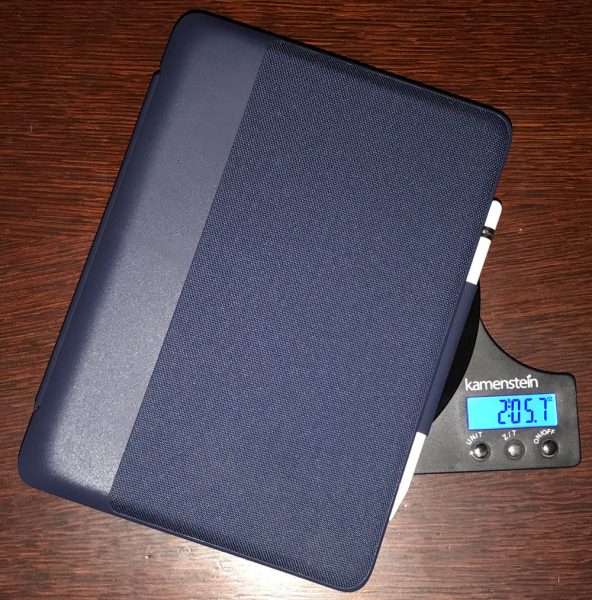
Alright, let’s discuss the elephant in the room. The Logitech Slim Combo is ANYTHING but slim/tiny/petite/etc… It transforms the sleek, tech-sexy 10.5″ iPad Pro into a clunky, though admittedly productive, behemoth. The case alone weighs more than the iPad Pro.

Together they weigh more than the 12″ MacBook.

Specifications:

  • Height x Width x Depth: 10.16 in x 7.24 in x 1.06 in
  • Weight: 1.16 lbs

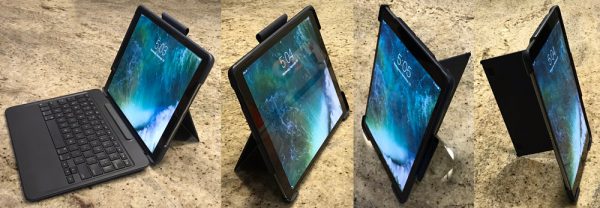
Logitech engineered a built-in stand into the back of the back cover. In landscape mode, the stand holds iPad Pro at any angle in within 50 degrees range: from 20 to 70 degrees. In portrait mode, the stand holds iPad Pro at 73 degrees. The iPad Pro auto turns on/off when the keyboard is opened or closed.

In true Gadgeteer style, this review was written on the Slim Combo keyboard with no hassle whatsoever. The typing was best on a flat surface because the case was not very lap-friendly at all.

While not as compact, sleek, or pretty as a naked iPad, the Logitech Slim Combo adds excellent protection in addition to significantly increasing productivity. The case is perfectly form fitted for the 10.5″ iPad Pro, completely encasing it. The keyboard is feature rich besting Apple’s keyboard in everything but size and weight. Overall the Logitech Slim Combo is an excellent choice if you want to transform your iPad Pro into more of a hybrid computing device.

Source:  The samples for this review were provided by Logitech. Please visit their site for more information and Best Buy to order.


Product Information

Price: $129.99
Manufacturer: Logitech
Retailer: Best Buy
Pros:
  • Perfectly fitted for the 10.5" iPad Pro
  • Excellent protection
  • Backlit keyboard
  • Extra function keys
  • Holds Apple Pencil
Cons:
  • Not lap-friendly
  • Adds significant weight & bulk

Filed in categories: Reviews

Tagged: ,

Logitech Slim Combo 10.5 inch iPad Pro keyboard case review originally appeared on The Gadgeteer on October 8, 2017 at 8:45 am.

Note: If you are subscribed to this feed through FeedBurner, please switch to our native feed URL http://the-gadgeteer.com/feed/ in order to ensure continuous delivery.